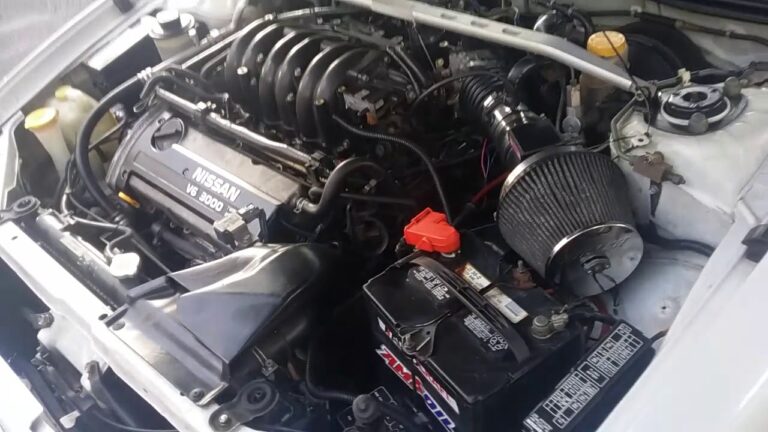
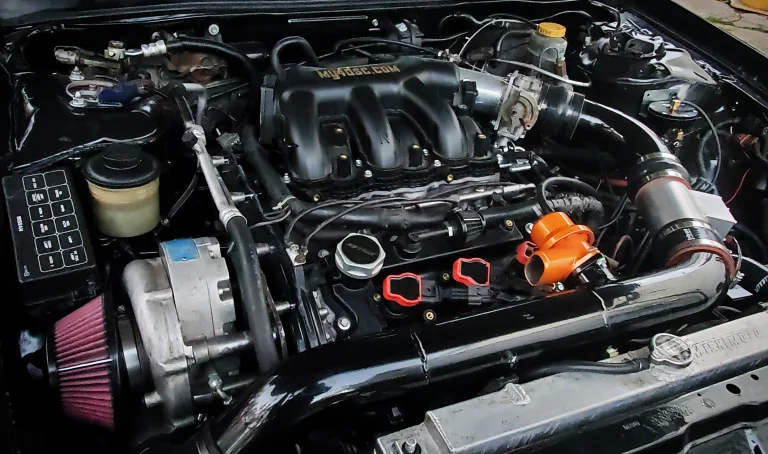
Although not many have completed this swap thus far, it has proven itself to be a far more potent solution than the MEVI. The MEVI, however, has it’s own advantages.
Advantages
00VI…
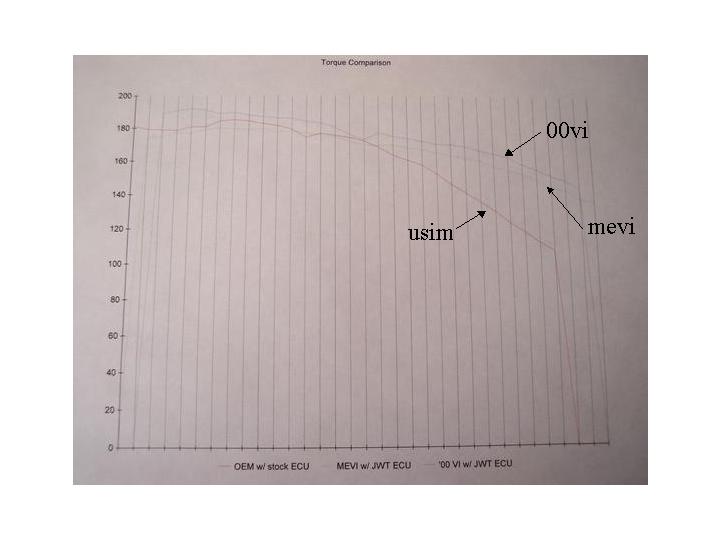
Low RPM power. Rather than lose power at low RPM’s over the USDM manifold, the 00VI actually gains a significant bit of power.
Midrange and high RPM power. Although the 00VI and MEVI are both variable manifolds, the difference in operation and design simply allows the 00VI to outflow and outperform the MEVI even as RPMs climb, resulting in even higher peak numbers.
Ease of finding parts. Because the 00VI was used as OEM equipment on 2000 and 2001 Maximas in the US, parts are easily accessible at a Nissan dealer or in junkyards.
MEVI…
Ease of installation. The MEVI has many similarities to the USDM manifold in terms of design and layout, and was meant for a 4th gen engine. It is basically a bolt-on part.
History. Simply put, people have been using the MEVI on their cars for years and years and there is lots of experience and knowledge regarding it.
Parts. Almost all of the parts off of your current 4th gen can be re-used with the MEVI.
Disadvantages
00VI…
Installation and preparation. The 00VI is simply a much more daunting task. It requires modification to the manifold, wiring work, many custom parts, and a lot of time.
History. Or it’s lack thereof. The 00VI swap is still relatively new (by comparison) and very few people have done it.
Parts. Almost nothing from your 4th gen manifold can be re-used, and even re-using your stock 4th gen intake becomes a task that involves ordering parts.
MEVI…
Power. It doesn’t make as much peak power, and you actually lose low RPM power as a result of it’s design.
Parts. They are hard to come by, and often must be ordered expensively through a Nissan dealer and require a good wait to get, due to the manifold never appearing on US Maximas.
On the Dyno
Boosted…
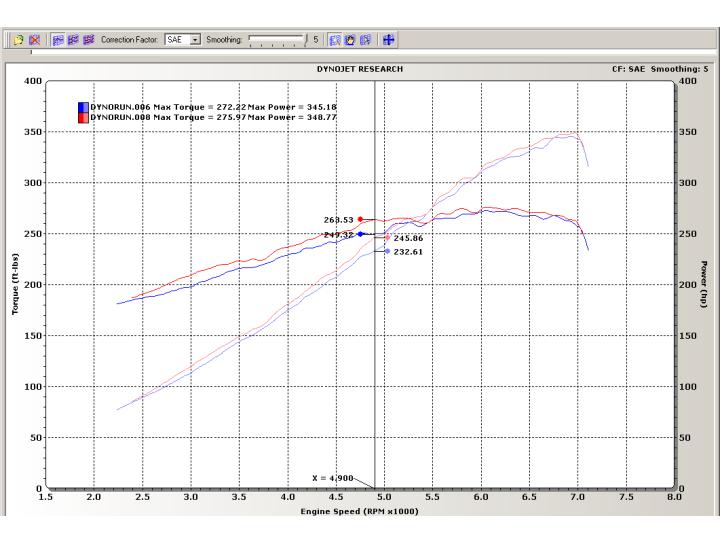
(Stephen Max’s car: 14.3 tq, 13.2 hp over MEVI and gains from 2500 rpm to 7000 rpm) All Motor…
(BSwithTF’s car: 11.45 tq, 8.61 hp over MEVI, and gains at every rpm)
200 WHP vs. 200 WHP
(jenk01SE’s car [00VI] vs. Zack342’s car [MEVI])
As of right now, there are primarily eight different ways to do this swap. Each has its own advantages and disadvantages, which will be discussed. They are as follows:
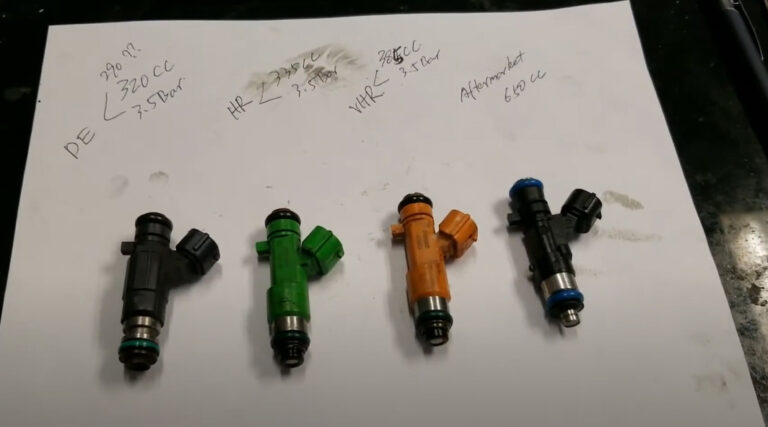
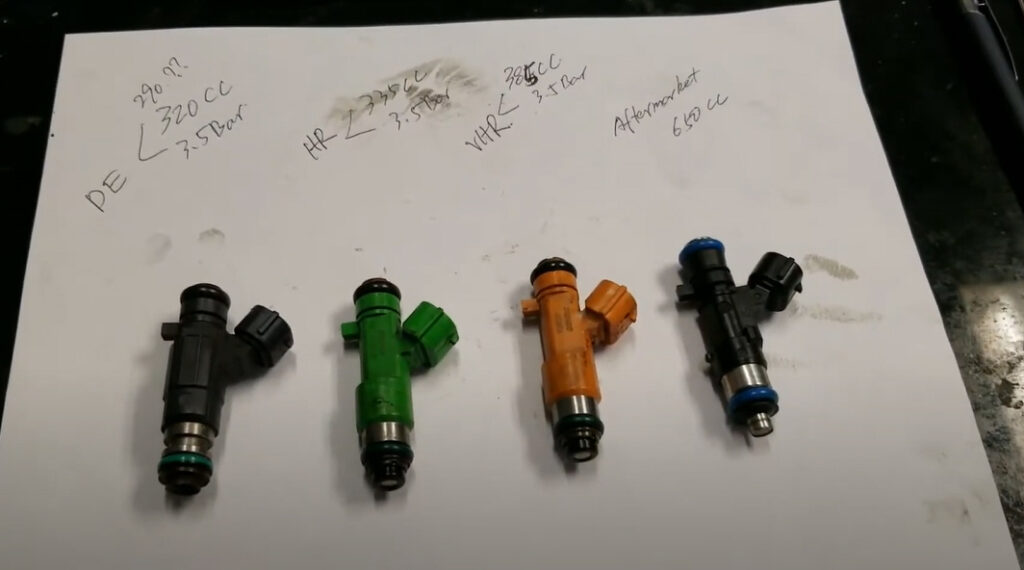
»Pros: Probably the least amount of work/customizing (and if you can find it all on one car, the easiest to compile parts for/possibly cheapest), throttlebody doesn’t require block-off. »Cons: Requires tuning due to larger injectors, requires work to adapt the fuel rail to the old lines, the 00 IACV is iffy at best on the 4th gen ECU.
»Pros: Second least amount of work/customizing (and if you can find most of it on one car, easier to compile parts for/cheaper), possibly superior IACV setup (not proven), throttlebody needs block-off plate. »Cons: Requires tuning due to larger injectors, requires work to adapt the fuel rail to the old lines, IACV needs adapter plate, throttlebody needs a block-off plate.
»Pros: Lesser amount of work/customizing (and if you can find most of it on one car, easier to compile parts for/cheaper), possibly superior IACV setup (not proven), larger throttlebody, throttlebody doesn’t require block-off. »Cons: Requires tuning due to larger injectors, requires work to adapt the fuel rail to the old lines, IACV needs adapter plate, throttlebody needs adapter plate.
»Pros: Lesser amount of work/customizing (and if you can find most of it on one car, easier to compile parts for/cheaper), possibly superior IACV setup (not proven), throttlebody doesn’t require block-off. »Cons: Requires tuning due to larger injectors, requires work to adapt the fuel rail to the old lines, IACV needs adapter plate, throttlebody needs adapter plate.
»Pros: Doesn’t require tuning, throttlebody doesn’t require block-off. »Cons: IACV needs adapter plate, IACV is iffy at best on 4th gen ECU, lower manifold must be drilled.
6) -00 upper manifold
-4th gen lower manifold****
-4th gen fuel rail
-4th gen injectors
-4th gen throttlebody (needs adaptor plate)
-4th gen IACV (needs adaptor plate)
-00 EGR guide tube**
-00 rear valve cover***
-00 rear coil packs***
»Pros: Doesn’t require tuning, possibly superior IACV setup (not proven), throttlebody doesn’t require block-off. »Cons: IACV needs adapter plate, lower manifold must be drilled, throttlebody needs adapter plate.
7) -00 upper manifold
-4th gen lower manifold****
-4th gen fuel rail
-4th gen injectors
-00 throttlebody (requires block-off plate in this setup)
-4th gen IACV (needs adaptor plate)
-00 EGR guide tube**
-00 rear valve cover***
-00 rear coil packs***
»Pros: Doesn’t require tuning, possibly superior IACV setup (not proven). »Cons: IACV needs adapter plate, lower manifold must be drilled, throttlebody must have a block-off plate.
8) -00 upper manifold
-4th gen lower manifold****
-4th gen fuel rail
-4th gen injectors
-Pathfinder throttlebody (needs adaptor plate)
-4th gen IACV (needs adaptor plate)
-00 EGR guide tube**
-00 rear valve cover***
-00 rear coil packs***
»Pros: Doesn’t require tuning, possibly superior IACV setup (not proven), larger throttlebody. »Cons: IACV needs adapter plate, lower manifold must be drilled, throttlebody needs adapter plate.
* = can be substituted for 01 QX4 parts, ** = can be removed and replaced with block-off plate, *** = you can grind down the rear coil packs and coil pack bosses instead of using these parts, **** = use of 4th gen lower manifold requires that you turn it 180º
This is what was making all that noise. Secondary tensioners are toast and water pump leaking. Chain stretched and all gears worn. Was not a difficult job as some say. Just tedious.
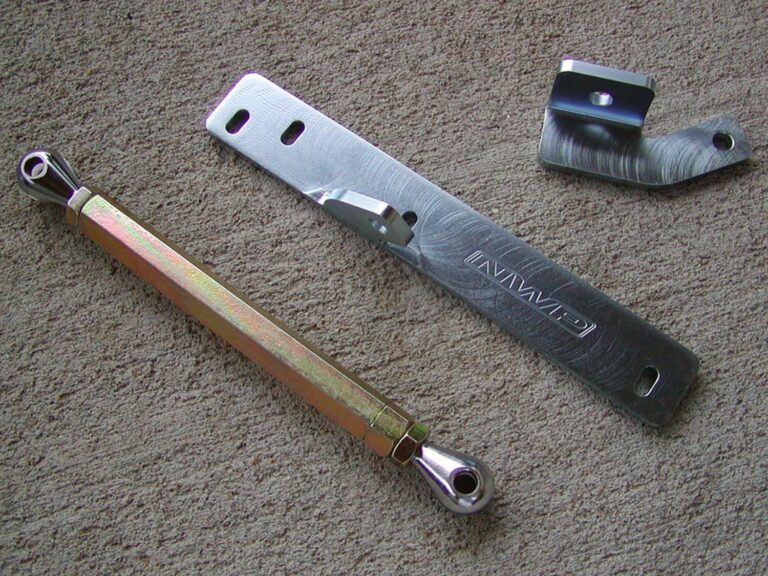
This afternoon I installed an NWP Engine Torque Link on the 98 GLE automatic. Installation was quick and easy. NWP does a “first-class” job on packaging and instructions for this product.
I’ve been running an NWP torque bar on the 99 SE 5-MT for 3 years. It really provides a nice tight feel and practically eliminates any engine rock during take-off and downshifting.
For the 98 models GLE automatic, it gives a more direct feel and eliminated some of the sloppy feelings that comes from engine movement with an automatic. I now feel more connected to the engine when driving — like it has a little more torque. Any wheel hop that it had before the installation is now unnoticeable.
The engine mounts are in very good shape on both cars. By reducing engine rock, I believe these torque links help extend the life of engine mounts.
Alright, I keep getting emails and posts about how NOS is going to destroy my car and take miles off my engine, so here’s some info that will hopefully become a sticky! (hint hint)
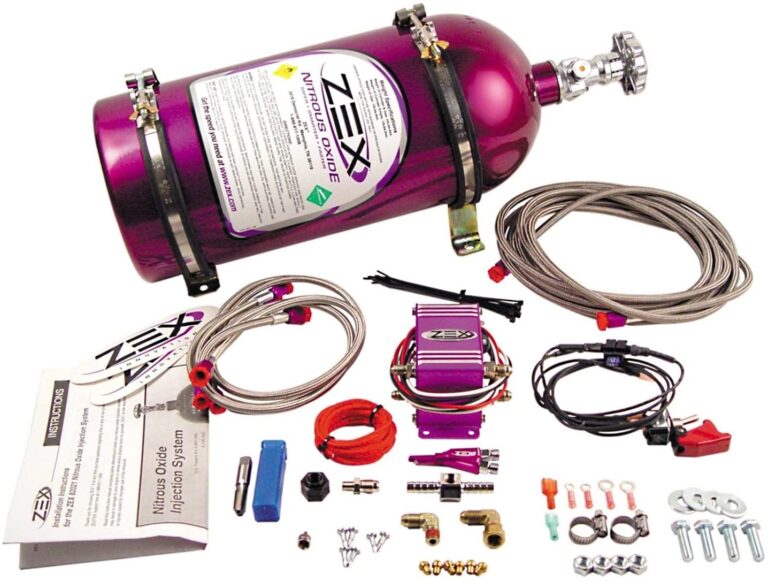
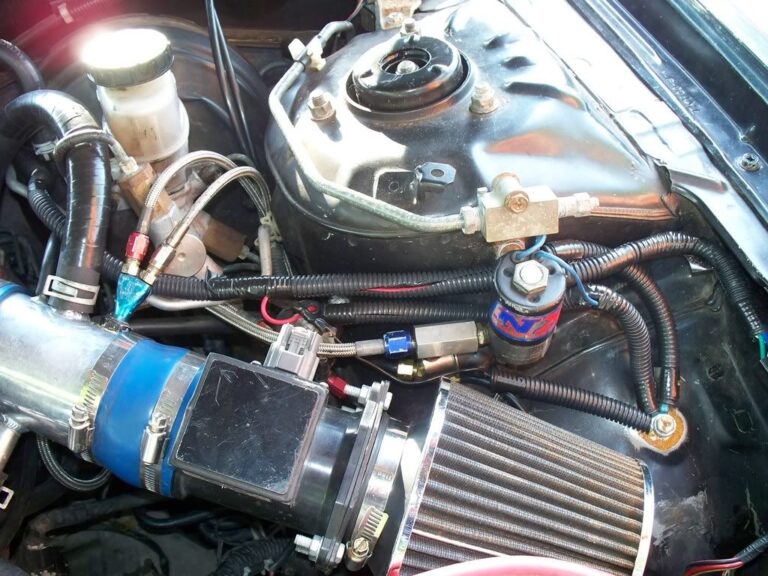
NOS kit #5124 is a universal kit that works great on the Nissan Maxima. You can use it in a basic 50 shot (.032 jet) without the addition of gauges or a fuel pump. The NOS jet connects to your intake plumbing and your fuel pressure regulator, to boost your power and raise your fuel pressure.
NOS is not combustible per se, it lowers your intake temp and adds more parts oxygen to the process, which increases your power. It can be used with either an auto or 5 speed, though I recommend getting a tranny cooler and vb mod for the auto, and a new clutch depending on what shot you use for the 5 speed. You can run a 50-60 shot without adding much else, though once you go over that, I would recommend at a minimum, a fuel pressure gauge, EGT, and a new fuel pump. The stock pump can not reliably provide enough fuel pressure over a 70 shot.
NOS is like anything else, abuse it you lose it. It is not on all the time like a supercharger or turbo and can be used safely for many many miles. The only time I have heard of anyone damaging anything was through negligence or running too high a shot of NOS. FYI, the picture of the blown-up maxima, was because he wired his bottle heater wrong, it was on all weekend, and he added an extra disc to his relief valve. NOS is inherently safe, it’s the users that get dangerous. The fastest times I’ve seen posted so far are 12.6 and 12.8, 5 speed and auto, with 120-125 shots I believe, but this was with other extensive mods and experience.
Right now I am running:
1997 GXE
4-Sped Automatic Transmission
Warpspeed Y-Pipe
Place Racing CAI
Stillen Exhaust
Transgo VB mod
Tranny cooler
Walbro 255lph High flow fuel pump
NOS
.042 jet
Step colder NGK platinum plugs
Autometer gauges
Best Track Times:
Auto: 15.3 @ 91 MPH
Auto w/NOS 13.9 @ 101 MPH
5spd NA 15.2 @ 92 MPH
I hope this provides you all with some info. Good luck to all!
As far as the stock fuel system is concerned. The Maxima uses an airflow referenced system. The mass airflow sensor (MAFs, or MAF) sends a voltage signal to the ECU based on how much air is flowing through it into the engine. The ECU uses that information, along with engine rpm and O2 sensor voltage to determine how long injector pulses should be to achieve stoichiometric combustion. This is for cruising and light acceleration and is called closed-loop mode. Closed-loop refers to the feedback loop in which fuel metering by the injectors is adjusted based on whether the O2 sensors detect combustion that is either leaner or richer than stoichiometric.
If the throttle is opened beyond a certain amount, as sensed by the throttle position sensor, the ECU goes into a mode in which it ignores O2 sensor voltage altogether and uses only the MAF signal and engine rpm. This is the open-loop mode. Injector pulse widths are determined by a lookup table for each combination of MAF voltage and engine rpm. The values in the lookup table are based on engine testing and give about a 13:1 to 13.5:1 air-fuel ratio for the stock engine at wide-open throttle.
When you install the supercharger kit you are significantly increasing the air flowing into the engine. This is not a problem during cruising and light acceleration because the SC does not exceed the airflow beyond what the MAF is able to measure. At wide-open throttle, however, it is possible to exceed what the MAF can measure. Also, for the boosted operation, we want an air-fuel ratio that is lower than what is provided by the ECU as a deterrent to detonation. The method that the Stillen kit uses to provide sufficient fuel for the additional air is to provide extra fuel pressure based on manifold pressure. This is done with the fuel management unit (FMU), which boosts fuel pressure according to a ratio that is determined by the size of the disk inside it. It is possible to have a fuel pressure to boost pressure rate as low as 3:1 and as high as 12:1. The stock Stillen kit comes with a 6:1 disk in the FMU (it might actually be 8:1, I forgot which), meaning that the FMU raises fuel pressure 6 psi for every psi of positive manifold pressure. This is a fairly crude way to tune, but it is simple and effective. In most cases, it results in an overly rich AFR at mid-range rpm which leans out to an acceptable AFR at high rpm.
In order to supply the additional fuel, either the Vortech auxiliary inline pump should be used, or the stock in-tank pump should be replaced with the Walbro 255 LPH pump. The stock pump can not deliver enough fuel at a sufficiently high pressure to provide a rich enough AFR to prevent detonation.
Additional Info:
You need more fuel than what the OEM fuel pump can supply. You have two options. You can use the Vortech T-Rex auxiliary inline fuel pump (that comes with the Stillen kit) along with the OEM in-tank pump, or you can replace the in-tank pump with a Walbro 255 LPH pump. If you go with the Walbro pump you do not need the Vortech aux pump.
In either case, you still need the FMU to raise fuel pressure when you are boosting. The only thing that would change that is if you installed larger fuel injectors that could supply an adequate amount of fuel at OEM fuel pressure.
The stock fuel pump has its strainer parallel to the bottom of the gas tank and is able to suck up pretty much all the gas in the tank. The strainer that comes with the Walbro points upward at about a 30-degree angle and is not capable of sucking as much gas up (when it gets below approximately 1/8th of a tank) as the stock strainer. To fix the problem, take the stock fuel pump strainer and put it on the Walbro fuel pump. This has been tested and proven to work during the course of installing Mike’s (VIP Maxima) supercharger. With this mod, you can now drive your car like normal and not worry about running out of gas/poor performance at 1/8th of a tank.
Contact @ Gerson Flores (Reputable and Trusted Seller)
Production will start once 20 group deal spots are filled. Full kit is $700.00 each for 20 kits. $750.00 for 15 kits.
The deposit is $350.00 if 20 kits are locked-in or $375.00 for 15 kits.
It takes a 4-8 weeks for the brackets to be made which is the most important part. Once it’s completed you can pay the remaining balance to receive the remaining kit.
What’s Included:
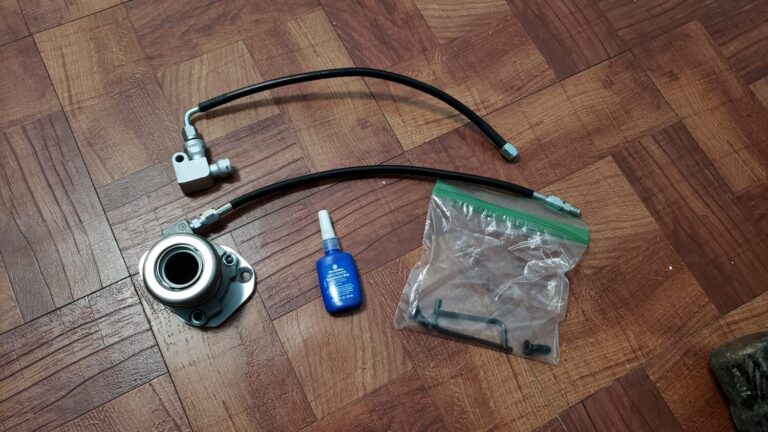
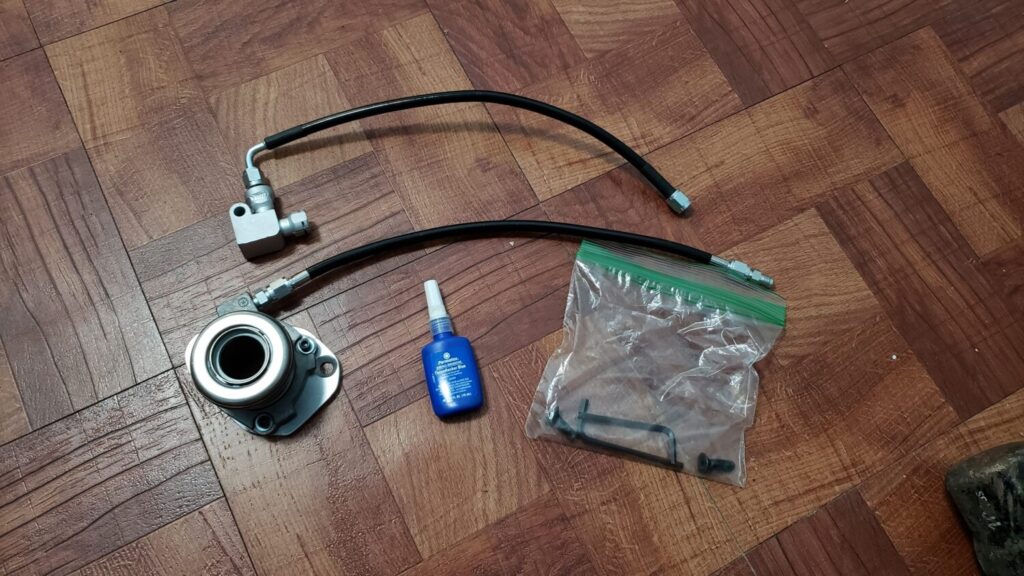
Custom CNC Bracket
Metal Slaves
Modified OEM T-Fitting to 4AN Line (Factory Master and Bleeder will bolt right up like normal)
2x 4AN Stainless Steel Lines (Heat Resistant)
Adapter Fittings
Install Info:
The kit is plug and play.
Only thing you need to do is shave 3 tabs on the transmission for the new upgrade slave to sit flush.
The bracket is made to where the slave is replaceable. You can also order the slave through Gerson.
The kit works for 2007-2012 Altima 2.5 / 2.5. Also works with 7thgen Maxima 6-Speed Swaps
Thanks to Kirill, we just ordered a set of “Street” Selector Springs for our 2002 6-Speed Supercharged 5thgen Maxima. Will post a review afterward. The owner Peter will get back to you quickly. This is only for the manual FWD RS6 6-Speed and RS5 5-Speed Transmissions. Also, if you are having issues with reverse just make sure the spring cup on the larger spring is not upside down.
Overview & Purpose from Vision1Racing
From the factory, Nissan utilizes two springs within the transmission to “center” the shifter in the 3/4 gate. These OEM springs are very weak and often cause 3rd gear lockout issues when attempting to quickly shift. This is simply due to the driver overpowering the spring’s ability to line up the shift mechanism in the 3rd gear fork. VisionOneRacing offers two kits to fit the driver’s needs.
Our Street Kit is 200% stiffer than the factory and provides a nice, crisp feel. This is truly how it should have come from the factory. Our Race Kit utilizes a higher grade spring steel and is over 300% stiffer than the factory. This will provide the necessary “kick” to the shifter when slamming them gears down the track.
Both kits have received excellent feedback and have propelled the V1R Sentra into the 9’s, being the first QR to do so. They have also helped send the all-motor Maxima into the 10’s with many other success stories along the way!
It’s also worth noting that I highly recommend aftermarket shifter bushings when using our Race Kit. These can be had from 2J Racing among others.
Price Options: Street Kit $45.00 / Race Kit $60.00



 All Motor…