Community Member Credit: Eddy
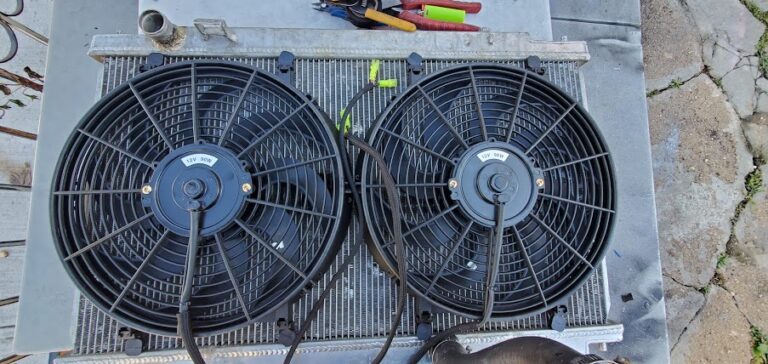
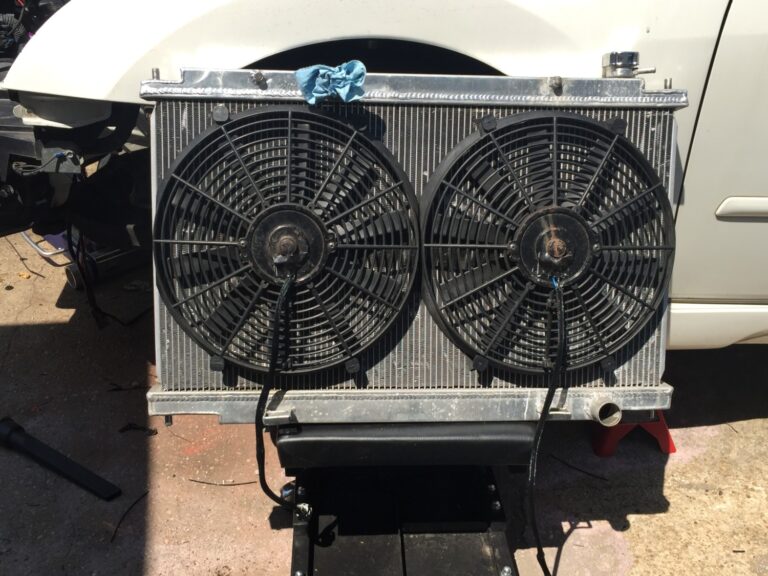
The fans on my 6thgen Maxima went bad, so I decided to try out these eBay ones before buying a more expensive brand again. At this price, I figured I could repurpose them for something else in the event my car was not cooling properly. I previously had a SPAL fan where the motor seized. To my surprise, these actually ended up working great with no issues. While a shroud is recommended, I don’t have one and my car didn’t have any issues with cooling during the summer. I have an external water temp gauge and temps are as they normally should be.
So if you’re looking for a Mishimoto alternative or OEM stock fan replacement, you can give these a try. And quite honestly, I saw no difference between these and a set a Mishimoto fans that I have on another car. I have these wired up directly to stock harness used a 4thgen Maxima pigtail. No external relay was required for these.
Description: 2×14”inch Slim Fan Push Pull Engine Radiator Cooling 90W Mount Kit Universal
Price: $32 Shipped (for both fans)
Order Link: https://www.ebay.com/itm/192031451879
Details:
Package Included:


| TYPE OF ENDS | Female Snap-Plug Terminal |
| MATERIAL | Plastic |
| AIR TEMP WHILE TESTED | 72°F (22°C) |
| NORMAL CURRENT (AMPS) | 7.8 |
| VOLTS | 12 |
| HOUSING DIAMETER | 14.75″ |
| OVERALL THICKNESS | 2.5″ |
| REVERSE | True |
| BLADE STYLE | Curved |
| INRUSH CURRENT (AMPS) | 15.1 |
| # OF BLADES | 8 |
| FAN RPM | 2200 |
| FAN DIAMETER | 14″ |
| OVERALL DEPTH | 2.67″ |
| CFM | 1300 |


Community Member Credit: Eddy
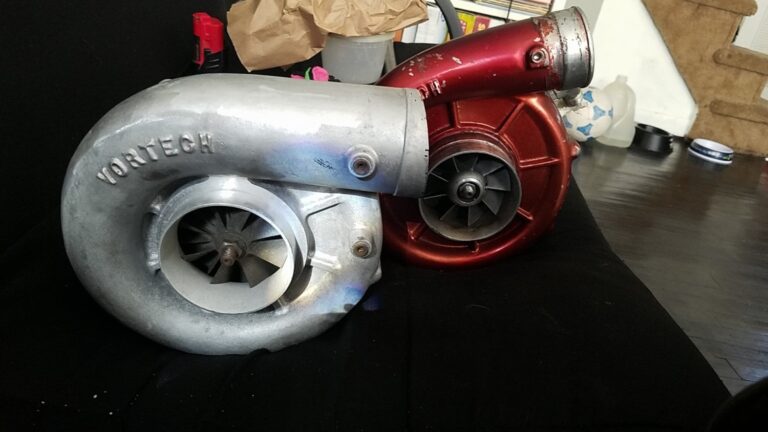
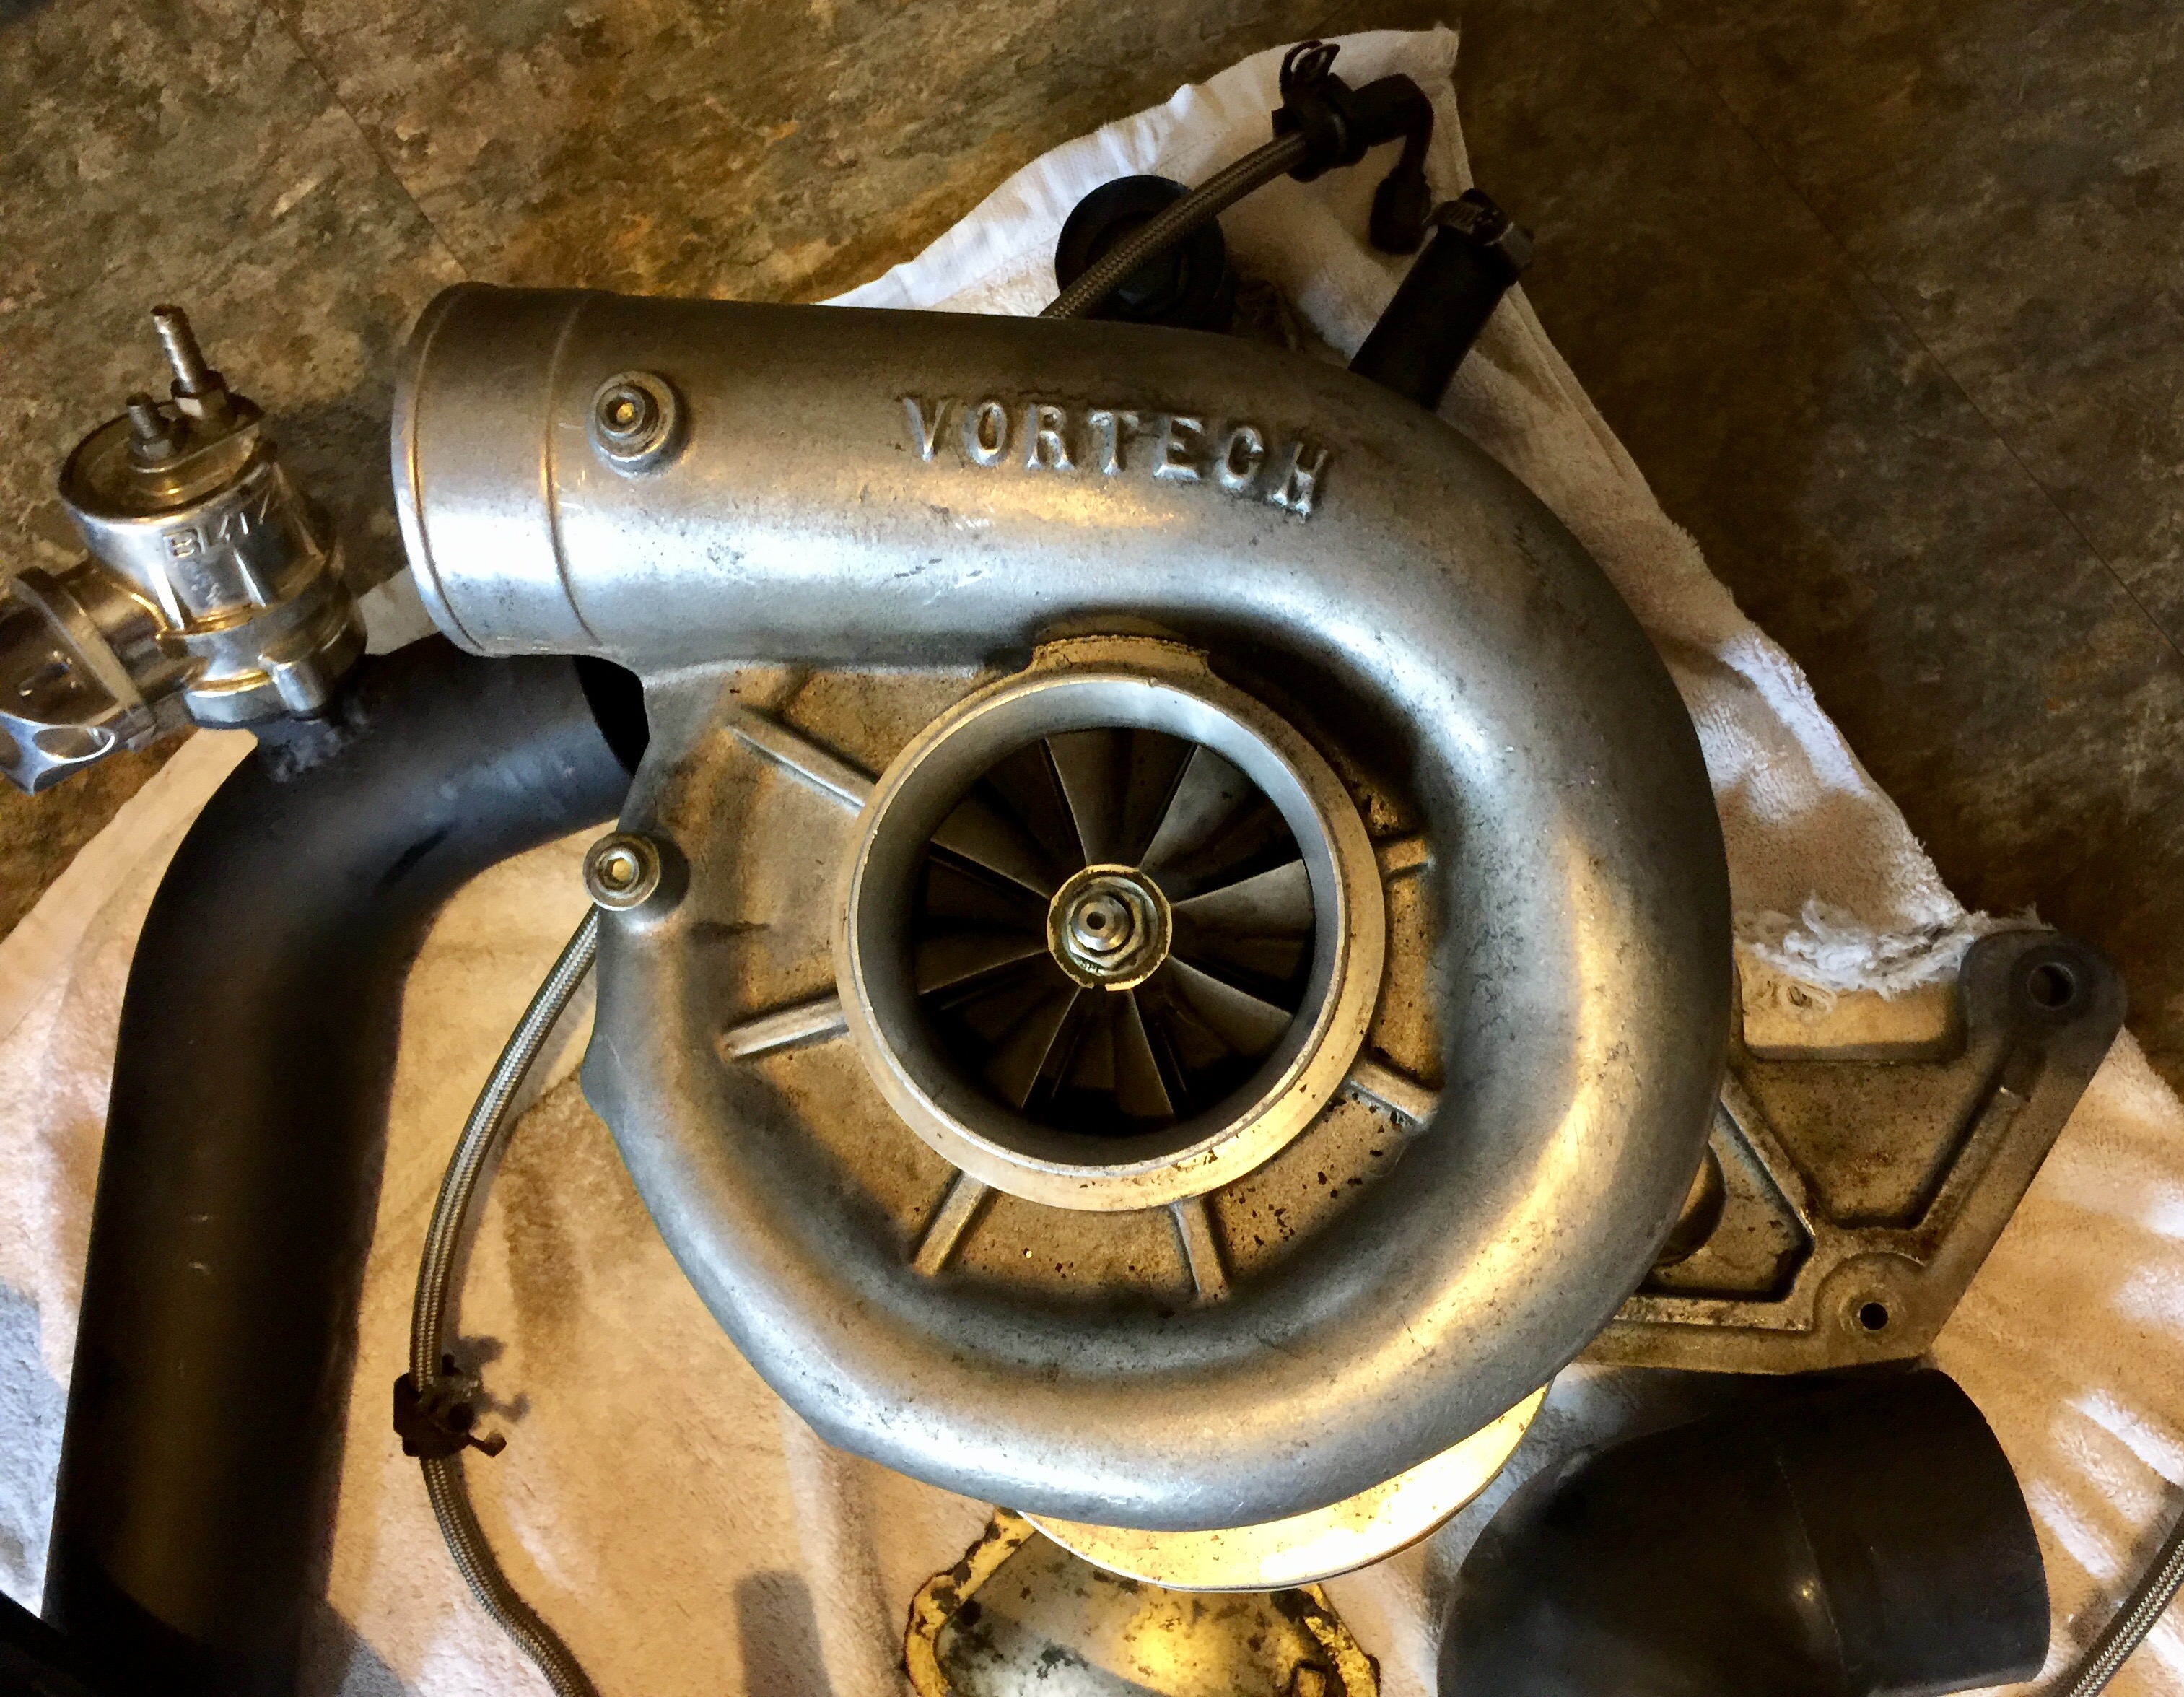
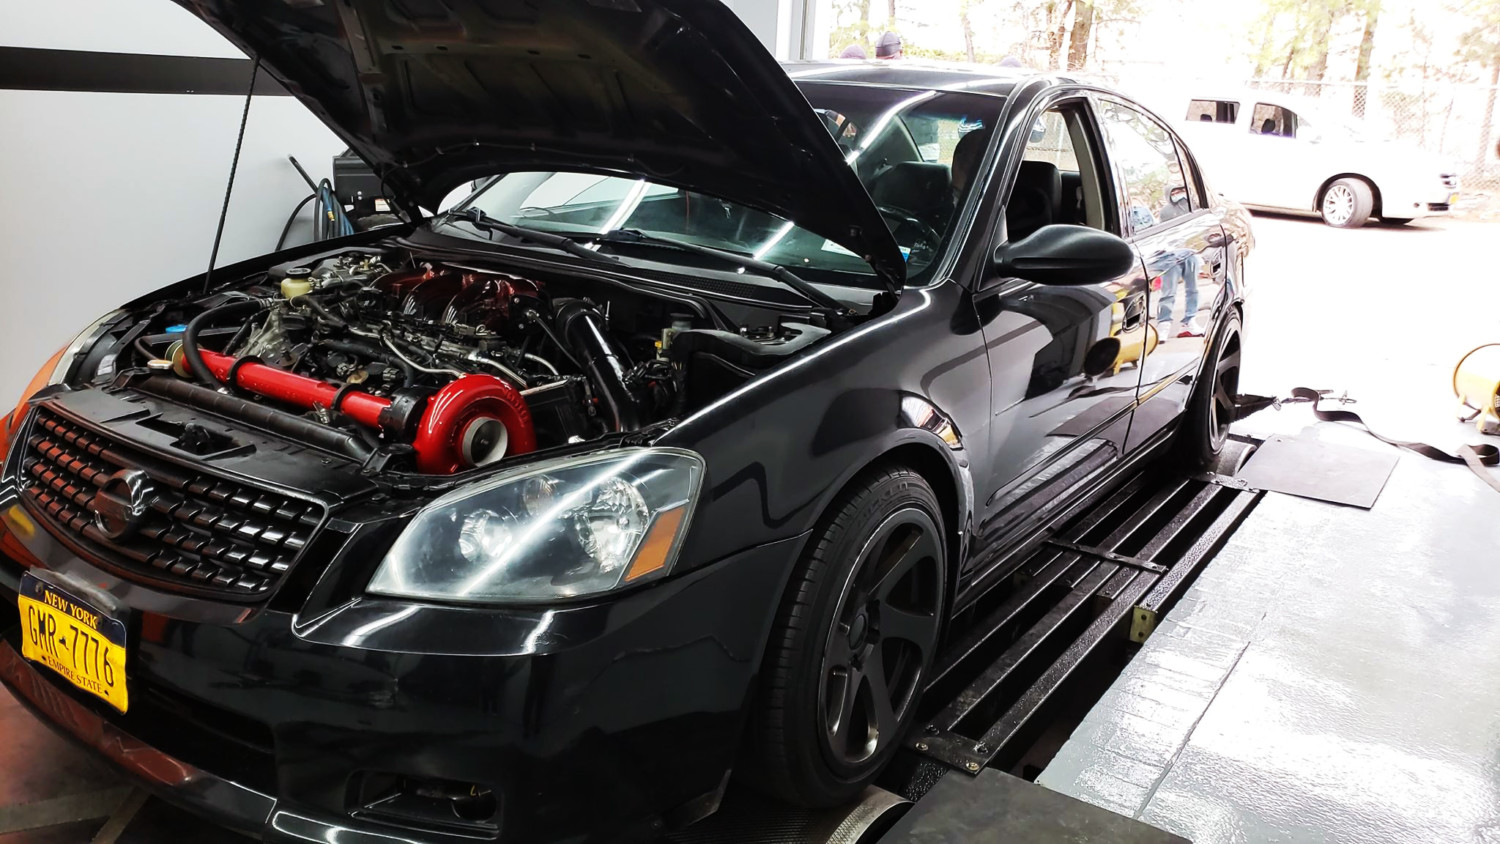
This is just for reference and comparison. The RIPP Supercharged Kit usually comes with the V-5 G Supercharger. Most upgrade to the V-2 Si Supercharger Trim. You will need to ensure the impeller is also in the right rotation for your setup.

| Supercharger | Max Speed | Max Boost | Max Flow | Max Power | Inlet OD | Outlet OD |
| V-5 F | 52000 RPM | 14 PSI | 750 CFM | 550 HP | 3.5″ | 2.5″ |
| V-5 G | 52000 RPM | 15 PSI | 750 CFM | 550 HP | 3.5″ | 2.5″ |
| V-2 S | 50000 RPM | 20 PSI | 1000 CFM | 680 HP | 3.5″ | 2.75″ |
| V-2 SC | 53000 RPM | 20 PSI | 1000 CFM | 680 HP | 3.5″ | 2.75″ |
| V-2 Sci | 53000 RPM | 17 PSI | 1050 CFM | 725 HP | 3.5″ | 2.75″ |
| V-2 Si | 52000 RPM | 22 PSI | 1150 CFM | 775 HP | 3.5″ | 2.75″ |
Vortech 5-G



Community Member Credit: Aaron92SE
First off, I just want to say that I got this idea from Jime. He purchased a 300amp battery jump box and used the battery out of it for his car. It weighed 6 lbs. I believe he had problems with it starting. So he purchased a 400amp battery jump box with a 12lb battery and has been using that ever since without issues. Jime, please correct me if I say anything incorrect. Thanks.
So I found that Harbor Freight had the best deal on a Battery Jump Box. So I purchased a couple of them. One to keep in the trunk of my car and one to use the battery out of.
The jump box I used was a 650amp one found here (Item #40615):
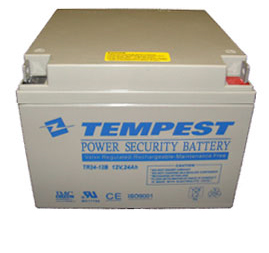
It’s the largest one they had. But before I ripped into this one, I looked at the manual and simply decided to order the replacement battery direct from Harbor Freight by calling their customer support at 1-800-444-3353. The battery cost $32.70. I order another battery for my HF drill, so that increased shipping costs to $7.99 instead of approximately $6.00 I think. The item number printed on my receipt for the battery is 26307. But you shouldn’t need that. Just give them the item number for the Jump Box and tell them you want the replacement battery.
The battery weighs 14lbs.
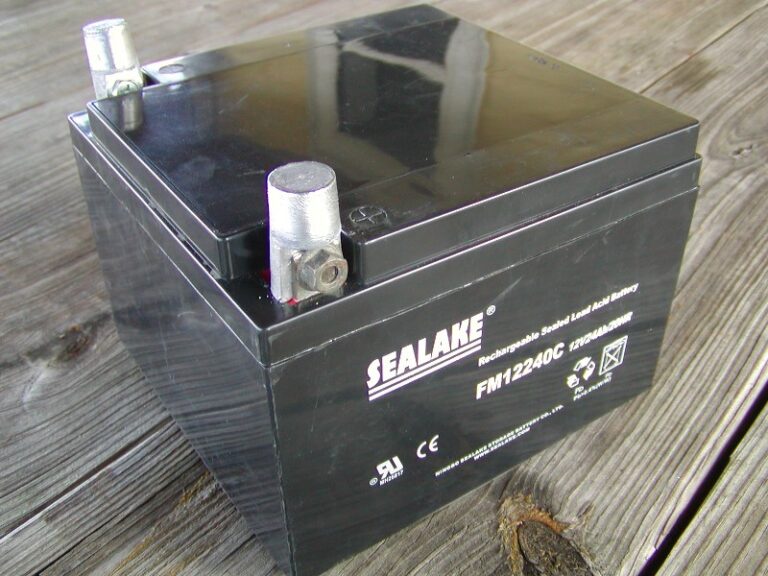
Here is what the battery looks like:

First I had to install “flag to post” adapters. I ordered them through my local Napa store (Part # NW 728219) for $6.29. They come in a pair and were cheaper than ordering them online from a battery supply store.
I had to slightly drill out the flag terminals on the battery with a step drill bit in order to use some spare M6 bolts I had laying around.
Next, I had to figure out a way to mount it in my 3rd gen. I really wanted to get rid of the battery tray as well for further weight reduction. But this posed several other problems. One being, the coolant tank attached to one of the battery tie down bolts. Plus, a couple relay boxes attach to the battery tray.
Out with the old battery. It weighed in at 40lbs and the tray is 3lbs.

I zip tied the coolant tank to the coolant tube on the VQ35. I know it’s ugly, but it’s ok. I’m only worried about performance here.

I put a fresh coat of paint on my OEM tie down. I found two bolt holes already in my frame that I was able to use. So I had these long M6 bolts laying around that I was able to use.

Here is what the battery looks like installed. I put some rubber bands on the bolts to prevent the bolts from ever dropping through the bolt holes. The bolt holes in my frame were threaded for M8 bolts and I didn’t have any M8 bolts that were long enough or I would have used those.
I was able to zip tie the relay boxes securely.
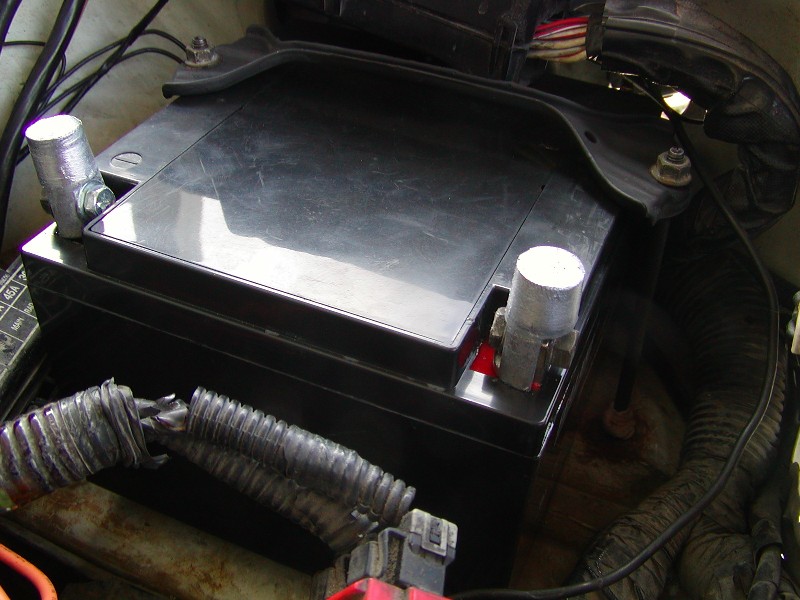


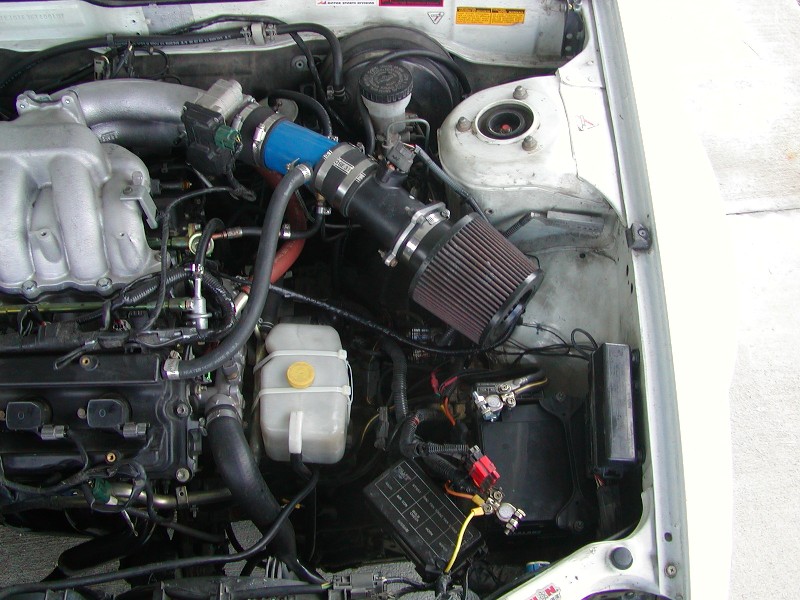
I installed a cheap Harbor Freight multimeter inside my car so I can always keep an eye on battery voltage. So far, this battery cranks my car up just fine. I have noticed that sometimes, the engine has to turn over one more time to get it to fire up. But this is not a concern. I believe this may be due to the engine turning over a tad slower than before. My old battery was the largest and highest CCA Duralast battery that Auto Zone had to offer. But it’s served it’s life as I bought it back in 2003.
Well that’s it. A weight reduction of 29lbs for under $40! I hope this helps somebody in the future. Thanks Jim for the idea!
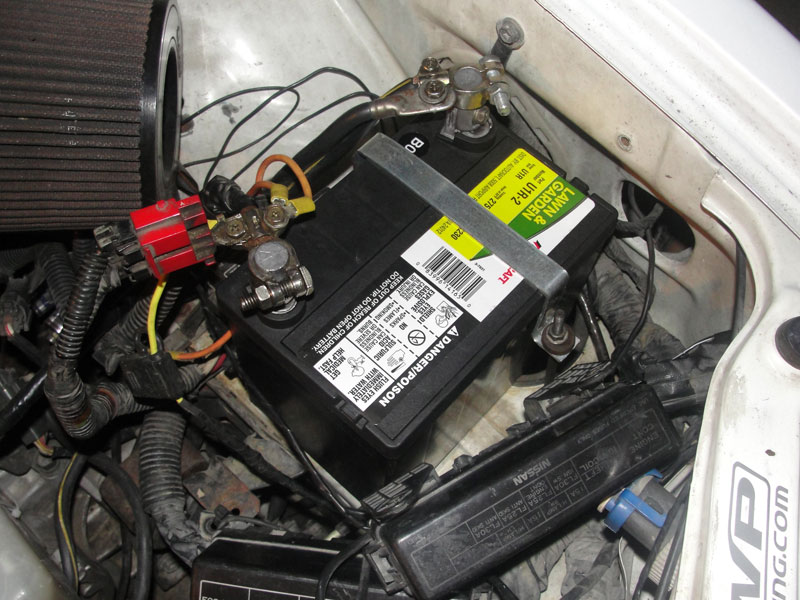
I went to Advance Auto Parts today and bought a battery for $31.99. It has 230CCA and 275CA and weighs 15lbs. It works just fine in the summer. So I’m happy. I just had to make a new tie down since it sits higher than the jump box battery. Car starts with plenty of power.
Member Credit: ridinwitha35
I did a MAF swap today & the results were so drastic I was feeling nice & decided to do a little write-up of the swap. Flooring it knocks me in at least 6k rpms with no hesitation (only floored it twice though); I used to floor it & get 5k rpms with good pull and then at other times it was if there was a brick wall at 3.5k rpms & it would slowly accelerate from there. Many have done it & this isn’t anything new to the regulars, but for noobs out there like me who like seeing stuff step by step, here it goes…
I’m sure the elite can do this without taking everything apart like I show, but that’s just what I did. Whole process takes less than 15 minutes.
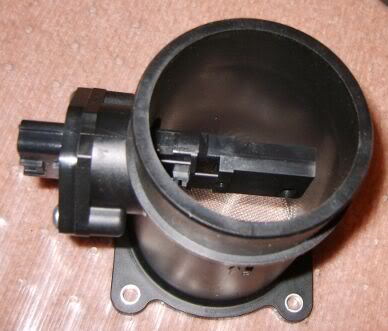
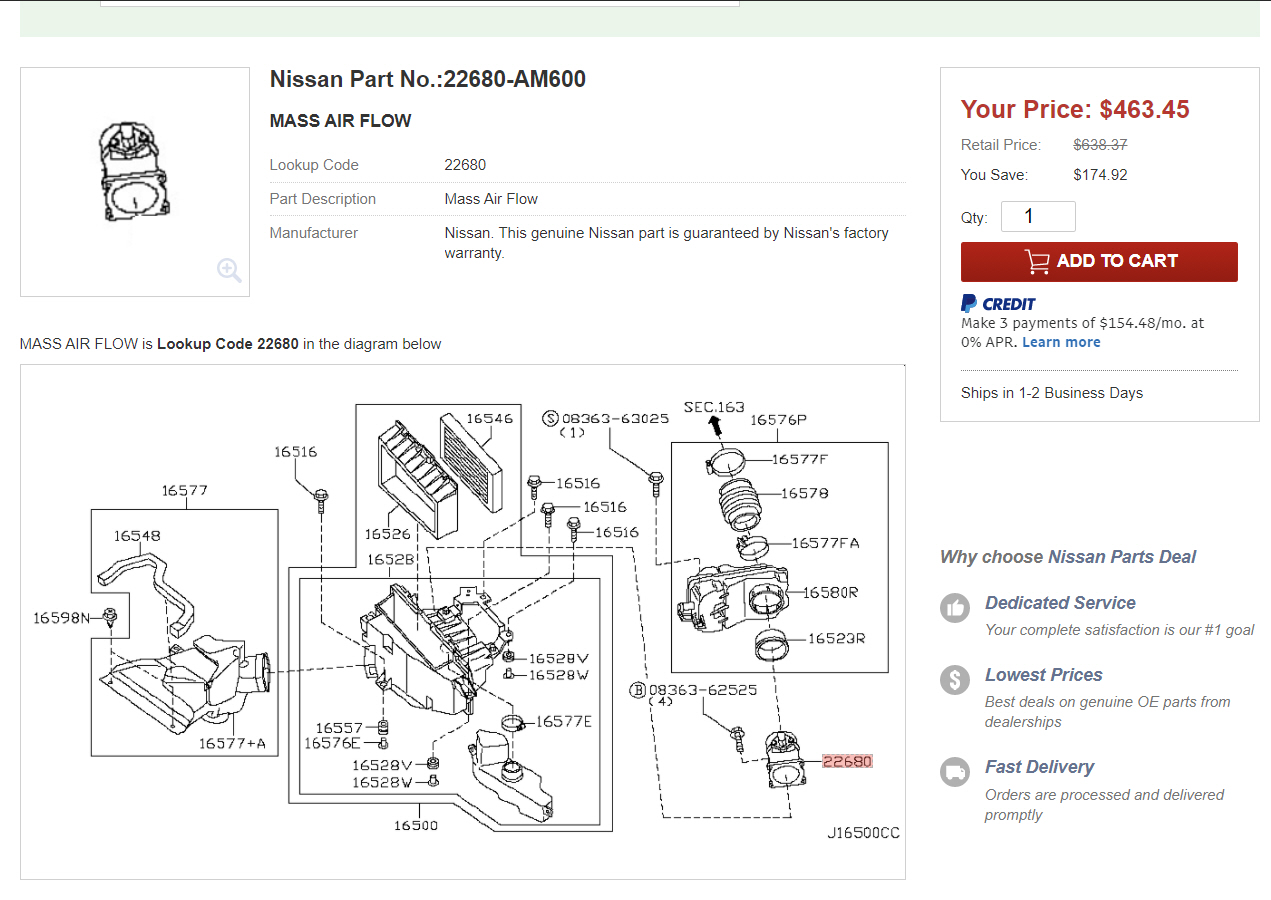
If you don’t know what this is about, this is a procedure for 5.5 gen Maximas [2002,2003] & I35s [NOT I30s] where you buy a basic version of the MAF and swap over a part from your old MAF to that new MAF, essentially making it a complete MAF as far as the ECU is concerned. This “basic version” does not contain a thermistor, which is a temperature-controlled resistor, known to the ECU as the IAT, or Intake Air Temperature sensor. The thermistor/IAT converts the air temperature into an electronic signal the ECU understands. This “basic version” is what is used on regular 5th gens & I30s without modification. A “complete version” can be purchased, but at the moment, there’s a $300+ price difference, making it more economical to buy a “basic version”, and swap the thermistor from your old MAF to it, turning it into a “complete version”. This basic procedure details how to remove the old MAF & swap the thermistor over, but it has pics.
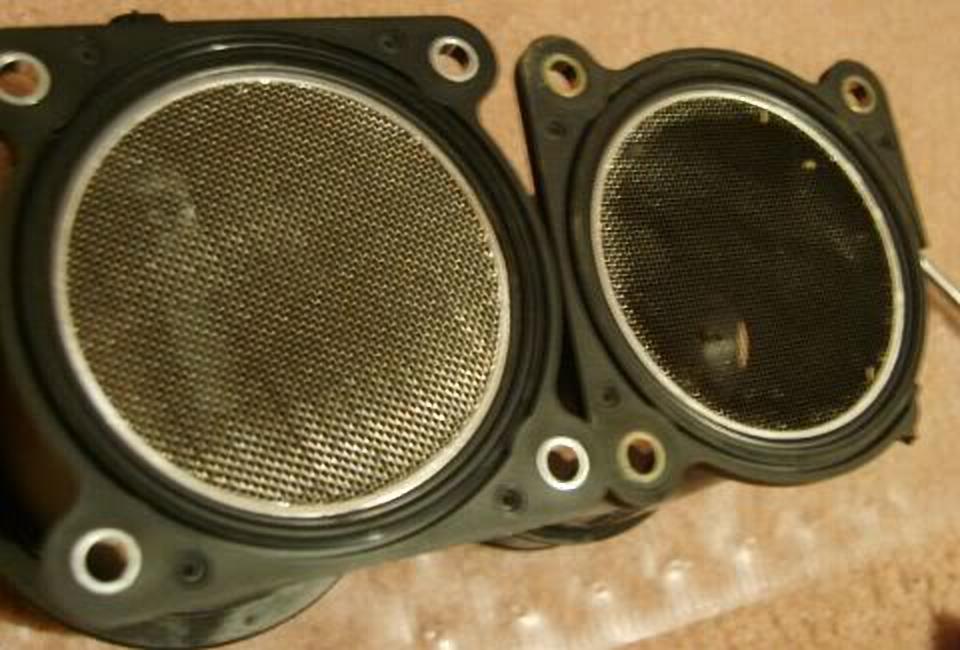
Comparison:
Parts:
New maf includes the sensor & housing:

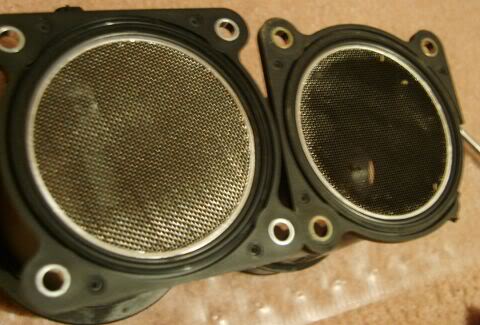
Good thing it includes the housing…screens side by side (new & old):
Steps:
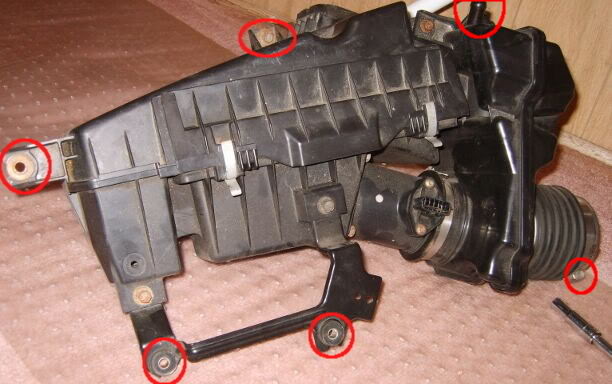
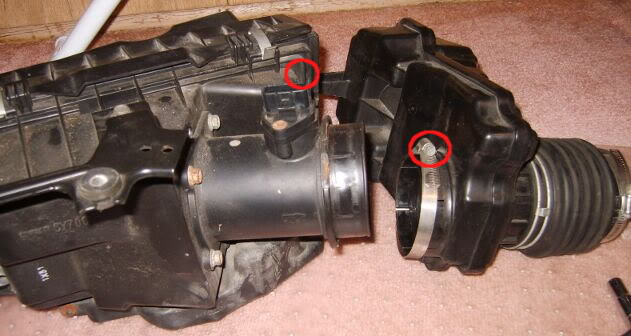
Unclip the MAF connector; remove air box/maf housing/intake tube by removing these bolts & loosening the collar’s flathead. ALSO don’t forget to take off the hose that connects from the intake to the front valve cover (I think)—the spiggot on the intake is the upper-most red circle. Then remove the whole thing from the car:
The maf sensor once removed from the maf housing:
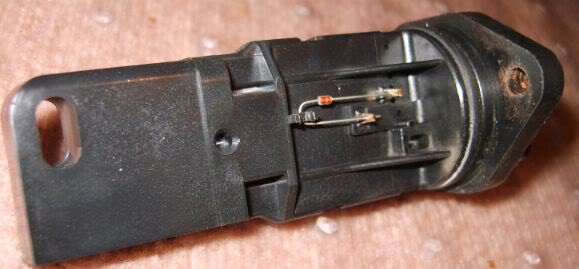
New (2k1) vs. old (2k2)
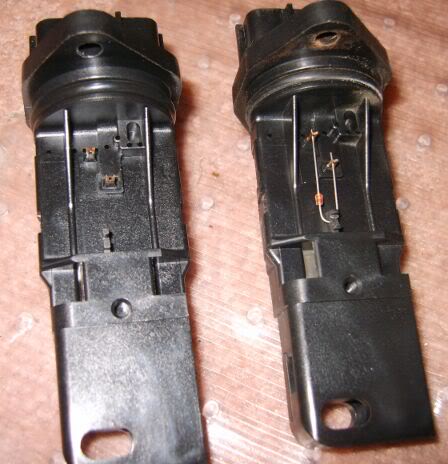
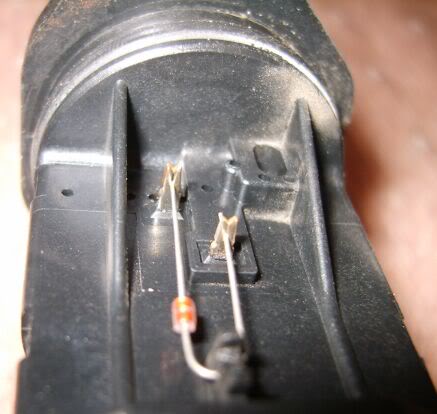
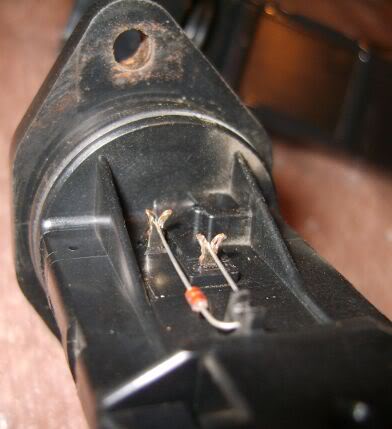
Electrical connection is via the metal clips squeezed around the leads of the thermistor
Separate clips using some side clippers…like you’re removing a cotter pin.
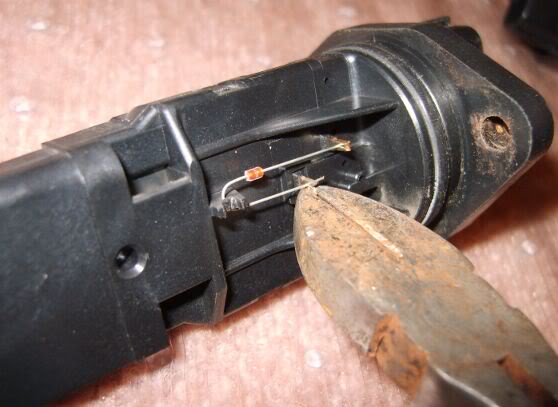
Clips separated; also cut the plastic at the base (at the curved part)..be careful not to cut the leads!
Remove the bolt & loosen the collar with a flathead to separate maf housing from intake tube:
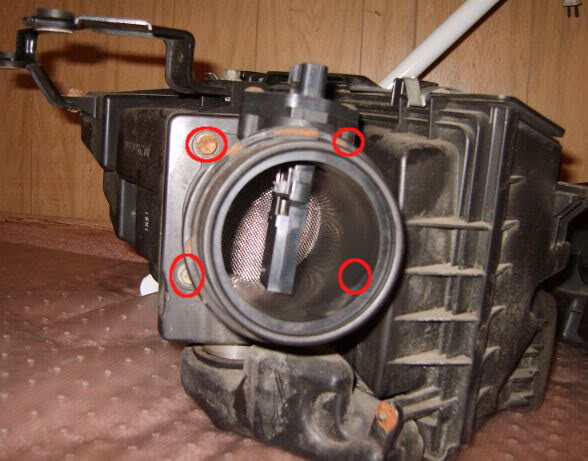
Remove these bolts to separate maf housing from air box:
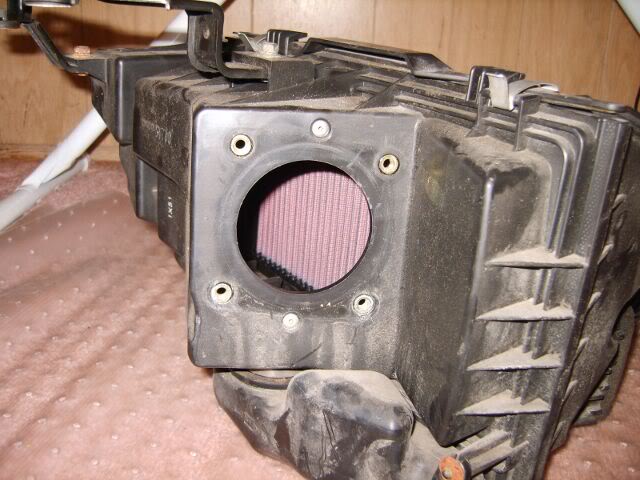
View after maf housing removed (can see the filter):
Remove the 2 torx screws, turn the connector a quarter-turn, and wiggle/pull the sensor out:
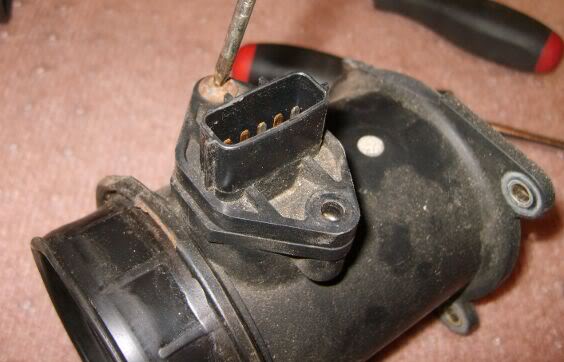
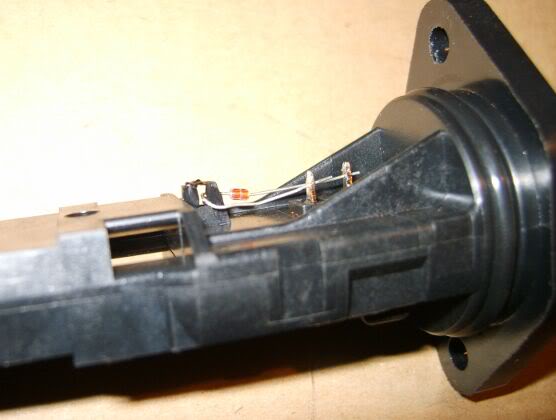
Note: might be best to handle the themistor with small pliers…I just used my hands & you can see I bent the leads – straight wires mean jack in terms of electrical conductivity…
Thermistor free…removing:
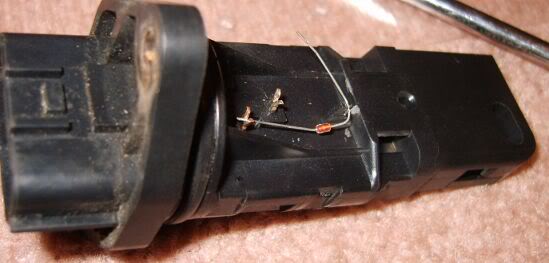
Thermistor in place on the 2k1 maf:
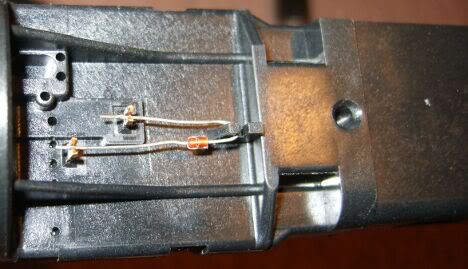
Squeeze the clips together once in place on the 2k1 maf:
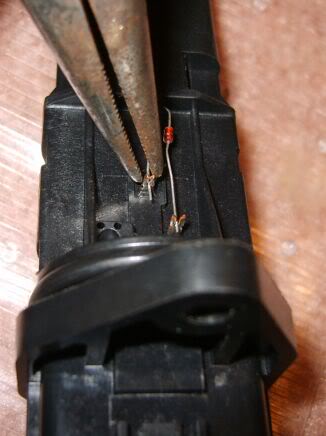
Use something to hold the top of the thermistor in. Whatever you use, make sure you give it enough time to set, otherwise you’ll hear a rattle on throttle (like I did with super glue gel…)
Put everything back together now…but don’t forget to transfer the rubber gasket from your old maf housing to the new housing:
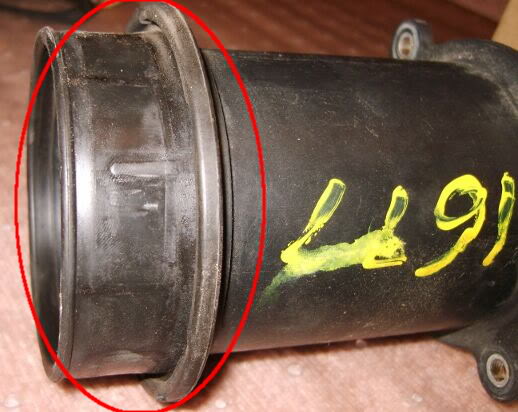
…looks like the maf that was on my car may have been from a junkyard…
There you have it. Start the car up. I did an ECU reset so it could get used to the more accurate airflow measurements. Go ahead and enjoy your new car…..

Community Member Credit: NiZMo1o1
So I know it’s been a while since I’ve updated on my build thread or anything with Betsy. Just wanted to share what’s been going on as we’re doing R&D at the moment. We are working on a custom plenum for the VQ35DE and VG30DETT. So this isn’t near the finish but I wanted to share with you guys my setup.
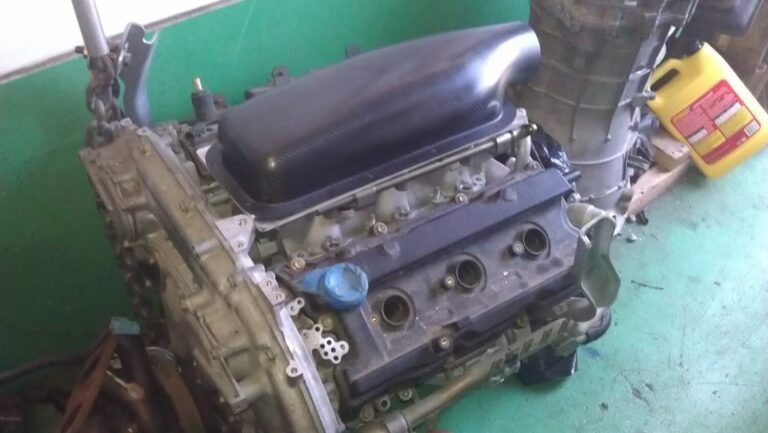
This is ACT carbon plenum with velocity stack airhorns inside it. I’ve decided to either go this route because of spacing underneath the hood. I intended to use the Jenvey ITB setup BUT because I would need to have two air boxes and may NOT have enough room, we decide to build our own intake.
This is how the ITB setup looks and we have a few running around ALL MOTOR in the FWD application.
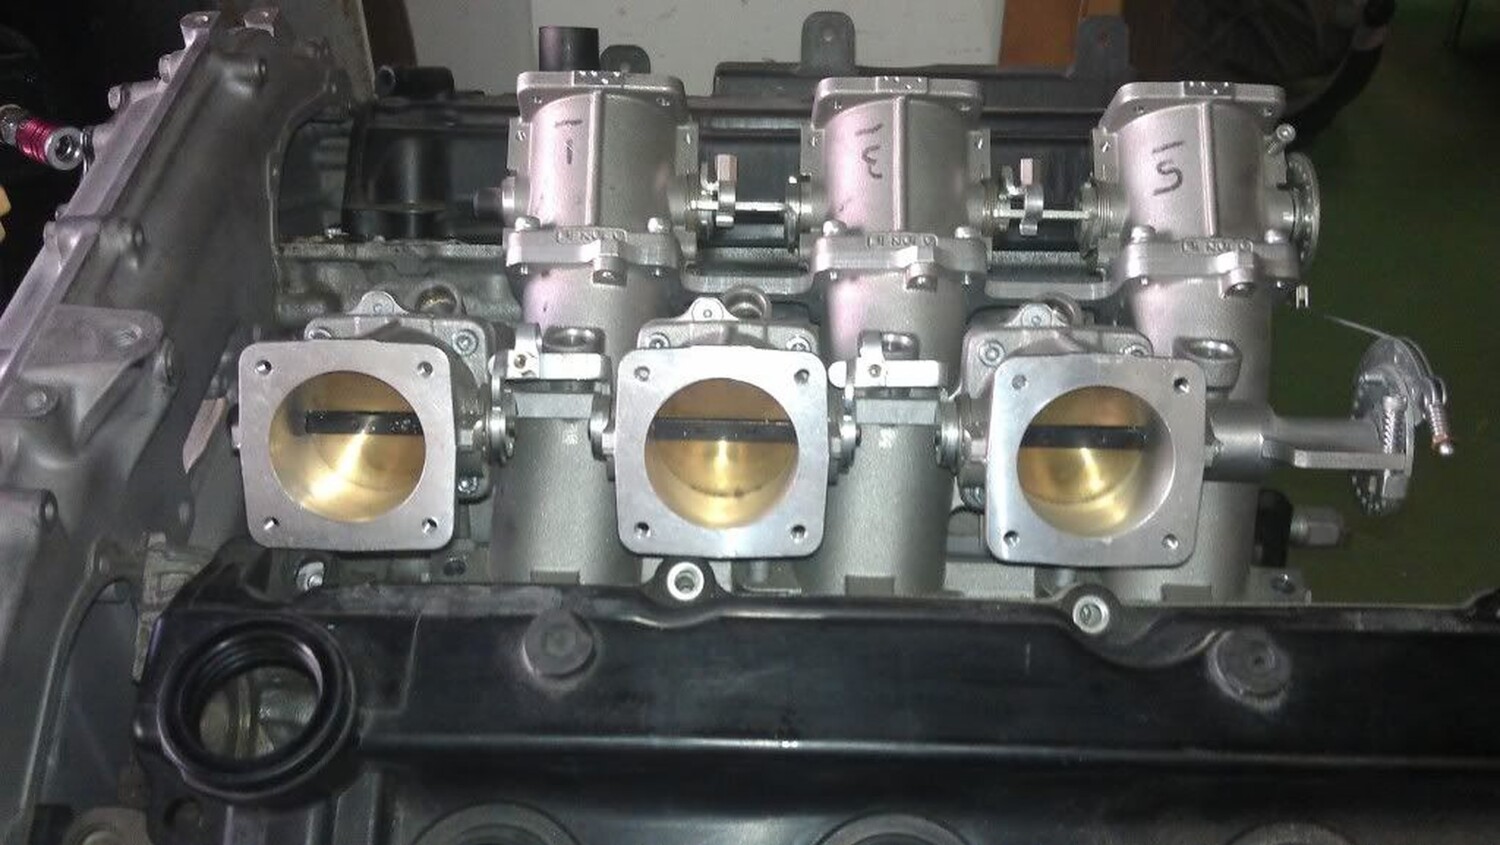
ACT Plenum


Rough idea, no Horn or stacks yet, not quite finished.

This is what its going to look inside

All this spawn from the VQ30DETT ( 300zx guys ) we are doing a setup for my buddy and got mixed reviews over on his board because there are many that are engineers over on his forum said it would never work.
The problem is these guys DON’T think out of the box, and because Nissan designs the OEM intake it’s supposed to work? Nissan built the OEM manifold to withstand 320hp-400hp max. Since we started this project guys overseas in New Zealand and Aussie have called us asking for this setup.
Over 3 weeks ago we started on the VG’s and then we looked at the mocked-up VQs and spare VQs at the shop. Decided today to start working on the VQ project, so this is just some rough draft early stages. The plenum will have enough volume with the velocity stacks inside to increase speed and airflow. The carbon plenum itself has been pressure tested to 90PSI which any motor will ever see that. I’m also tinkering with the idea to have the injectors sit INSIDE the air horns like F1 cars like so
Member Credit: Eddy
I decided to change my stock OEM Nissan fans to Mishimoto Slim fans. Below is what I did in order to make the fans plug-n-play, to the stock harness. For Mishimoto, you don’t really need a relay but it doesn’t hurt to have one. If you decide to do stronger fans like SPAL, you will definitely need a relay to avoid melting your wires. Those are very very strong fans of which the stock plugs cannot handle without a relay.
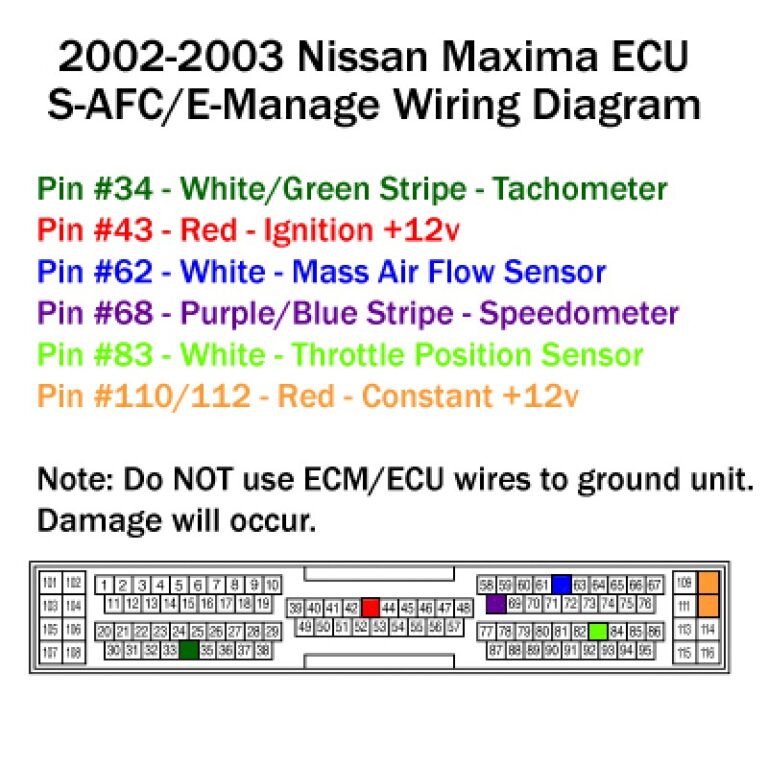
Important Note: Wire colors may be different so please check the factory service manual. You can use the below as a reference.


All Set.


Community Member Credit: Eddy
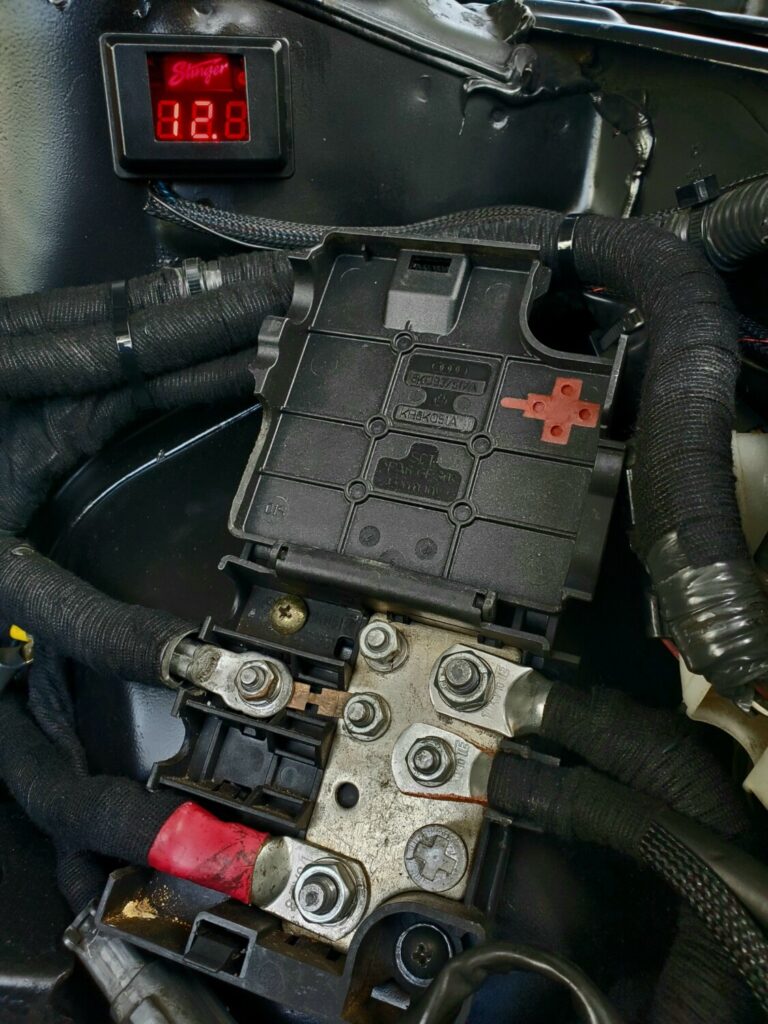
I decided to install an Audi Battery Power Jump/Terminal Box. The engine bay is so much cleaner and I can now jumpstart the car from the engine bay vs the trunk if I ever need to. You can also see where I put the OEM battery fuse that comes on the original setup.
You can find these on eBay. Just search for these keywords “AUDI BATTERY JUNCTION BOX OEM”. If you want the one I have, you can search for this part number: 8K0937517. Prices range anywhere between $10 and $30 bucks depending on the style/model of Audi you pick.

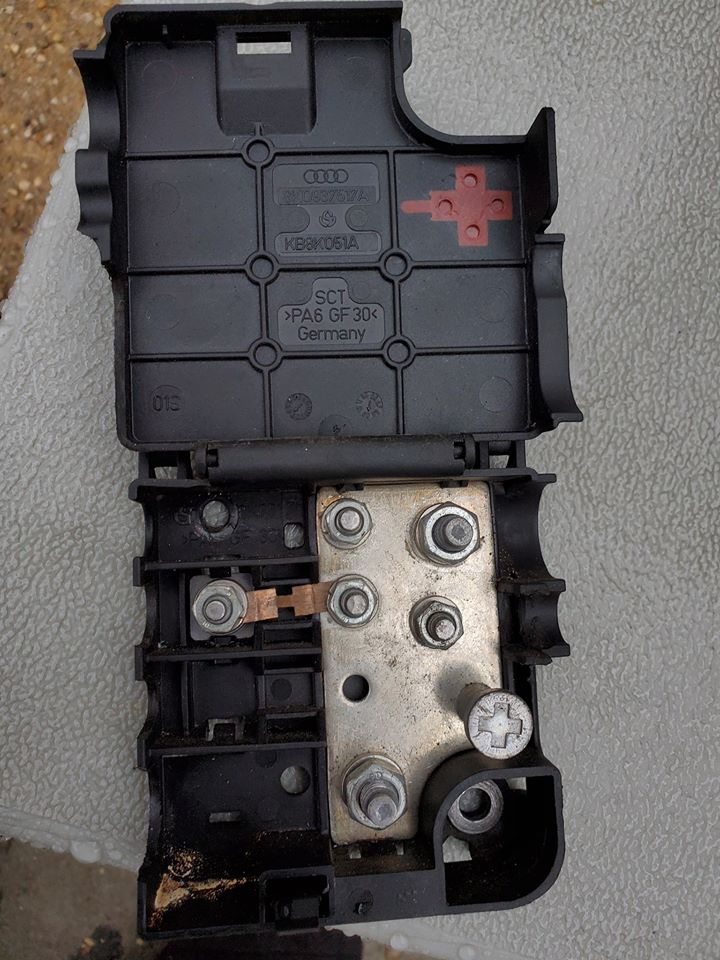
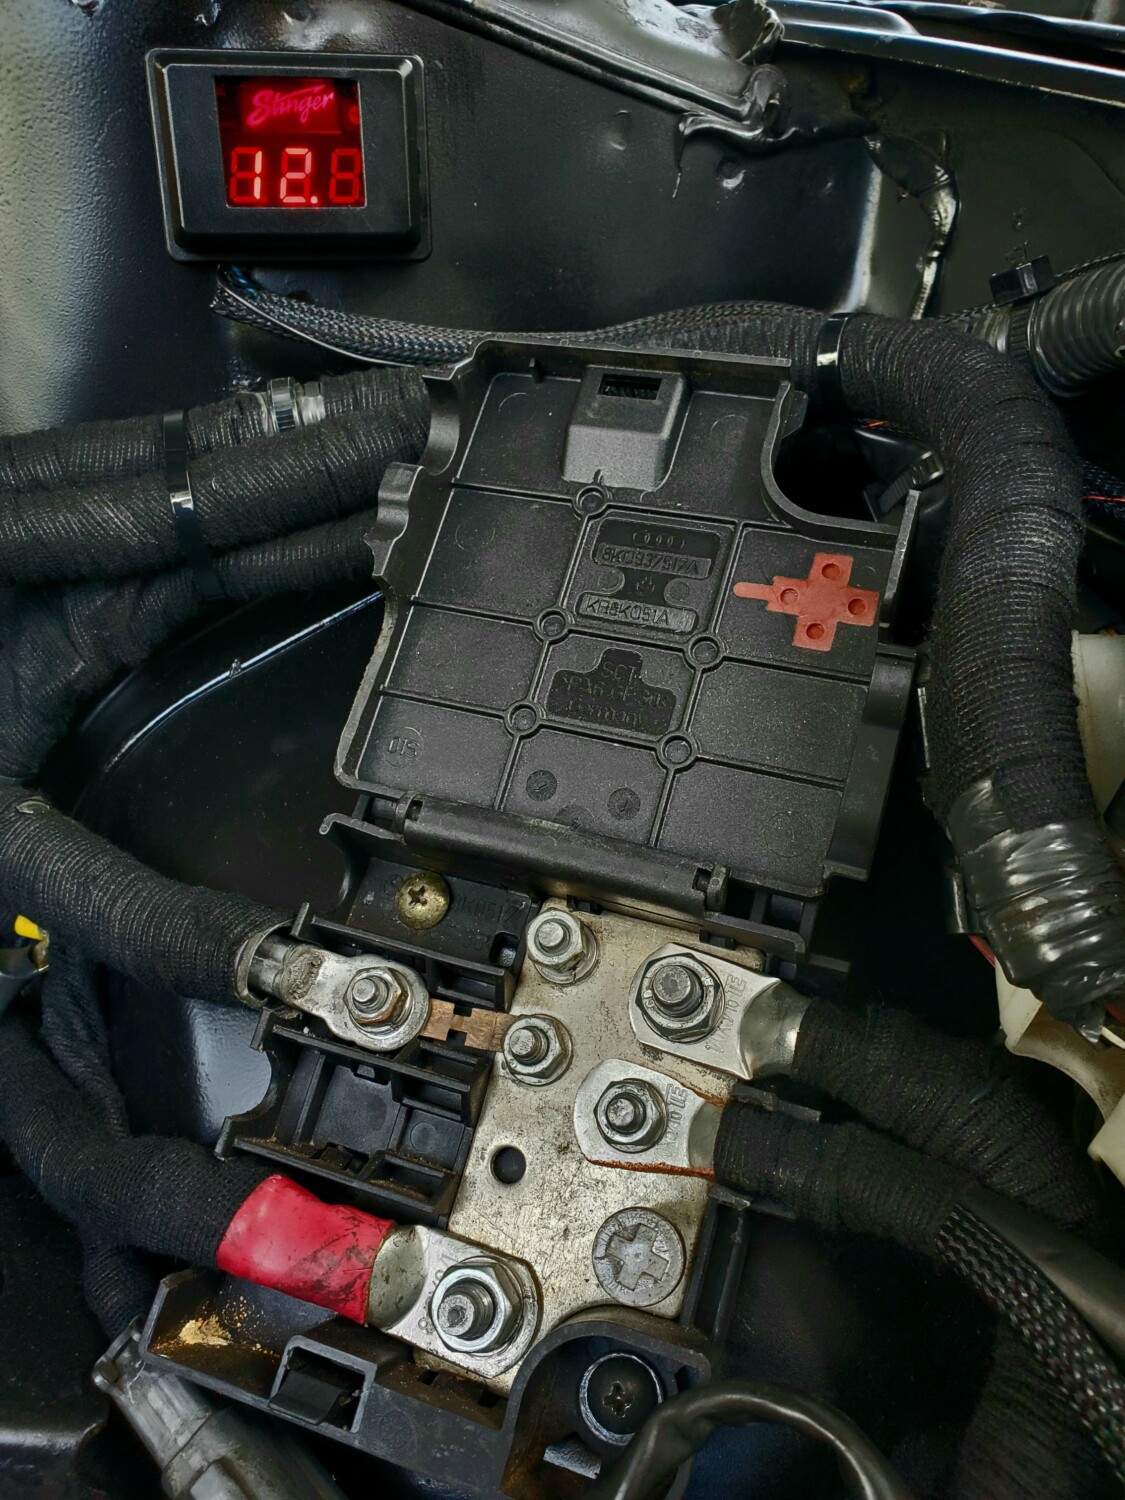
You can see where I put in the Negative Terminal
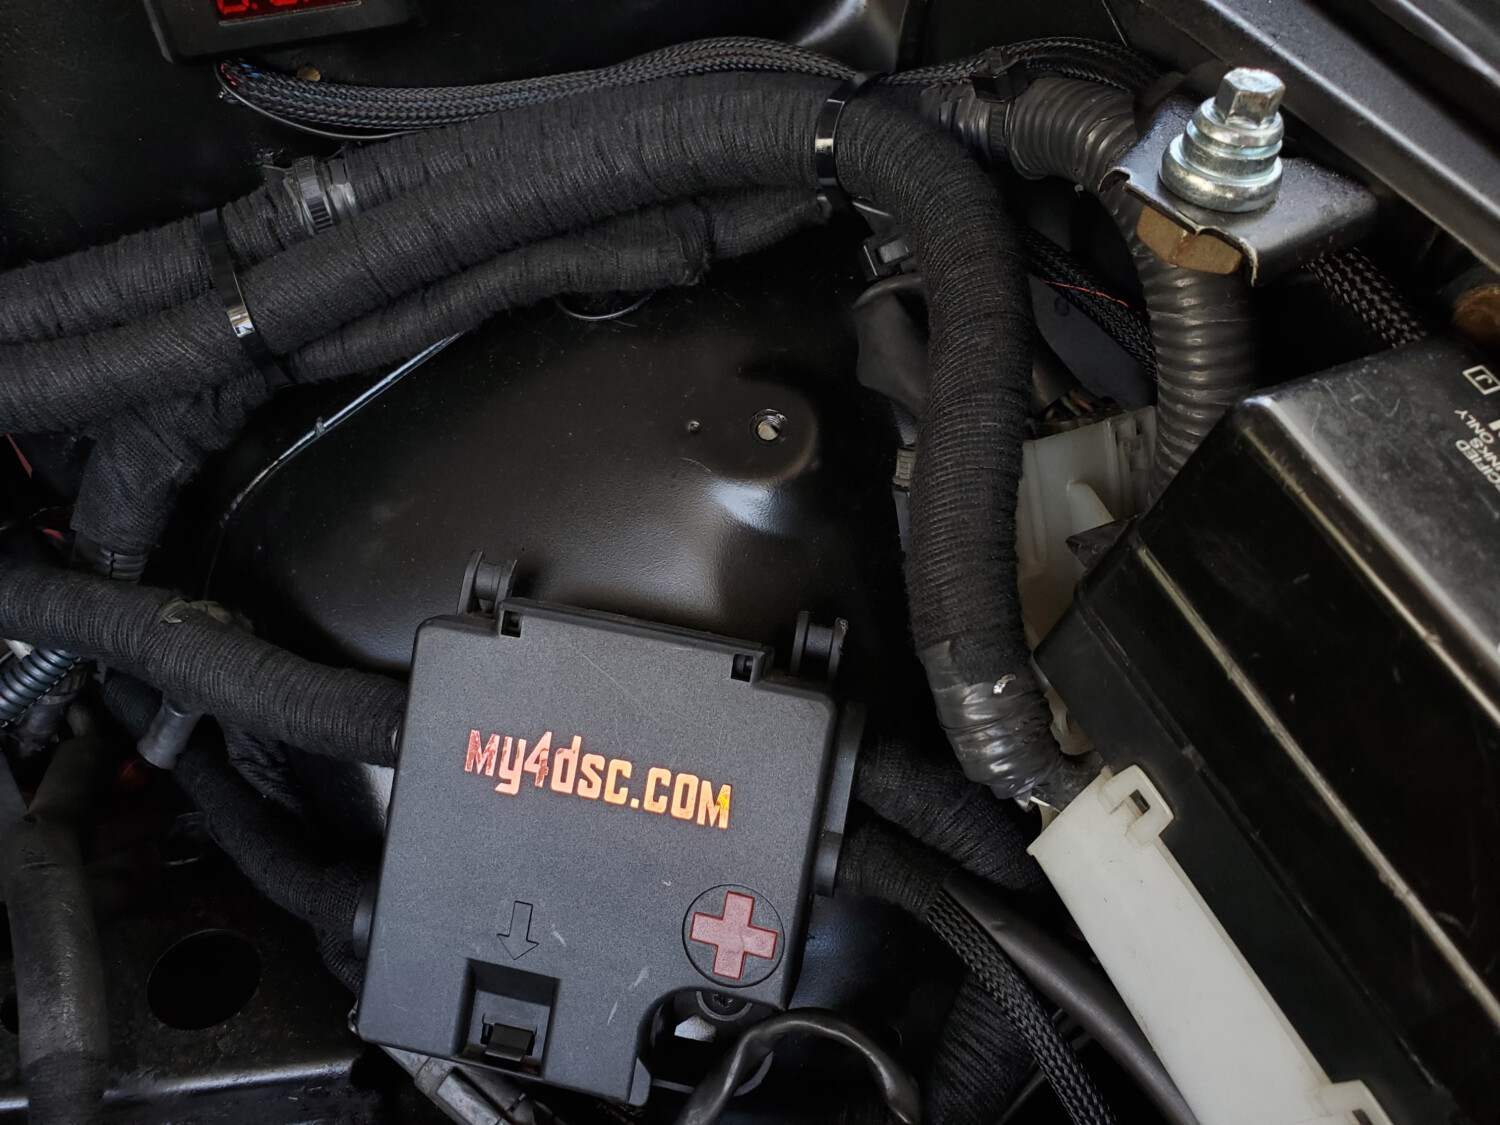

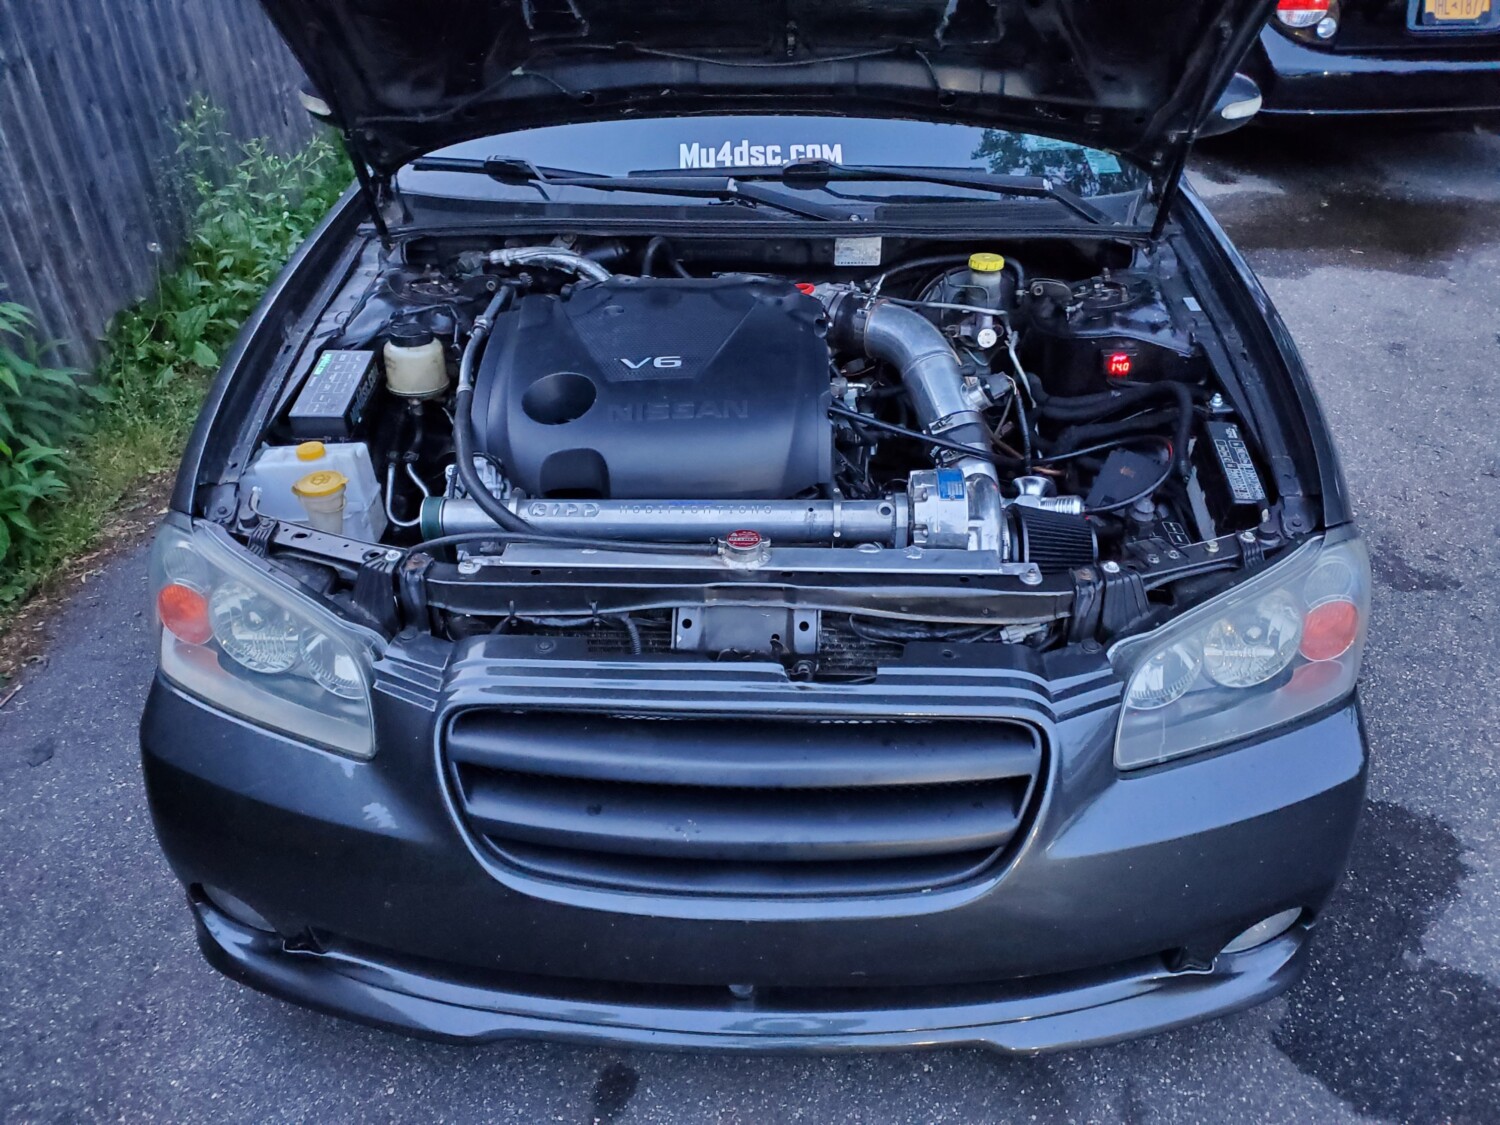

Update 11/8/2020
You can also buy the fuse from an Audi as well which is beefier than the OEM Nissan one. Below are the details:
Part Number: N10424906
Description: Audi Fuse box w/Fuse Battery Terminal – N10424906 – Genuine Audi
Price: $5.00-$6.00


Member Credit: Nathan Davis
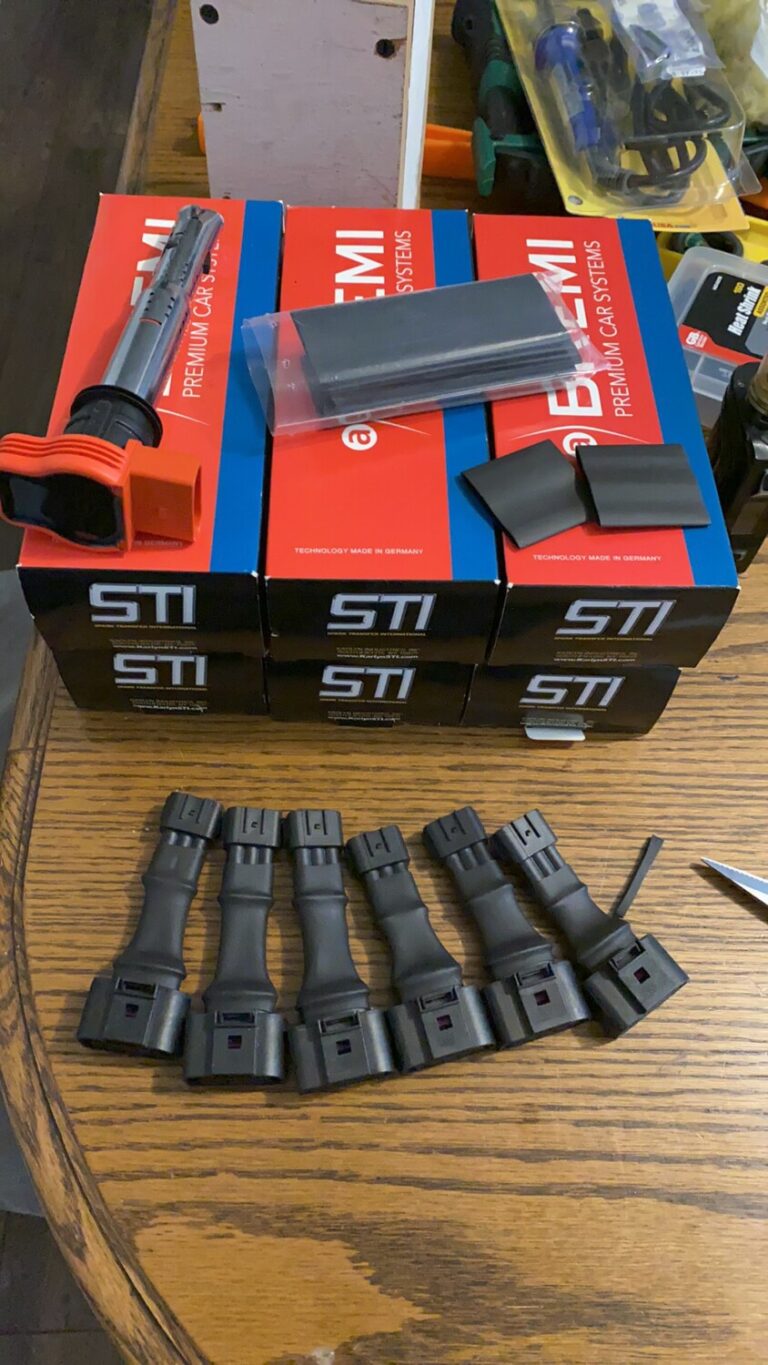
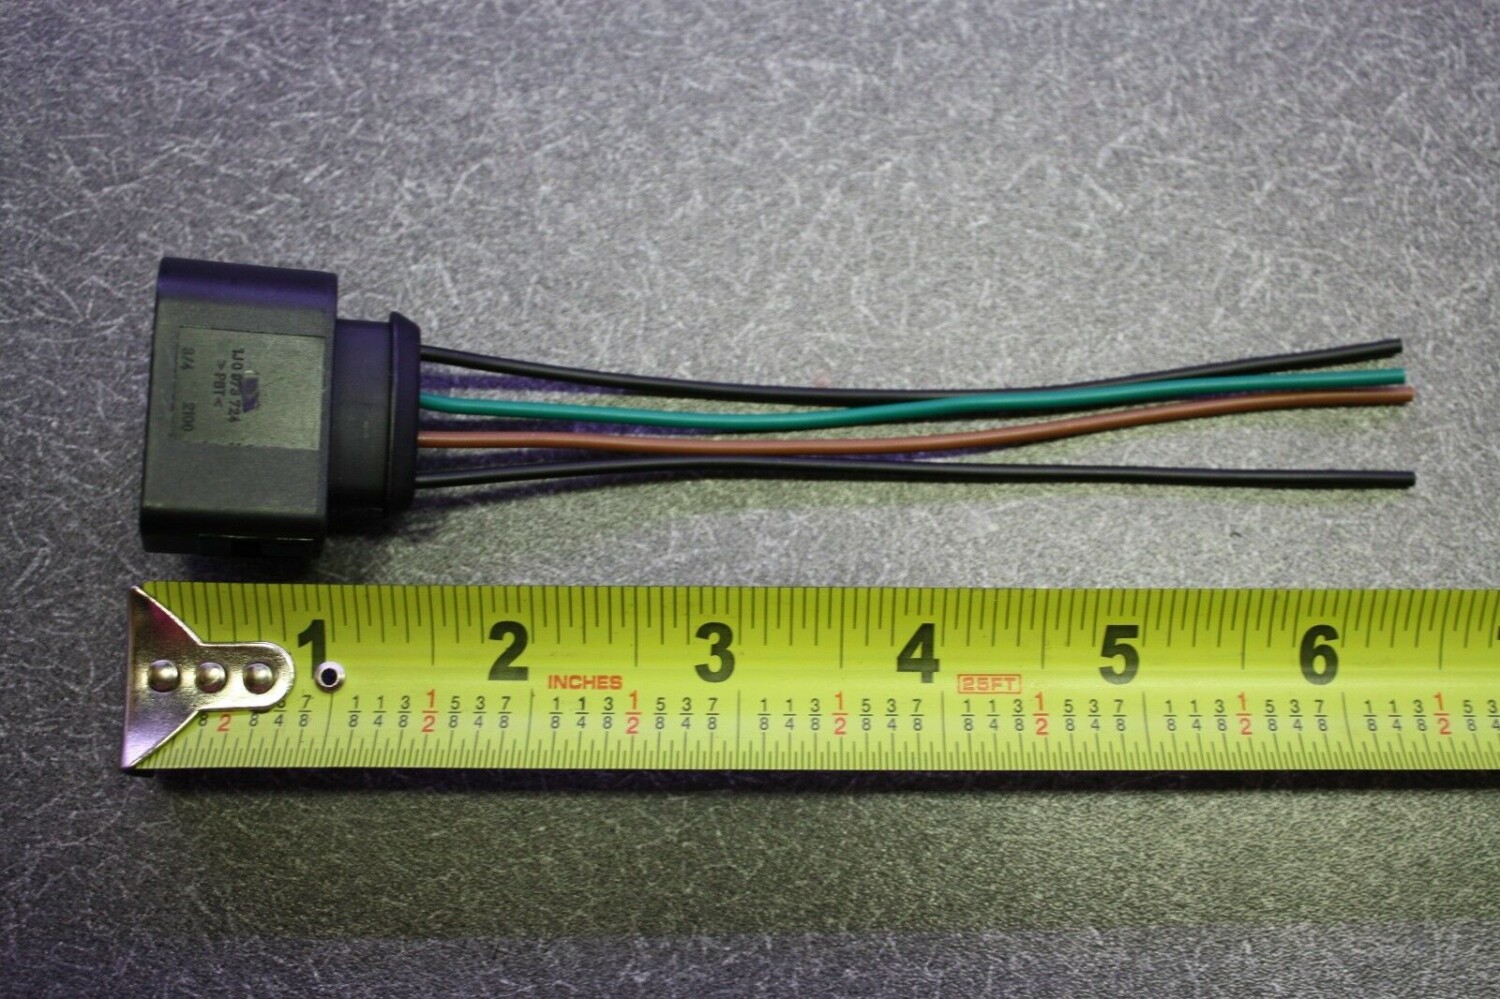
This write-up will help you make your own Audi R8 Coil Pack connectors. This version is very nice and clean. You can also hit up Nathan Davis on Facebook if you would like for him to make you a set.
Important Note: On the VQ35DE (2002-2008), you will need to use NWP Spacers for the Coil Packs to sit properly. The Gen2 VQ35DE (2009+) do not require spacers. You will also need the adapters to plug them in or make your own by splicing directly.
Audi R8 Coil Pack Connector


Nissan Coil Pack Connector

Additional Items:
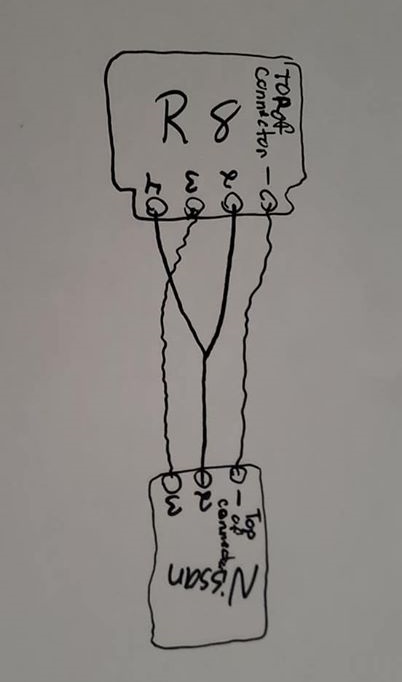

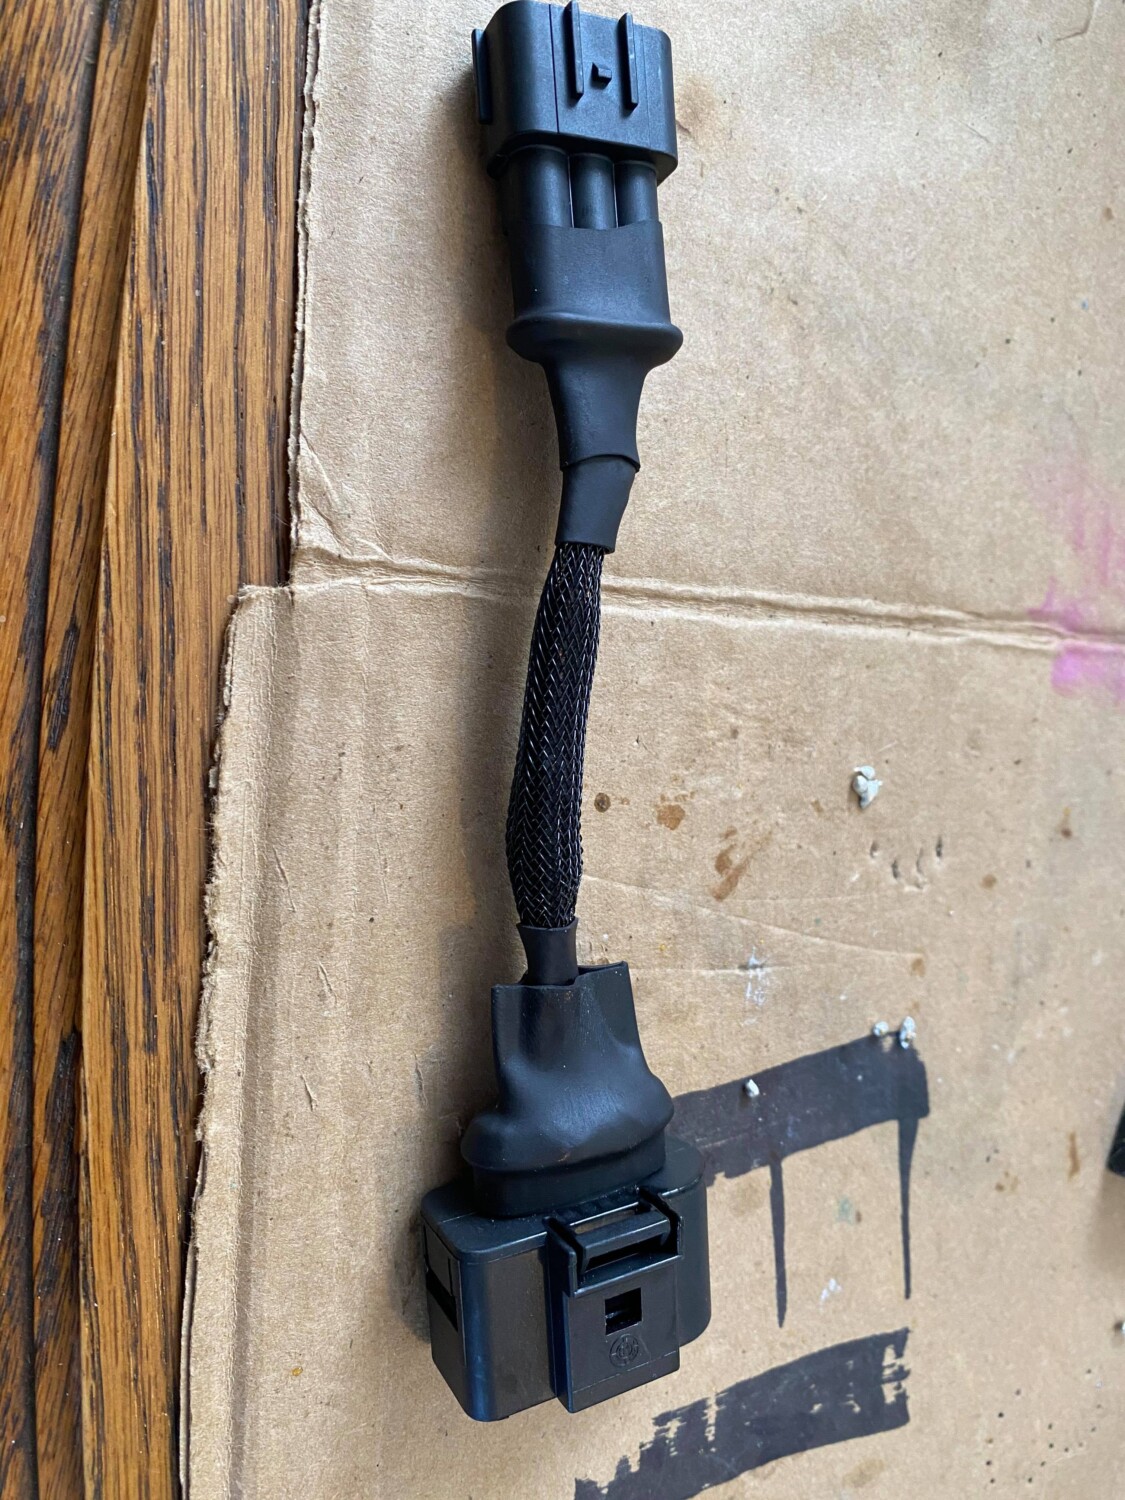
 Installation Photos


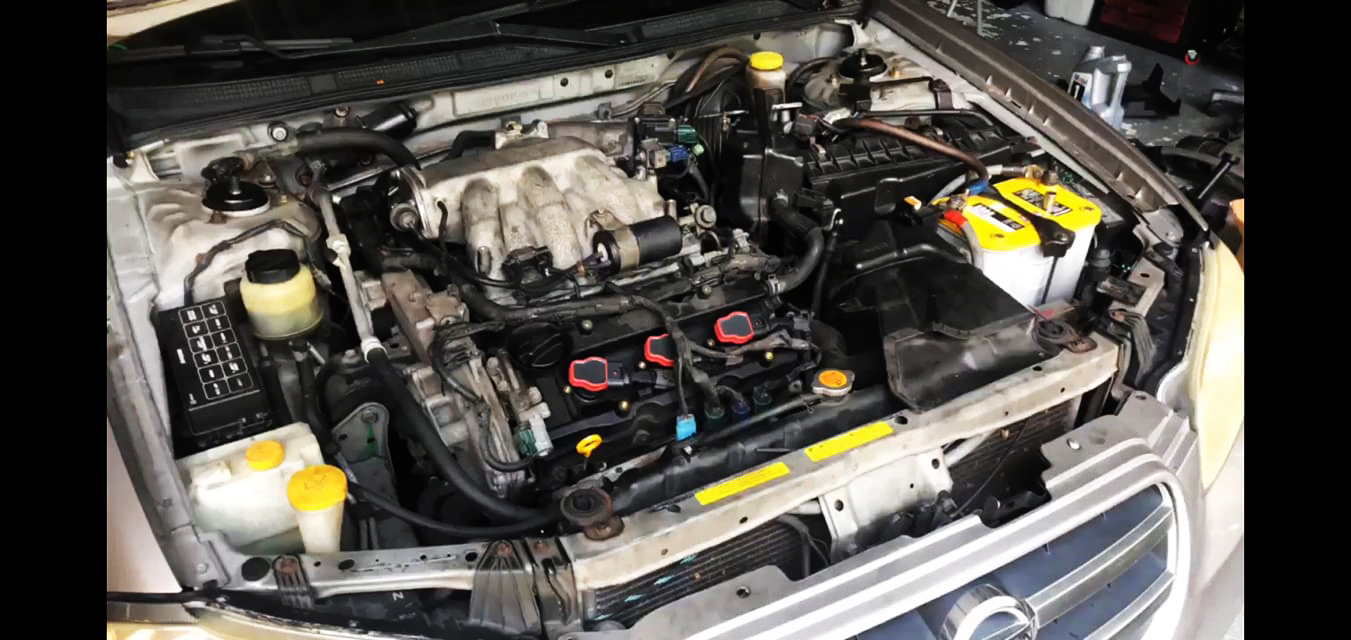

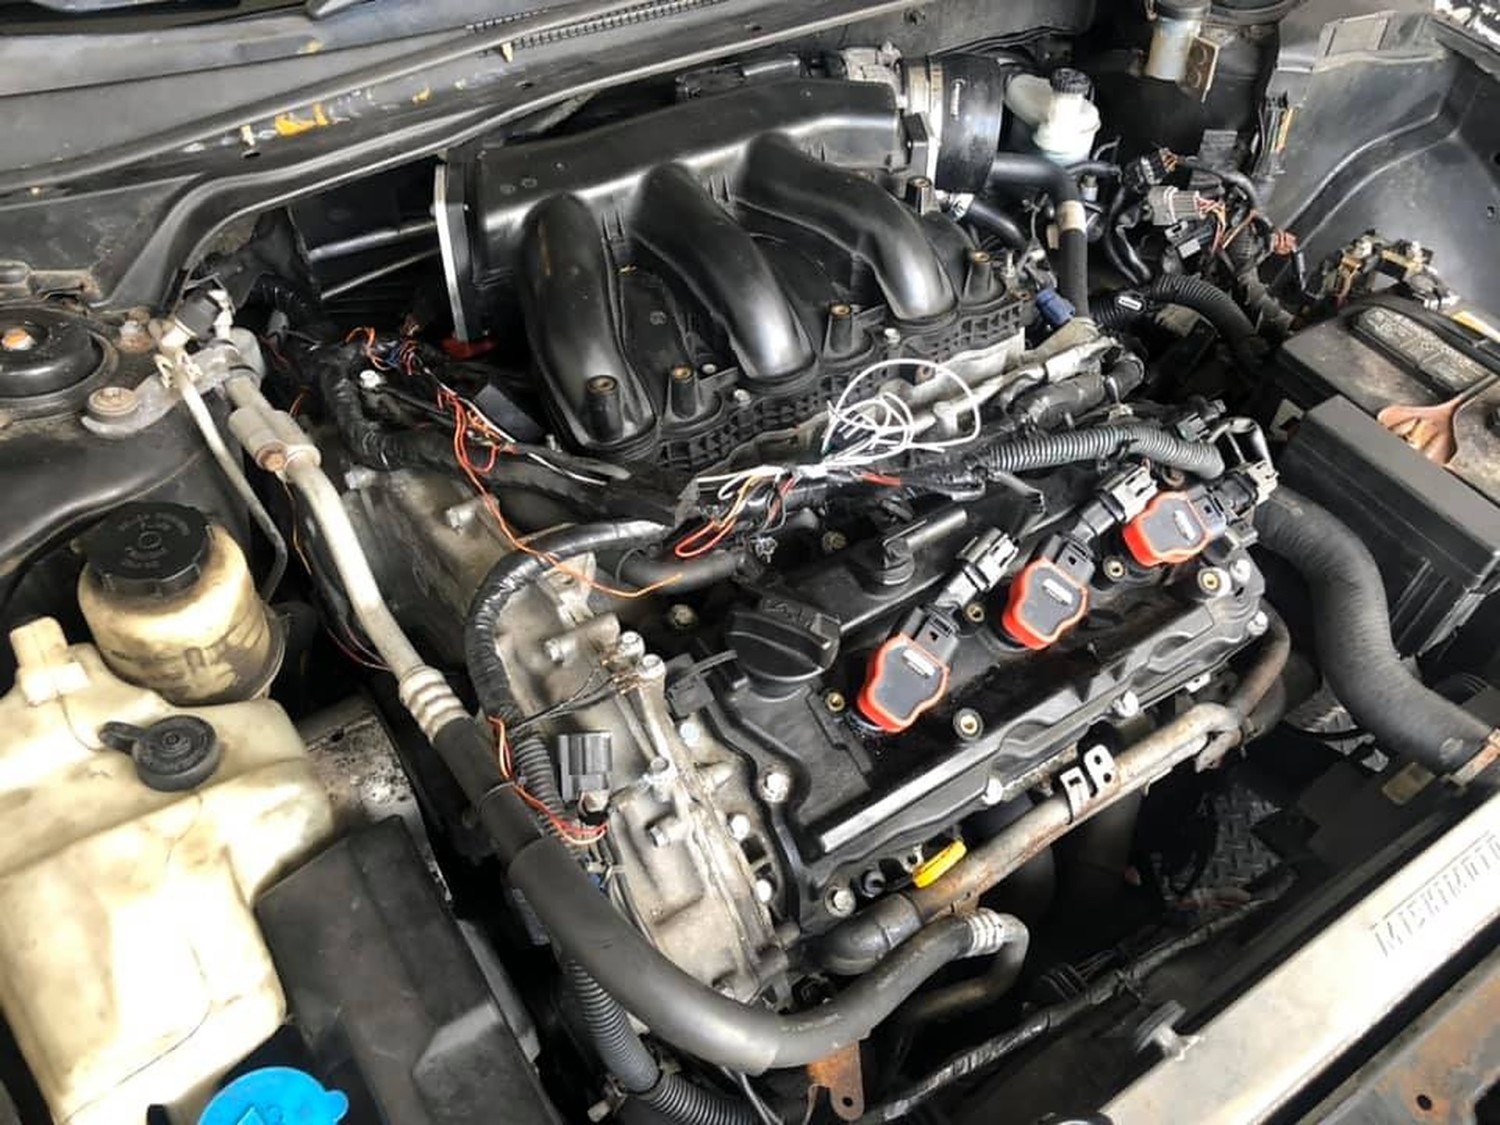
Now the coil packs price varies due to different name brands. They range from $132-$216 for a V6 engine. Below is the link of the coil packs below so you can see the prices and brands. Doesn’t matter which brand you use. They all make the same exact power.
Order Link: https://www.nedautoparts.com/search?q=Audi+coilpack