Tag

Engine Bay Mods

Browsing

Community Member Credit: Rochester

Part: Shifter Stabilizer Bushings – Nissan Maxima – 7.1115
Order Link: https://www.energysuspensionparts.com/7.1115

Here are the notes on removing the shifter trim and center console. Pictures follow.

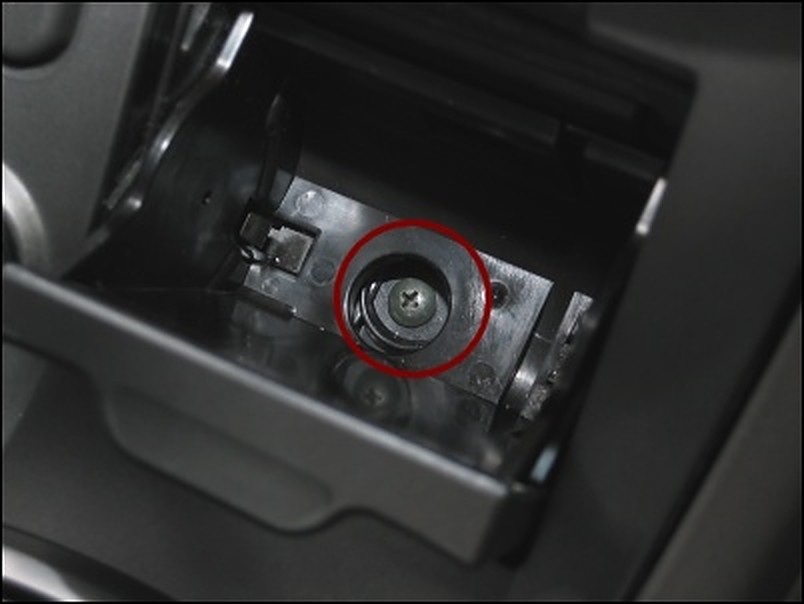
  1. Remove the ashtray and the screw behind the ashtray. (picture)
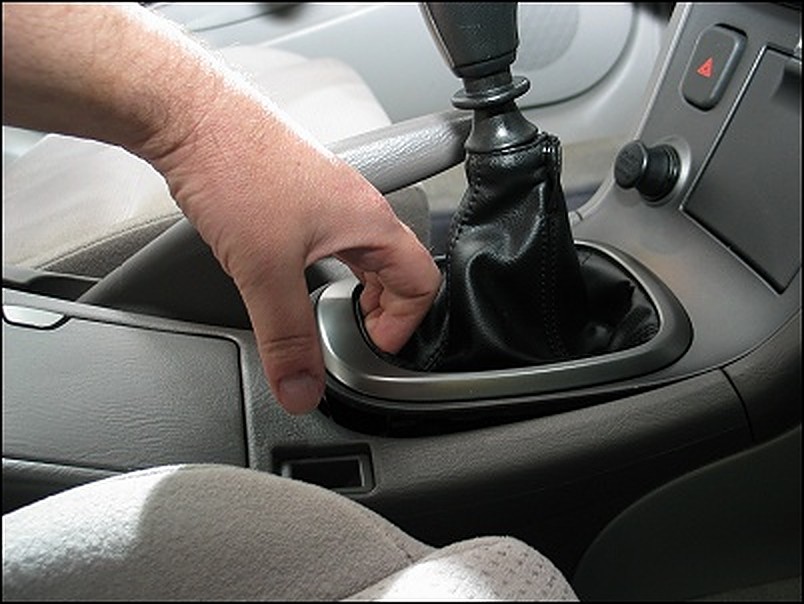
  2. Unsnap the shifter trim by gently pushing your fingers into the leather on the back end for grip, then pull upwards to unclip it. (picture)
  3. Lift the shifter trim from the back end, and wiggle it down from the front end. The shifter trim fits under the climate controls and will slip free with a little effort.
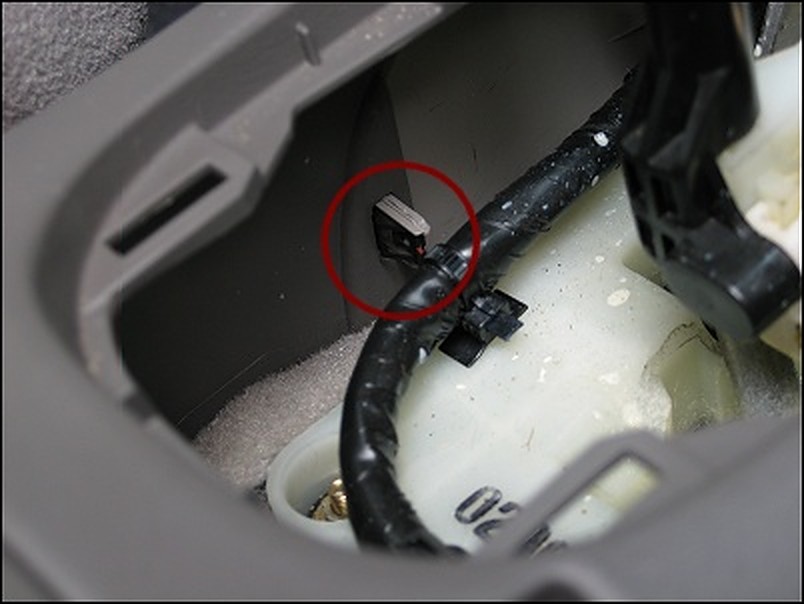
  4. Once the trim piece is free, unclip the power connectors that go to the hazard lights, ashtray light, and cigarette lighter. (Yeah, there’s an ashtray light. Who knew?) Use a small flat-head screwdriver to help unclip these connectors.
  5. Unsnap the leather boot and slip the entire trim piece off the shifter. Set it aside.
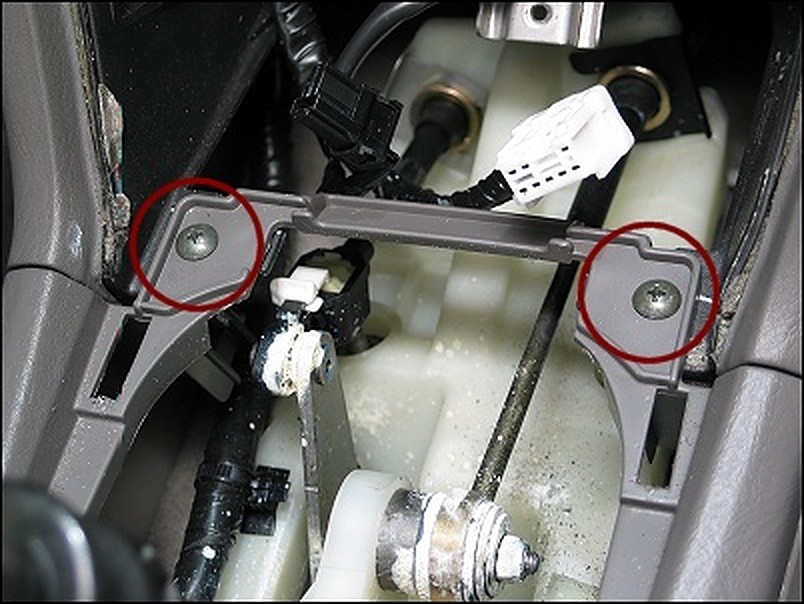
  6. Now on to the center console. Unscrew the 2 console screws made accessible now that you’ve removed the shifter trim. (picture)
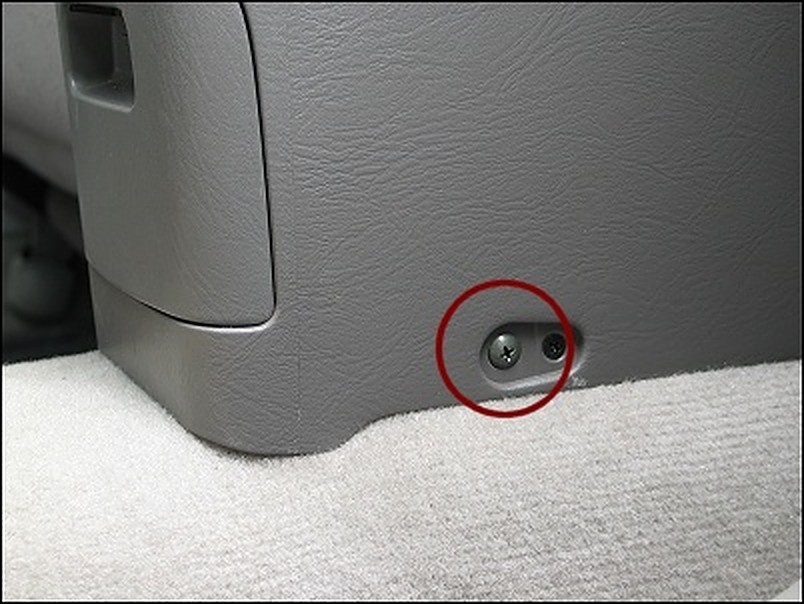
  7. Unscrew the two (large) screws that are on the bottom sides of the console, accessible from the back seat. There are two screws here, you want the larger ones. (picture) I’m not sure what the other one is, but it’s not the one you want.
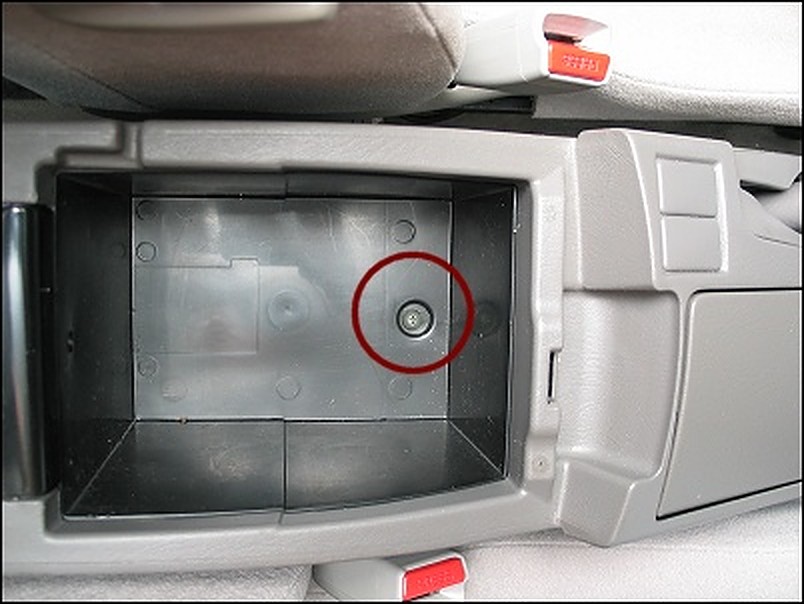
  8. Unscrew the single screw inside the center console glove box. (picture)
  9. Find the clips inside the front of the center console that attach the console to the side trim. (picture) Unclip the center console from the front-side panels, and lift the console up and out. It’s not a smooth process the first time you try to pull the console away, so take your time. Figure out how to remove it safely by adjusting the position of the hand brake.
  10. Once the center console is free, unclip the power connector to the back seat cigarette lighter. Set the center console aside.

Next up are the steps I used to replace the bushings underneath the shifter assembly. eclid98 suggests wearing mechanics gloves for certain things. I don’t have any, and yes, I cut myself.

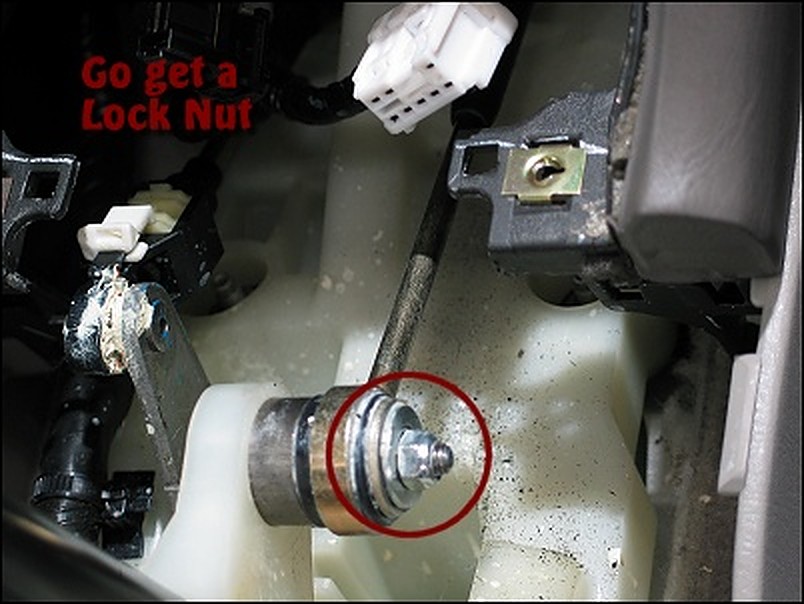
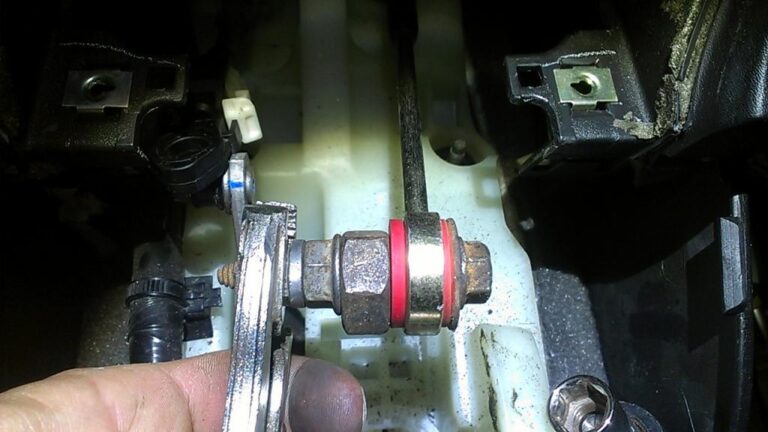
  1. Disconnect the shifter cable from the shifter arm by removing the nut over the OEM banjo bushing. (picture)
  2. Take out the OEM banjo bushing and replace it with the new ES banjo bushing. It can be difficult putting the new bushing in — use channel locks, or a couple of fat washers, a nut and bolt, screwing the washers together until the banjo bushing slips in. Do the same at the transmission end, under the hood. (I’m brushing past this part, because I already did this a while ago, and my playtime today consists of the bushings underneath the shifter assembly.)
  3. Don’t put the cable back on the shifter arm just yet. However, when you do, do not use the OEM nut. Go buy a replacement lock-nut… the kind with plastic in the threads. You see, now that you’re loosened it, the OEM nut will just back off again in the future, and it’s been known to do so on a number of people. (Me included, but I was lucky and felt it getting sloppy before it completely fell off.) Use a lock-nut so you don’t have to deal with that worry.
  4. Unclip the side-to-side articulating arm on the left side of the shifter. You do this by pushing it off its post, NOT by unclipping the white retention piece. That piece holds yet another plastic clip in place below it, who’s purpose is for fine-tune adjustment to the centered placement of the shifter’s left-to-right position. Play with it if you want to figure it out, but it’s not part of these instructions.
  5. Now… you think there would be some kind of retention washer on this connector. The post is designed for it, but there wasn’t anything there. I’m thinking that was a manufacturing-line SNAFU on my car, so I bought an E-washer for that purpose, and used it when everything went back together. Go figure.
  6. On to the shifter assembly. Use a 10mm socket to remove the 4 nuts that are holding the shifter assembly to the floor.
  7. Wiggle and lift the shifter assembly off those four bolts. You don’t need to remove the entire thing; you just need to establish clearance one bolt at a time.
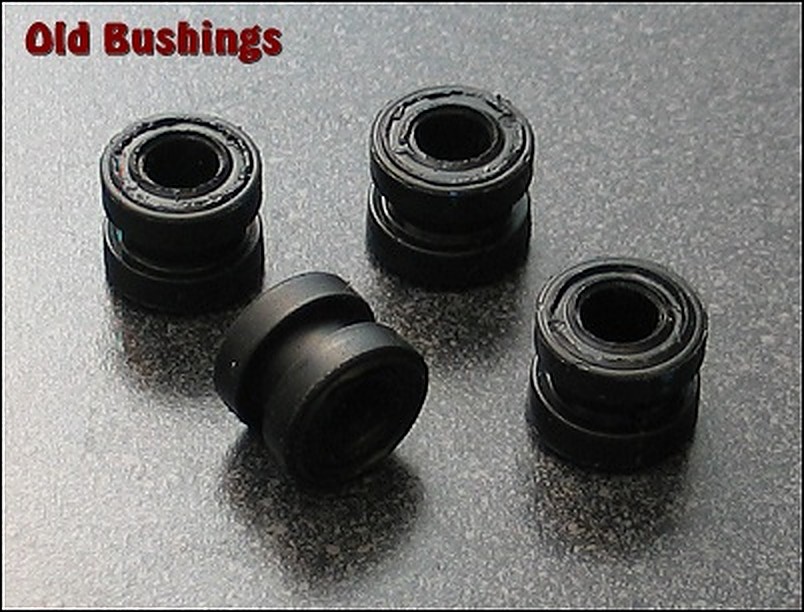
  8. Working on one corner at a time… start by slipping the OEM metallic washer-tube-thingy (hereafter referred to just as the “washer”), off the OEM rubber bushings. Use a small flat-head to do this, prying the washer downward from the underside of the shifter assembly. Be careful you don’t lose this thing into the floorboards. That would be bad.
  9. Once the washer is removed, use pliers or a big screwdriver to force the OEM rubber bushing out of the hole. You can pull it upward (difficult), or push it downward (easier).
  10. Take the normal looking ES bushing and push it over the washer’s post (with a little force.) It’s probably easier to do this in your hand now, rather than after you re-install put the washer. (Thanks to eclid98 for that tip.)
  11. Now slip the metallic washer back on the bolts. Note, you’re still working on the underside of the shifter assembly.
  12. Repeat this step on the other 3 corners. You’ll probably cut yourself, bleed and swear a lot. It’s all part of the fun.
  13. Now slip the shifter assembly back down over the four posts.
  14. With the assembly back on the floor flat, slip the other ES bushing piece into the one of the holes, small end downward. Select one of the 2 more accessible corners as your first one. Don’t worry about forcing it down into the hole… that will happen next.
  15. Put the OEM washer/nut over the bushing and screw the bushing down into the hole. Don’t tighten it all the way just yet, just enough to push the bushing down into the hole. (Thanks again, eclid98.)
  16. Repeat this step on all four corners.
  17. Last step — tighten down all four corners evenly.

Reference Photos
Additional Insight from: AWeb80

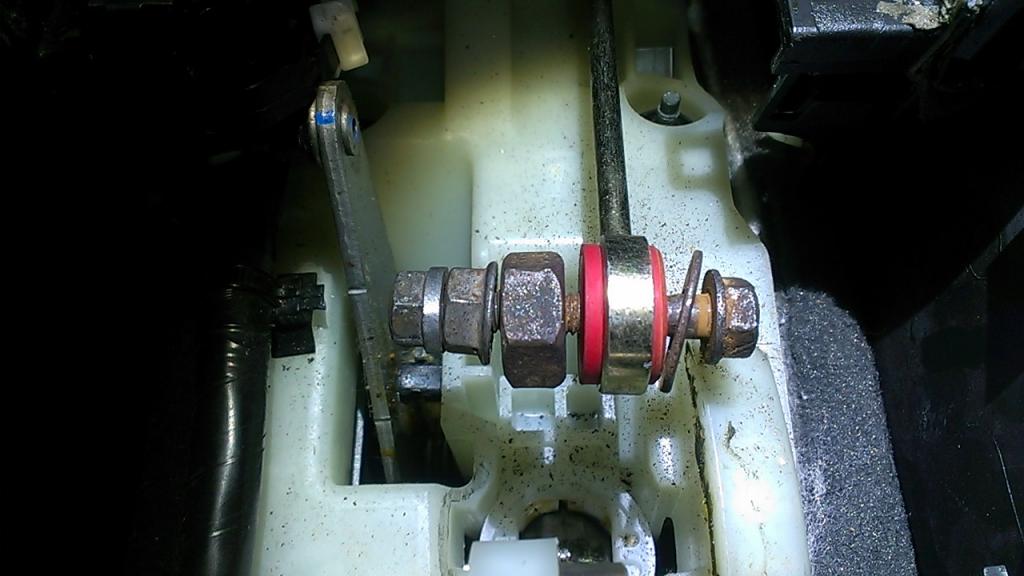
I do have a tip to put the banjo bushings in. Put a bolt that is smaller, not snug, through the bushing and use a nut to tighten it in place. I think the pictures explain themselves. It took all of 2 minutes per bushing. It pushes it in square and is MUCH easier than trying to squeeze it in w/ pliers.

*don’t mind the extra nuts I have on the left side….they are just there as spacers so I didn’t have to thread the actual nut on so far. *
Name: IMAG1679.jpg Views: 401 Size: 64.7 KB

Name: IMAG1677.jpg Views: 400 Size: 66.3 KB

Name: IMAG1678.jpg Views: 388 Size: 73.7 KB

Loading

Community Member Credit: Rico Rodriguez

Big shout to Rico for spending countless hours in finding a cost-effective solution to coilpacks for the VQ35DE engine. This also works on other models and years.

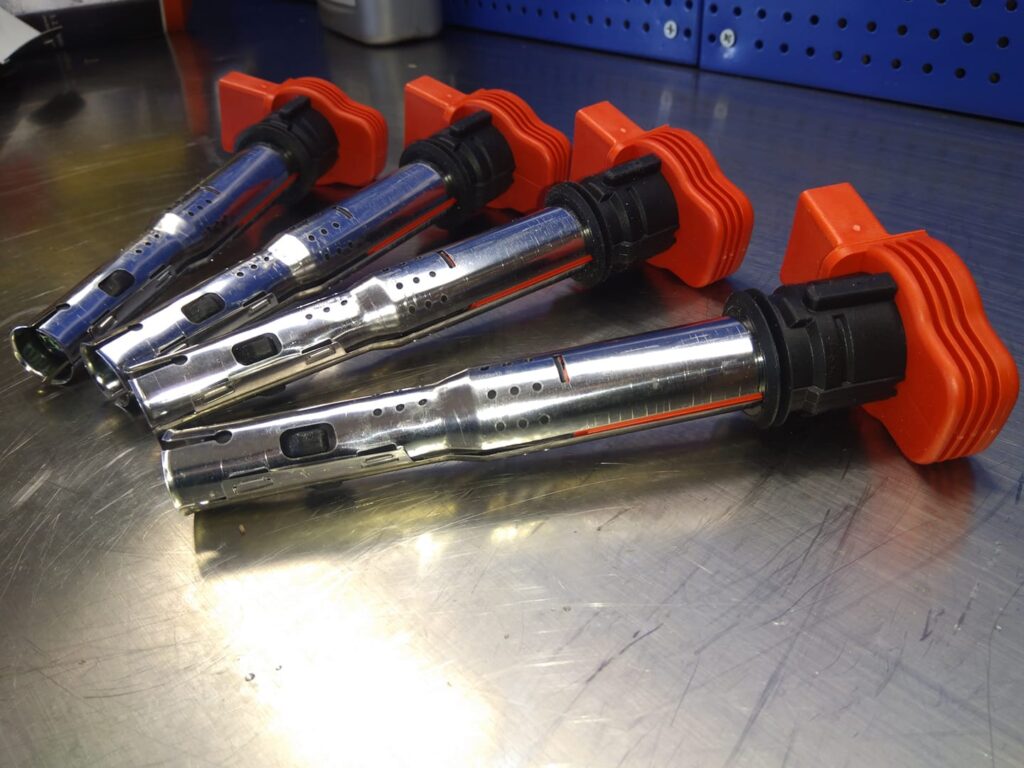
For those that don’t know, Audi coilpacks are stronger and better than Nissan coilpacks. They add better mpg and more HP/TQ. It works on bone stock vehicles or highly modified vehicles. Just rewire the OEM pigtails to Audi pigtails, plug it in and play!

Nissan Coilpack only has 1 coil. Audi has 2 coils as you can see in the picture below. By having 2 coils it doubles the spark output and can easily handle spark blow out that turbocharged vehicles suffer from. Because it’s outer exterior has a metal body it can dissipate heat ALOT quicker than Nissan rubber which helps with heat cycling. It’s also cheaper than OEM Nissan Coilpacks.

Audi R8 Coil Pack Advantages:

  • 50,000 volts compared to Nissans/Infiniti 30,000 volts.
    • Some measure it with Kv so Nissans coils put out 21Kv while VW coils put out 30Kv
  • Quicker Heat dissipation. (Because of its metal body construction it can quickly dissipate heat. Nissan OEM body is made out of rubber that isolates heat instead of disperses it.)
  • More complete burn of the fuel mixture compared to OEM Nissan which equals to better MPG.
  • Idle Stability Improved
  • NO CEL (Check Engine Lights)
  • BEST PART ABOUT THEM IS THEY ARE CHEAPER $$$ than Nissan OEM yet they are much better.
  • Looks 10000% Cooler than OEM Coilpacks

Now the coil packs price varies due to different name brands. They range from $132-$216 for a V6 engine. Below is the link of the coil packs below so you can see the prices and brands. Doesn’t matter which brand you use, I’ve tested them all and they all make the same exact power.

Order Link: https://www.nedautoparts.com/search?q=Audi+coilpack

Reference Photos

Installed a 2003 Nissan Maxima (Credit: Altaf Rahaman)

Important Note: The 02-08 DE Manifold requires NWP spacers.

Important Note: The 2nd Gen Engine does not require spacers. Straight plug-n-play.

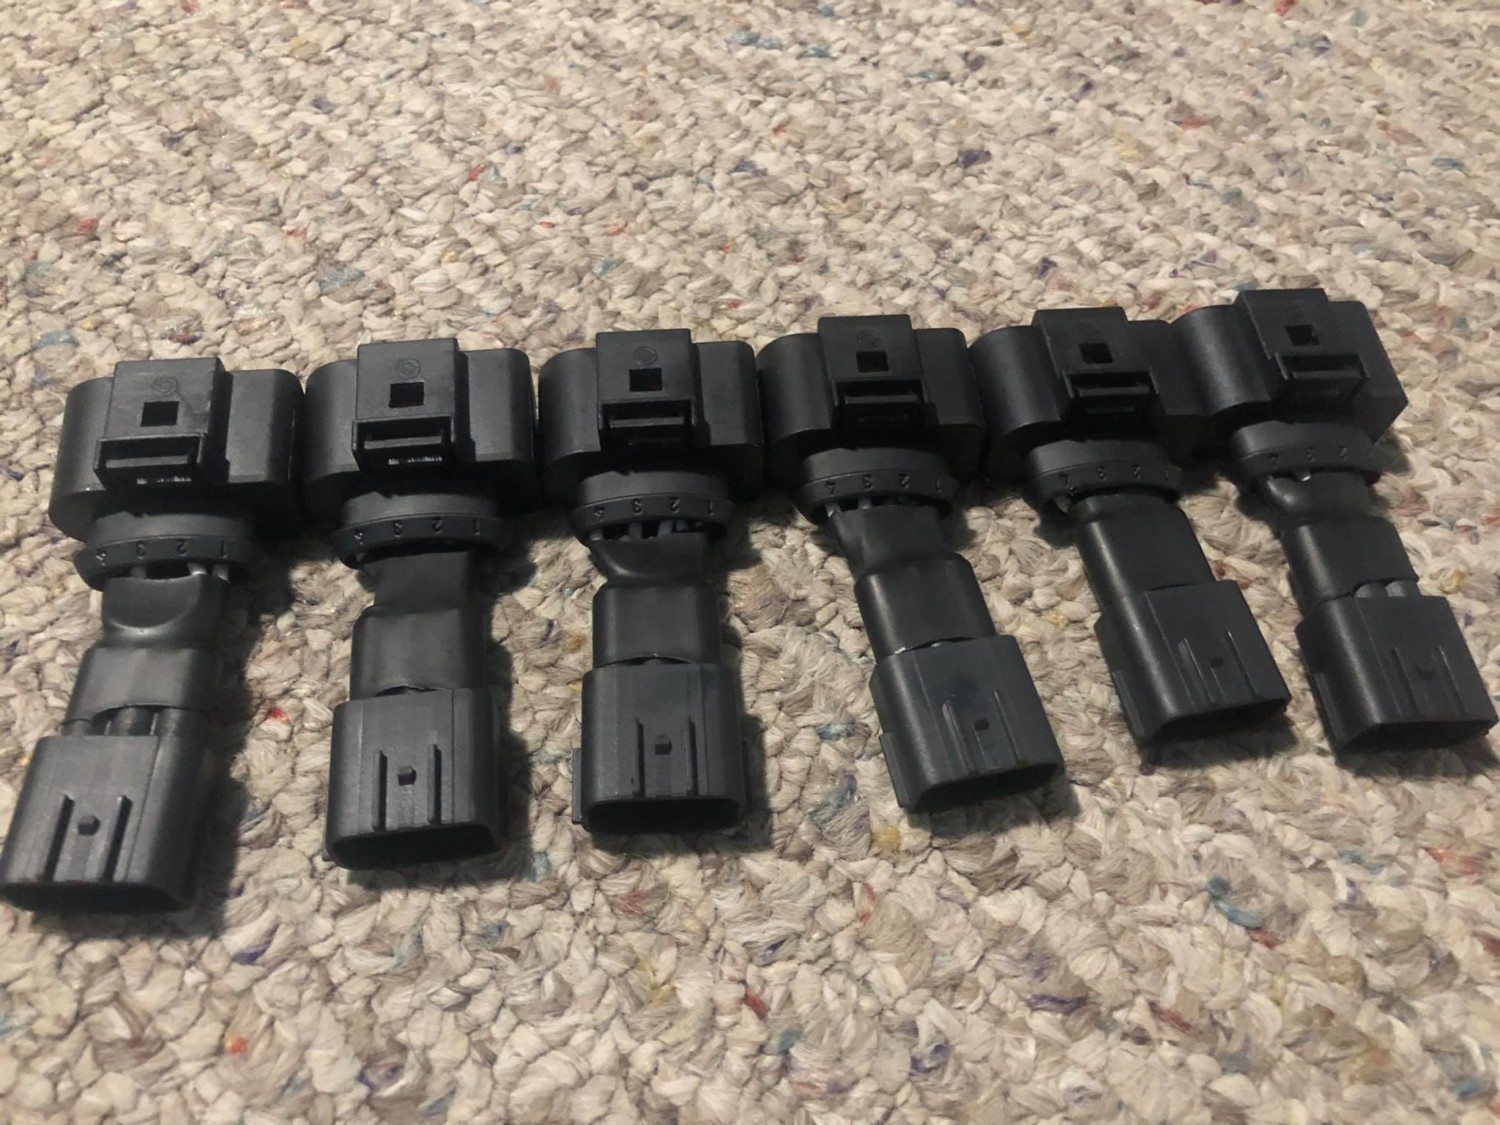
Adaptor Options:

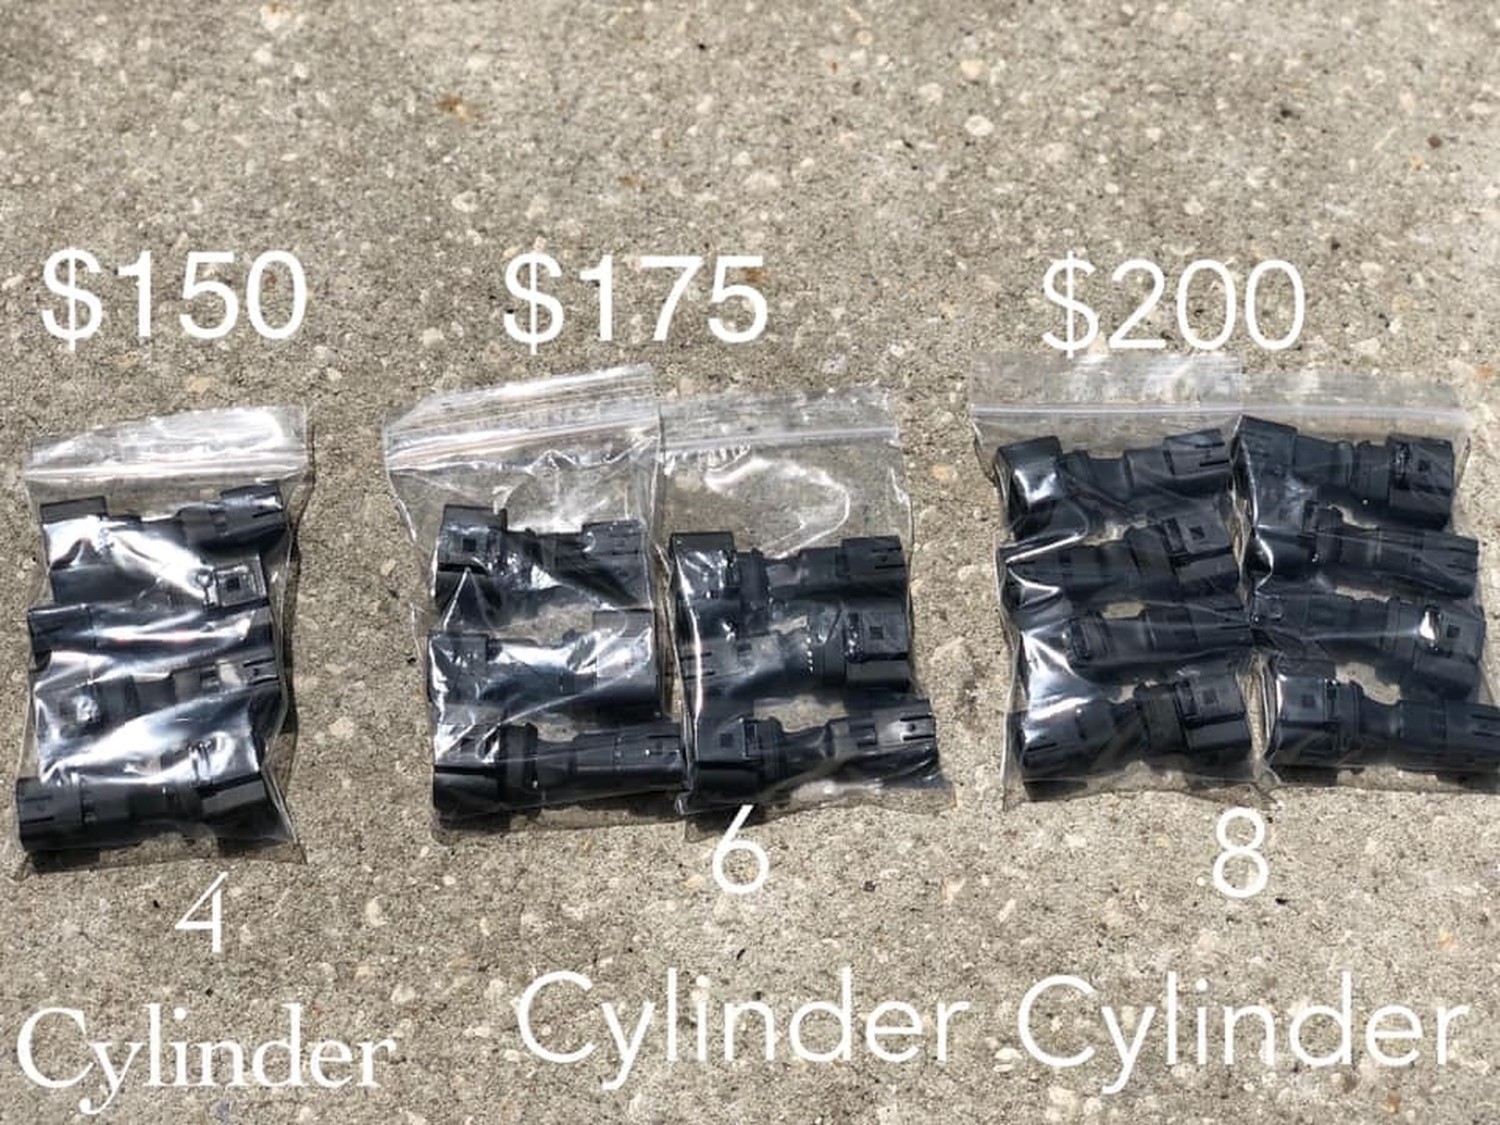
You can also purchase the adapters directly from Rico. Below are the prices.

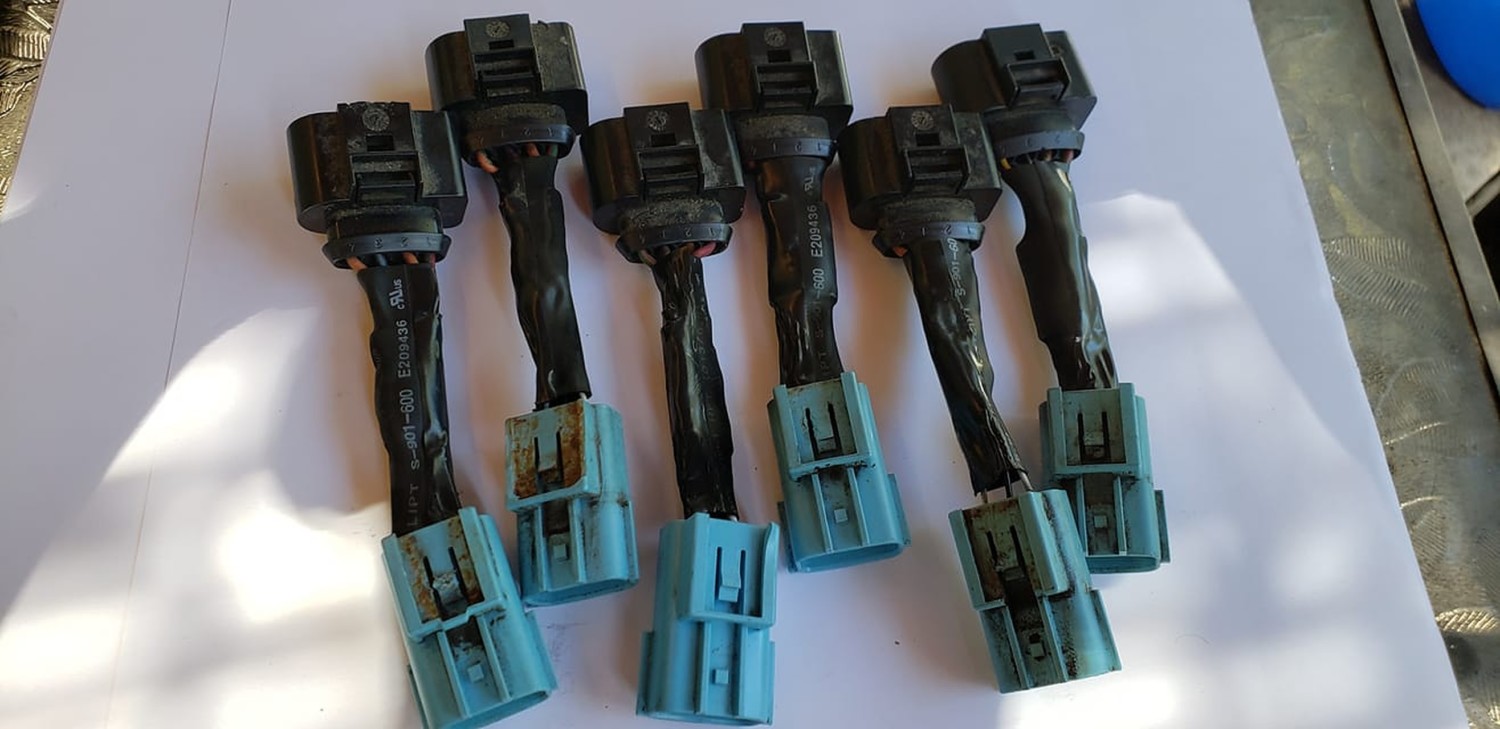
Create Connectors using O2 Plugs (Credit: Rob Tilley)

Finally got my R8 coils installed today and I must say it was definitely worth the time and money I spent. I installed them on my turbo 350z running 15psi with #7 plugs. Car runs so much smoother, especially under boost. It’s a totally different car. I used o2 plugs from a 02/03 Maxima to make the adapters for the plug. Just have to file down the alignment guide on the outside of the blue connector.

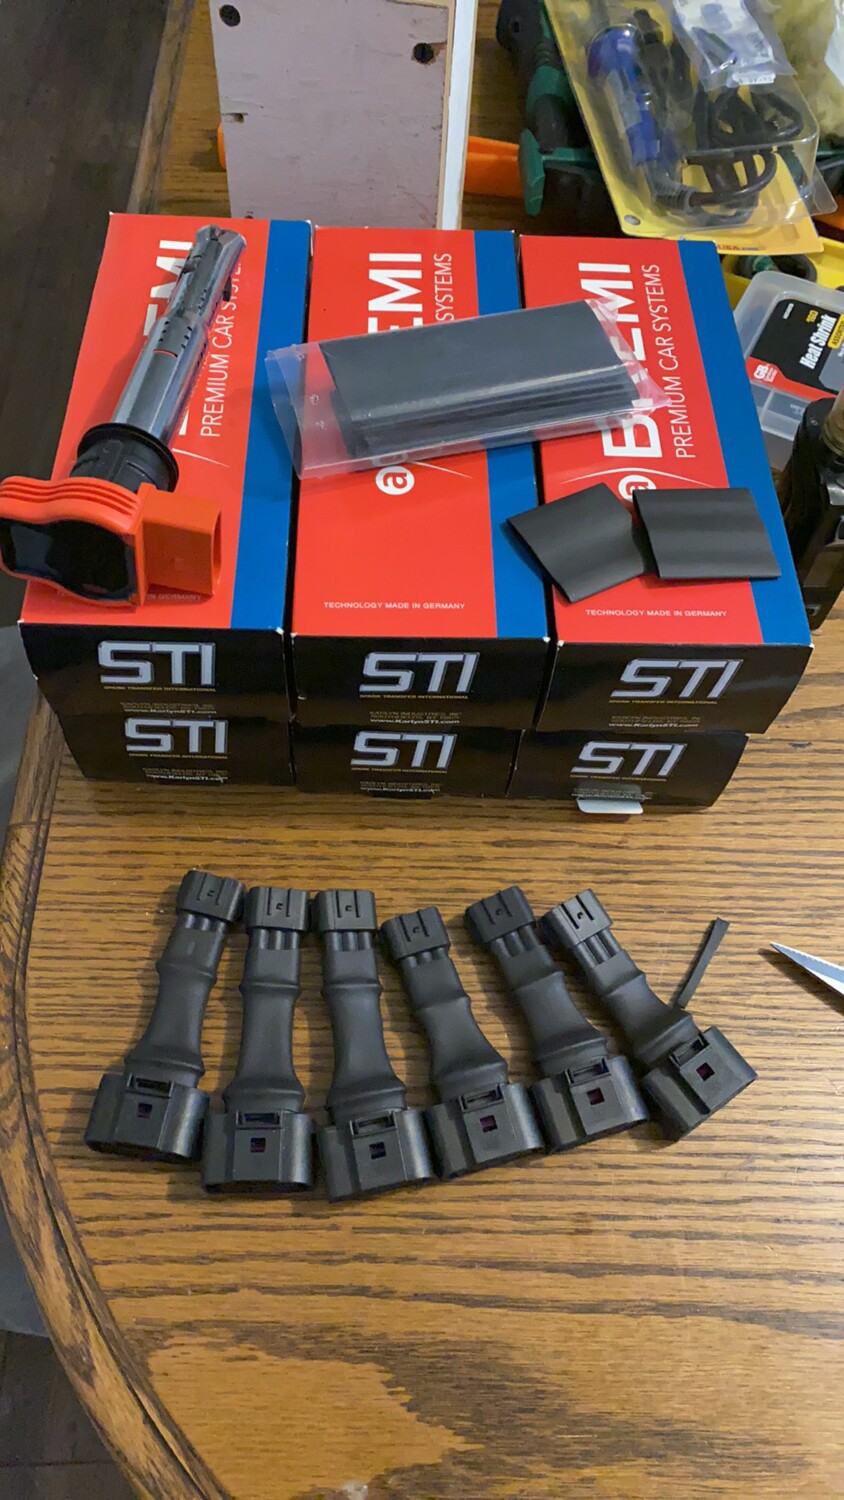
Make your Own Clean Connectors using new Plugs: https://www.my4dsc.com/audi-r8-coilpacks-installed-on-nissan-maxima-vq35de-make-your-own-plug-n-play-connectors/

If you’re splicing directly (Courtesy of Jerome Fenwick)

Nissan OEM Coilpack vs Audi R8 Price Difference (Courtesy of EddyMaxx)

Loading

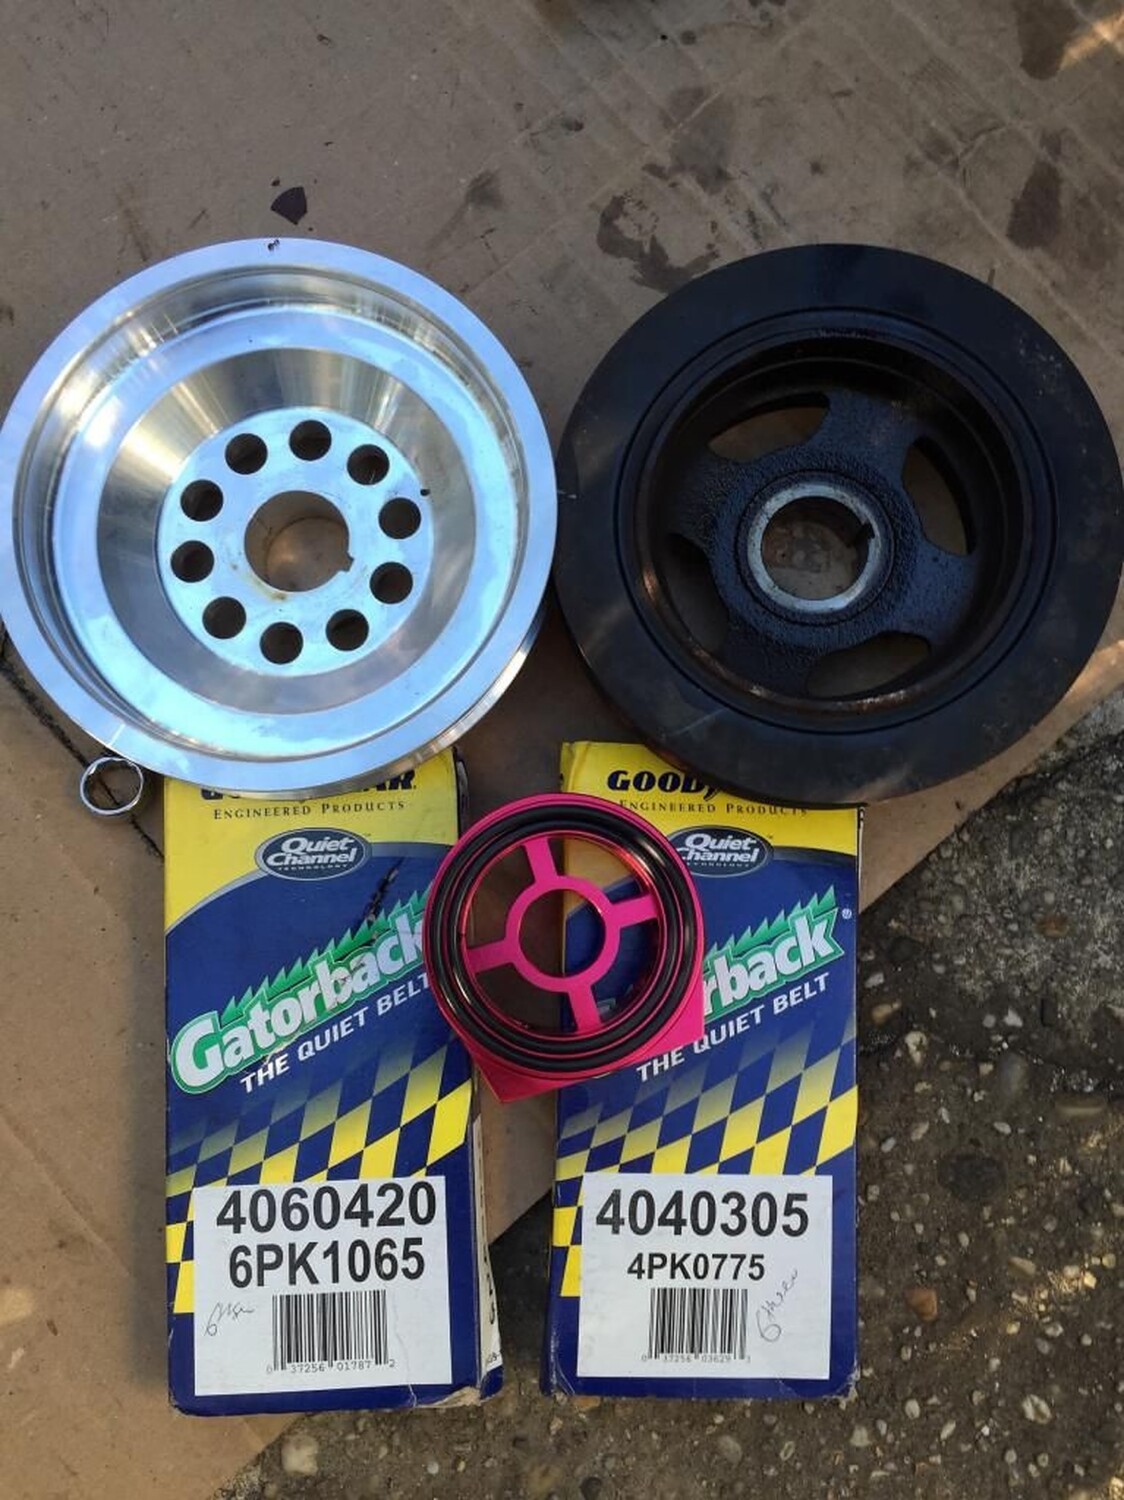
This is a popular upgrade for the VQ35DE Engine. Below is the information you need when ordering these pulleys. These pulleys fit the Nissan Maxima VQ35DE Engine from 2002-2008. Also applies to 4thgens if you have a VQ35DE Swap.

Ralco RZ pulleys are designed with a unique blend of performance and reliability. They are made from the highest quality 6061 aluminum billet. Ralco RZ pulley conversions are proven to produce maximum power gains with the performance benefits of weight reduction, which you wouldn’t receive from factory parts. Throttle response, horsepower, and torque are all increased with this great product.

Features:

  • 6061 Aluminum Billet
  • Lightweight
  • Note: Crank pulley Polished

Stock-Diameter Ralco Pulley (Part #: RZ-914924)

Fitment

Make Model Years Application Notes
Infiniti I35 2002-2003 (Crank Only) (Polished Color) , Stock Size Light Weight, I35 3.5L DOHC 24V FWD Auto,Manual L31 VQ35DE
Nissan Altima 2002-2006 (Crank Only) (Polished Color) , Stock Size Light Weight, SE 3.5L DOHC 24V FWD Auto,Manual A34 VQ35DE
Nissan Altima 2005-2006 (Crank Only) (Polished Color) , Stock Size Light Weight, SE-R 3.5L DOHC 24V FWD Auto,Manual A34 VQ35DE
Nissan Maxima 2002-2006 (Crank Only) (Polished Color) , Stock Size Light Weight, SE, SL 3.5L DOHC 24V FWD Auto,Manual A34 VQ35DE
Nissan Murano 2003-2006 (Crank Only) (Polished Color) , Stock Size Light Weight, S, SE, SL 3.5L DOHC 24V AWD,FWD Auto,Manual FF-L VQ35DE

Under-Drive Ralco Pulley (Part #: RZ-914870)

  • Pulley Model: # 914870
  • Average Price: $125.00-$139.00
  • Recommended Belt Sizes
    – Alternator/AC Belt- 41.5″ (Gates K060408)
    – Power Steering Belt- 30.75″ (Gates K040300)
  • Order Link: https://www.ebay.com/itm/264406309369

Stock-Size Photos:

Under-Drive Photos:

Videos:

Loading

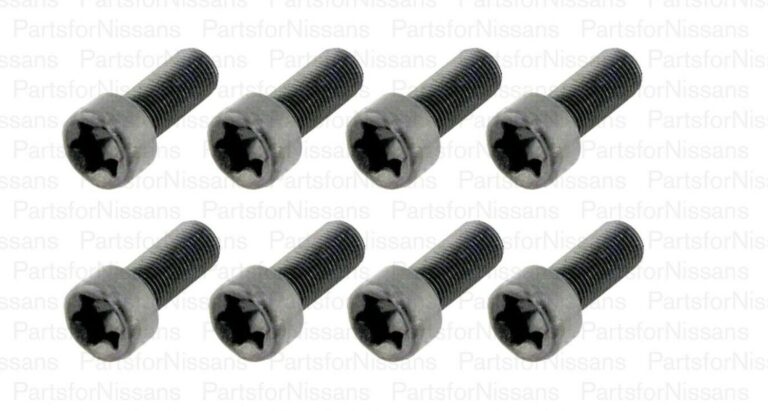
If you need OEM flywheel bolts, below is the information you need. It’s best to buy them in larger quantities due to the overall shipping costs. You will need a total of 8 bolts. These are honestly best to get from your local Nissan dealer to save on shipping.

OEM Part Number: 12315-8J100
Total Quantity Needed:
8 Bolts
Price: $1.99 – $2.50 (each)

Torx Size: T55
FSM Torque Specs: 61 to 69 ft lb

Cart Summary via https://www.rockawaynissanparts.com/p/Nissan__Altima/Clutch-Flywheel-Bolt/89394231/12315-ZA000.html


Loading

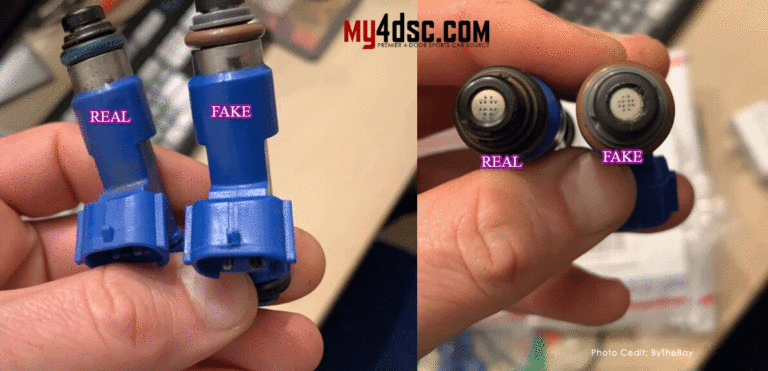
This is just a quick guide for those upgrading to R35 GTR injectors. They are many fakes out there in the market. While some have had success with the fakes, the majority have experienced issues. These injectors are most commonly used for running E85 on Nissan Maxima builds.

Your best chance is to buy them used from someone who can verify they are genuine. However, if you ever plan to boost the car, it doesn’t make sense to buy the GTR injectors new because for about the same price you can get a set of new Injector Dynamics injectors that are good for more fuel delivery.

The real/authentic injector is on the left. The fake/knock-off injector is on the right.

Additional Video Reference


Loading

Community Member Credit: yellow_cake

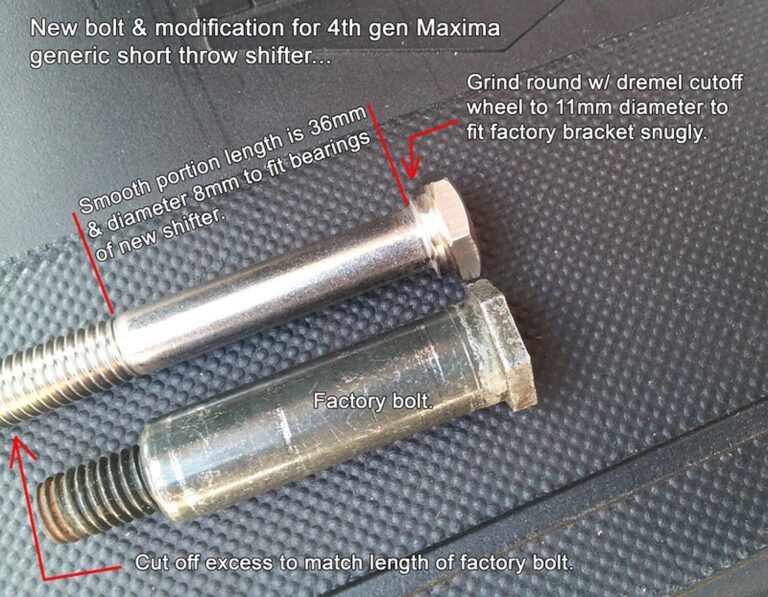
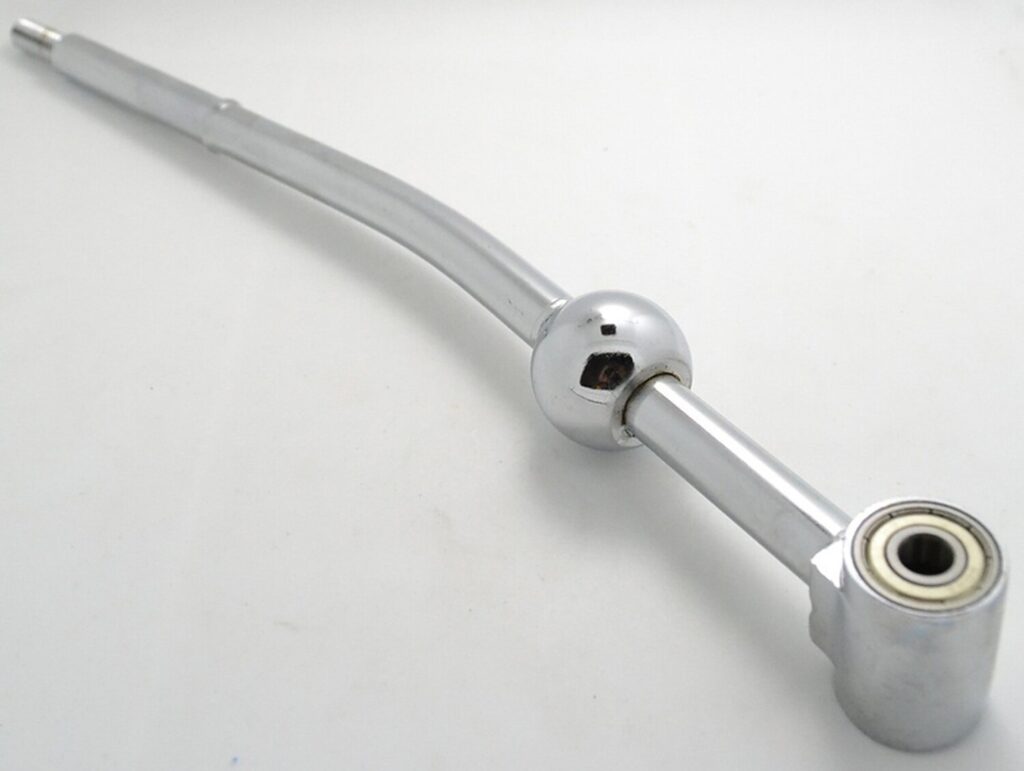
As you know may know, the generic short shifters do not come with a bolt. These use roller bearings (what you find in skateboards) and the factory bolt is too large to pass through.

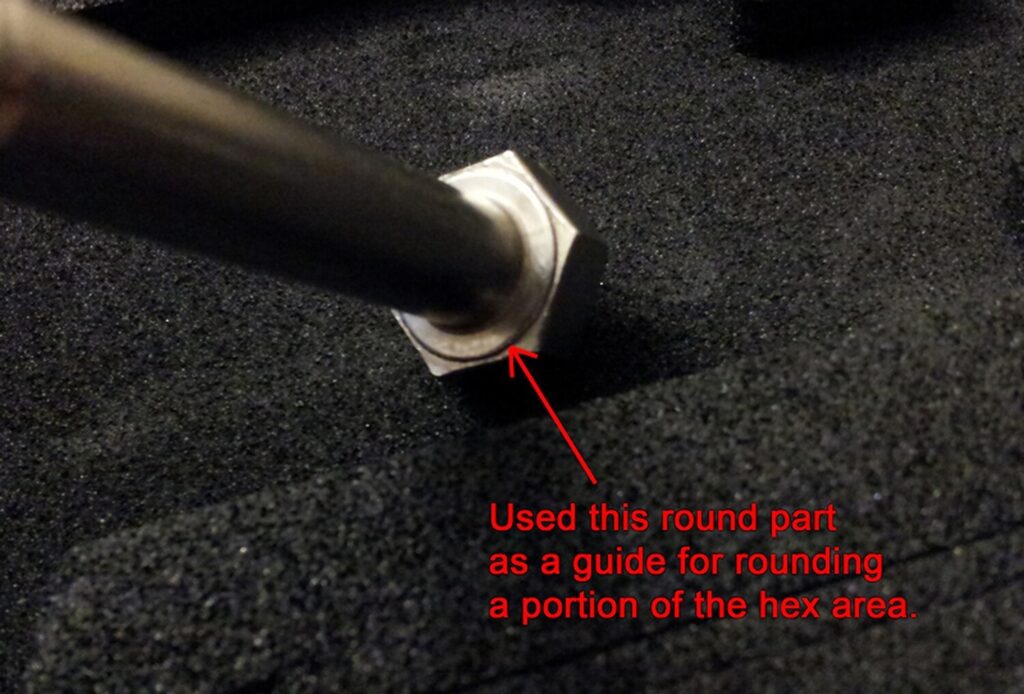
Now, the important thing with this bolt is that the smooth shaft is the right diameter and length to fit into the roller bearings of the new shifter… The rest can be modified from here… See the pic for a description.

The rounding of the hex part is necessary for the bolt to sit snugly in the factory bracket, see the 2 bolts side by side.
I used a dremel type tool to round off the portion of the hex head. It helps to use a new cut off wheel as it’s edges are nice and square and not rounded.

The bolt actually has a round indentation which I used as a guide while grinding.

You’ll need some washers to fill the space as the new shifter is not as wide as the original. Buy a few various thickness washers and see what fits best. Oh, and use a washer before the nut as well.

Important: DO NOT TIGHTEN THE NUT TOO MUCH OR SHIFTING WILL BE STIFF! Just tighten it till it’s snug, then back it off about a 1/2 turn or so. The nylon locking nut will stay in place.

Hope it helps some of the guys who don’t have the cash to buy a brand name shifter with all the complete parts but want it done cheap and right…

Loading

Community Member Credit: Eddy

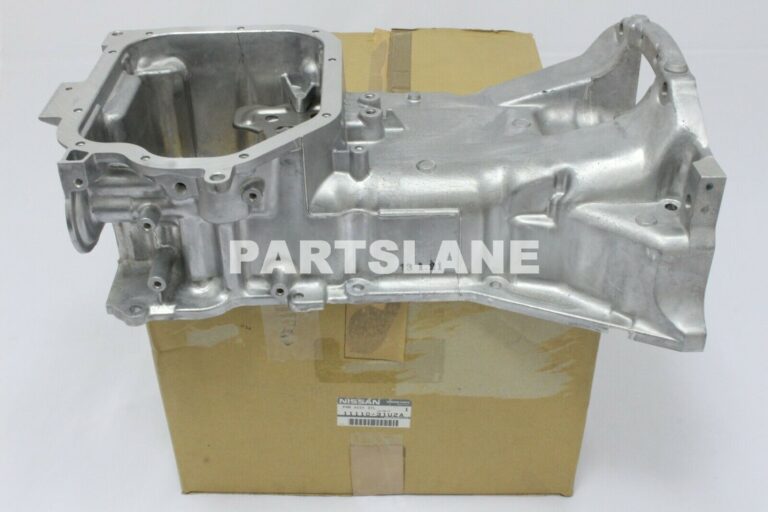
If you are doing a VQ35DE swap on 3.0 timing, you will need the 3.0 upper oil pan. Both the Automatic and Manual upper oil pans are the same, making it easier to source one. Below are the part numbers that you need. I personally didn’t want to re-use my old one. The time spending cleaning and removing RTV was not worth the hassle to me. Plus I had a brand new 2020 engine and wanted to keep everything as close to new as possible.

Order Link: https://www.infinitipartsdeal.com/parts/infiniti-pan-asmy-oil~11110-31u2a.html
Price: $142.48

Part Numbers:

  • 11110-31U21
  • 11110-31U22
  • 11110-31U2A

Fitment:

  • 1995-2001 Nissan Maxima VQ30DE (Auto or 5MT)
  • 1996-2001 Infiniti I30 VQ30DE (Auto or 5MT)

Loading

Member Credit: Eddy

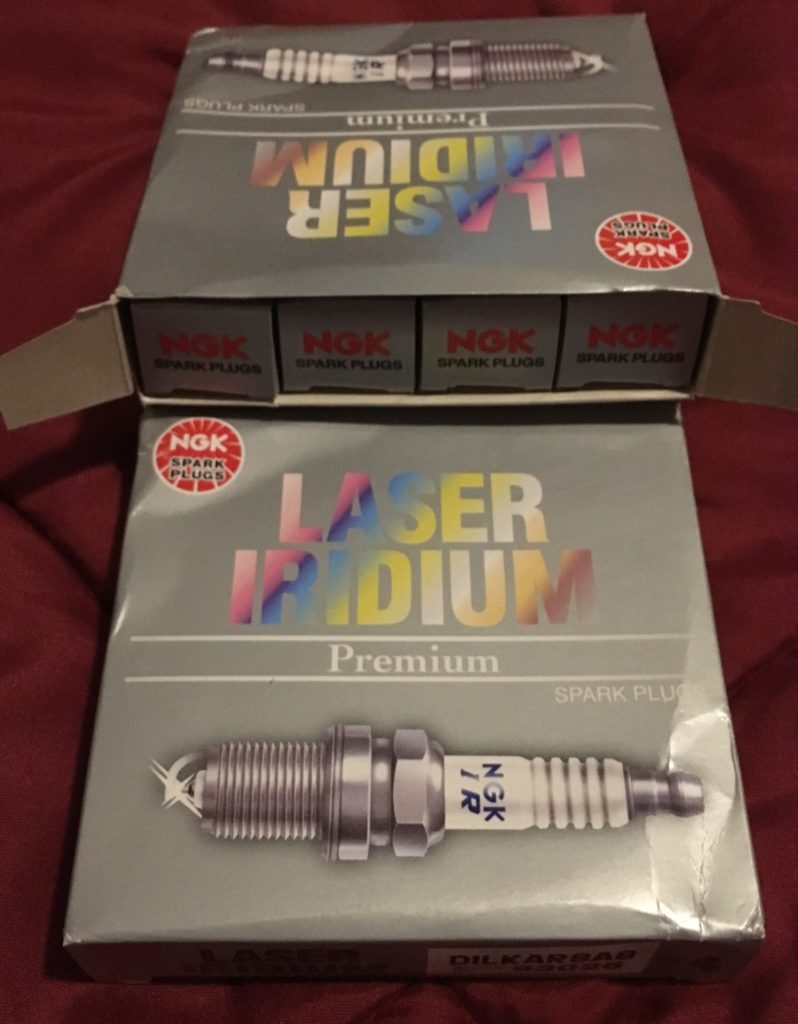
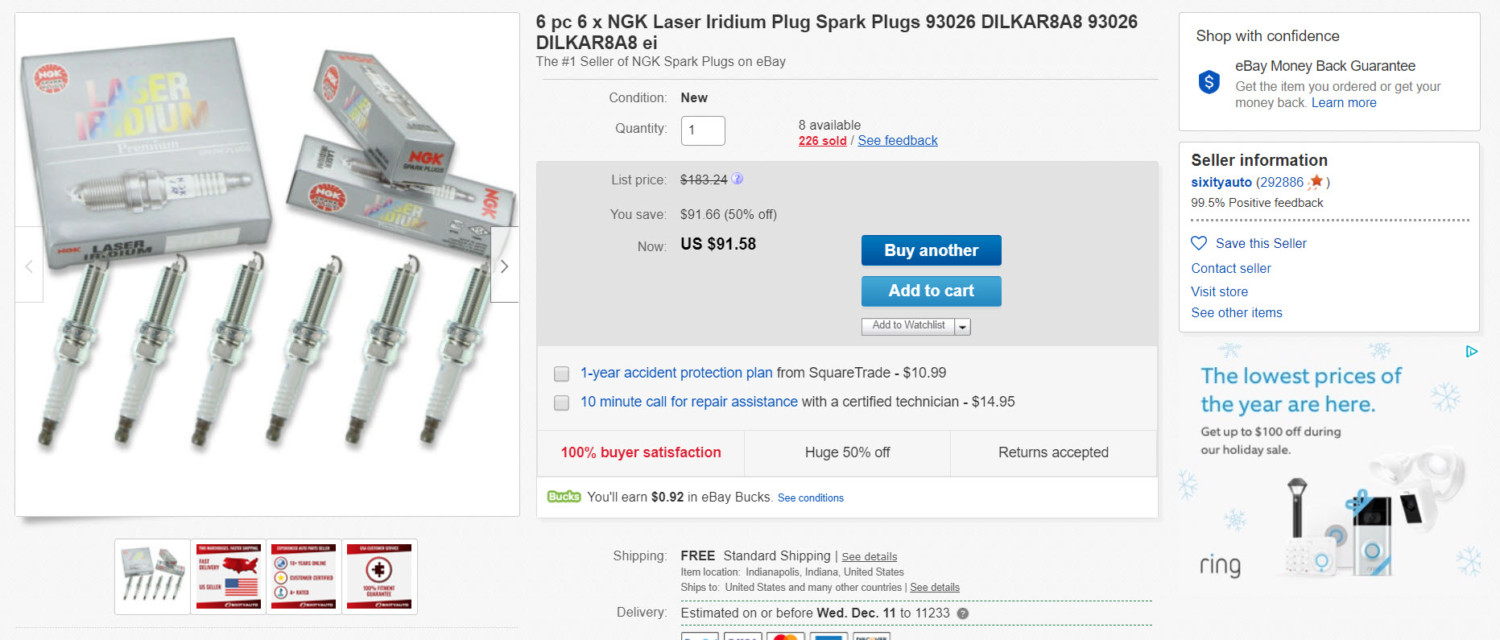
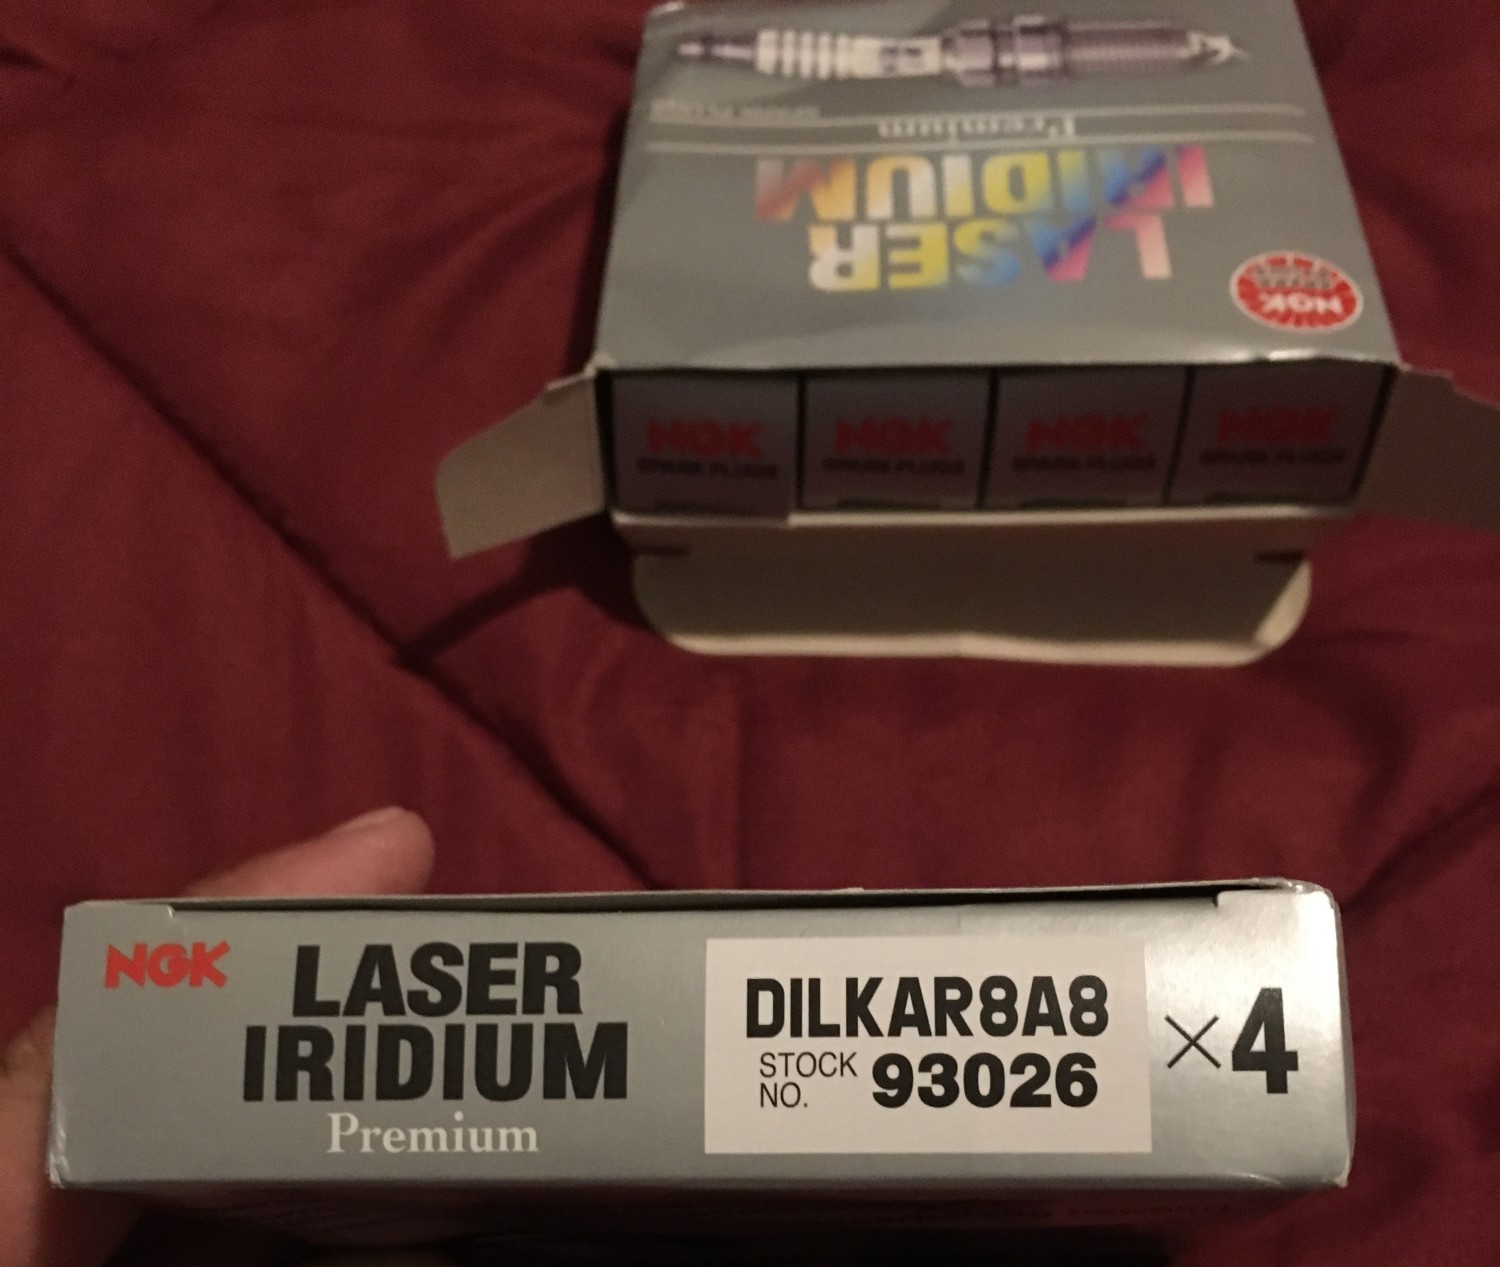
I recently installed R35 GTR Spark Plugs on my 2002 Nissan Maxima which has a 2014 Maxima engine swap. I went this route for my custom Supercharger setup. These plugs are 1-step colder are a direct fit. I paid $91.58 on eBay for all 6 shipped. I replaced them at the same time I did the Audi R8 coil packs. The gap on the spark plugs is .031″ (0.8mm).

Update 8/7/2021: These are still working great for me with no issues. 

Note: These only work for the Gen2 VQ35DE Swaps. You will also need a 9/16″ Spark Plug Swivel Socket to install these.

GTR Years: 2009-2019
Part Numbers:
NGK 93026 / DILKAR8A8 93026
Description: Laser Iridium Spark Plug
Price: Between $15-16 / Each

Shell:

  • Thread Size: 12mm
  • Thread Pitch: 1.25mm
  • Gap: .031″ (0.8mm)


Loading