Tag

Engine, Trans, F/I & Tuning

Browsing

Member Credit: secondtonone317 (R.I.P)

This build was completed in July of 2009 by Bishnu. May he sleep in peace.

Well, I been busy and didn’t have time to drop this motor back in the car until. I have been working on it for the past month or so. Most of the work was done solo but I did need some help on a few things and some friends helped out, like mating the tranny and motor. (shout out to Mike, lol)

Started with:


Painted pipes before wrapping


NWP TQ Link


Did the whole front end in ES bushings…..pain in the ***

Half size radiator installed

Got boost?


Reclocked

Best FMU location ever

RG45 gate

Closer look, open dump

Getting there

Filter installed. I will endup running this filter into the fender and putting the maf before the turbo inlet because the way I fabbed up the charge pipes there is no room for the MAF on the charged side because of taking up some space for three 1/8npt taps……

BC for this year

Meth kit behind the bumper, going to run a dual nozzle setup. I will also tune for meth and need to be 100% positive it is spraying. That LED light just doesn’t cut it for me so I bought a cheap electric fuel pressure gauge that I will use to monitor my meth pressure……


FMIC, not too visible behind the 5.5gen bumper but should get lots of air.


You can see the charge pipe from the turbo to the intercooler here, very short!!!
After completed I will have very short charge pipes.


So, thats where I am at presently. All I need are a few couplings that are on order and I need to weld the downpipe in one spot because I had to cut it.

I also need to do some things like a 3in catback, fab up some support brackets for the turbo, wrap the rest of pipes, etc, etc

Here’s a lil rendering of the pipes once finished.

3in mandrel bent catback from Tesh, cost effective functionality


Final piping setup


Loading

Member Credit: TJ_Max

Don’t mind the wiring and the mess of wires, hoses in the bay. It still needs to be cleaned up and be made presentable, so no comments on the mess please. And the owner says ” to the clowns on Maxima.org that think they know it all by saying it couldn’t be done, or it would be too costly”.

As for the comment about where it could be found…overseas? Nah, try a junkyard in NYC. As for someone saying it would be well over $2K, ended up being well under $2k to complete the swap. I believe it was a special deal since it was the first, but the motor costs $1k. BK FTW, and shout to my TB people.


Loading

Member Credit: pmohr

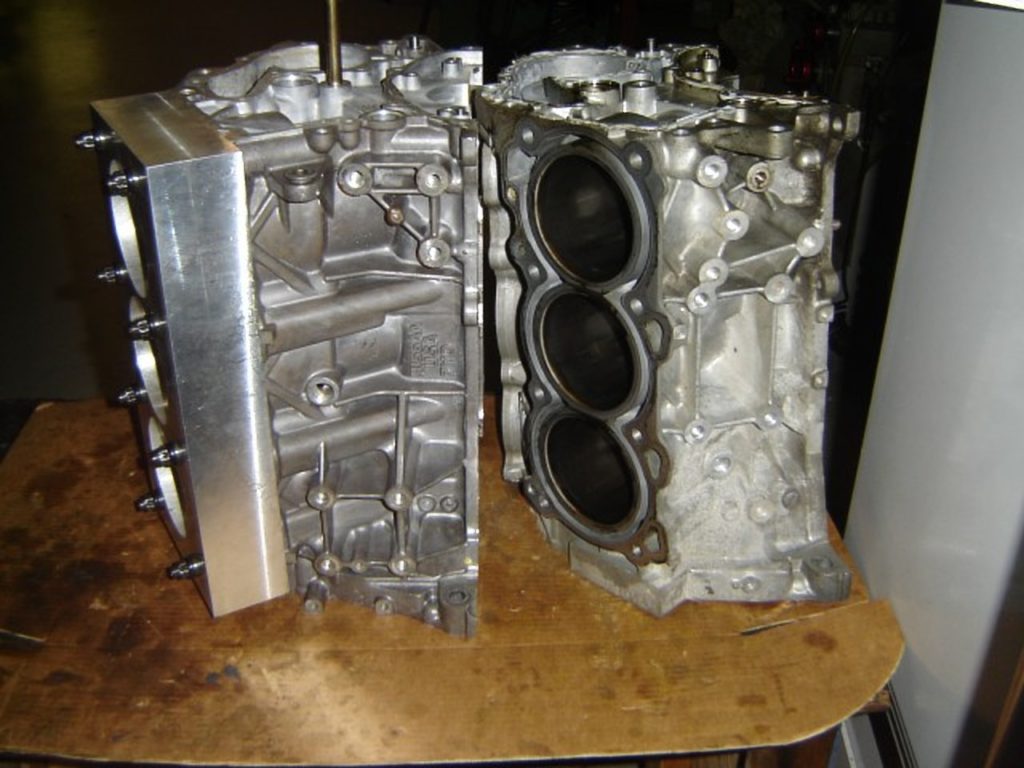
To try to cut down on the ‘can I use a 350z motor in my car‘, or ‘why can’t I use a G35 or FX35 or (etc) motor for my swap?‘ type of questions. The following pictures all have the blocks aligned in basically the same exact way for ease of comparison).

RWD Block (350z, FX35, G35, any RWD VQ35DE platform)
FWD Block (Maxima, Altima, Quest, any FWD VQ35DE platform)
Mounting Comparison

  • RWD:
    • Large bolt pattern, maybe 8″x5″ (from memory, definitely not accurate)
    • Mount cast positioned towards the timing cover
  • FWD:
    • Small bolt pattern, maybe 4″ square (from memory, definitely not accurate)
    • Mount cast positioned towards the end of the block

Accessory/Manifold comparison

  • RWD:
    • Exhaust manifolds/headers curve backwards, away from the motor mounts
    • Accessory mounting points are located vertically along the front edge of the block (these are for the AC compressor, IIRC)
  • FWD:
    • Exhaust manifolds/headers head straight down, motor mount is offset and doesn’t get in the way
    • Accessory mounting points are located horizontally along the lower edge of the block

Here’s two side-by-side pics (blocks are aligned in the same position, however the FWD block has torque plates ‘installed’):

Left side

Right side (crappy pic, but you get the point)
Basically, you can definitely use the RWD block in a FWD design, it would just require re-engineering of a lot of things. Not even minor things, but motor mounts, headers/exhaust manifolds, etc.
To use a RWD block in a FWD chassis

  • Custom motor mounts that extended towards the trans to utilize the center crossmember. Would most likely be weaker than the stock FWD mounts (on the FWD block) unless you braced the hell out of them.
  • Custom headers made to stretch around the custom motor mounts made above – as you can see the RWD mounts are just plain in the way of any sort of manifold that comes straight down.
  • Custom mounting brackets for all of the accessories, or try to customize the RWD accessories/mounting rails to work

Benefits of using a RWD block in a FWD chassis (assuming it will ever be done, not likely)

  • Turbo manifolds could go directly over to the driver’s side without the typical FWD mount interference
  • Engines may be easier to find
  • Possible ability to use the revup engine (with all associated electronics of course)

Loading

Member Credit: EddyMaxx

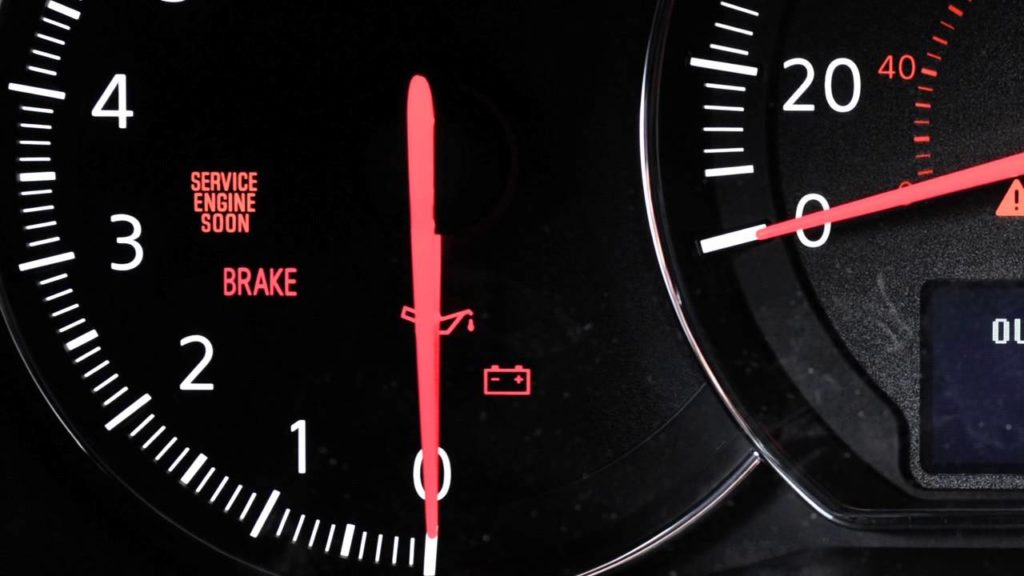
I had recently encountered a Brake/Battery Light. The alternator checked out OK and car was driving well.

After a little research, I discovered that the 10A Alternator Fuse located in the engine bay (picture below) was blown. Once I replaced it, both the Battery and Brake Light went off. The reason why the fuse blew is because the alternator plug was a little frayed and both wires made contact with each other. I re-did the wiring and sealed it up nicely.

Just wanted to share this information in case you think it’s your Alternator and/or ECU. Simple fix!

Loading

Member Credit: Josh Frohman aka ptatohed

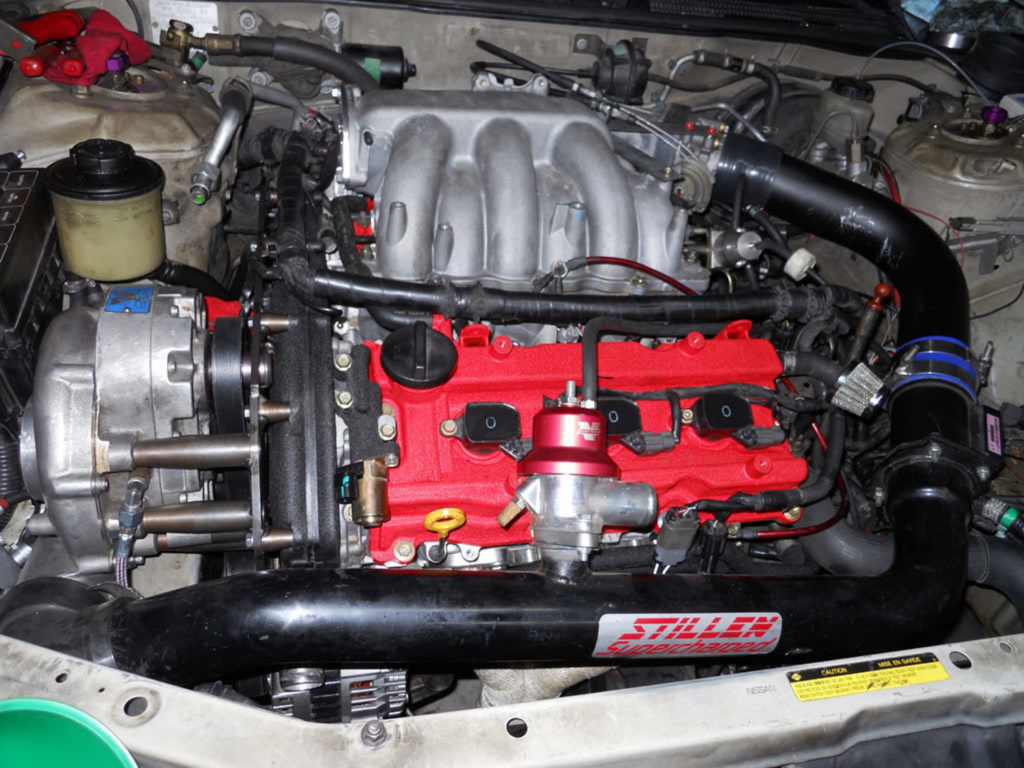
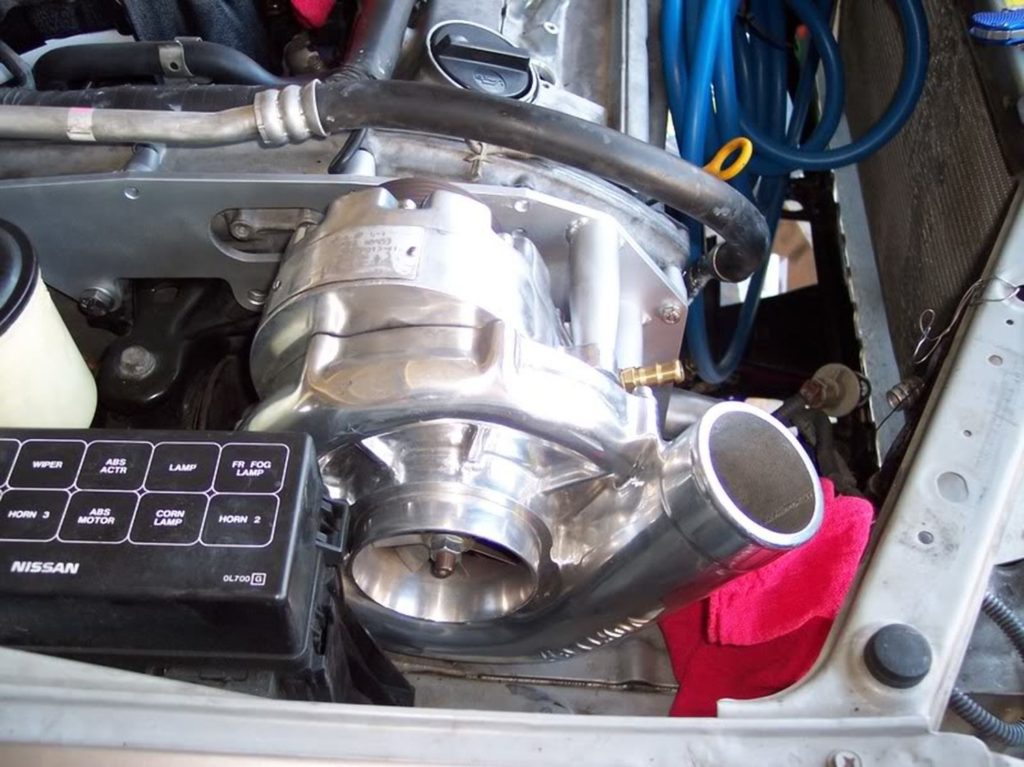
I have written the following to aid anyone who wants to take on the job of installing their Stillen supercharger himself or herself. My intention is to provide you with supplementary material to the instructions provided by Stillen. I want you to have what I wish I had during my installation! I hope that my time spent writing this installation-aid will benefit anyone whom decides to use it.

You will be using the Stillen instructions for your installation but I will be adding, deleting, correcting, giving tips, etc. to the Stillen instructions. Don’t worry, you can install this thing yourself. I was hesitant at first but now I am so glad I did. You get a great learning experience, you get to save $600 – $800, you don’t let any grease monkeys touch your car, you get a wonderful feeling of accomplishment, you get future bragging-rights and you get to stick your tongue out at those who told you couldn’t do it yourself.

Note: The PDF file below is 22 MB (may take a few seconds to download).

Supercharger Instruction Download

Photos of ptatohed Maxima: 

Loading

Member Credit: Voltaire Duran Cacal

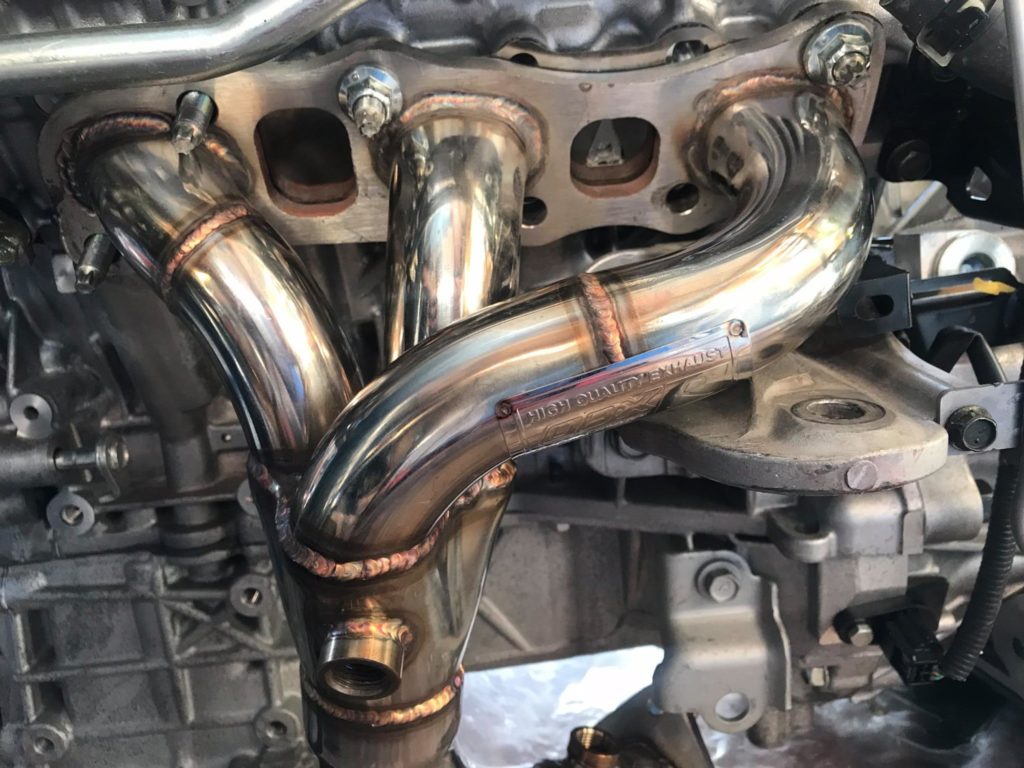
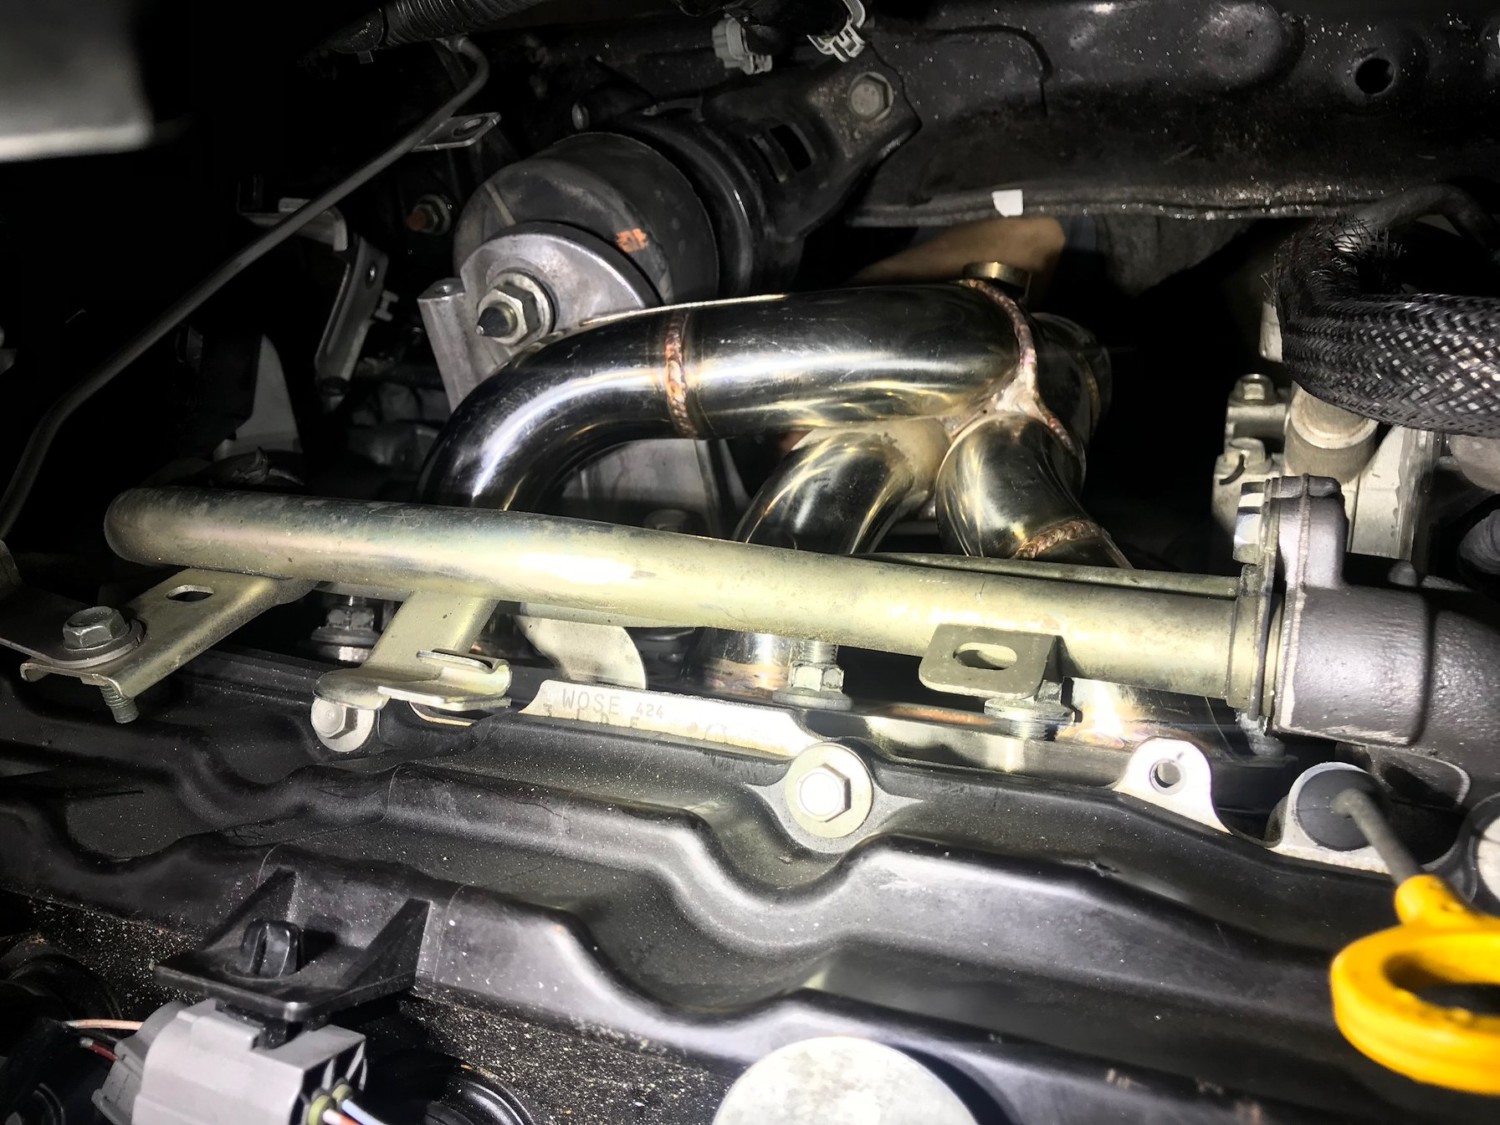
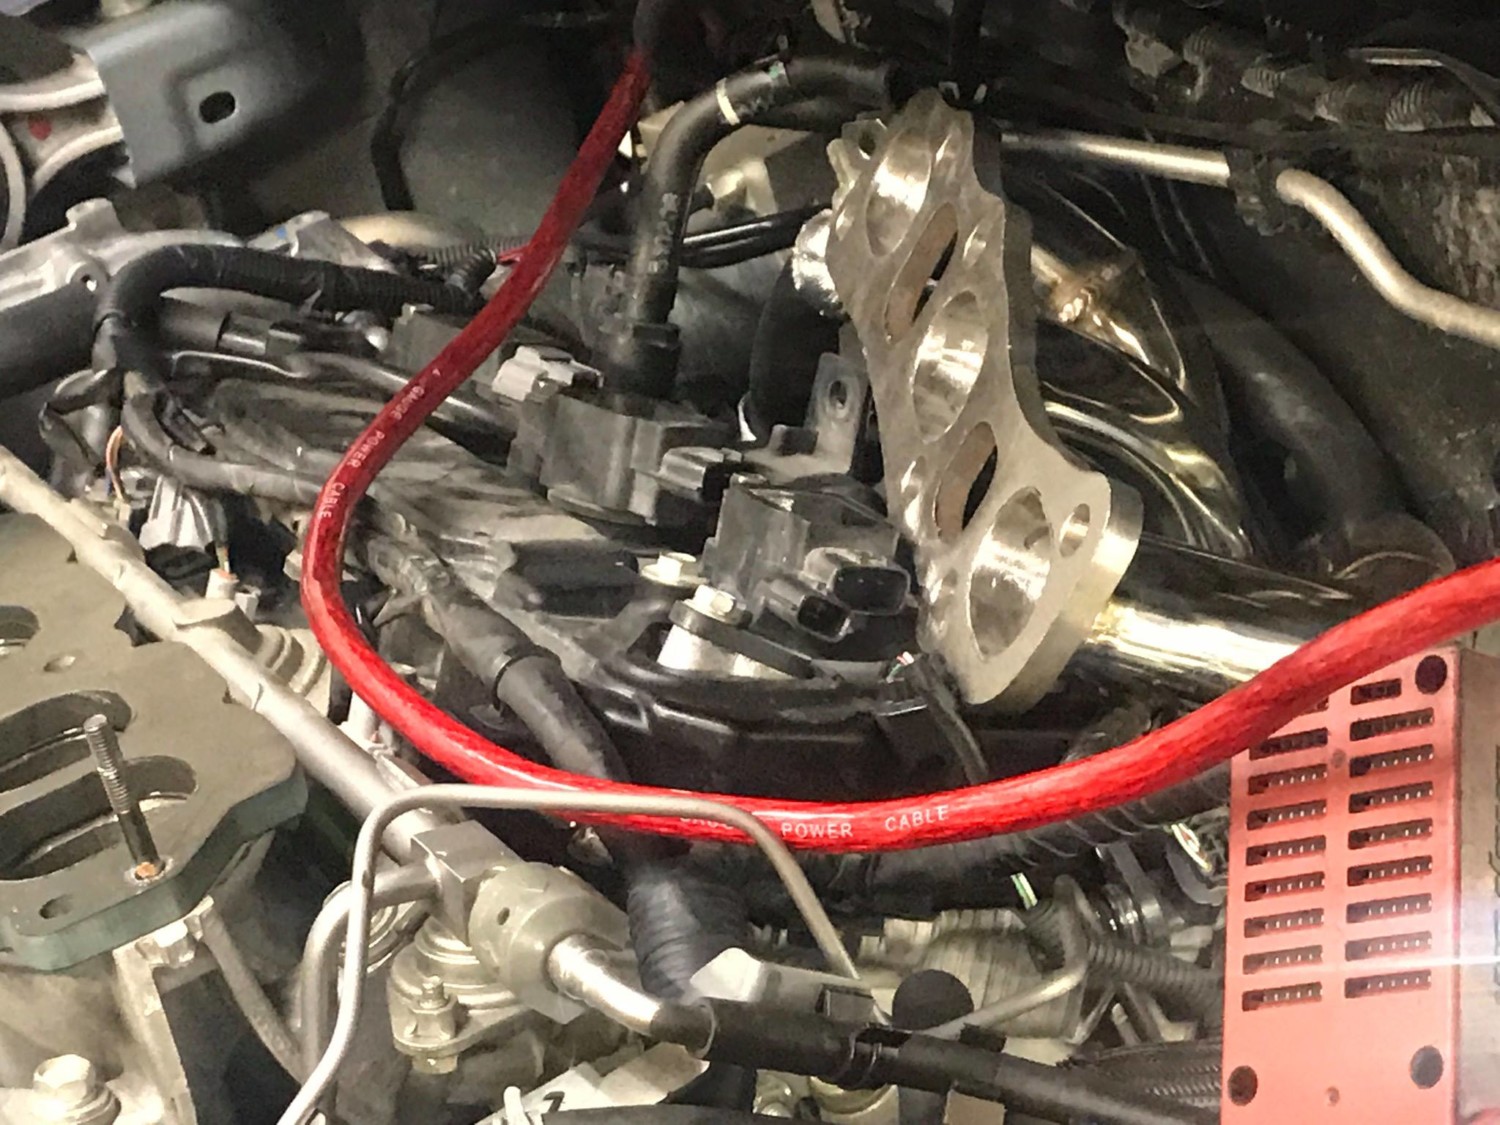
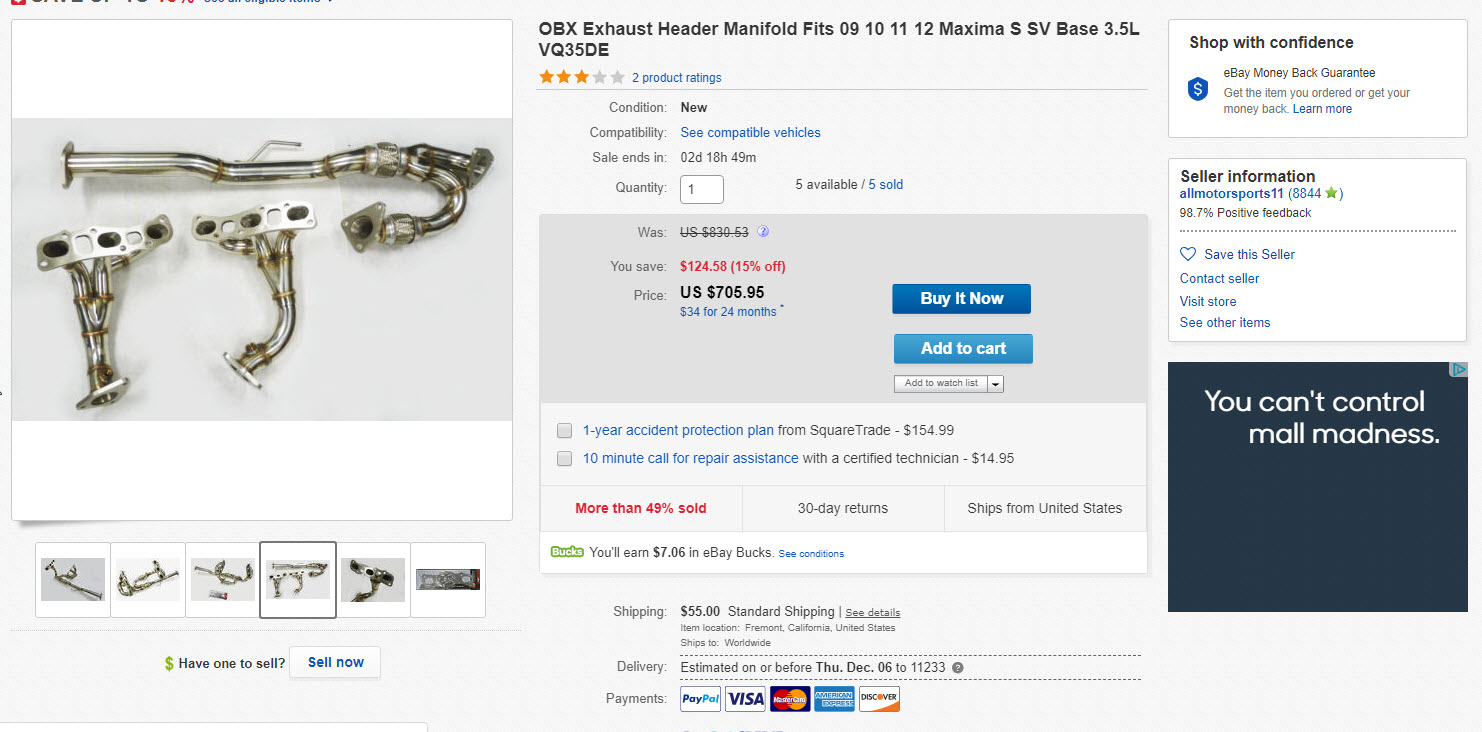
With so many questions and doubts about the OBX headers fitting on a 7th gen, I just thought I’d go ahead and post our pics in one place. As a result, we love the added power and change in sound!

The price ranges anywhere between $700-$850. All depends on where you get it from. eBay has some good deals from time to time.

Helpful Information:

  1. These are the OBX headers that are made specifically for the 7th gen Maxima (not Altima, not any other gen Maxima).
  2. There was no need for modifications, except for extending the harnesses for the top sensors in both banks. OBX has the sensors lower and pointing out. Whereas, our stock headers have them higher and pointing up.
  3. We suggest having these ceramic coated for heat before installation.
  4. You will need a tune to get rid of the CEL since you will, obviously, no longer have catalytic converters.
  5. It took a little elbow grease to line up the collectors with the Motordyne y-pipe, but it wasn’t hard. I assume, though, that the OBX y-pipe that these headers come with should be easier.

Note: If you still have your OEM y-pipe, this OBX setup comes with a y-pipe. So it’s actually a pretty good deal.

Specifications:

  • Primary Runner Tube: 1.6″ OD
  • Collector Outlet: 2.3″ OD
  • Flange Thickness: 0.4″
  • Runner Wall Thickness: 16 Gauge (1.5mm)
  • Sus-304 grade stainless steel
  • CNC machined flange
  • Mandrel bend for smoother flow
  • Individual port
  • Dual Tig weld

Install Photos:

Videos:


Loading

Member Credit: Matty

Here is a list of parts you will need if you plan on purchasing my V1 Starter Kit and want to finish off the kit with custom items.

  1. Vortech V1 or V2 Blower (Counter Clockwise Rotation, Straight Discharge)
    • The blower NEEDS to have this fitting on it in the front
    • Also a drain line on the bottom of the blower
    • Blower can be found between $500-$700 on eBay. Search “Vortech”

      Photo3 Zps915bd4c8

  2. SC Pulley: Up to you what size you go with. Stock is 3.6 at about 6lbs of boost. MUST be 6 Rib Pulley. Can be had at Vortech or Ebay. $30-$40
  3. FMU: The Vortech Unit is probably the best to use. Add a disc and it works perfectly. With the Cartech, you’ll need to set it just right for fuel adding. I think the Vortech is most feezable and easy unit to use. Can be had new at Vortech or www.superchargersonline.com or used on Ebay. $60-$100
  4. Blow Off Valve + Flange:  You Will NEED Both. Can be Vortech or any other type of Blow off valve will work. It also uses the same flange as any Greddy BOV so you can switch down the road if you like. Anywhere they sell new BOV’s or Ebay for used. $150-$200 w/flange

Other NON-Vortech Related Parts

  1. Super Charger Drive Belt: Good year Gator-back belt Size will be different for every size pulley. Any Good Year Dealer $40
    • 3.6 (stock)…….4060705 6PK1790 70 1/2″–71 1/4″
    • 3.33…………….4060705 6PK1790 70 1/2″–71 1/4″
    • 3.48…………….4060705 6PK1790 70 1/2″–71 1/4″
    • 3.25…………….4060695 6PK1765 69 1/2″–70 1/4″
    • 3.125…………..4060695 6PK1765 69 1/2″–70 1/4″
    • 3.00…………….4060690 6PK1755 69 “–69 3/4”
    • 2.87…………….4060690 6PK1755 69 “–69 3/4”
  2. SS Feed line with T: SS -4AN approx. 3 to 4 feet in length

  3. Rubber Drain Line: Stock Nissan Part #11823-31U00 $21 **Will Need to be Cut to Fit**
  4. Rubber Power Steering Lines: This kit requires the installer to install rubber PS lines in place of the metal bent ones that are there from the factory. GXE and GLE do NOT have those lines. I would think 9 feet of 3/8″ High pressure P/S hose will suffice the install. 5/16″ High pressure line will also work. GLE/GXE guys will have to get 5/16 Brake Hardline and Bend a Cooler for the front of your car. Small Pipe bender also needed.
  5. Small Hose Clamps: Power steering lines, Fuel lines, Blower Drain Back Hose. Local Auto Parts Store $10
  6. Large Hose Clamps: For Charge pipe. Should need 9 to 11 depending on how you set your Charge pipe up.  $1 a piece Do yourself a favor and invest in t-bolt clamps. They are twice the price, but you will not be sorry that you got them. You need to go up 1/4″ in size (so for a 3″ pipe, you need the 3.25″ t-bolt.
  7. Charge Pipe 3″ or 2.5″: Any type of 3″ or 2.5″ SS or Aluminum Tubing. Then get a U Bend of 3″ for the Upper Bend. You’ll have to do some fitting and such. You can use silicone couplings for the entire thing, every bend, or you can have it welded completely to eliminate silicone couplings. Up to you. You can purchase from https://www.intakehoses.com/
  8. MAF Adaptor
  9. In-Tank Fuel pump: Walbro in tank High Pressure GSS342 High Pressure. Part #GSS342-400-954
  10. Gas Tank Sender Seal. Nissan Part #17342-01A00 $9
  11. Pancake Filter: K&N Part #RA-0980. You have the option to do a Cold Air System.
  12. Radiator Over-Flow Relocation Bracket: You’ll need to make this work somehow. Its a simple piece of sheet metal and holds the over-flow bottle behind the battery. Alot of guys wedge it there and tie it to the battery posts. Use your creativity.
  13. Coolant Line: 48″ of 5/16 thin wall hose to reach the New bottle location.
  14. Crank Case Breather: The front crank case no longer breaths to the intake stream. A Small filter for that end on the valve cover $5
  15. Fuel hose/Vacuum hose: Some of this to complete the entire job will be necessary. Fuel hose is 5/16″ and Vaccum hose is 5/32. Any local auto Parts store $10-$15
  16. 5/32 Vaccum T. Each thing you have will need a vaccum source depending on what your engine bay looks like. BOV, FMU will both need vaccum sources. Local Auto Parts store $2
  17. Boost Gauge: Not needed, but I would recommend it to make sure your running properly with no Vacuum leaks or Boost leaks. Find vacuum source right off of Intake Manifold NOT OFF T.

Loading