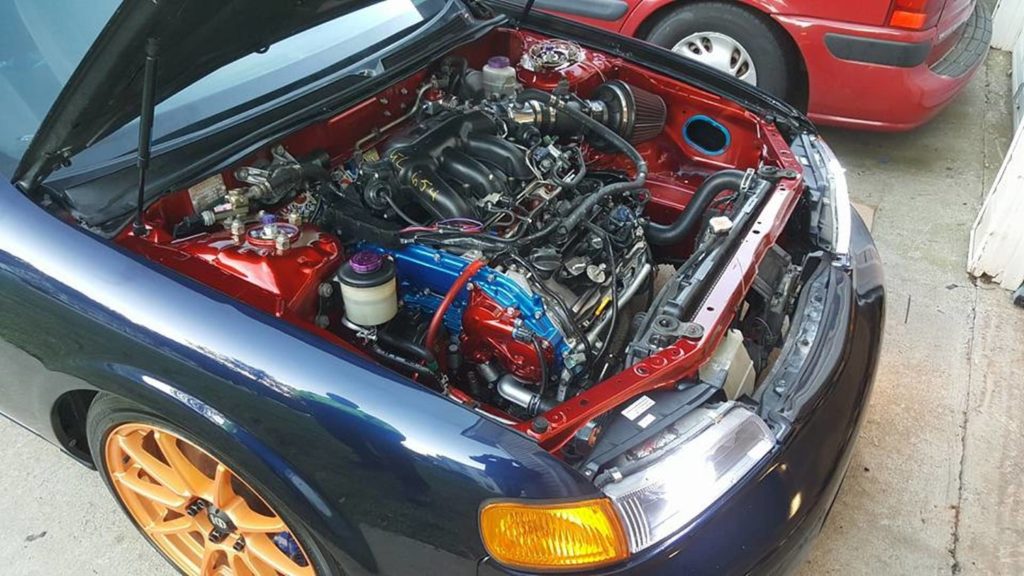
Gallery of Maxima’s and Altima’s with HR Swaps aka FWD 2nd Gen VQ35DE Swap.
![]()
Member Credit: Tito Savain (@thekidlyric on YouTube)
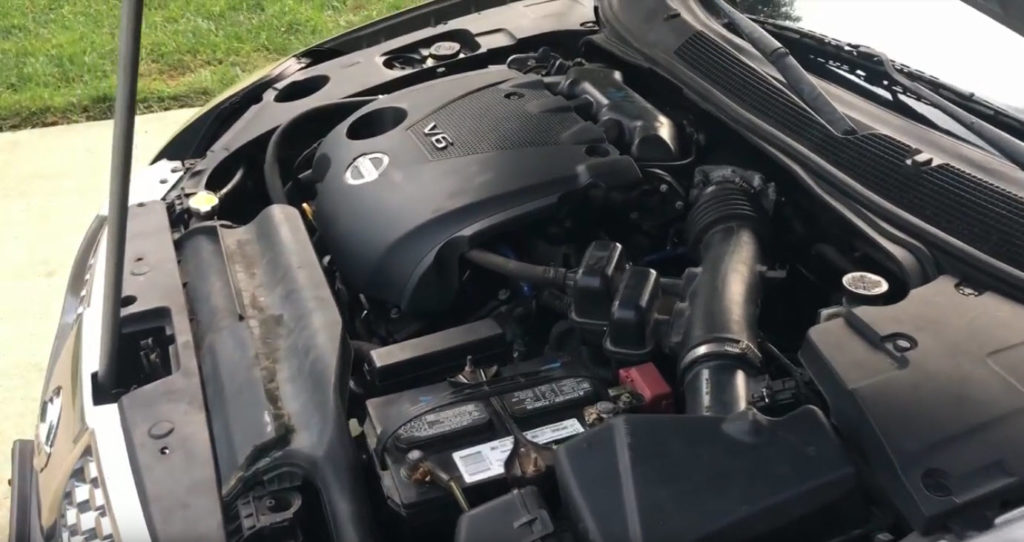
This is Tito’s journey on swapping his 2004 6-Speed Maxima with a newer VQ35DE Engine. This swap is commonly known as the HR Swap aka FWD 2nd Gen VQ35DE Swap. The engine was from a 2014 Nissan Maxima with 45K miles and cost $600 from a junk yard. For anyone considering the swap, check out the videos below.

![]()
Member Credit: EddyMaxx
Over the past few weeks, there’s been a strong gasoline smell coming from the driver side. I almost thought it was a gas leak since I had a tiny pinch in exhaust pipe which was leaking some condensation / water. Upon scanning it for codes I found it had: P0455 NISSAN – EVAP Control System Gross Leak Detected.
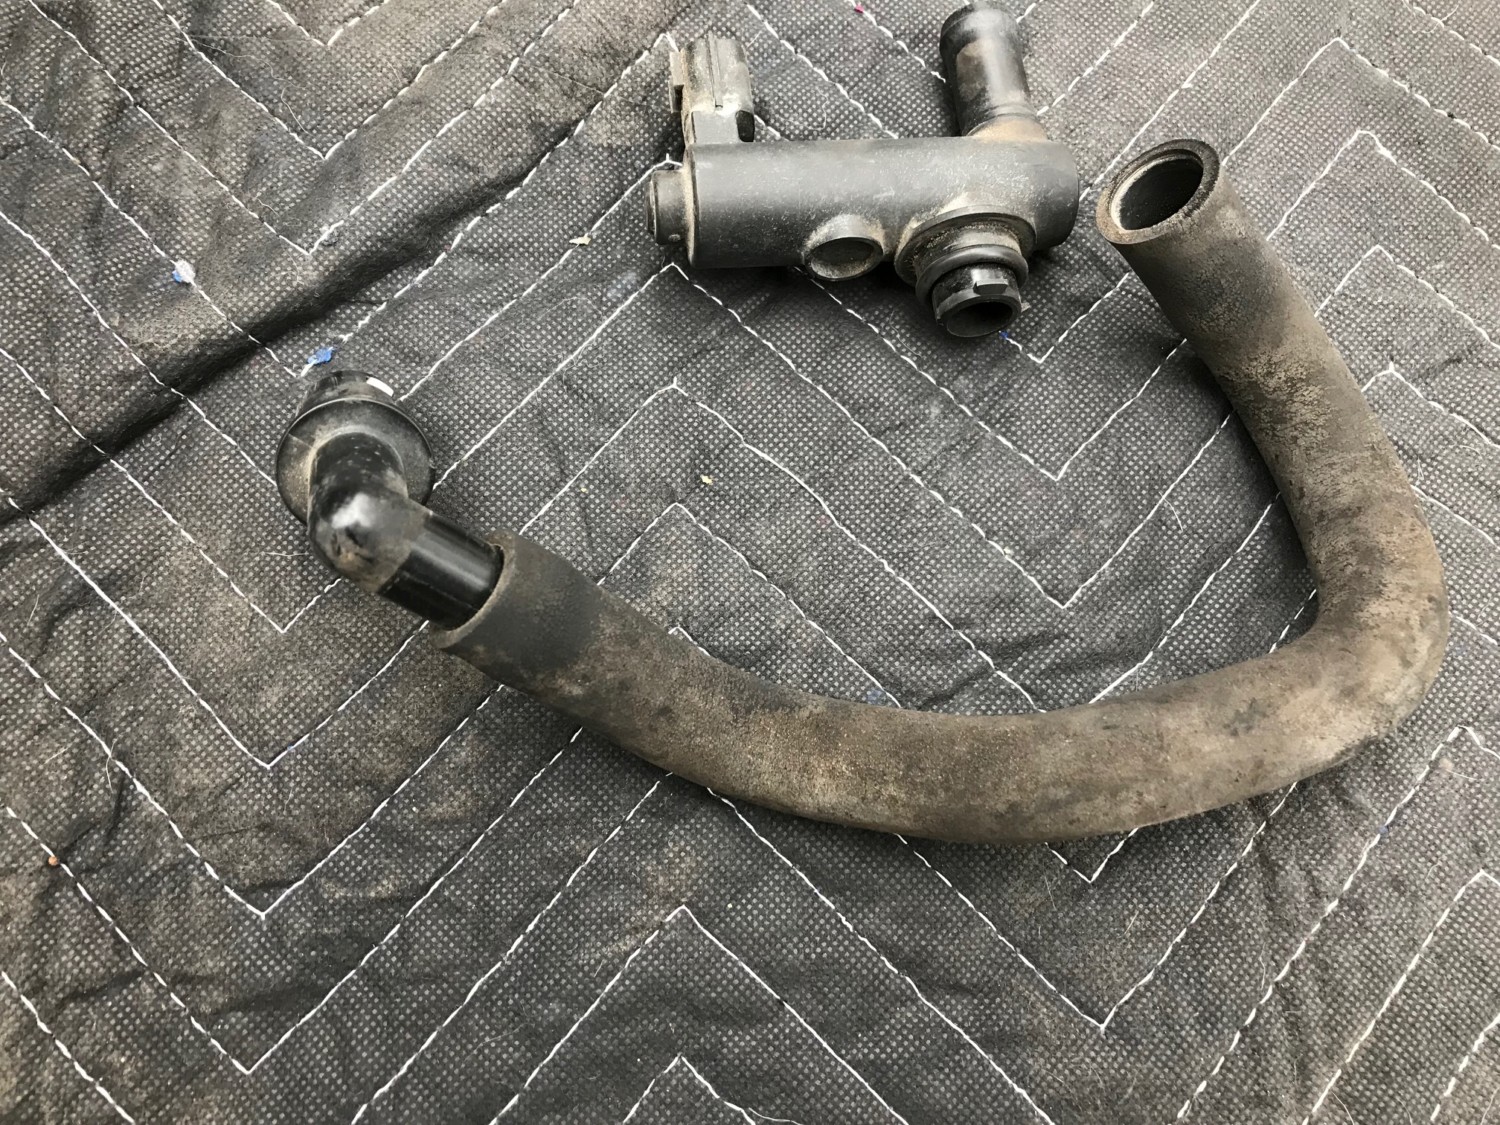
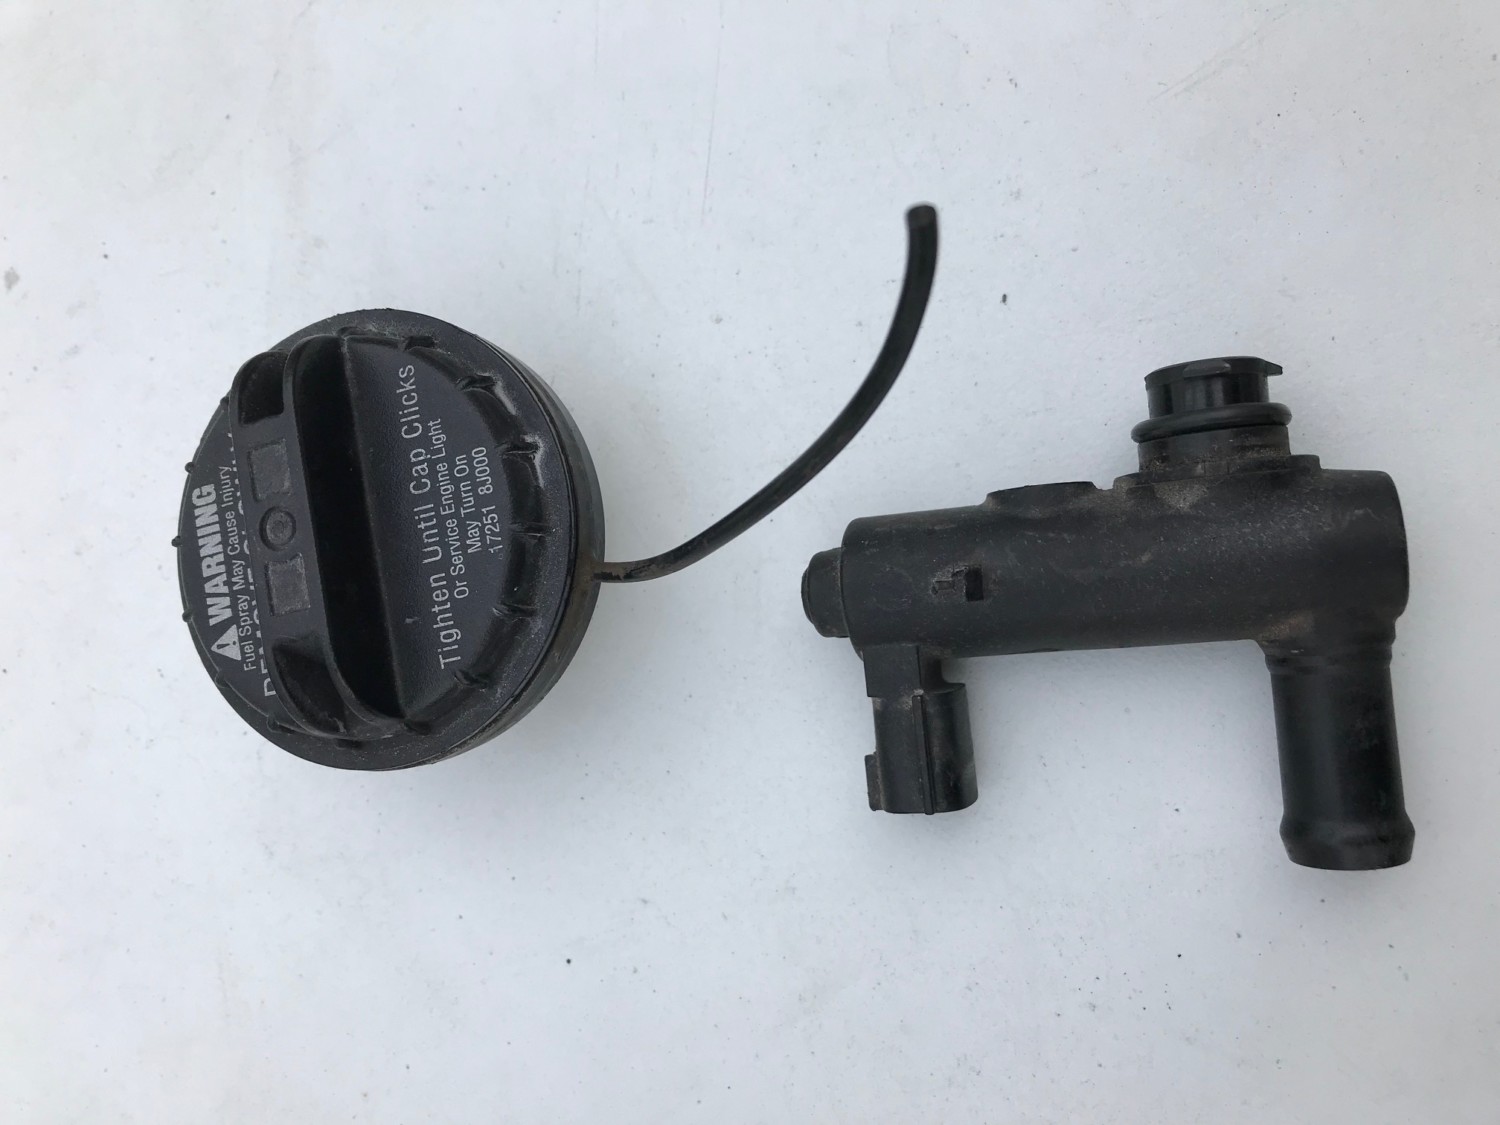
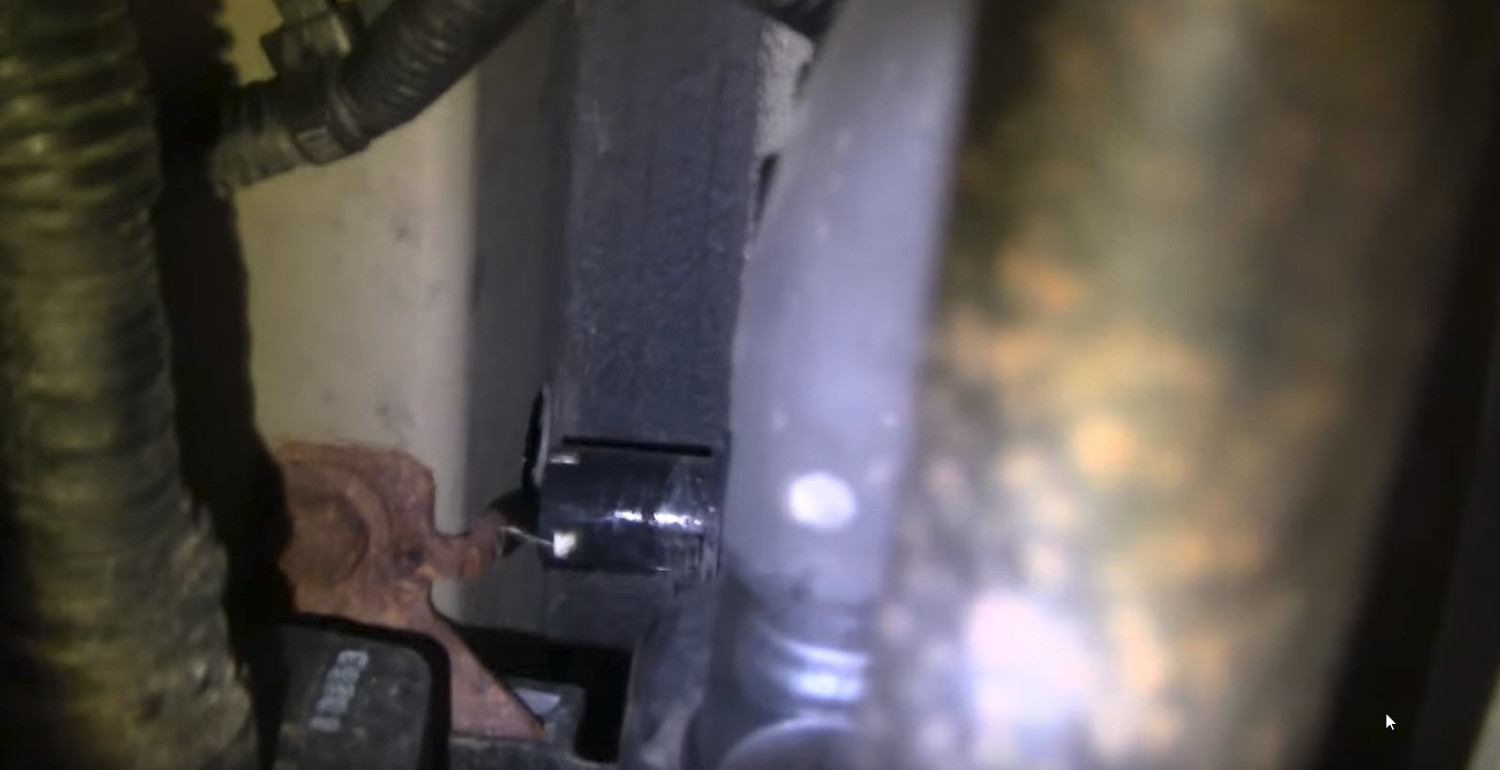
After doing some research and testing, I determined that I needed to replace the gas cap and Vapor Canister Vent Valve. Since I bought the car I’ve never changed the gas cap. The car has over 100K miles. Both are super easy to replace and do not require any special tools. Just need to jack up the car on the driver side to get to the valve (video included in post courtesy of 1A Auto Parts).
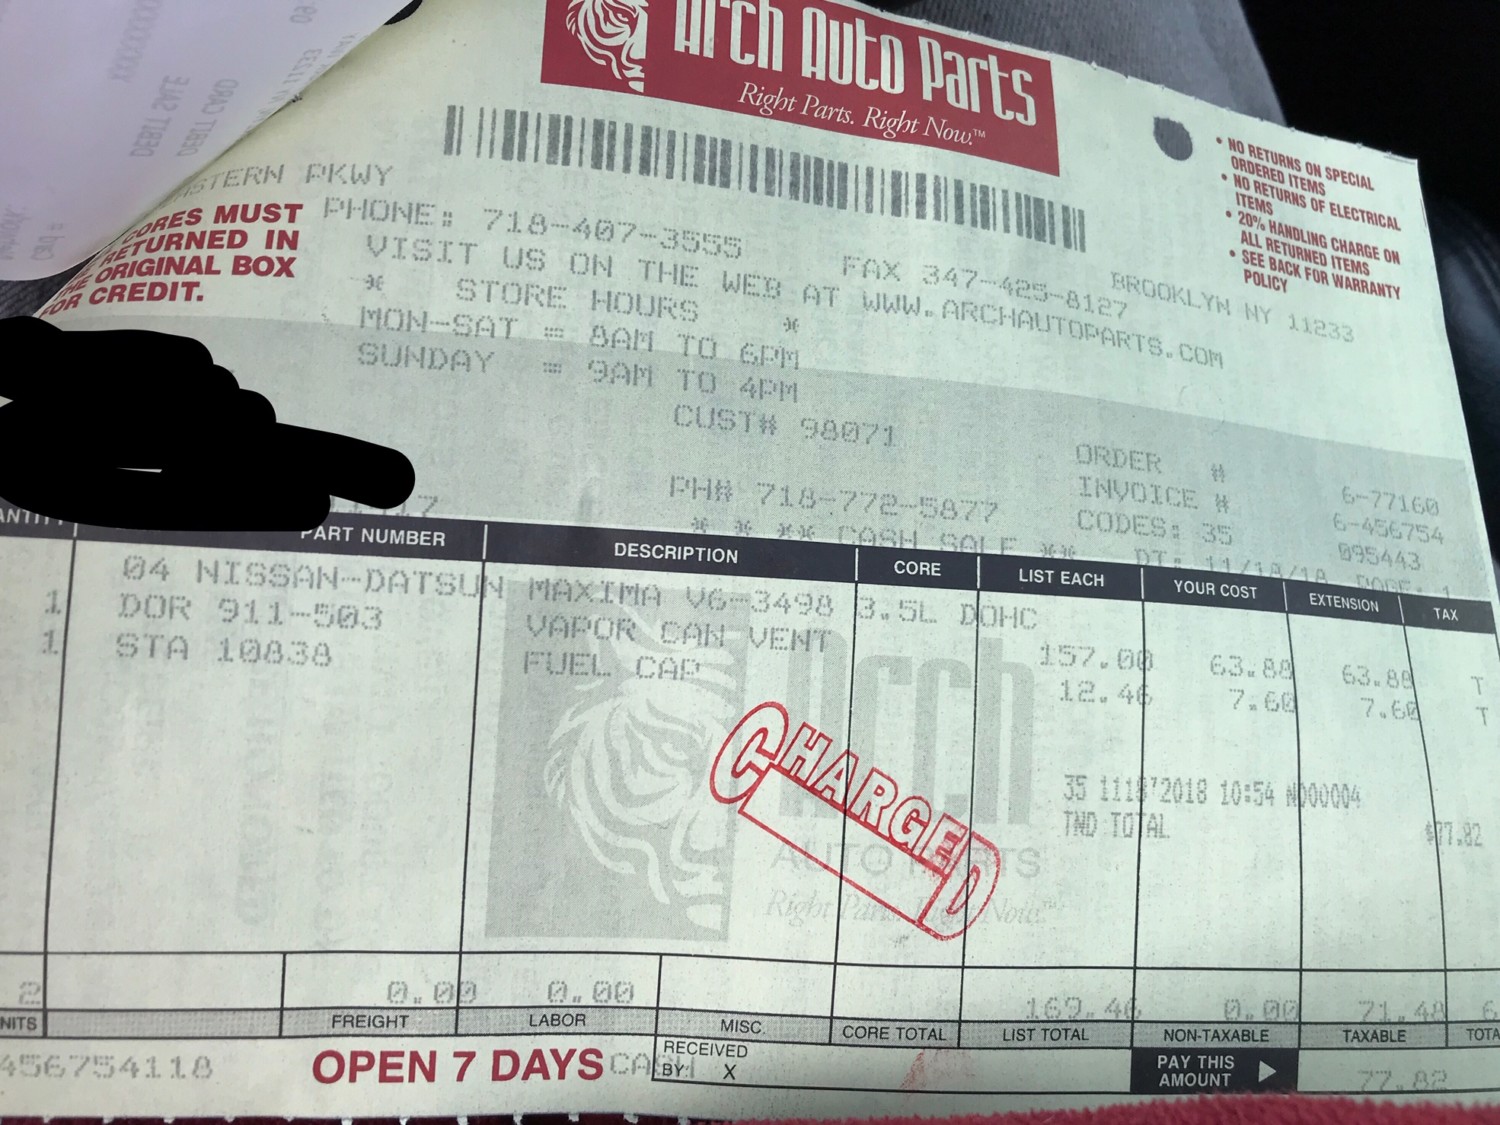
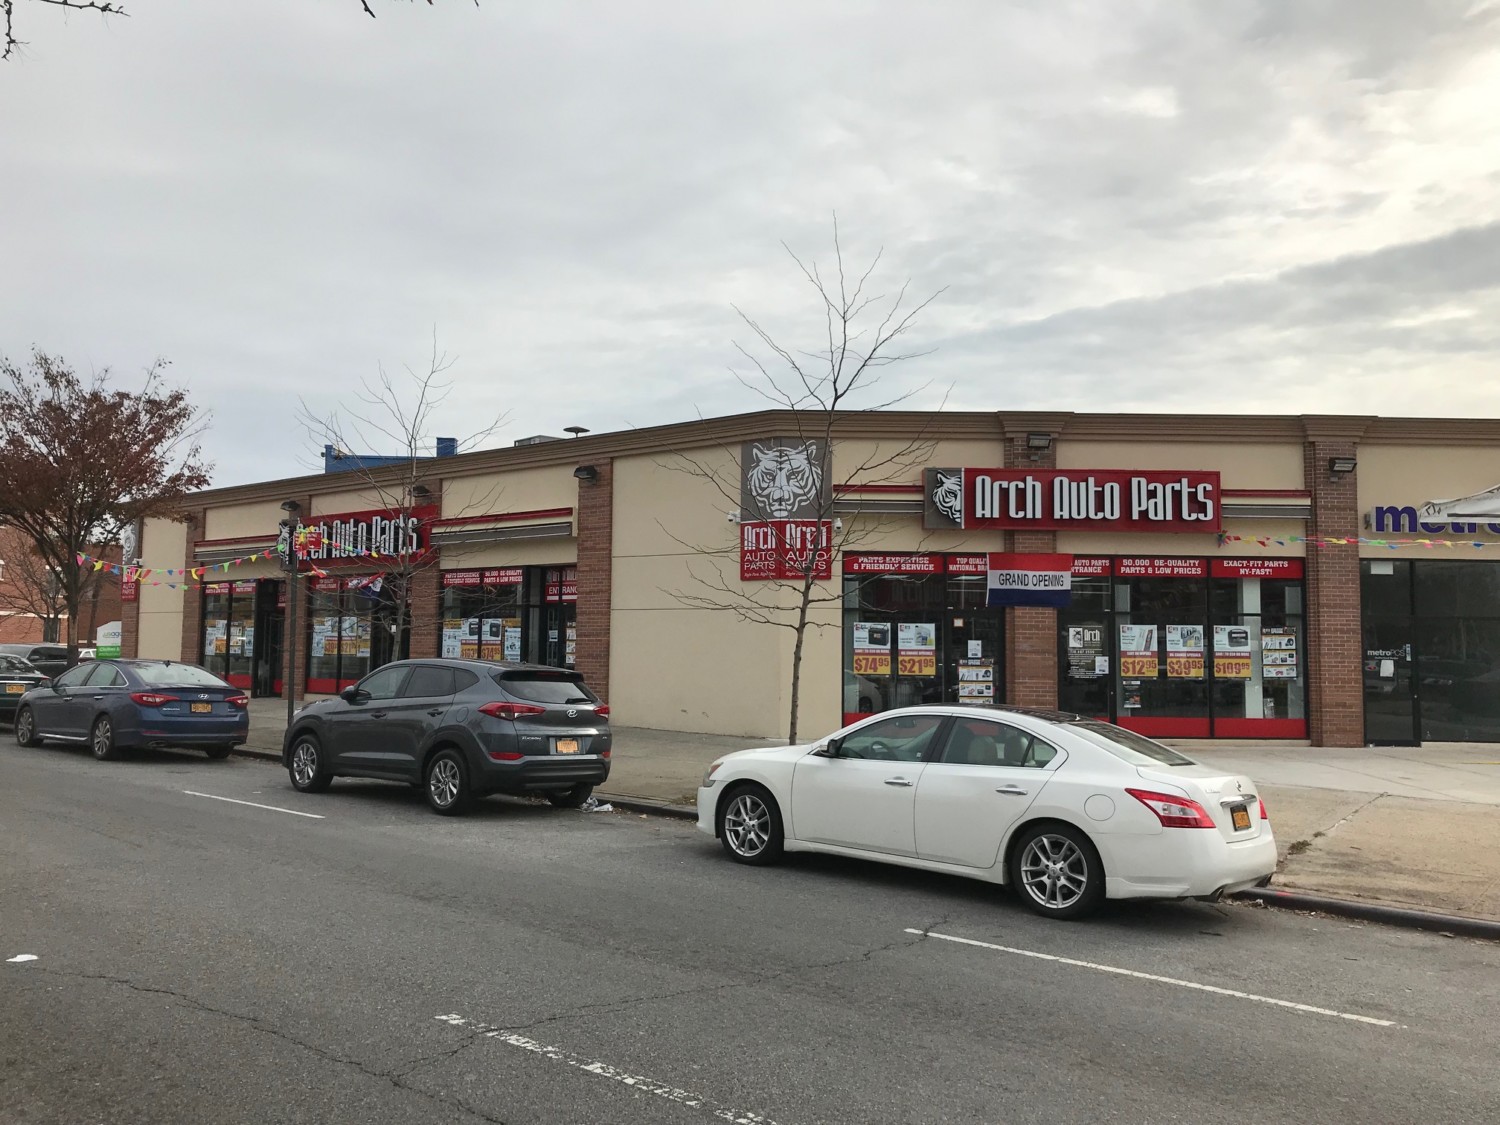
I personally went with the aftermarket parts. I have an Arch Auto parts store that is very close to me and they are super friendly. If any issues, I can easily return with no problem. Plus they are open 7 days a week.
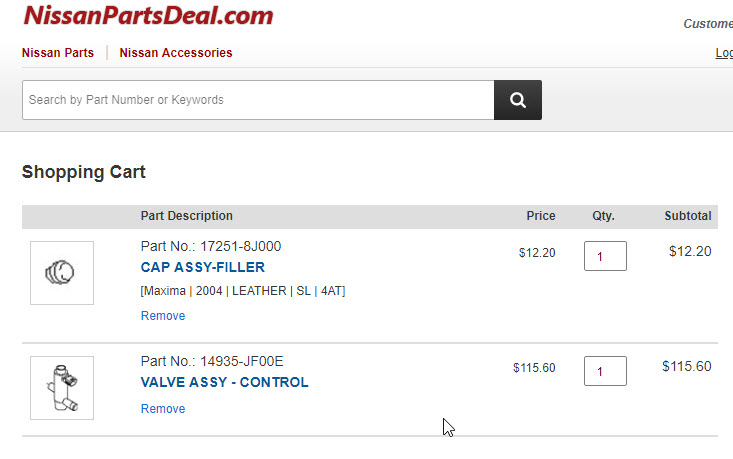
OEM Part Number: 17251-8J000
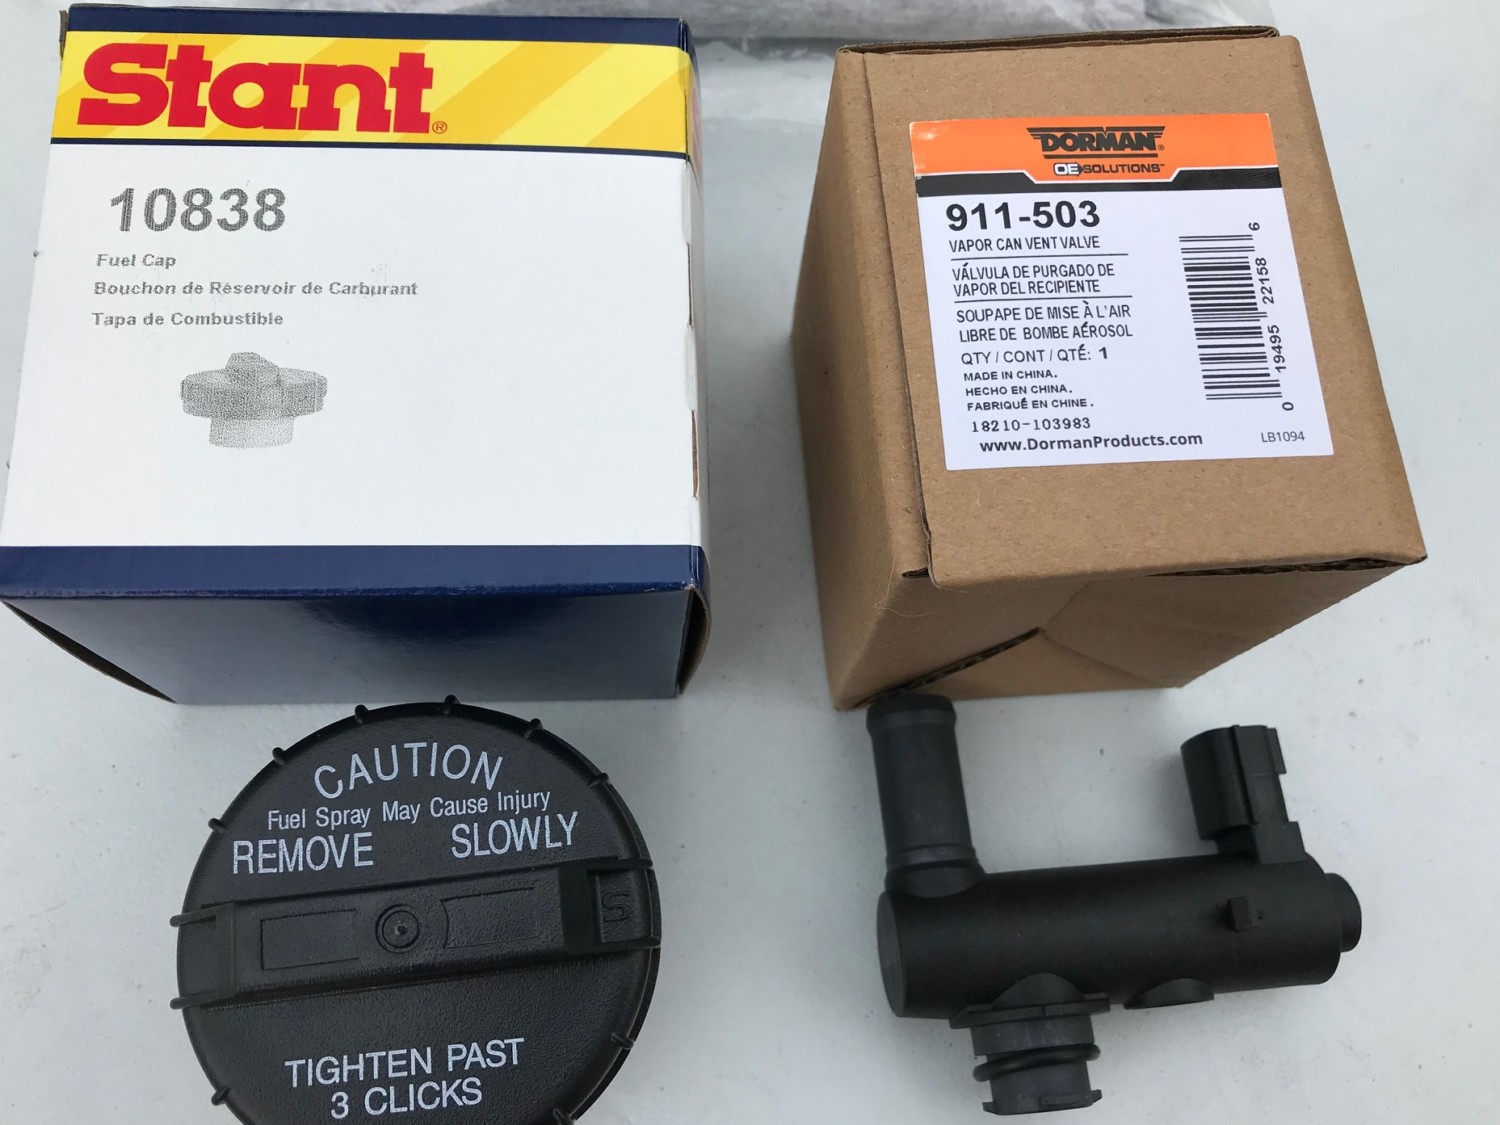
Aftermarket Part Number: 10838 / Stant
Price: Between $8.00 – $15.00
OEM Part Number: 14935-JF00B
Aftermarket Part Number: 911-503 / Dorman
Price: Between $865.00 – $120.00
This is the code that was thrown: P0455

OEM PARTS


AFTERMARKET PARTS


I personally like Arch Auto Parts. Great customer service!

OLD STUFF


This is where the other end of the hose goes once you install new valve. I was a little confused at first but was able to find it goes here. You can see from the photo above.

![]()
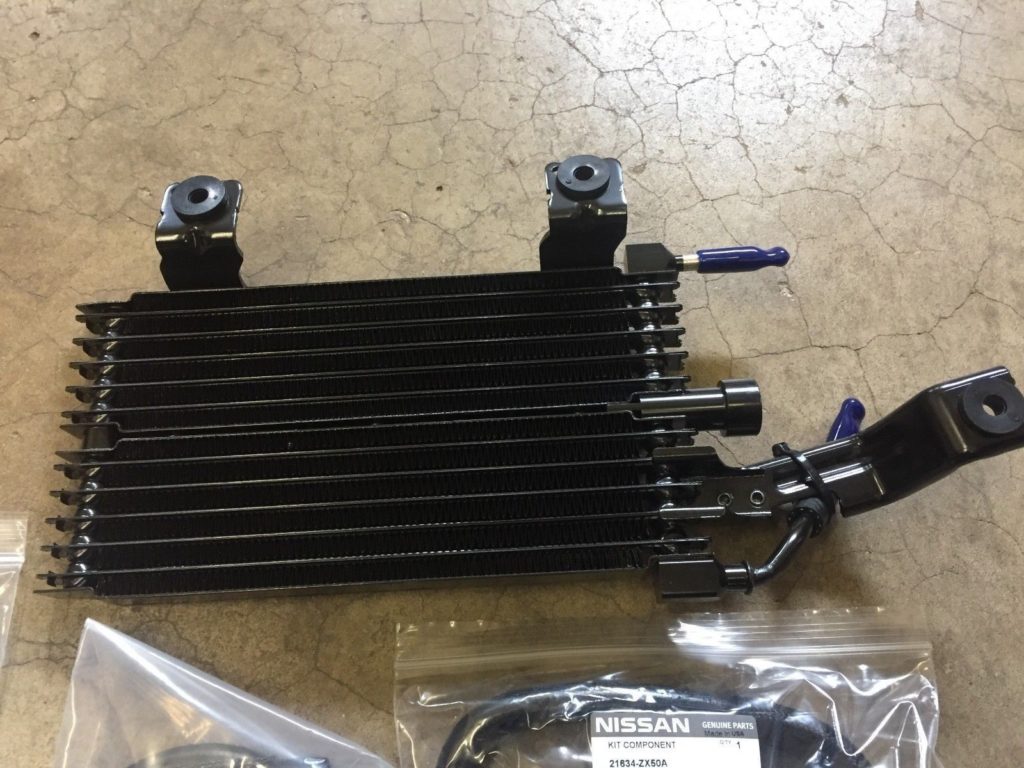
If you are looking for an OEM CVT oil cooler for your 7thgen / 6thgen Maxima, you can purchase the OEM cooler below. It’s from a Nissan Altima 21606-ZX59A.
Part Name: Nissan Altima 2007-12 CVT Transmission Oil Cooler Kit
Part# 21606-ZX59A
Interchange # 21606ZX59A 21606ZX50A
Price: $175.00
Install Instructions: https://www.my4dsc.com/install-cvt-transmission-cooler-7gm/


![]()
Member Credit: Thomas Purdue
This is a basic Intercooler Layout for 4thgen / 5thgen /5.5 Gen’s. Same side vs opposite side is a personal choice. Same side has more psi drop, more hard bends, more expensive intercooler. Other style less hard bends, less psi drop, cheaper IC but longer piping.
I really like same side intercooler but my next Maxima won’t have one cause it limits how I can run my CAI piping for the turbo filter due to congestion and the few extra inches in piping won’t really effect anything anyways.


![]()
So you get your code scanner and it says something like, “Bank 1 Sensor 2“. So where exactly are these banks located?
Bank 1 means that the sensor is closest to the Firewall.
Bank 2 means that the sensor is closest to the Radiator.
Yup, it’s that simple.

![]()
Member Credit: whlimi
I was running a cali spec ECM in my 3.5 swapped 99. I had 14 codes, most of them emissions related (damn cali spec) and TCM codes (running SSV4). Got myself a 95 5spd ECM from the junk yard and decided I would take the plunge and swap it into my 99. After an EU and SSV4 install, I’m happy to say that it was a fairly easy modifaction and took about an hour and a half most of which was spend tracing wires to double check the 99 FSM.
The advantages are obvious. No more codes apart from EGR (will solve this) and the P1320 because of the EU. This mod is great for those 3.5 swapped 99s looking to erase some codes. I can finally replace my broken keys without paying for the reprogramming and if I ever choose to do so, I can run a JWT or Technosquare ECM without paying the extra bucks for a 99.
Since I’m running the SSV4, I did not pay any attention to the automatic transmission communication wires running to the ECM. You might have to make a few more changes to get it to work with an auto. This write-up will work for a 5spd.
– Disconnect the negative terminal of your battery
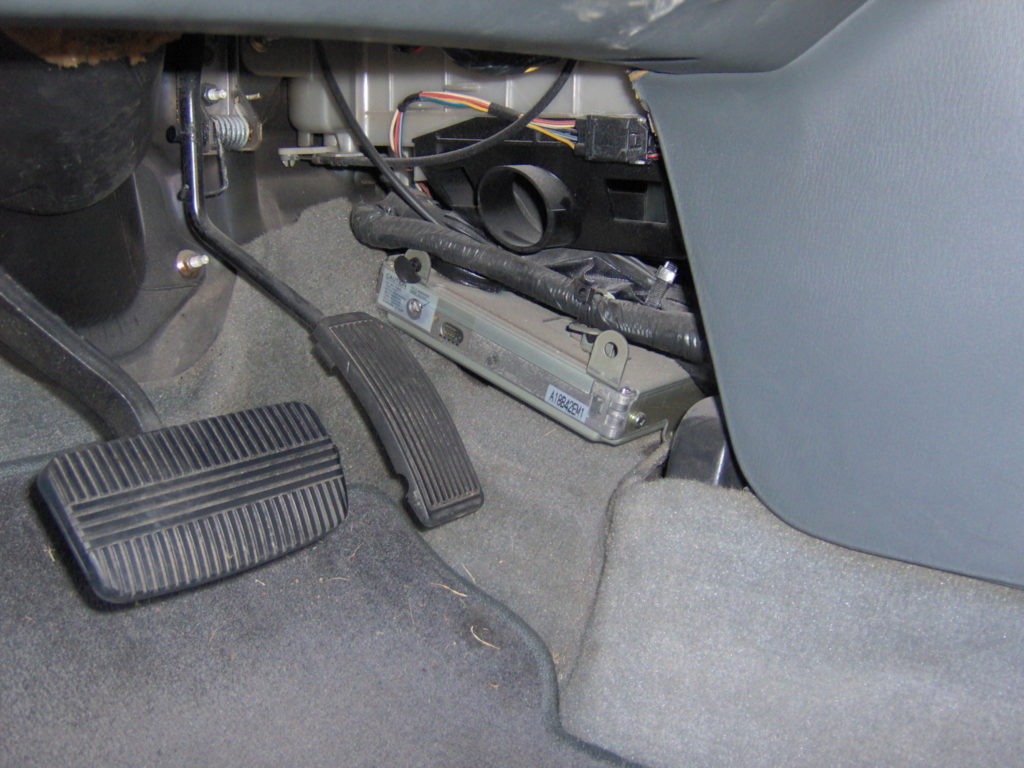
– Pull out the ECM and disconnect the harness. Familiarize yourself with the orientation of the harness and the pinout sheet you’re referring to.
– Pry the white locking tabs up to unlock the pins. I used a small flat head screwdriver.
– I removed the Pins by yanking on the wire a la Pmohr. No wires or pins were damaged this way. (Make sure the white tab is unlocked or you will damage the wire/pin)
Fuel Pump Relay – switch B/P wire from 117 to 11. What you need to know about this pin is that it’s larger than the socket in location 11. It’s the only pin that was not a direct swap. You will either need to acquire a smaller pin from another harness or use a redundant one from the 99 ECM. I used the NATS pin. NATS is pin 17 (Orange wire). Remove the NATS pin and relocate it to 11. Cut the NATS Orange wire leaving enough wire so that you can splice into it. Remove 117 B/P and splice it into the NATS wire now located 11. You have successfully moved 117 to 11.
PNP Switch – Wire colour is G/W Manual Transmission or R/G Automatic Transmission located at 27. We need to swap it over to 22.
CKPS REF and CMPS – This was super easy. All you need to do is swap the locations between the two sensor’s pinout locations. Originally on the 99, CKPS is at 46 and 47 and CMPS is at 44 and 48. We need to swap it so that CKPS is at 44 and 48 and CMPS is at 46 and 47.
Rear O2 – Not necessary but will get rid of the code. Red wire Located at 107. You need to move it to 105.
Reconnect harness to 95 ECM. (I think you can run 95-98 but I’m not positive and will let the Guru’s chime in)
Swap completed
During the course of your modification, you might be a bit overwhelmed by how tightly packed all the wires are. If you cant get to a wire, trace it down, locate it near the bottom of the harness and you can pull it up and yank it from there. When inserting the pins, make sure it’s all the way in. Most of the time once it’s in, it will resist being pulled out again.
Double check everything and reconnect the negative terminal to the battery. Your security light will remain on when the car is running but will not effect anything. You will have an EGR code. I suggest you verify pinout locations yourself with a multimeter and not solely rely on this writeup. Better safe than sorry.
****** I will not be held responsible for any damage caused to your car due to preforming this modification. You do so at your own risk. *****
Member Credit: 95crackedhead
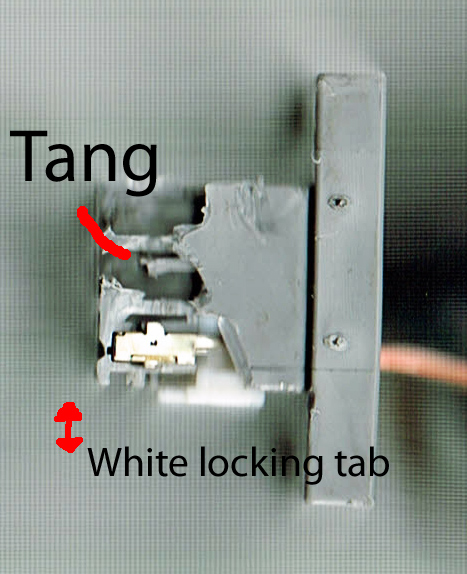
For anyone that wants to know how to repin the harness, I took a couple pictures. First one is a side view of a harness that I sacrificed to practice on, (car came with a spare). I broke off a portion of the housing so you can get an idea of what a pin looks like fully seated in its socket.
First, pull the white locking tabs away from the housing. Use a small flatblade screwdriver or electronics pick.

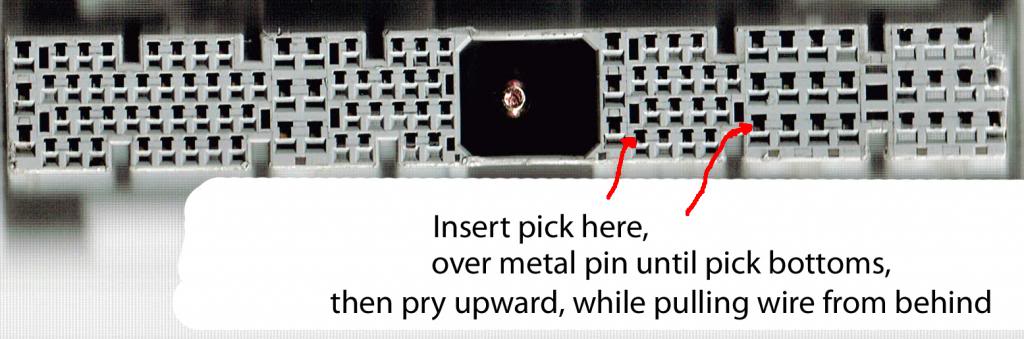
The plastic tang that is contained in the harness for each pin is what is holding the pin in place once the white locking tab is pulled away. If you insert your pick or small screwdriver inside the terminal side and release it, you should be able to pull the wire out the back of the harness to clear it. But this must be done simultaneously.

Looking at the last pic, the horizontal portion of each pin socket is what actually makes contact with the pin sticking out of the ECM. Don’t put the pick here. Put the pick in the hole above the horizontal portion, feeling for when the pick bottoms out, then pry upwards. I had luck with a small flatblade jeweler’s screwdriver for the large sockets, and an electronics pick (Radio Shack) for the small sockets.
![]()
Credit: Sparky’s Answers
This 2004 Nissan Maxima came in with the complaint that the transmission would not shift properly. The customer stated it felt like the transmission was starting in a high gear. I really did not want to work on this vehicle as the customer informed me that the engine and transmission had both been replaced with used parts. You just never know what you will run into when going behind someone else. First the code checks.
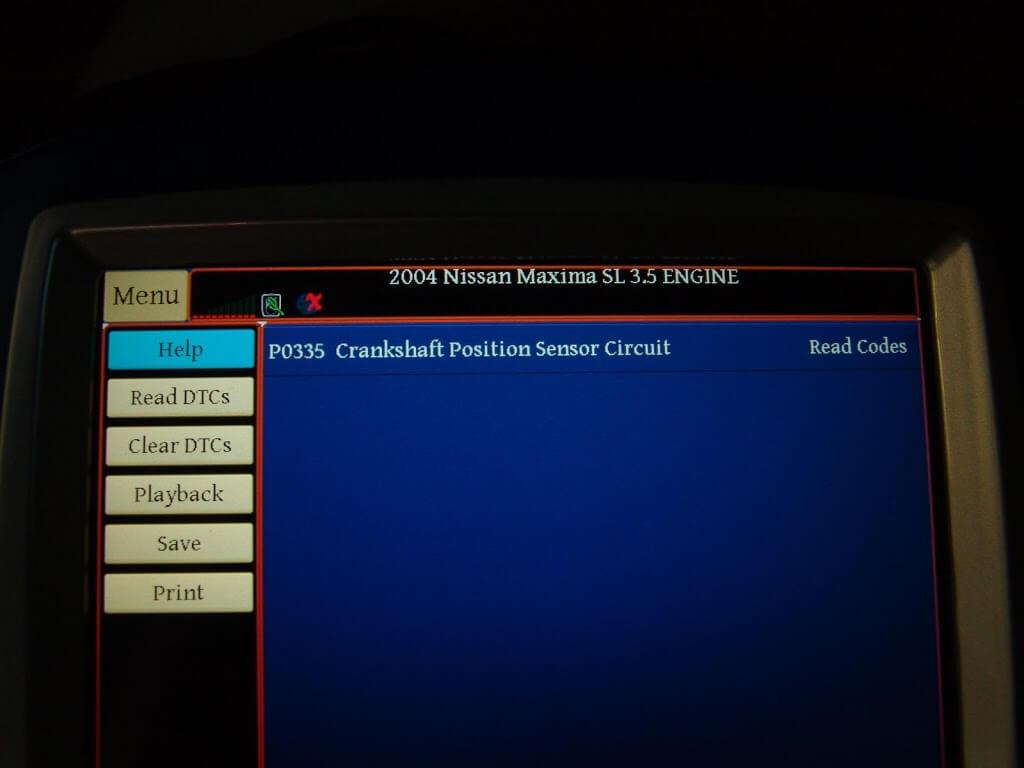
Code P0335 stored in the PCM. although the customer had not complained about it, I had noticed that there was an extended crank time before the engine started.

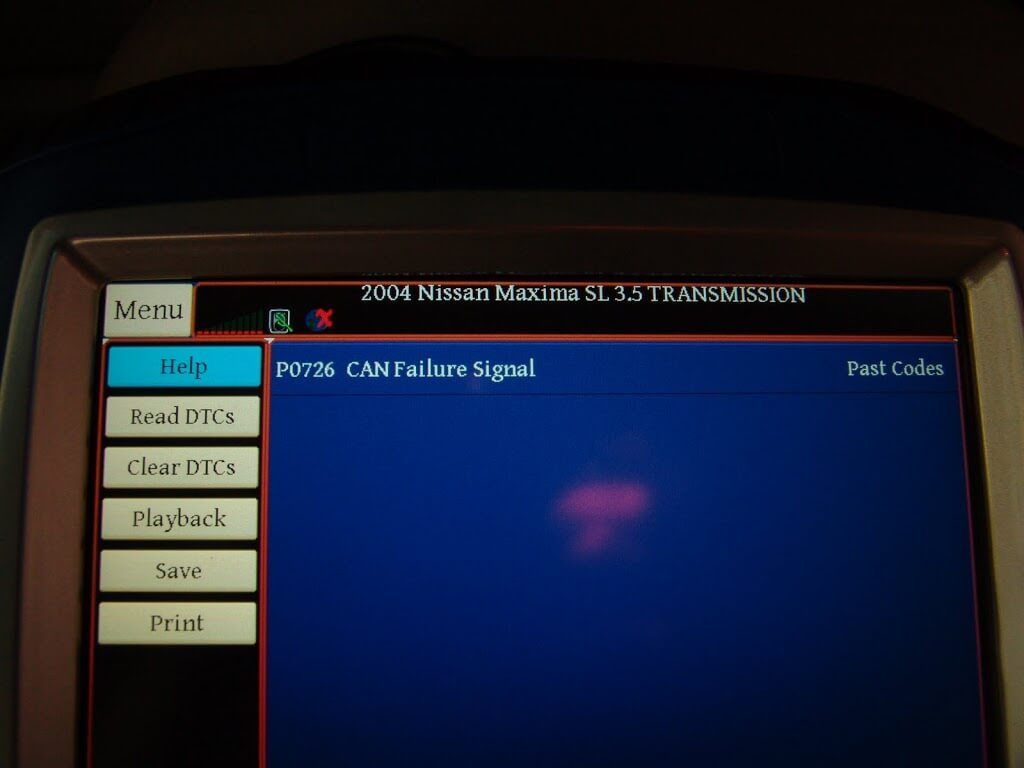
The TCM had a code P0726 stored for a CAN Failure system. In case you were wondering CAN stands for Controller Area Network. This means that there is a communication problem between modules.

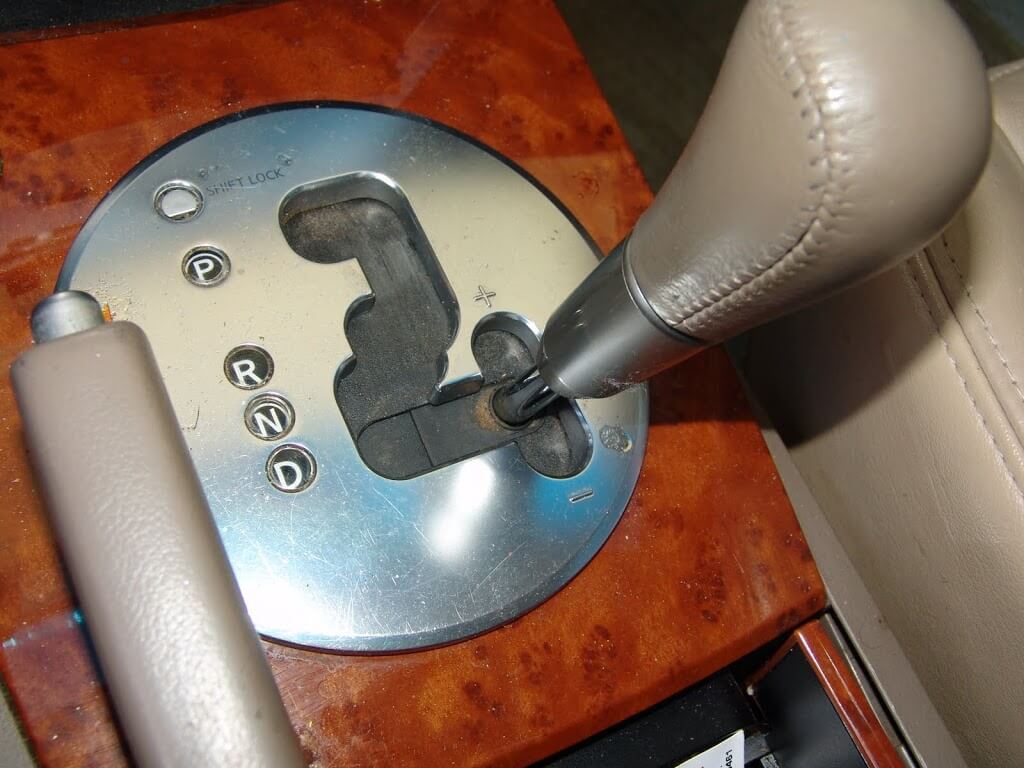
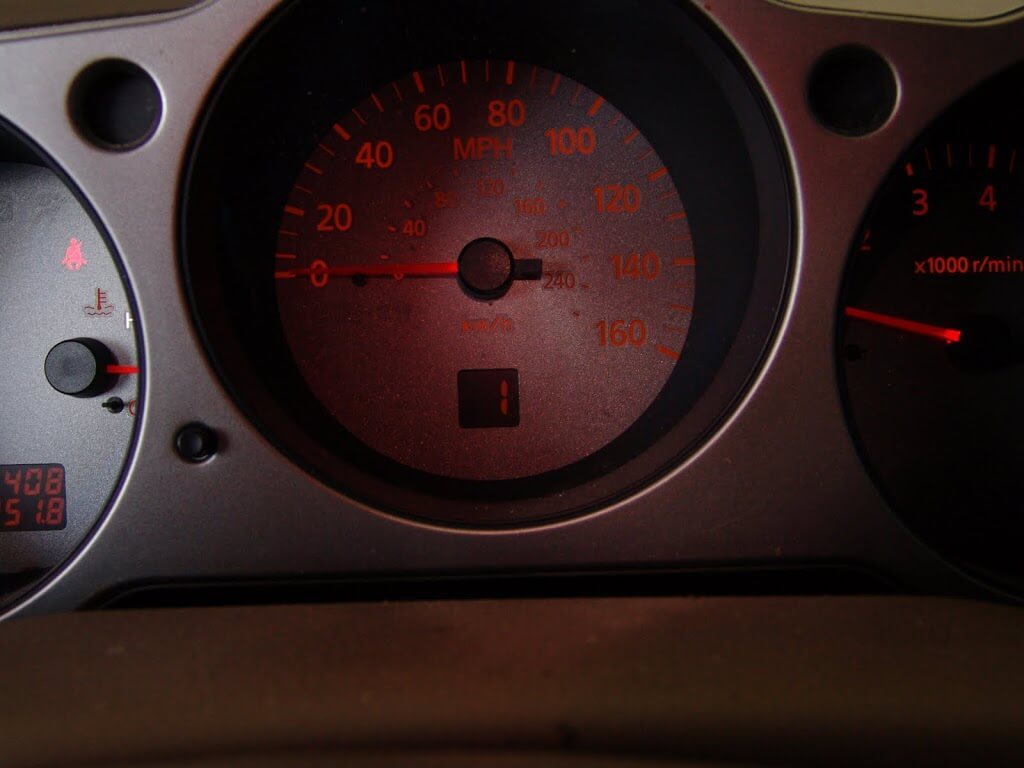
With the key on and the gear selector in the manual shift position the gear indicator in the instrument cluster shows that the transmission is in the 5th gear.

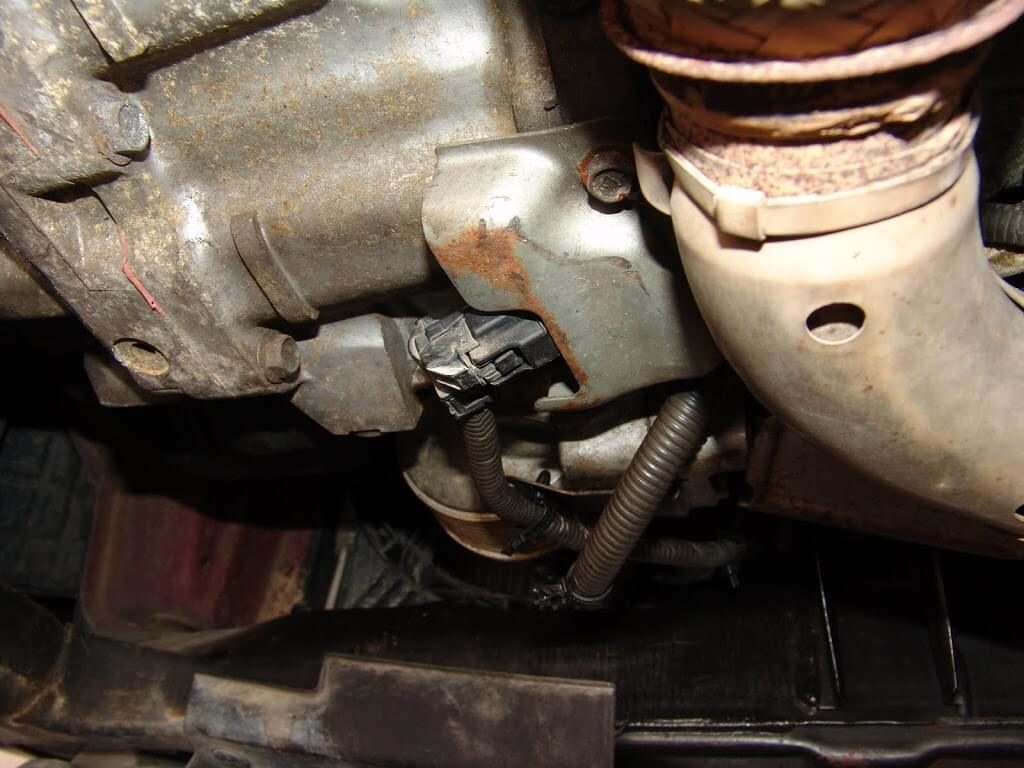
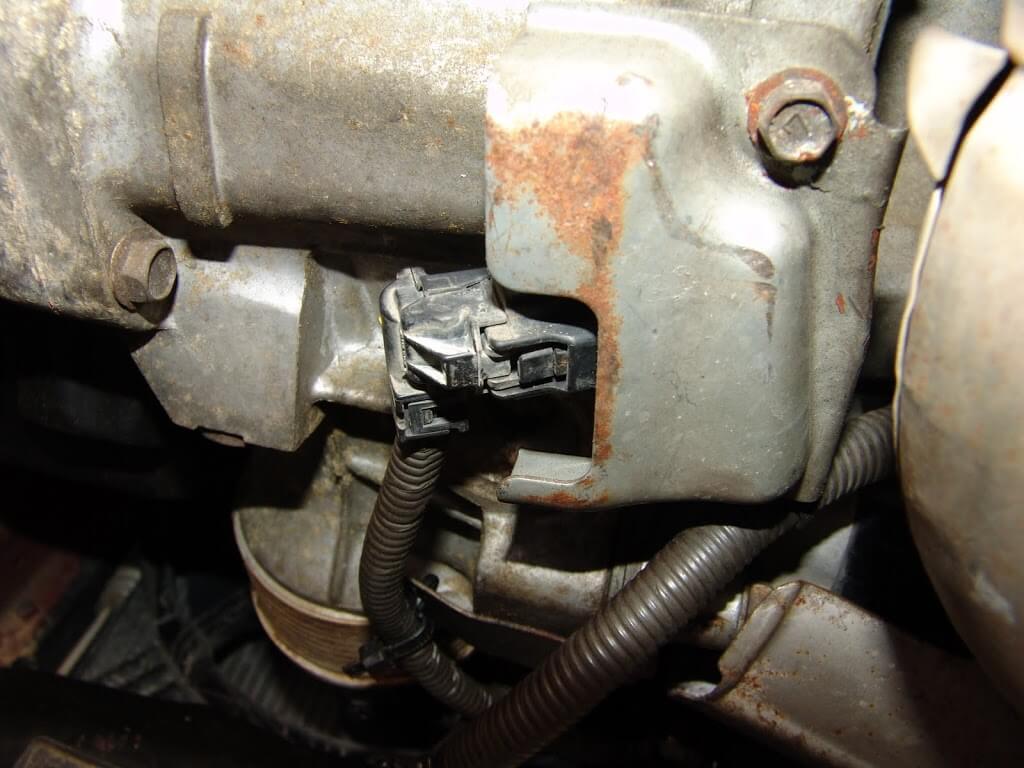
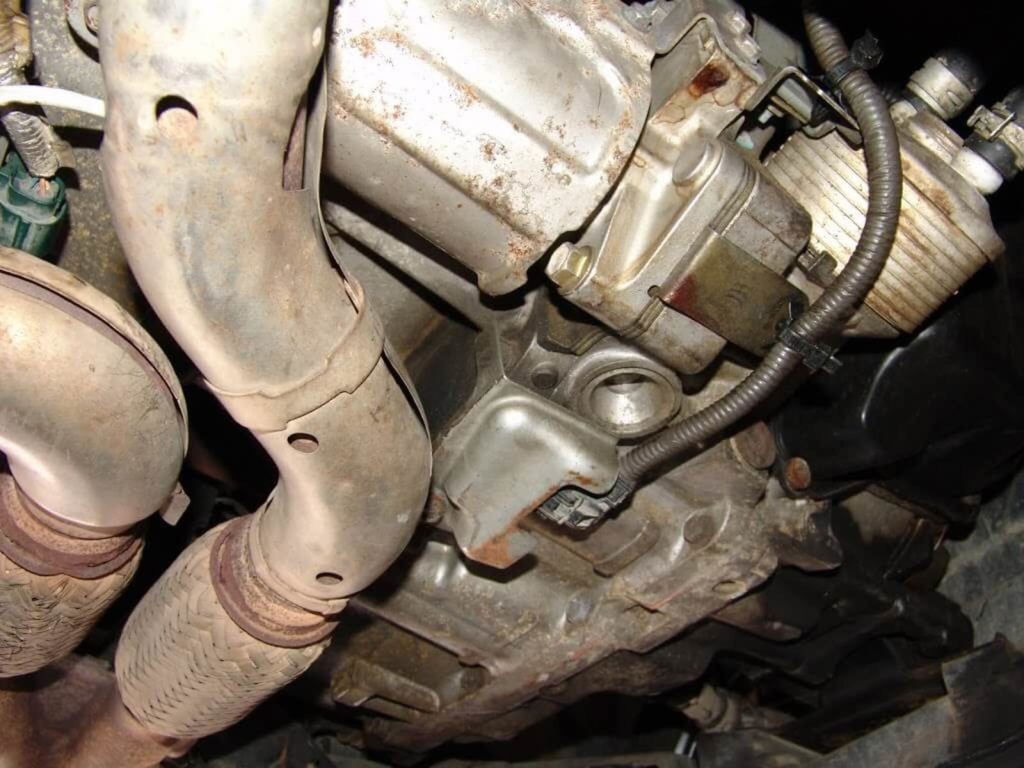
I wanted to do a little research, in that I have never seen a code P0726 before and I wanted to know a little bit more about it. I found that there are some real world anomalies with the factory diagnostic procedures. The TCM is supposed to use a crank sensor signal along with other data to determine shift patterns. The real world has found that cam sensor signals are also involved with this process. The engineers it seems did not plan on this or they did not inform the service information writers about it. Since I did have a crank sensor code I decided to start there. The crank sensor is located at the bottom center of the engine just below the flywheel area.
Everything looks okay here or does it? Kind of strange how the end of the connector looks like it is lined up perfectly with the edge of the sheet metal shield. A gentle pull revealed that it was not fully seated.

Could it be that it was that simple. This vehicle had been to two other shops before arriving at mine. Using a pry bar, I straightened out the sheet metal shield.

Then installed the connector until the lock snapped into place.

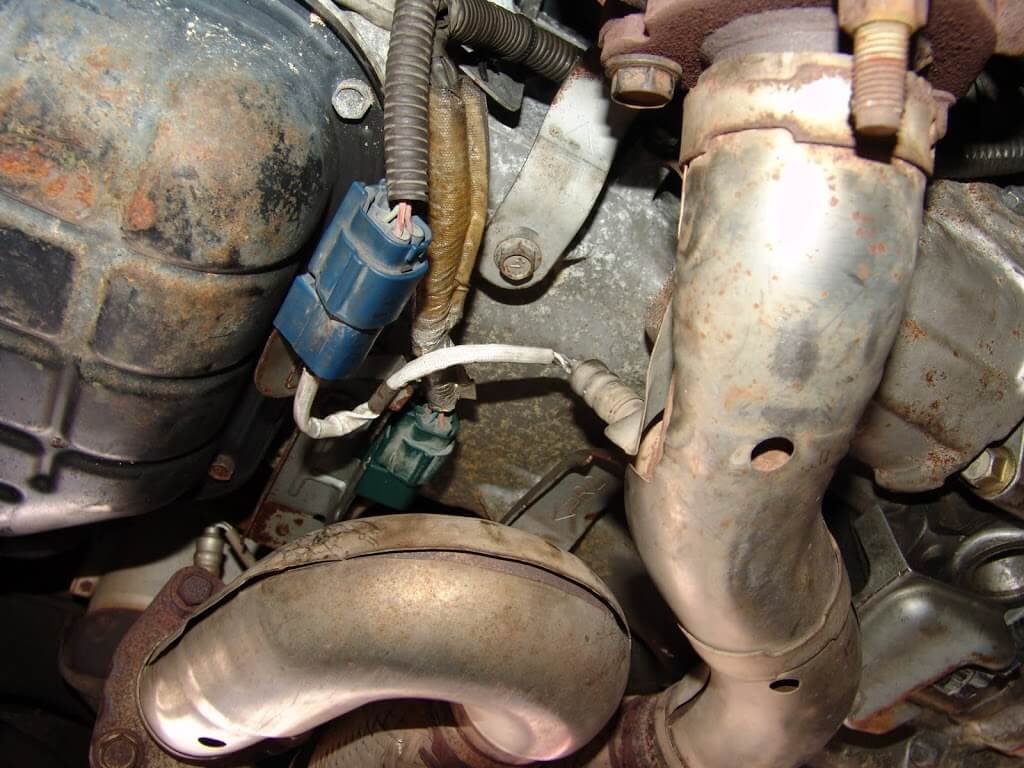
Of course while I was looking around at the problem I noticed quite a few things out of position.

Gee, you think a wiring harness laying on an exhaust pipe might cause some problems?

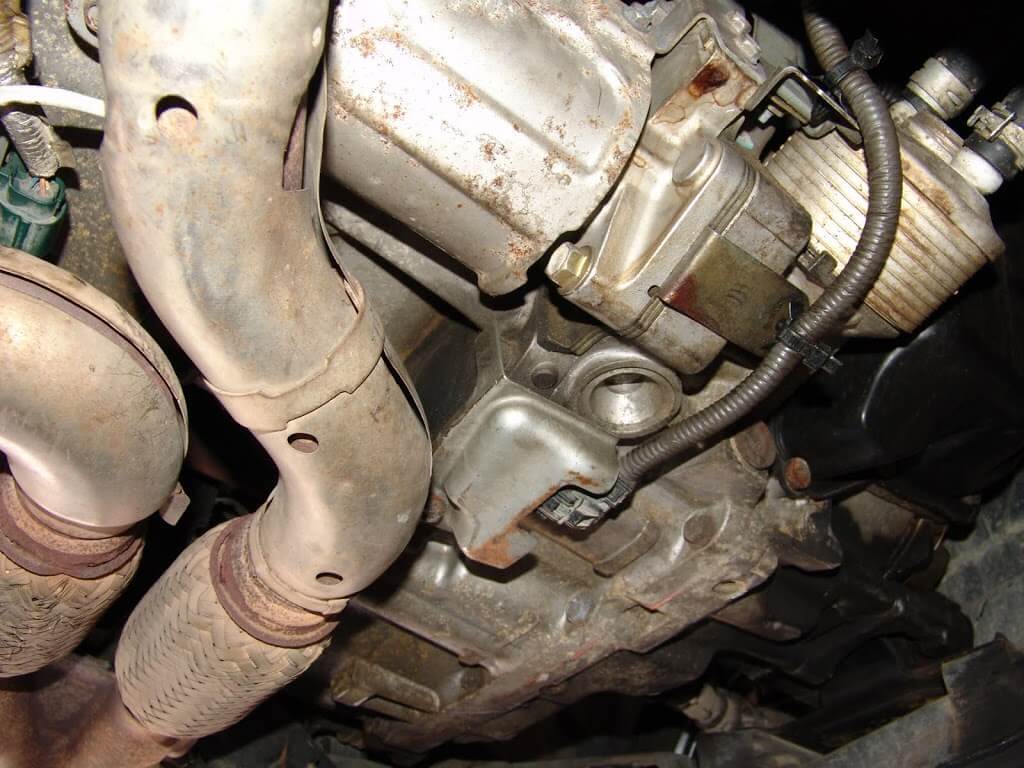
It amazes and worries me that someone can actually get an engine and or transmission in and out of a vehicle and leave something like this a mess. I had to round up a few bolts and finish installing a couple for brackets and heat shields. Then reroute the oxygen sensor wiring so that it would not be laying on the exhaust.

It does not look too bad now but I informed the customer that the engine installation needs to be gone over to make sure nothing else is loose or not installed.

Now the shift indicator shows that the transmission is in 1st gear. Both the PCM and TCM codes are now gone. The engine also starts as it should.

This one will be back in a few weeks to finish going over the wiring under the hood.
![]()
Member Credit: EddyMaxx
I was getting the following code: P0335 Crankshaft Position Sensor A Circuit Malfunction
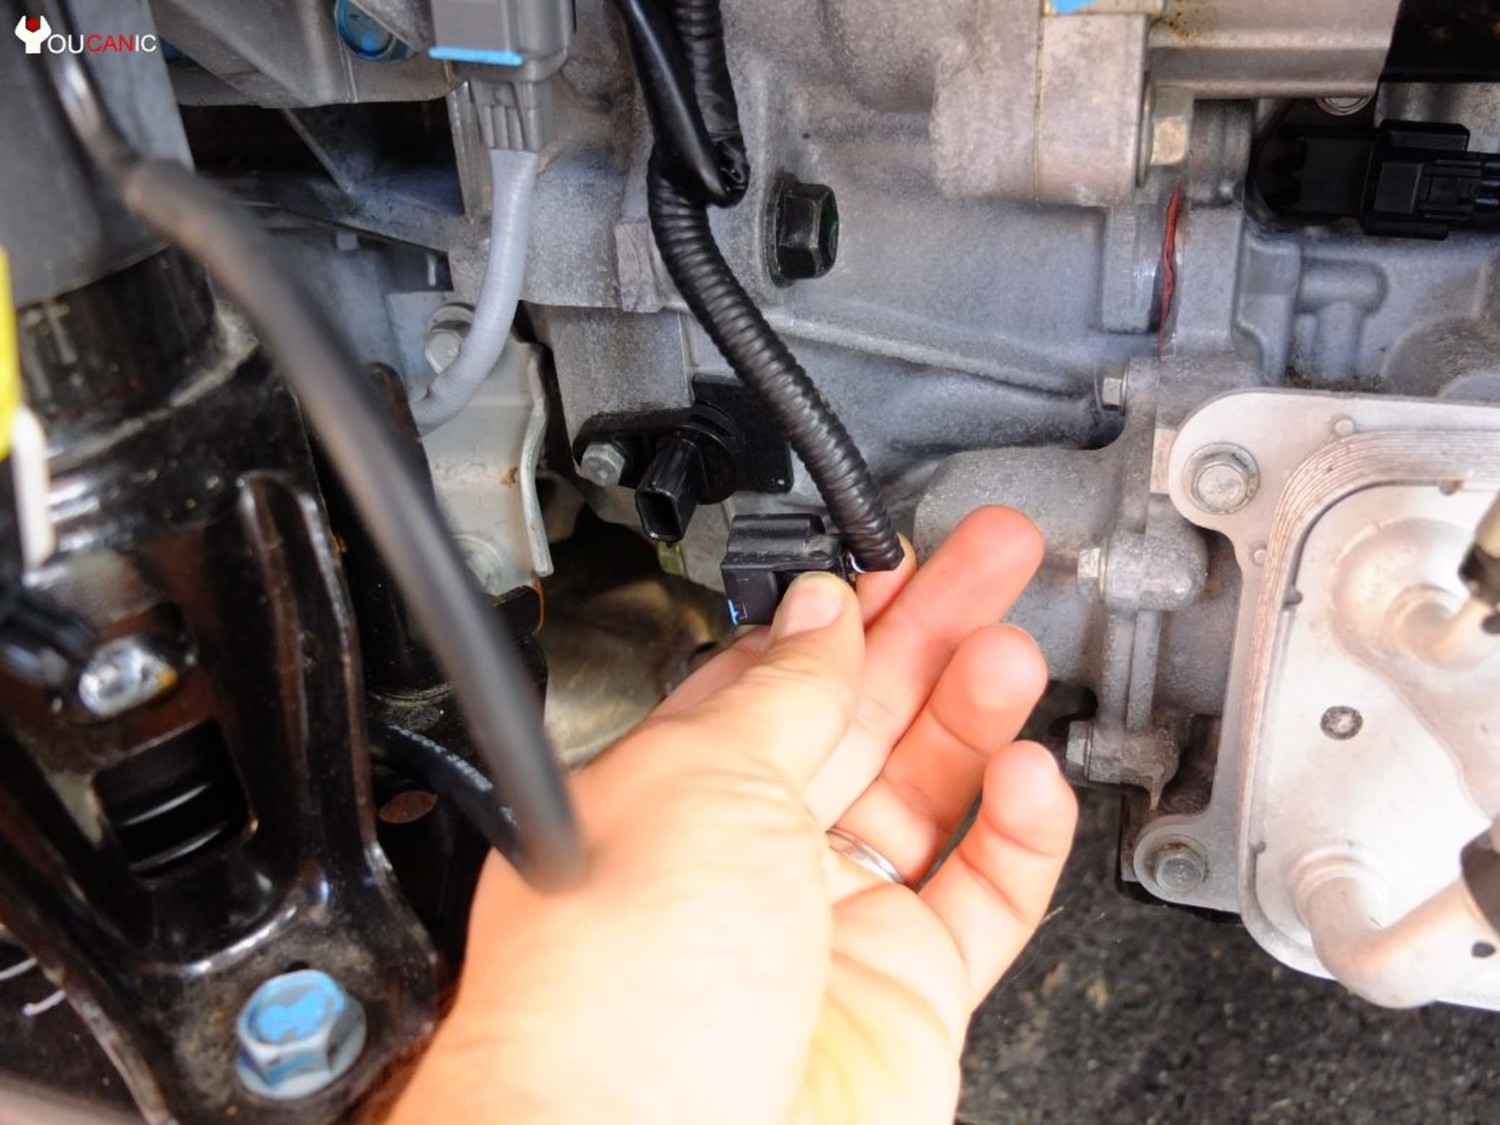
This code was causing my car to go into “limp mode” and wouldn’t go over 3500 RPM. Also, don’t confuse this sensor with the Camshaft Position Sensor. The sensor is very easy to change. All you need is a 10MM socket.
Symptoms:
The Fix:
I ordered a sensor from eBay which claimed to be OEM. The part number is 23731-AL60C. While the car started up fine, it still wouldn’t rev over 3500 RPM. Likely a faulty sensor. So I went to my local Advanced Auto and purchased a new one. With the discount code, it came out to $35.00. After installing the sensor the car started up perfectly and went out of limp mode. I went for a quick drive and code was permanently gone. I’m always about OEM products when it comes to sensors. However, in the case the aftermarket one below work just fine and comes with warranty. Just ensure you keep the receipt.

The crank sensor is located at the bottom center of the engine just below the flywheel area.
Photo Credit: Sparky Answers

Photo Credit: Youcanic

![]()
Member Credit: EddyMaxx
I was getting the following codes together, P0720 and P1574 on my 2004 Nissan Maxima which has a 4-Speed Automatic Transmission.
My Symptoms:
Code Definitions:
The Fix
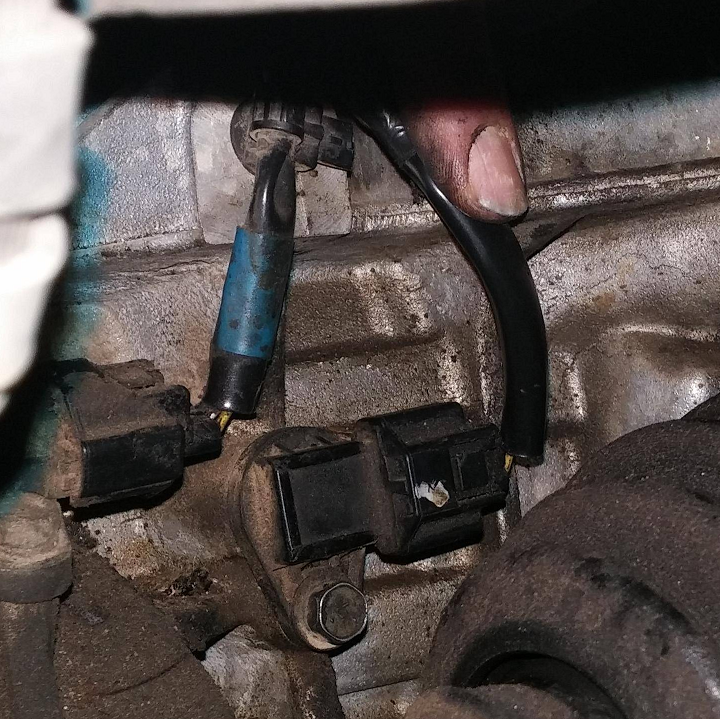
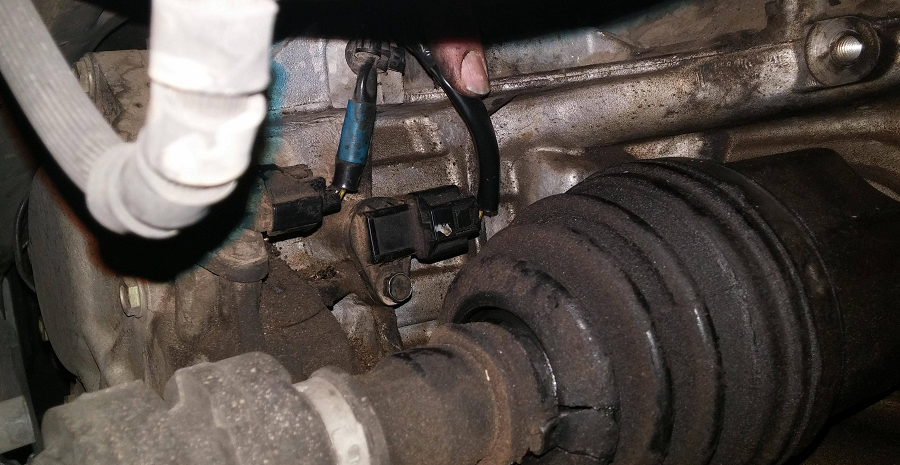
I was getting ready to just buy and replace the sensors. However, I decided to check the harnesses for these two sensors. Surely enough, the harness had an exposed wires due to corrosion and the connectors were very loose. I fixed the exposed connections and tapped up them up nice. I also ensured the harness plugs were properly secured. And PROBLEM resolved for these two codes.
Below is a photo of the two sensors.

Photo Credit: Picodroid


![]()