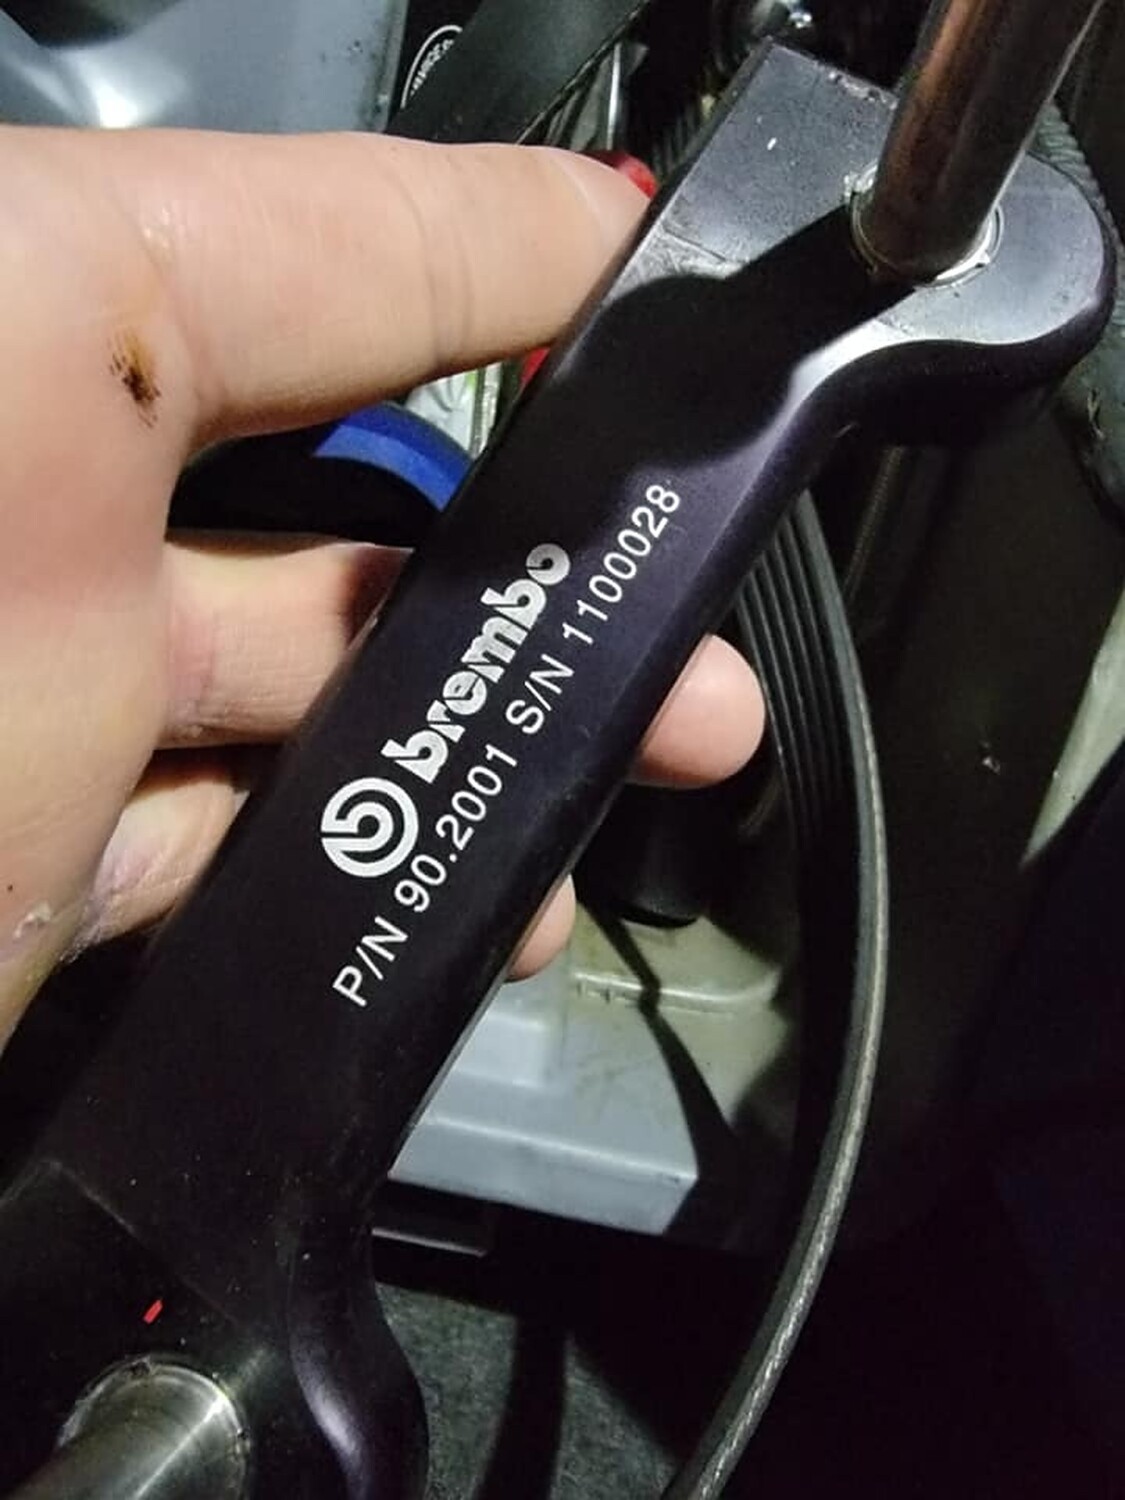
I pulled the BBK off the i30krab, and with the help of Victor Dragos we identified it as a Brembo GT JR big brake kit, using 2-piece Brembo 13″ rotors. These rotors were commonly used on VW, Porsche, and Audi applications.
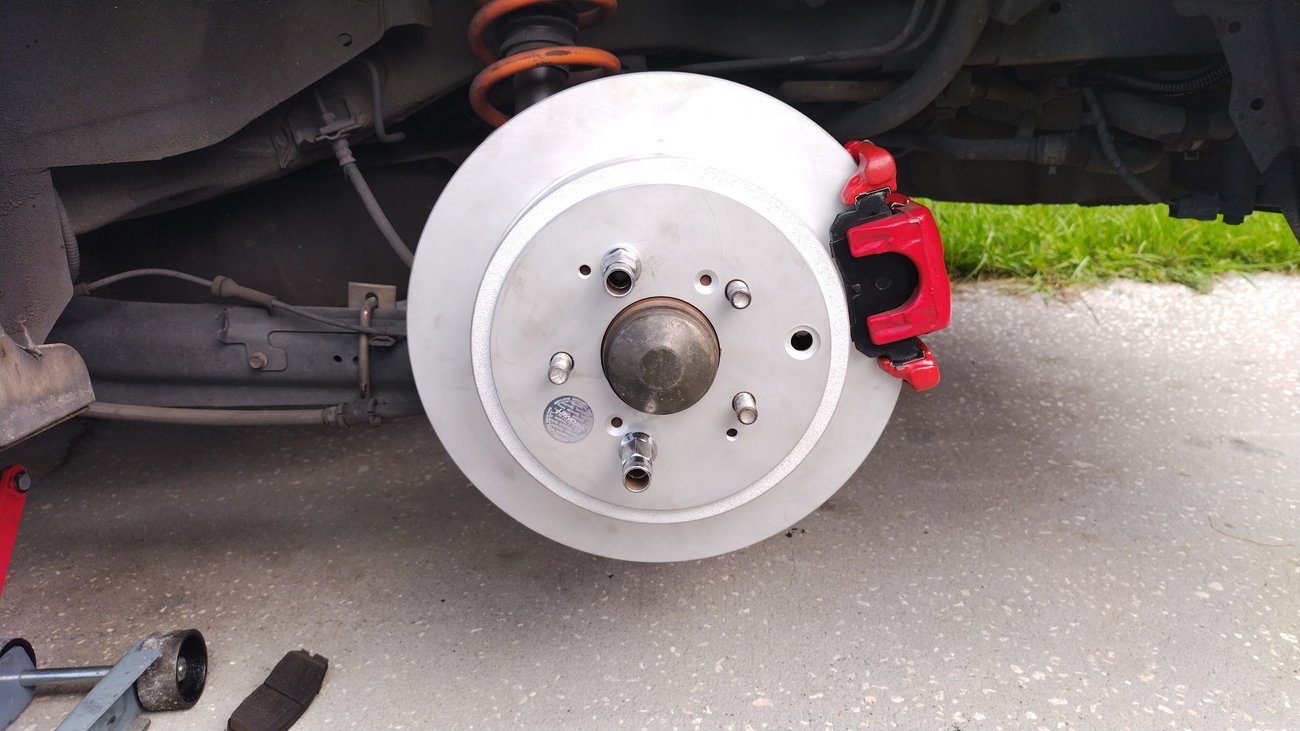
Calipers & Adapter: The calipers are radial mount, and a Brembo-marked adapter (with part and serial number visible in the pics) was used to fit the Nissan application. The caliper mounting holes are 130mm apart. The adapter bolted up with no modifications to the knuckle.
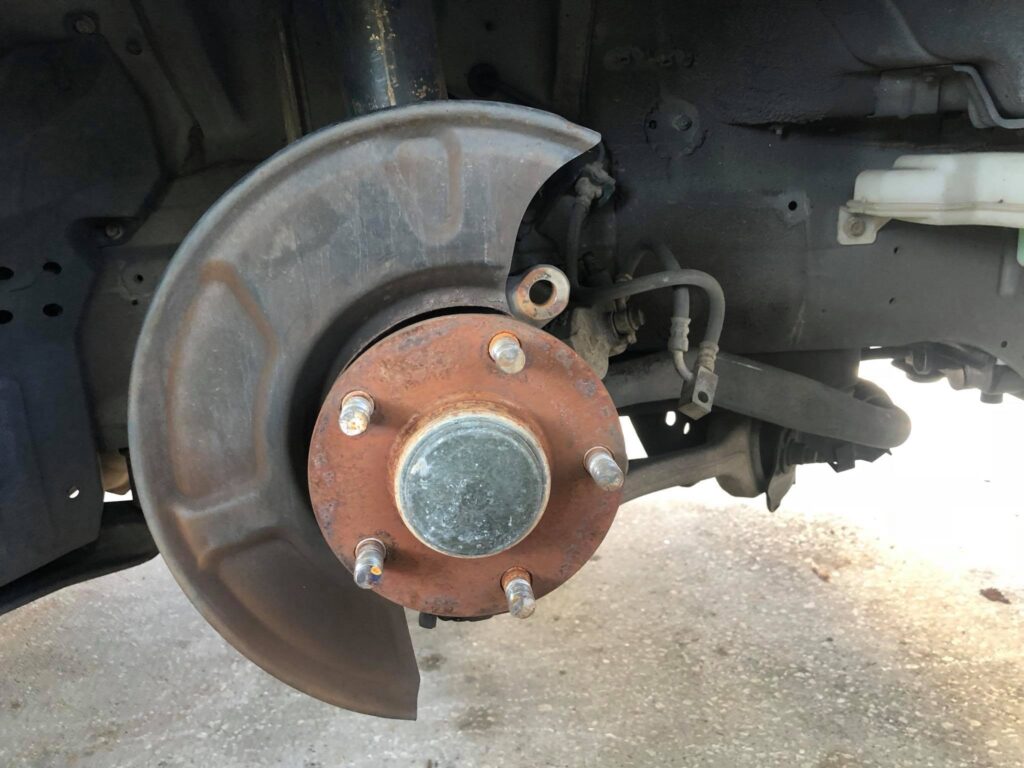
Fitment Mods: The brake dust shield had to be removed for clearance. Steel braided brake lines were also added.
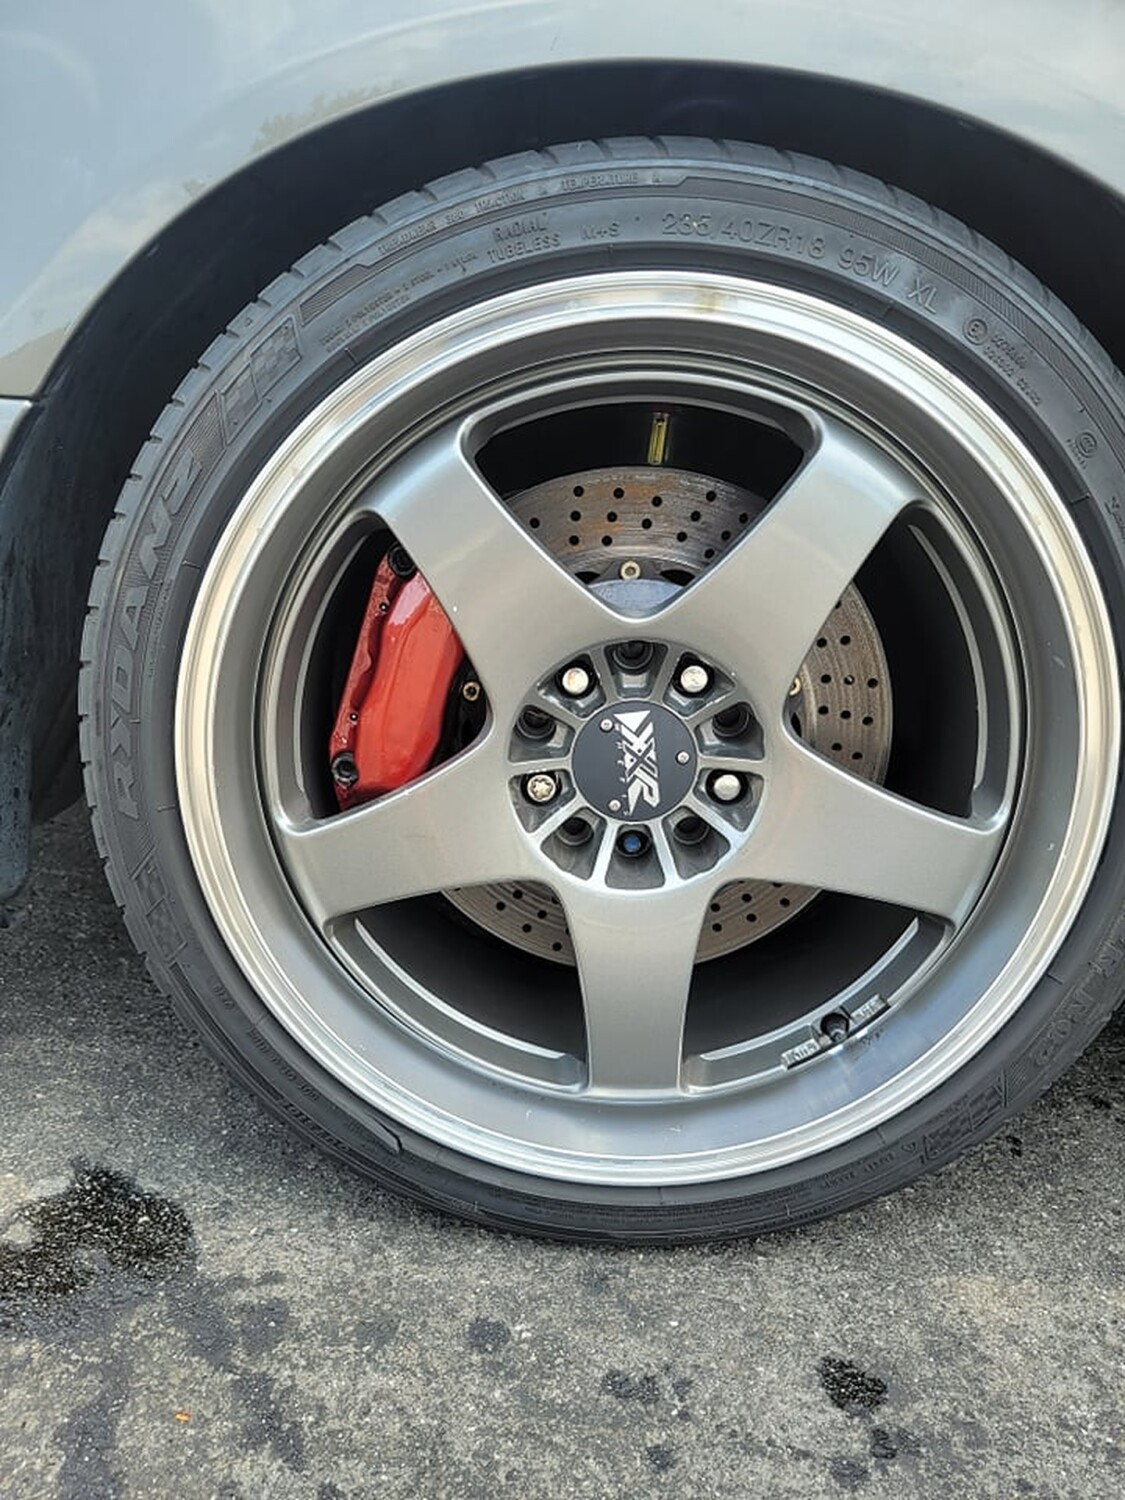
Wheel Fitment: On the i30krab, the kit cleared 17″ Volk wheels. On my current setup, 18″ wheels with +35 offset clear with room to spare.
Caliper Work: I painted the calipers with two layers of G2 epoxy paint. I actually split the calipers during the process (not really recommended). While doing that, I had to replace the separator O-ring for the brake fluid transfer port. I lost one and ended up sourcing replacements — New Provisions Racing O-rings for 2004–2017 STI Brembos worked perfectly.
Overall, this is a great kit. I’m still researching more details since some info I gathered came from old sale posts, so specs may vary slightly depending on the exact kit.
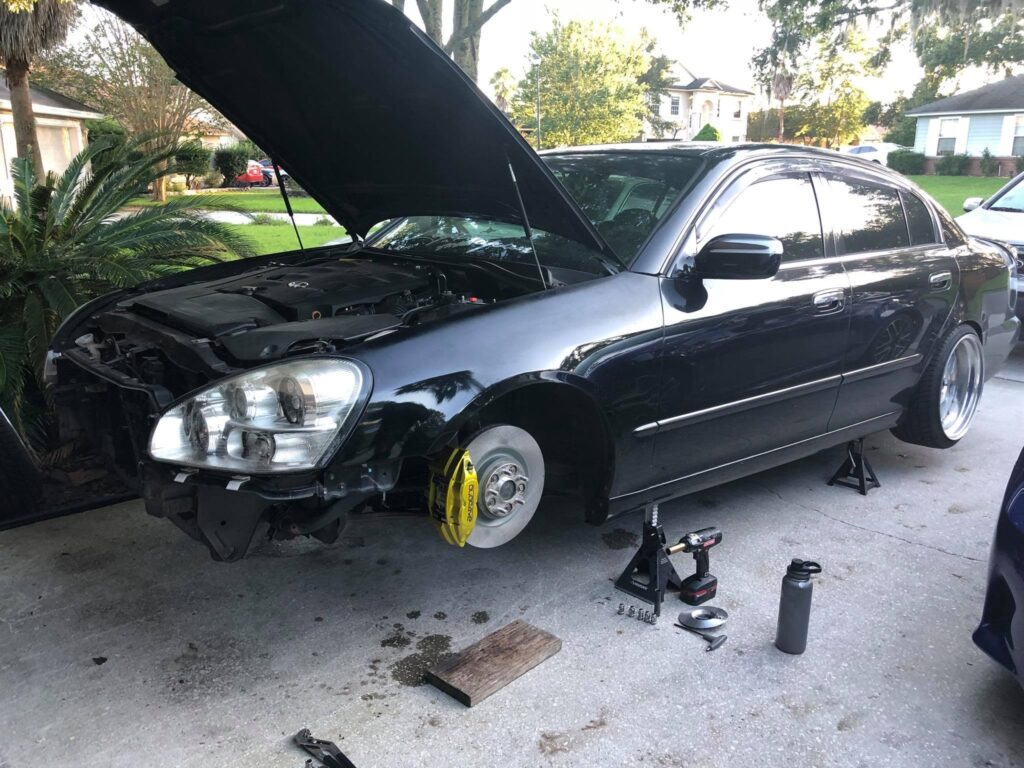
Ryan Watson got some new 370Z/G37 Akebono 4Piston 14” Rotor Upgrades with StopTech SS lines on his 2004 Infiniti Q45. Today ima show you step by step on how to do this upgrade to your F50 (This applies to all 2002-2006 Q45’s).
Parts needed for the swap are:
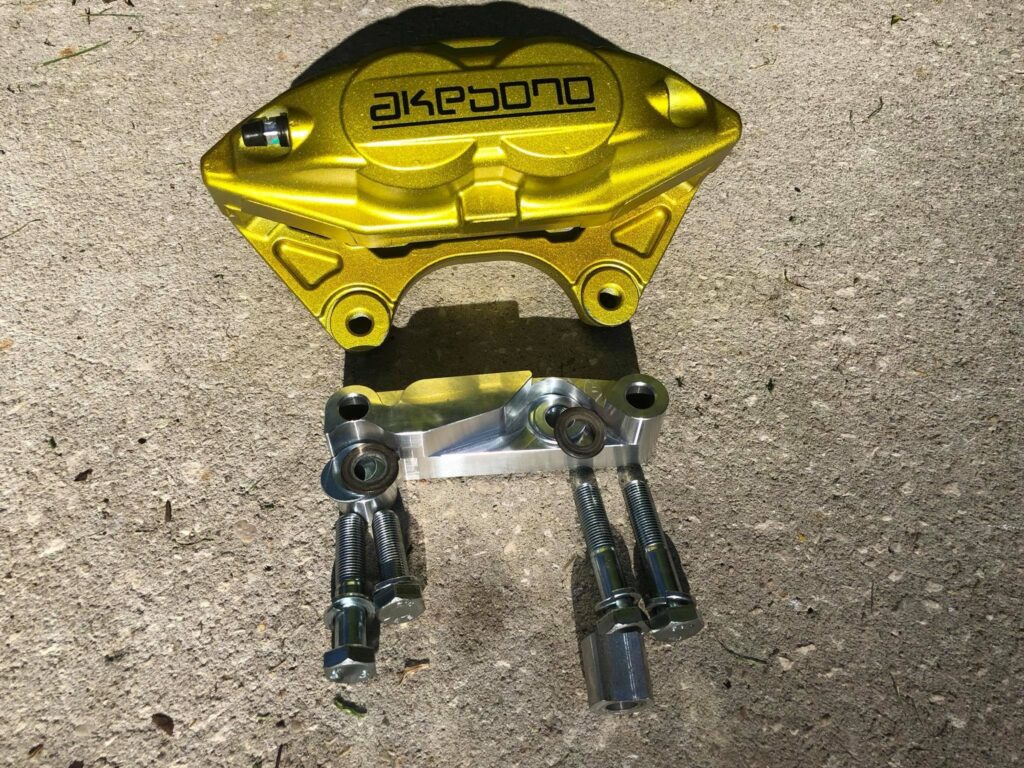
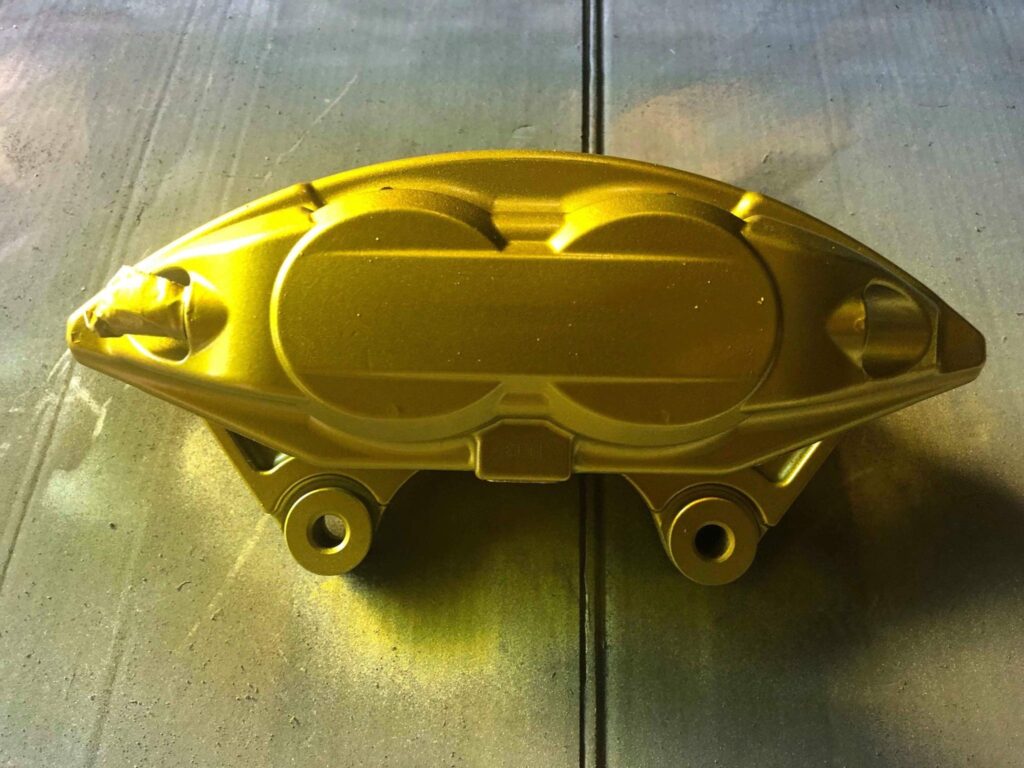
2009+ 370Z or 2009+ G37 Akebono Sport calipers.
2009+ 370Z or 2009+ G37 Sport Rotors
2009+ 370Z or 2009+ G37 Sport SS Brake lines.
350Z/G35 Akebono Caliper Brake Adapters
Brake Fluid
Brake Cleaner
I set up the picture in reverse order from Finish to Start. So you wanna start off by:
Remove the 2 – 14mm bolts holding your stock calipers on to your rotor brackets. Then slide the Caliper off and put them to the side.
Remove your stock brake pads. (some people leave them on and just remove the whole rotor bracket off with them.
Use a 22mm or 7/8 socket/wrench to remove the 2 – 22mm bolts holding on to your rotor brackets off your spindle. Then remove the bracket all together.
Remove the Rotors (11.4” inch diameter rotor).
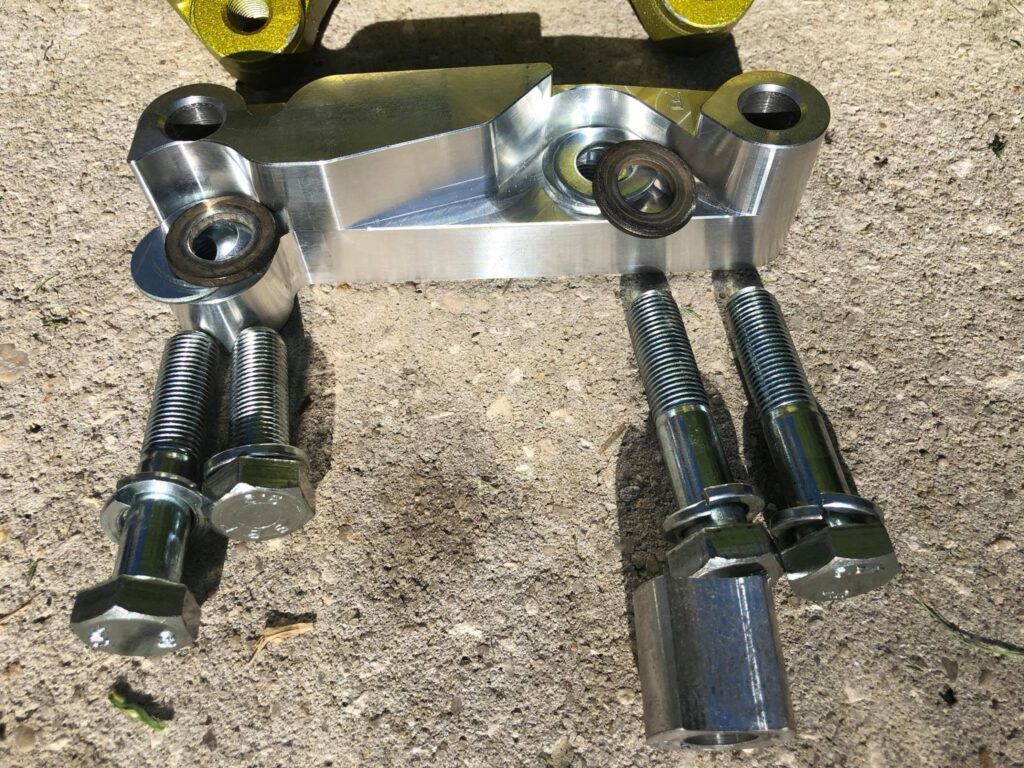
Before putting on the brake calipers adapter, you will need to setup your washers. Each bolt uses 1 crush washer. The brake adapter comes with 2 washers for each spindle bolt.
Mount your brake caliper adapters on using the new hardware supplied.
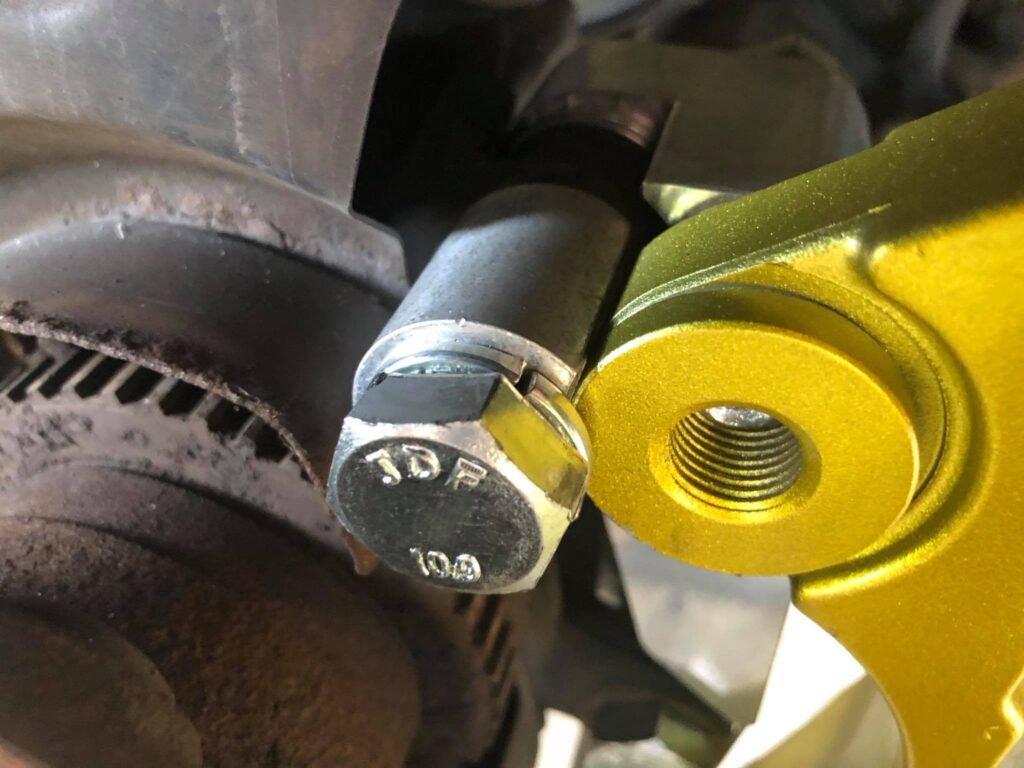
THIS PART IS IMPORTANT, the kit only comes with 2 washer per spindle bolt. YOU WILL NEED 3 WASHERS IN ORDER TO MAKE THE ADAPTER FLUSH WITH YOUR SPINDLE! RE-USE THE WASHER THATS ON YOUR 22mm SPINDLE NUT! (from step #3). THE WASHERS GO BEHIND THE SPINDLE, INBETWEEN ADAPTER AND SPINDLE. If your vehicle did not have the washer, you will need to get a 3rd washer. (If you do not add the 3rd washer the caliper won’t be aligned to the spindle and it will make your rotors scrape the caliper and a loud grinding noise).
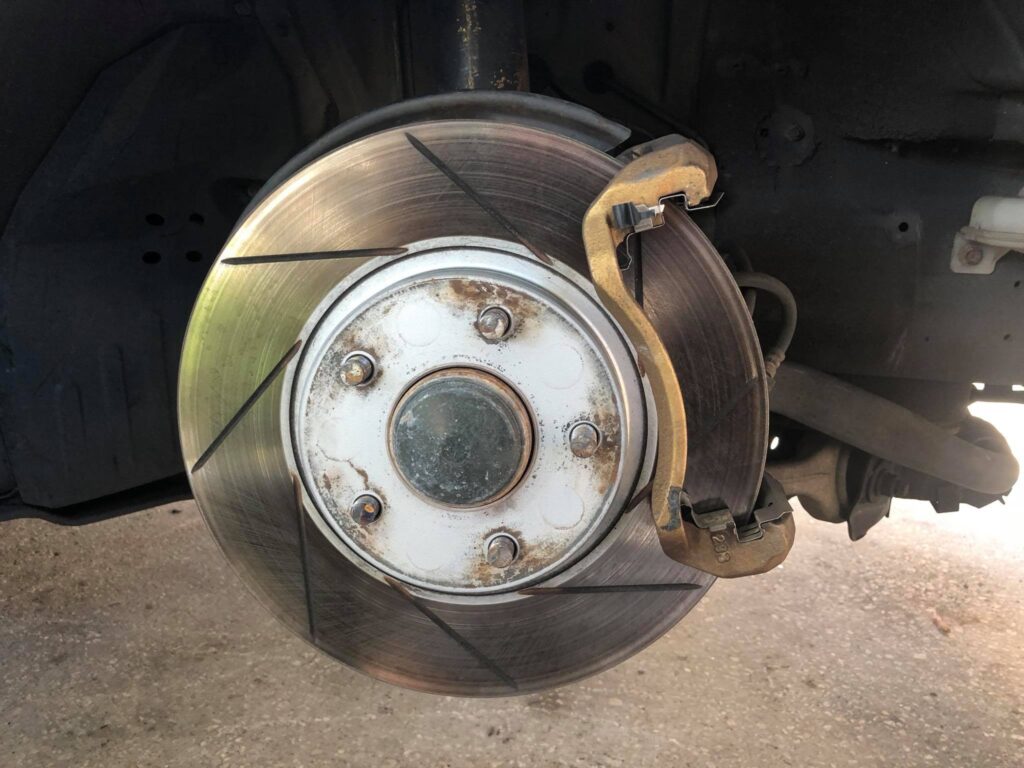
There is a Half Moon included in the kit. You will have to Align the half moon with the caliper to properly mount the caliper on to the Adapter. You will do this by mounting the caliper WITHOUT THE ROTOR. Then tighten the 22mm bolt on.
The Adapter comes with a shorter bolt, the shorter bolts goes on the bottom bolt for the Spindle.
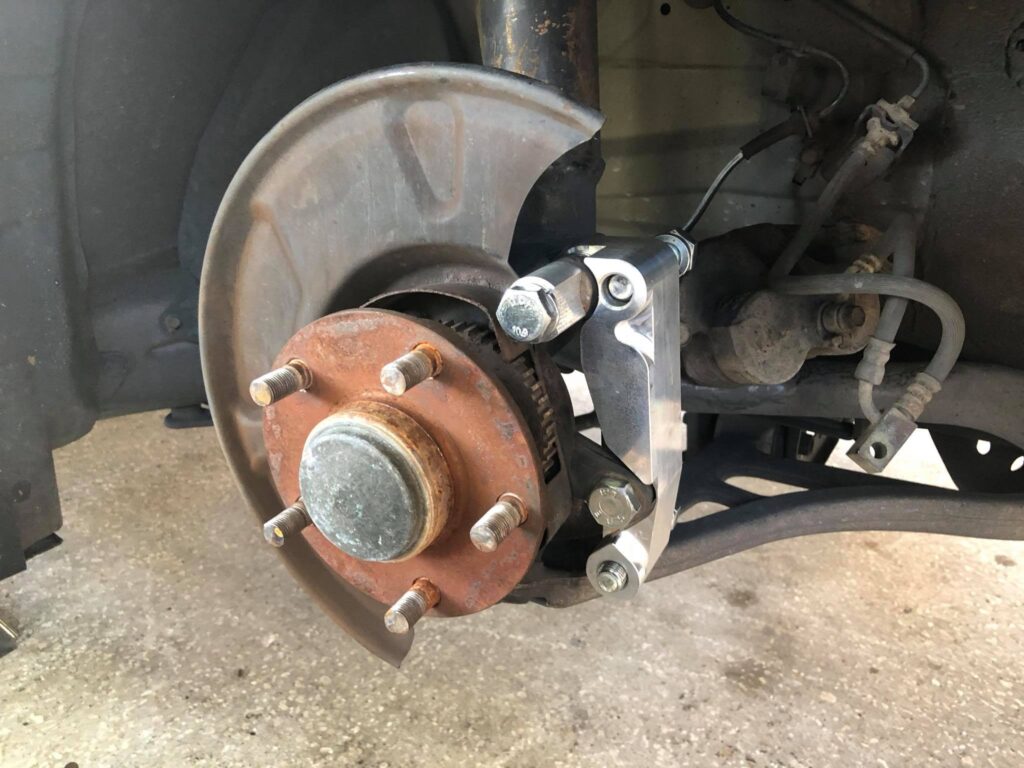
Bend and push the Heat shield. Just far back enough so it doesn’t rub against the rotor.
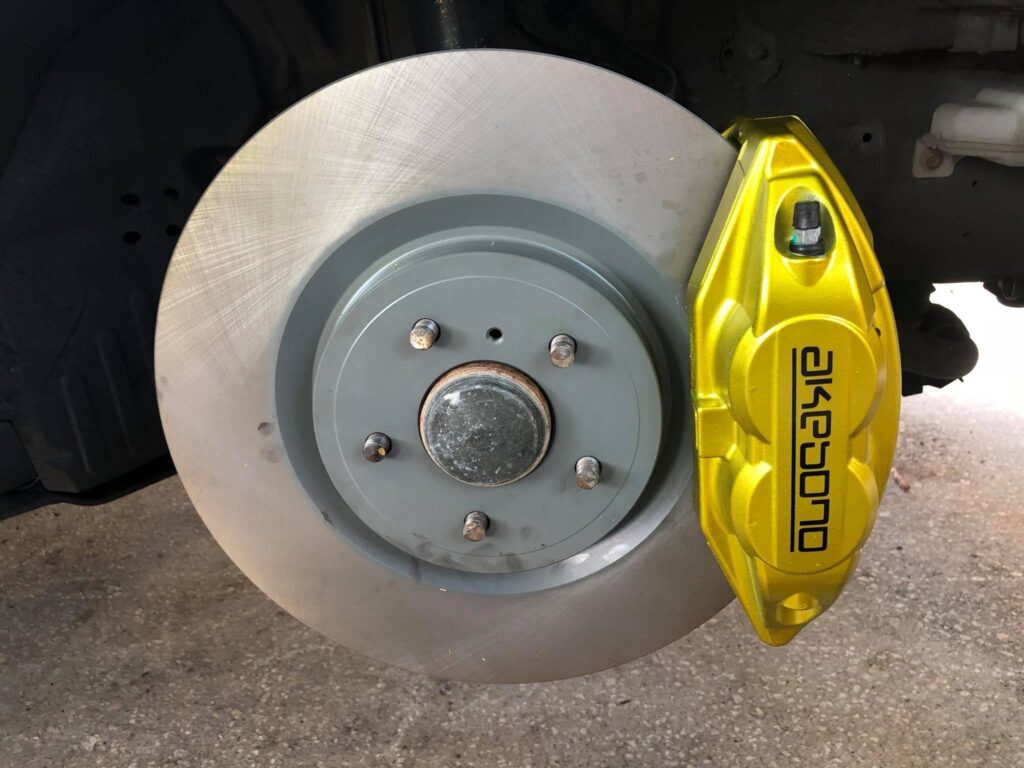
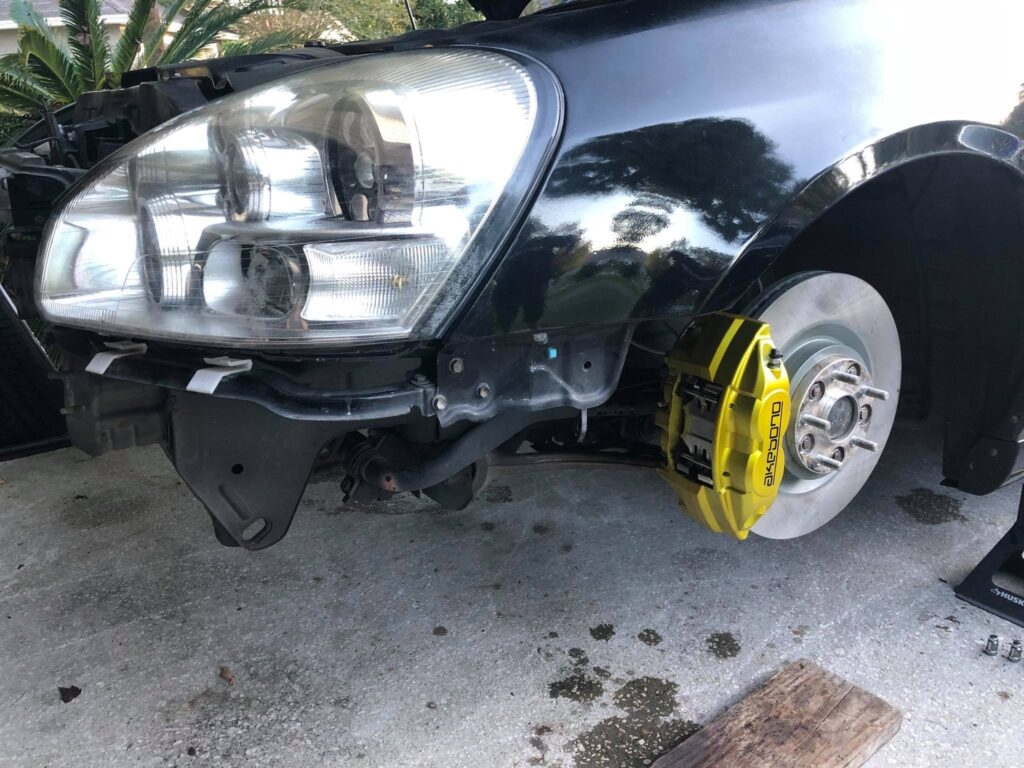
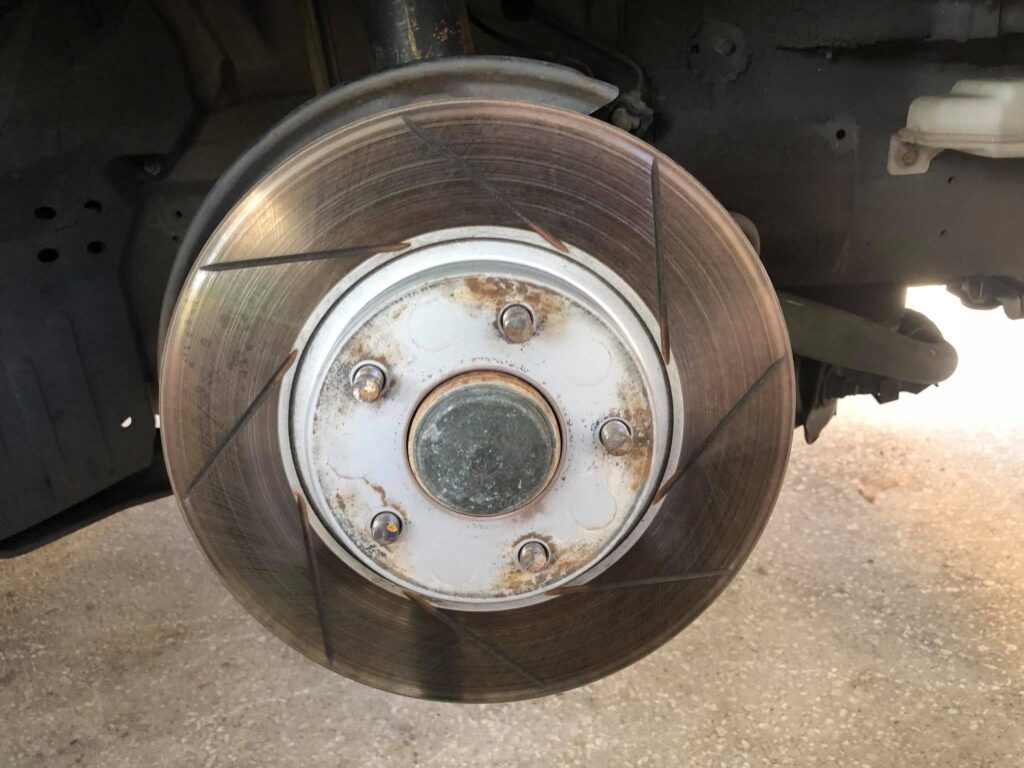
Install your Rotors. (14” inch diameter rotor)
Install your calipers using the new bolts with the adapter kit.
Remove the C Clíp on your brake line hardline.
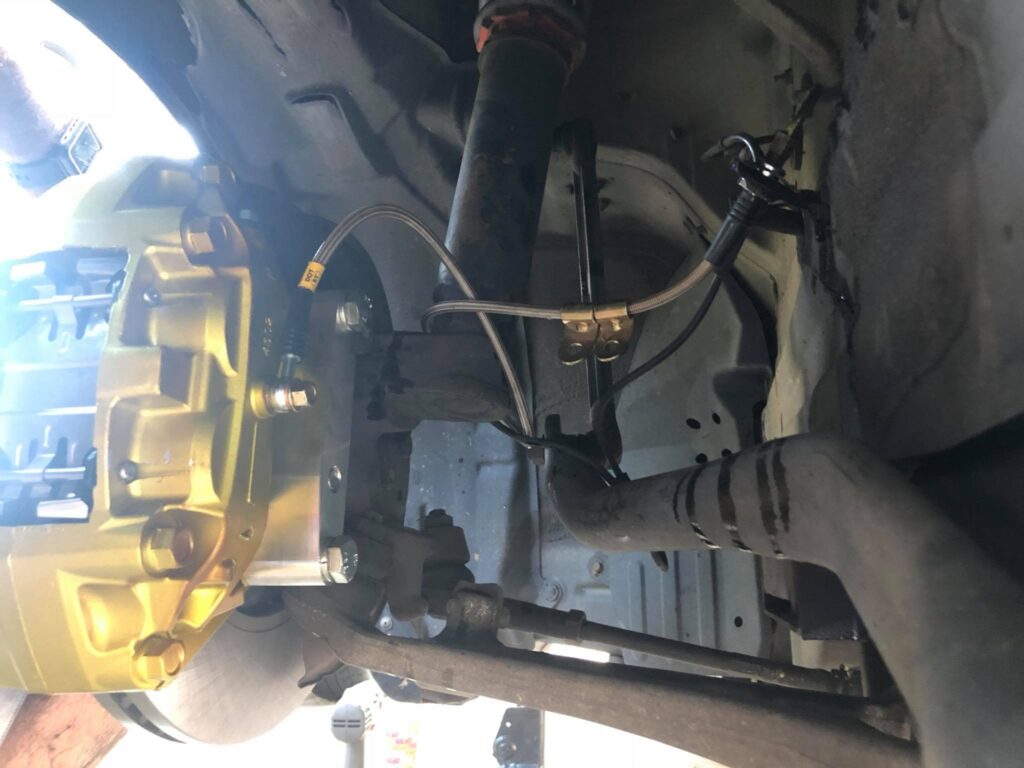
Separate the Soft brake line from your Hard brake line by using a 10mm wrench.
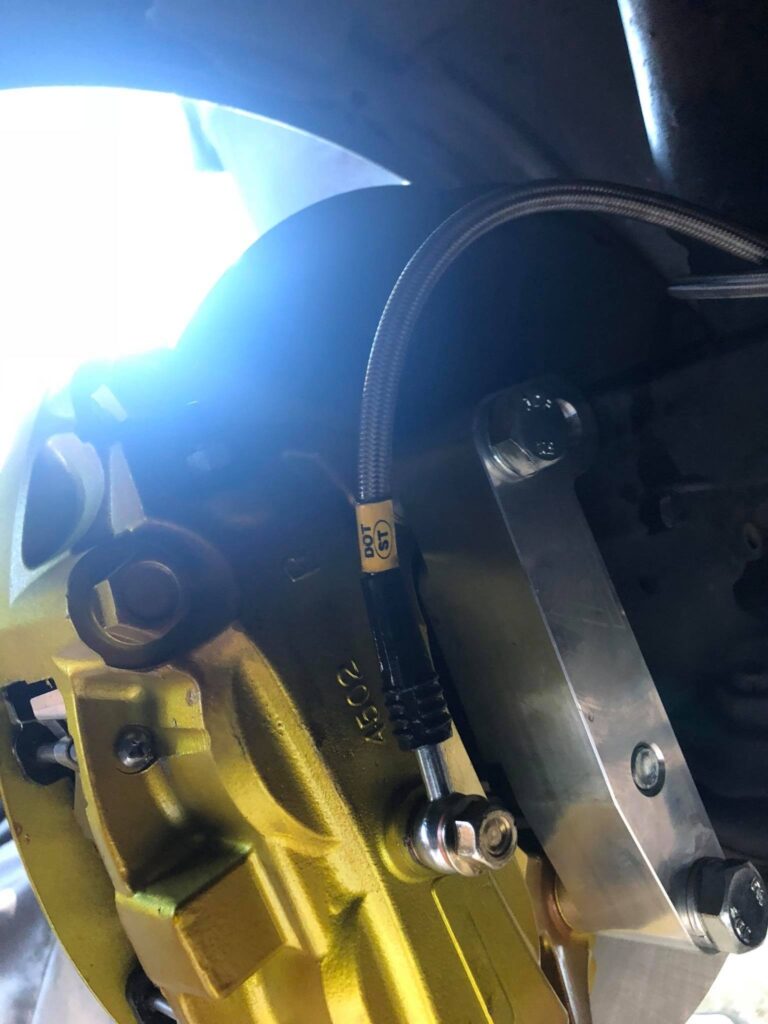
Install your new SS 370Z/G37 brake like on your Hard Brake line using a 10mm wrench and 12mm on the caliper side. 2 copper washers on each side of the Banjo bolt.
Install your brake pads, Brake pad hardware, pins and clips.
Bleed all 4 brake calipers starting from the back passenger side, back driver side, Front passenger side and finally front driver side. (The Akebono calipers has 2 bleeders. Start bleeding the outside bleeder first and then bleed the inside closest to the engine last.)
Use Brake cleaner to clean your rotors from any grease on your fingers that may have gotten on the rotors.
Enjoy your new Akebono brakes!
Remove the 2 – 14mm bolts holding your stock calipers on to your rotor brackets. Then slide the Caliper off and put them to the side.
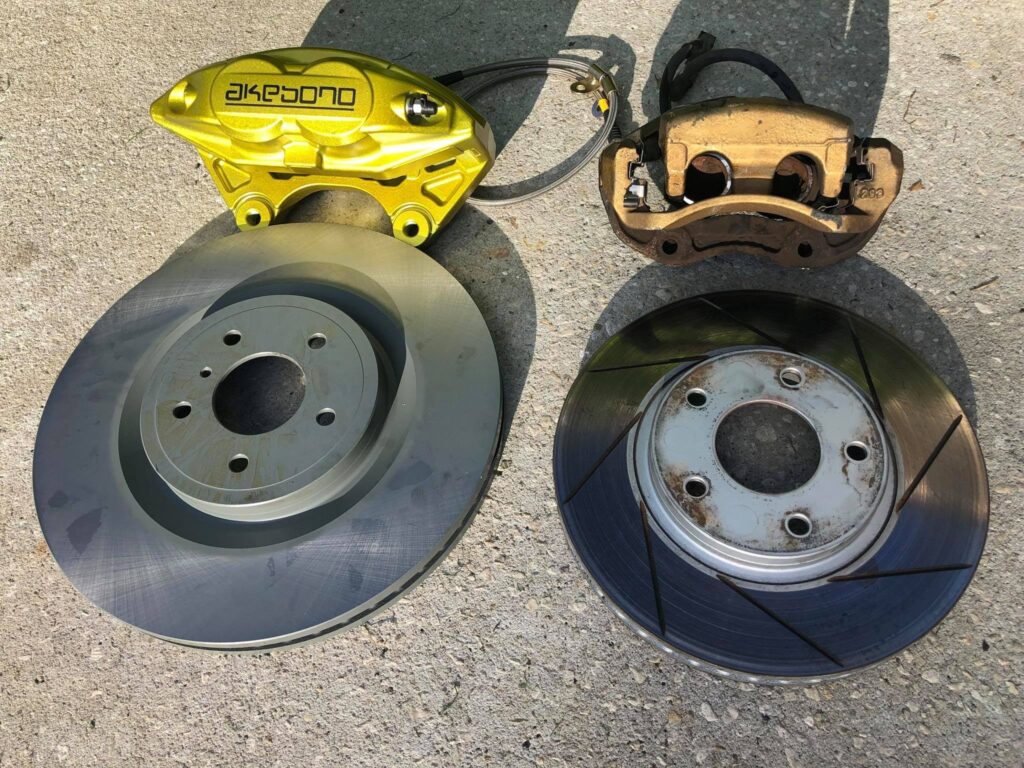
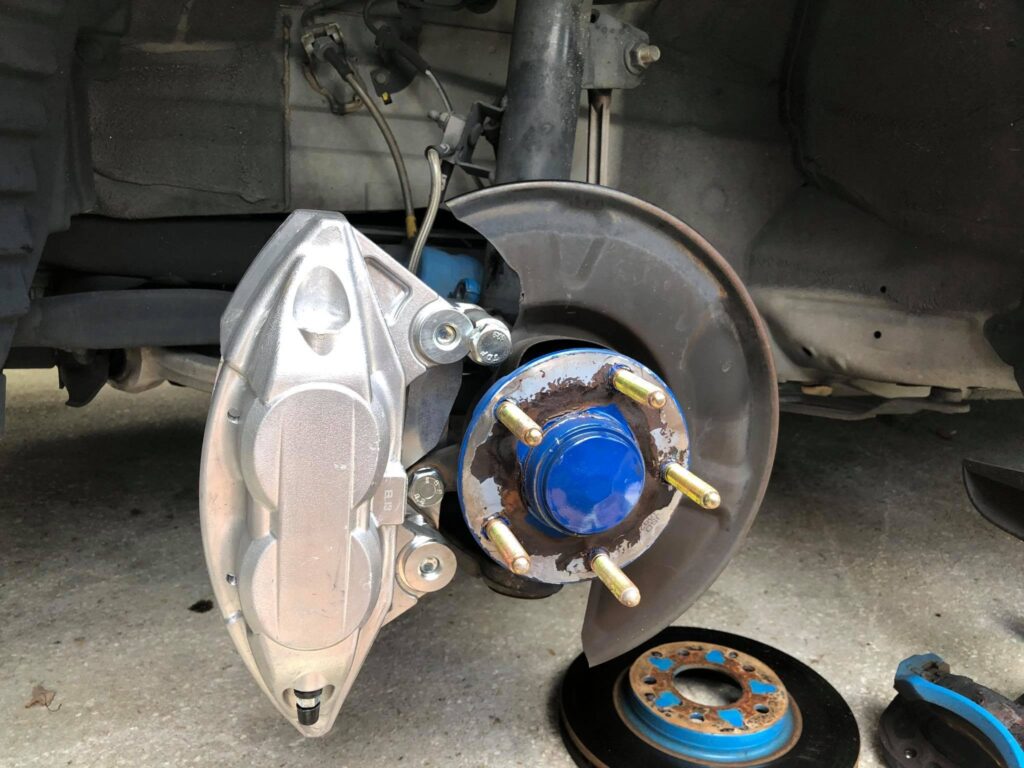
Side by Side comparison of the old F50 setup with the new Akebono Calipers and rotors.
Bleed all 4 brake calipers starting from the back passenger side, back driver side, Front passenger side and finally front driver side. (The Akebono calipers has 2 bleeders. Start bleeding the outside bleeder first and then bleed the inside closest to the engine last.)
Install your brake pads, Brake pad hardware, pins and clips.
Install your new SS 370Z/G37 brake like on your Hard Brake line using a 10mm wrench on the hard line and 12mm on the caliper side. 2 copper washers on each side of the Banjo bolt.
Remove the C Clíp on your brake line hardline. Separate the Soft brake line from your Hard brake line by using a 10mm wrench.
There is a Half Moon included in the kit. You will have to Align the half moon with the caliper to properly mount the caliper on to the Adapter. You will do this by mounting the caliper WITHOUT THE ROTOR. Then tighten the 22mm bolt on.
Mount your brake caliper adapters on using the new hardware supplied.
Mount the caliper without the rotor so you can align the half moon spacer. The Adapter comes with a shorter bolt, the shorter bolts goes on the bottom Bolt for the Spindle.
THIS PART IS IMPORTANT, the kit only comes with 2 washer per spindle bolt. YOU WILL NEED 3 WASHERS IN ORDER TO MAKE THE ADAPTER FLUSH WITH YOUR SPINDLE! RE-USE THE WASHER THATS ON YOUR 22mm SPINDLE NUT! (from step #3). THE WASHERS GO BEHIND THE SPINDLE, INBETWEEN ADAPTER AND SPINDLE. If your vehicle did not have the washer, you will need to get a 3rd washer. (If you do not add the 3rd washer the caliper won’t be aligned to the spindle and it will make your rotors scrape the caliper and a loud grinding noise).
Before putting on the brake calipers adapter, you will need to setup your washers. Each bolt uses 1 crush washer. The brake adapter comes with 2 washers for each spindle bolt. See less
Bend and push the Heat shield. Just far back enough so it doesn’t rub against the rotor.
Remove the Rotors (11.4” inch diameter rotor).
Remove your stock brake pads. (some people leave them on and just remove the whole rotor bracket off with them.
Use a 22mm or 7/8 socket/wrench to remove the 2 – 22mm bolts holding on to your rotor brackets off your spindle. Then remove the bracket all together.
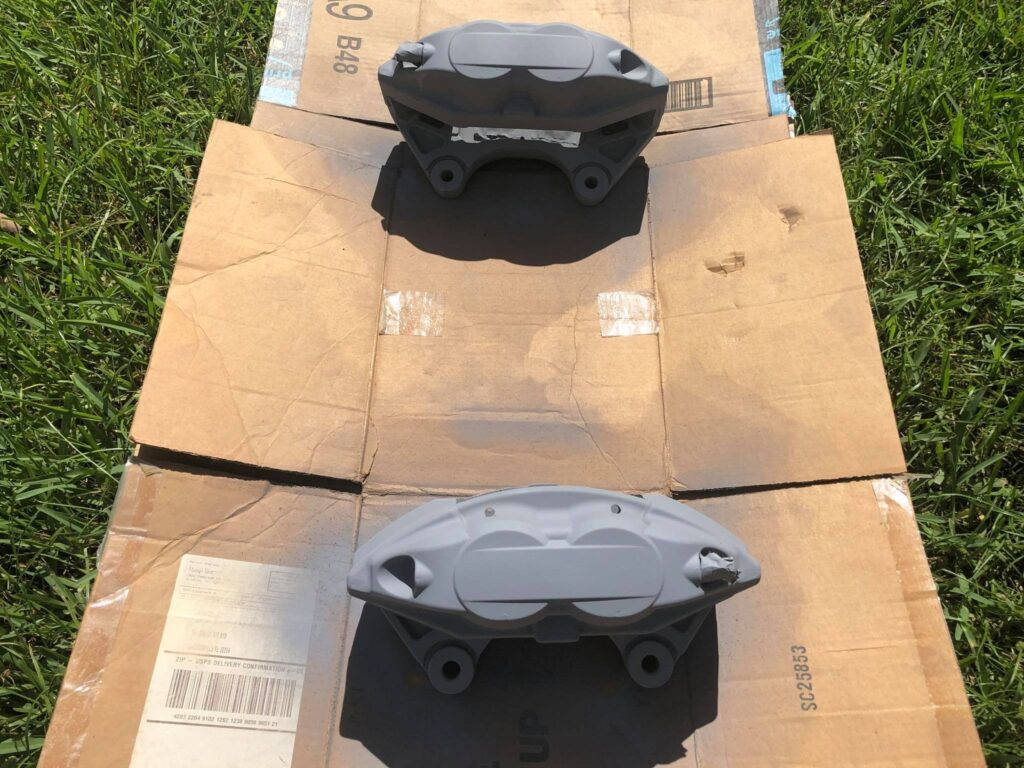
Calipers were painted Anodized Gold using High Temp Paint.
Calipers started the painting process with high temp primer.
Test Fitting the calipers on a different F50 prior to paint caliper painting.
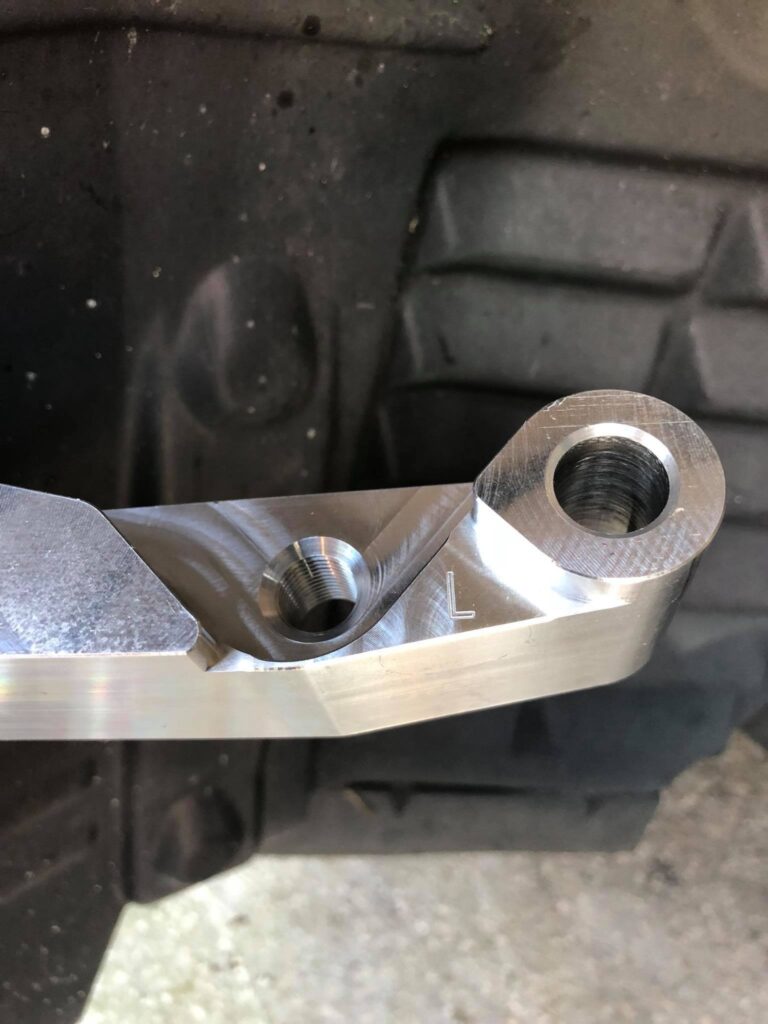
Each Caliper Adapter bracket is mark “L” and “R” for each side.
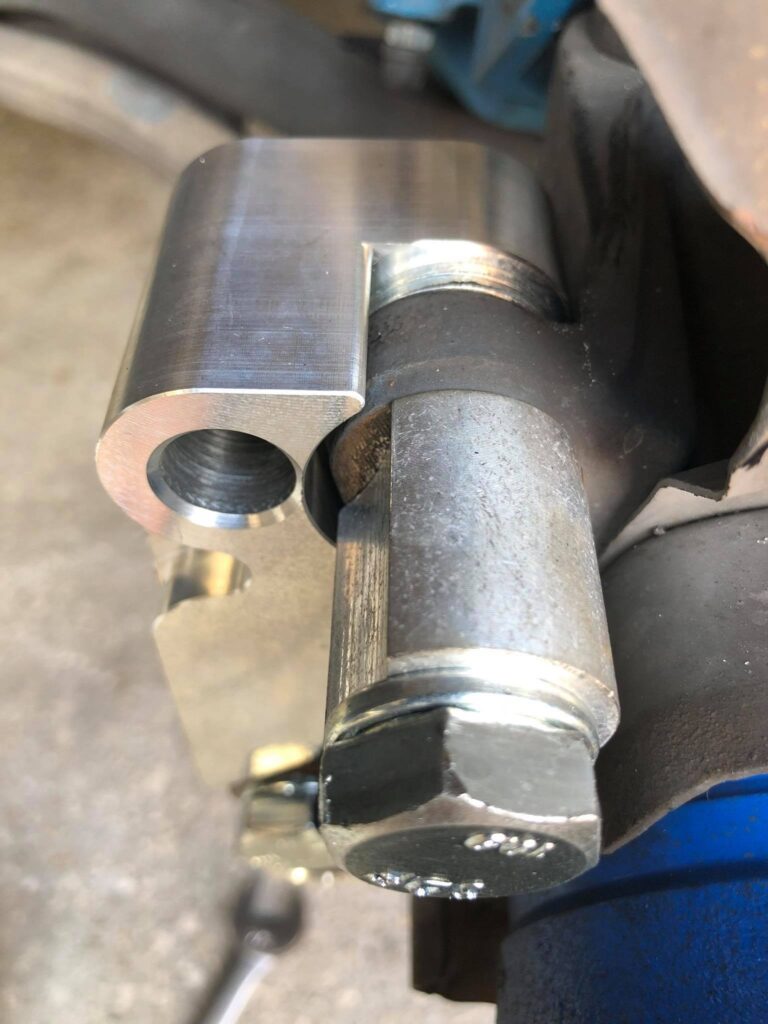
The 3 washers go BEHIND the spindle.
See in this picture the caliper Adapter brackets does not line up with the spindle using the 2 washers provided in the kit. You have add a 3rd washer to line it up with the spindle.
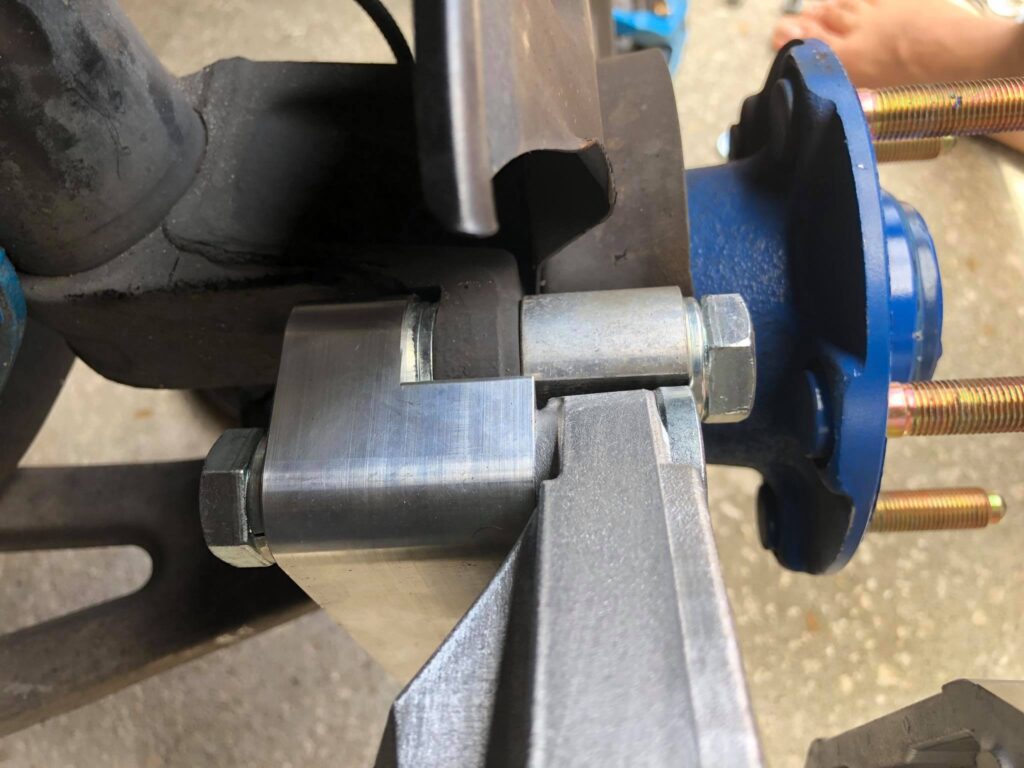
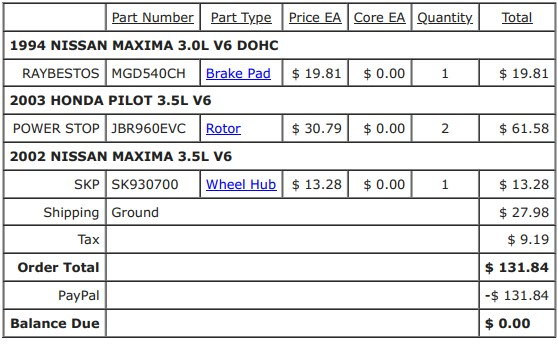
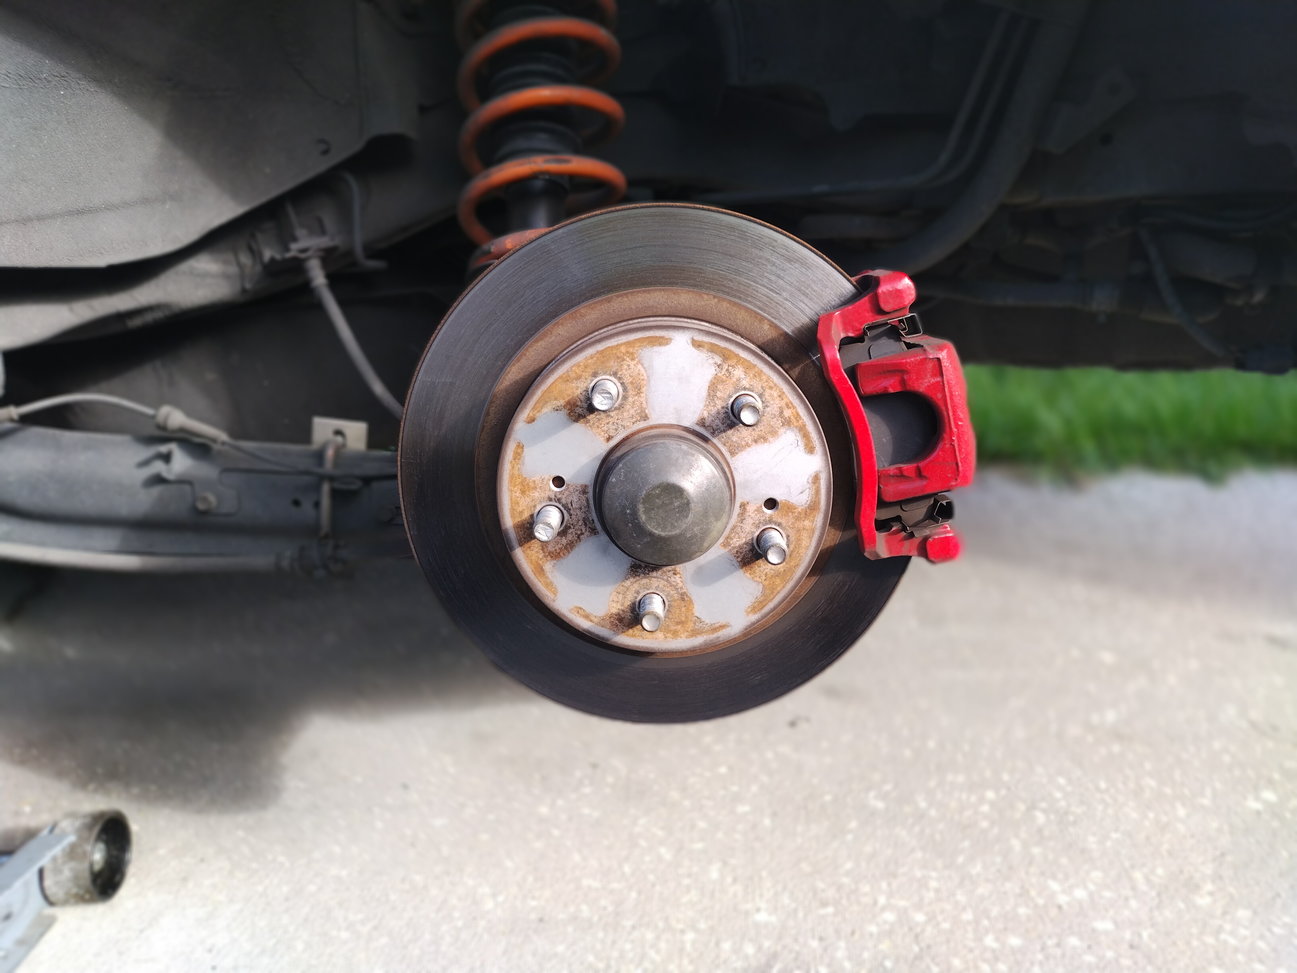
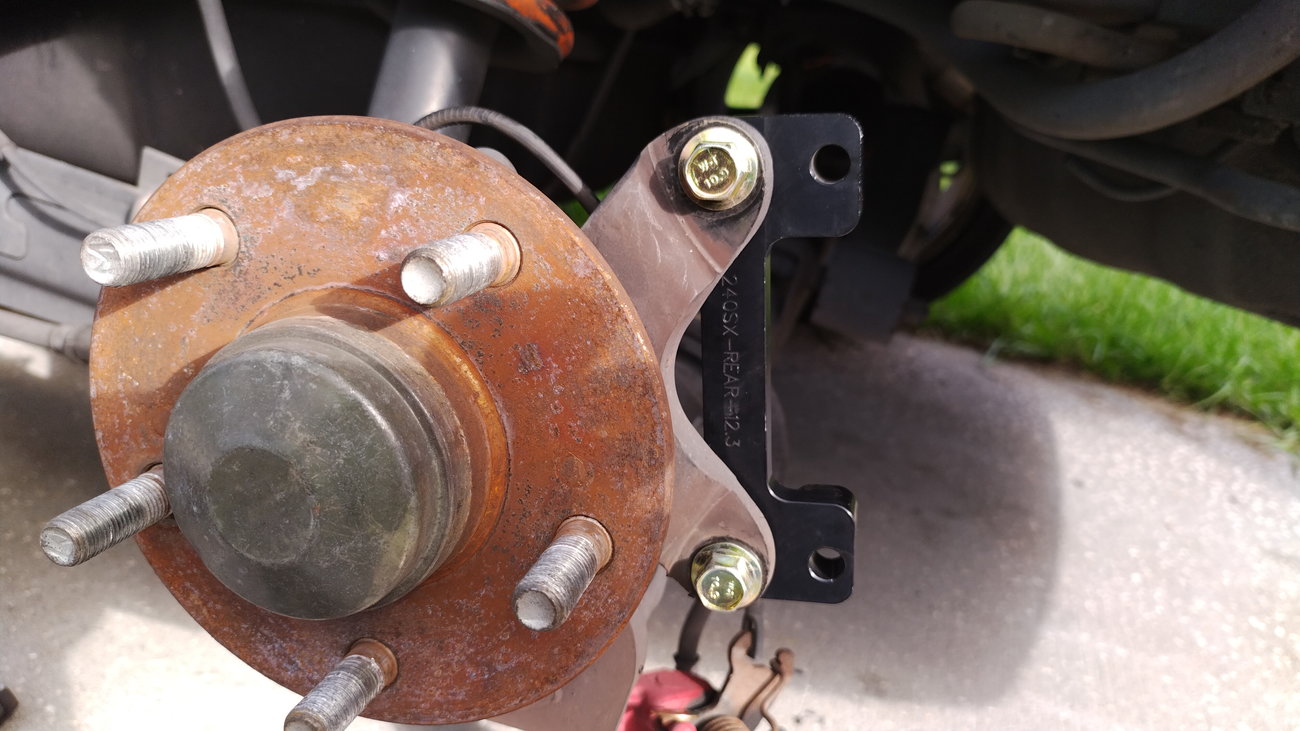
I just installed the Fastbrakes rear brake kit on my 02 SE. between all the parts, machining and the Fastbrakes bracket that I purchased individually, it all came out to $437.07. Fastbrakes bracket was engraved with 240SX-REAR-12.3″ but fit perfect with proper shimming.
Stock is 278mm ( 10.9″) and the new rotors are 312mm (12.3″) my fronts are 320mm (12.6″) 6th gen brakes.
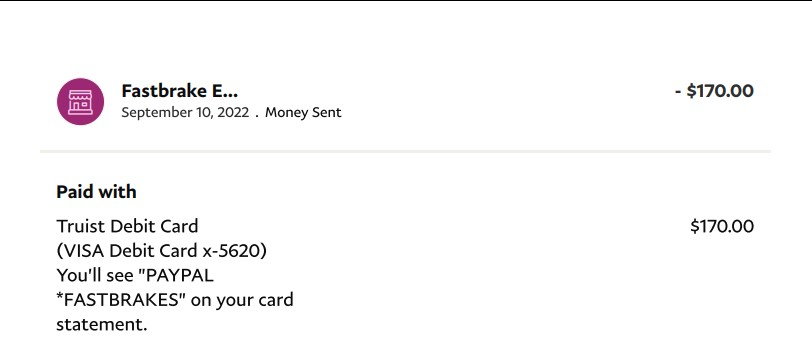
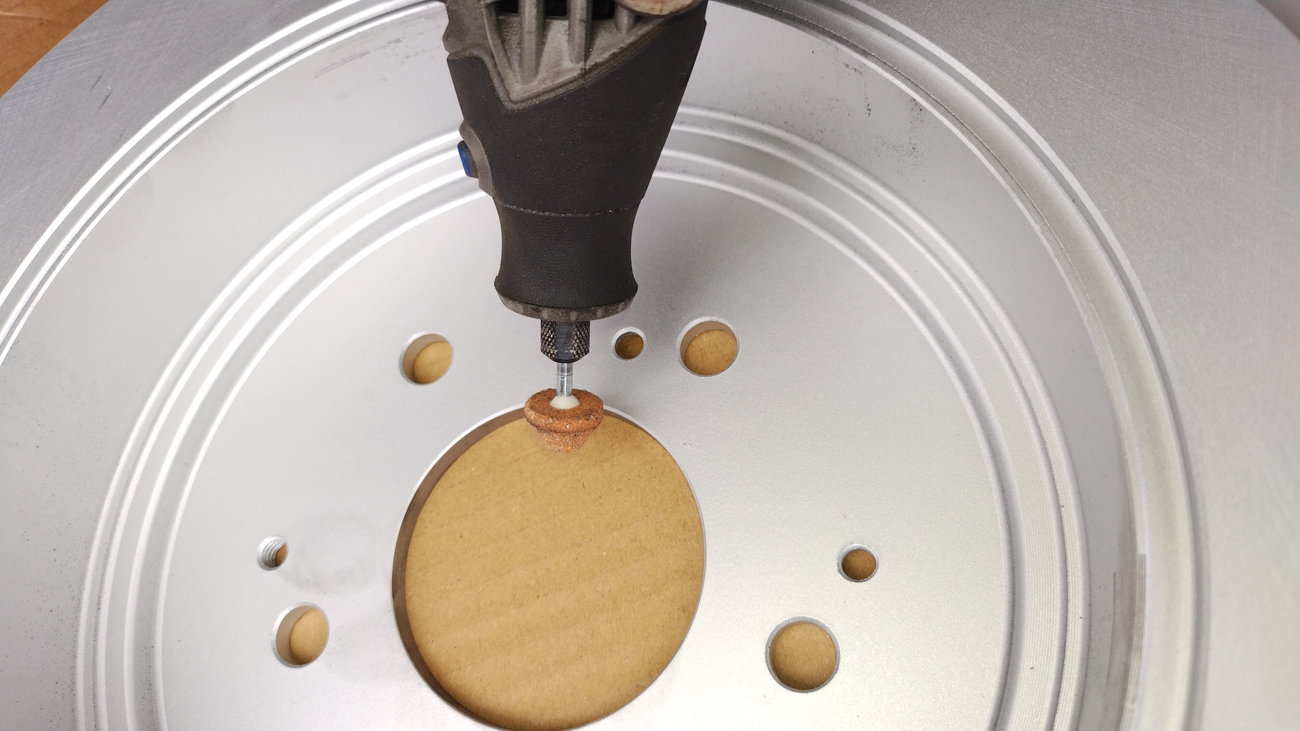
I’ll post up receipt pics. on op top of that, i paid $85 for machine shop to bore the rotor center out and sandblast my 94 caliper brackets for painting. I also ordered a wheel hub for the machine shop to size up the center hub to the rotors….
I don’t think the machine shop tested the fit of the rotor on the hub when they machined them. I had to open up the inner part of the bore hole so the rotor would seat properly to the hub.
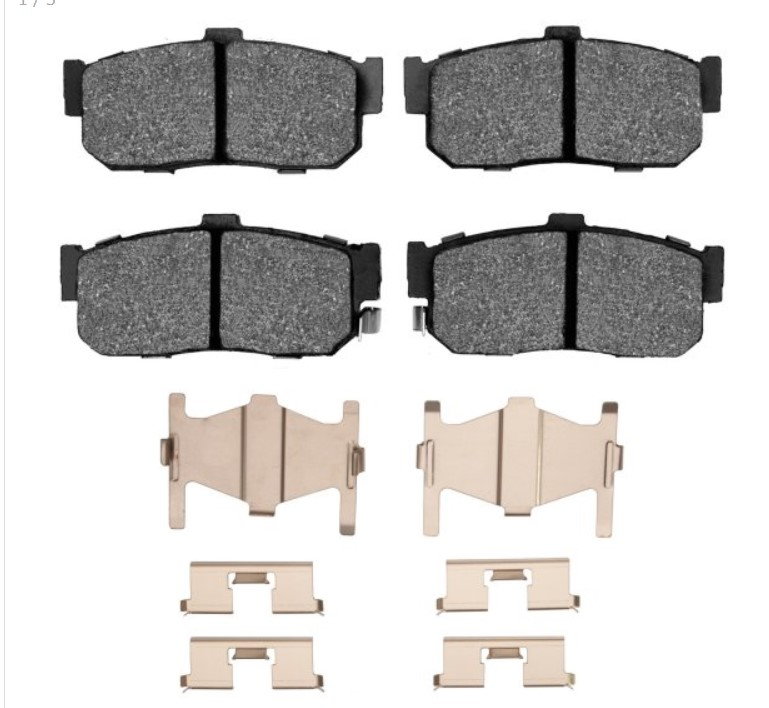
1994 pads are different along with the hardware which will all be used.
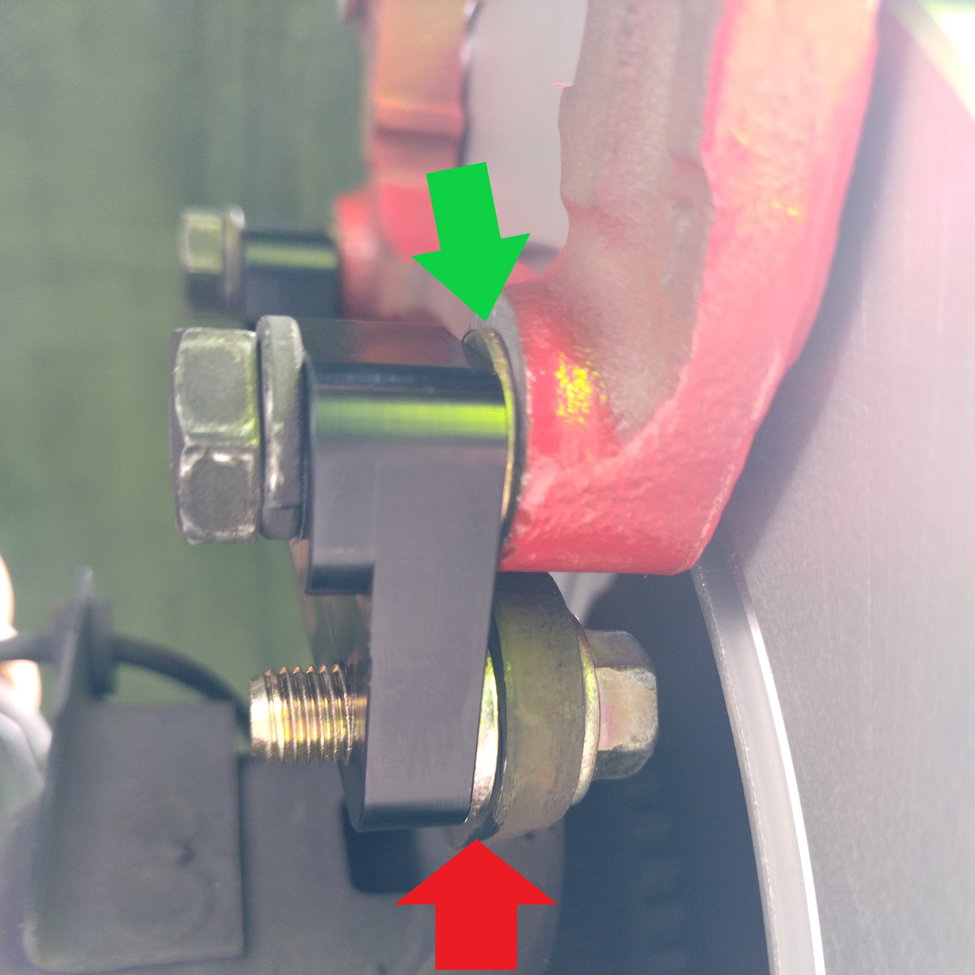
The green arrow is pointing to the washer that was supplied and the red arrow is the 1 of 4 thicker washers that were supplied.
The parking brake cables will have to be unbolted from the trail arm and bolted back on once the parking brake cable is attached back to the caliper…
Modify the Dust Shield: Trim the dust shield behind the rotors to allow for caliper clearance, then bend it back slightly to ensure it doesn’t interfere with the new setup.
Avoid 350Z Rotors: Although 13.5” 350Z rotors will technically fit, they leave about a half-inch of pad overhang, which results in incomplete pad contact. Use 370Z Sport Rotors: Opt for the 14” 370Z Sport Rotors to achieve full pad contact and perfect fitment in the calipers. (Photo will be posted to show the fit.)
For 18” Wheels: You may need to shave down the corners of the calipers to prevent rubbing on the wheel barrel. For 19” Wheels: No modifications should be needed, as they offer enough clearance. Note: I kept my 350Z wheels and chose to shave down the calipers to ensure clearance. Now there’s just enough space to fit a credit card between the caliper and barrel.
Attach OEM Brake Line: The OEM brake line will connect to the 370Z calipers without any additional modifications.
Choose Compatible Brake Pads: I used the OEM 370Z pads that came with the calipers, but you can use any 370Z Sport pad compatible with Akebono calipers.
Although this setup may have been done before, I wanted to provide a comprehensive guide for anyone looking to upgrade their 4th-gen Maxima brakes with Akebono calipers, as most previous write-ups only cover Brembo installs.
For anyone curious, the Akebono Nissan 370z front calipers can be directly attached to the 370z rotor. However, you will need a substantial wheel spacer as the caliper contacts the SR turbo wheels.
A minor modification to the dust shield is necessary. I think the brake line is compatible, but I didn’t proceed to that point because when I checked the wheel clearance, I realized a large spacer was required to fit the stock wheels.