

Last Updated: 09/07/2025 @ 06:47 am
Community Member Credit: Rico R.
Ryan Watson got some new 370Z/G37 Akebono 4Piston 14” Rotor Upgrades with StopTech SS lines on his 2004 Infiniti Q45. Today ima show you step by step on how to do this upgrade to your F50 (This applies to all 2002-2006 Q45’s).
Parts needed for the swap are:
- 2009+ 370Z or 2009+ G37 Akebono Sport calipers.
- 2009+ 370Z or 2009+ G37 Sport Rotors
- 2009+ 370Z or 2009+ G37 Sport SS Brake lines.
- 350Z/G35 Akebono Caliper Brake Adapters
- Brake Fluid
- Brake Cleaner
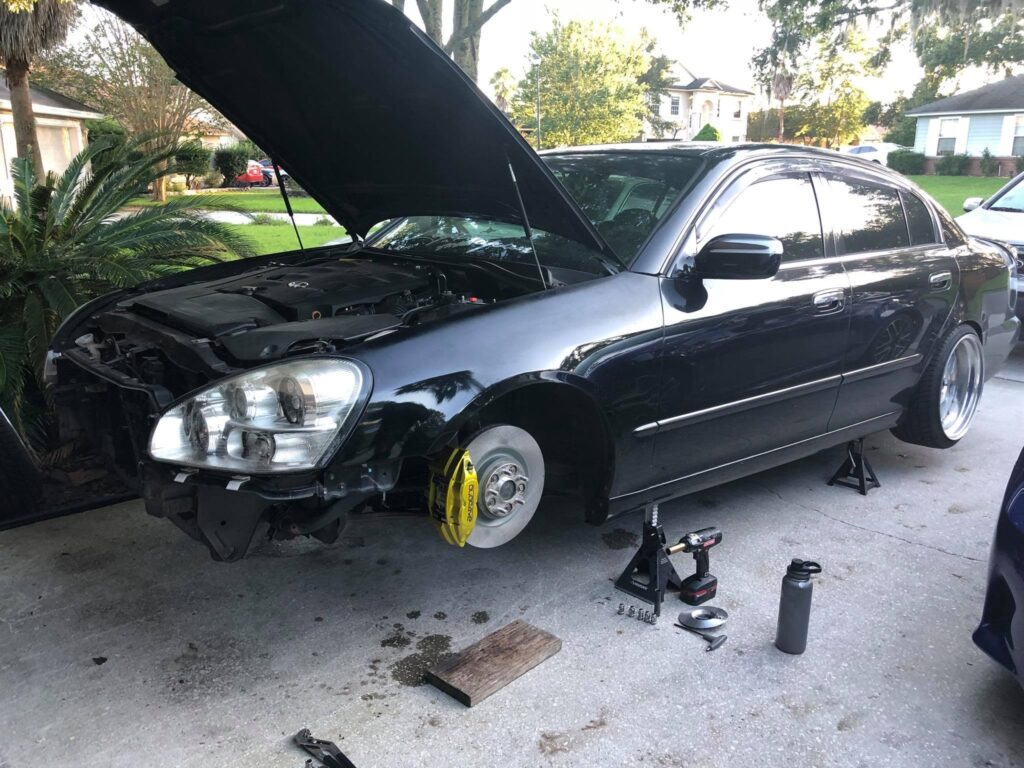
I set up the picture in reverse order from Finish to Start. So you wanna start off by:
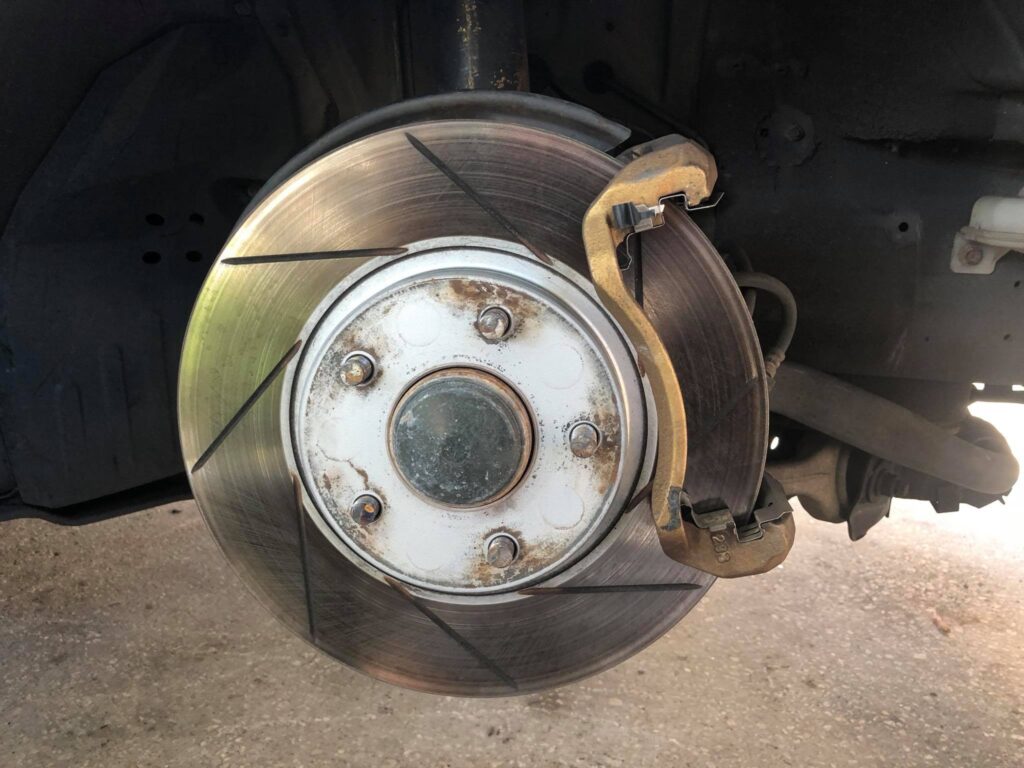
- Remove the 2 – 14mm bolts holding your stock calipers on to your rotor brackets. Then slide the Caliper off and put them to the side.
- Remove your stock brake pads. (some people leave them on and just remove the whole rotor bracket off with them.
- Use a 22mm or 7/8 socket/wrench to remove the 2 – 22mm bolts holding on to your rotor brackets off your spindle. Then remove the bracket all together.
- Remove the Rotors (11.4” inch diameter rotor).
- Before putting on the brake calipers adapter, you will need to setup your washers. Each bolt uses 1 crush washer. The brake adapter comes with 2 washers for each spindle bolt.
- Mount your brake caliper adapters on using the new hardware supplied.
- THIS PART IS IMPORTANT, the kit only comes with 2 washer per spindle bolt. YOU WILL NEED 3 WASHERS IN ORDER TO MAKE THE ADAPTER FLUSH WITH YOUR SPINDLE! RE-USE THE WASHER THATS ON YOUR 22mm SPINDLE NUT! (from step #3). THE WASHERS GO BEHIND THE SPINDLE, INBETWEEN ADAPTER AND SPINDLE. If your vehicle did not have the washer, you will need to get a 3rd washer. (If you do not add the 3rd washer the caliper won’t be aligned to the spindle and it will make your rotors scrape the caliper and a loud grinding noise).
- There is a Half Moon included in the kit. You will have to Align the half moon with the caliper to properly mount the caliper on to the Adapter. You will do this by mounting the caliper WITHOUT THE ROTOR. Then tighten the 22mm bolt on.
- The Adapter comes with a shorter bolt, the shorter bolts goes on the bottom bolt for the Spindle.
- Bend and push the Heat shield. Just far back enough so it doesn’t rub against the rotor.
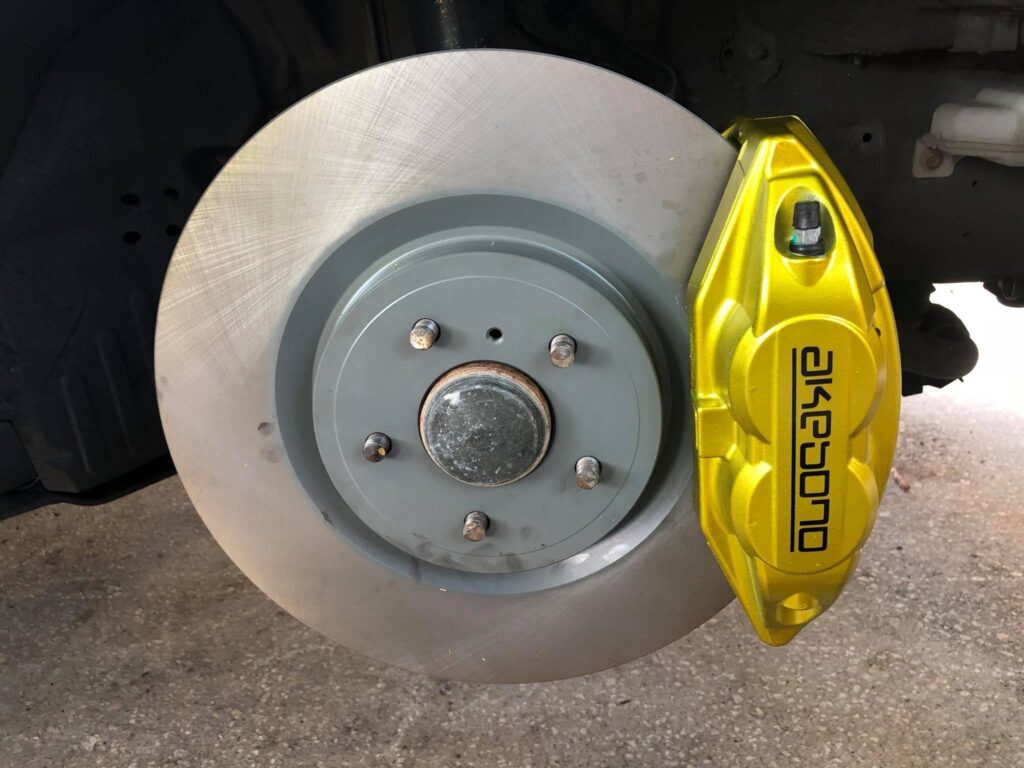
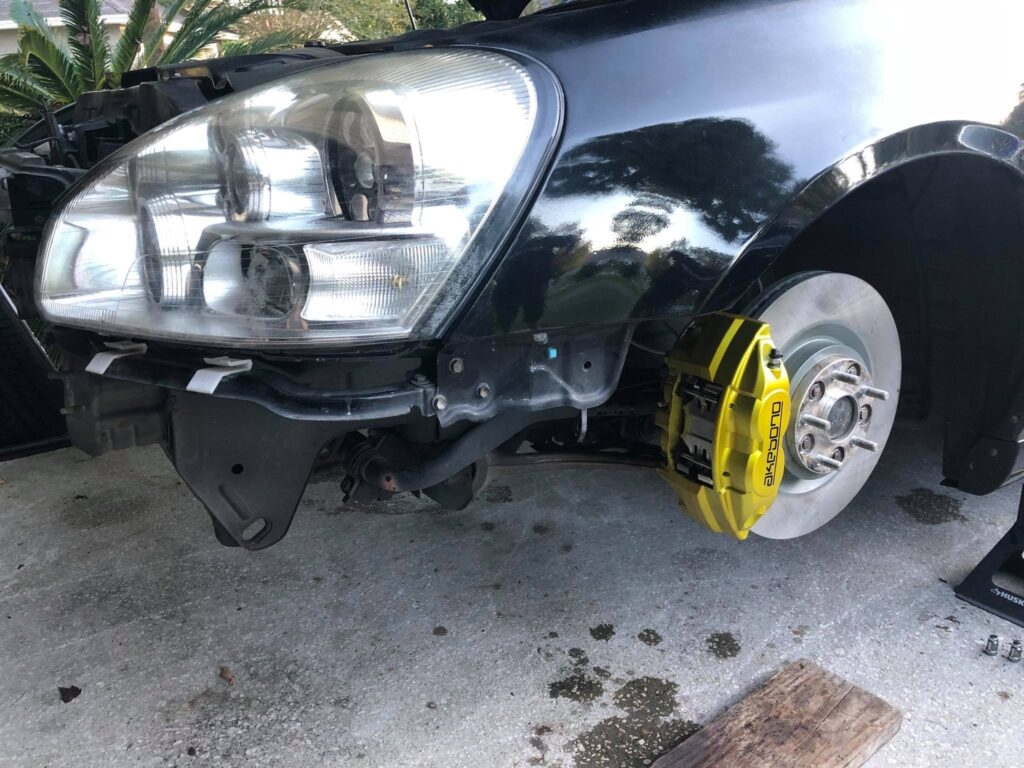
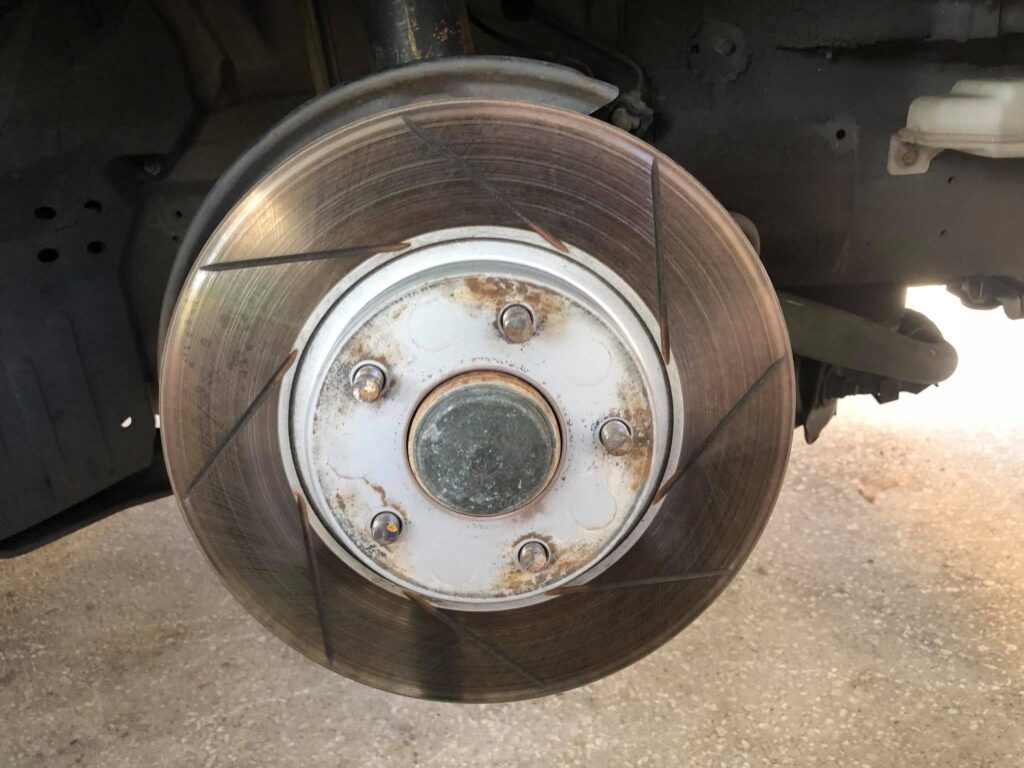
- Install your Rotors. (14” inch diameter rotor)
- Install your calipers using the new bolts with the adapter kit.
- Remove the C Clíp on your brake line hardline.
- Separate the Soft brake line from your Hard brake line by using a 10mm wrench.
- Install your new SS 370Z/G37 brake like on your Hard Brake line using a 10mm wrench and 12mm on the caliper side. 2 copper washers on each side of the Banjo bolt.
- Install your brake pads, Brake pad hardware, pins and clips.
- Bleed all 4 brake calipers starting from the back passenger side, back driver side, Front passenger side and finally front driver side. (The Akebono calipers has 2 bleeders. Start bleeding the outside bleeder first and then bleed the inside closest to the engine last.)
- Use Brake cleaner to clean your rotors from any grease on your fingers that may have gotten on the rotors.
Enjoy your new Akebono brakes!
Remove the 2 – 14mm bolts holding your stock calipers on to your rotor brackets. Then slide the Caliper off and put them to the side. 
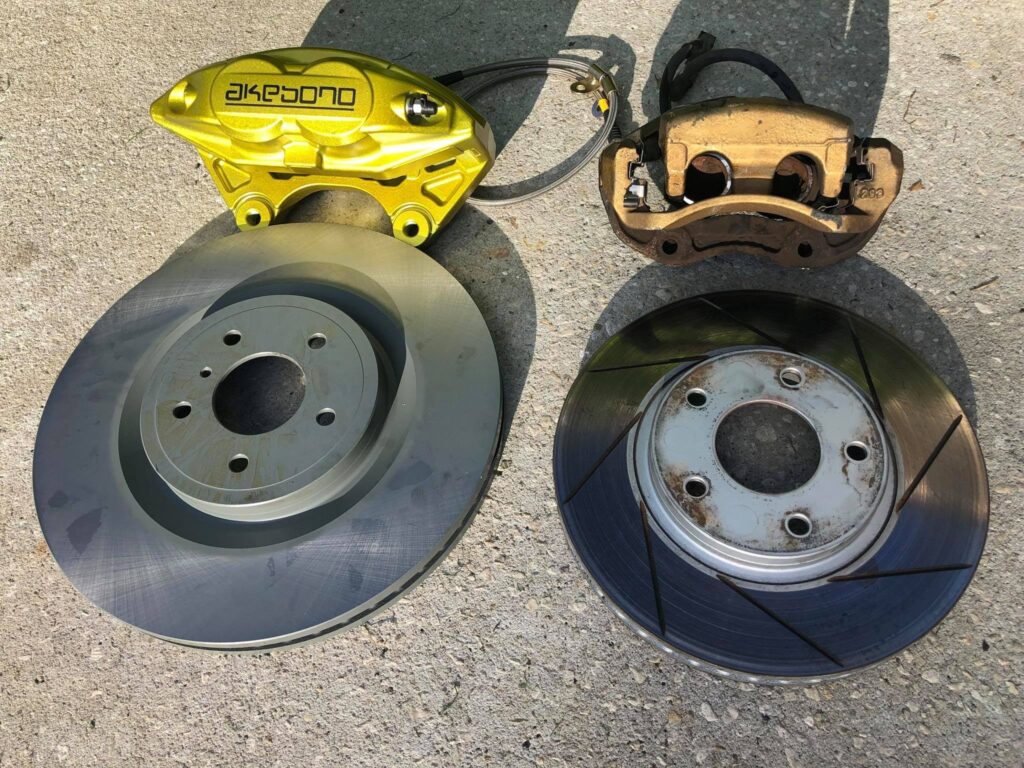
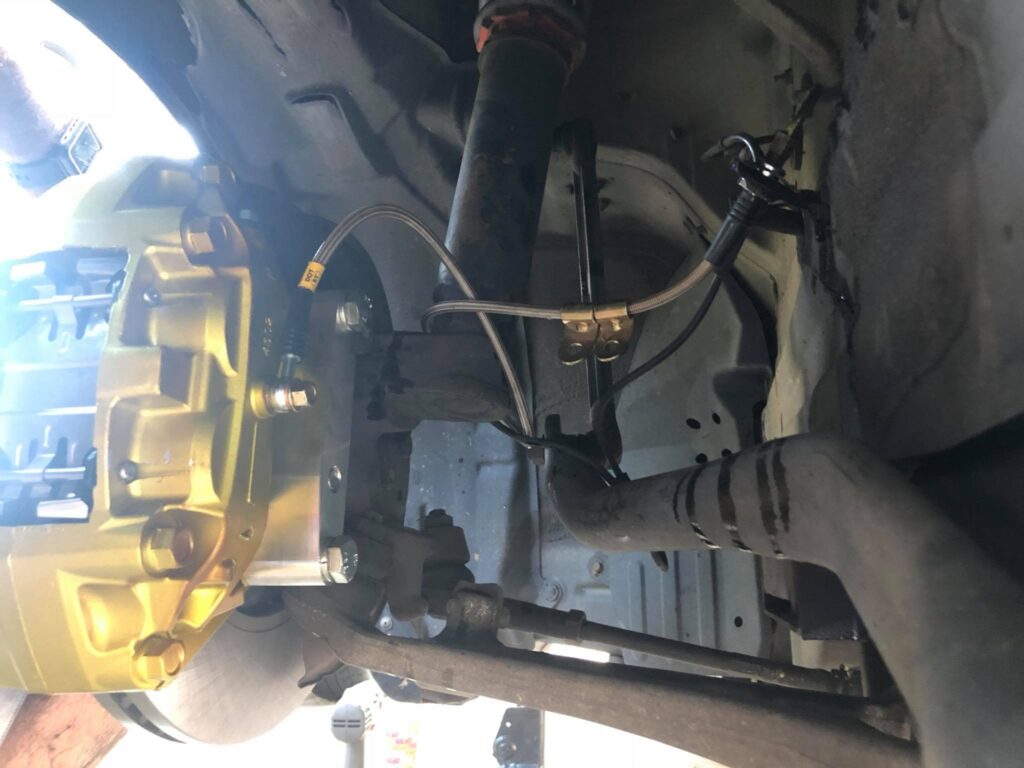
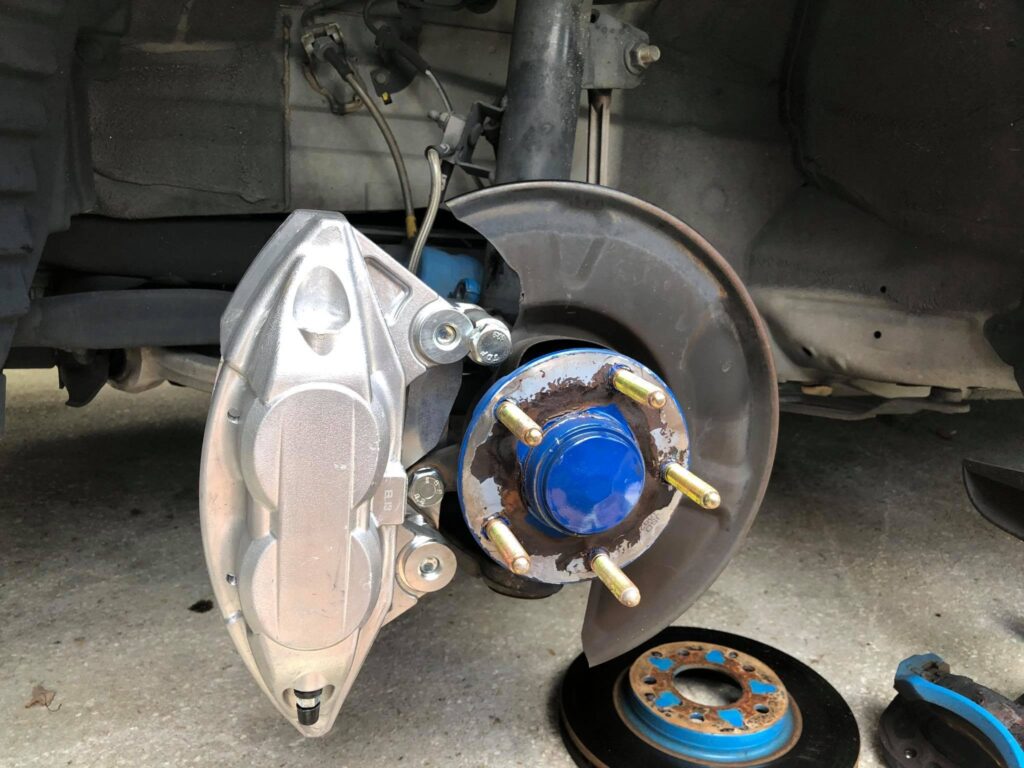
Side by Side comparison of the old F50 setup with the new Akebono Calipers and rotors.
Bleed all 4 brake calipers starting from the back passenger side, back driver side, Front passenger side and finally front driver side. (The Akebono calipers has 2 bleeders. Start bleeding the outside bleeder first and then bleed the inside closest to the engine last.)
Install your brake pads, Brake pad hardware, pins and clips. 
Install your new SS 370Z/G37 brake like on your Hard Brake line using a 10mm wrench on the hard line and 12mm on the caliper side. 2 copper washers on each side of the Banjo bolt. 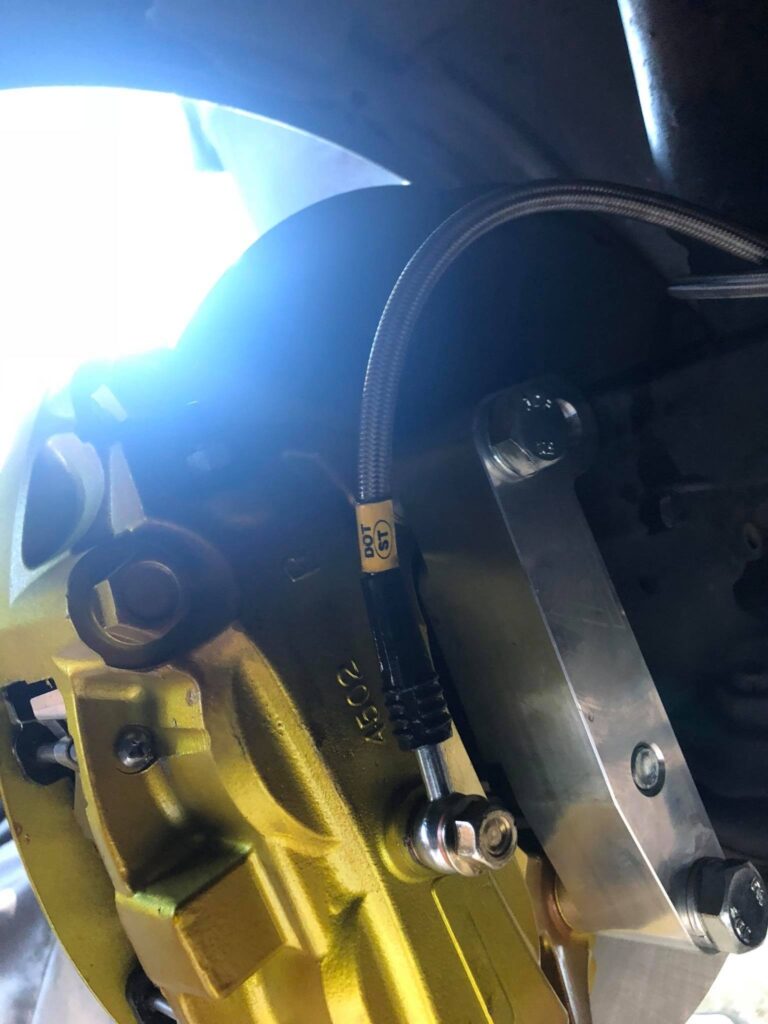
Remove the C Clíp on your brake line hardline. Separate the Soft brake line from your Hard brake line by using a 10mm wrench.
There is a Half Moon included in the kit. You will have to Align the half moon with the caliper to properly mount the caliper on to the Adapter. You will do this by mounting the caliper WITHOUT THE ROTOR. Then tighten the 22mm bolt on.
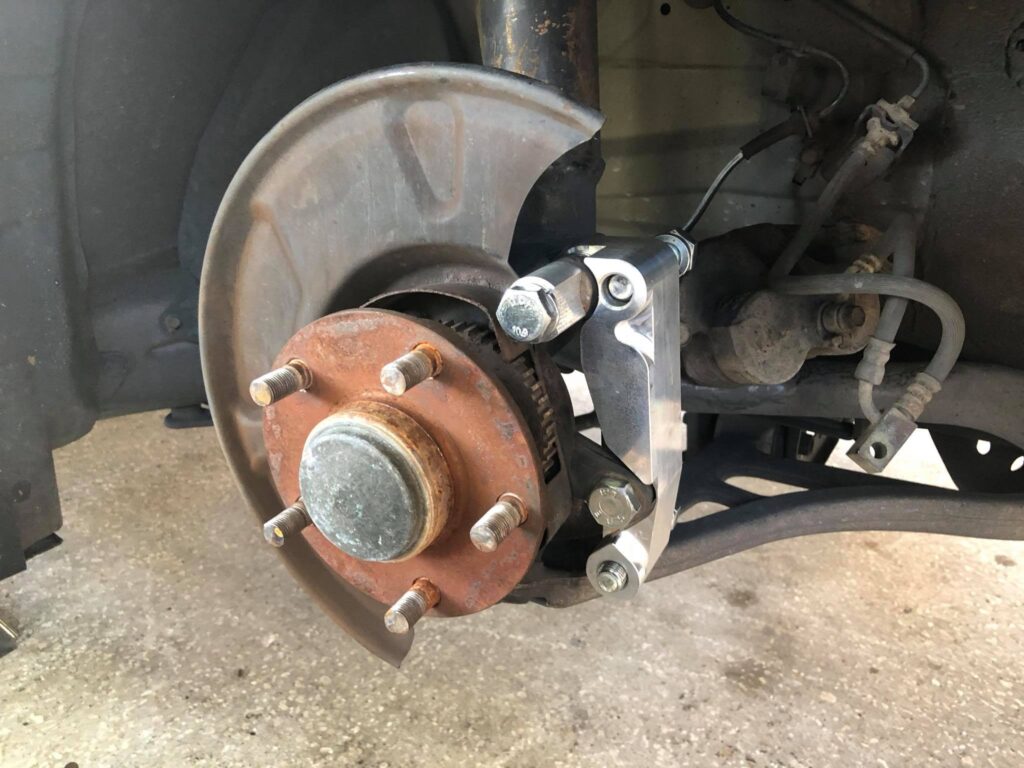
Mount your brake caliper adapters on using the new hardware supplied.
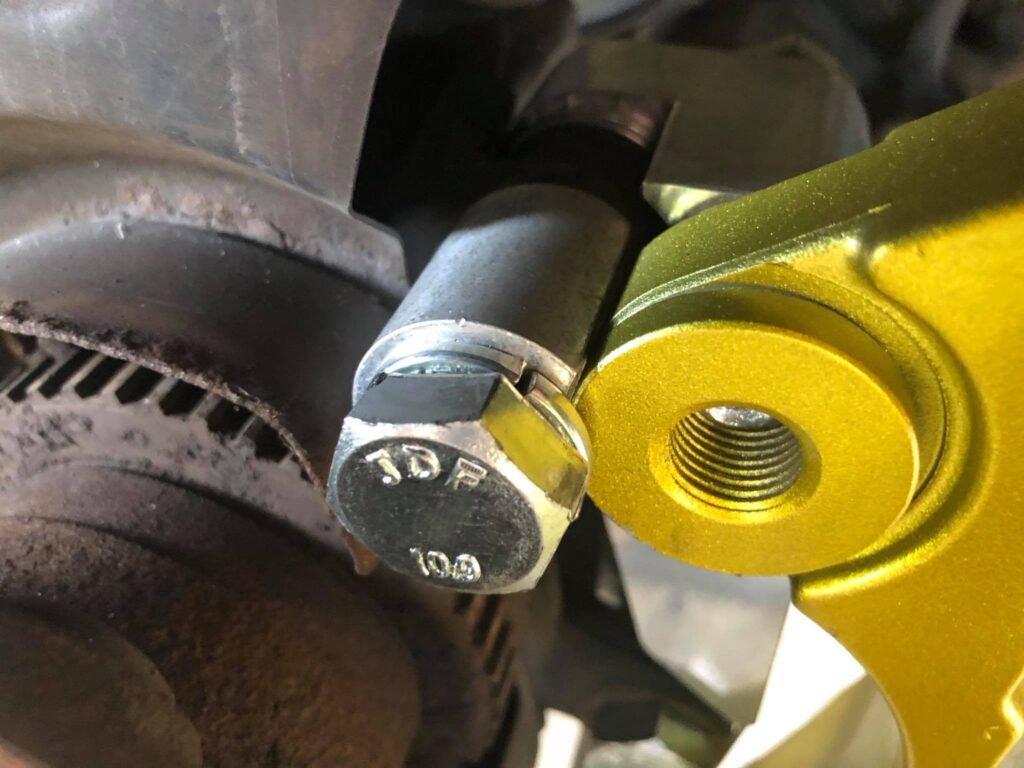
Mount the caliper without the rotor so you can align the half moon spacer. The Adapter comes with a shorter bolt, the shorter bolts goes on the bottom Bolt for the Spindle.

THIS PART IS IMPORTANT, the kit only comes with 2 washer per spindle bolt. YOU WILL NEED 3 WASHERS IN ORDER TO MAKE THE ADAPTER FLUSH WITH YOUR SPINDLE! RE-USE THE WASHER THATS ON YOUR 22mm SPINDLE NUT! (from step #3). THE WASHERS GO BEHIND THE SPINDLE, INBETWEEN ADAPTER AND SPINDLE. If your vehicle did not have the washer, you will need to get a 3rd washer. (If you do not add the 3rd washer the caliper won’t be aligned to the spindle and it will make your rotors scrape the caliper and a loud grinding noise).
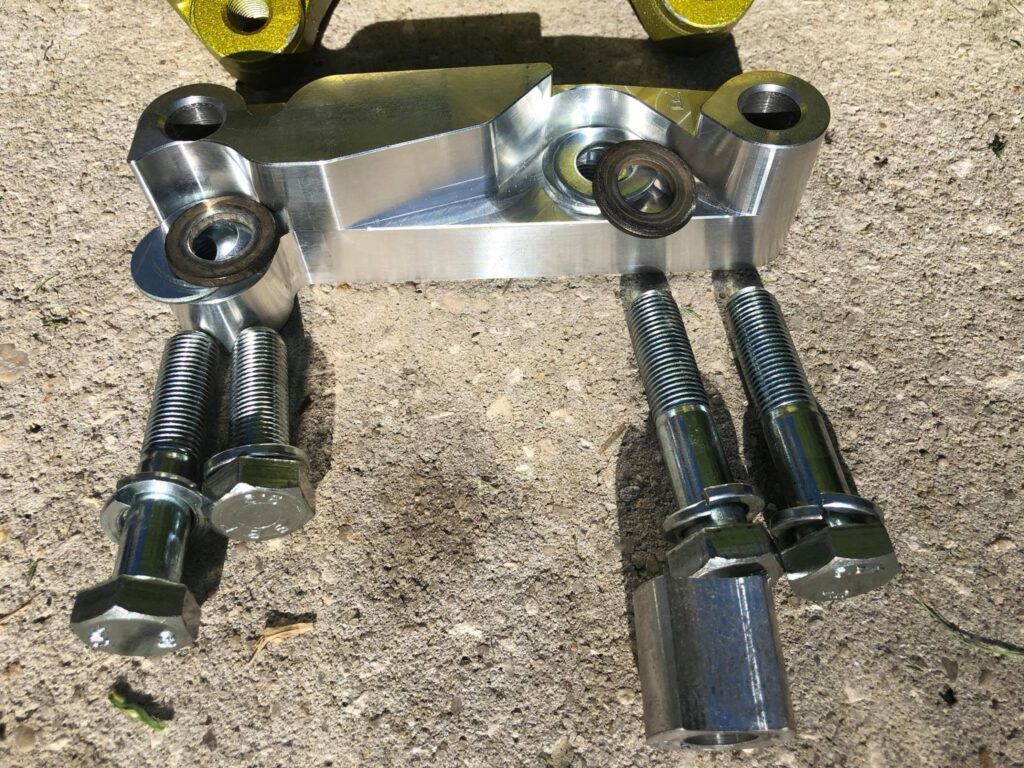
Before putting on the brake calipers adapter, you will need to setup your washers. Each bolt uses 1 crush washer. The brake adapter comes with 2 washers for each spindle bolt. See less
Bend and push the Heat shield. Just far back enough so it doesn’t rub against the rotor.
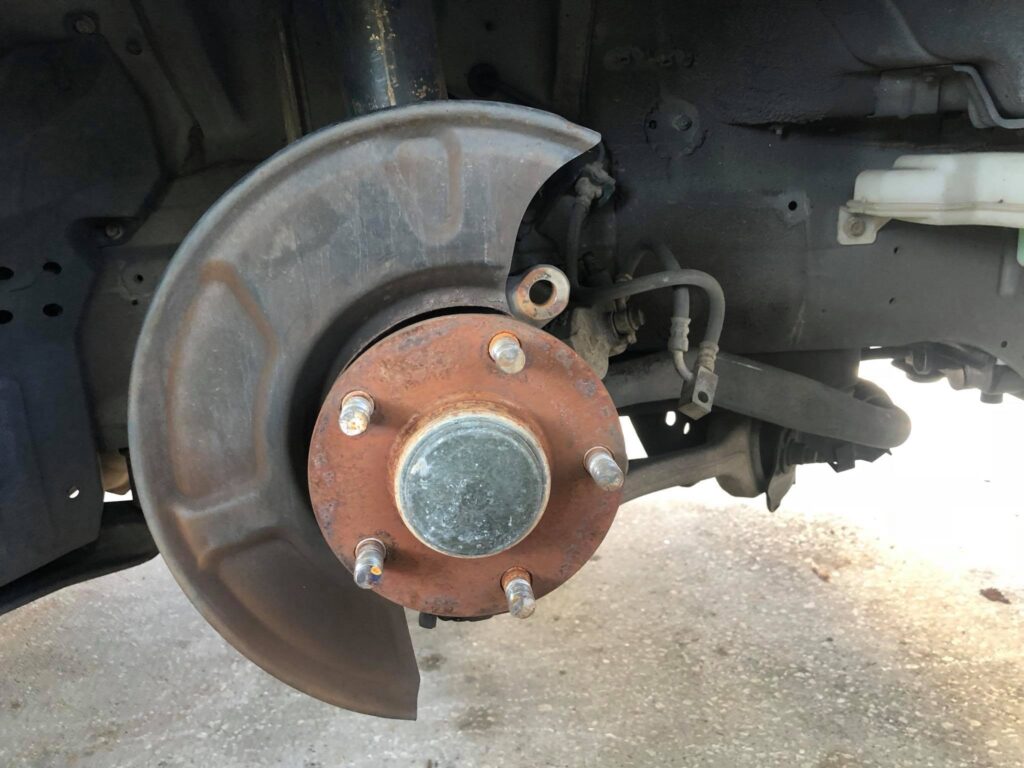
Remove the Rotors (11.4” inch diameter rotor).
Remove your stock brake pads. (some people leave them on and just remove the whole rotor bracket off with them.
Use a 22mm or 7/8 socket/wrench to remove the 2 – 22mm bolts holding on to your rotor brackets off your spindle. Then remove the bracket all together.
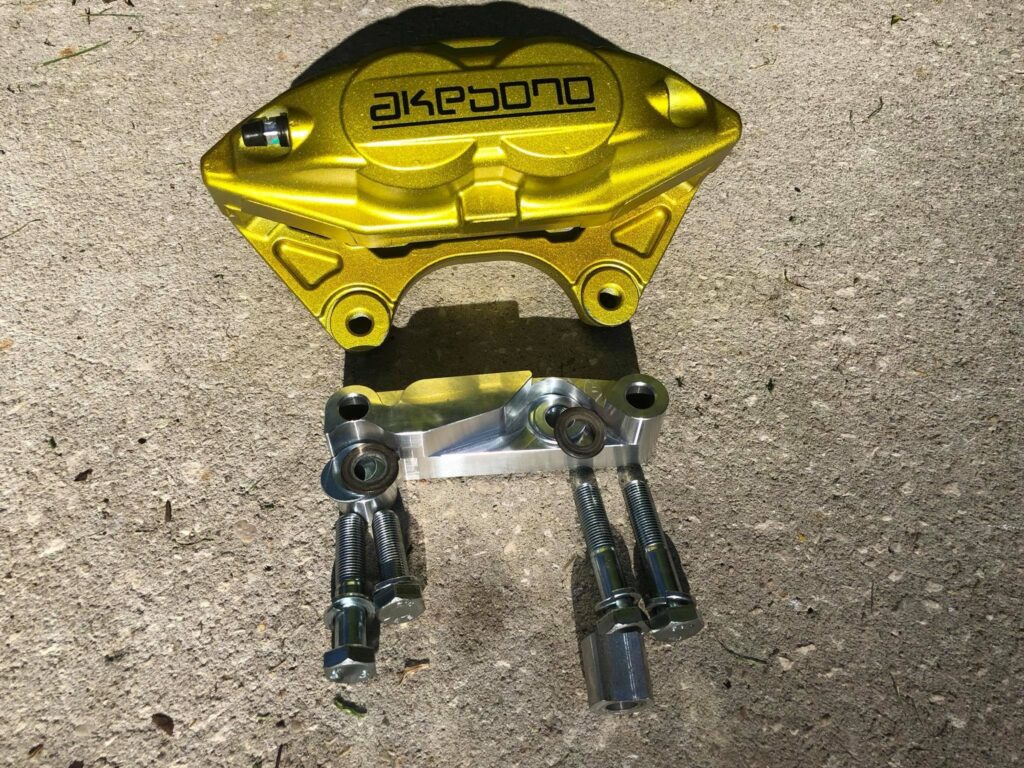
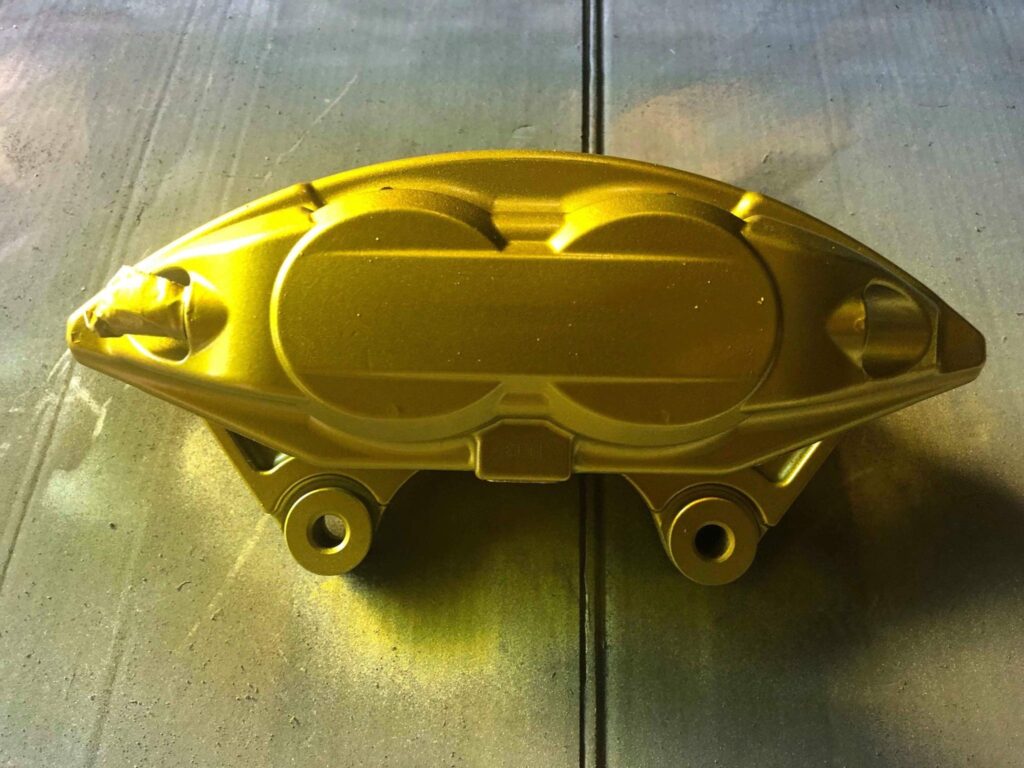
Calipers were painted Anodized Gold using High Temp Paint.
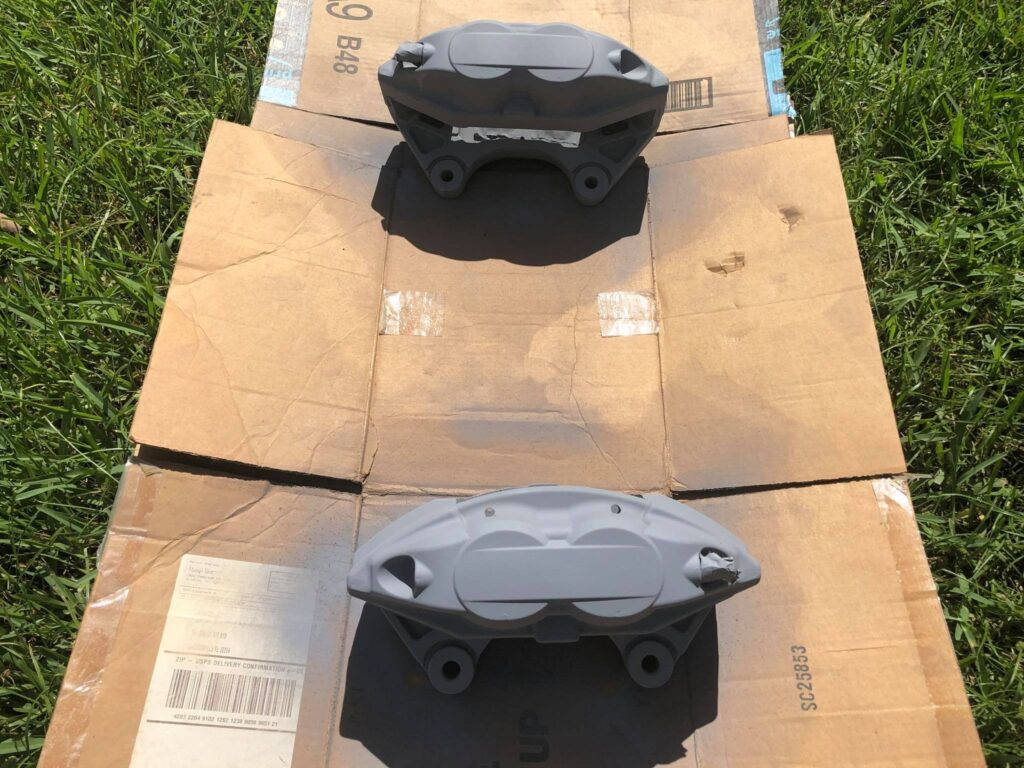
Calipers started the painting process with high temp primer.
Test Fitting the calipers on a different F50 prior to paint caliper painting.
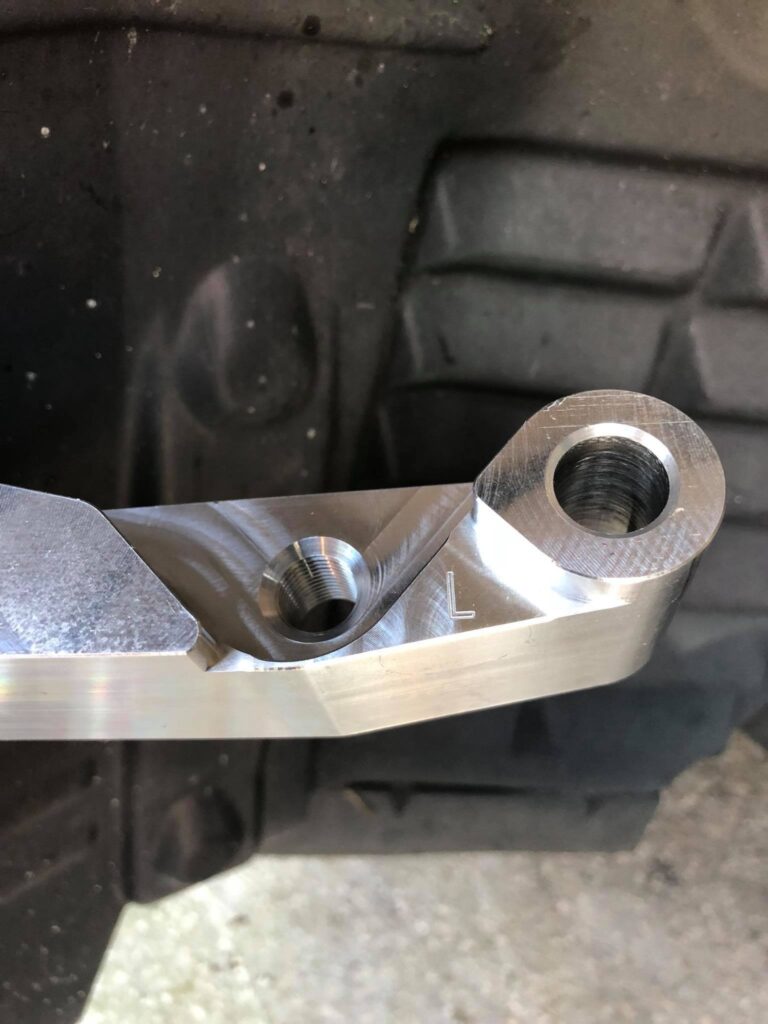
Each Caliper Adapter bracket is mark “L” and “R” for each side.
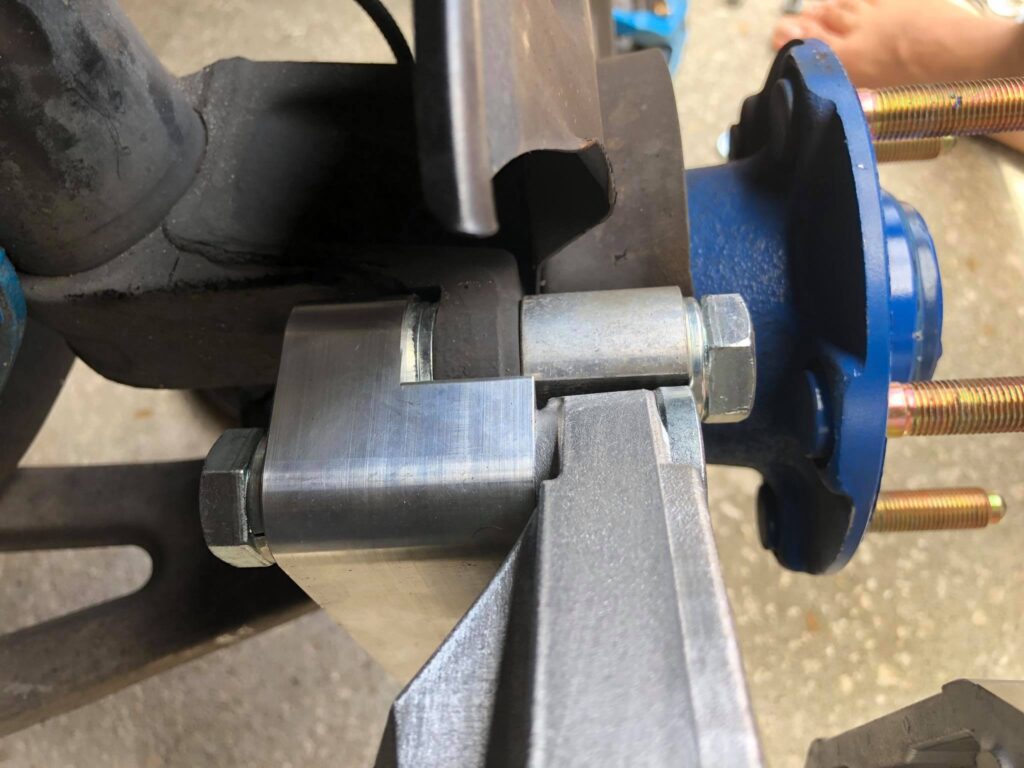
The 3 washers go BEHIND the spindle. 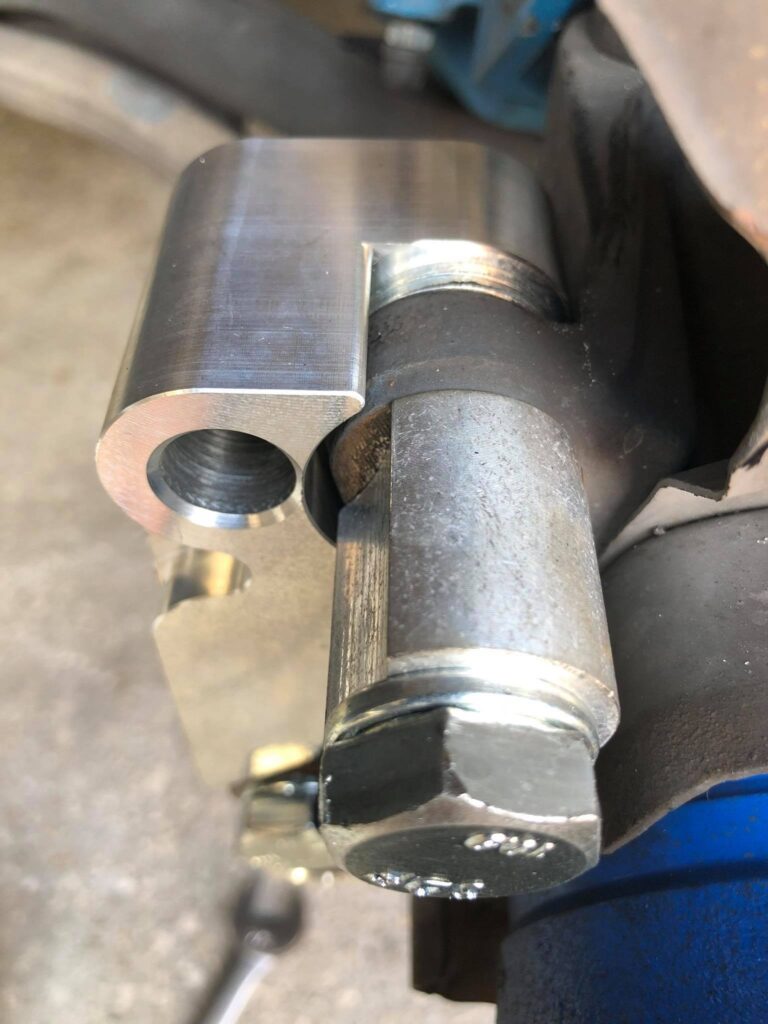
See in this picture the caliper Adapter brackets does not line up with the spindle using the 2 washers provided in the kit. You have add a 3rd washer to line it up with the spindle.
![]()

Comments are closed.