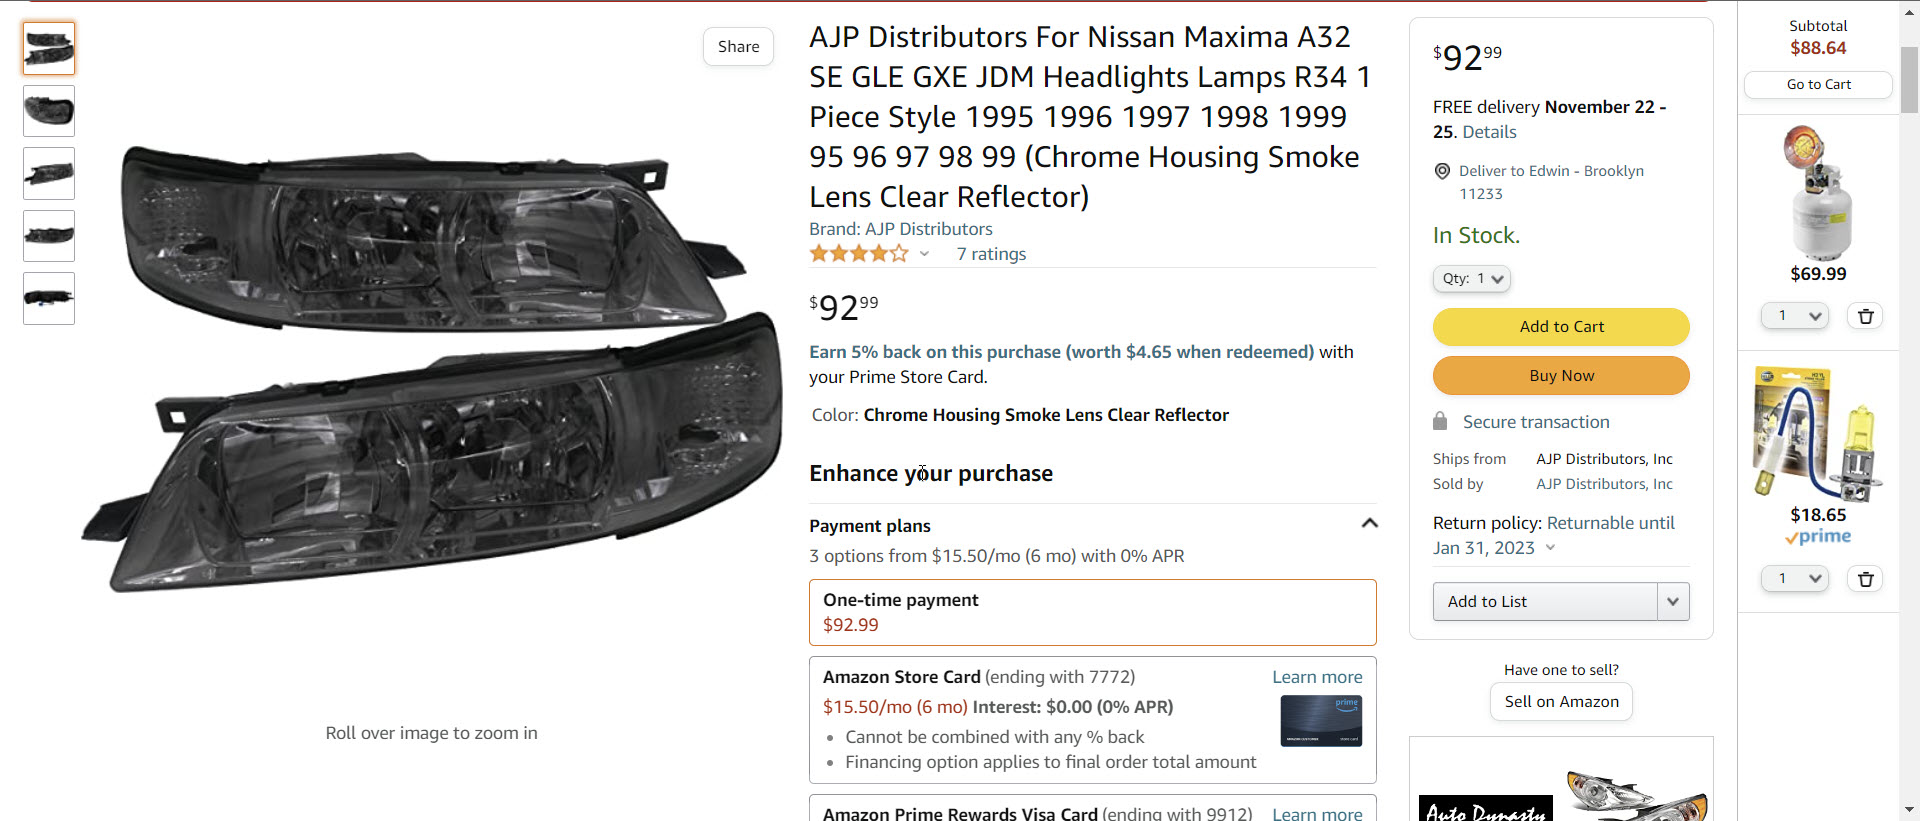
I have created a video showing some of the steps I took in order to get the R34 aftermarket head lights installed on my 97 Maxima. These headlights look great however they are inexpensive aftermarket items that usually need some fine adjustments to install correctly. In this particular case they sent two left side brackets that are needed, I had to modify one of them to work on one side. Another note is that the rubber seal around the lights tend to detach easily; they can be put back with glue.
Overall I like the lights a lot, they are a great improvement to the original lights I had. These lights could be bought on eBay or on amazon here: https://amzn.to/2LPeB1t
Thank you for watching and I hope you found this to be helpful. Sign up to my email list so that you could be notified of new articles, video and product re
I would like to start by thanking JNCoRacer for his motivational pep talk. He was smart enough to know that I could do it, even though I didn’t think I could. Thanks man.
You will need various standard tools: screwdrivers (Phillips for screws & flat for prying), wire cutters and a ratchet, extensions (I found that my 24 inch was very useful), a U-joint, and a 10 & 12mm socket. I strongly recommend a 6 point socket for the 12mm.
You will need one special tool, a T50 Torx, 6 point security wrench. I didn’t have a security Torx but got lucky and was able to modify my standard T50.
Cliff notes version –
1 – Remove the glove box.
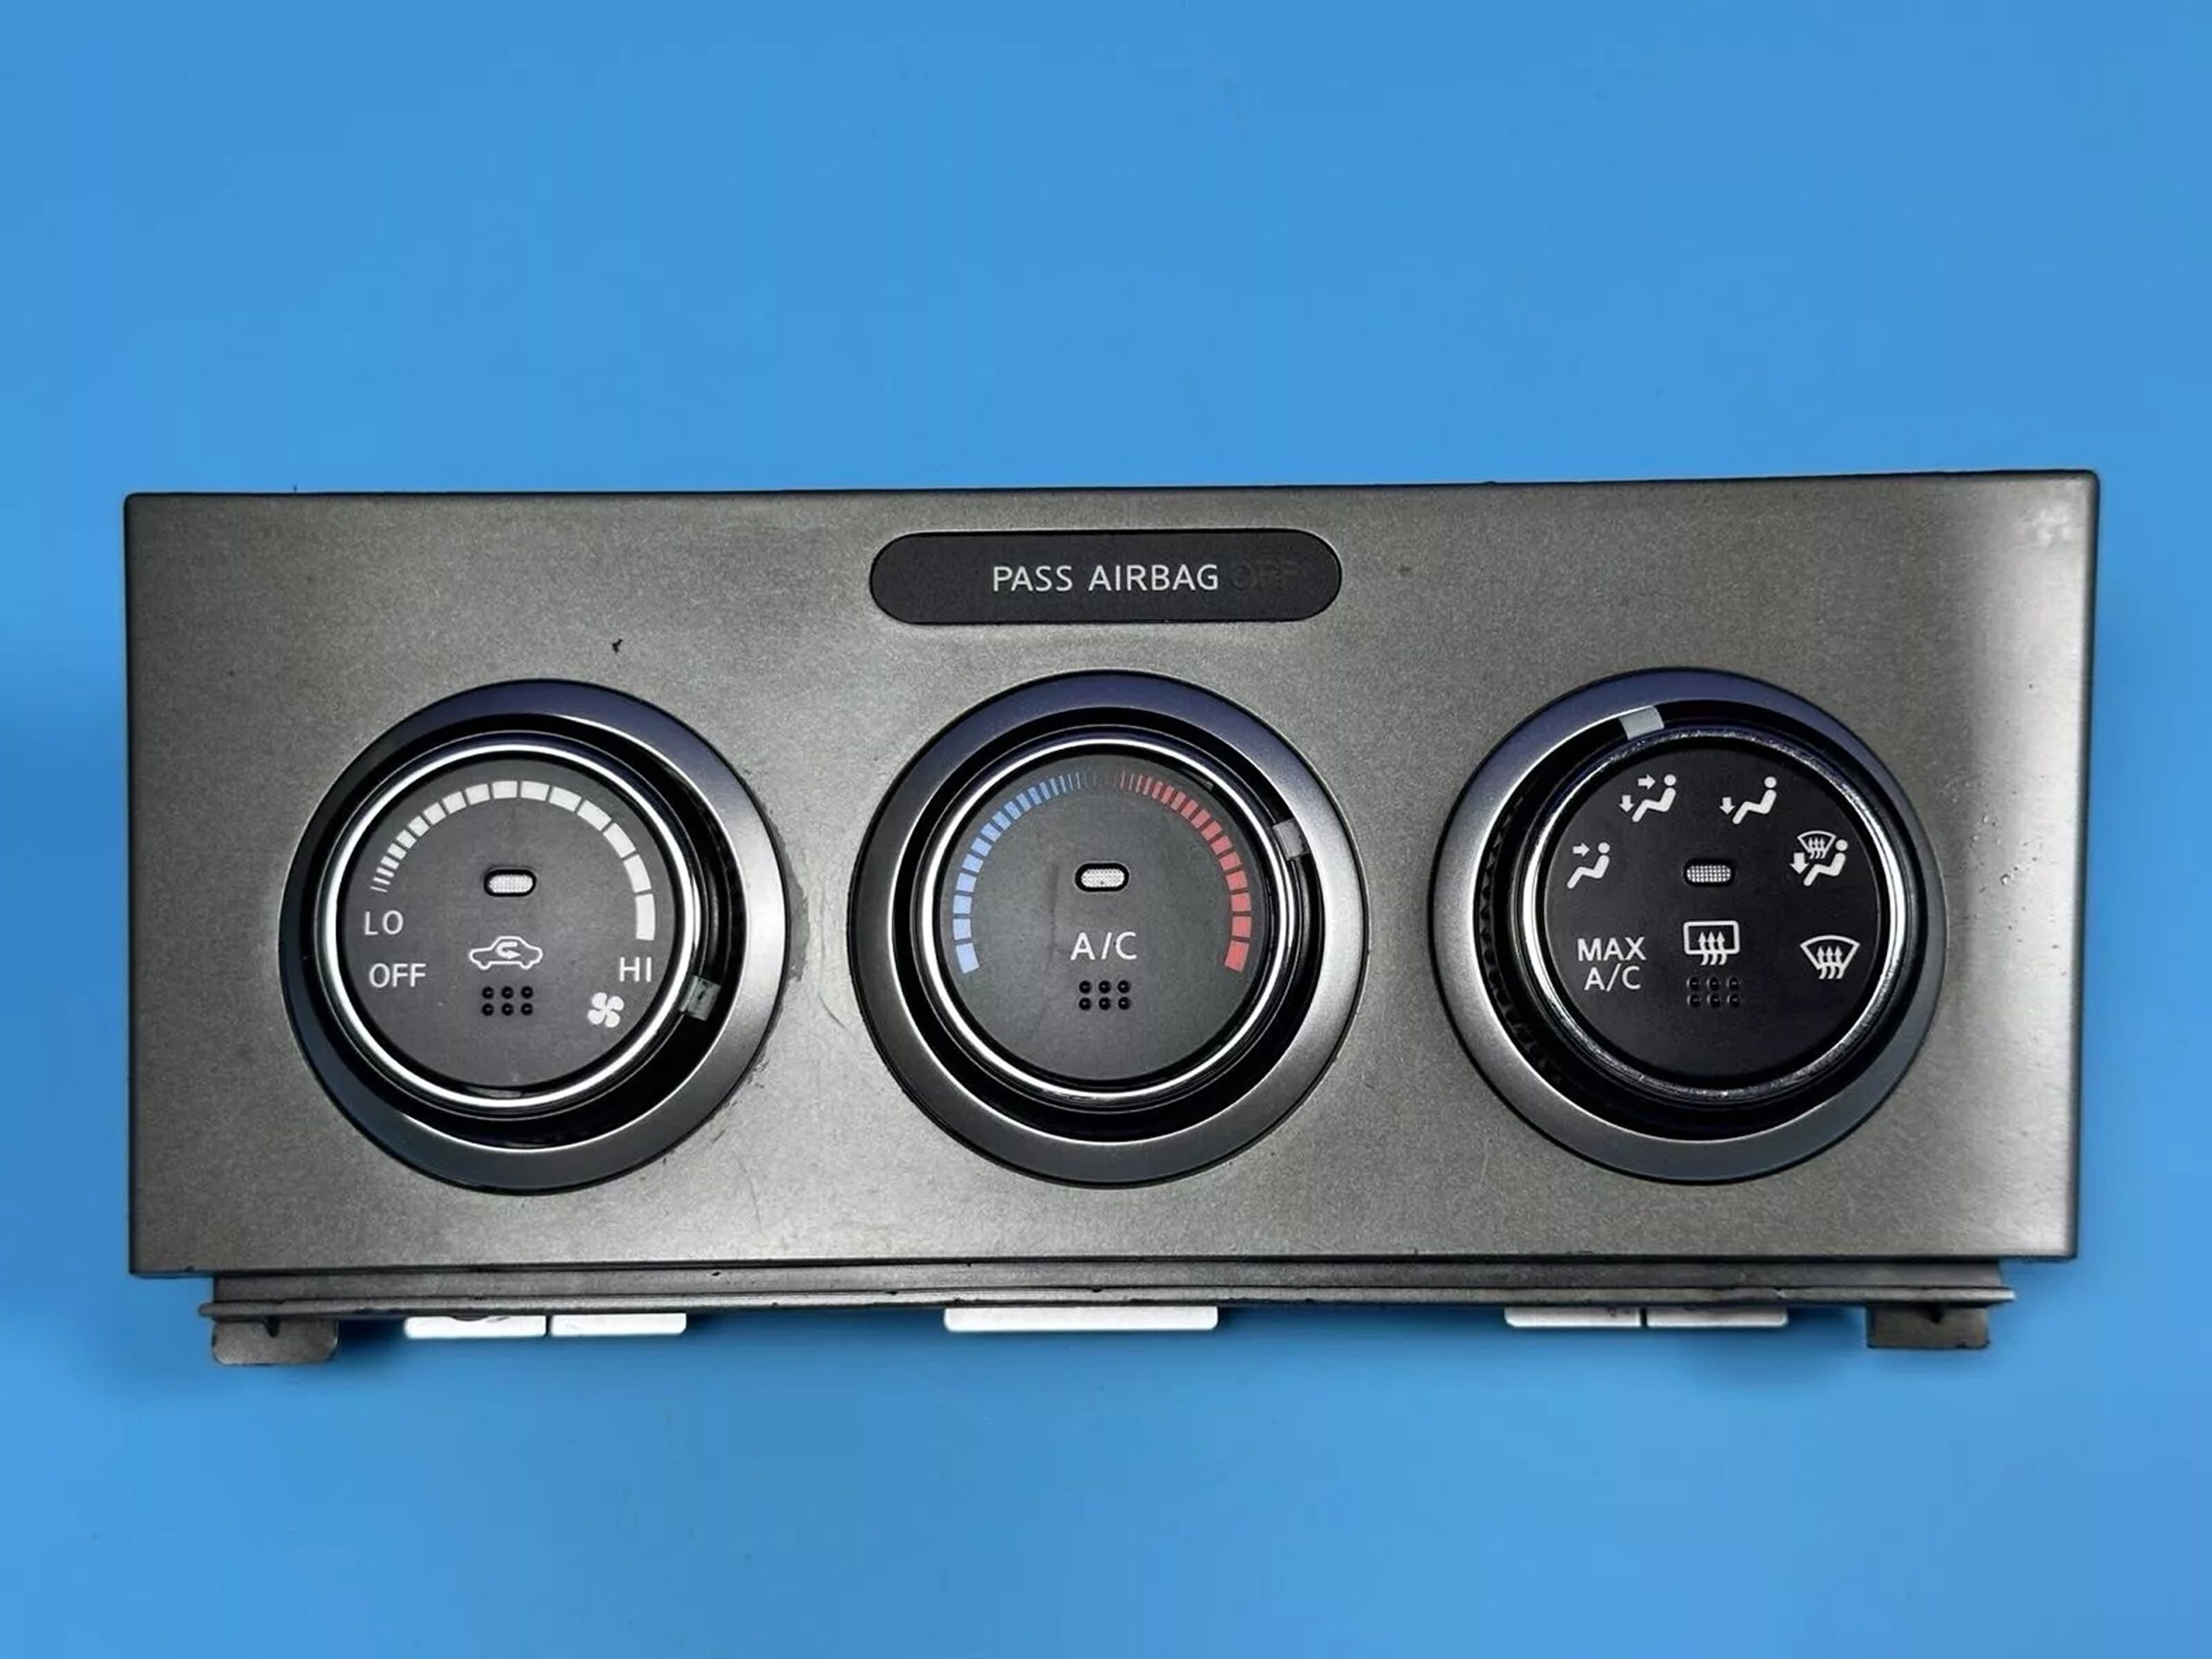
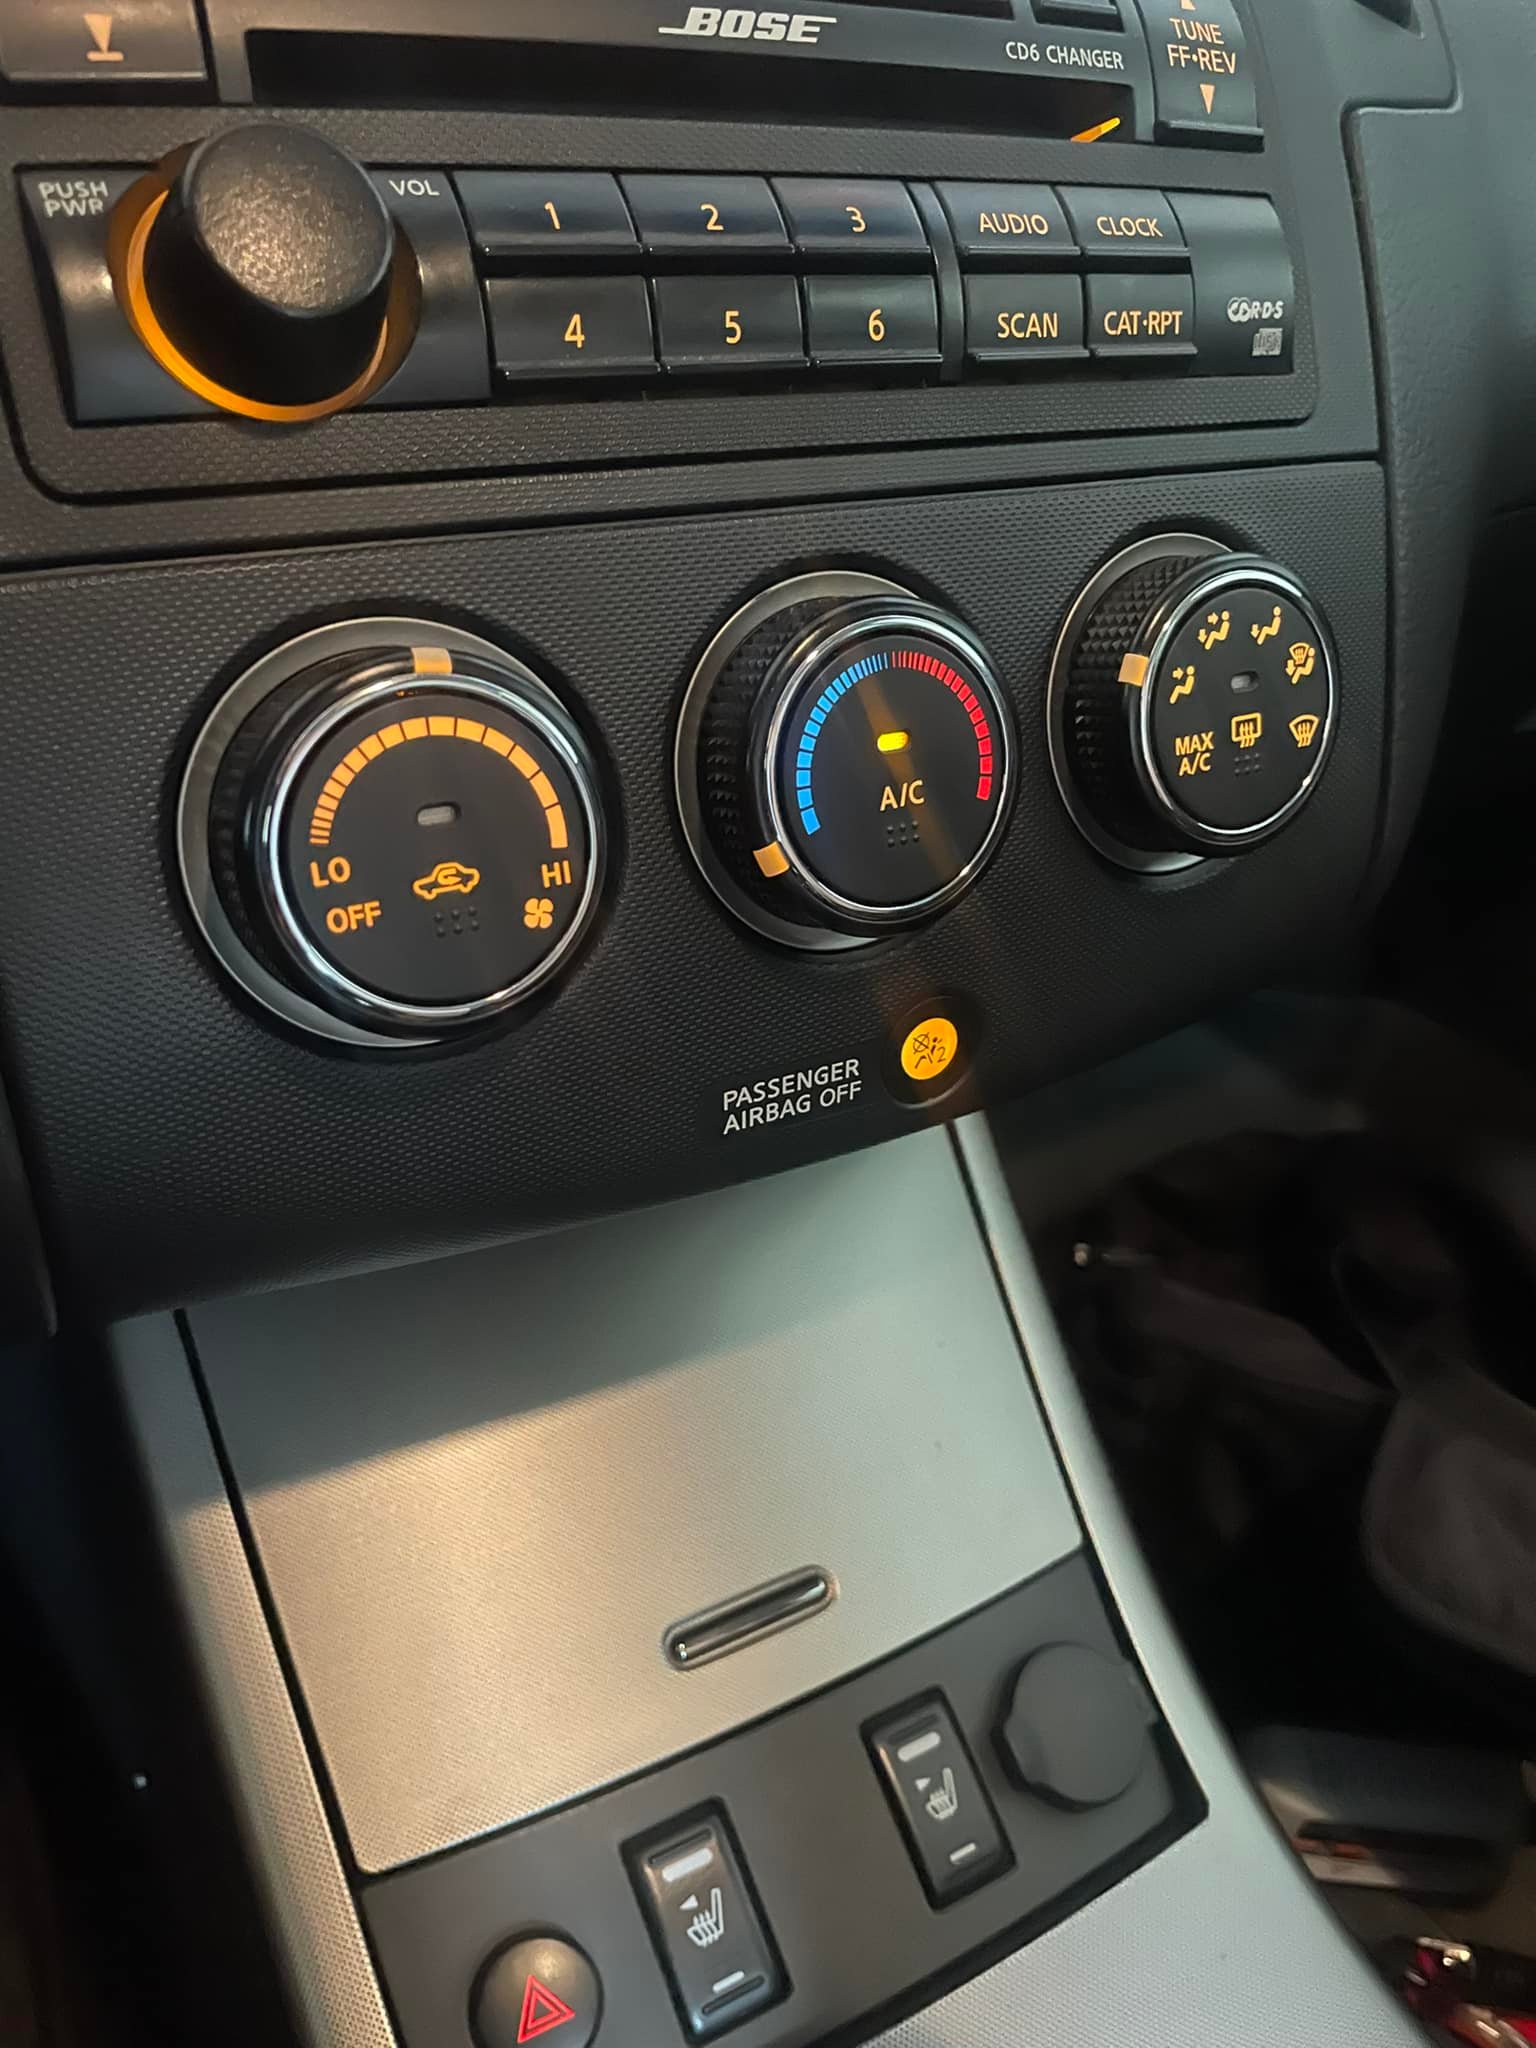
2 – Remove the radio/heater control cluster.
3 – Remove the speedometer cluster.
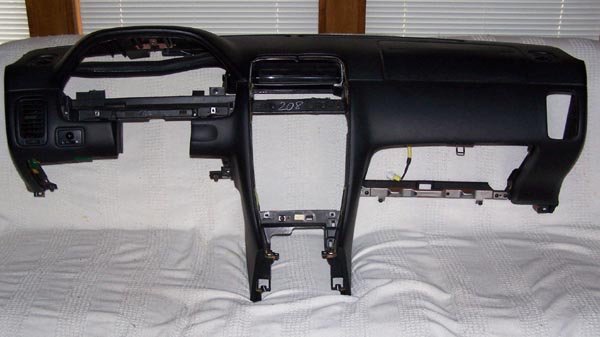
4 – Remove the dash.
Easy smeezy, right?
Let’s get started and find out.
Move the driver’s & passenger’s seats forward and remove the 2 screws that hold down the rear of the center console.
Move the driver’s & passenger’s seats all the way back.
Disconnect the battery. You will be messing with the passenger airbag and it is recommended to wait a half hour after disconnecting the battery.
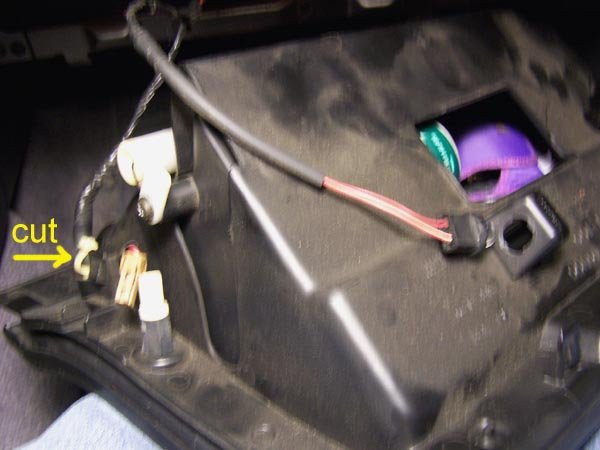
Remove the glove box (6 Phillips head screws) and disconnect the 2 wires. You will also have to cut the zip tie that holds the wire harness to the glove box.
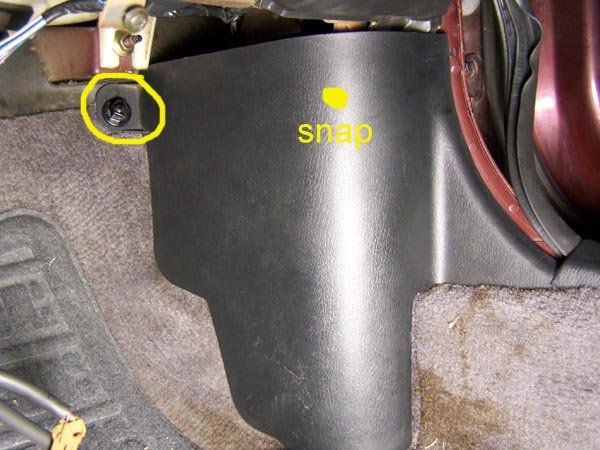
While you’re down here, remove the kick panel in the foot well. There is a plastic nut on the top front corner that you can most likely remove by hand. Then there is a snap along the top edge just before the panel curves to meet the door. Pull the panel towards the driver’s side to unsnap it.
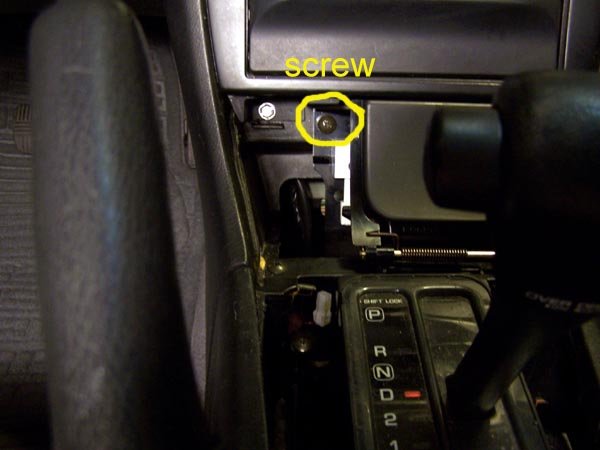
Remove the radio and heater controls. Start by removing the trim plate around the transmission shift lever. If you have an auto trans, you need to move the shift lever out of park. I’m guessing that you’ll need to do the same with a standard trans. Pry up the 2 rear corners of the trim plate to pop the snaps free. Actually, pry on the sides by the corners, not the bottom edge. Lift up by hand to pop the forward snaps that are near the curve. When free, disconnect the wire for the cigarette lighter.
Remove the ash tray. Remove one screw at the top left corner. On the right side there are 2 snaps, one top and one bottom. Pry the ash tray straight back towards the rear. Did I mention that a 1 inch putty knife works better than a screwdriver for this? Disconnect the wire to the ash tray.
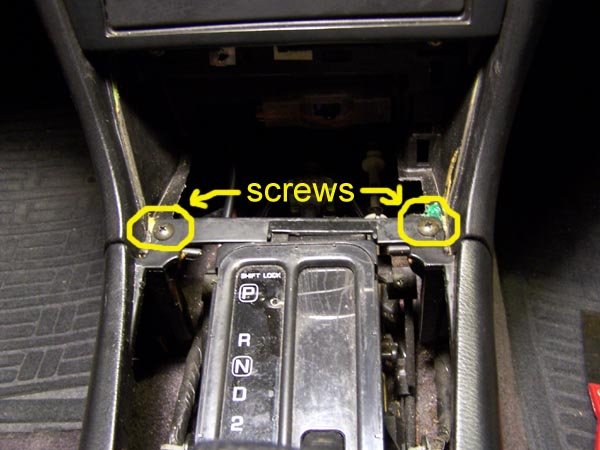
Now finish removing the center console. In the opening created by removing the ash tray, there are 2 screws in the corners where the center console meets the dash. Remove those screws, pull the parking brake handle up as far as you can, unsnap the boot around the parking brake handle and remove the center console by lifting up.
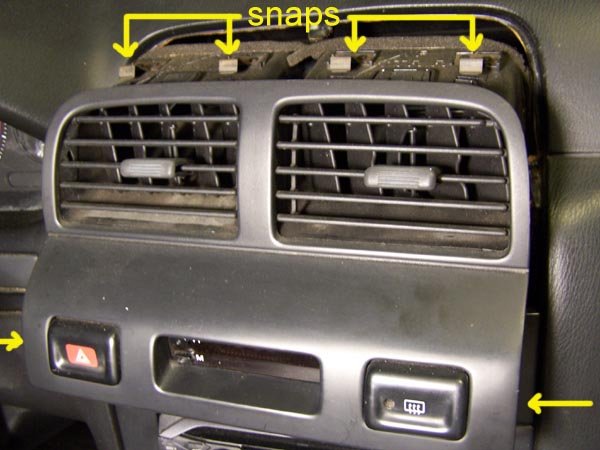
Remove the dash center vents. Pry up on the lower corners, the sides, not the bottom edge and pop the snaps free. There are 4 snaps across the top edge. Using moderate level swear words, free the top edge. While it is difficult to do, the vents need to come almost straight back with a little downward motion, not tilted up from the bottom. Once you have the vents free, disconnect the wires for the hazard flasher, clock and the rear window defroster switches.
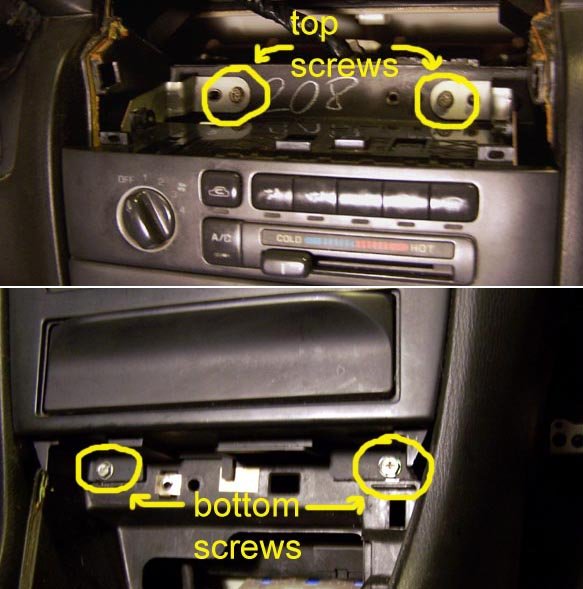
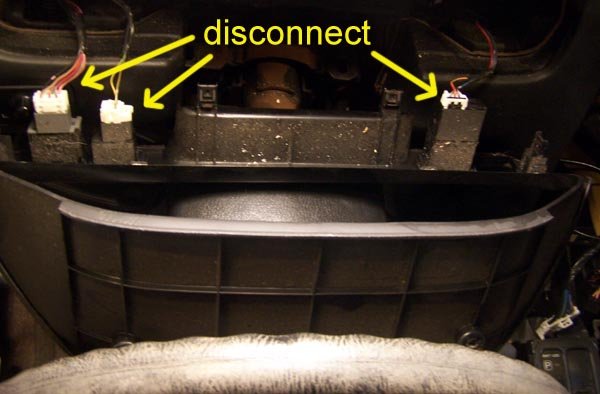
Now you can remove the radio and heater controls. This is one unit held in by 4 screws, one in each corner, 2 screws down where the ashtray was and 2 on top above the heater controls. Have your transmission shift lever towards the rear of the car and lift out the radio/heater controls. Disconnect the wires from the radio and heater controls.
Remove the speedometer cluster. Since the goal is to remove the dash, this procedure will do things not needed if all you wanted to do is remove the speedometer cluster.
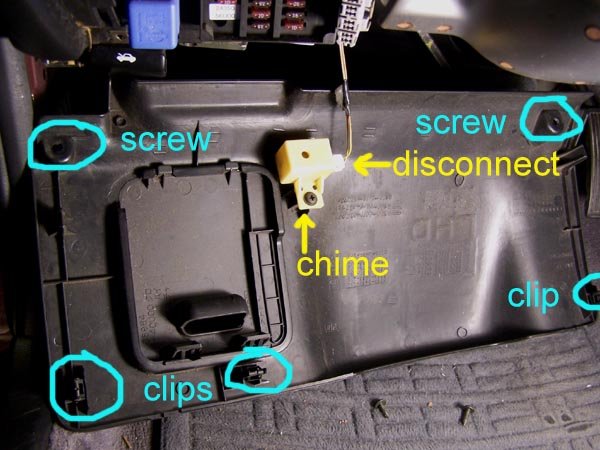
Start by dropping the steering column. Remove the lower dash trim panel that runs underneath the steering column. Remove the 2 screws in the bottom edge at the corners. There are 2 snaps on top edge, again at the corners. Pry the snaps free. *** Caution *** The chime that sounds when you open the door when you have the keys in the ignition is attached to the backside of this panel by the fuse panel. Disconnect this wire.
While you’re down here, remove the kick panel in the foot well, just like on the passenger side.
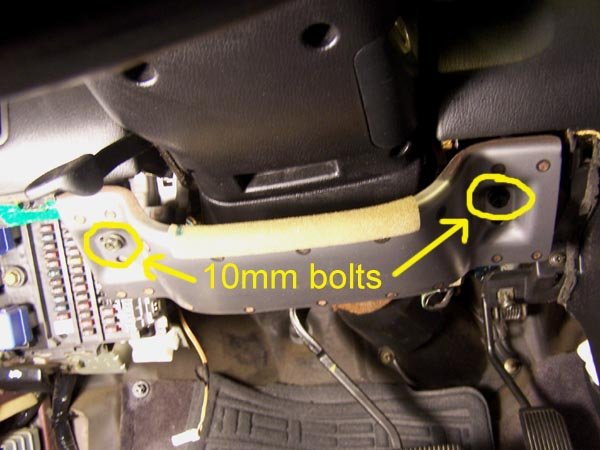
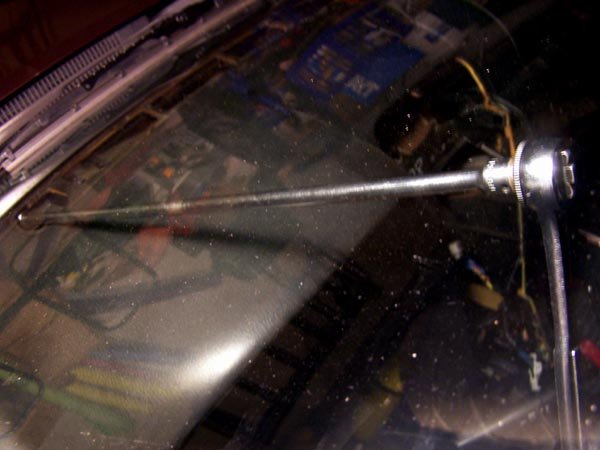
Remove the metal plate that runs underneath the steering column. There is a 10mm bolt on each end. The plate will stay in place after you remove the bolts. Slide the plate towards you about a quarter inch and it’s off.
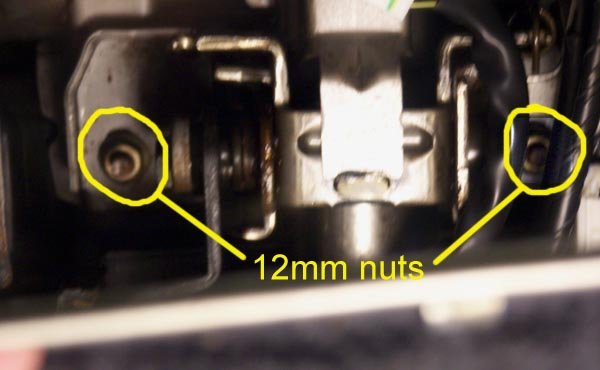
Now you can drop the steering column. Two 12mm nuts. Mine had Locktite on them and my 12 point socket was starting to strip the one nut, so I changed to a 6 point socket. The steering column is kind of heavy, so you are forewarned. I was concerned about the steering column hanging by itself, so I found a 10 inch length of 2 inch PVC pipe that I rested the steering wheel on.
Now for the speedometer cluster. There is a finishing bezel around the cluster that also has the cruise control on/off switch, the security led and the dash light dimmer switch. You have to disconnect the wires from these switches. You have 2 choices – before you remove the bezel or after. If you choose before, then you have to pry the switches out of their holes and then disconnect the wires. I chose the other option, after I had the bezel loose. This way I didn’t have to pop the switches out.
Start removing the bezel by removing 2 screws in the top curve of the bezel. Then there are 4 snaps along the bottom edge. Pry/pull them free. If you hadn’t done so earlier, disconnect the wires from the switches.
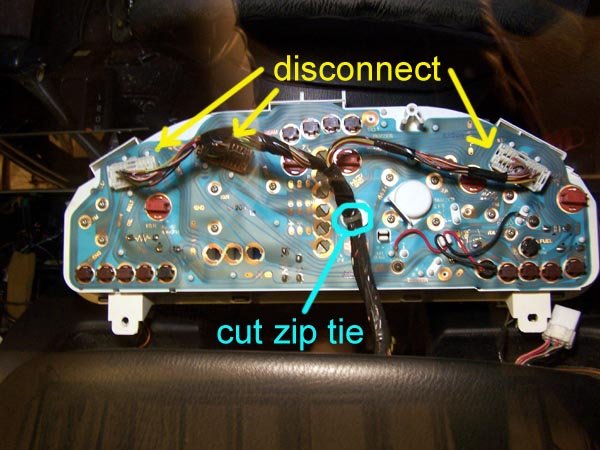
Finally, the speedometer cluster itself. 3 screws, 1 at the top and 2 along the bottom. There are 3 connectors on the back of the speedometer cluster that need to be disconnected. I would suggest you get something soft to lay the cluster face down on while you disconnect the wires so you don’t scratch the face plastic. It costs about $35. You will also have to cut a zip tie that holds the wire harness onto the back of the cluster.
Now disconnect the wires from the side view mirror switch. Either pop the switch out or reach in from behind the dash.
The final phase, remove the dash. There are 5 10mm nuts, 2 Torx head security bolts and a pair of screws to go.
Remove the trim pieces from the windshield pillars by grabbing the trim at the top edge and pulling the snap free. Then lift it off.
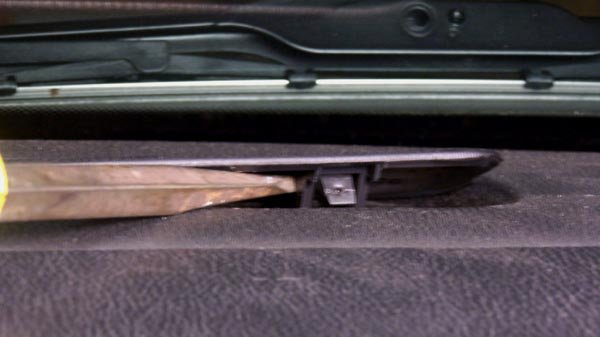
Pry off the defroster vent grill plates. There are 4 snaps spaced along the back edge. Pry the back edge of the grill up.
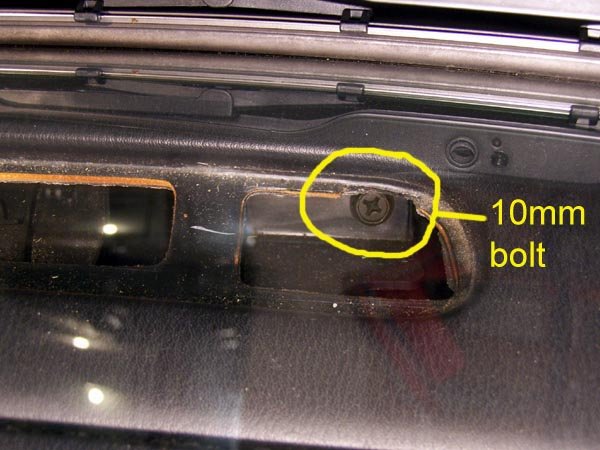
When the grill is removed, you can see a 10mm bolt at the end closest to the outside of the car. Remove this bolt. This is where my 24 inch extension was useful.
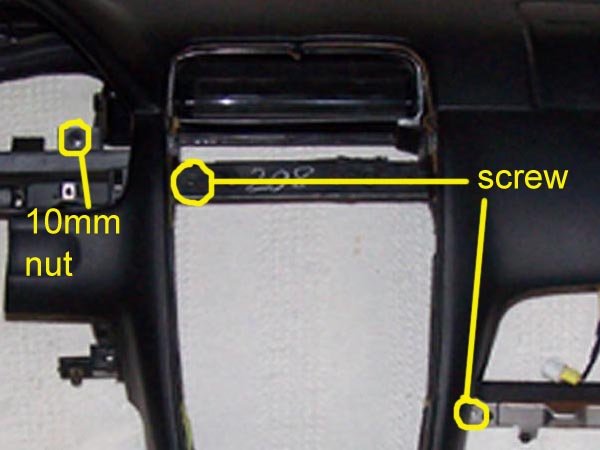
In the bottom left and right corners of the dash is a 10mm nut that was revealed when you removed the kick panels. Remove these 2 nuts.
In the opening where the speedometer is a 10mm nut.
In the opening where the radio was there is a screw.
In the opening where the glove box was is a screw.
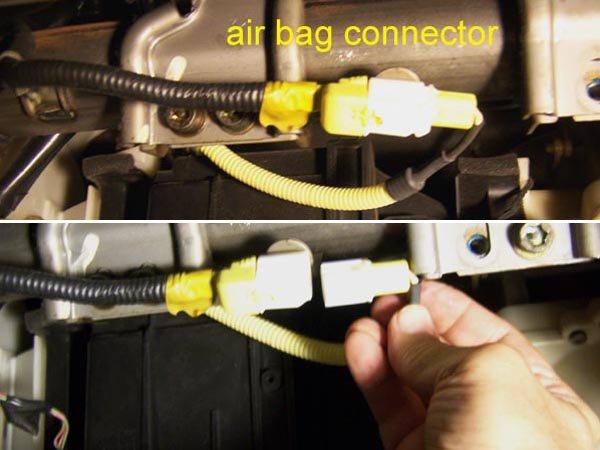
OK, last 2 fasteners and one wire harness connector.
Looking in the glove box opening at the top, you will see a yellow wire harness connector. This is for the passenger air bag. It looks like you could pull either end out, but you have to pull the right side out to disconnect it.
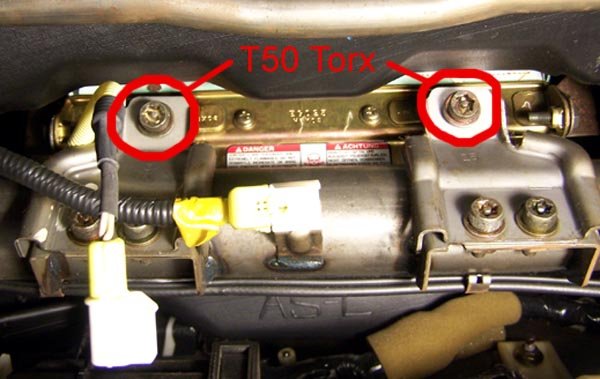
Now for the Torx bolts. Look up through the glove box opening and you will see 6 Torx head bolts. You only need to remove the 2 that are by themselves, not the pairs.
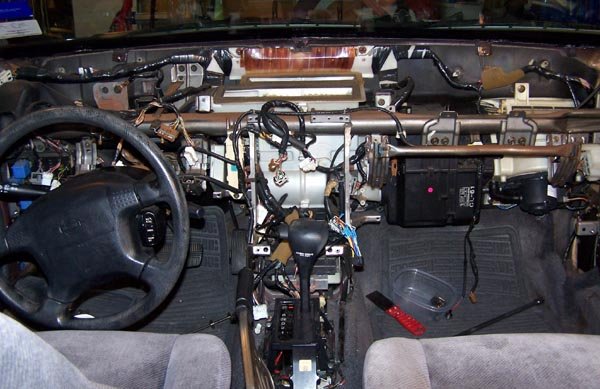
Once you have these 2 Torx bolts out, the dash is free and ready for removal. I did it by my self, but if you can get a helper, it is no doubt a lot easier. You have to pivot out the bottom edge a little bit and then pull back and up. There are guide pins built into the top front edge of the dash that require you to pull the entire dash back evenly. Because of the airbag, the right side has probably 75% of the weight.
For what ever it’s worth (in the category of useless trivia), I weighed the dash on my bathroom scale. It was 25.5 pounds. Most of that is the airbag.
Additional Reference Info
Thank you for not only making this thread with excellent pictures and descriptions, but for also keeping the pictures alive for all to view! It helped me out a great deal today when I removed my dash. I now have some questions about the heater core and blower motor:
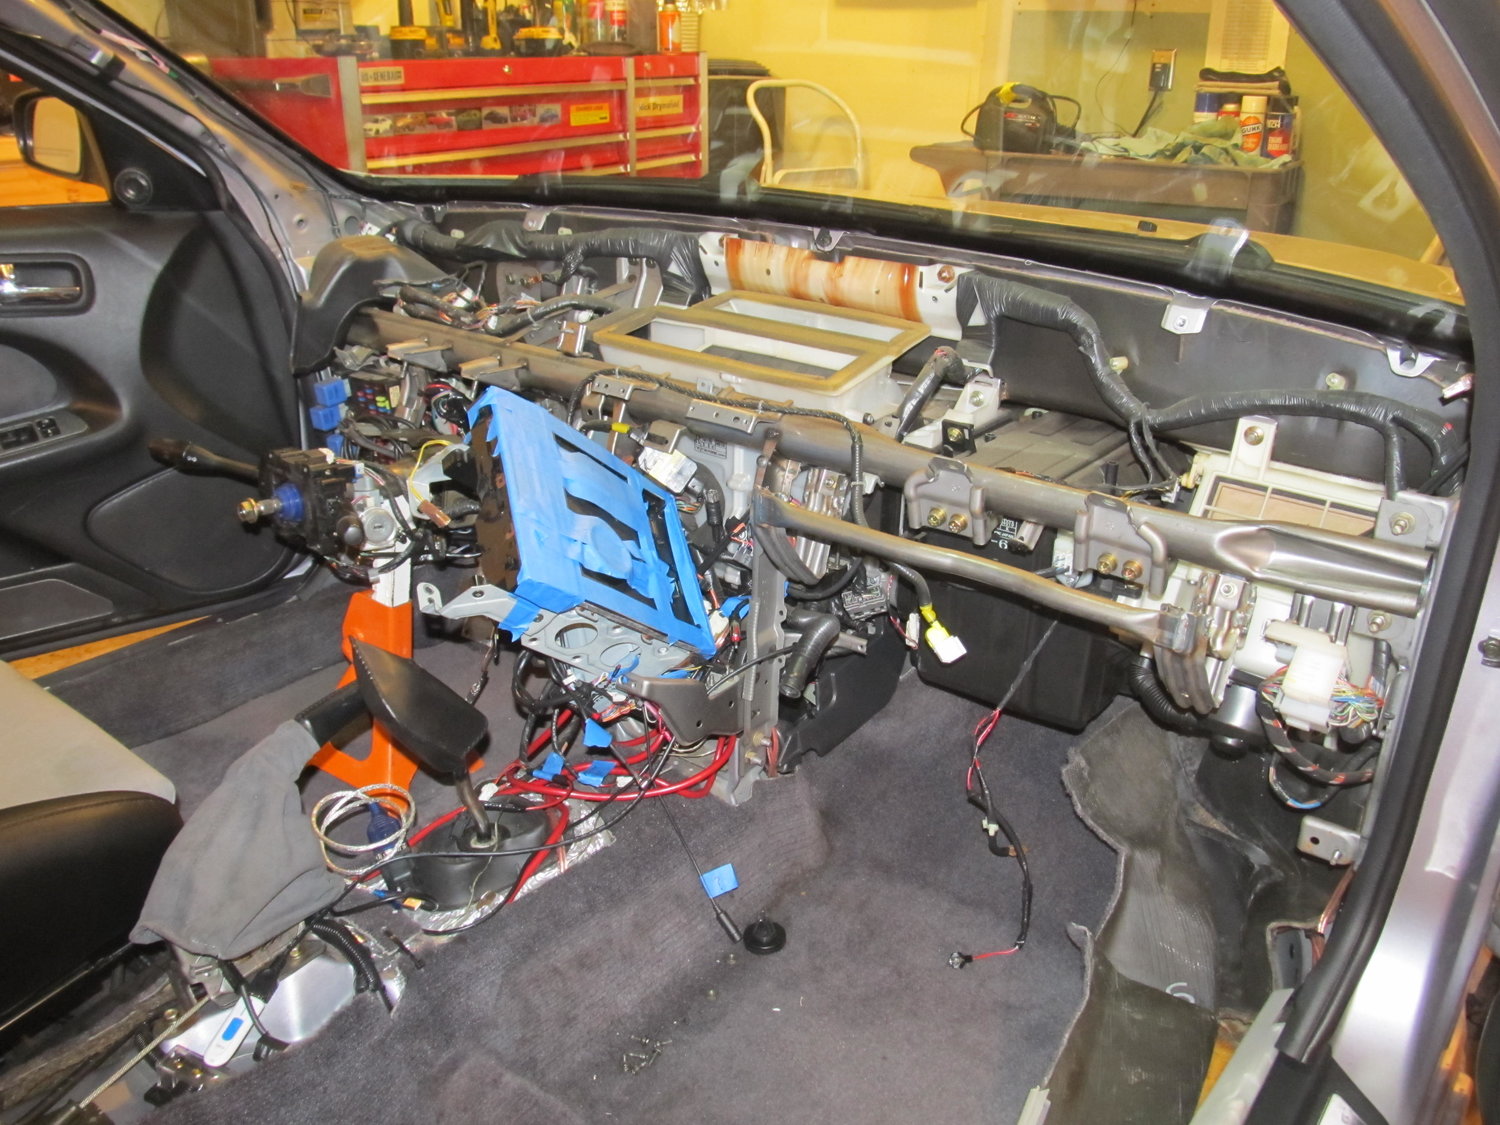
I’m trying to track down a water leak that’s coming down the corner behind the blower motor on the firewall. I’m really hoping I can remove the blower motor (the white thing on the right) without removing the whole heater core (black part on the left). I’m really not trying to drain all my coolant and my AC lines. Does anyone know if it can be done? Without removing the blower motor, I can’t get to any of the seams on the firewall. So close, but so far!
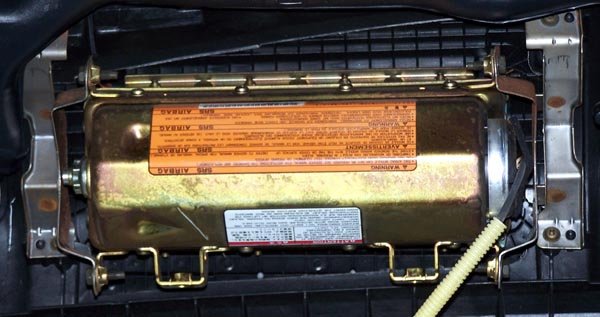
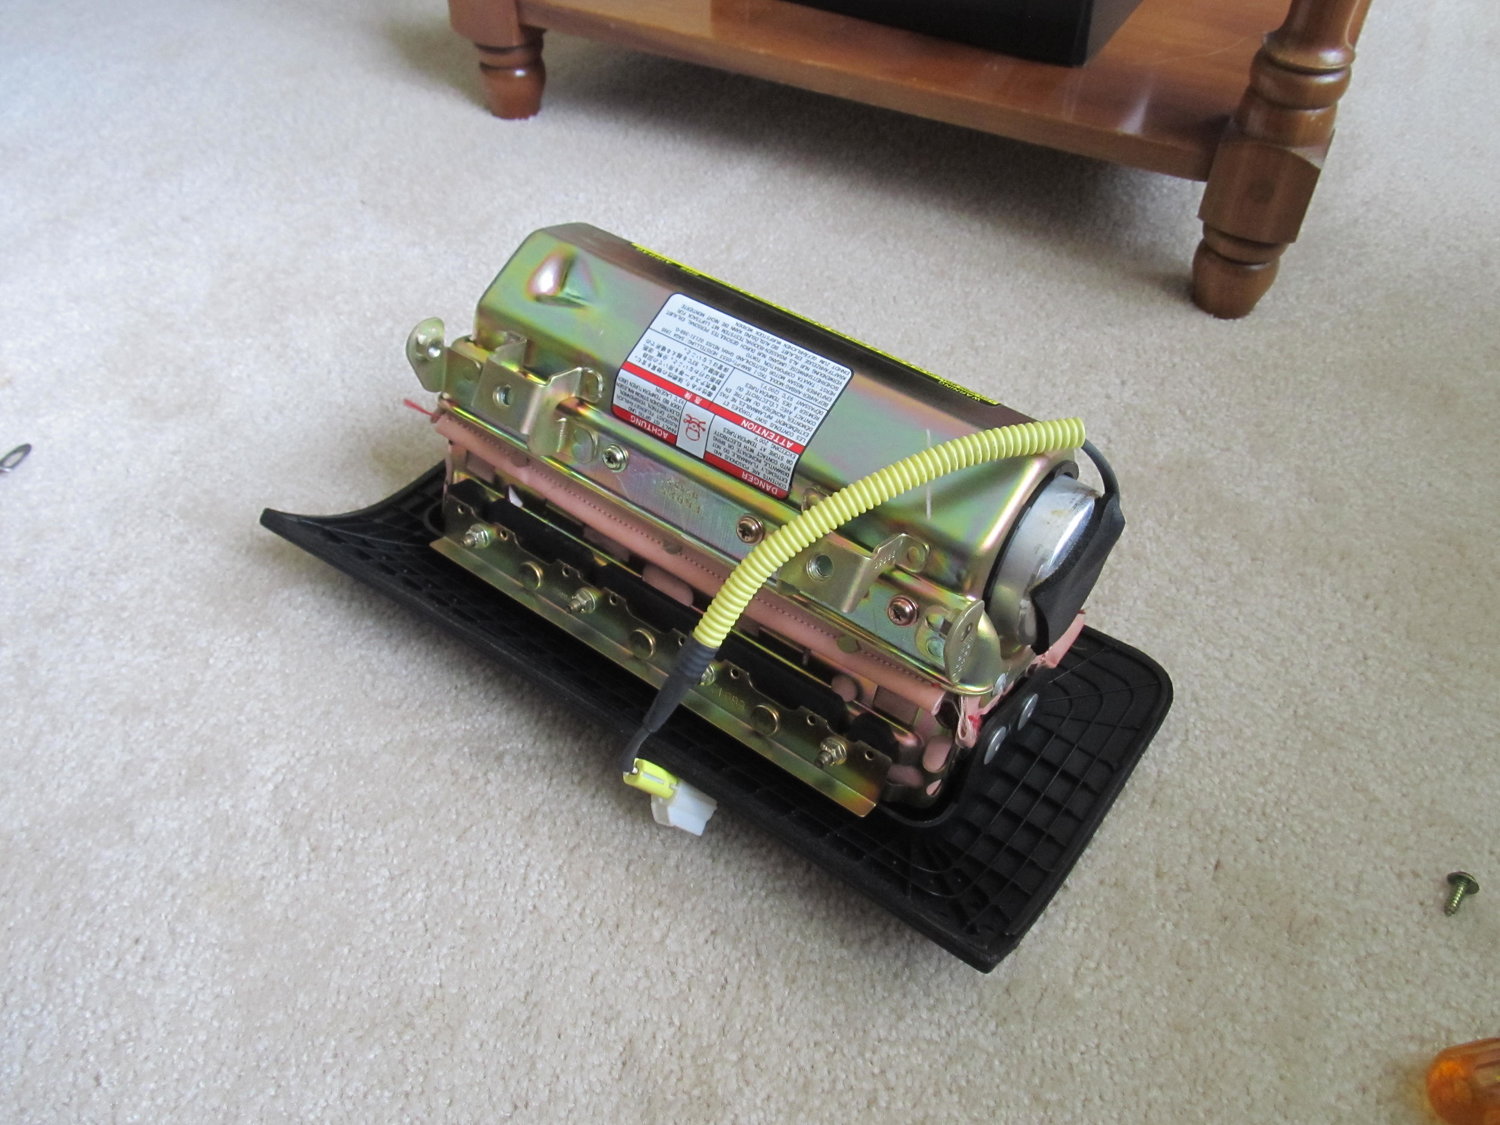
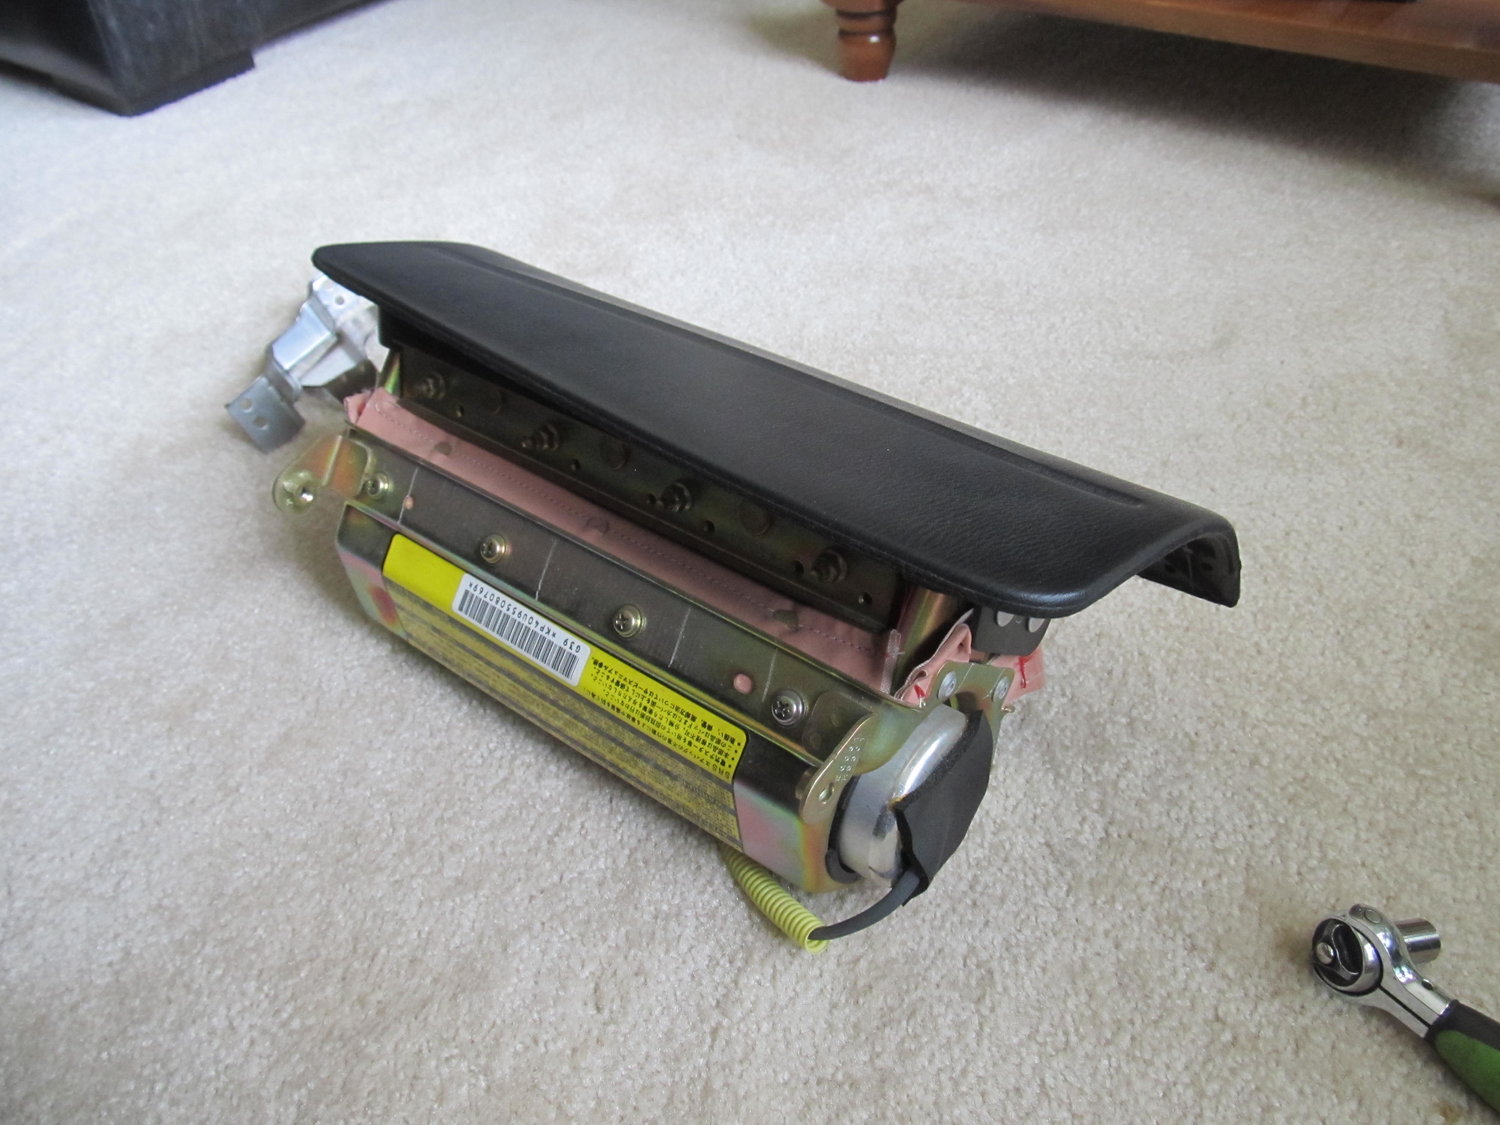
I would also like to remove the PS air bag, as I don’t have one on the DS, which disables the PS one, so I might as well get rid of it. Except it seems to be “one piece” with the outer cover:
There are a bunch of bolts and four rivet things, but without the air bag’s brackets, there’s no way to properly reinstall just the cover. Does anyone know if this can be done, or if I just need to keep the air bag?
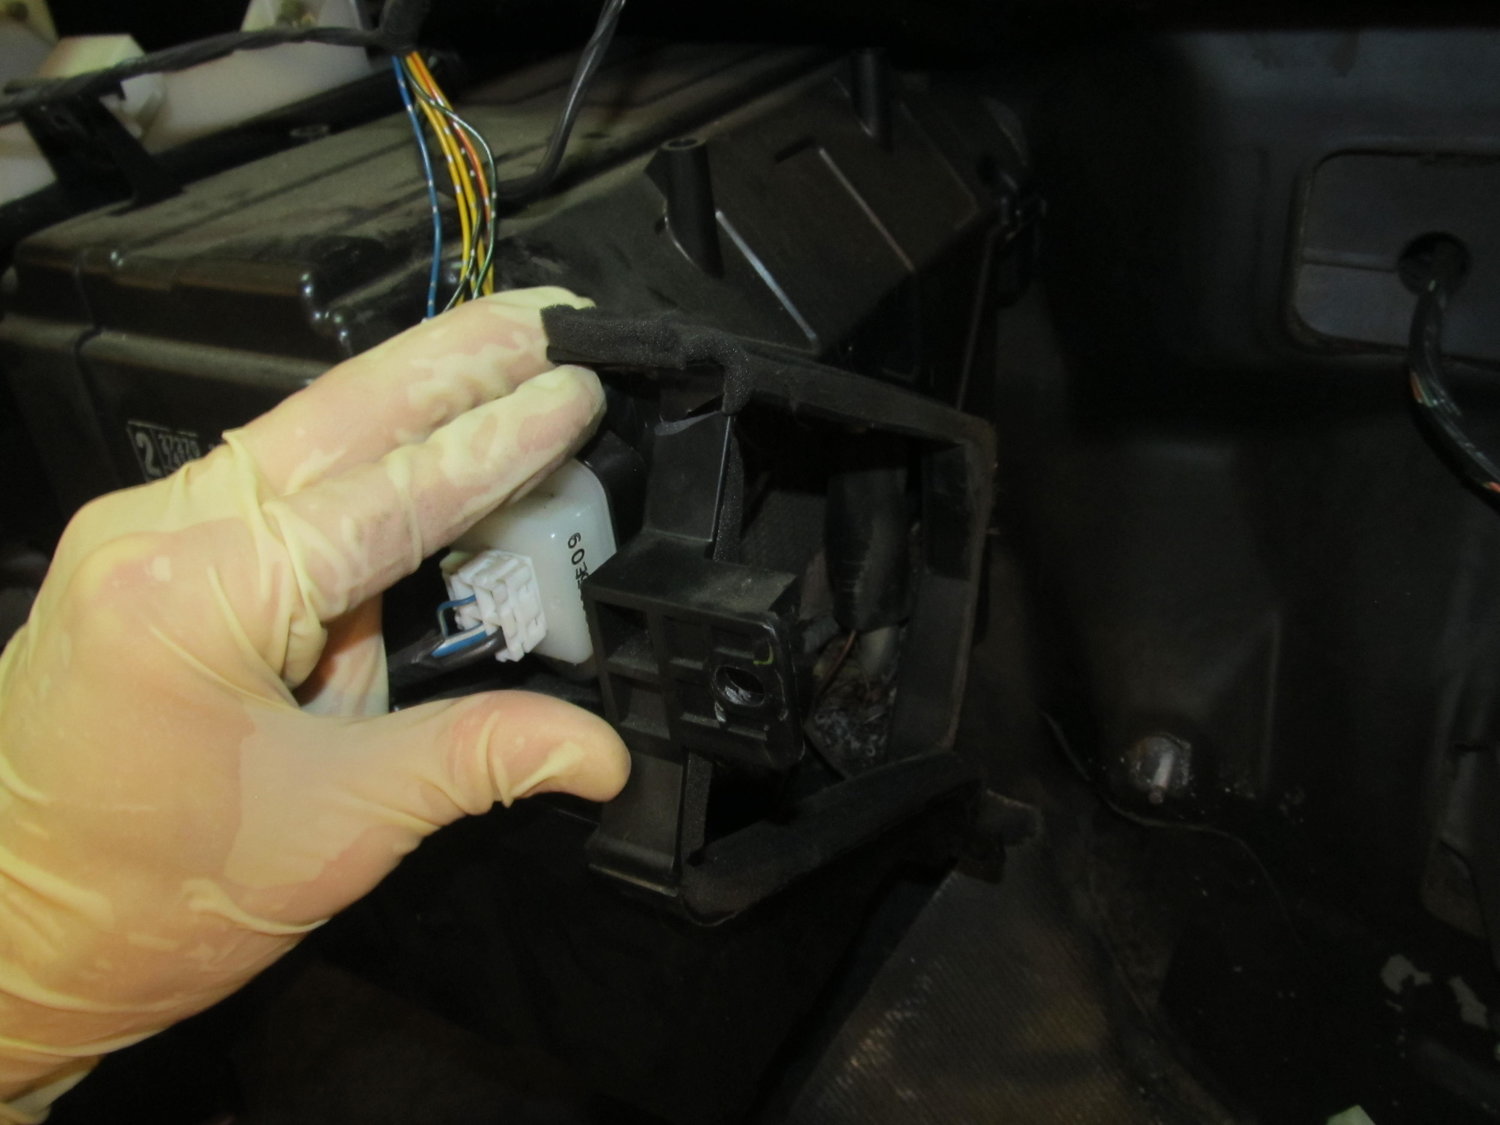
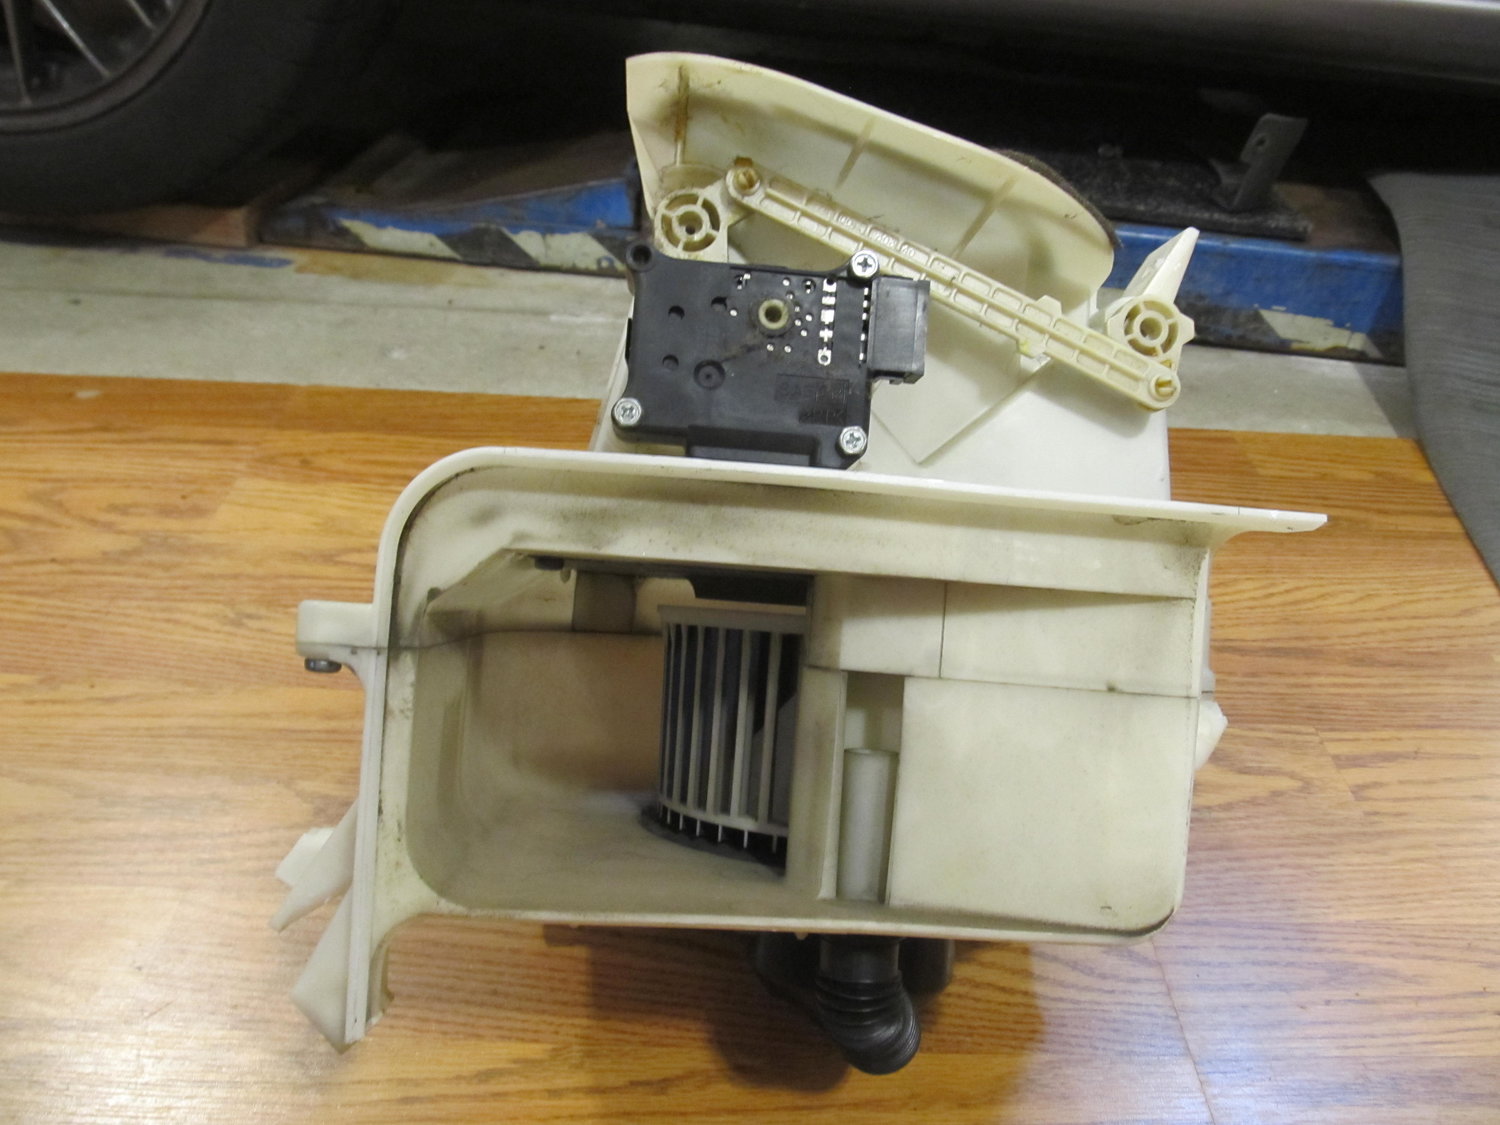
Well I got the blower motor out without removing the AC evaporator in the black box to its left! I was under the impression that the black box housed both AC and heater stuff, but upon looking at the lines from the engine bay, it became clear that the black box only held AC stuff. The main blower assembly in the center is what houses the heater stuff I guess. I do have the ability to recharge the AC, but it’s not something I’m very good at, and I didn’t feel great about venting my whole system to the atmosphere. So I hoped and prayed that I would find a quick and simple way to get out the blower by itself. I went back into the garage this morning pretty worried about what the day had in store. I had the idea that I might want to trim off some plastic from the black box to give me enough room to slide out the blower. I was in there looking at it, and noticed that one of the sides for the black AC box was pretty flimsy. With almost no effort, I was able to snap off a good piece of it. I then followed up with my snips, and with that little bit of plastic out of the way, I could get the blower out! It was a joyous moment to be sure. Here’s what I did:
That little bit of plastic was all that was keeping me from getting the blower out!
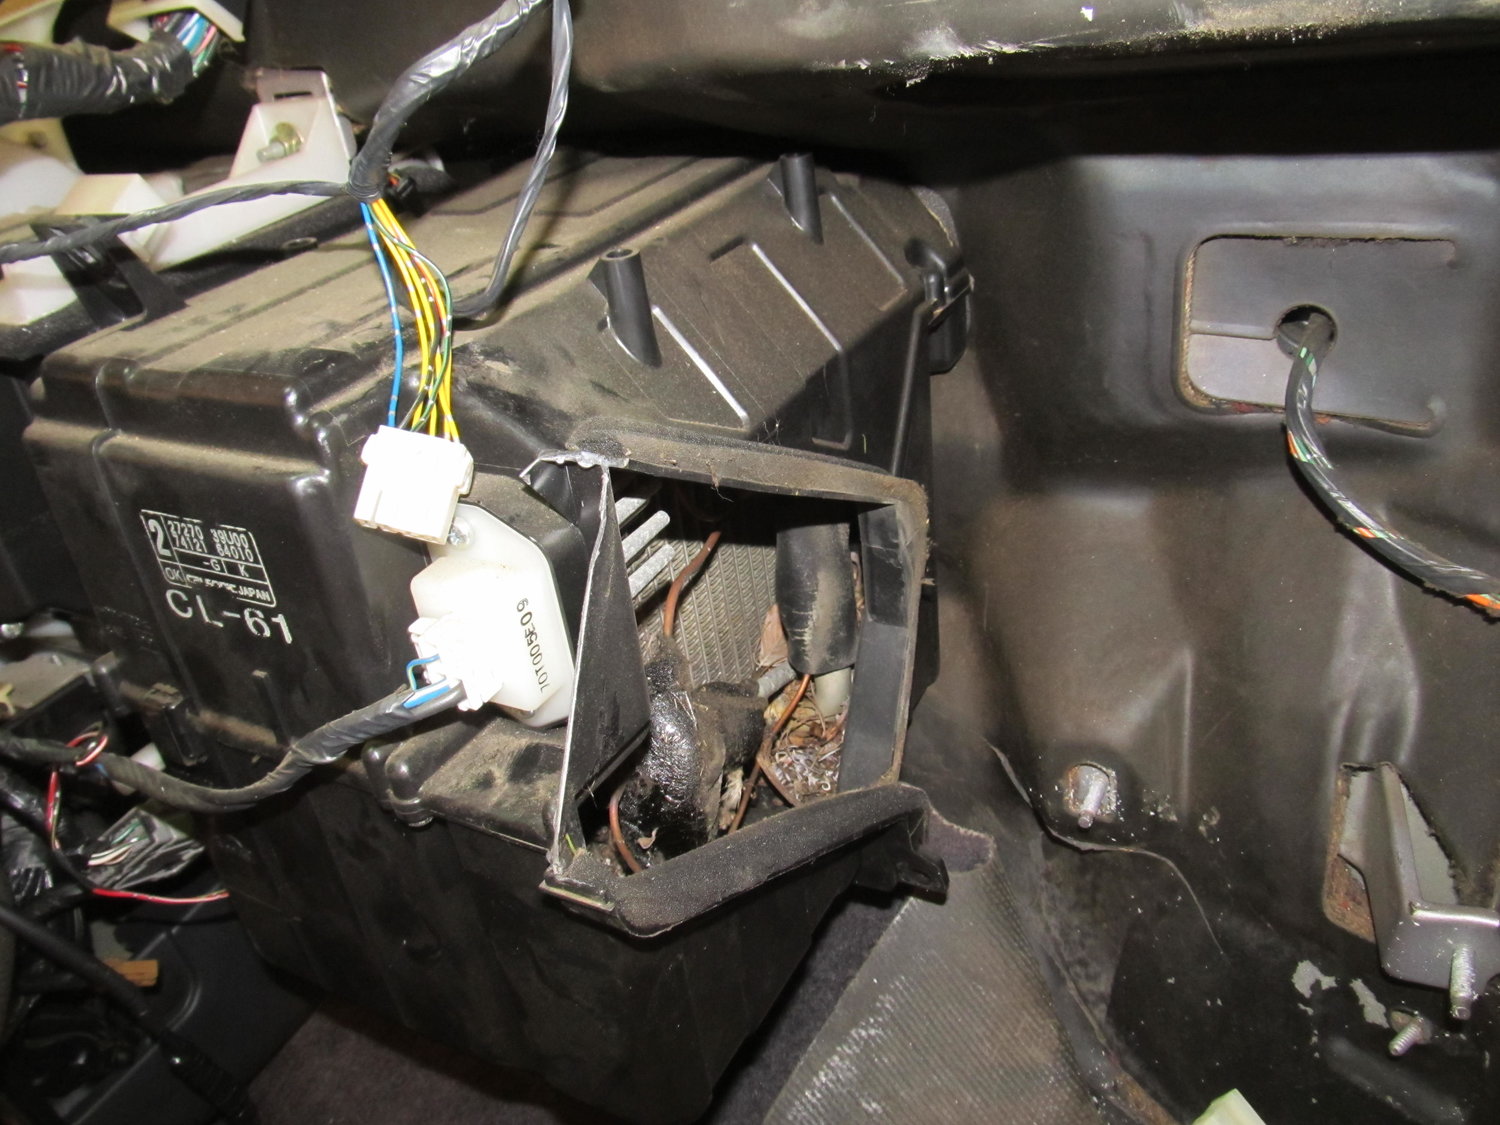
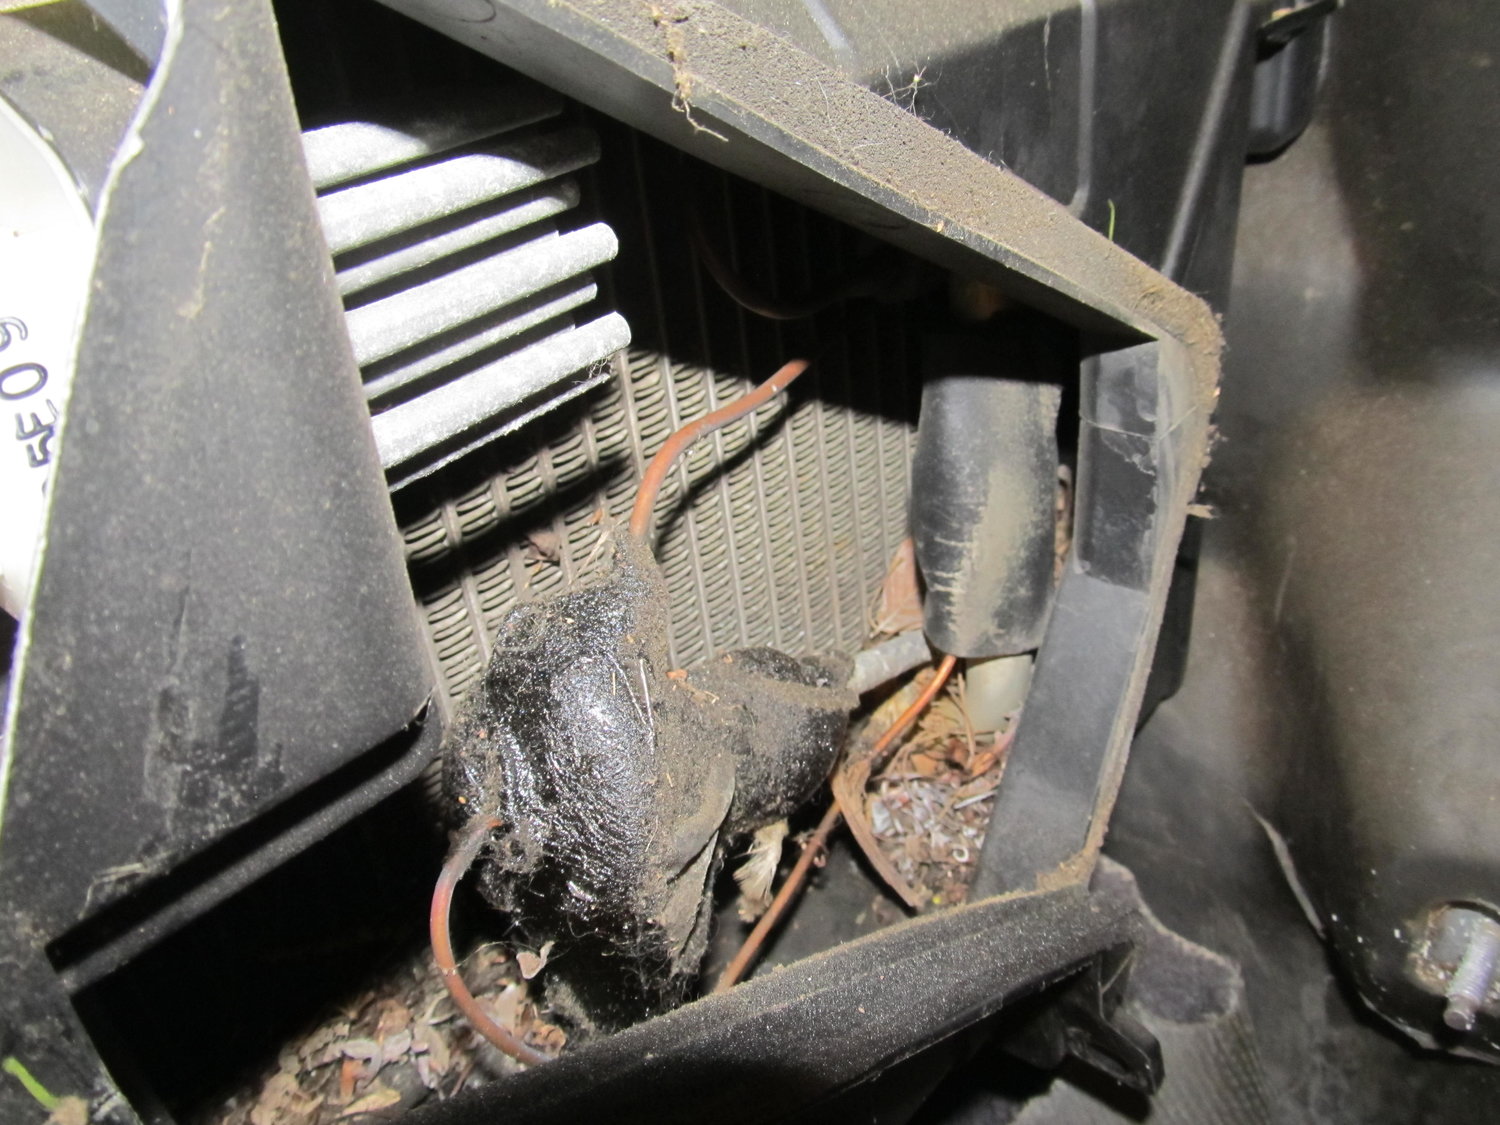
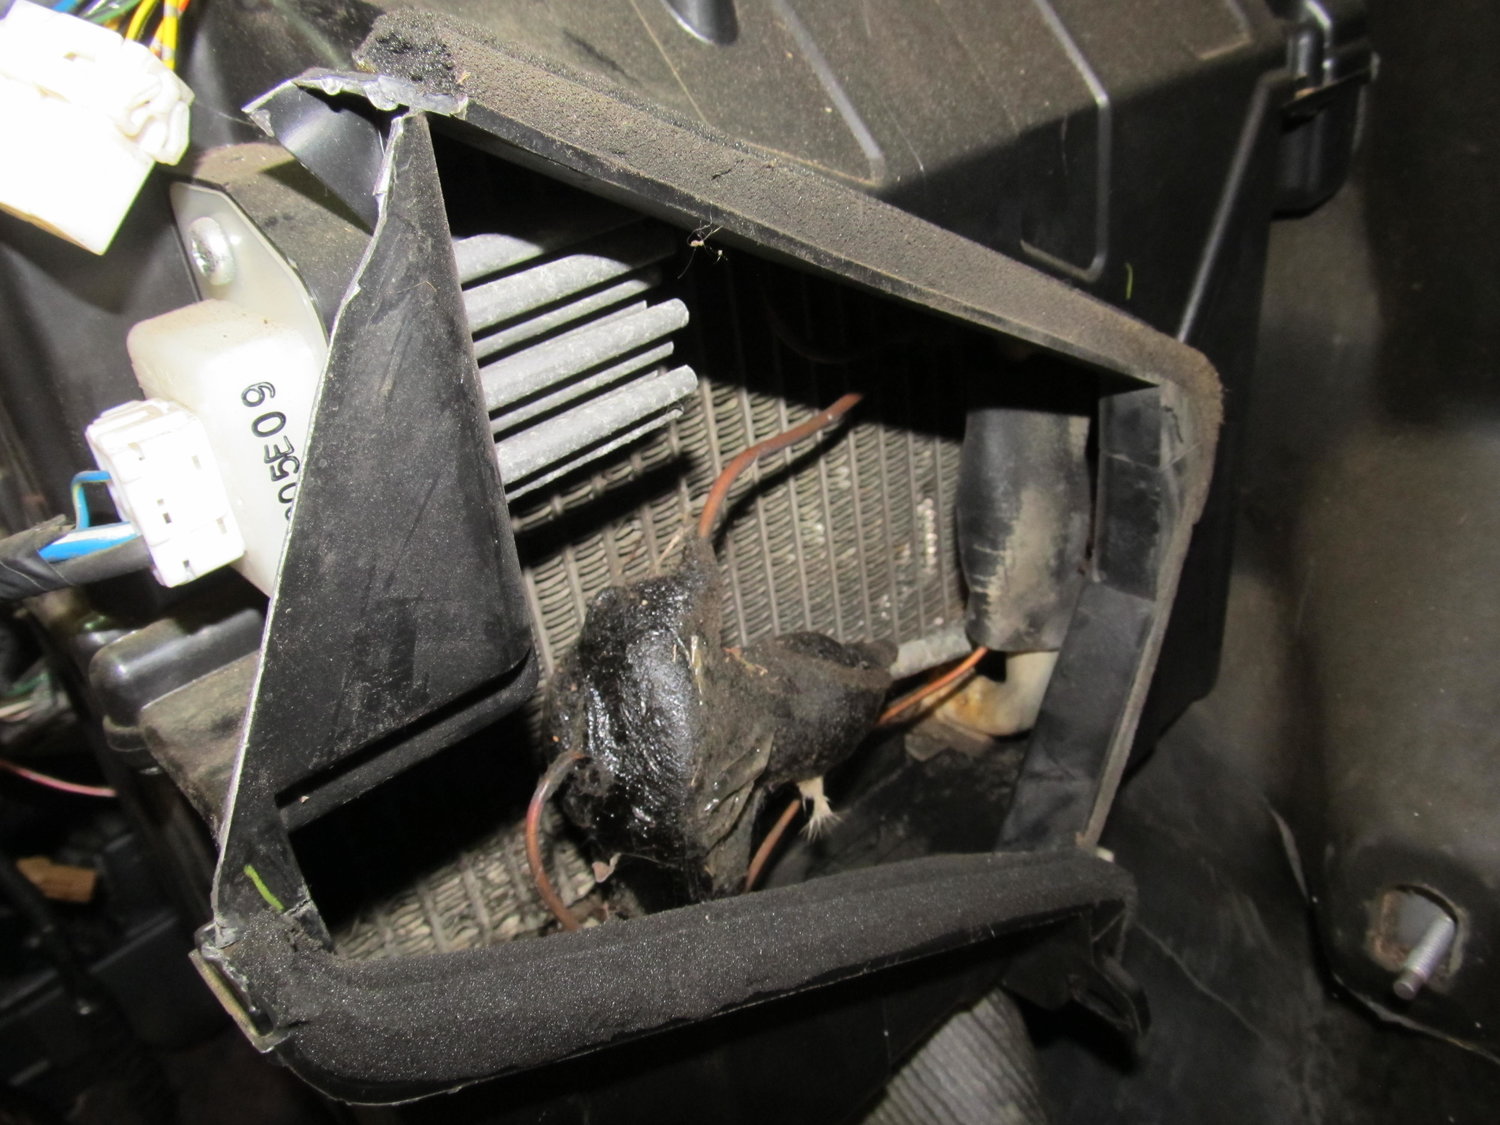
As this out of focus picture shows, there was a good amount of debris in the evaporator housing:
So I spent some time with different picks and my shop vac and cleaned it all out:
The blower was actually very clean:
So I was then left with this:
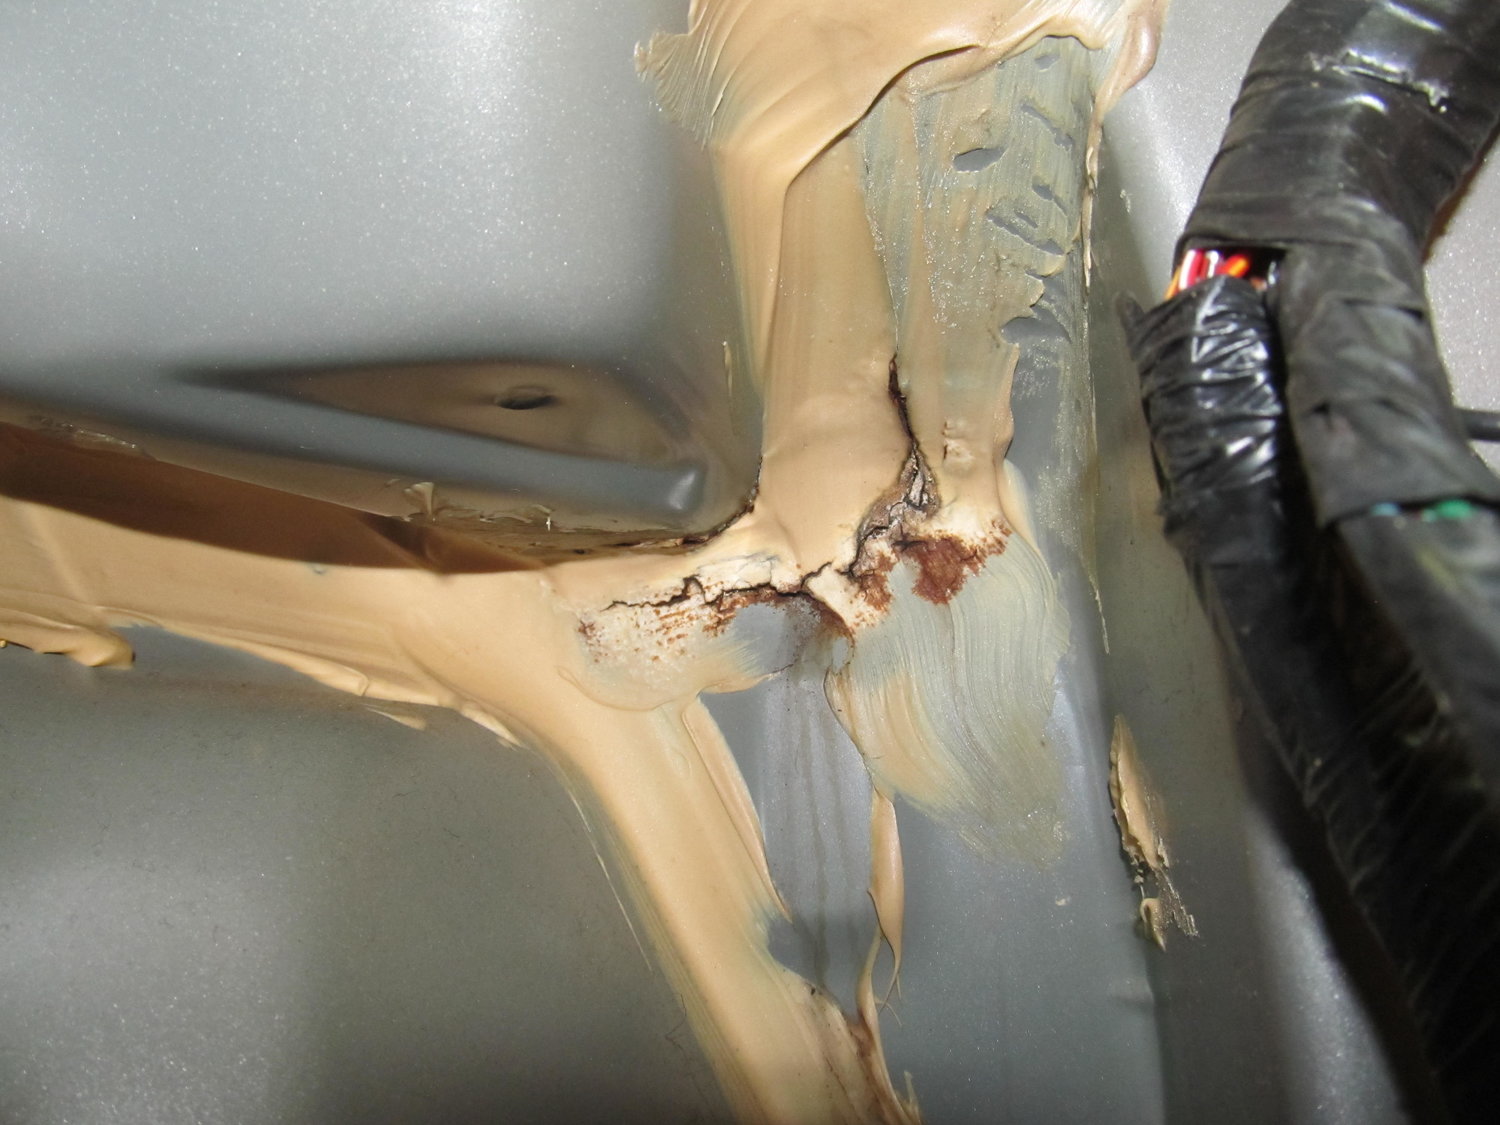
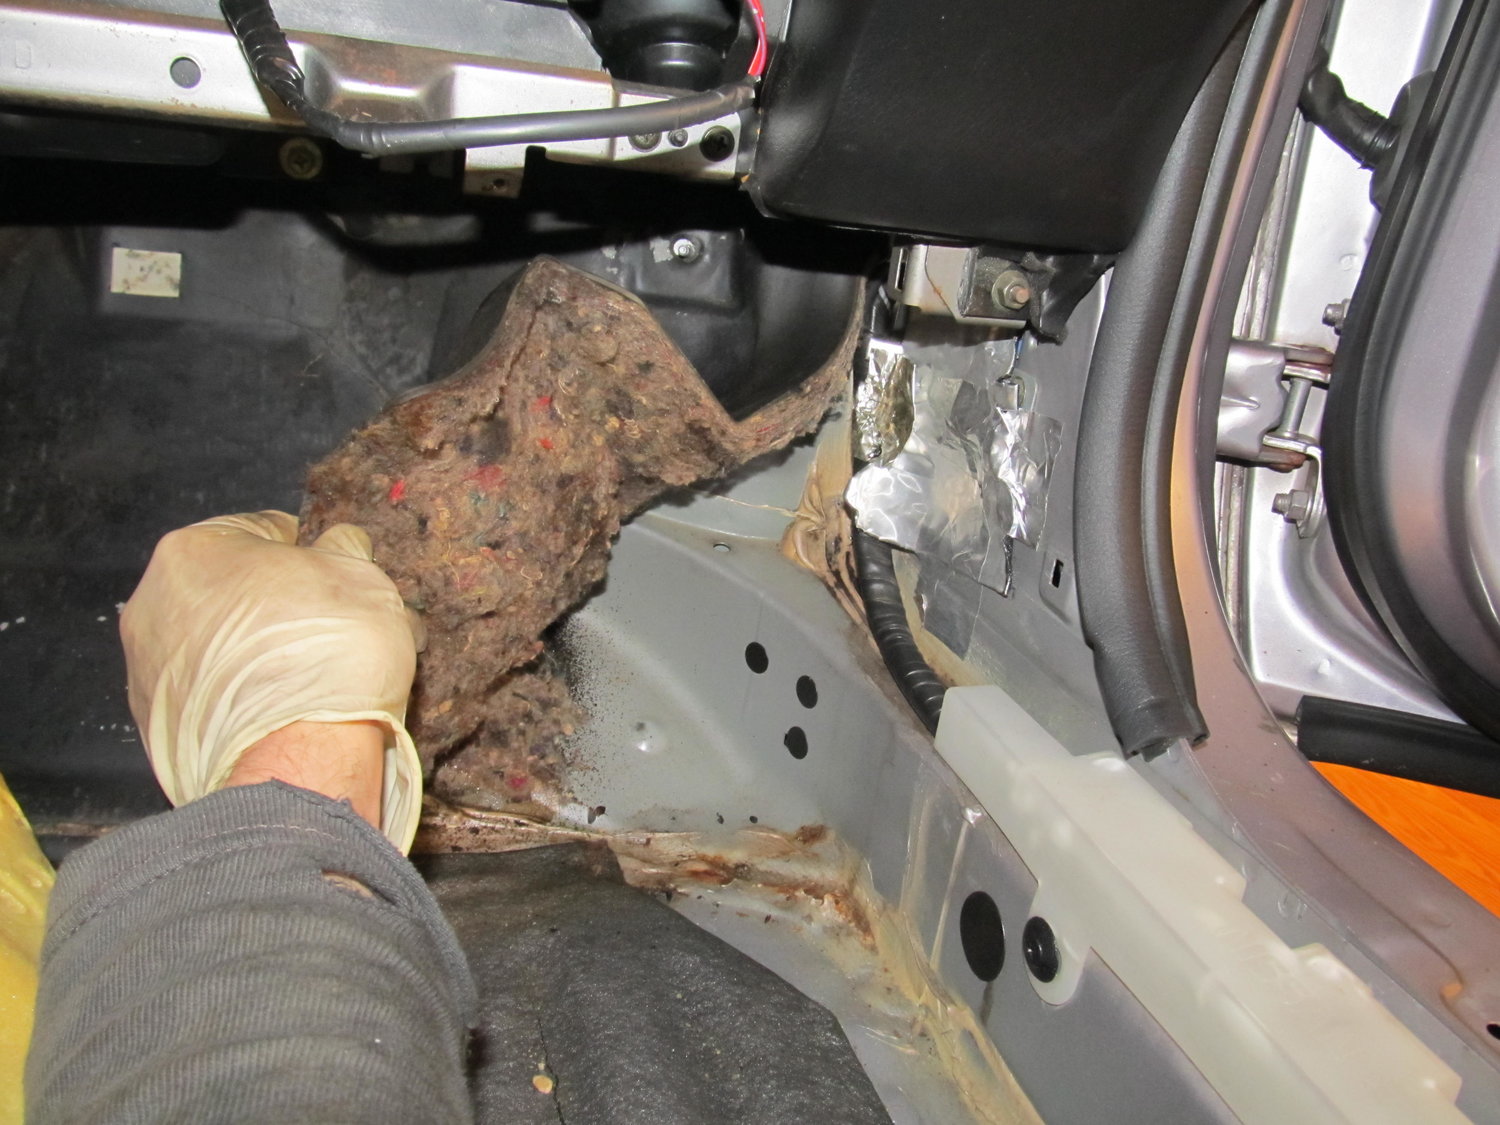
But there was still the factory insulation in the way. I ended up just cutting off a piece so I could get easy access to where I thought the leak was (I’ll reinstall properly when I’m all done). And with that, I was FINALLY able to see the source of my water leak:
It’s not in the exact same spot as the pics from schmellyfart, but it’s not far, maybe 2″ away. It’s clear that this area has a few body panels coming together, and it’s also right next to the drain for the cowl, so being sealed properly is crucial. If you have a water leak in a 4th gen, I wouldn’t be surprised to find it’s in this area! You can see three water trails coming down from that area, so I’m very confident this was my problem.
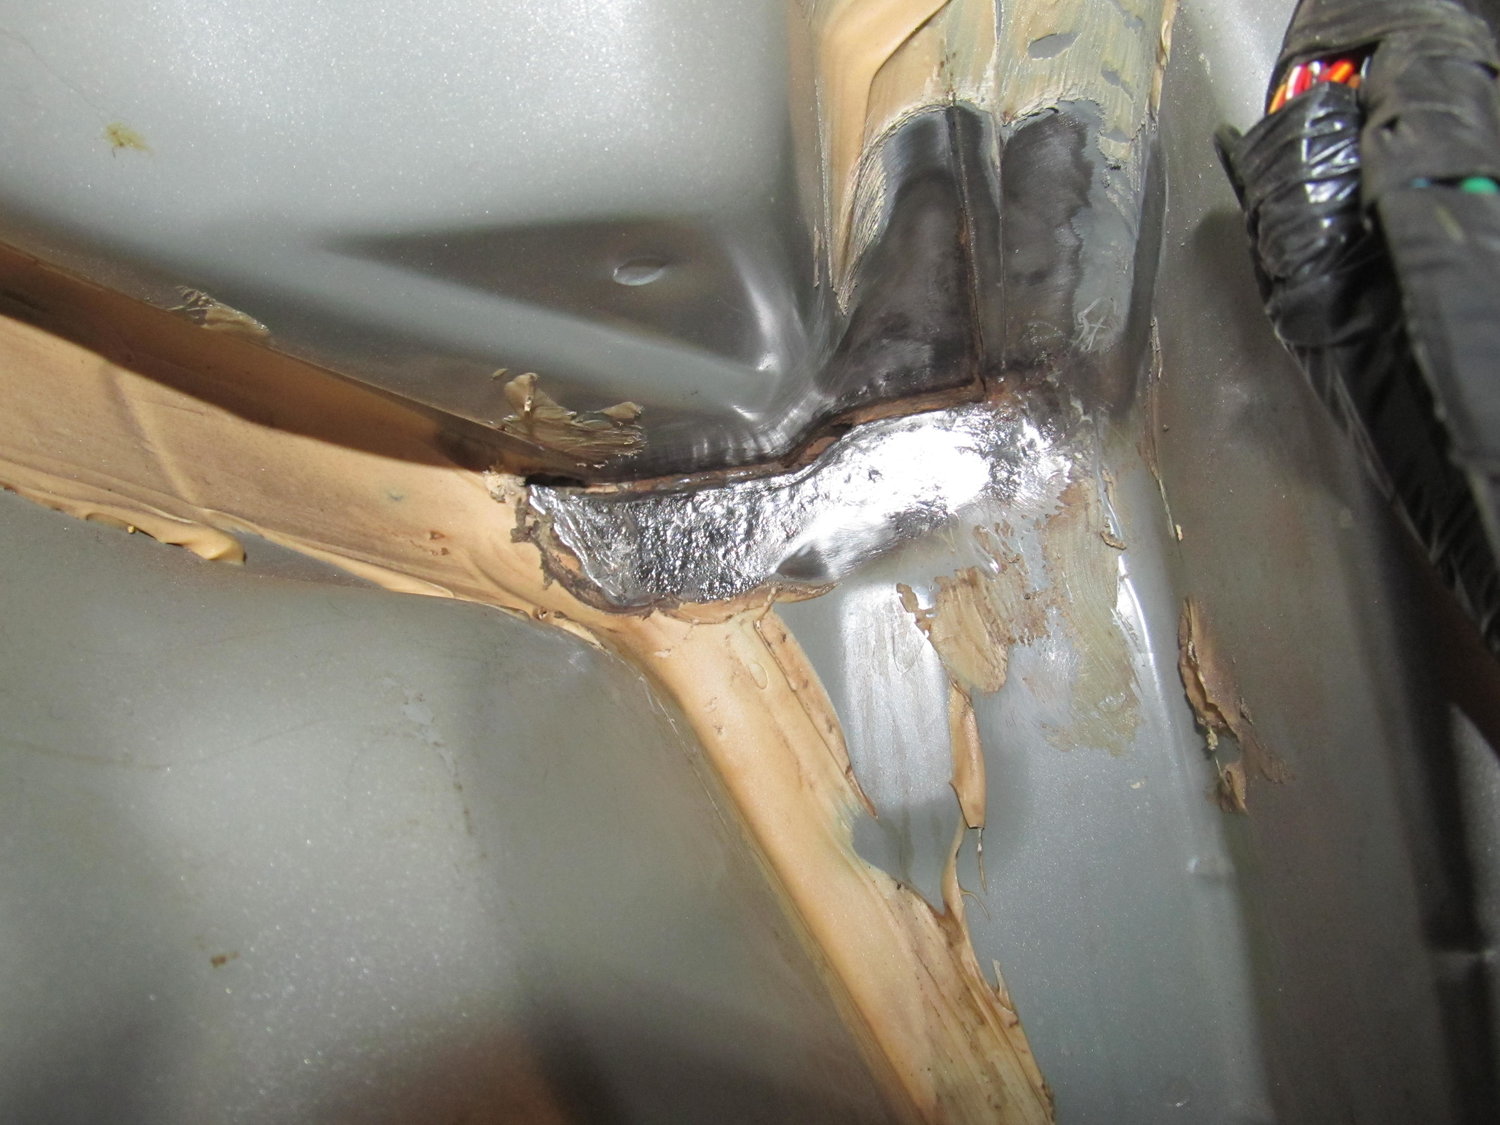
I spent quite a bit of time with different wire wheels, both on my big gun and little ones on my dremel, trying to peel back the old seam sealer so I could get a better look at exactly where the water is coming in.
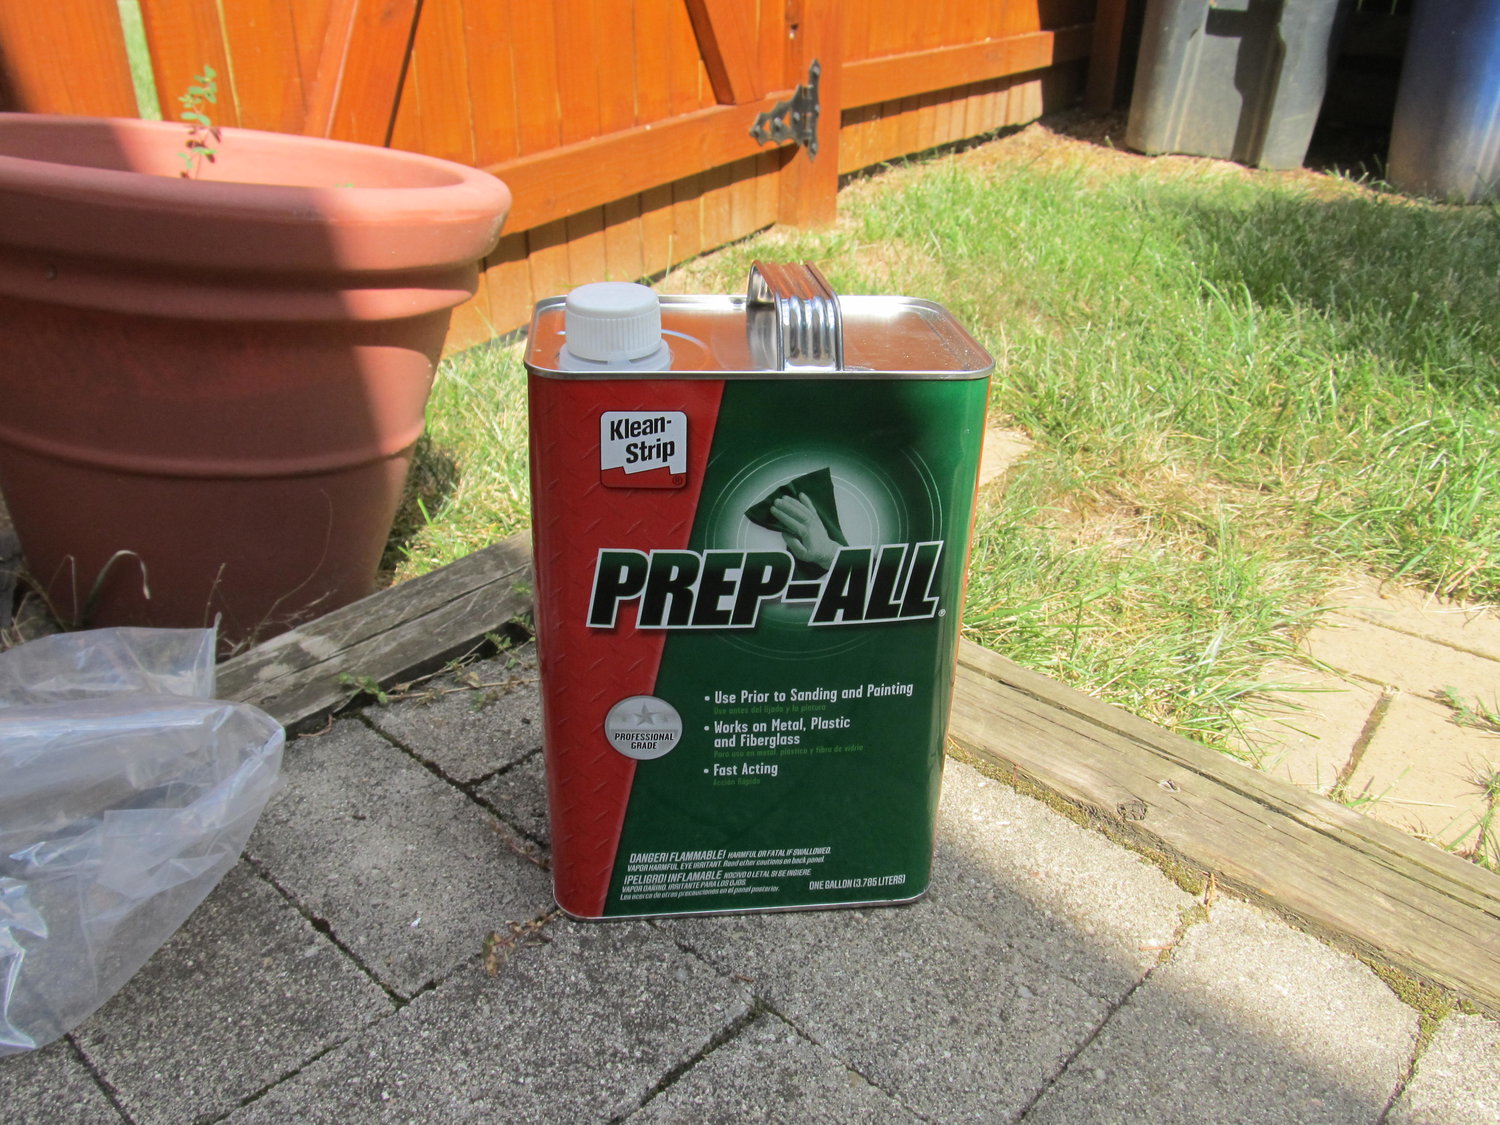
It doesn’t really come through in the picture, but the horizontal area just right of center is actually completely open now. I had to scrape the old seam sealer out of it with a screwdriver, because I didn’t want any of that old cracked stuff getting in the way of my fresh seam sealer. Now I’ll be able to completely refill the gap with new sealer. Access into this area was pretty awkward, and my back was aching after a few hours in there, but I think I’m happy with how clean I was able to get it. When I finally couldn’t get it any cleaner, it was time to prep the surface for the seam sealer:
This stuff is SUPER strong, and has tons of warnings all over it. I go full-hazmat when I use this stuff, but professional painters swear by it, so I grit my teeth and bear it. I was considering applying the seam sealer today, but then I thought about it more and realized I would feel much better about it if I bought a new tube of it. My current tube is a few years old, and since I couldn’t get a firm answer on its shelf life, I decided I would rather spend another $20 on new sealer than to have my current sealer fail because it was too old and didn’t adhere properly. It should be here on Tuesday, so I’ll continue after that. But for now I’m feeling pretty damn good that I was able to get the blower out by itself without ruining anything!
I’m left with this to look at, and ponder how many things I’m going to forget to reinstall, or reinstall in the wrong order. I’m not out of the woods yet!
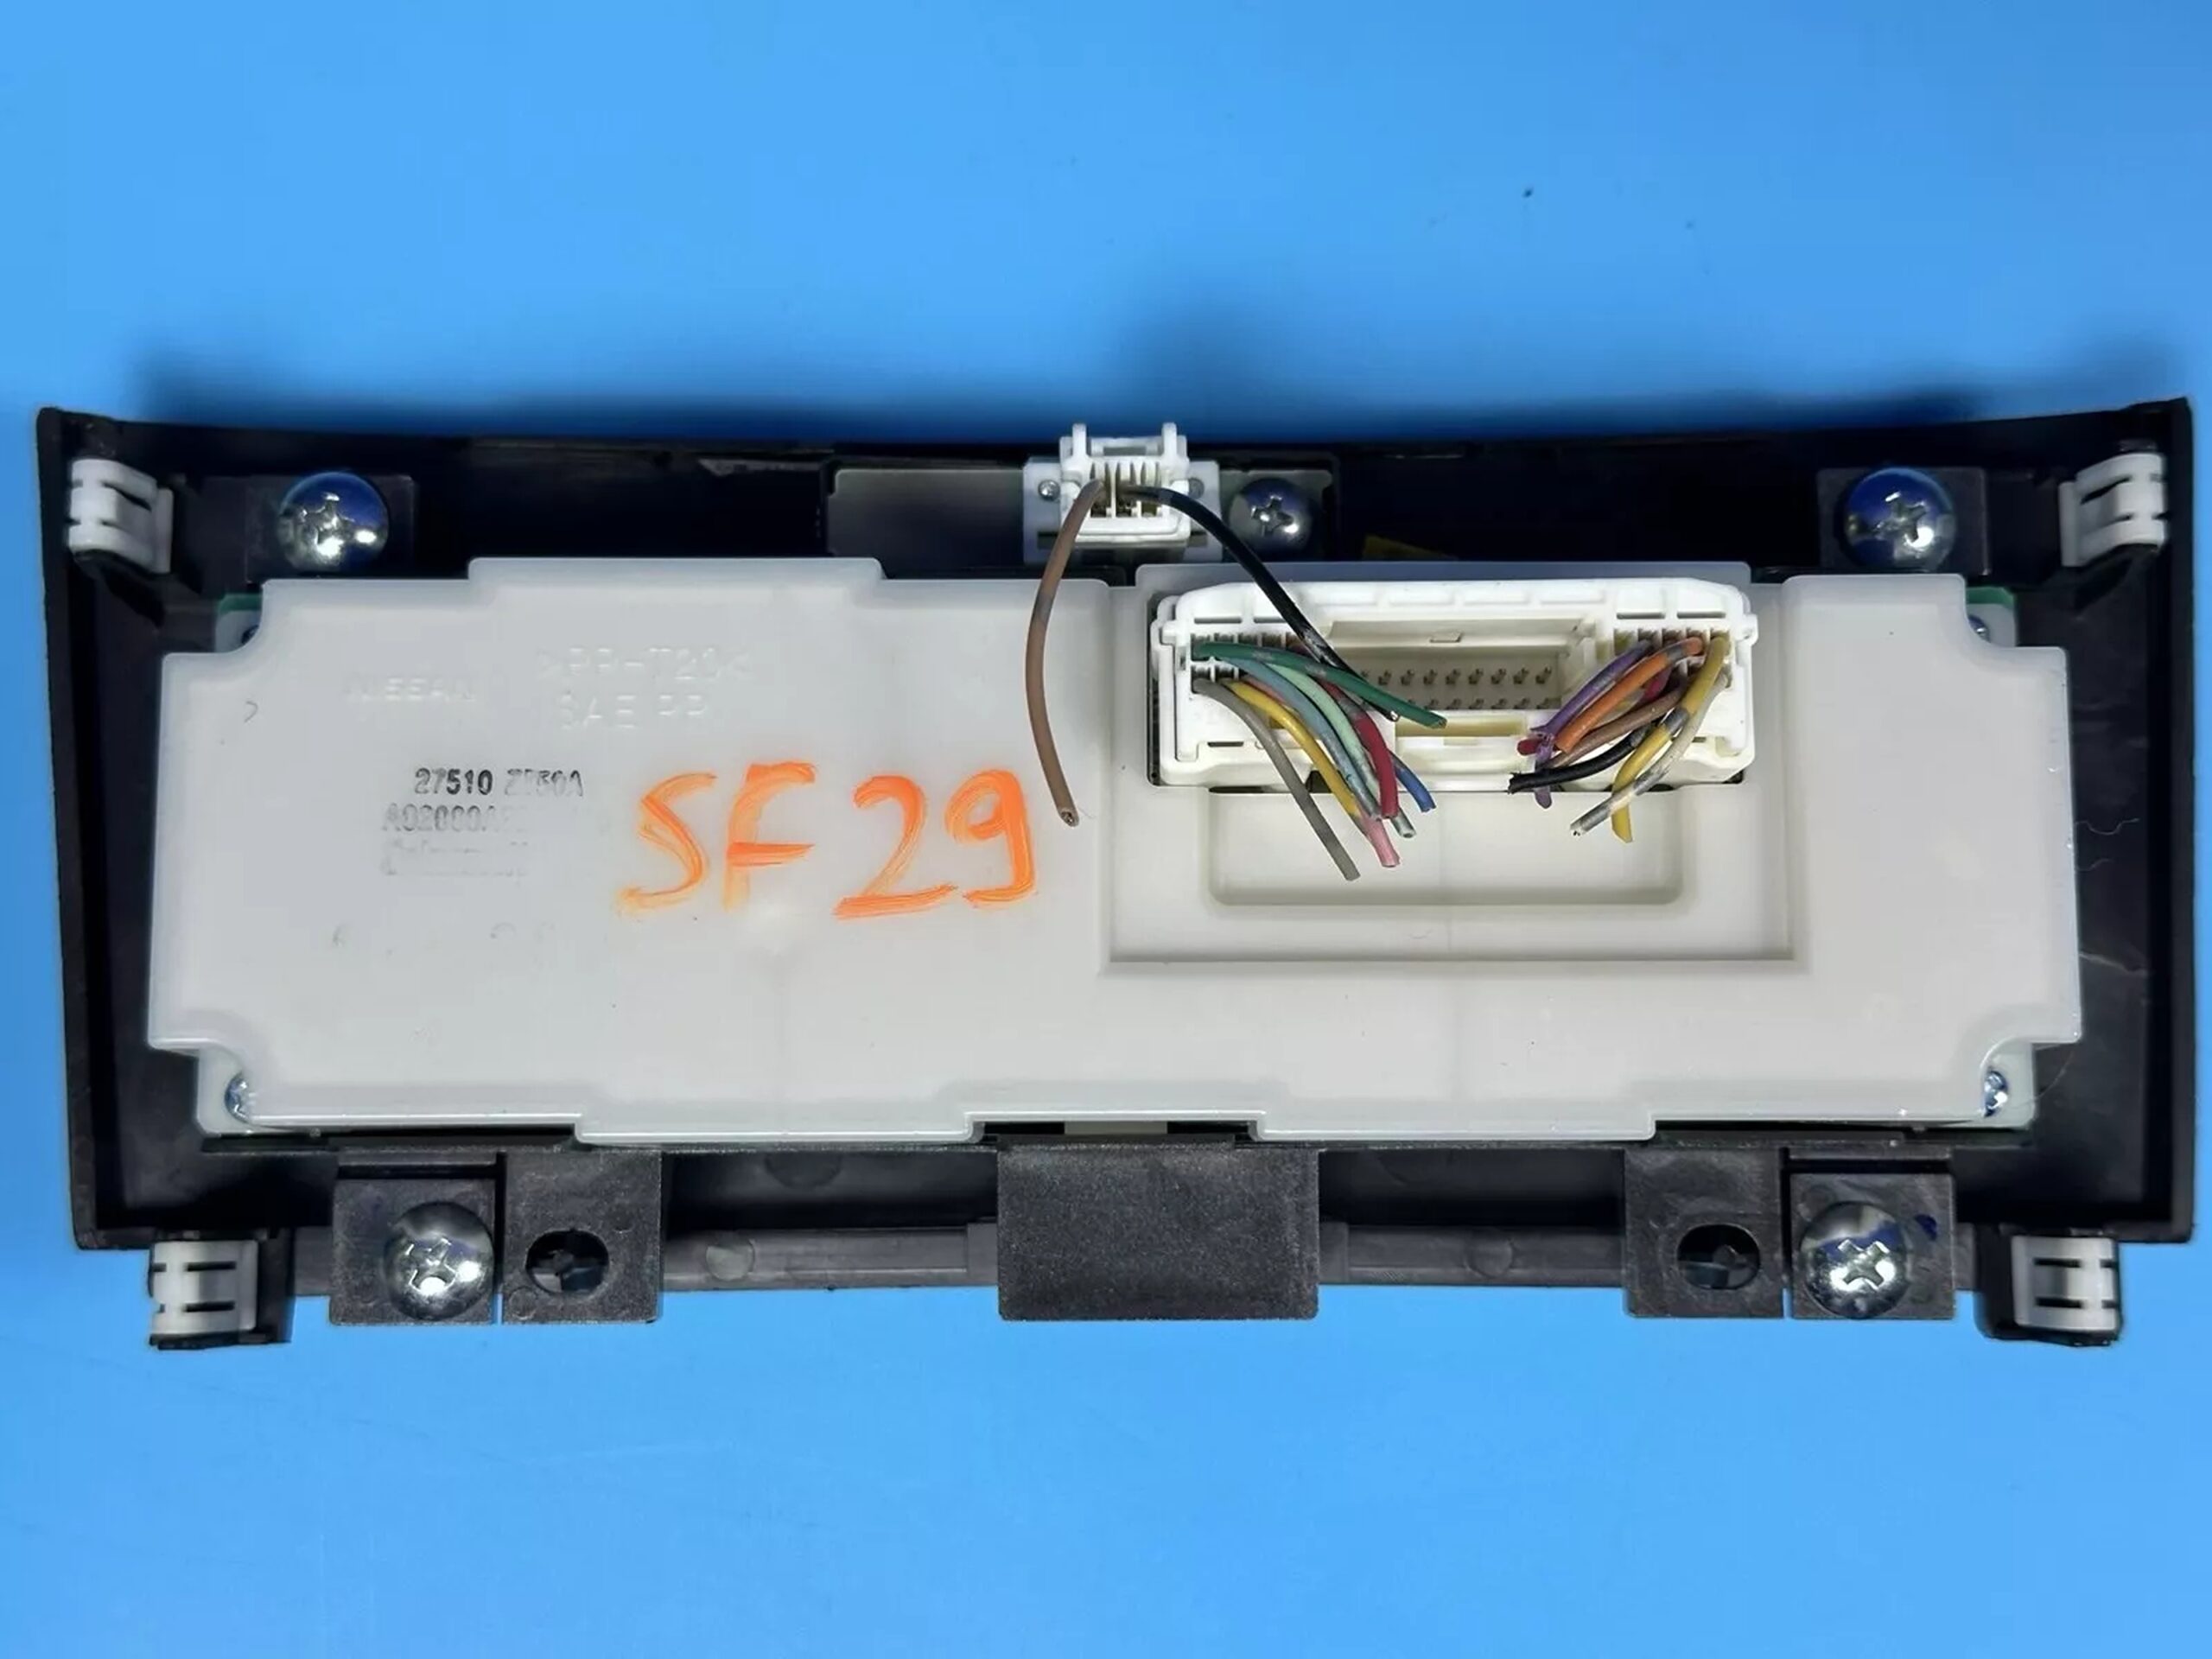
Now here is what the back of the clock unit looks like. If you look closely, you will see that EVERY wire is labeled and tells you what it is. All you have to do is hook it up to the correct corresponding wire.
Now this shows an exact picture of the wiring I have done. The RED wire from the SCANNER connects to the Yellow/Red wire. The YELLOW wire from the SCANNER connects to the Green Wire (The picture shows me splicing a black wire, that is because I had to extend the original yellow wire from the scanner.) The last wire left on the scanner is BLACK, that I just grounded to the sunroof bolt under the sunglass holder. No need to extend that wire all the way down to the clock unit for NO reason.
This will work and is the correct way to wire the scanner. It will blink or do whatever pattern when the car is off or armed. When the car is turned on, the scanner turns off.
Hope this helps and solves everyone’s problems. Simple install, but I think some of you got confused. Now everyone can have knight rider style SCANNERS.
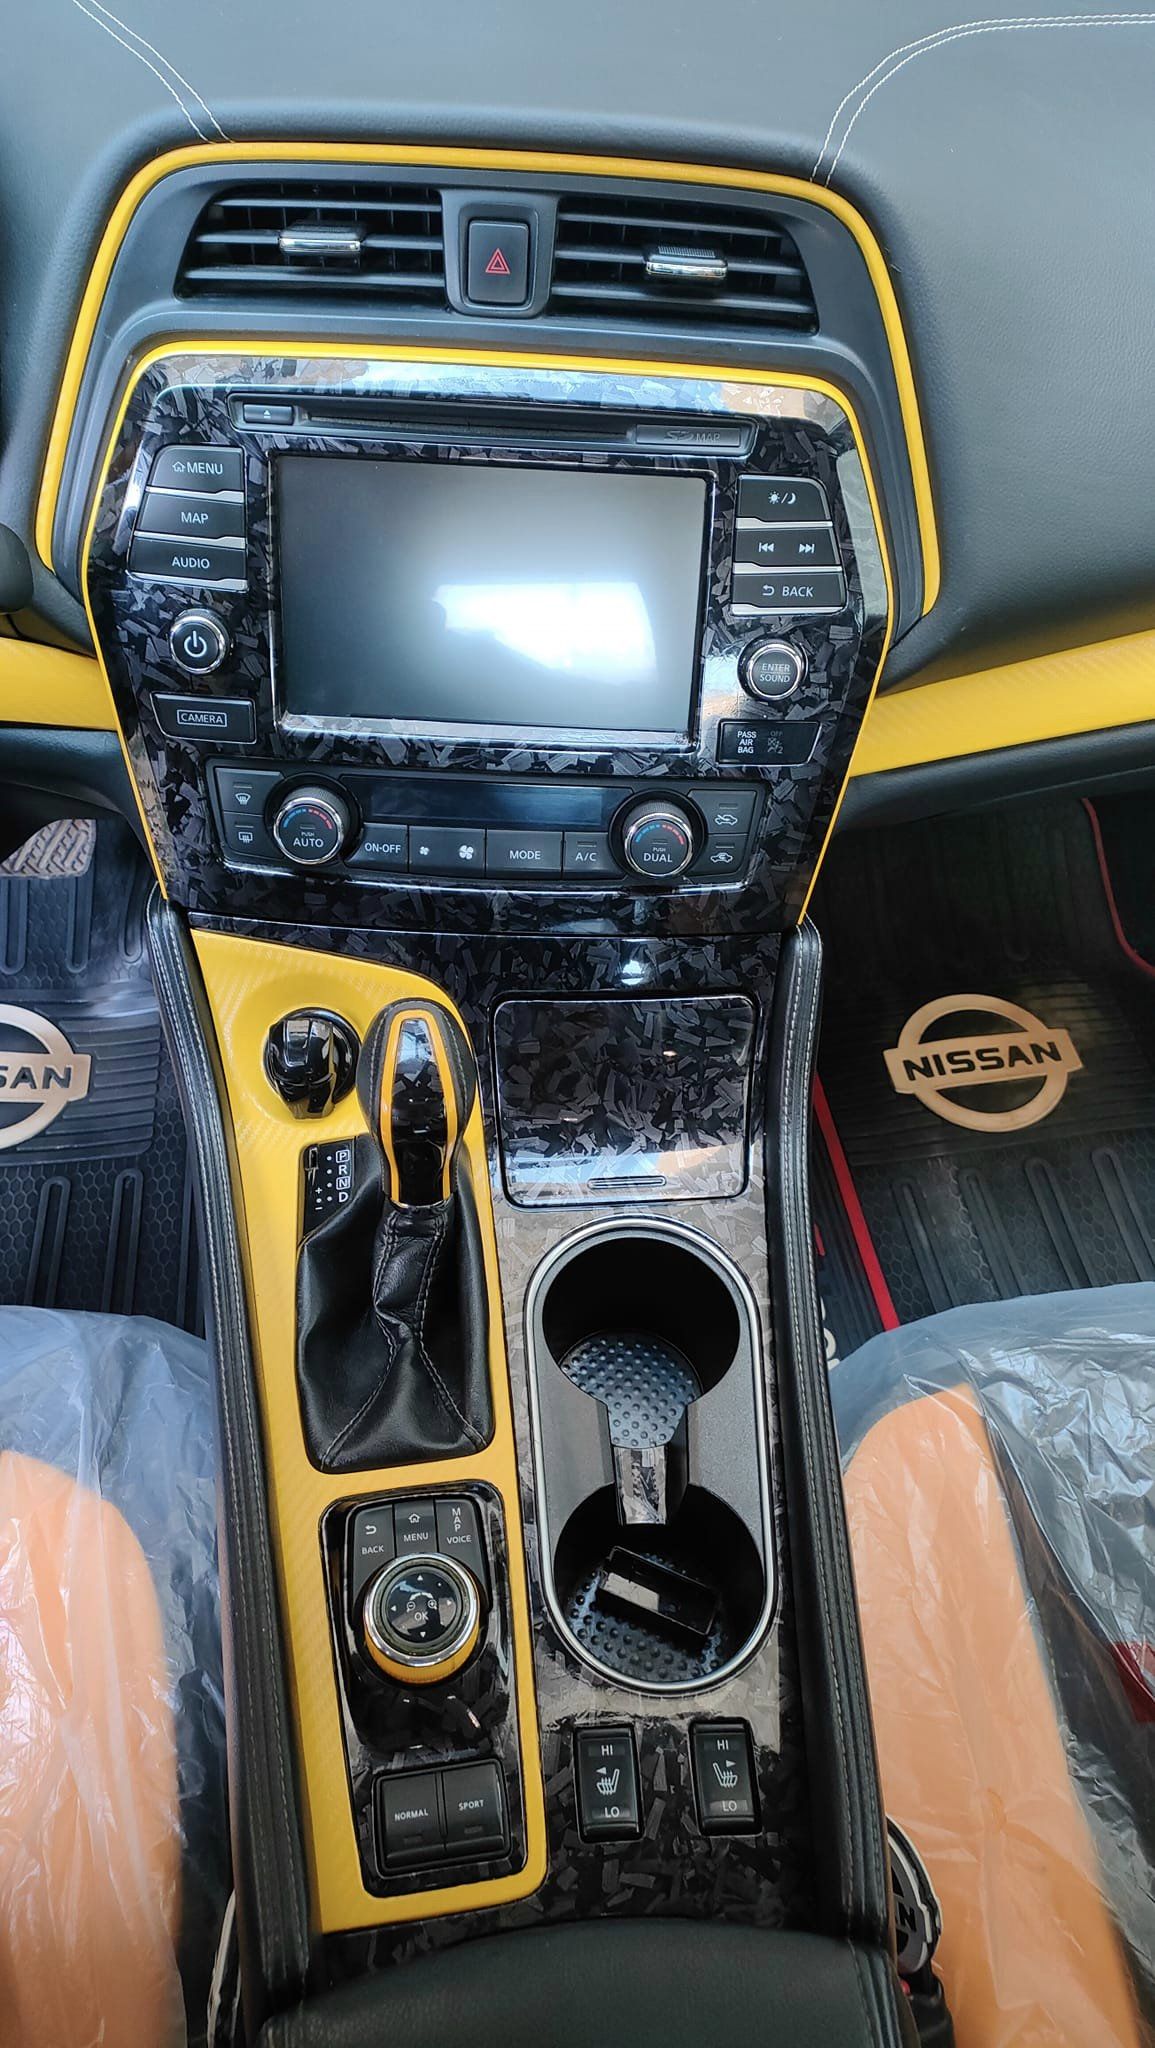
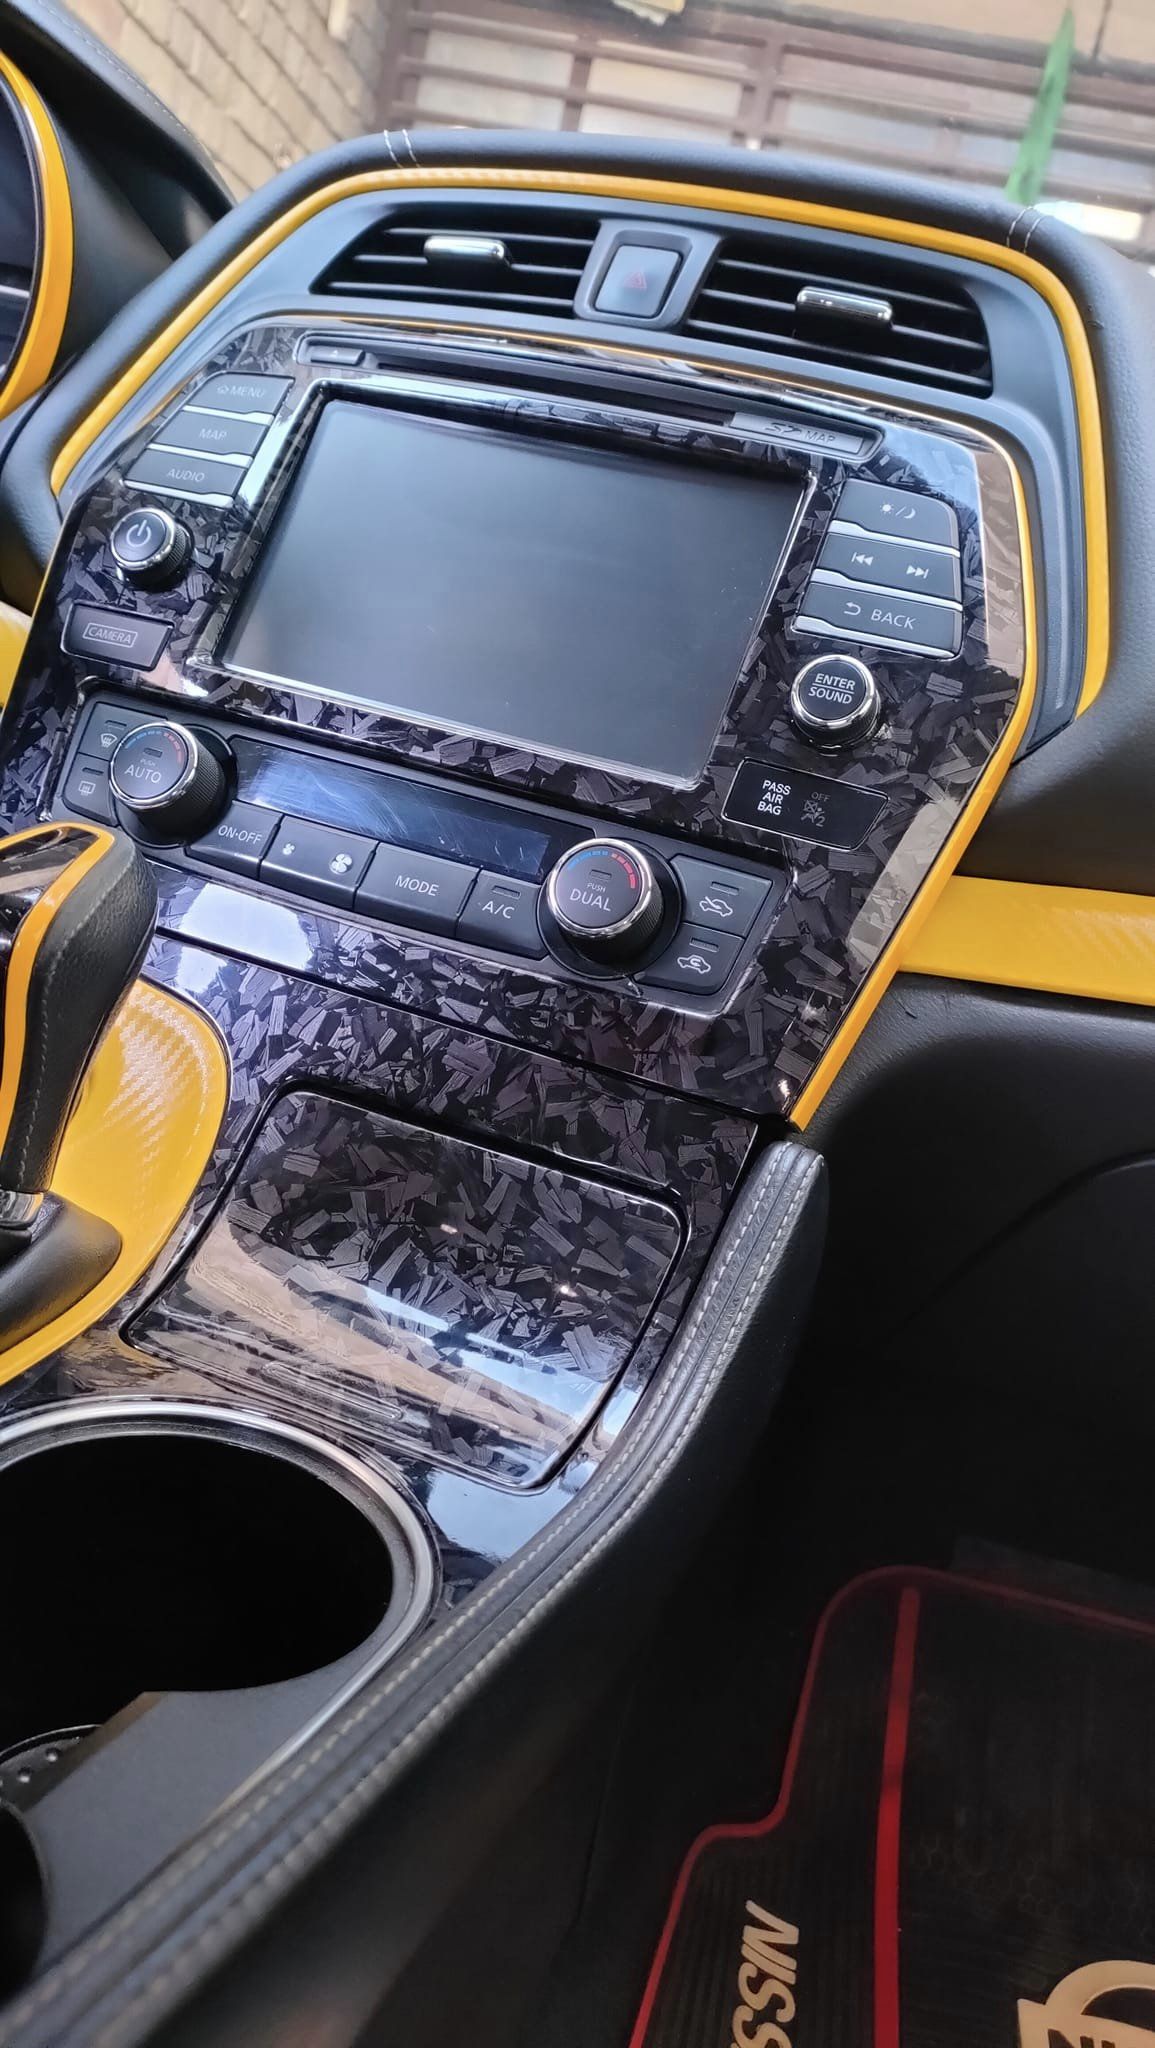
Car Photos
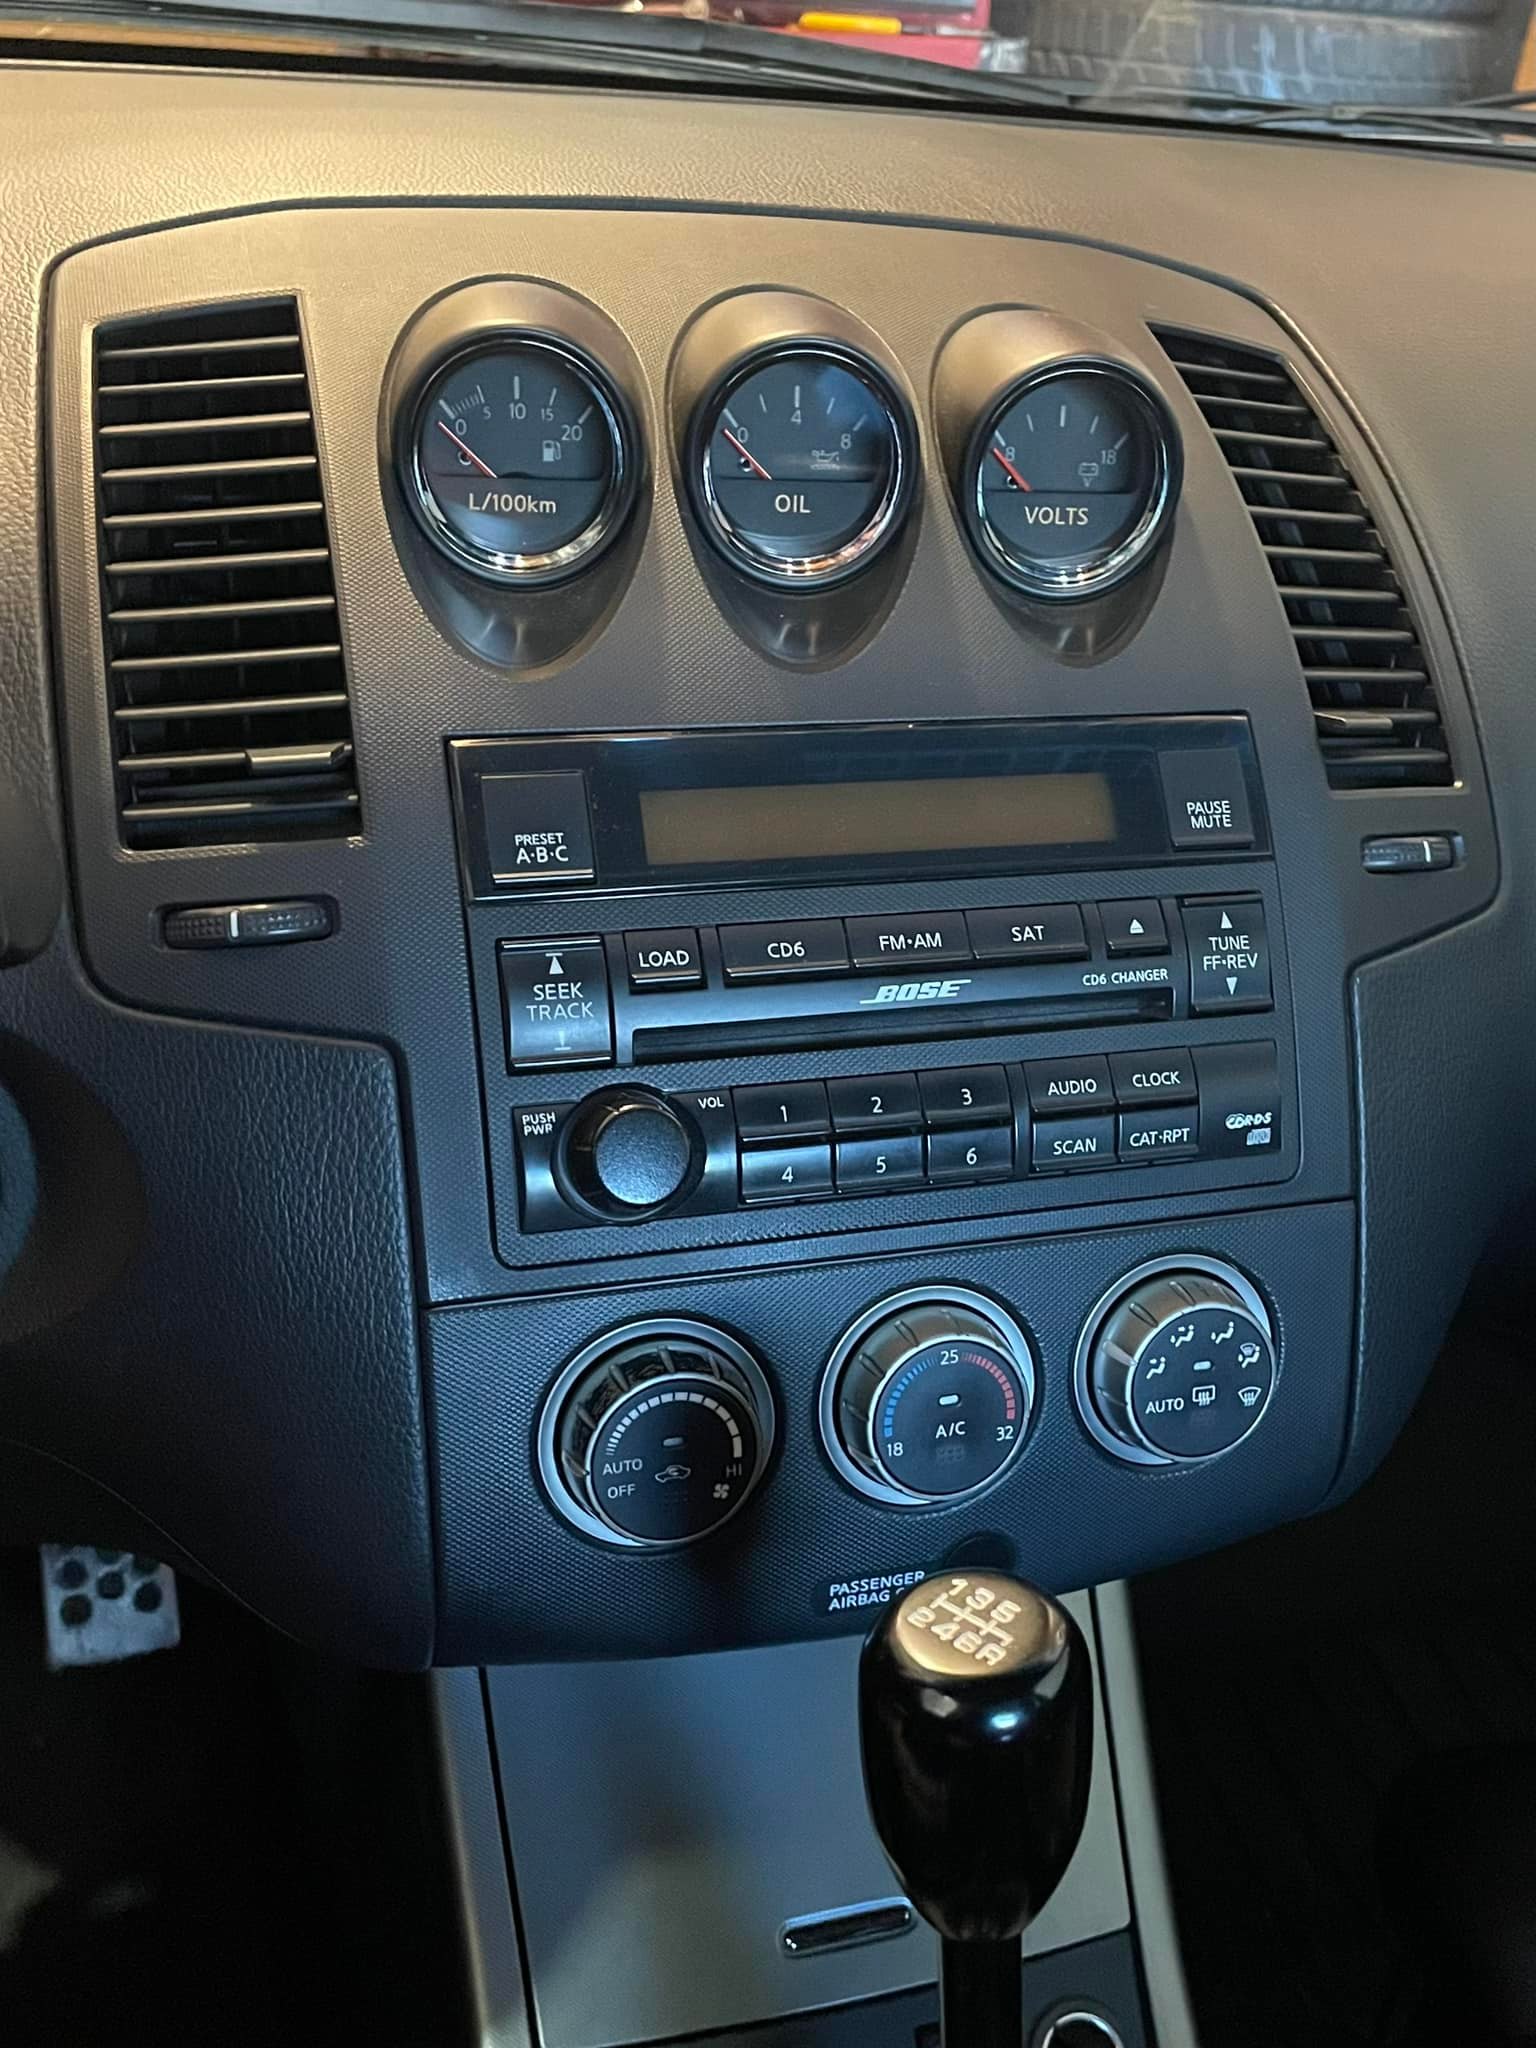
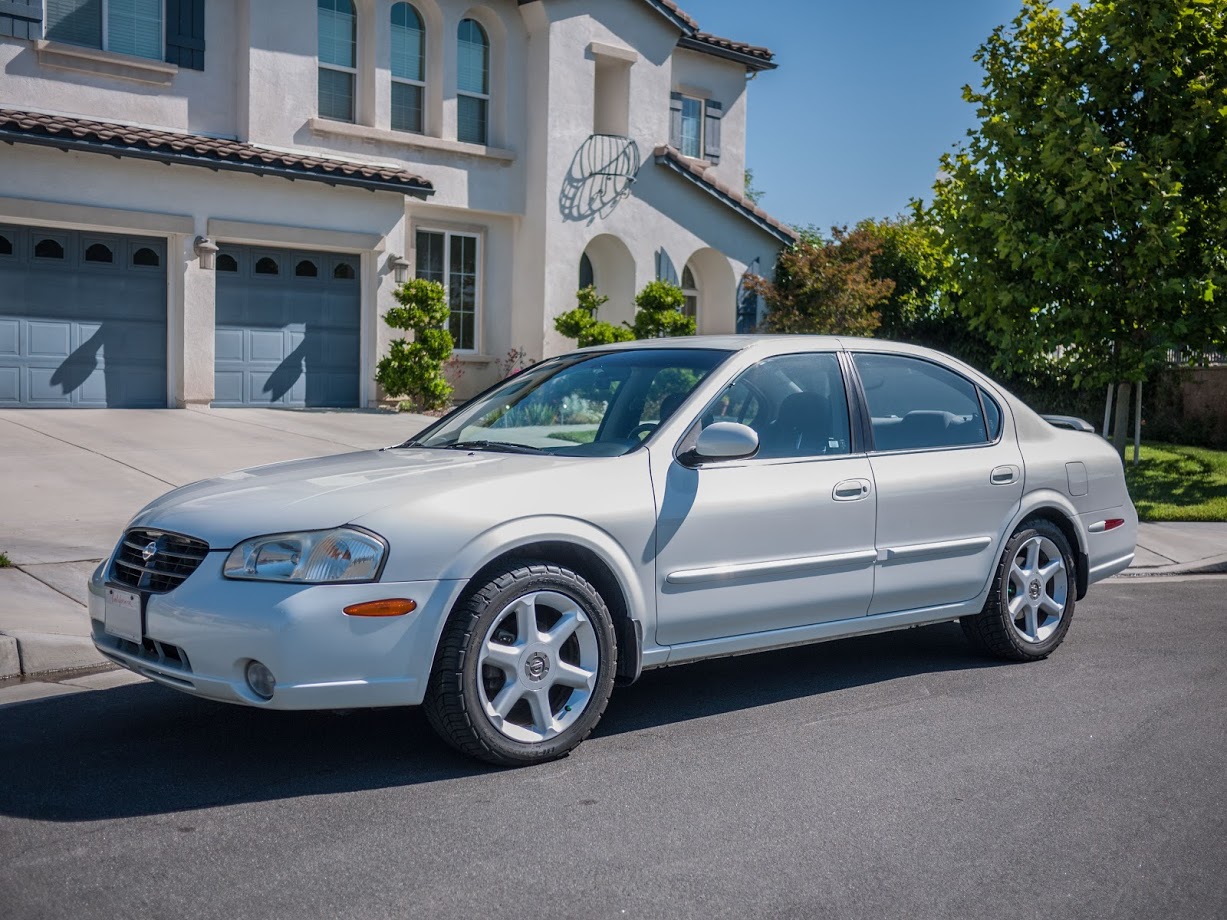
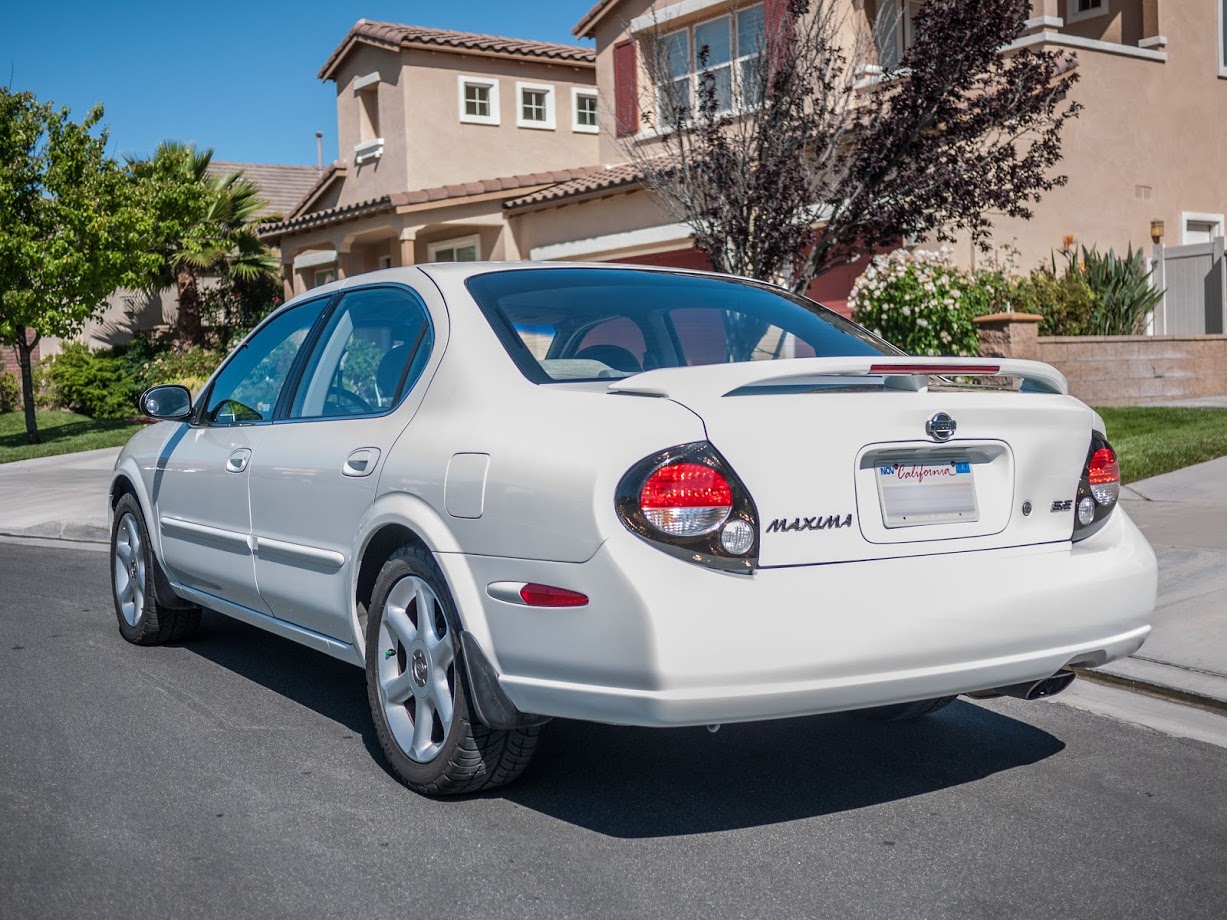
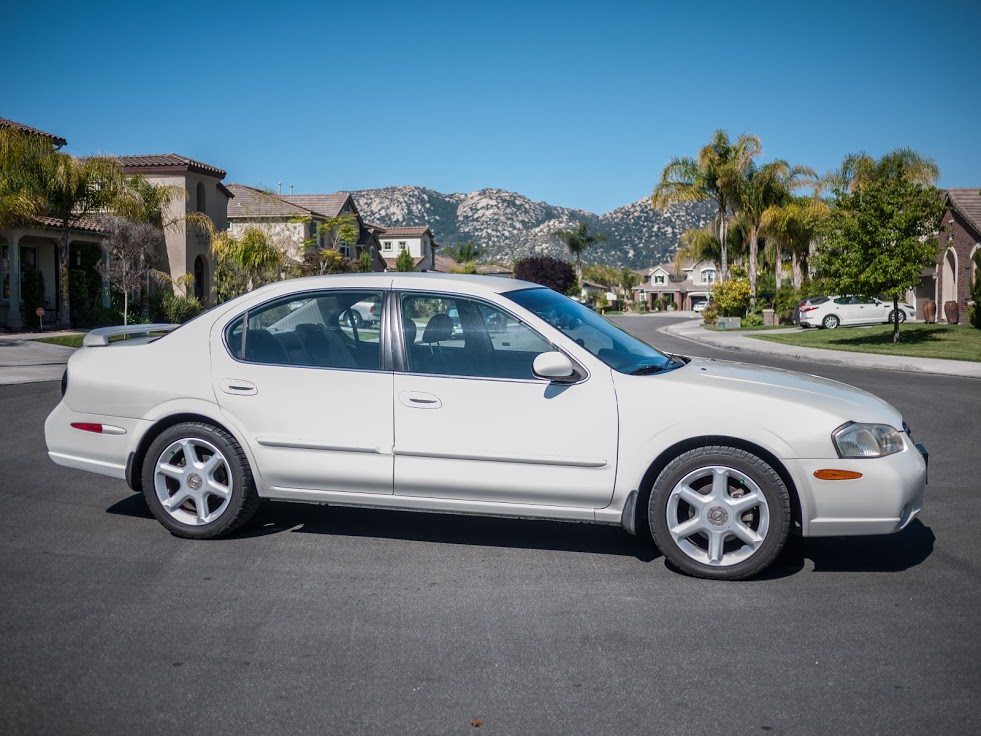
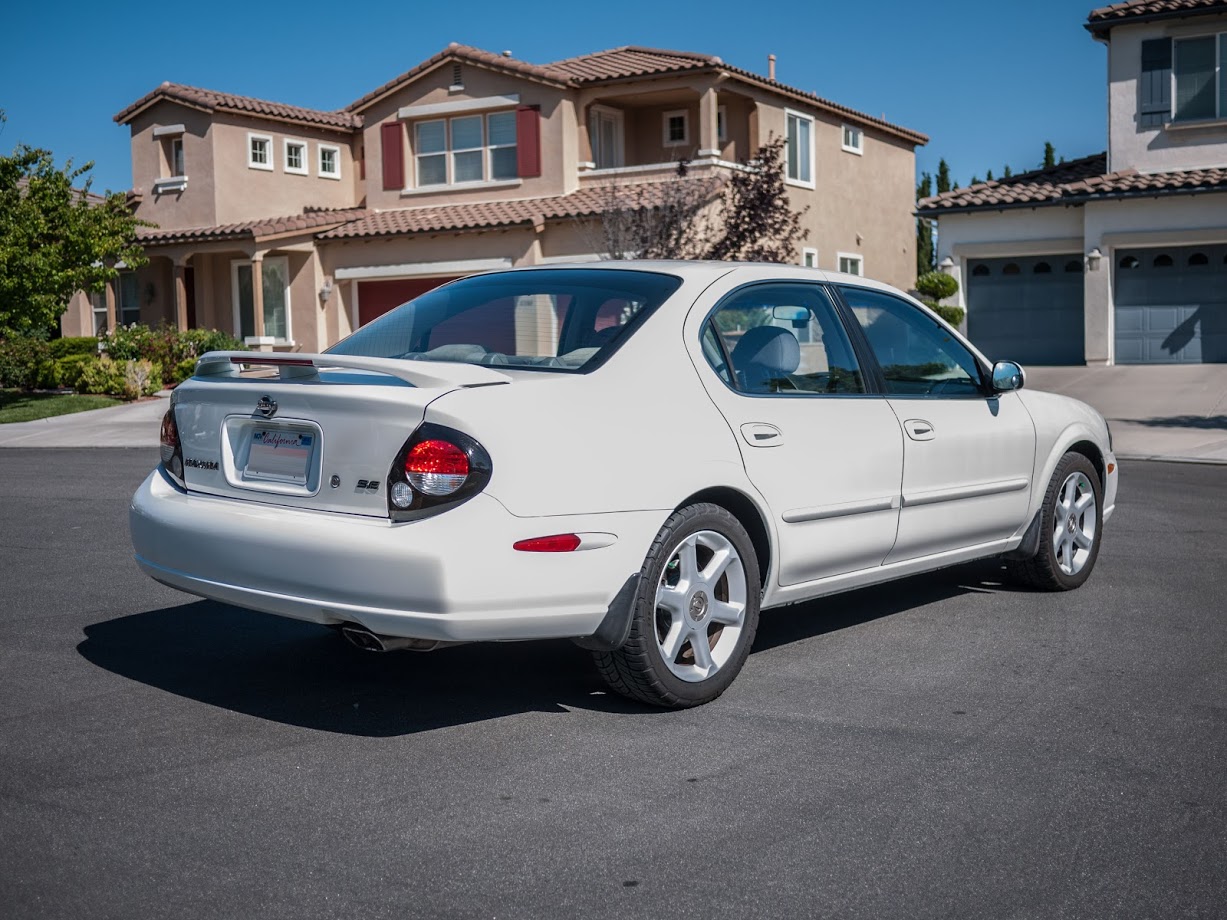
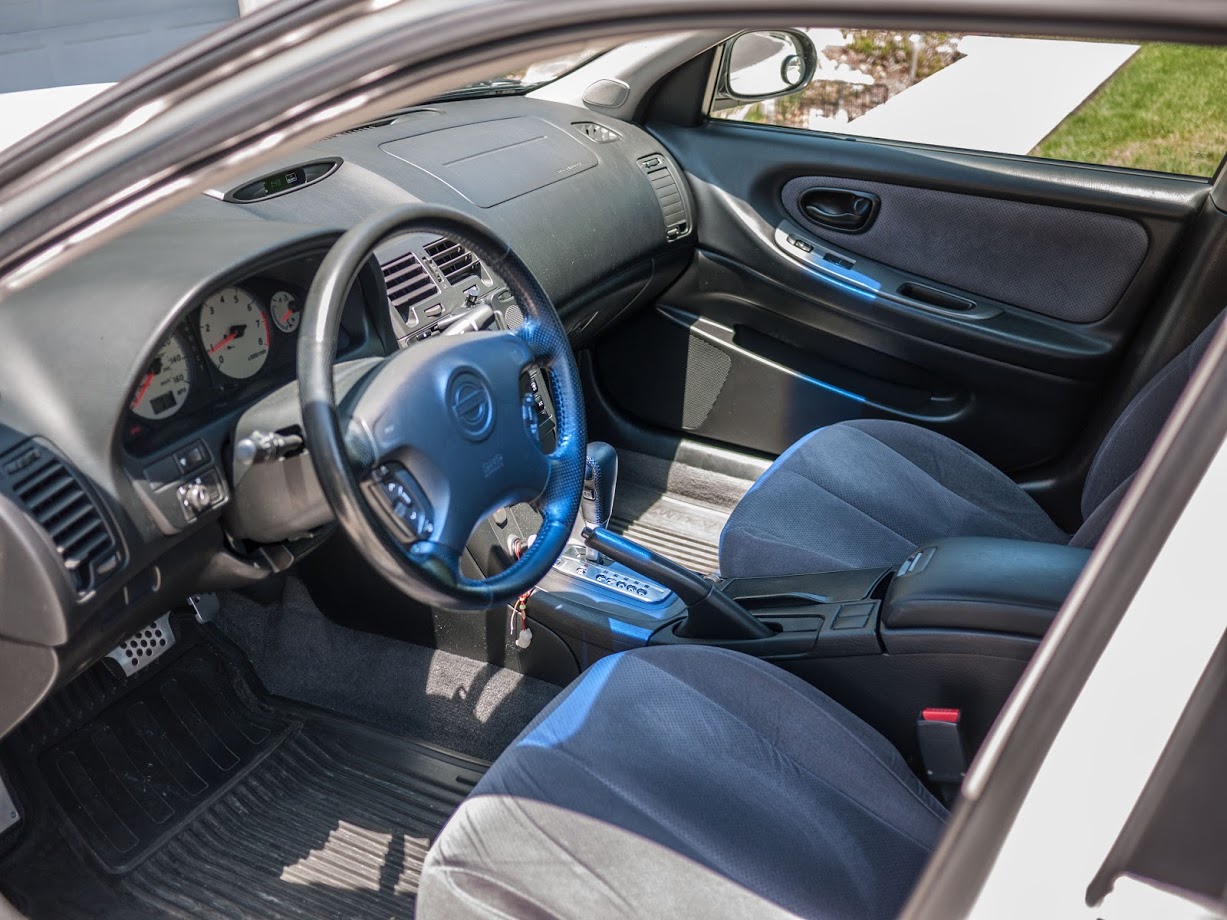
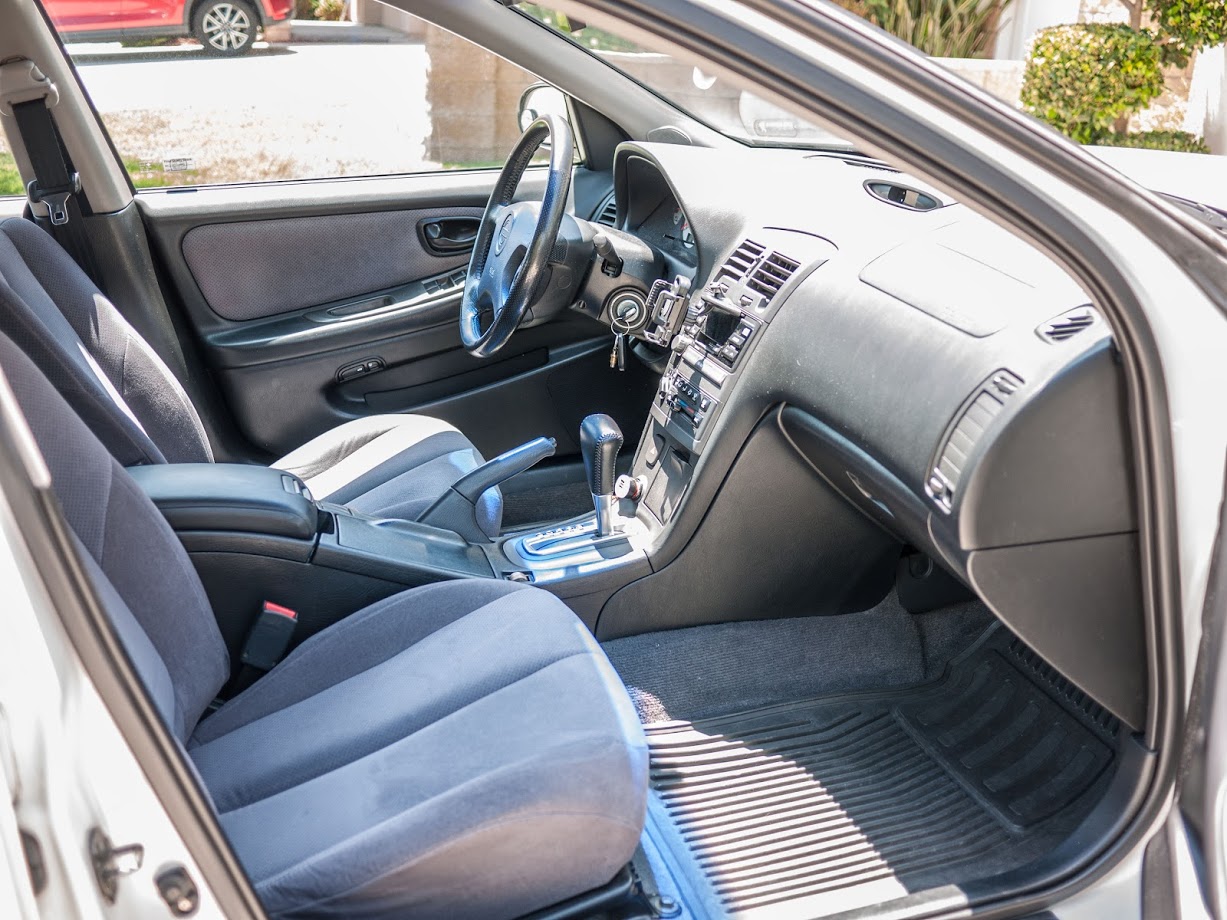
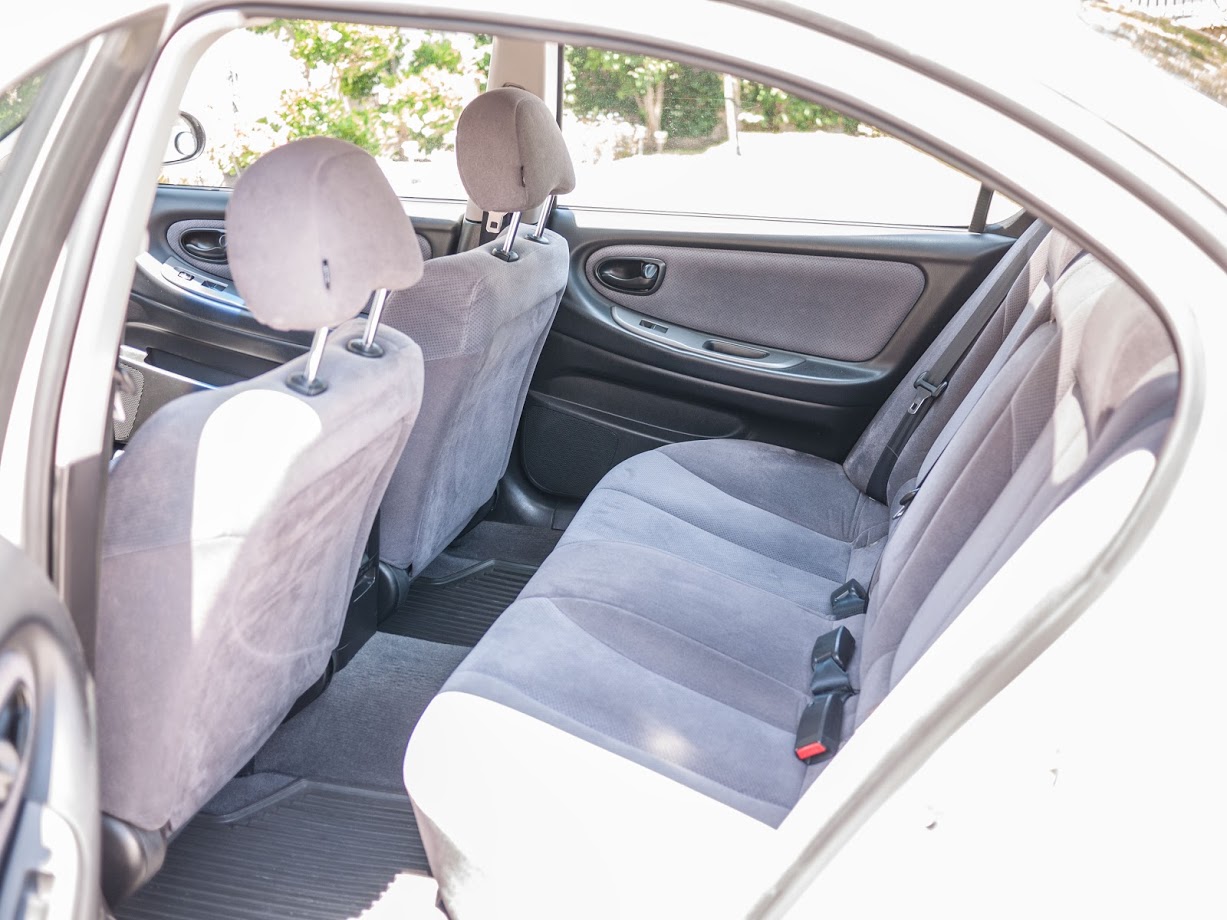
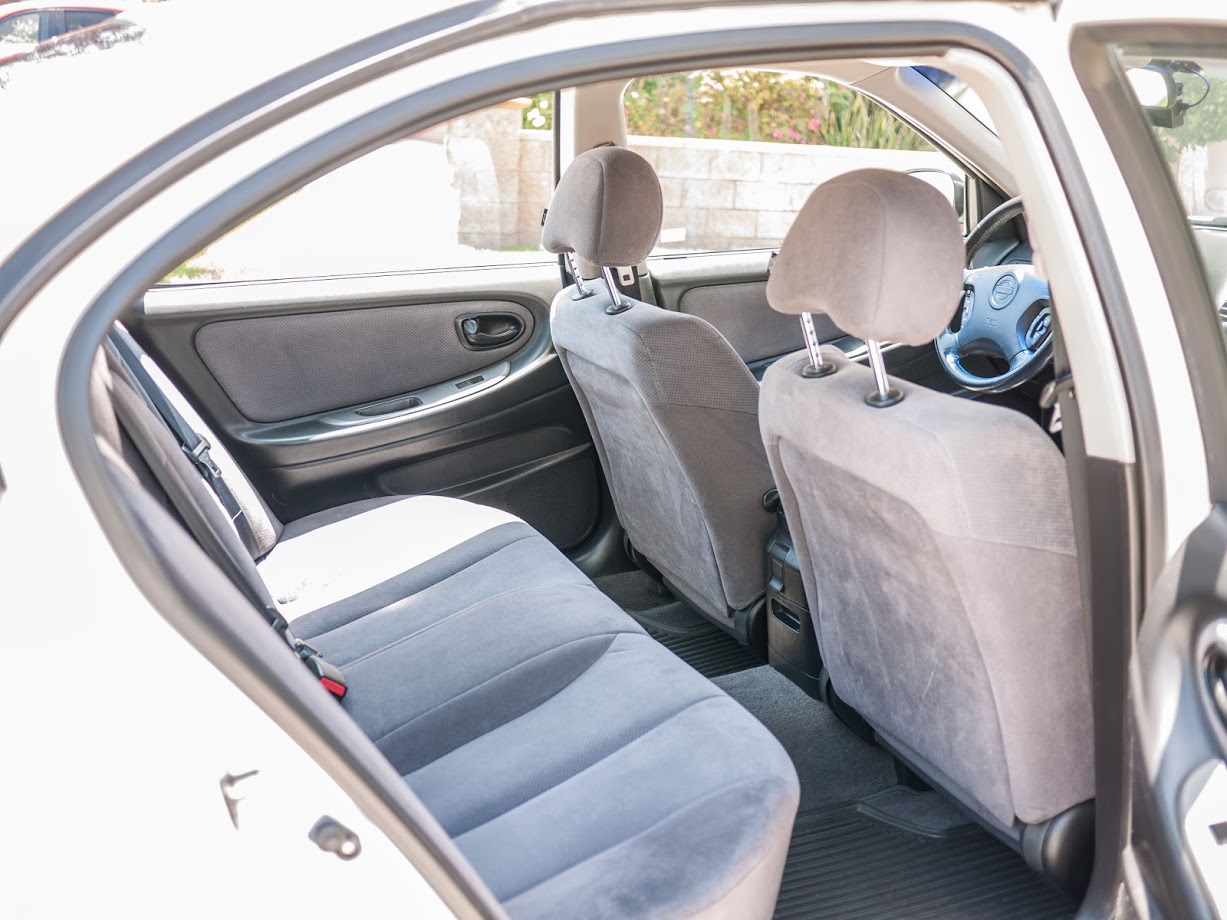
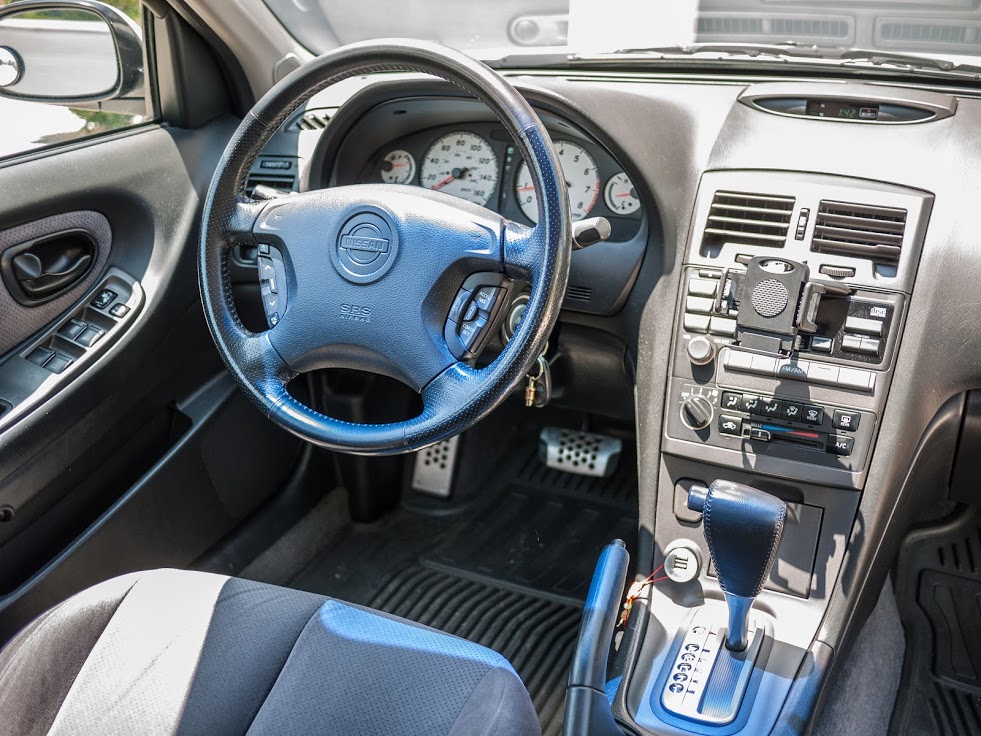
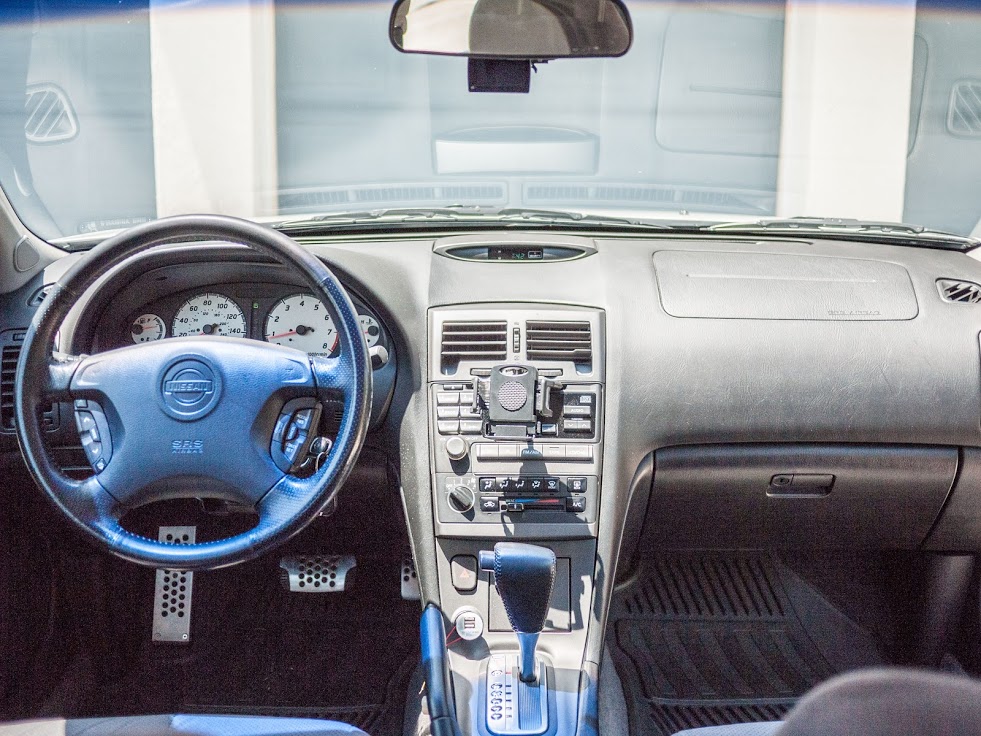
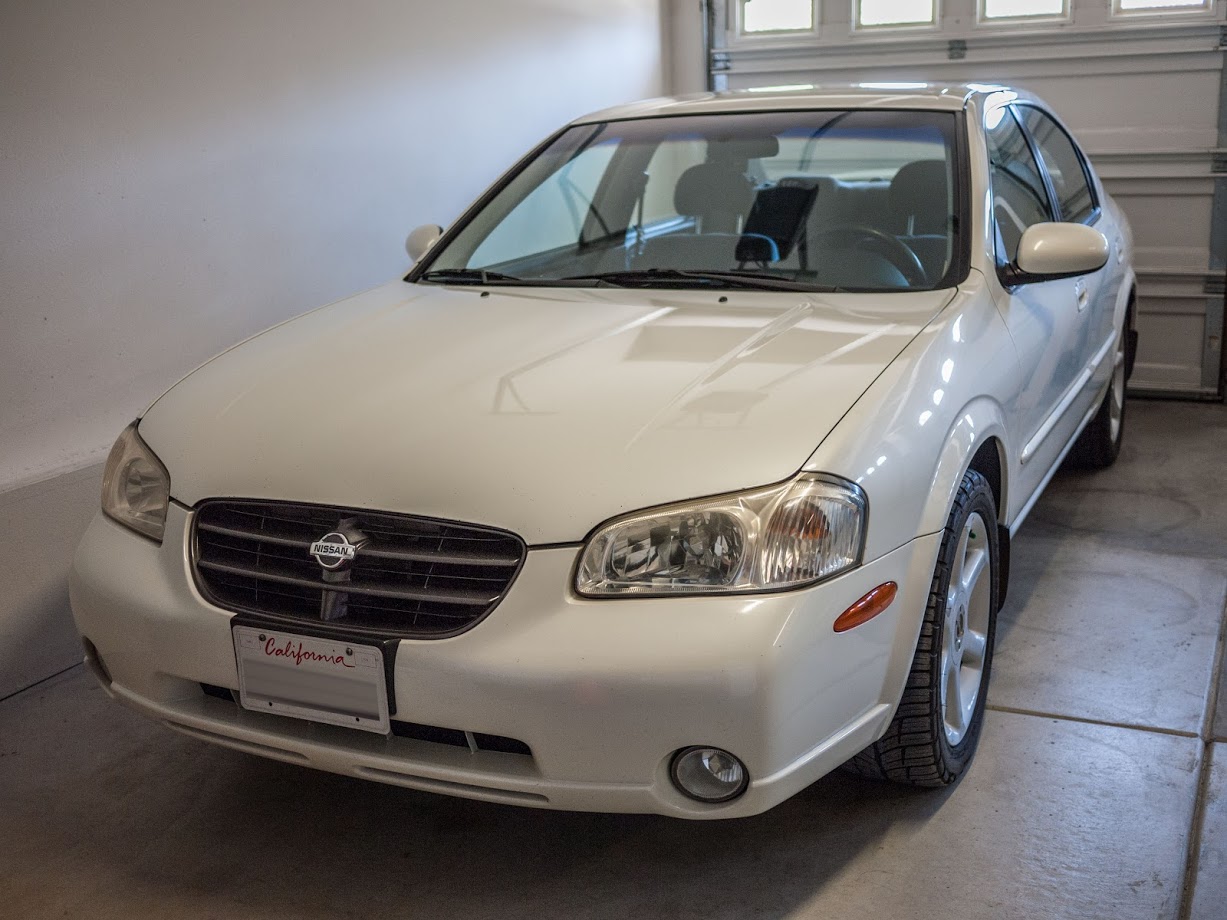
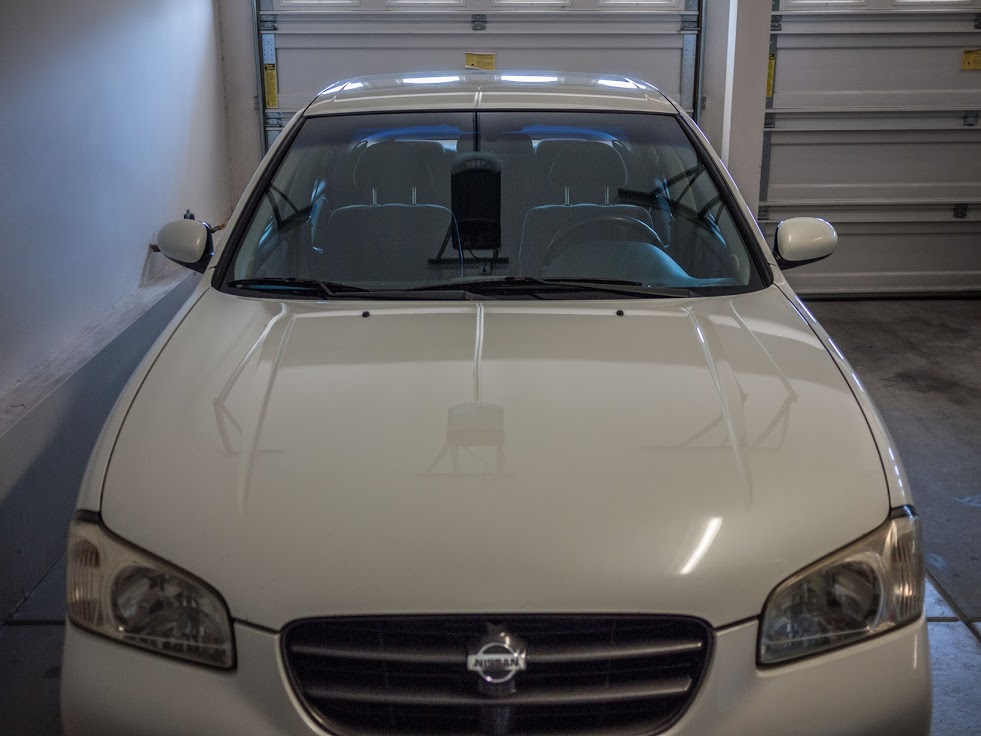
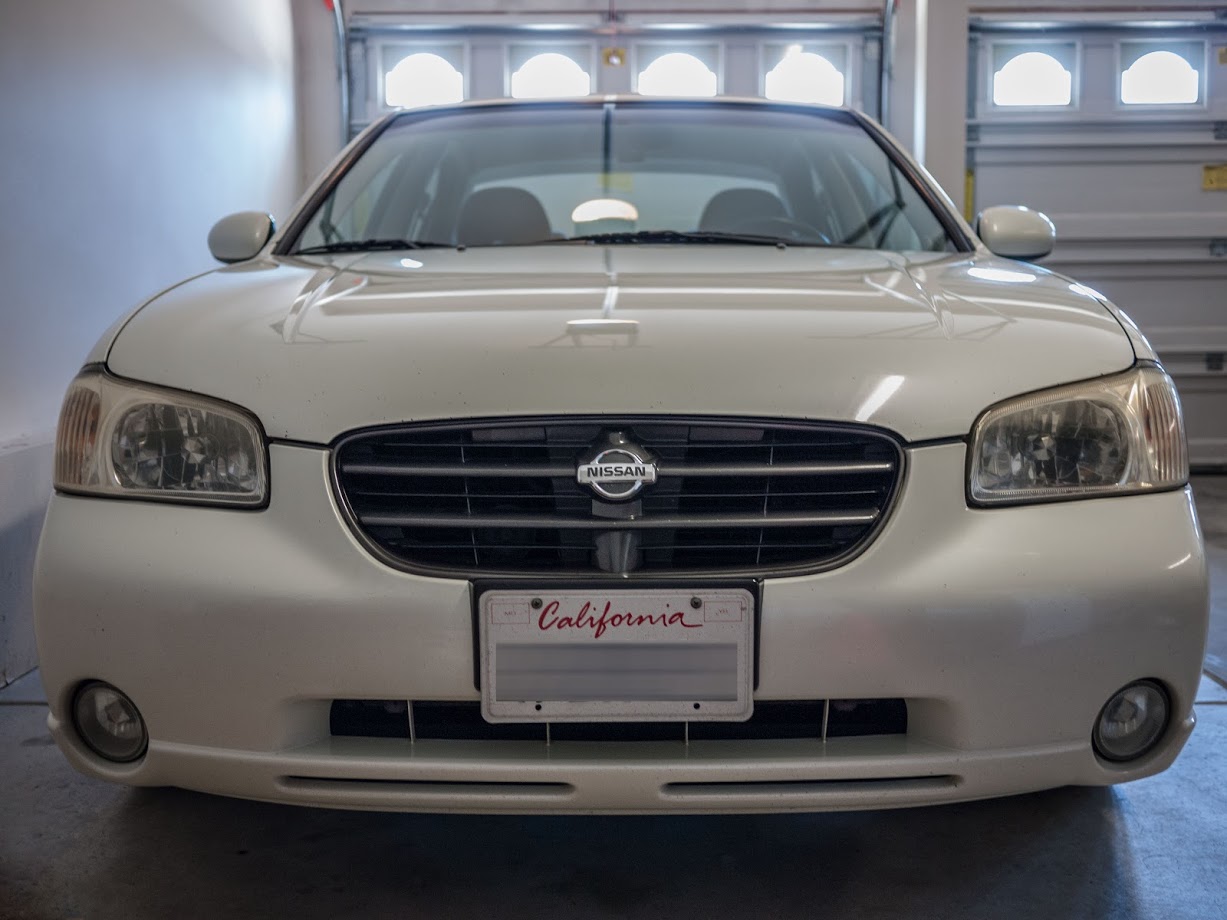
I’m the original owner of this car. She is a 2001 Nissan Maxima SE with an Icelandic Pearl exterior and a Black interior with simulated perforated cloth trim and seats. At the time, I actually had her custom ordered at the dealership, so she wasn’t a dealer-upgraded / price-hiked model that was just sitting on the lot for me to pick.
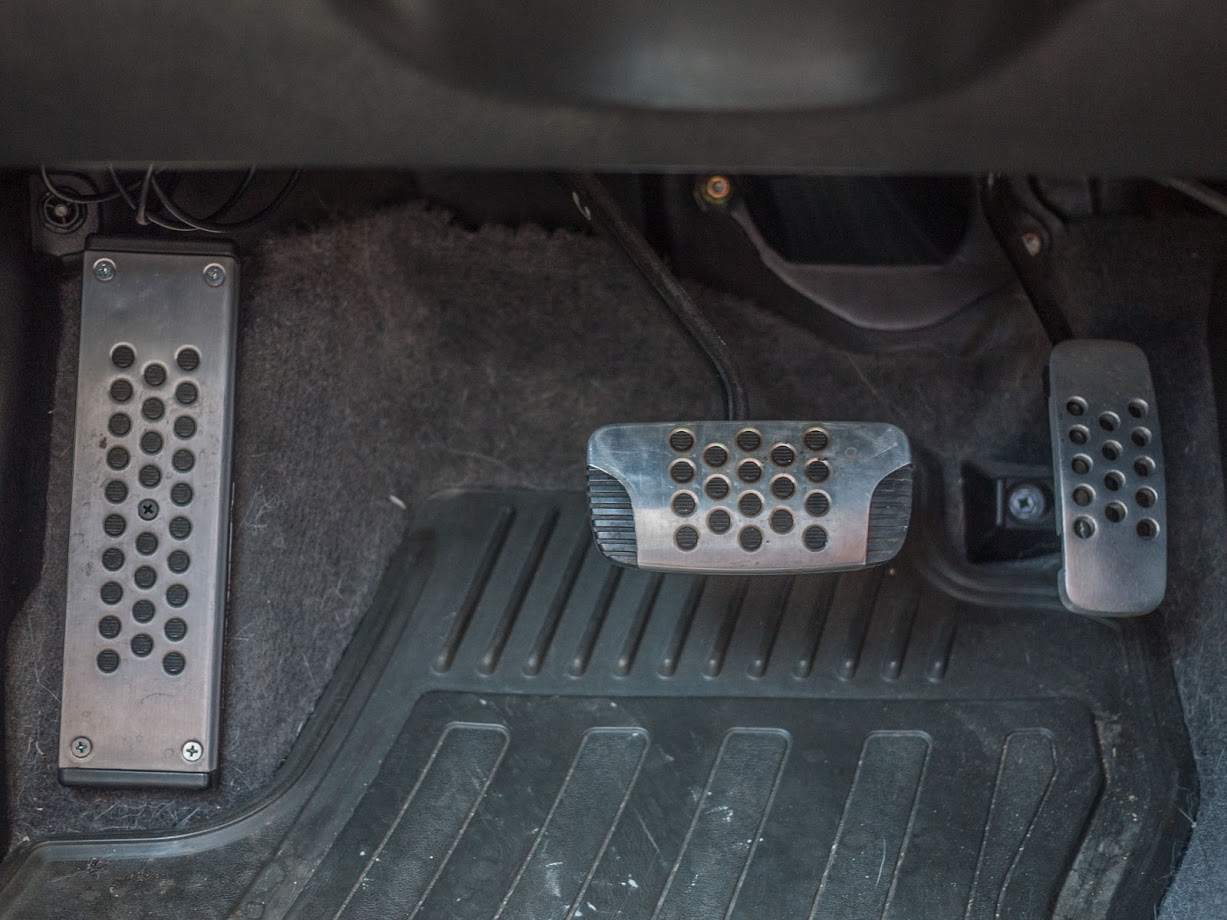
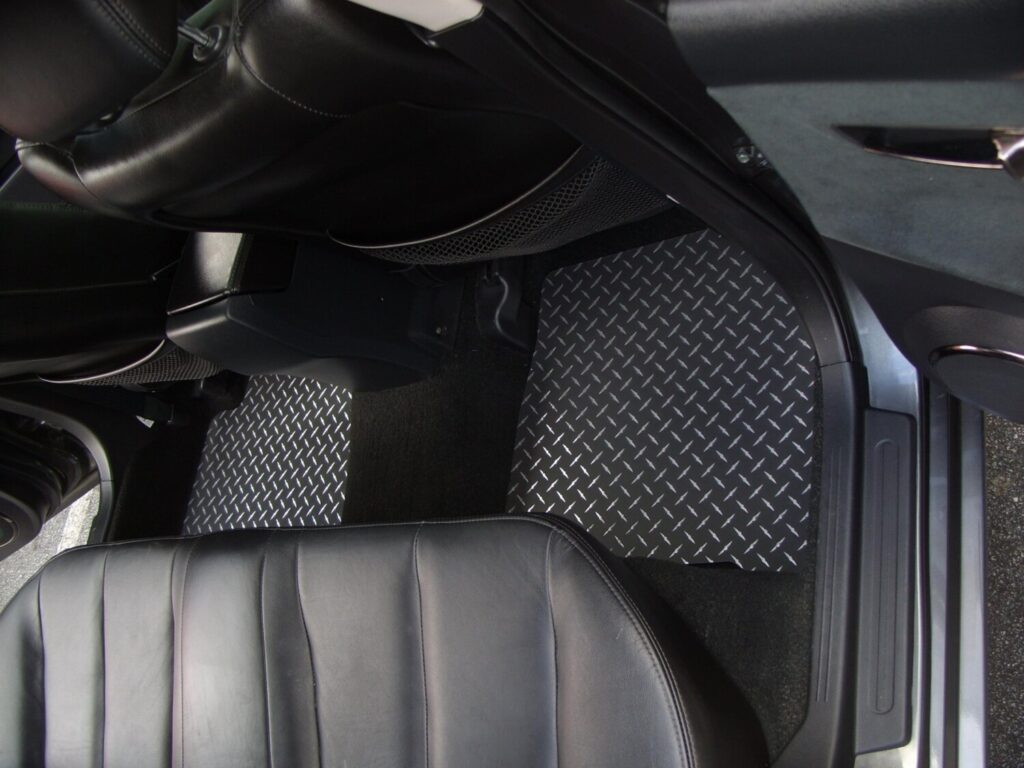
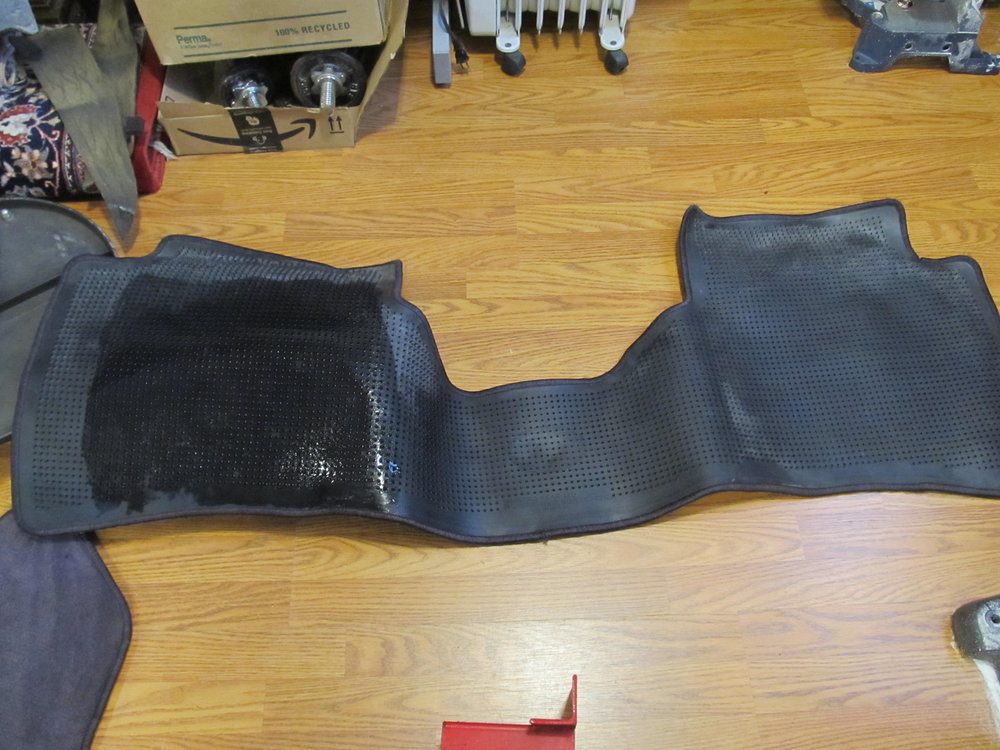
I’ve never really modded her except for a generic FSTB, a Progress rear anti-sway bar, and swapping out the stock 16-inch wheels with the 17-inch ones from that model year. As for interior mods, I have the chrome door sills, OEM rubber floor mats, and 350Z dead pedal with Anniversary Edition pedals. I do have the Anniversary Edition shifter too, but I haven’t been motivated enough to install it. For electronics, I have a GROM Audio adapter which allows me to have Bluetooth while keeping the steering wheel audio controls and a YI 4K Action Camera that I use as a dash cam.
Below is the wiper size chart for your Nissan Maxima. On my 2004 6thgen Nissan Maxima, I went with RainX Conventional Expert Fit wipers. I’ve included a photo below. They work well and got them both for around $18 bucks at Walmart.
I’m trying to track down a water leak that’s coming down the corner behind the blower motor on the firewall. I’m really hoping I can remove the blower motor (the white thing on the right) without removing the whole heater core (black part on the left). I’m really not trying to drain all my coolant and my AC lines. Does anyone know if it can be done? Without removing the blower motor, I can’t get to any of the seams on the firewall. So close, but so far!
I would also like to remove the PS air bag, as I don’t have one on the DS, which disables the PS one, so I might as well get rid of it. Except it seems to be “one piece” with the outer cover:
Well I got the blower motor out without removing the AC evaporator in the black box to its left! I was under the impression that the black box housed both AC and heater stuff, but upon looking at the lines from the engine bay, it became clear that the black box only held AC stuff. The main blower assembly in the center is what houses the heater stuff I guess. I do have the ability to recharge the AC, but it’s not something I’m very good at, and I didn’t feel great about venting my whole system to the atmosphere. So I hoped and prayed that I would find a quick and simple way to get out the blower by itself. I went back into the garage this morning pretty worried about what the day had in store. I had the idea that I might want to trim off some plastic from the black box to give me enough room to slide out the blower. I was in there looking at it, and noticed that one of the sides for the black AC box was pretty flimsy. With almost no effort, I was able to snap off a good piece of it. I then followed up with my snips, and with that little bit of plastic out of the way, I could get the blower out! It was a joyous moment to be sure. Here’s what I did:
That little bit of plastic was all that was keeping me from getting the blower out!
As this out of focus picture shows, there was a good amount of debris in the evaporator housing:
So I spent some time with different picks and my shop vac and cleaned it all out:
The blower was actually very clean:
So I was then left with this:
But there was still the factory insulation in the way. I ended up just cutting off a piece so I could get easy access to where I thought the leak was (I’ll reinstall properly when I’m all done). And with that, I was FINALLY able to see the source of my water leak:
It’s not in the exact same spot as the pics from schmellyfart, but it’s not far, maybe 2″ away. It’s clear that this area has a few body panels coming together, and it’s also right next to the drain for the cowl, so being sealed properly is crucial. If you have a water leak in a 4th gen, I wouldn’t be surprised to find it’s in this area! You can see three water trails coming down from that area, so I’m very confident this was my problem.
I spent quite a bit of time with different wire wheels, both on my big gun and little ones on my dremel, trying to peel back the old seam sealer so I could get a better look at exactly where the water is coming in.
It doesn’t really come through in the picture, but the horizontal area just right of center is actually completely open now. I had to scrape the old seam sealer out of it with a screwdriver, because I didn’t want any of that old cracked stuff getting in the way of my fresh seam sealer. Now I’ll be able to completely refill the gap with new sealer. Access into this area was pretty awkward, and my back was aching after a few hours in there, but I think I’m happy with how clean I was able to get it. When I finally couldn’t get it any cleaner, it was time to prep the surface for the seam sealer:
This stuff is SUPER strong, and has tons of warnings all over it. I go full-hazmat when I use this stuff, but professional painters swear by it, so I grit my teeth and bear it. I was considering applying the seam sealer today, but then I thought about it more and realized I would feel much better about it if I bought a new tube of it. My current tube is a few years old, and since I couldn’t get a firm answer on its shelf life, I decided I would rather spend another $20 on new sealer than to have my current sealer fail because it was too old and didn’t adhere properly. It should be here on Tuesday, so I’ll continue after that. But for now I’m feeling pretty damn good that I was able to get the blower out by itself without ruining anything!
I’m left with this to look at, and ponder how many things I’m going to forget to reinstall, or reinstall in the wrong order. I’m not out of the woods yet!
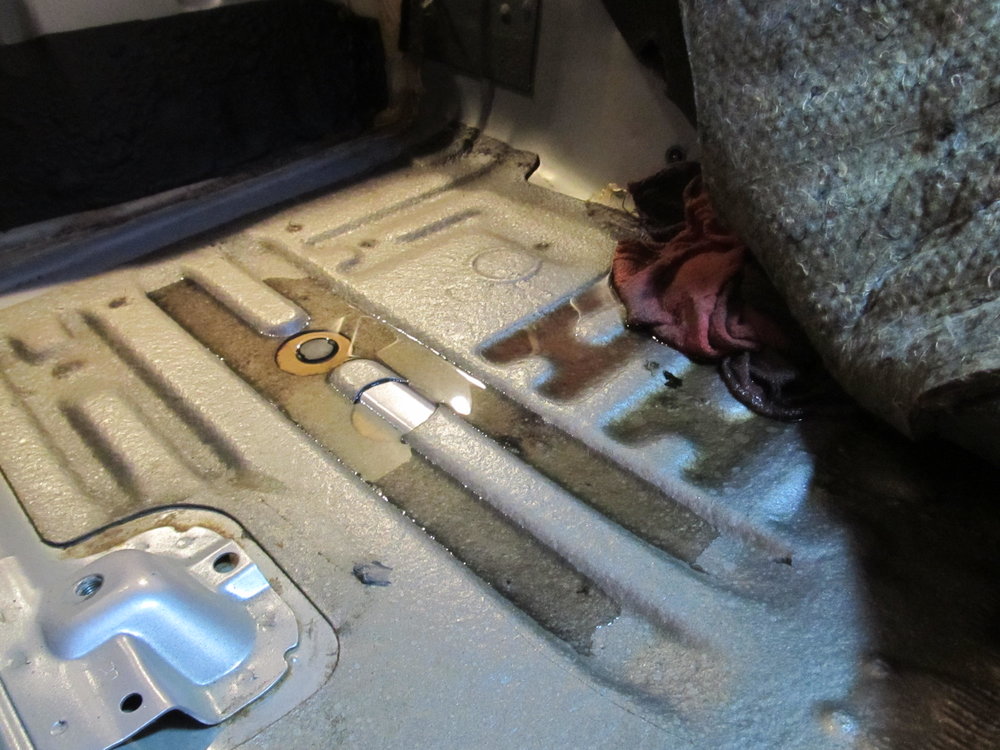
A little while ago while redoing some stuff for my stereo I noticed a large amount of water in the area behind the passenger seat on the floor. This is what tipped me off:
Then this…
And finally, this is what drained out of the carpet over night:
I know what you’re thinking: your sunroof drains are clogged! Except I don’t have a sunroof in my car!
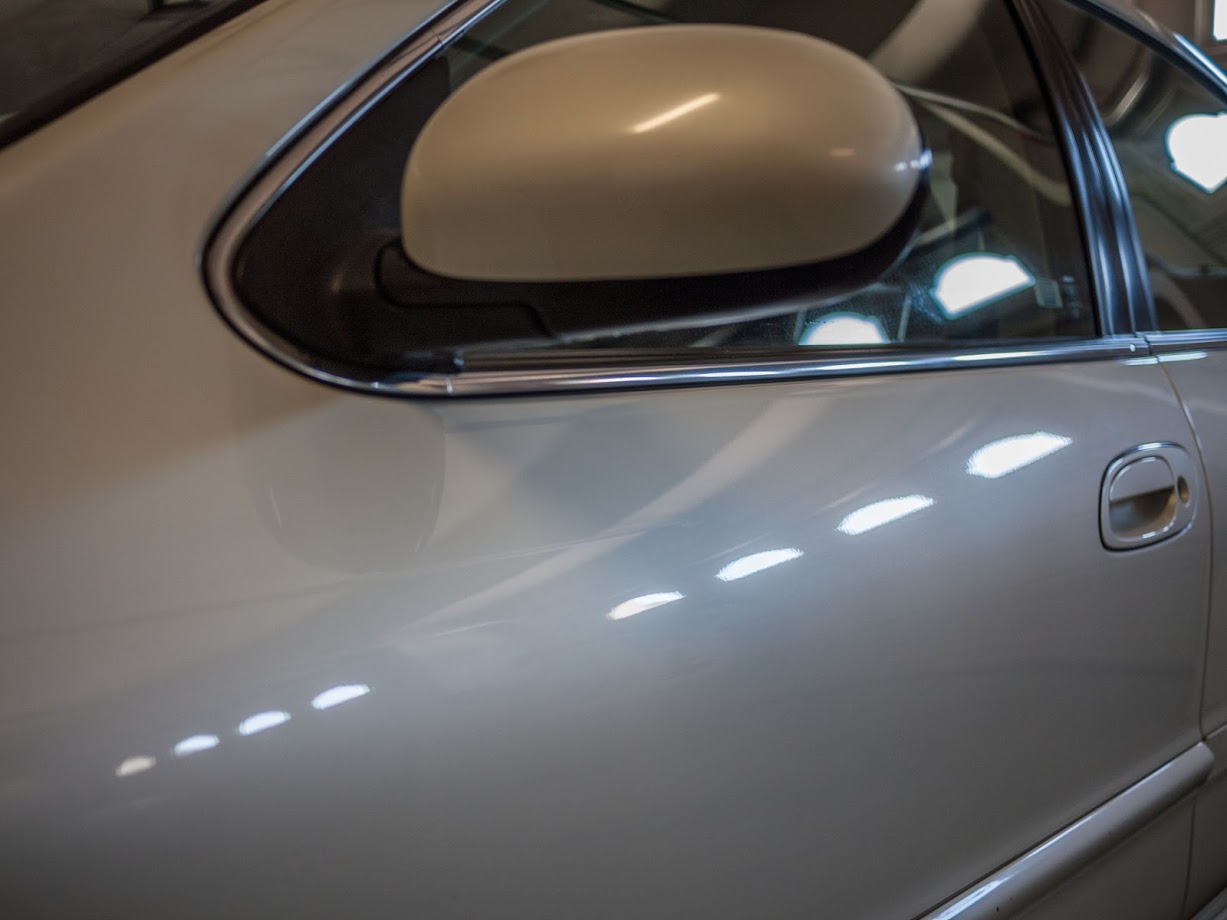
I knew that my door rubber on the PS front door had some rips in it, so I picked up some good ones at the junkyard and installed them.
Old:
The new one for the body side has a little crease in it, but I don’t think it’s anything to worry about:
And yet, after all that, I just found the same area soaking wet again. I’m completely stumped as to what’s happening here, and how water is getting into that area. I should mention that I park my car in my driveway, which is uphill, so if water gets in the front of the car, it could make its way to the rear without issue. With that said, I saw no indication that anything in front of that area was wet.
Time for an update, I need some more help!
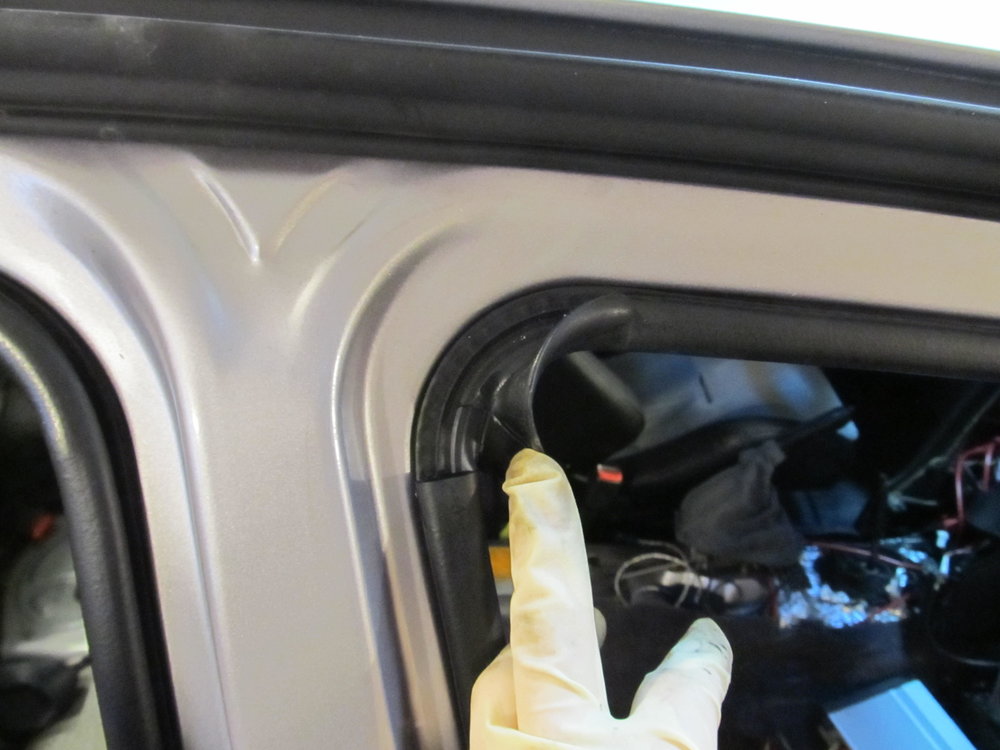
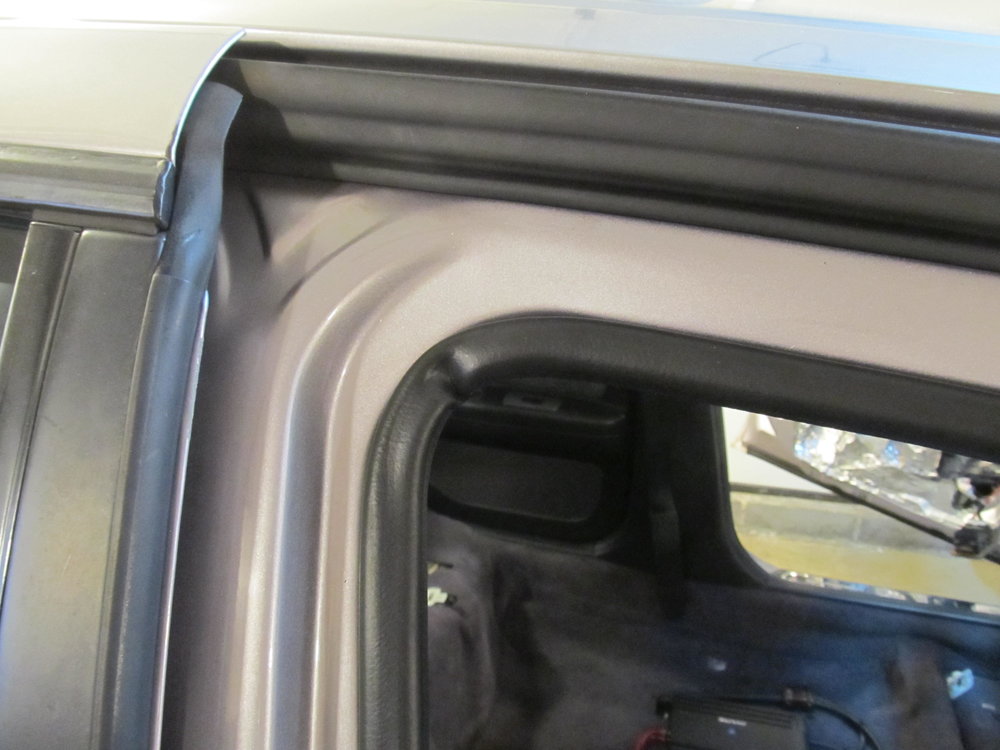
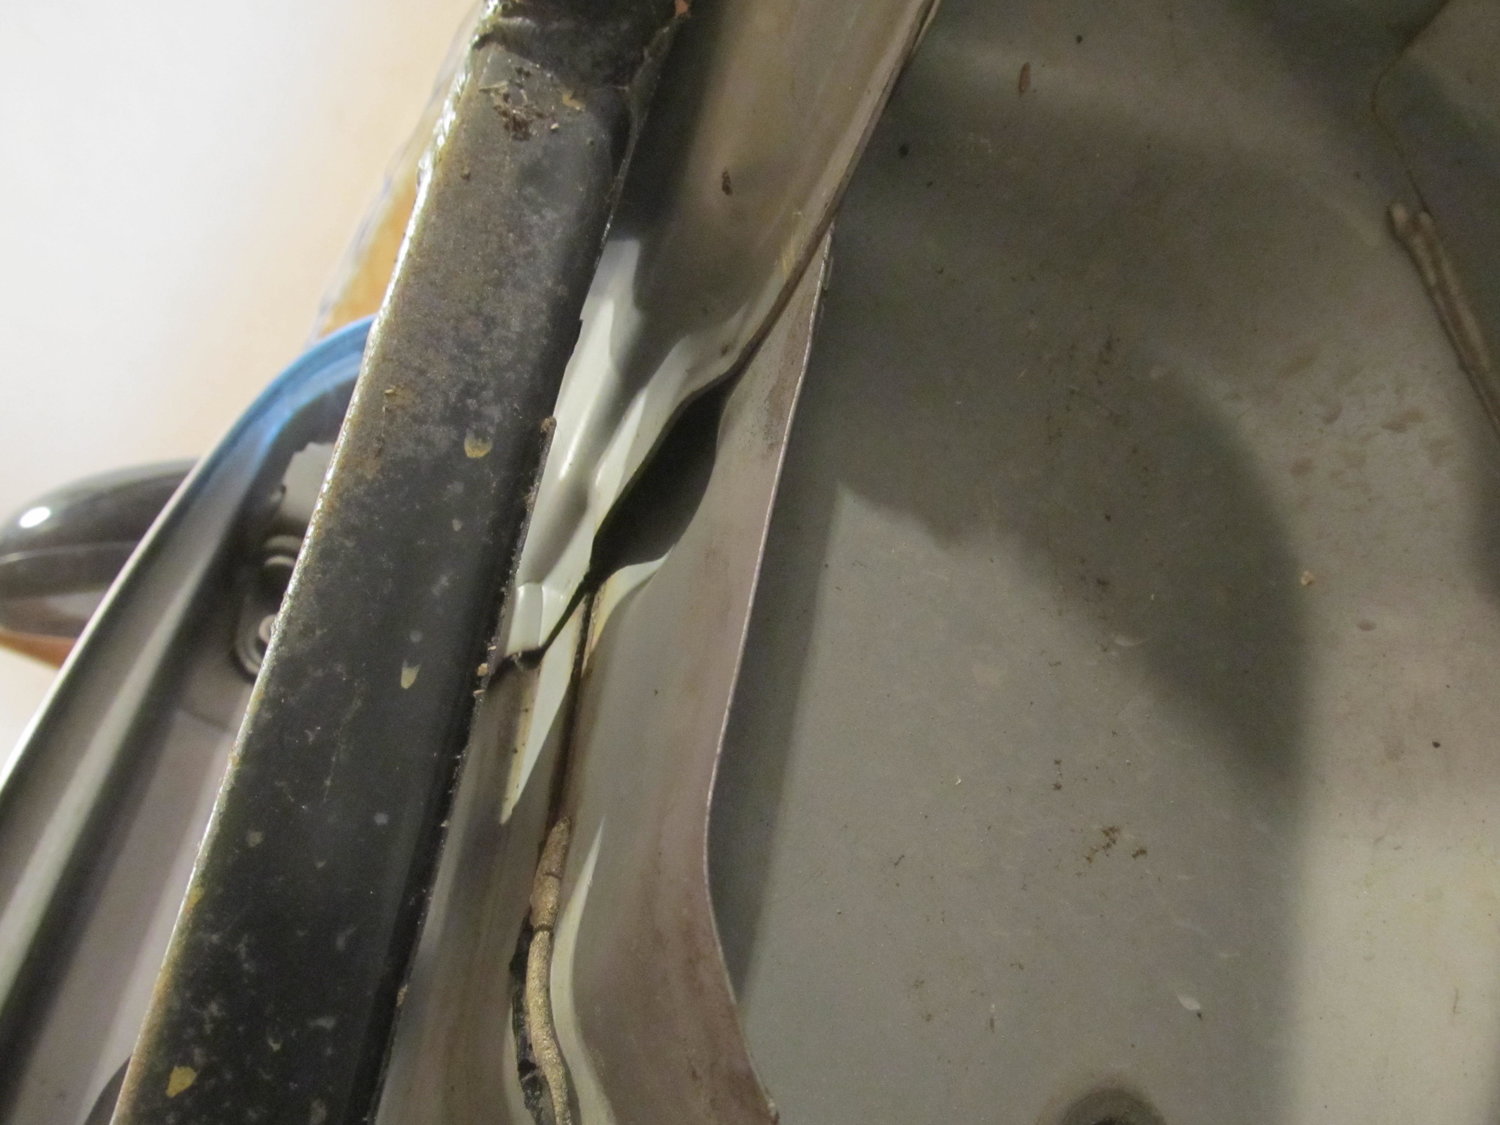
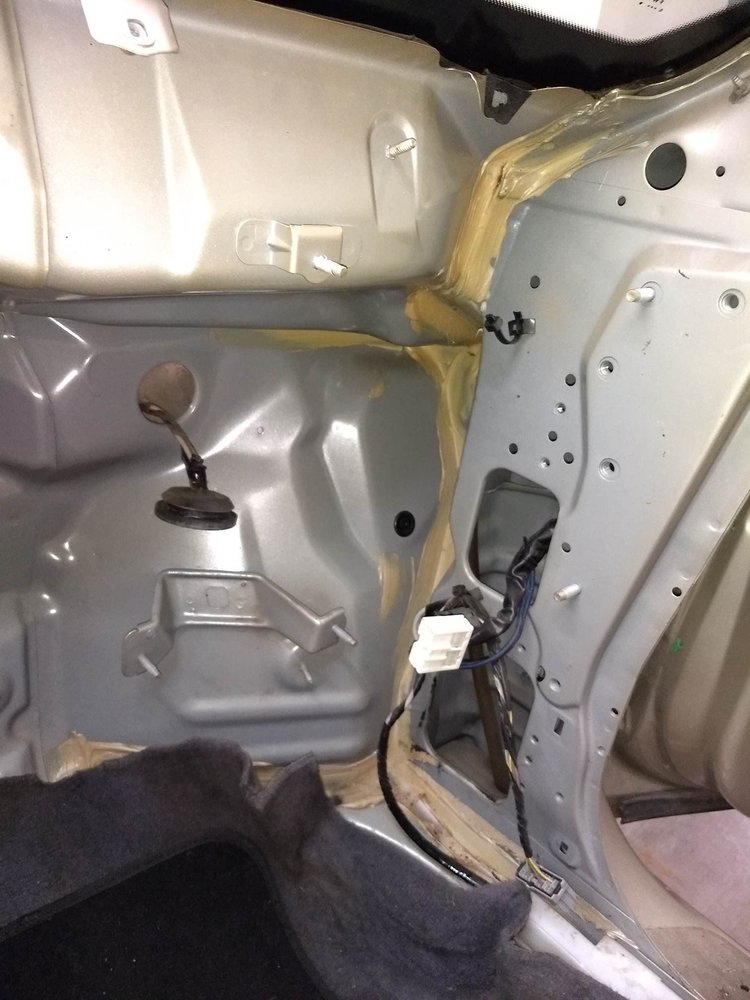
It turns out that the water behind the passenger seat was actually coming from the front of the car, not the rear. That’s due to my driveway being on an incline. I located a water leak somewhere around the base of the A pillar on the PS. I removed the A pillar cover, and as far as I can tell, the water isn’t coming from anywhere around the windshield. I can only see it coming out from below, in this corner:
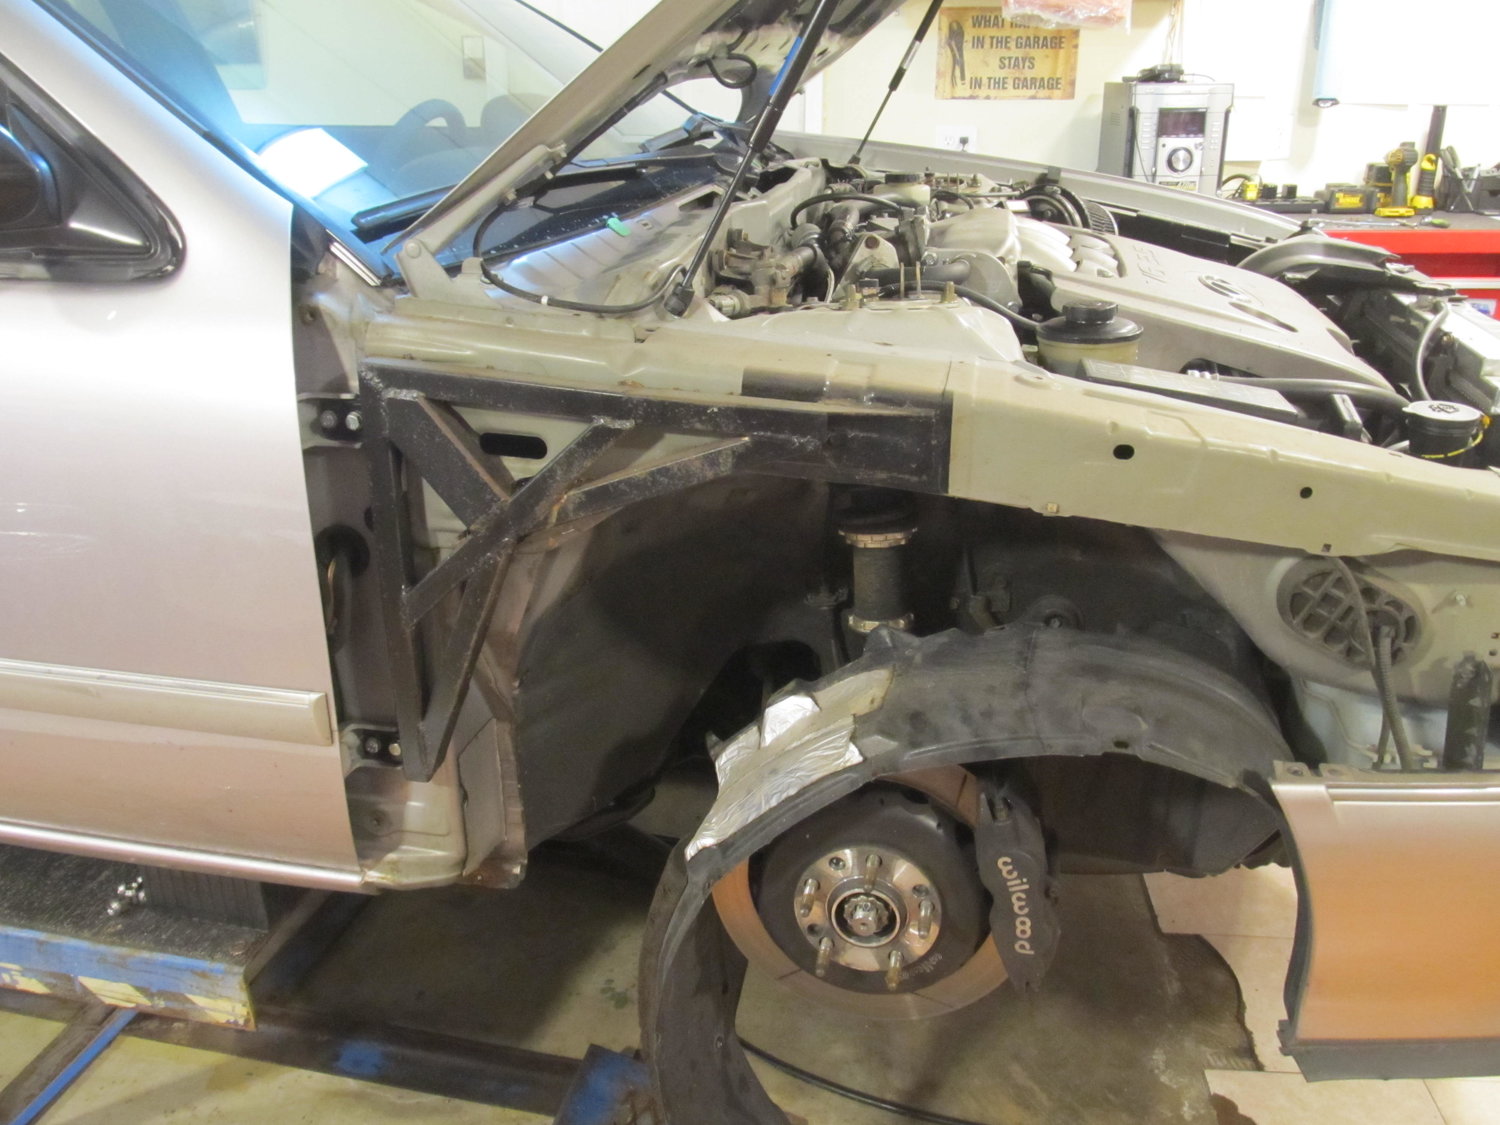
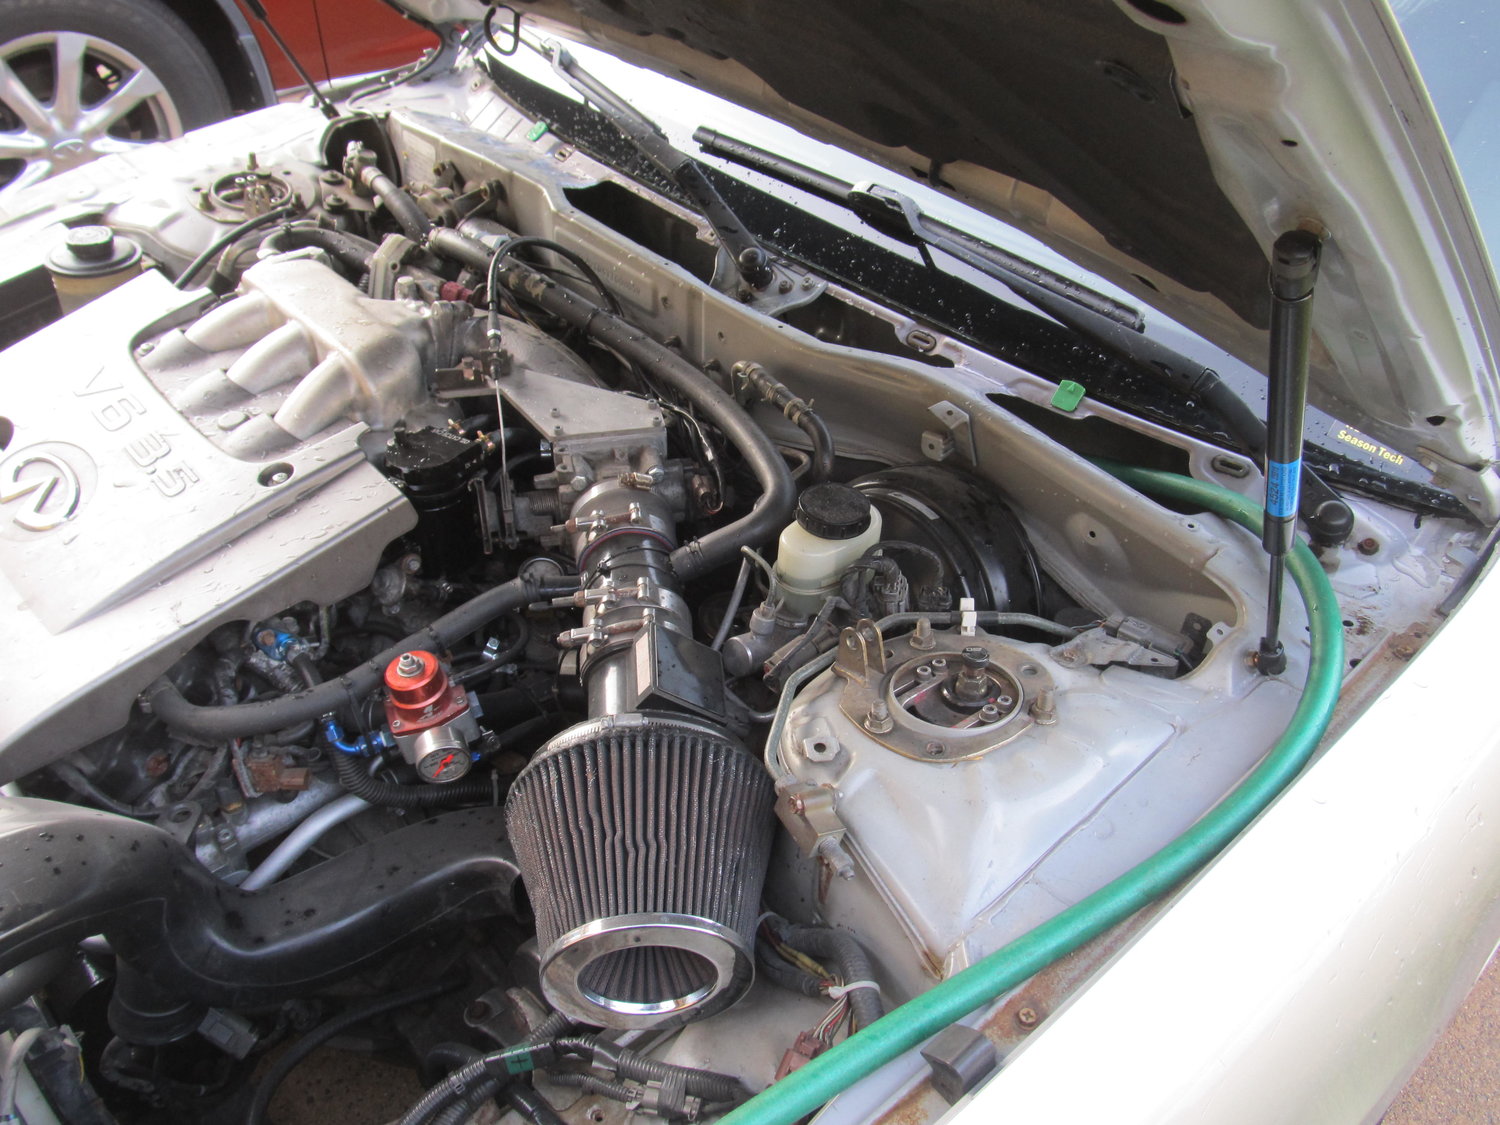
So I decided to remove the PS fender to see if there were any visible cracks on the firewall. Unfortunately, taking the fender off did little to help me see where the leak is coming from.
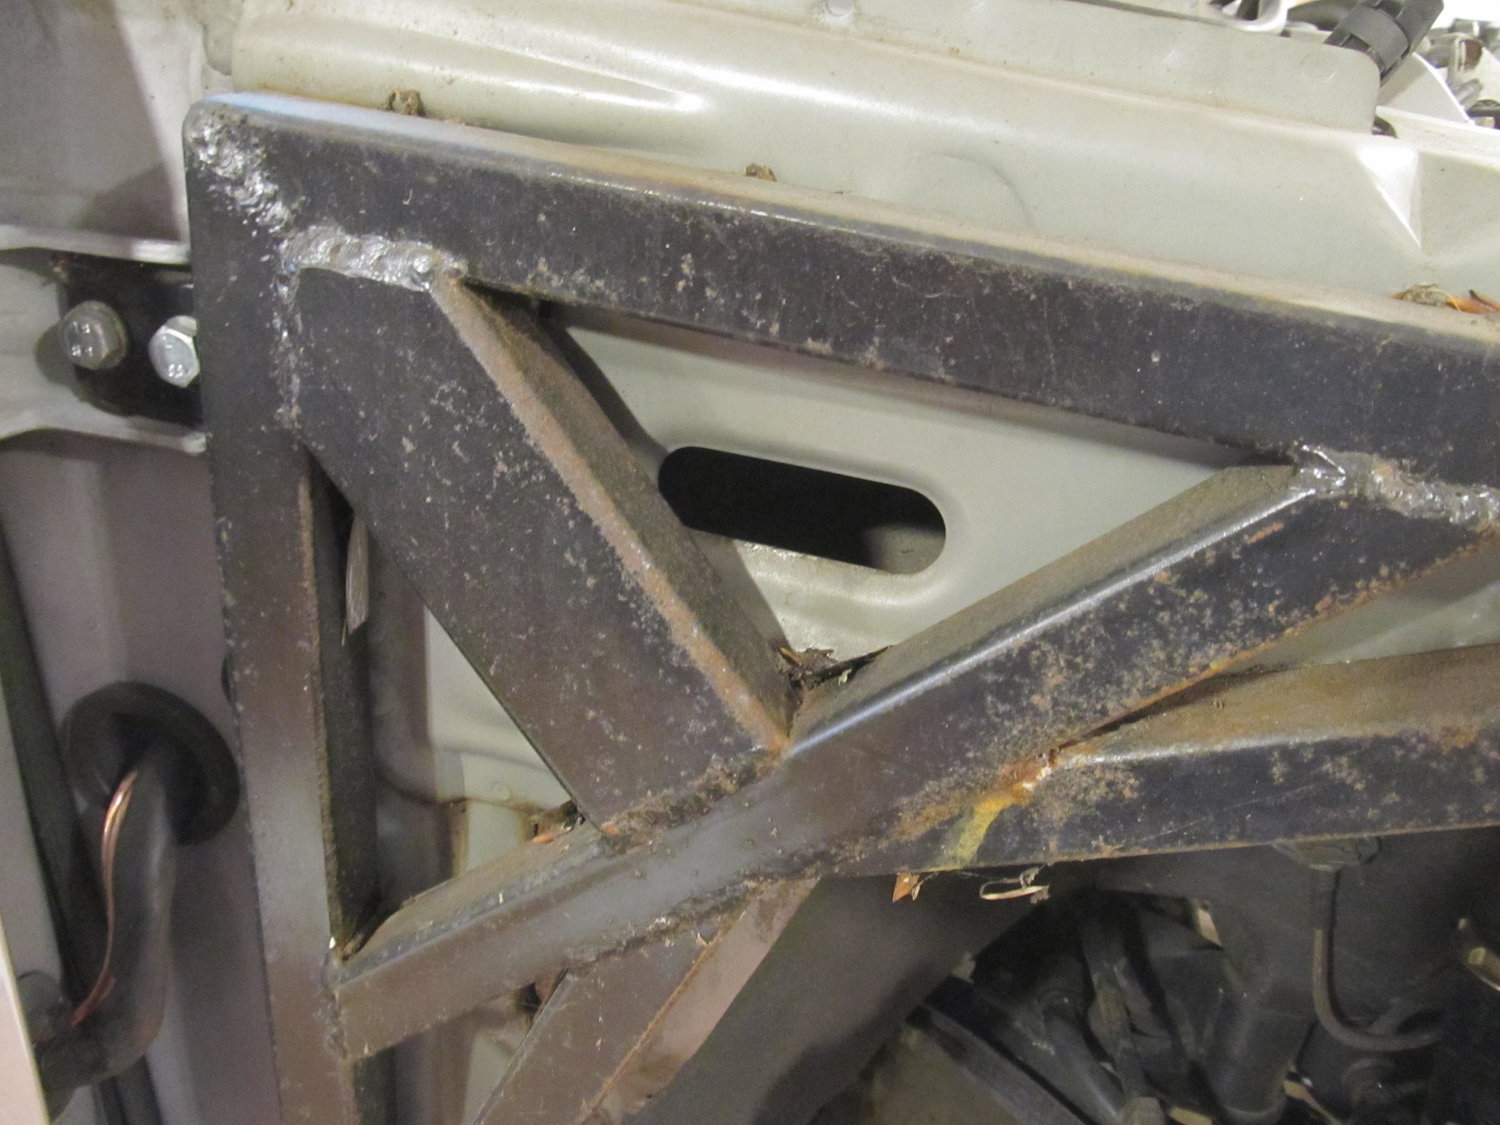
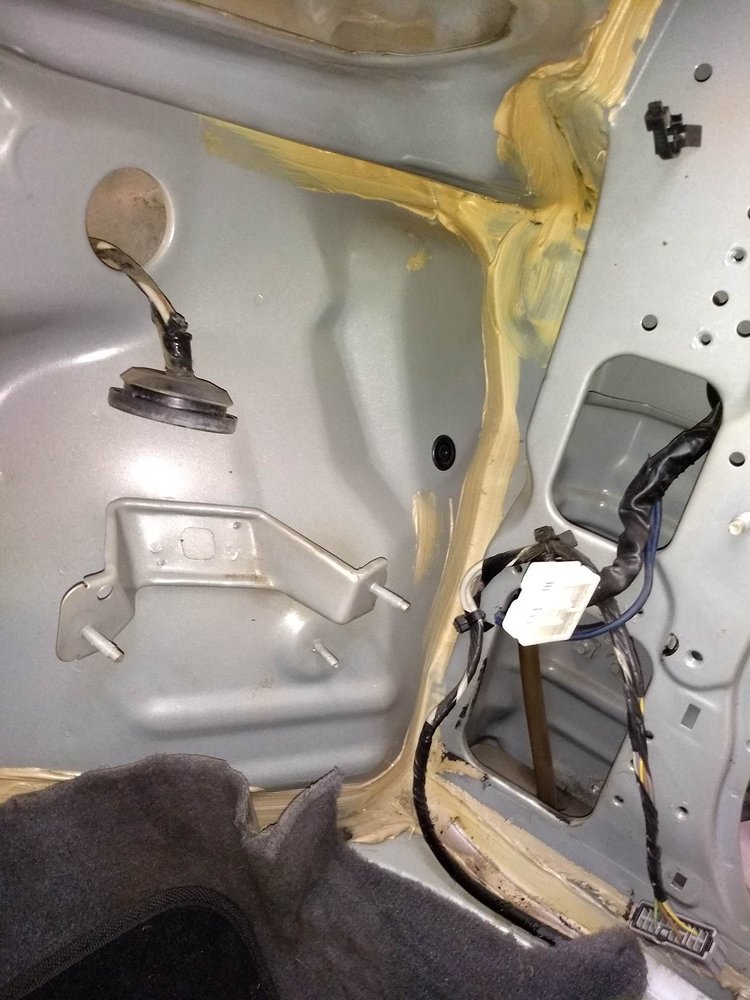
Here are some closeups:
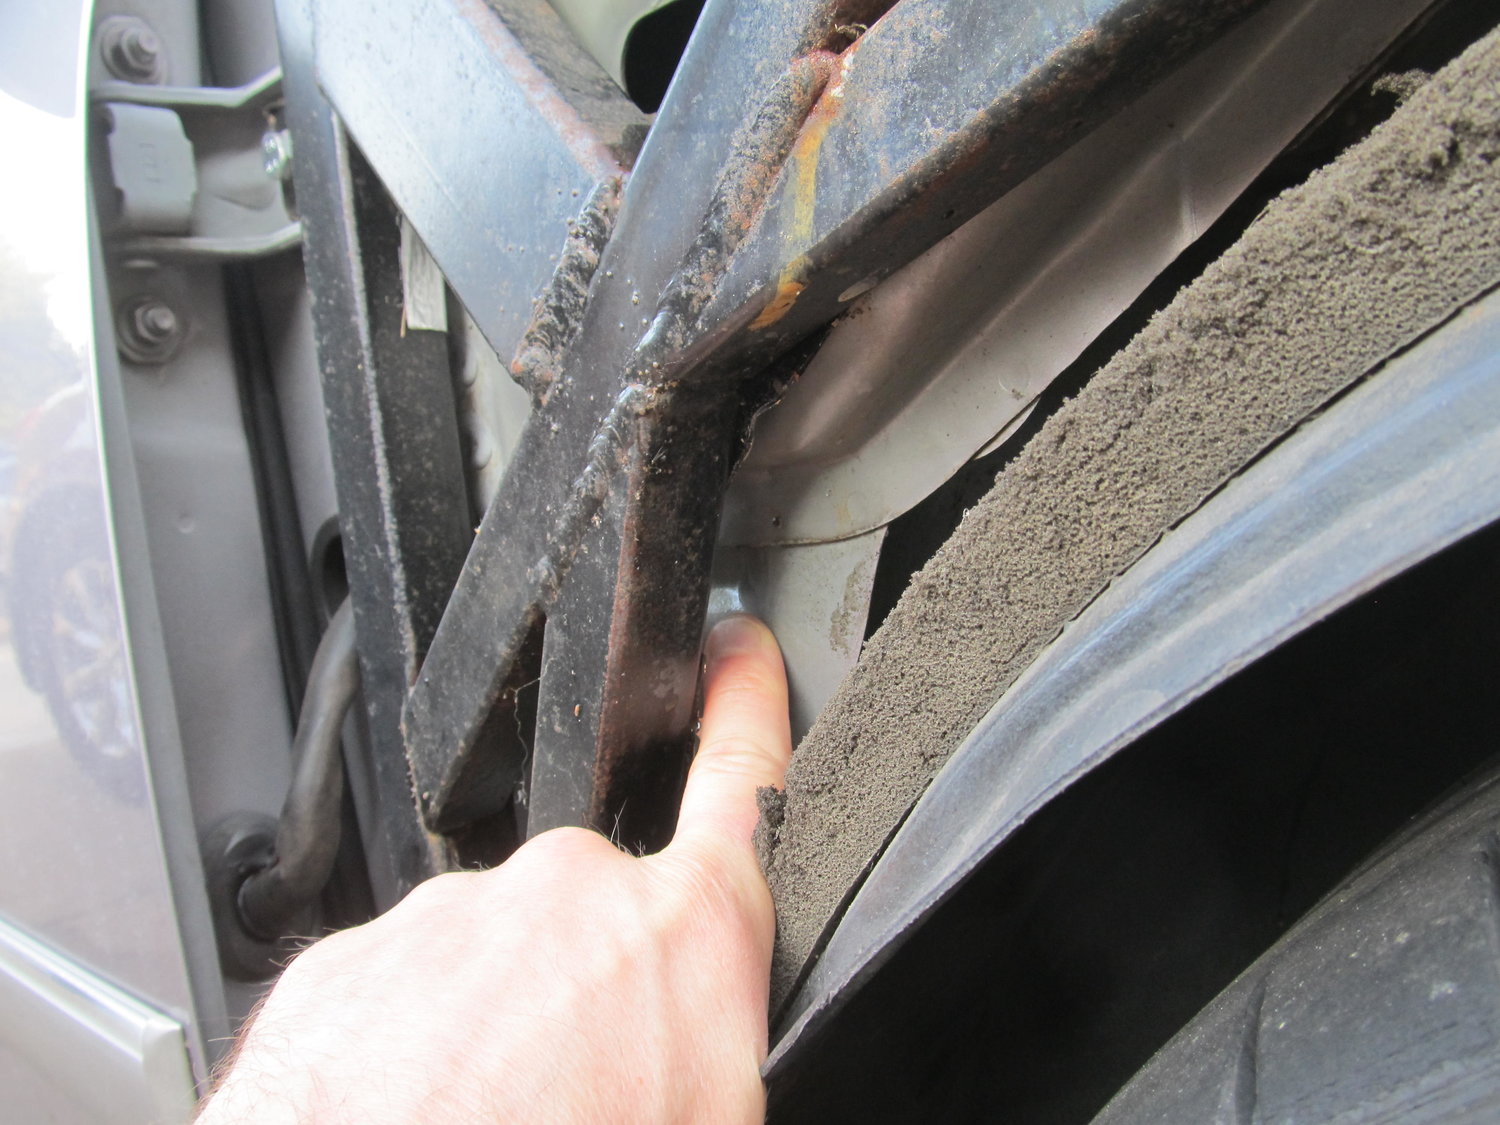
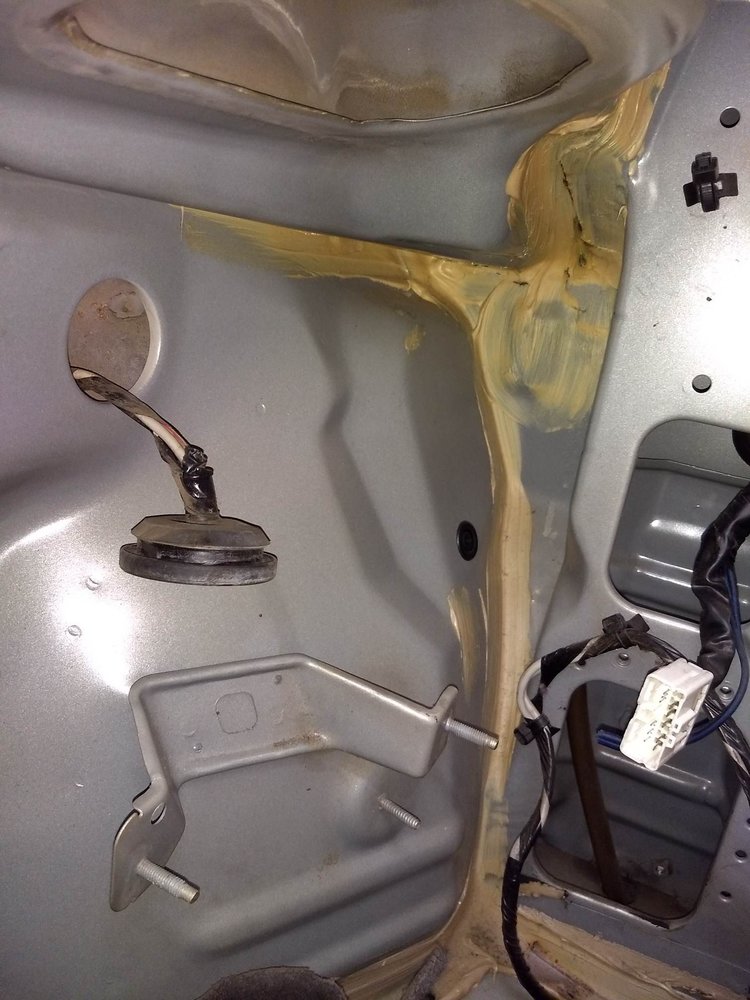
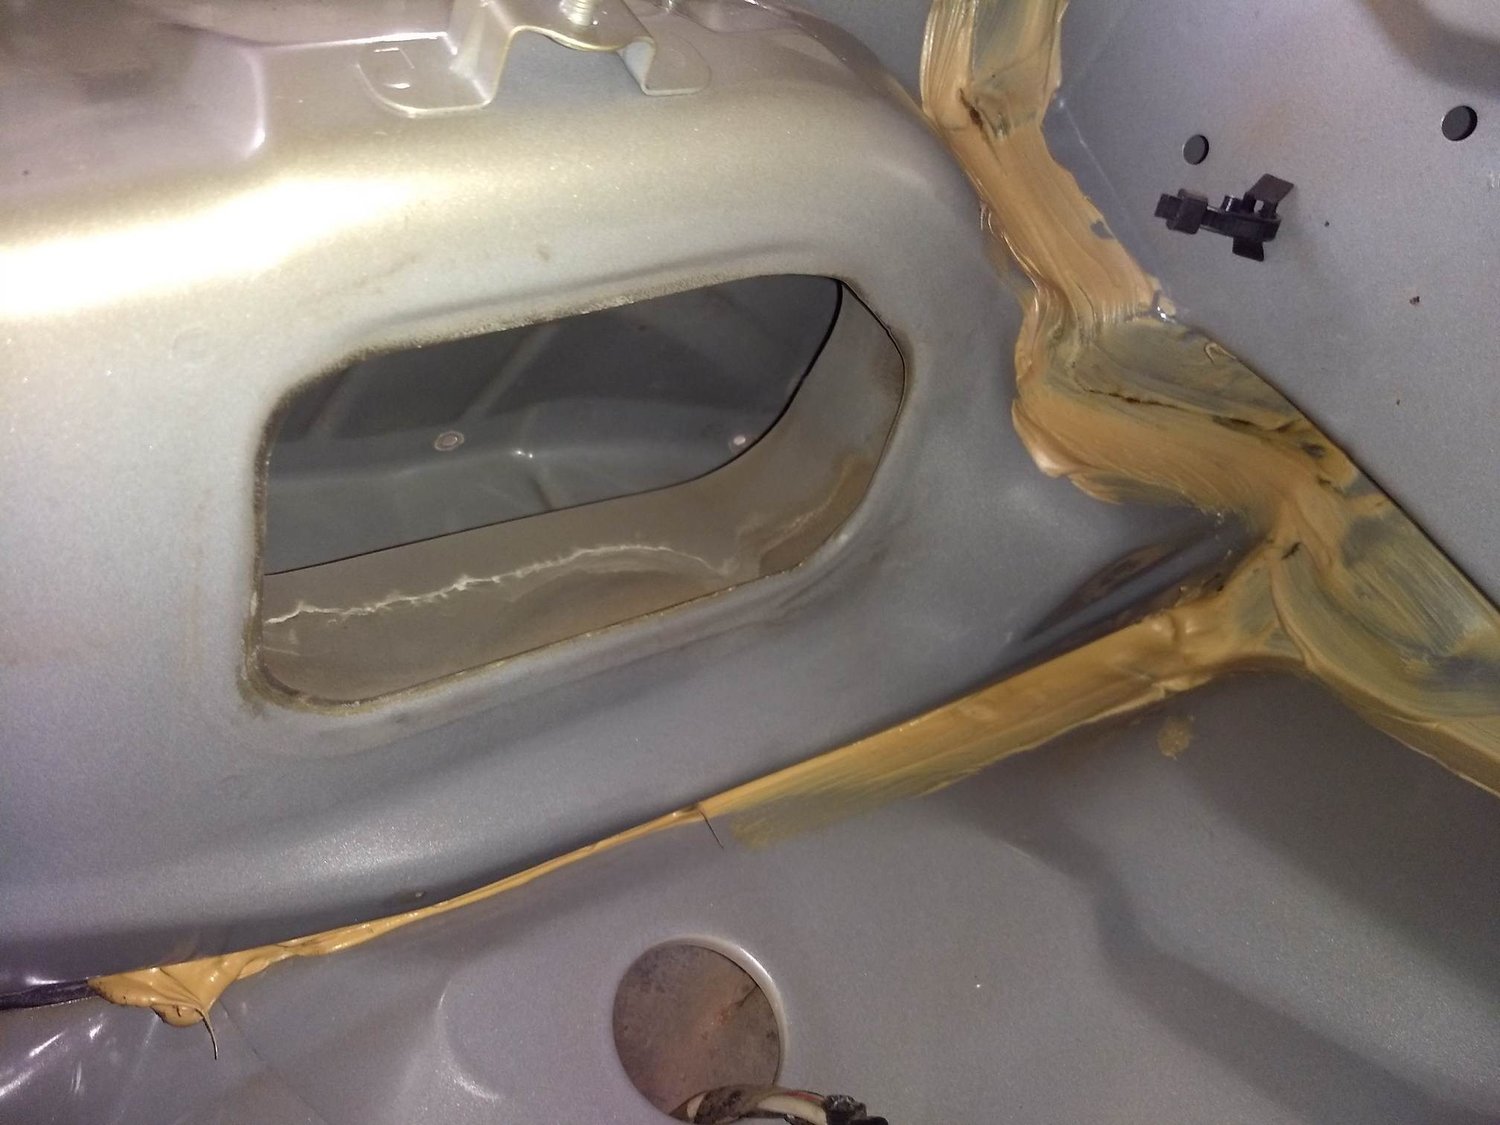
There appears to be a drain hole beneath that large oval hole:
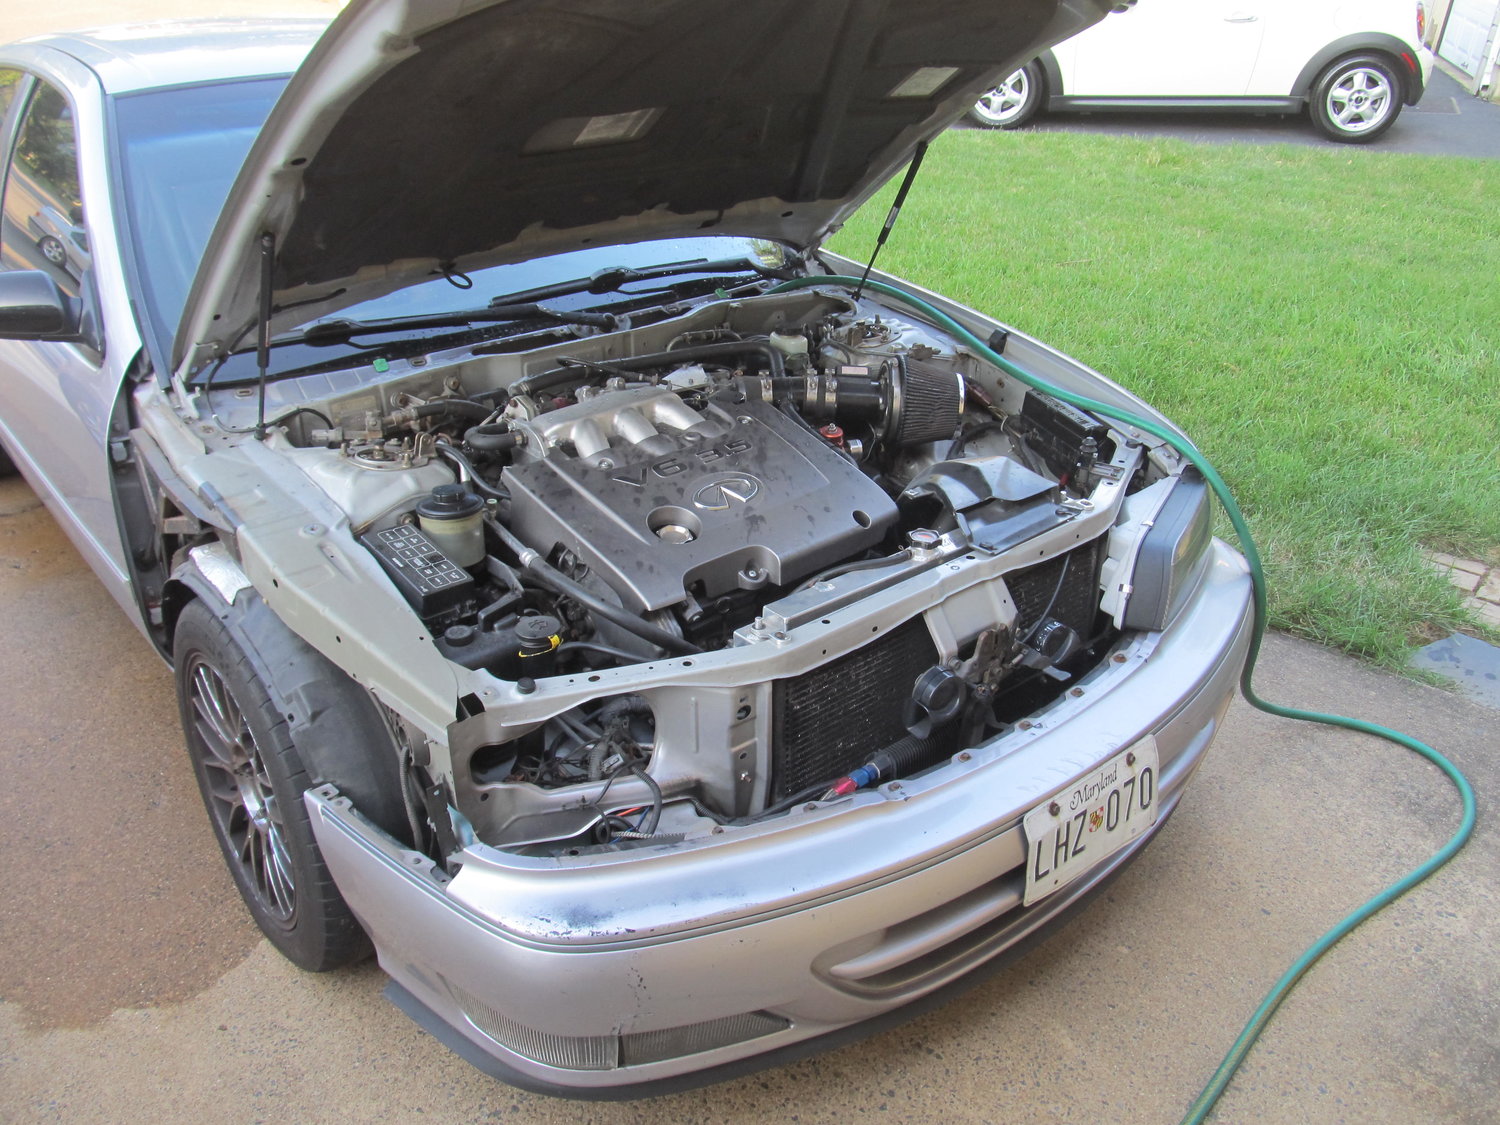
I was able to clear out some debris by sticking my vacuum into the large oval hole, and I think some of it was semi-clogging the drain. I took the car back outside and got the hose ready:
Sure enough, the water mostly drained out of the little drain under the large oval:
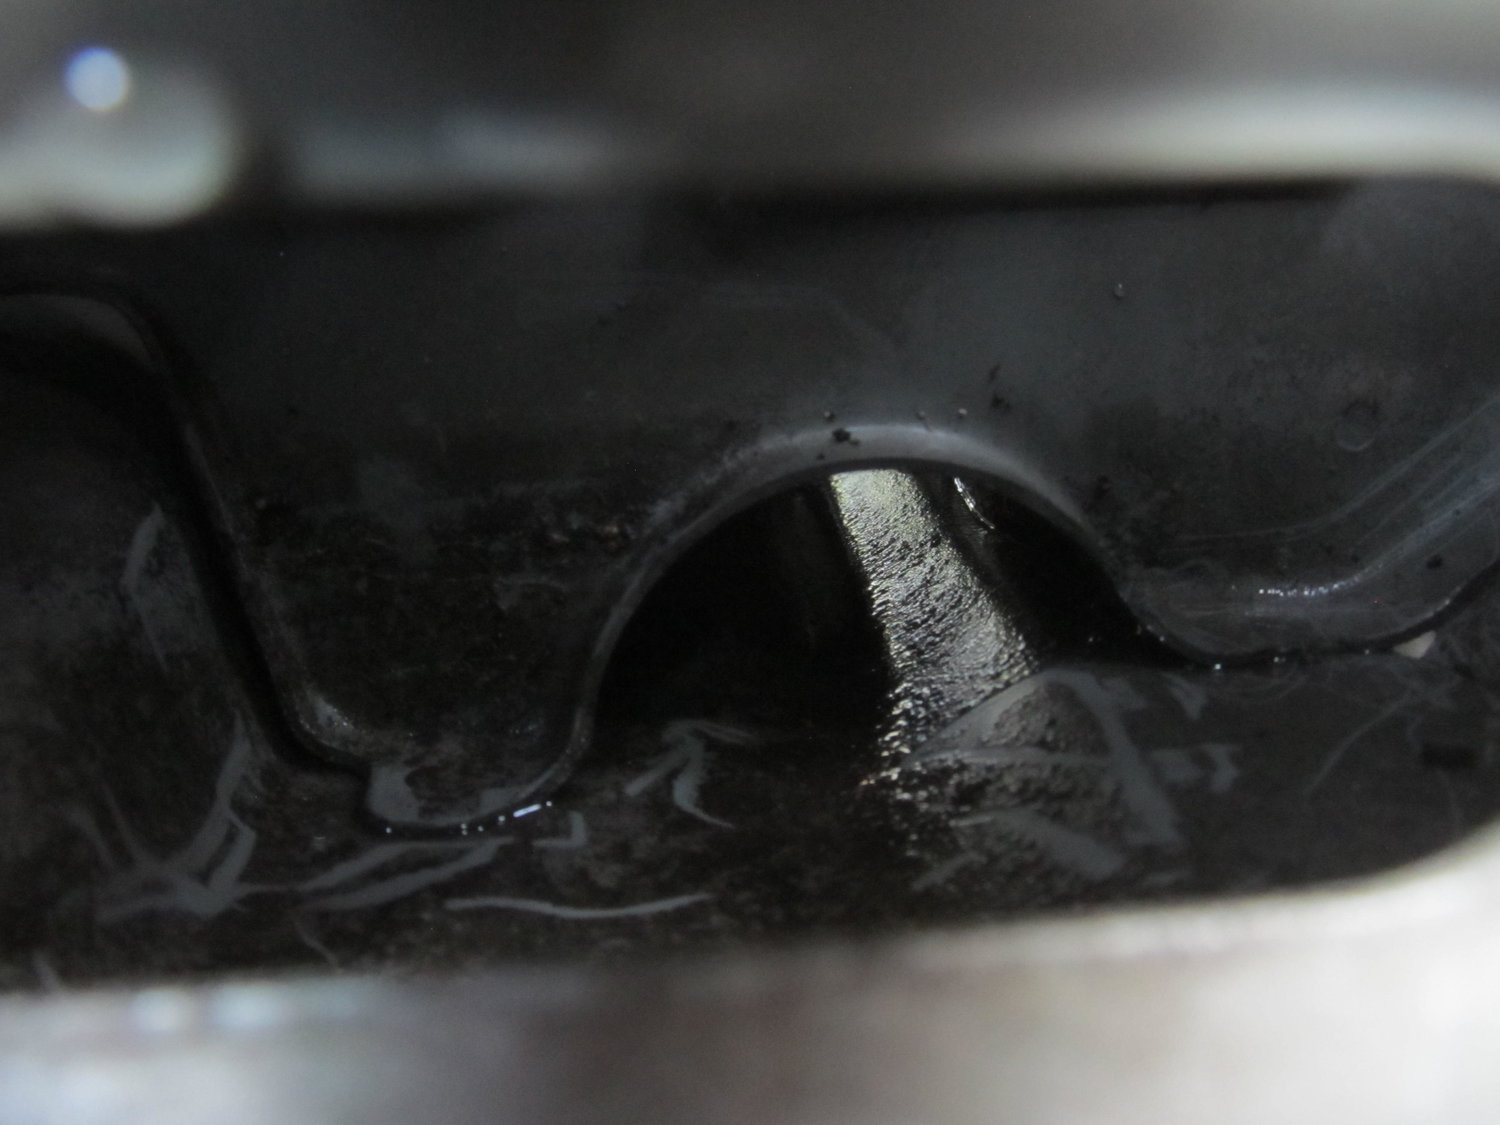
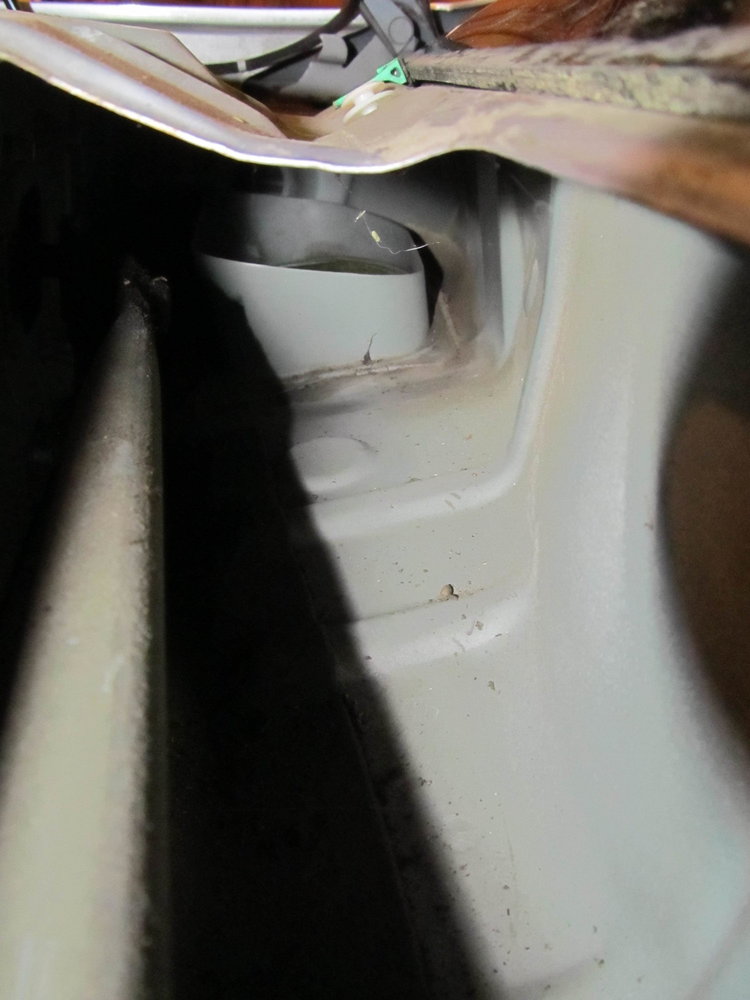
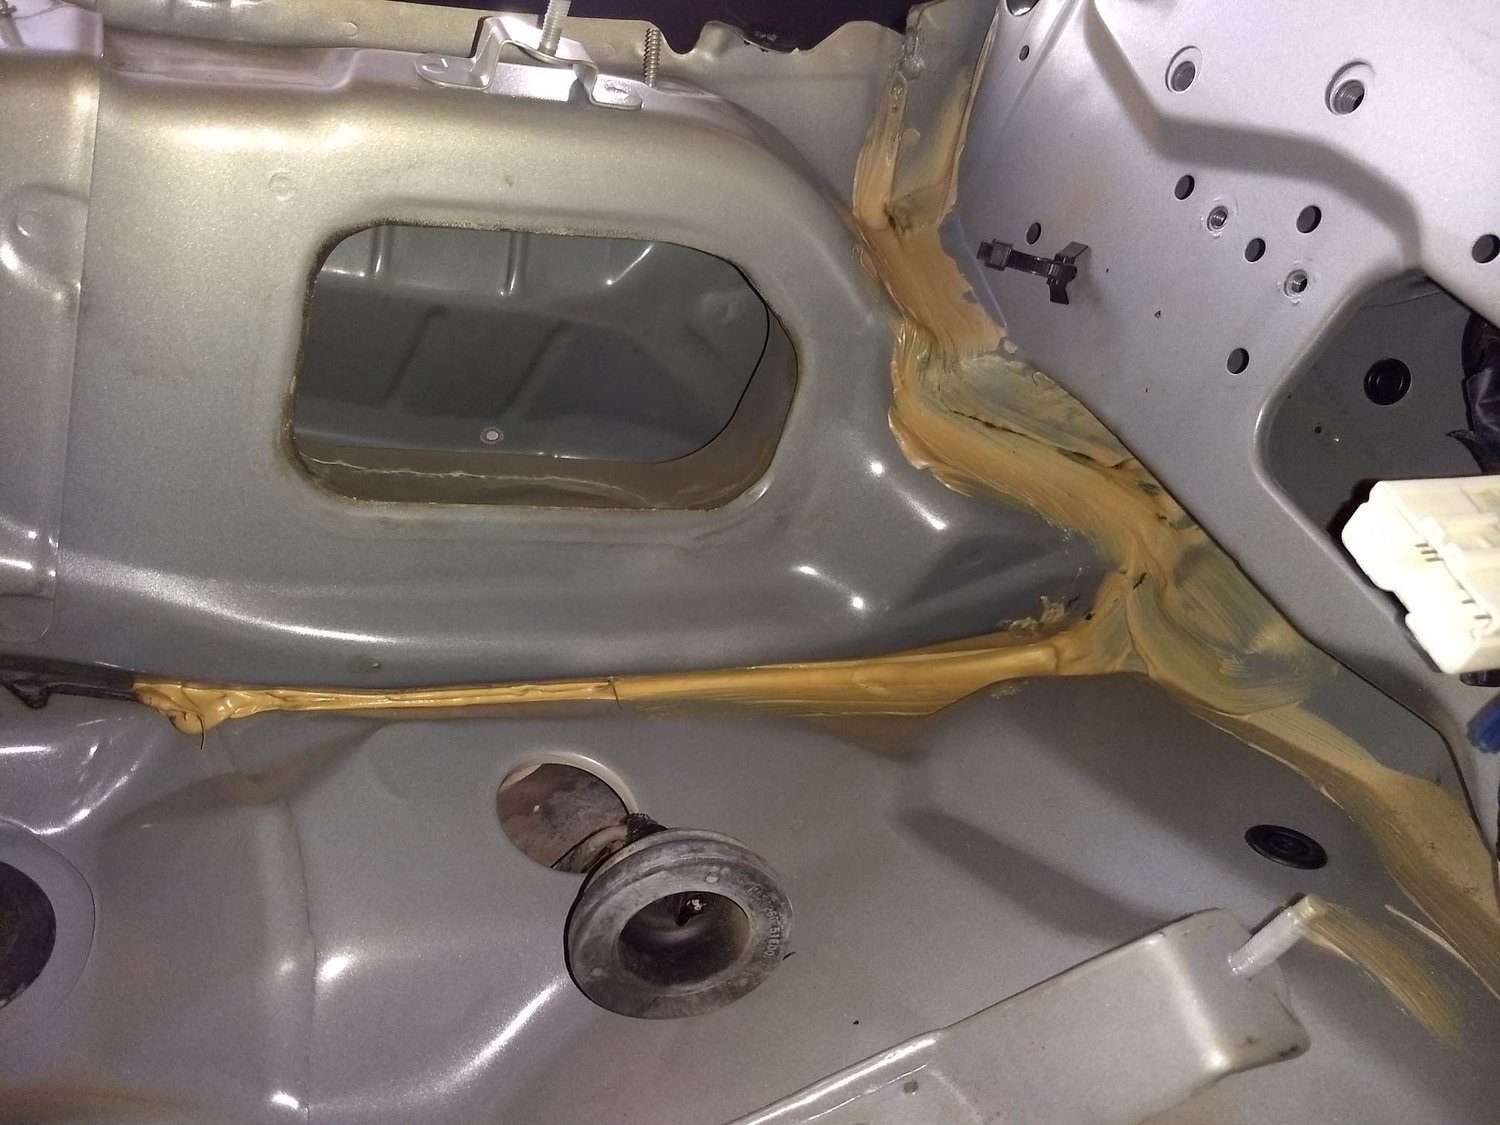
This is the view inside the oval hole:
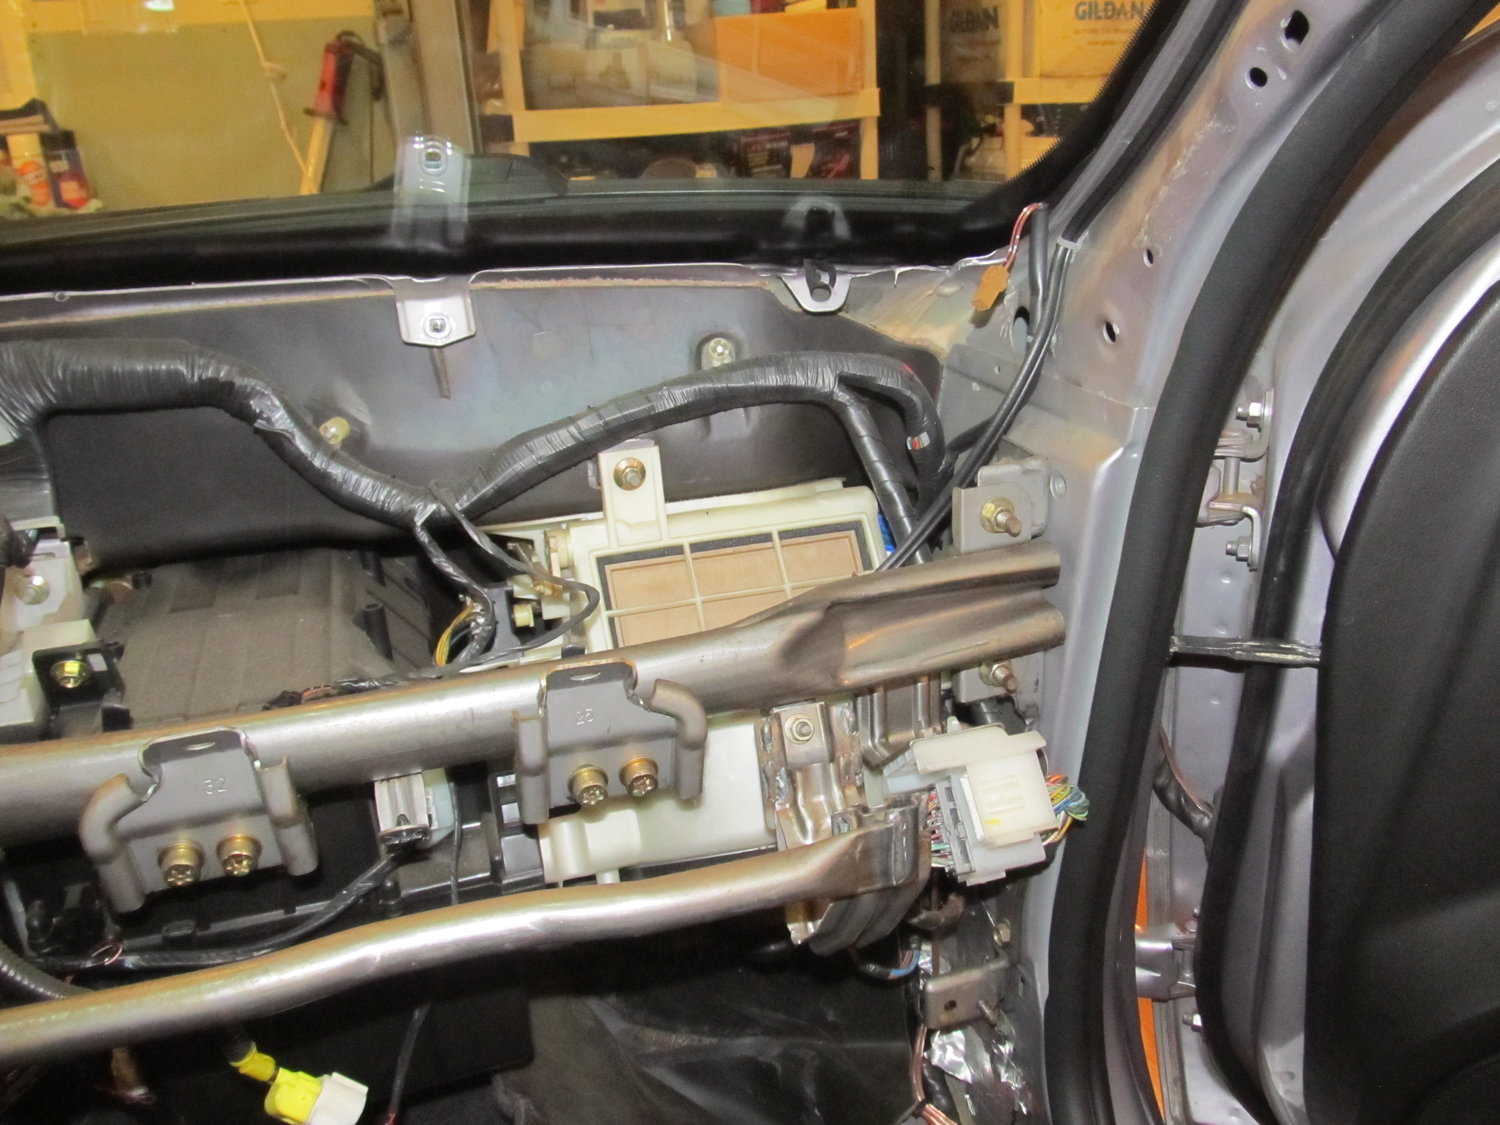
The chamber behind that wall is where the intake for the HVAC is located. That intake sits inside a hole surrounded by metal about 2″ high, preventing water from going into the HVAC. Here’s a view from the DS:
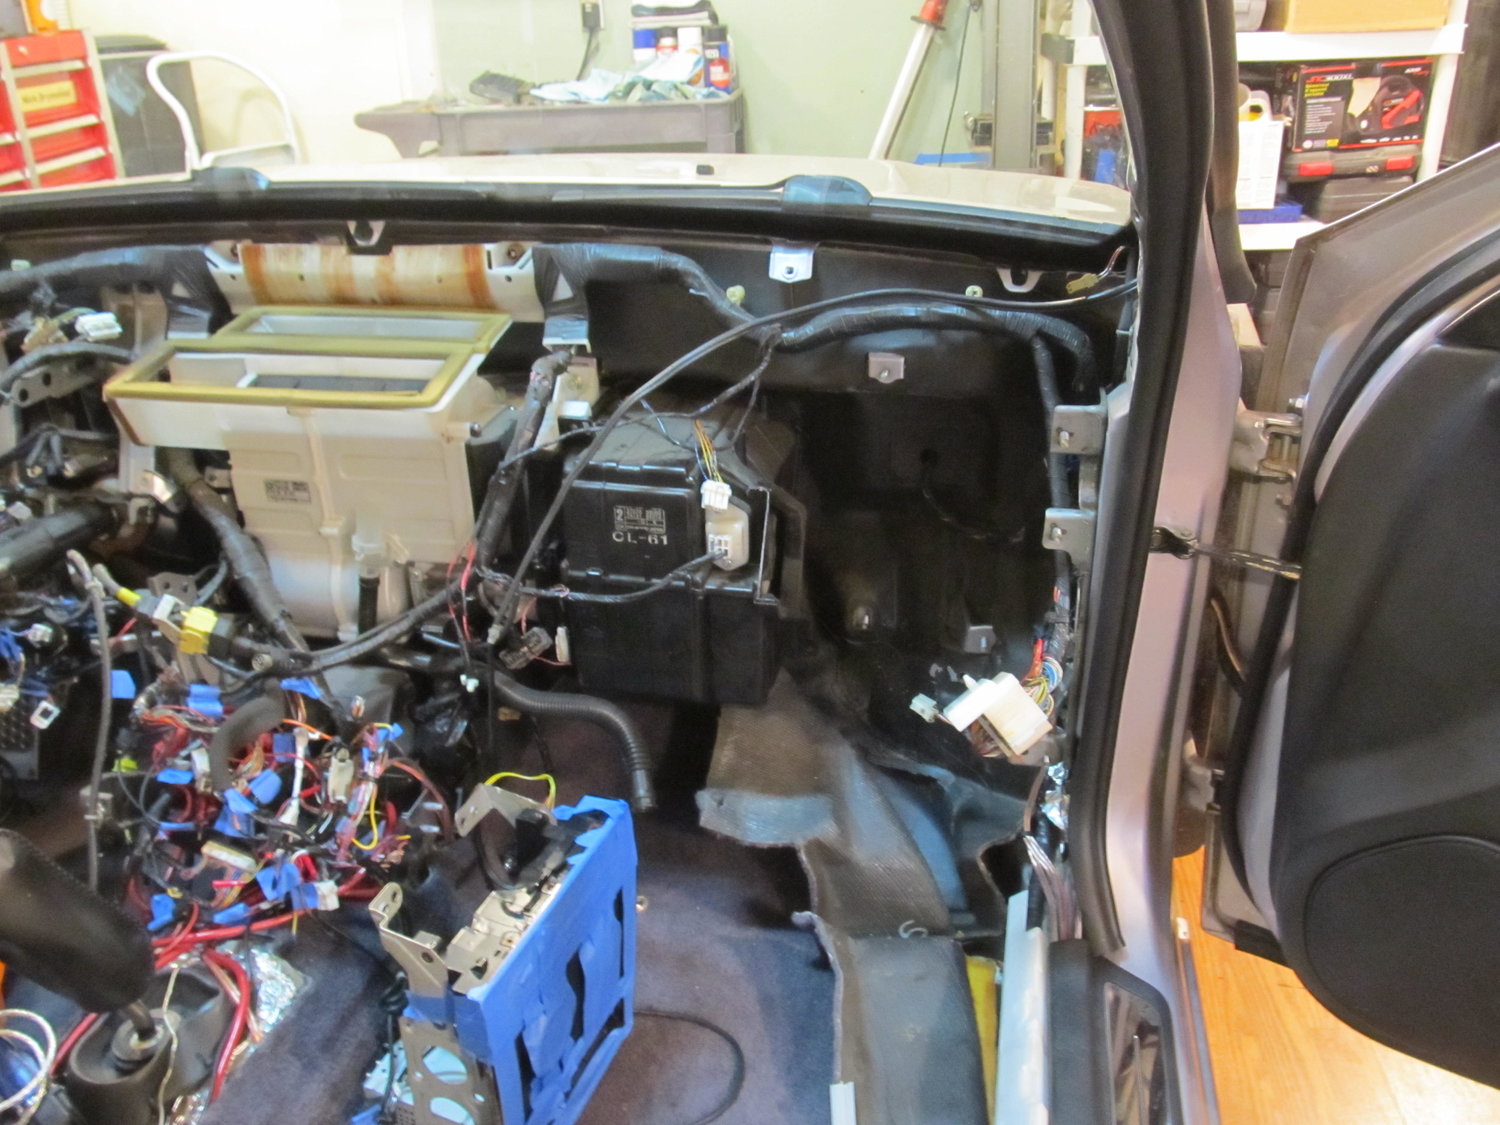
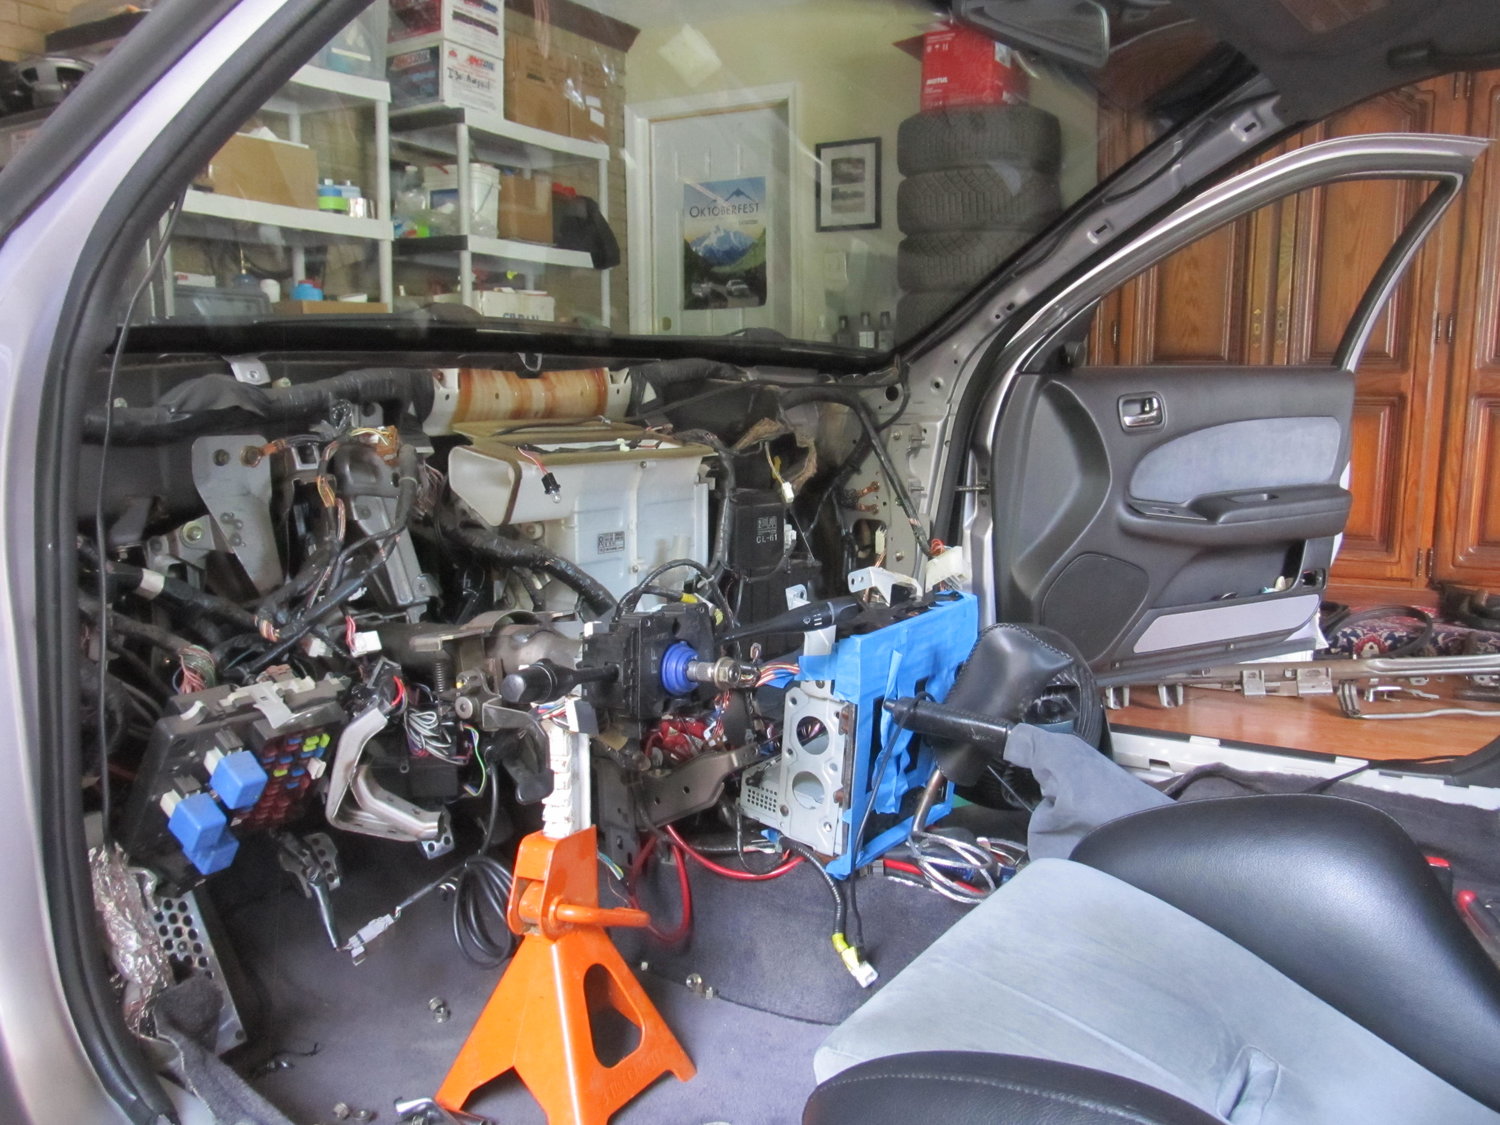
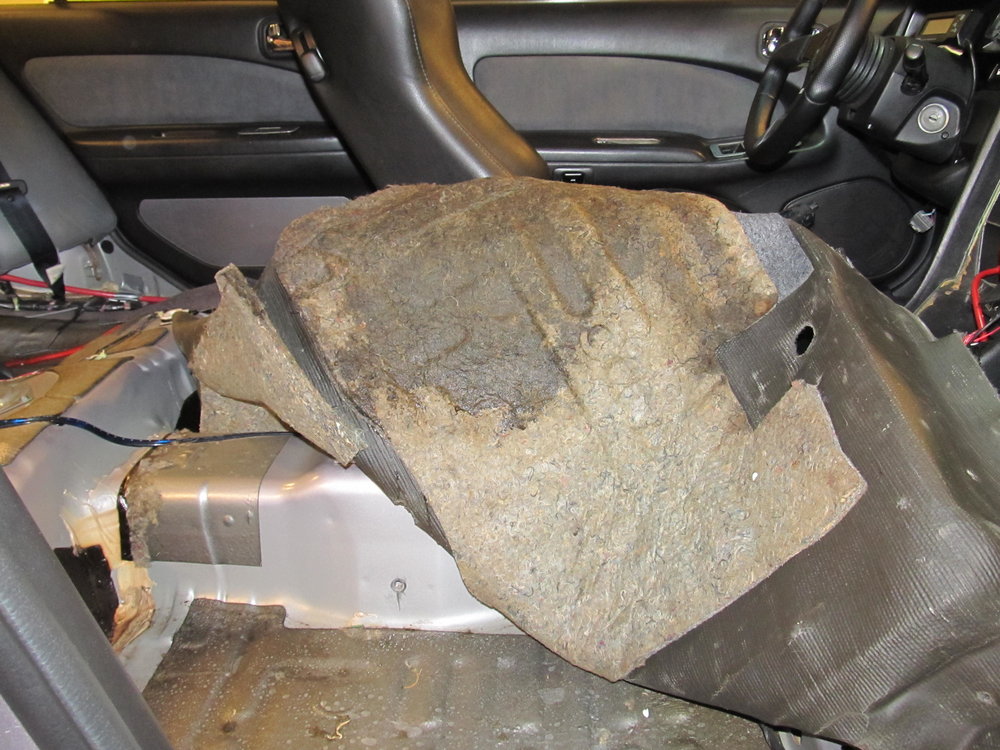
With my hose putting out a lot of water, no water went into the HVAC. But it did come right into the car again! So this seems to point to the problem being somewhere around the HVAC intake on the firewall, and not higher up around the windshield. The only problem is that I can’t see a way to access the area where the leak is occurring, none of the metal around the firewall is removable! The only thing I can think to do now is to remove the dash and/or the heater core. Can anyone think of any other solutions here? Am I overlooking something real simple and stupid? Here’s a look at the heater core:
So Schmellyfart is taking apart a car to go to the junkyard, and was nice enough to snap some pics of what the inside of a 4th gen car looks like with the dash and heater core removed. These pictures are very helpful, and if you look close, you can see an area that is rusting, likely around where mine is doing the same:
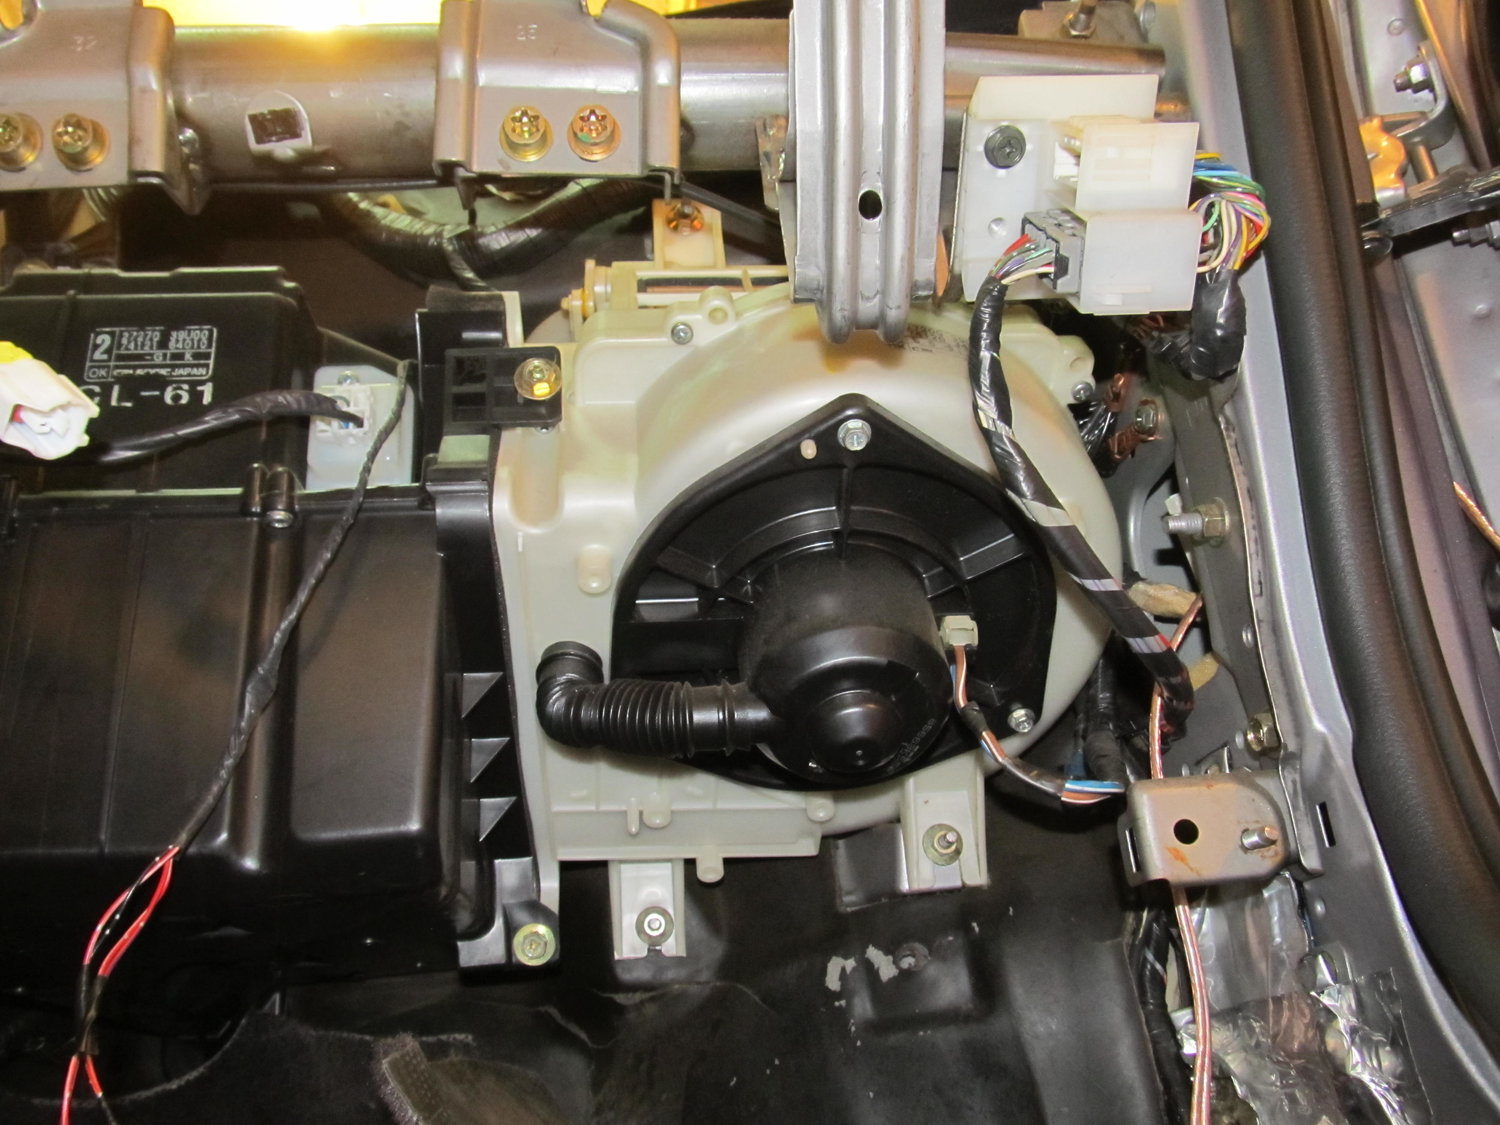
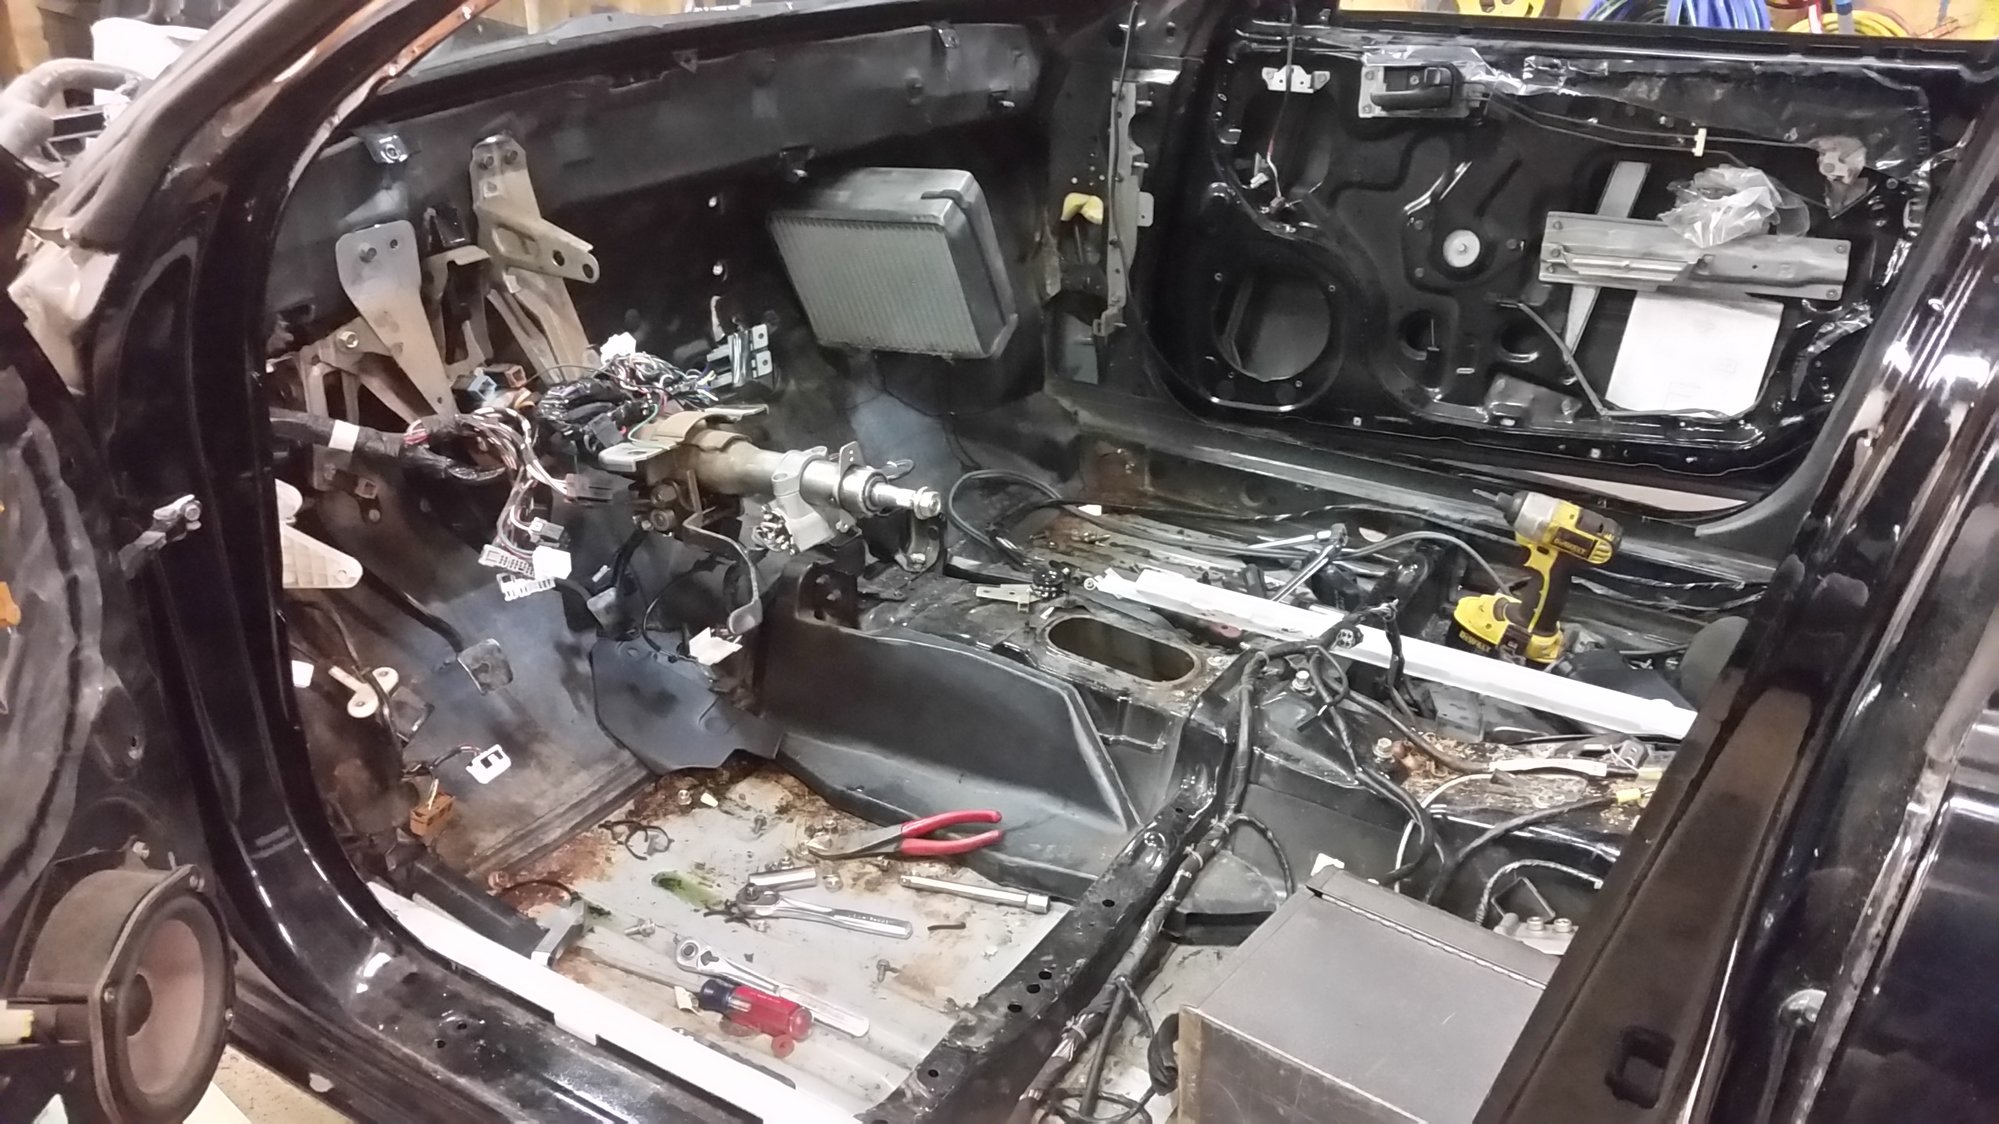
Ok, so I’ve pulled the dash, and I’m looking at the heater core and blower motor assembly:
I’m really hoping I can remove the blower motor (the white thing on the right) without removing the whole heater core (black part on the left). I’m really not trying to drain all my coolant and my AC lines. Does anyone know if it can be done? Without removing the blower motor, I can’t get to any of the seams on the firewall. So close, but so far!
I would also like to remove the PS air bag, as I don’t have one on the DS, which disables the PS one, so I might as well get rid of it. Except it seems to be “one piece” with the outer cover:
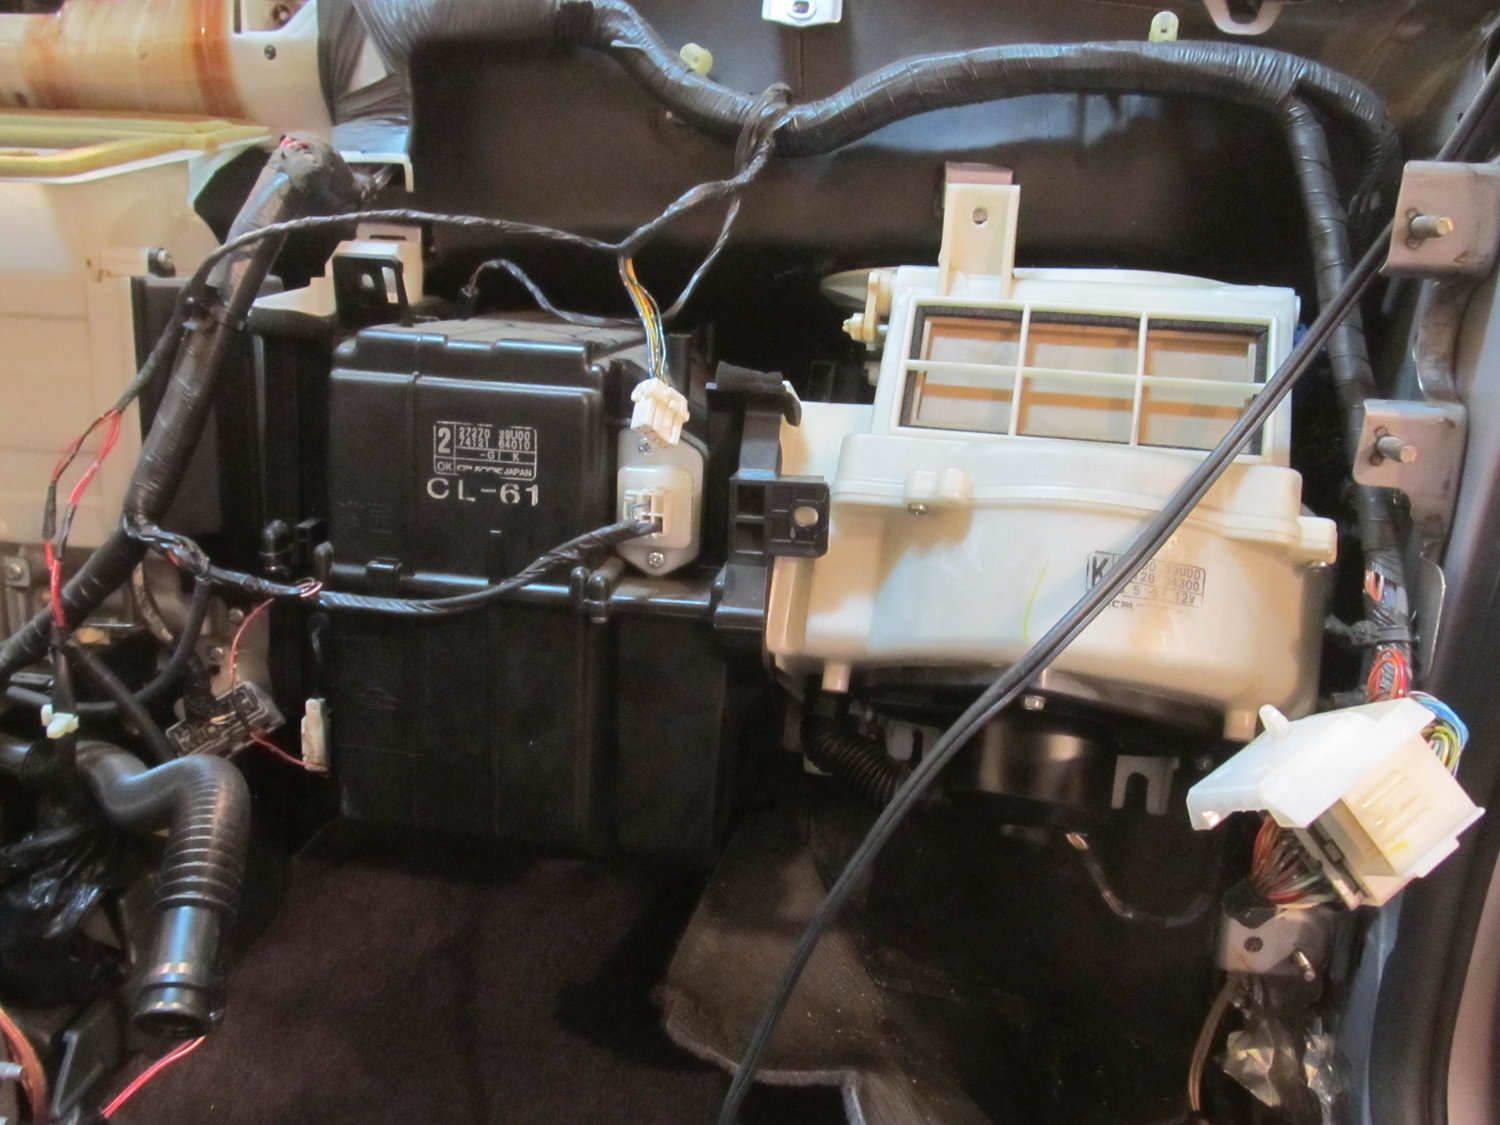
removed the crash bar, but the blower motor still doesn’t have quite enough room to come out.
Well I got the blower motor out without removing the AC evaporator in the black box to its left! I was under the impression that the black box housed both AC and heater stuff, but upon looking at the lines from the engine bay, it became clear that the black box only held AC stuff. The main blower assembly in the center is what houses the heater stuff I guess. I do have the ability to recharge the AC, but it’s not something I’m very good at, and I didn’t feel great about venting my whole system to the atmosphere. So I hoped and prayed that I would find a quick and simple way to get out the blower by itself. I went back into the garage this morning pretty worried about what the day had in store. I had the idea that I might want to trim off some plastic from the black box to give me enough room to slide out the blower. I was in there looking at it, and noticed that one of the sides for the black AC box was pretty flimsy. With almost no effort, I was able to snap off a good piece of it. I then followed up with my snips, and with that little bit of plastic out of the way, I could get the blower out! It was a joyous moment to be sure. Here’s what I did:
That little bit of plastic was all that was keeping me from getting the blower out!
As this out of focus picture shows, there was a good amount of debris in the evaporator housing:
So I spent some time with different picks and my shop vac and cleaned it all out:
The blower was actually very clean:
So I was then left with this:
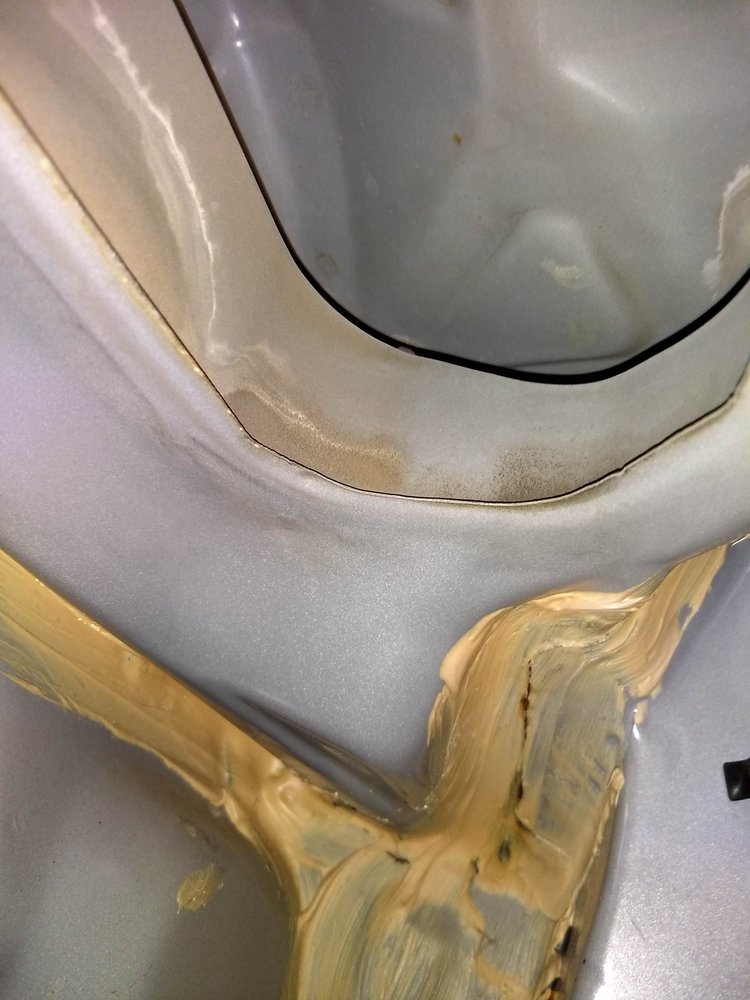
But there was still the factory insulation in the way. I ended up just cutting off a piece so I could get easy access to where I thought the leak was (I’ll reinstall properly when I’m all done). And with that, I was FINALLY able to see the source of my water leak:
It’s not in the exact same spot as the pics from schmellyfart, but it’s not far, maybe 2″ away. It’s clear that this area has a few body panels coming together, and it’s also right next to the drain for the cowl, so being sealed properly is crucial. If you have a water leak in a 4th gen, I wouldn’t be surprised to find it’s in this area! You can see three water trails coming down from that area, so I’m very confident this was my problem.
I spent quite a bit of time with different wire wheels, both on my big gun and little ones on my dremel, trying to peel back the old seam sealer so I could get a better look at exactly where the water is coming in.
It doesn’t really come through in the picture, but the horizontal area just right of center is actually completely open now. I had to scrape the old seam sealer out of it with a screwdriver, because I didn’t want any of that old cracked stuff getting in the way of my fresh seam sealer. Now I’ll be able to completely refill the gap with new sealer. Access into this area was pretty awkward, and my back was aching after a few hours in there, but I think I’m happy with how clean I was able to get it. When I finally couldn’t get it any cleaner, it was time to prep the surface for the seam sealer:
This stuff is SUPER strong, and has tons of warnings all over it. I go full-hazmat when I use this stuff, but professional painters swear by it, so I grit my teeth and bear it. I was considering applying the seam sealer today, but then I thought about it more and realized I would feel much better about it if I bought a new tube of it. My current tube is a few years old, and since I couldn’t get a firm answer on its shelf life, I decided I would rather spend another $20 on new sealer than to have my current sealer fail because it was too old and didn’t adhere properly. It should be here on Tuesday, so I’ll continue after that. But for now I’m feeling pretty damn good that I was able to get the blower out by itself without ruining anything!
I’m left with this to look at, and ponder how many things I’m going to forget to reinstall, or reinstall in the wrong order. I’m not out of the woods yet!
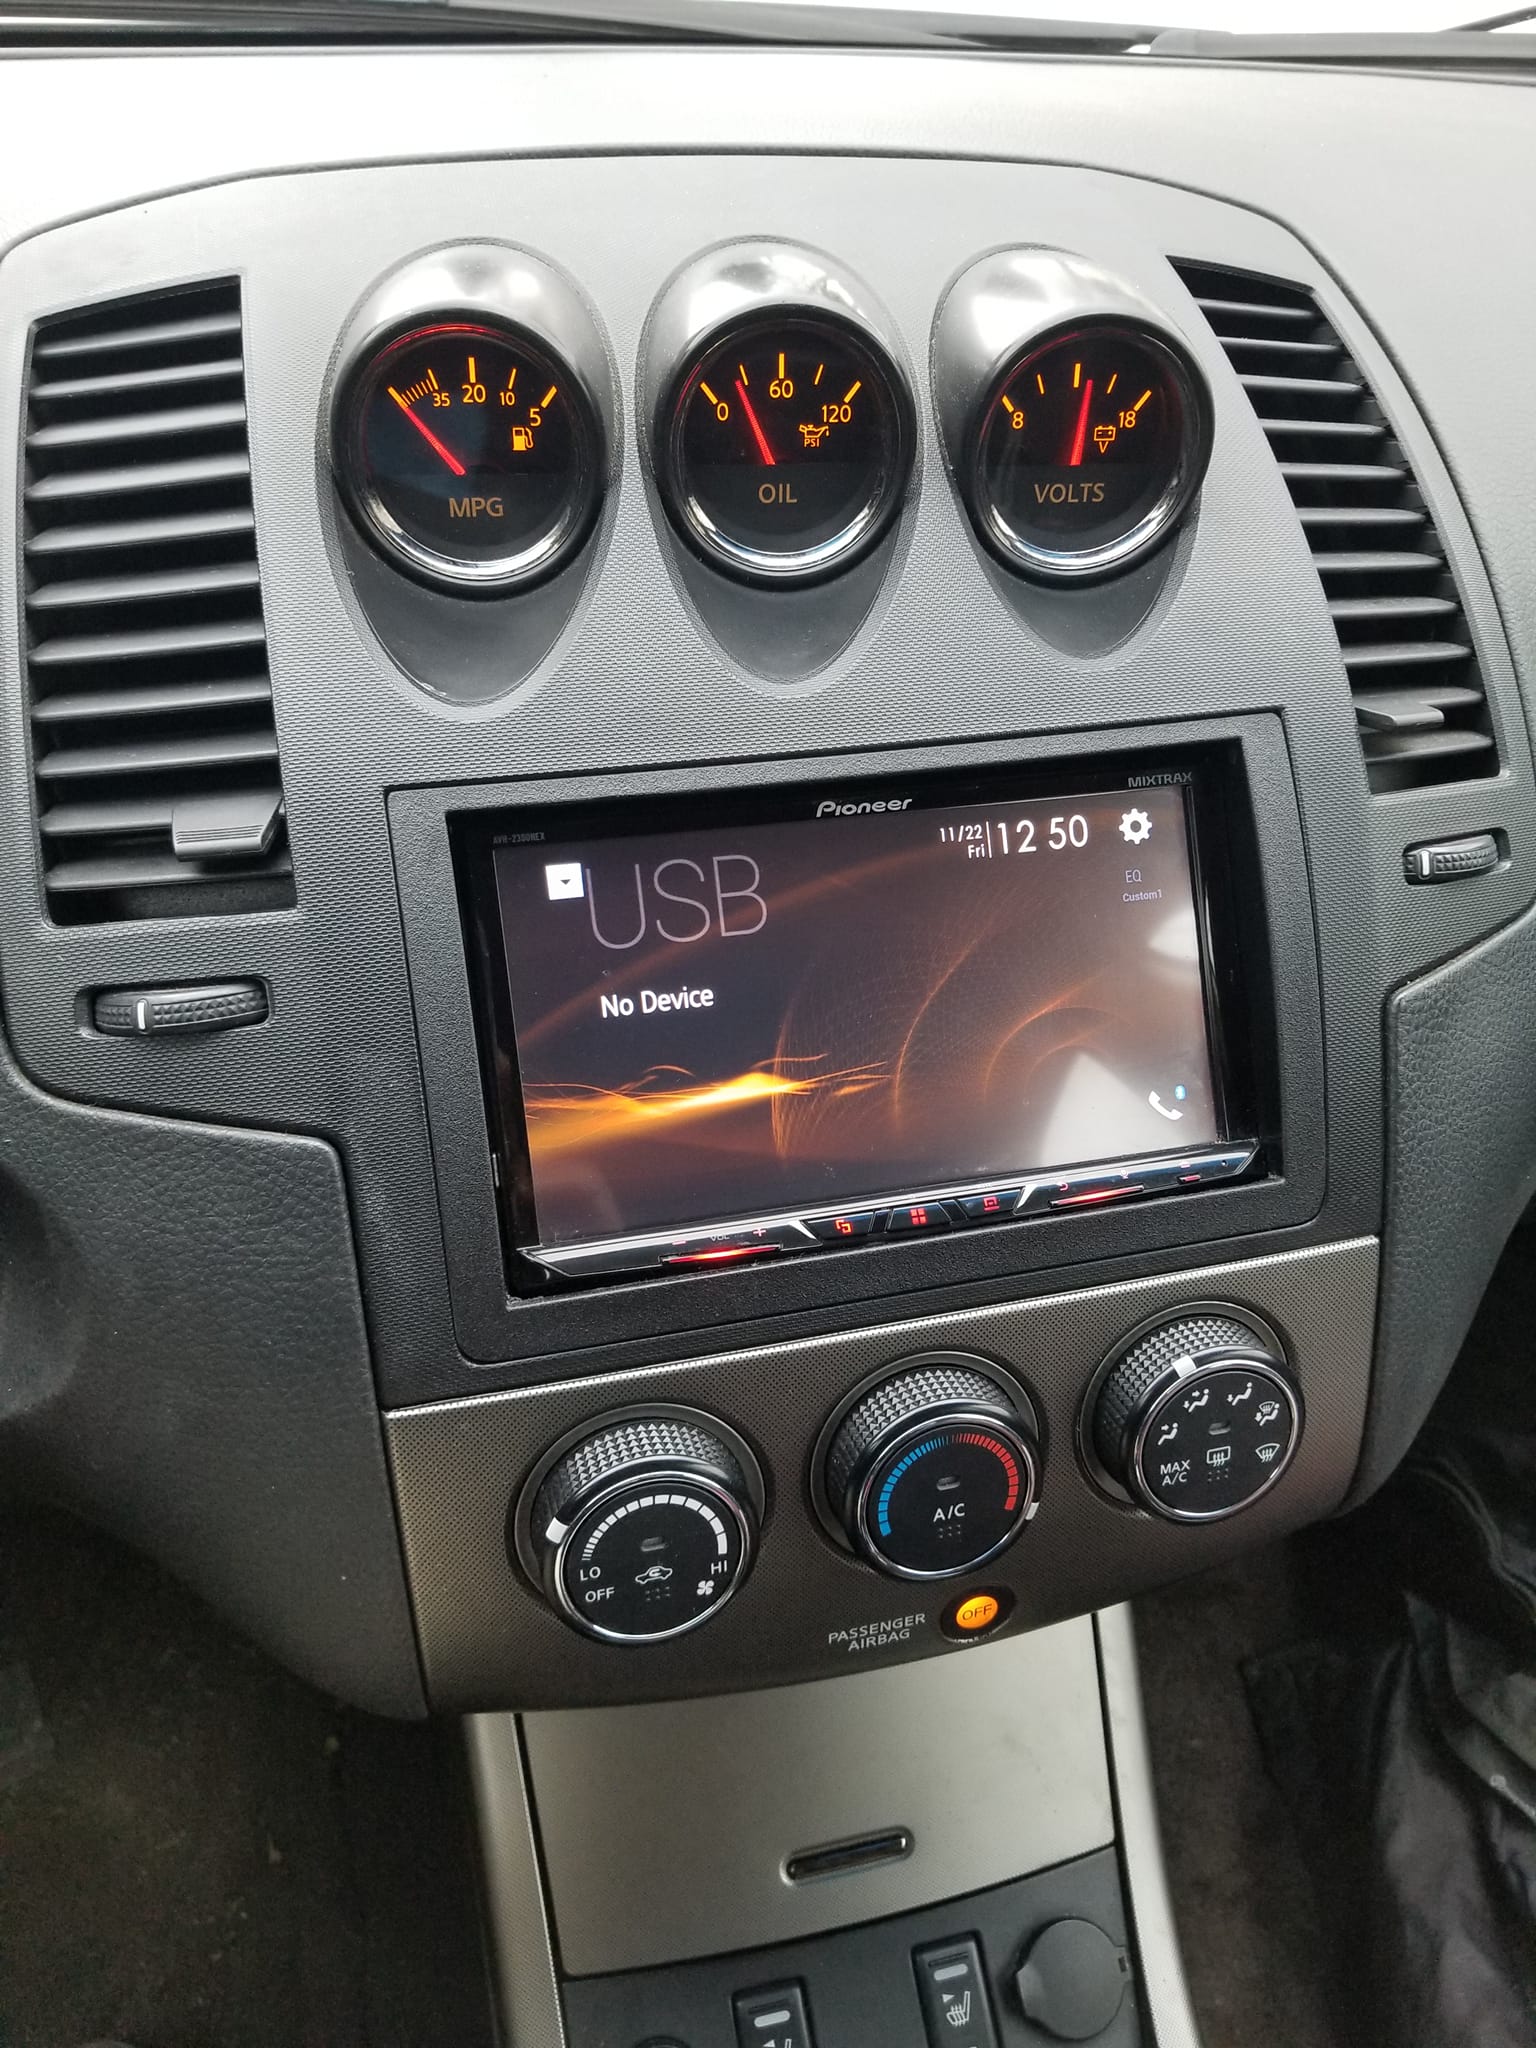
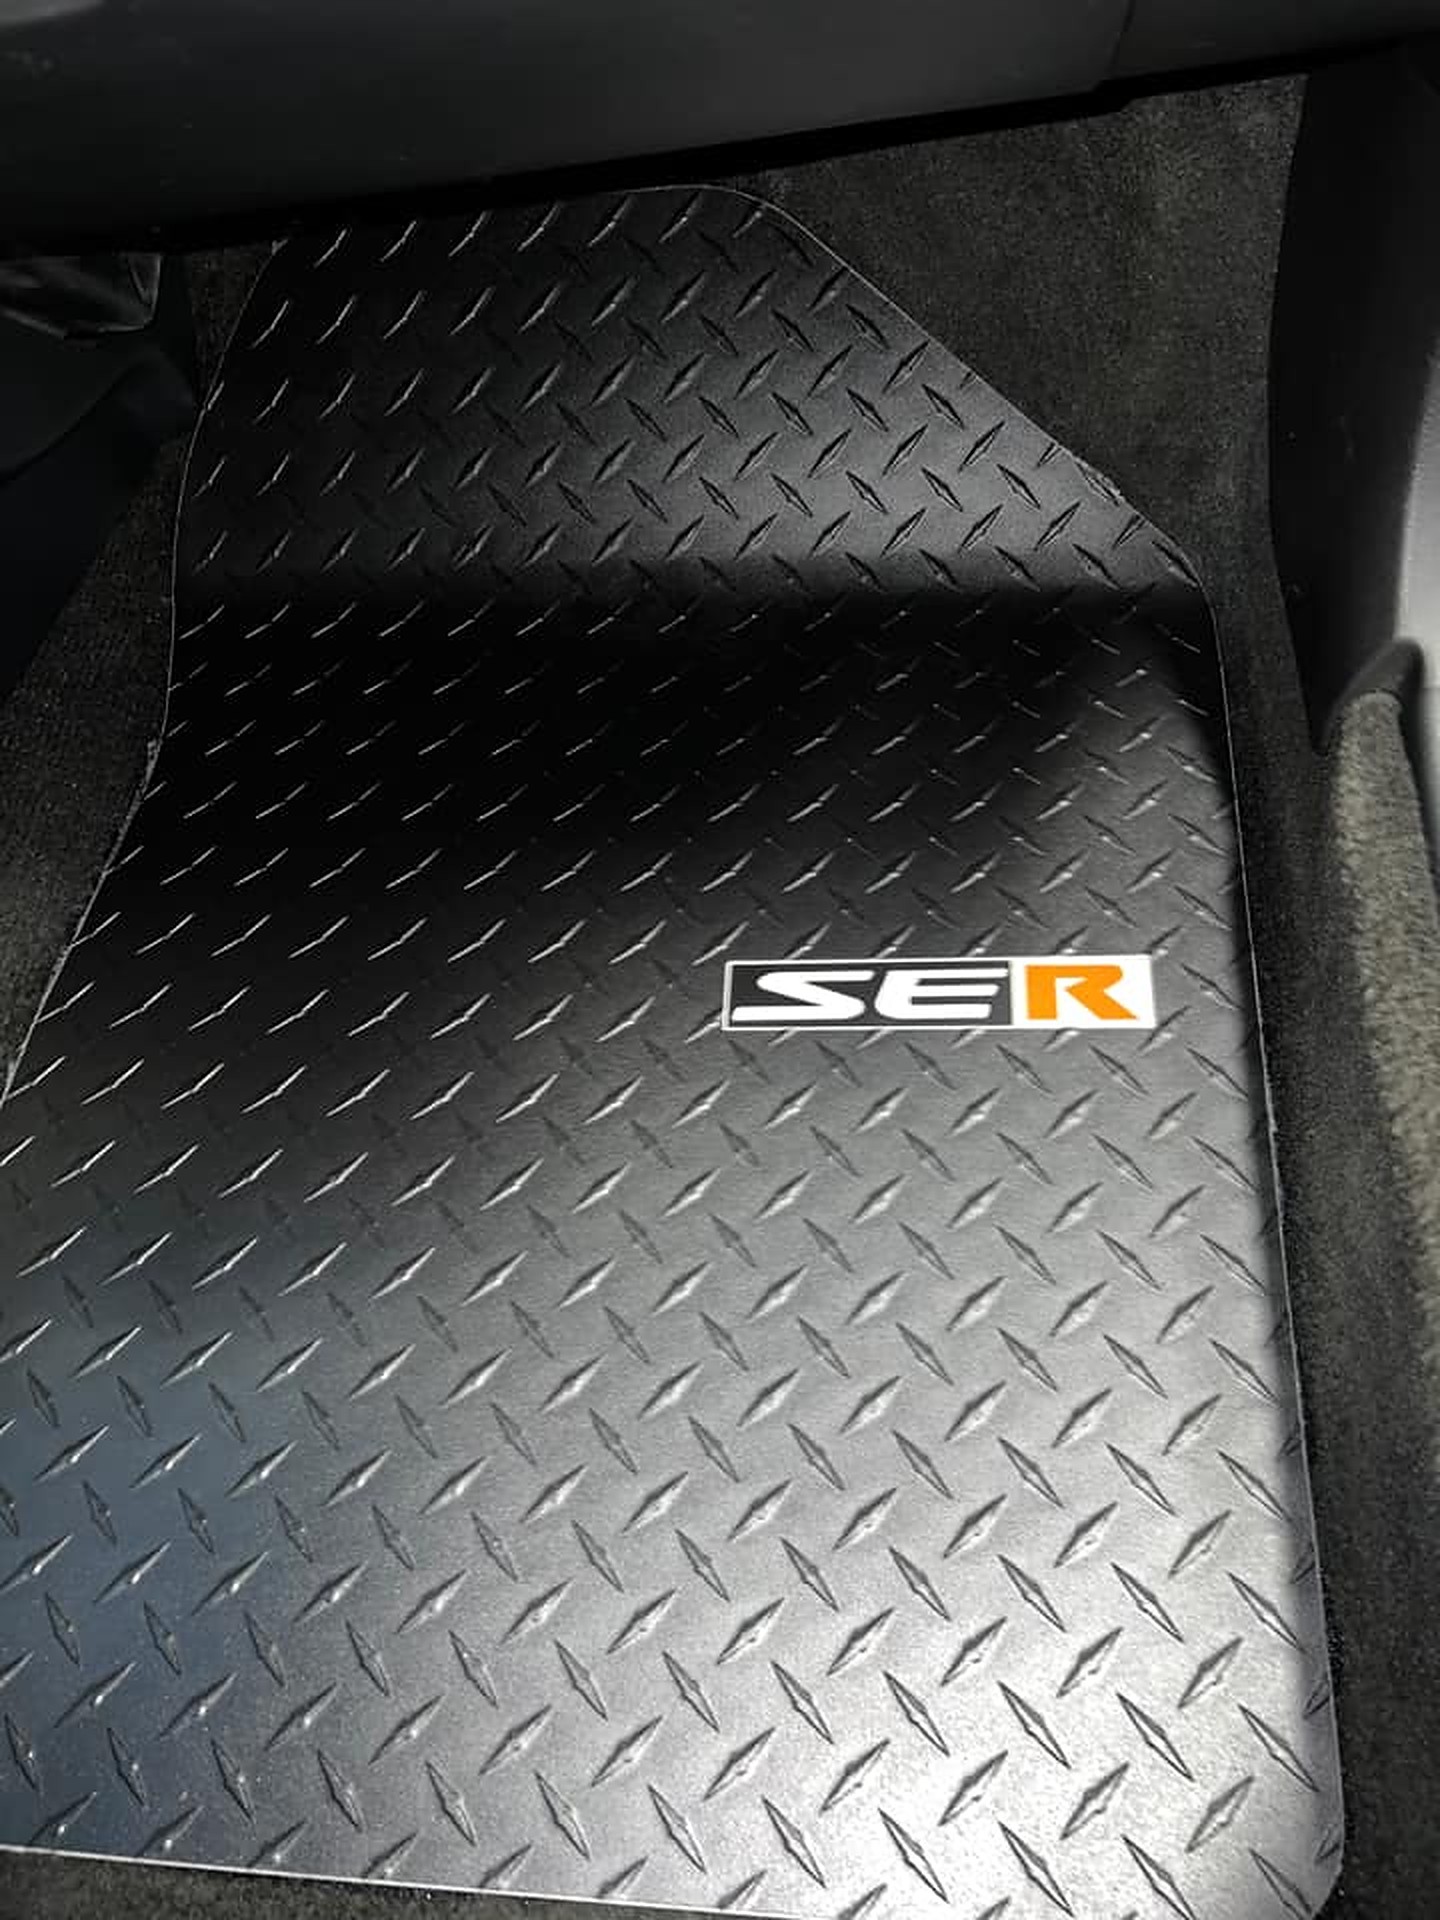
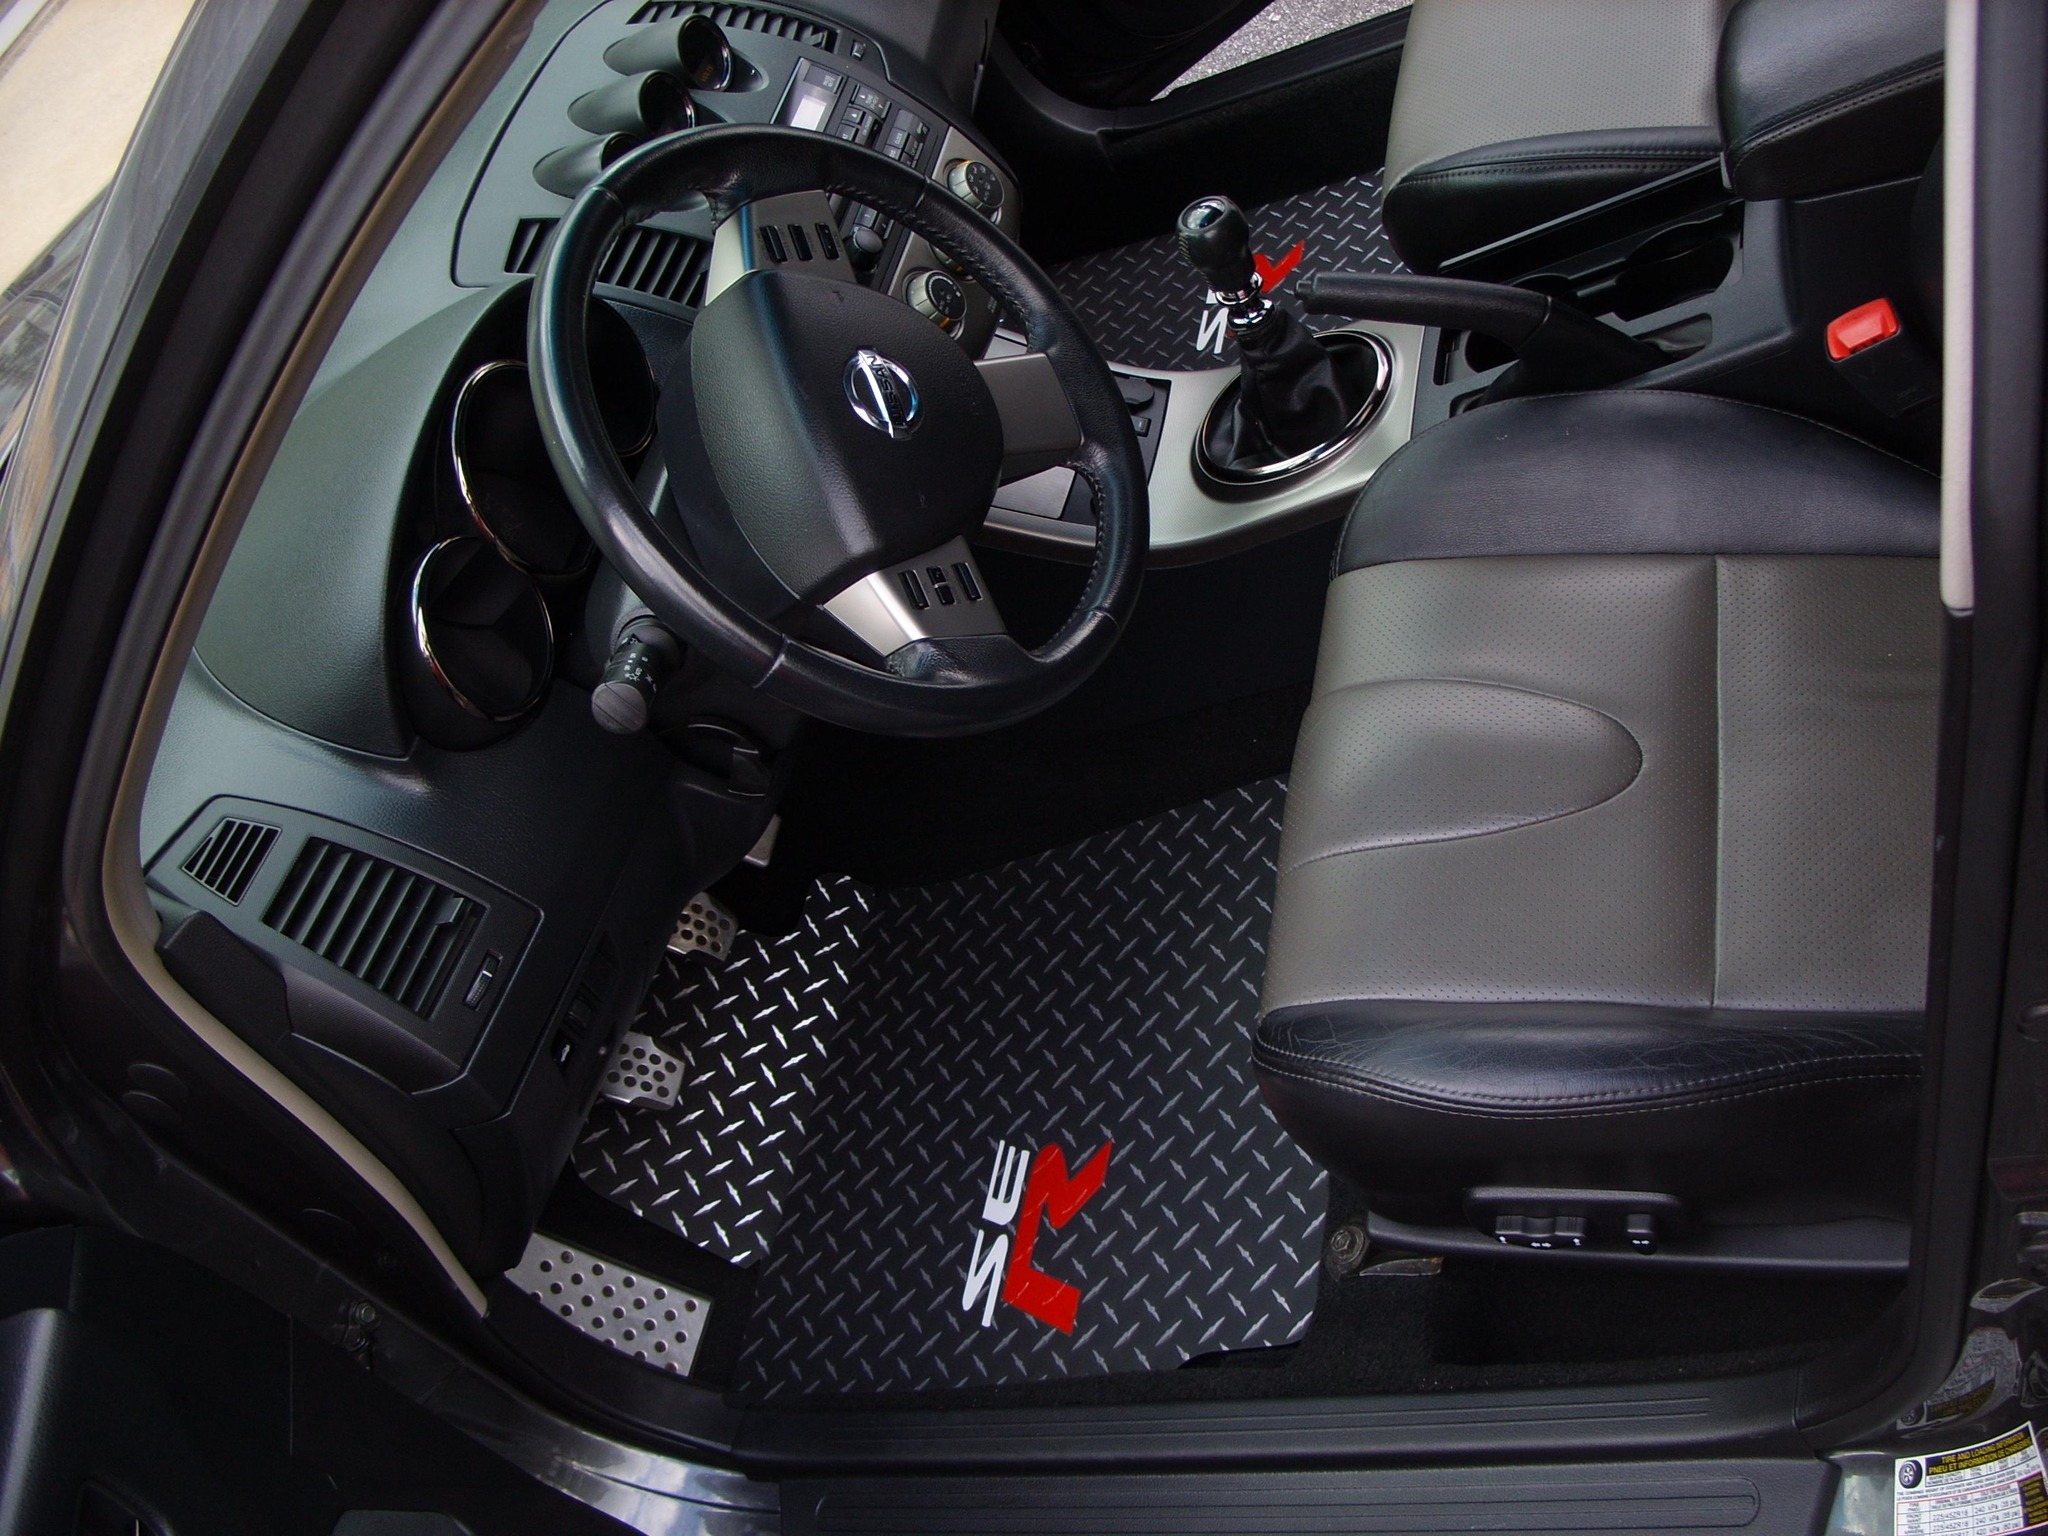
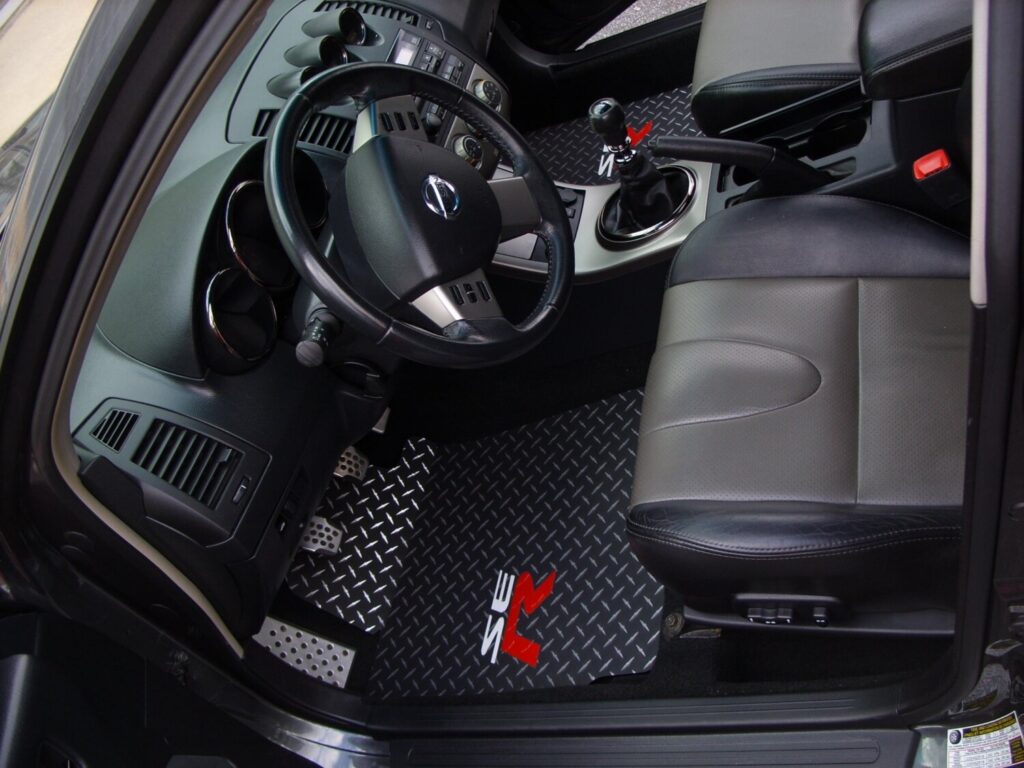
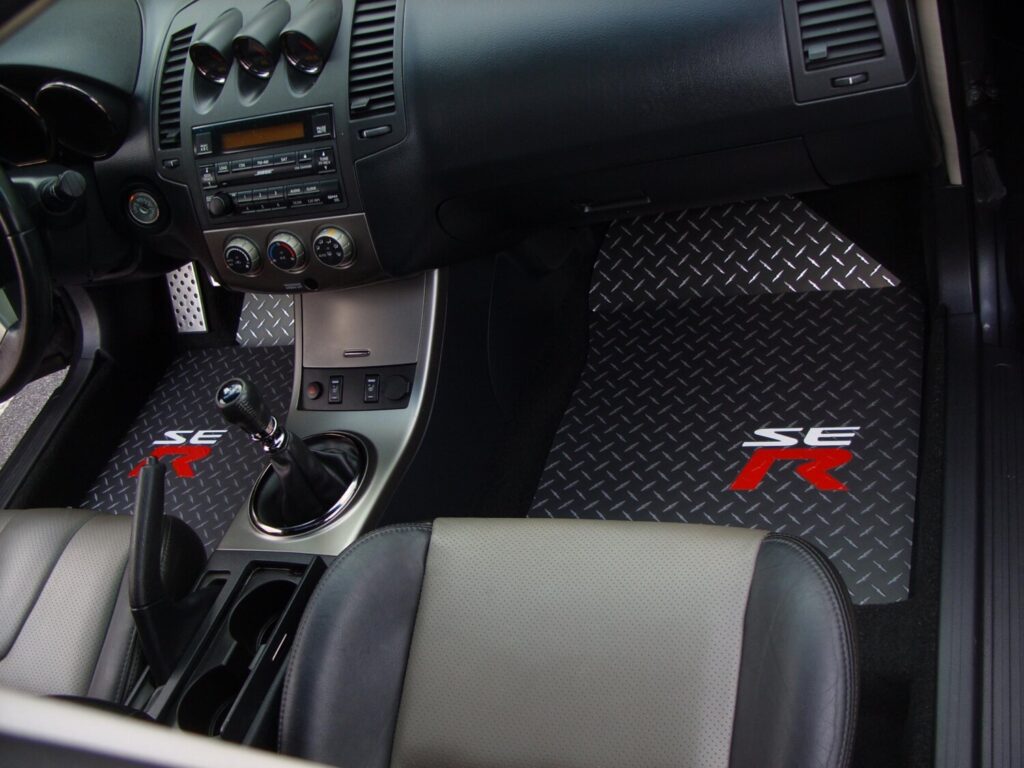
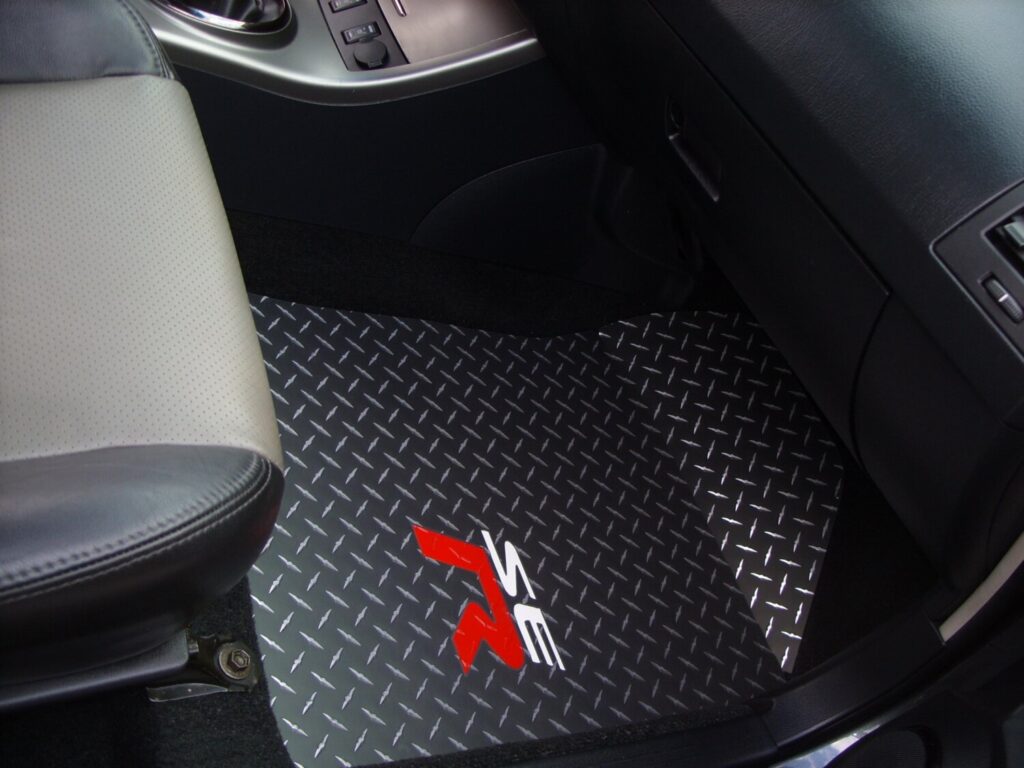
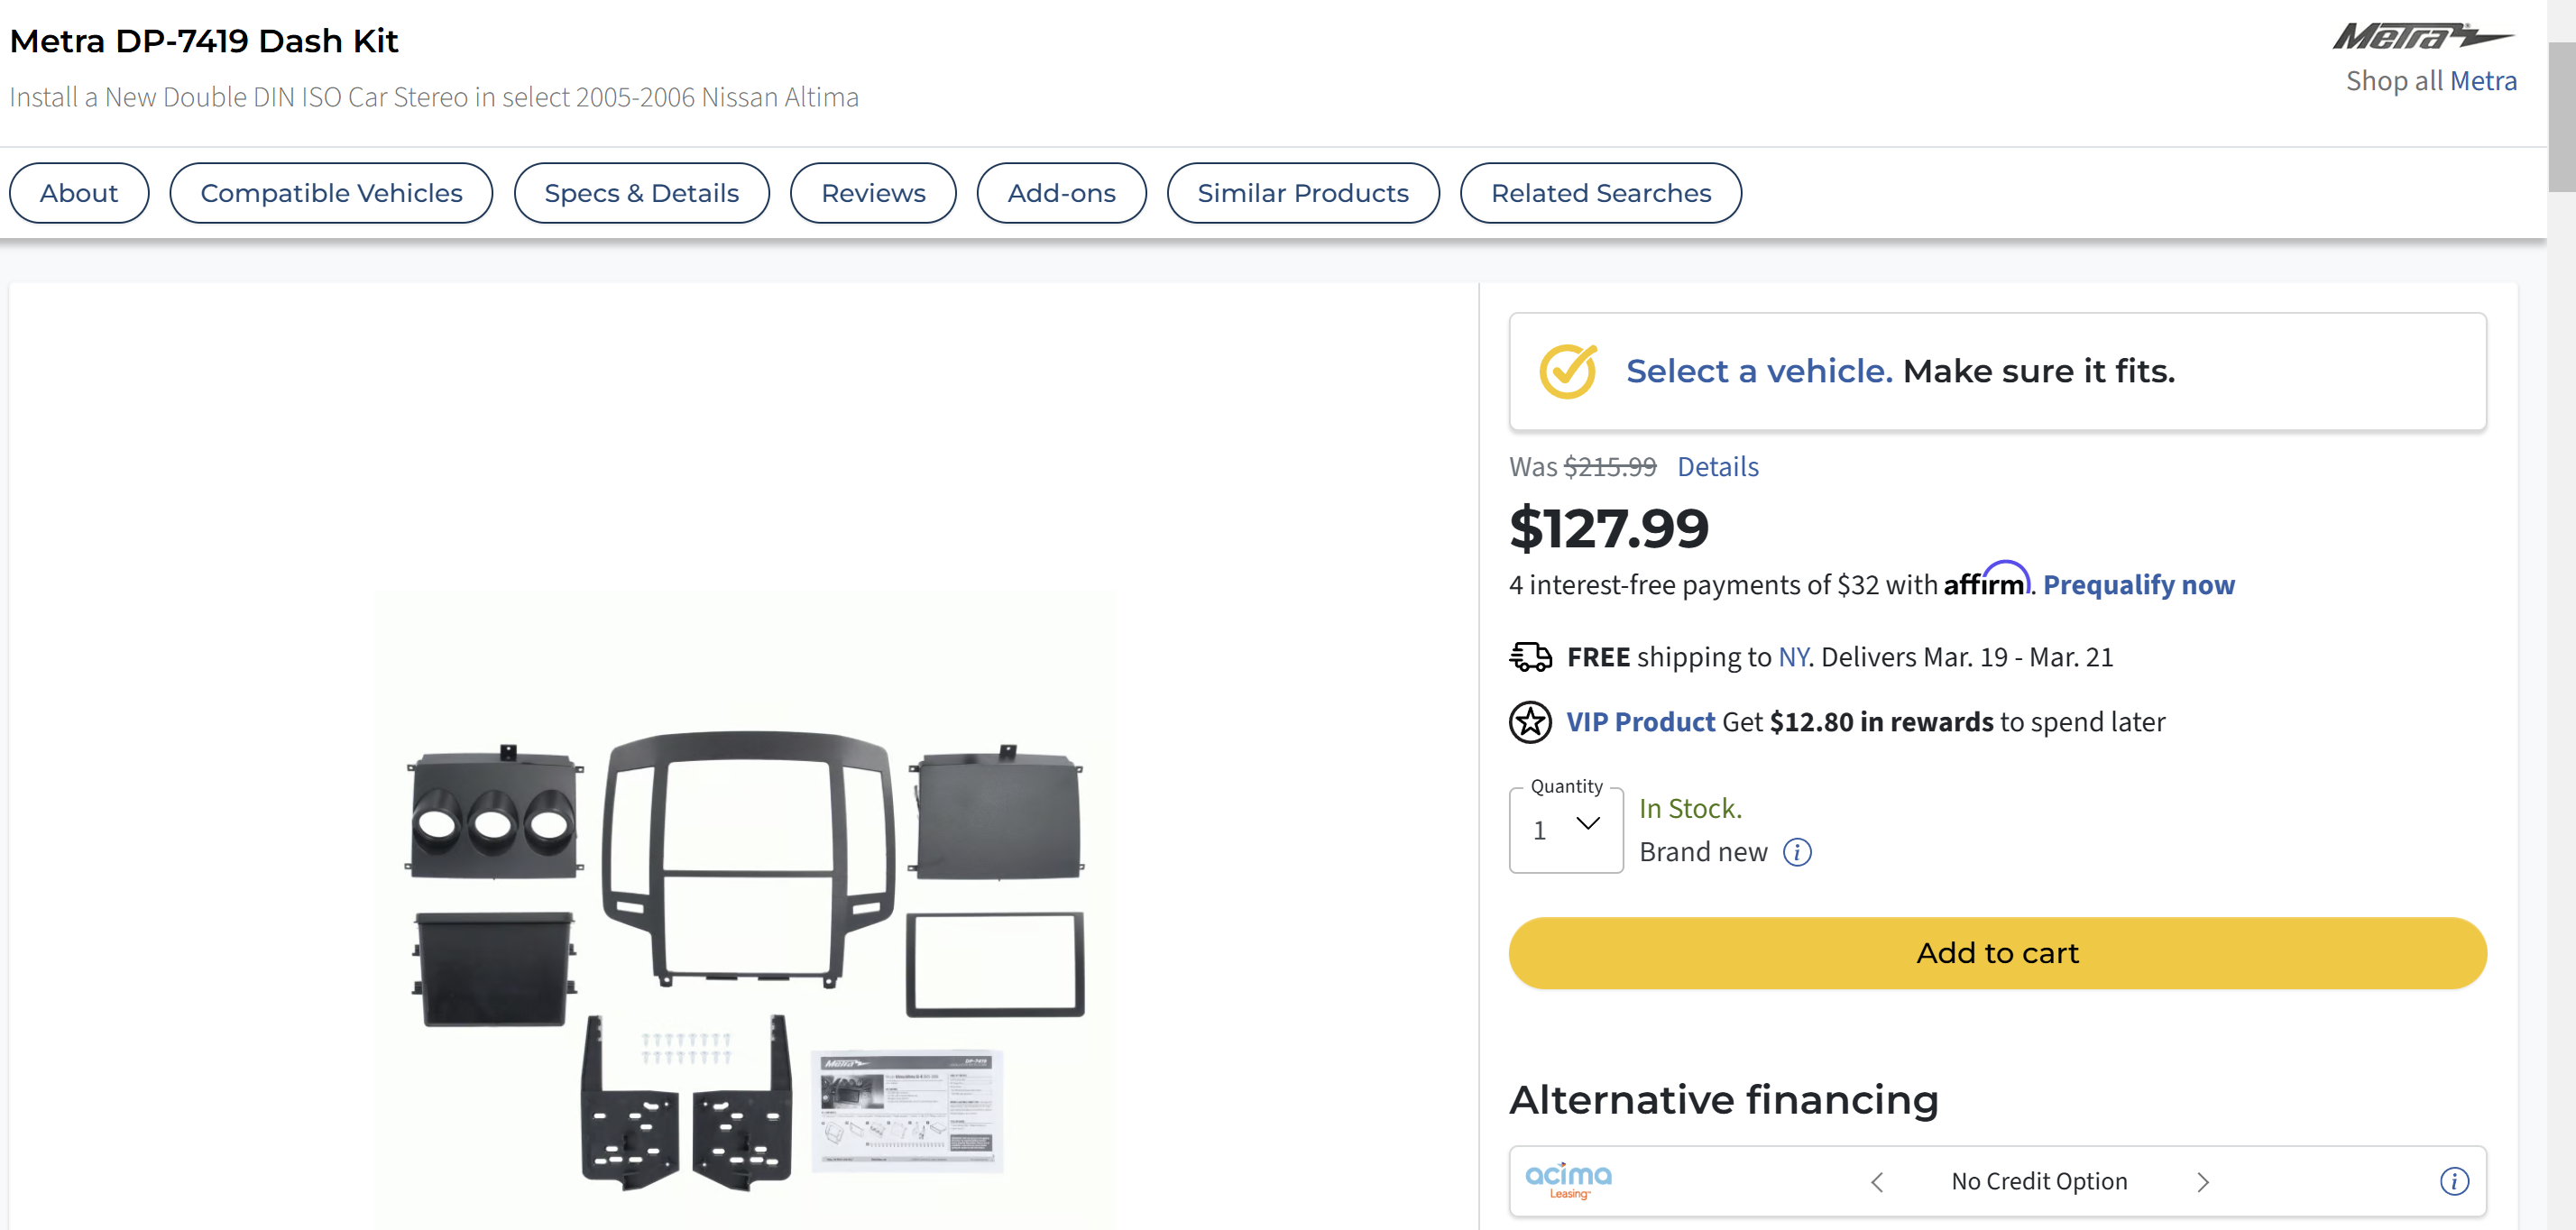
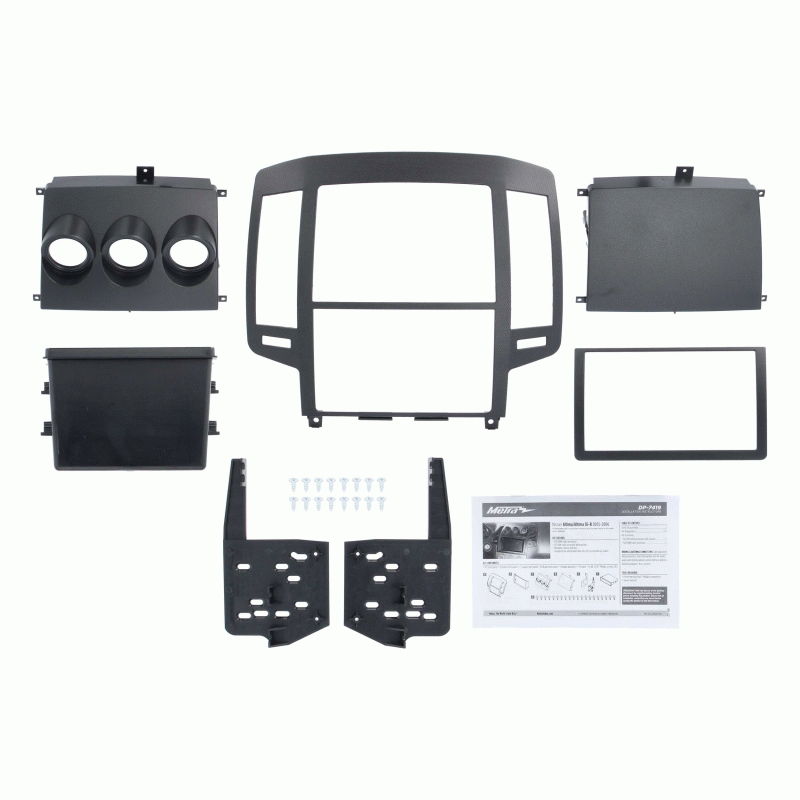
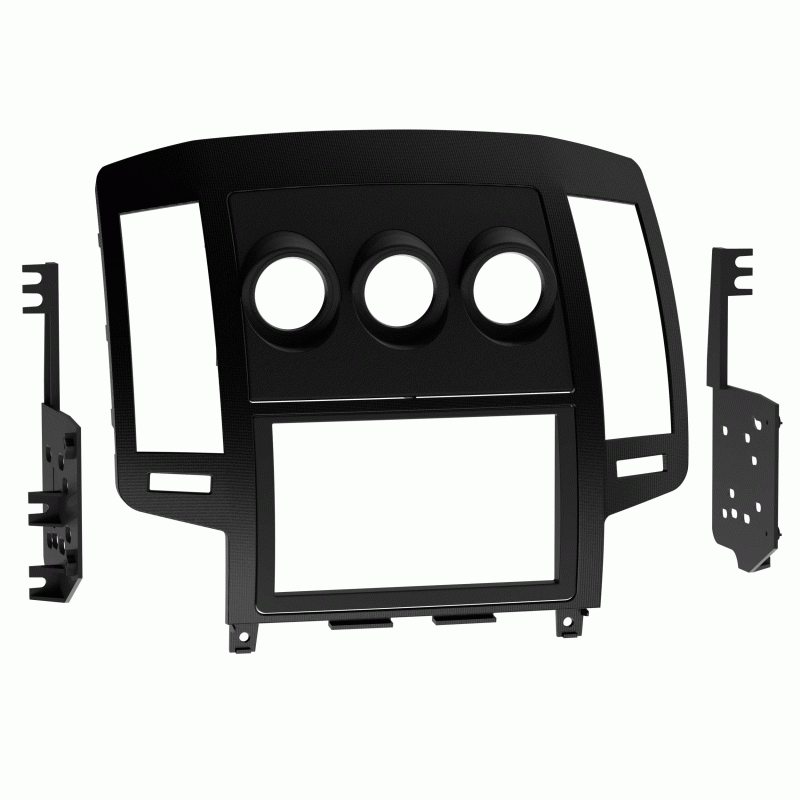
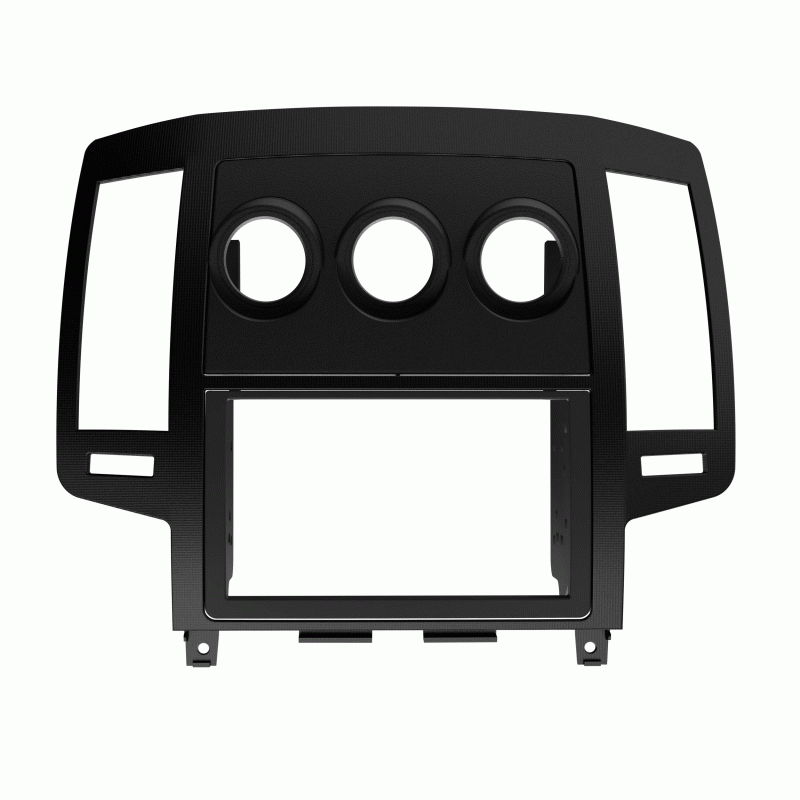
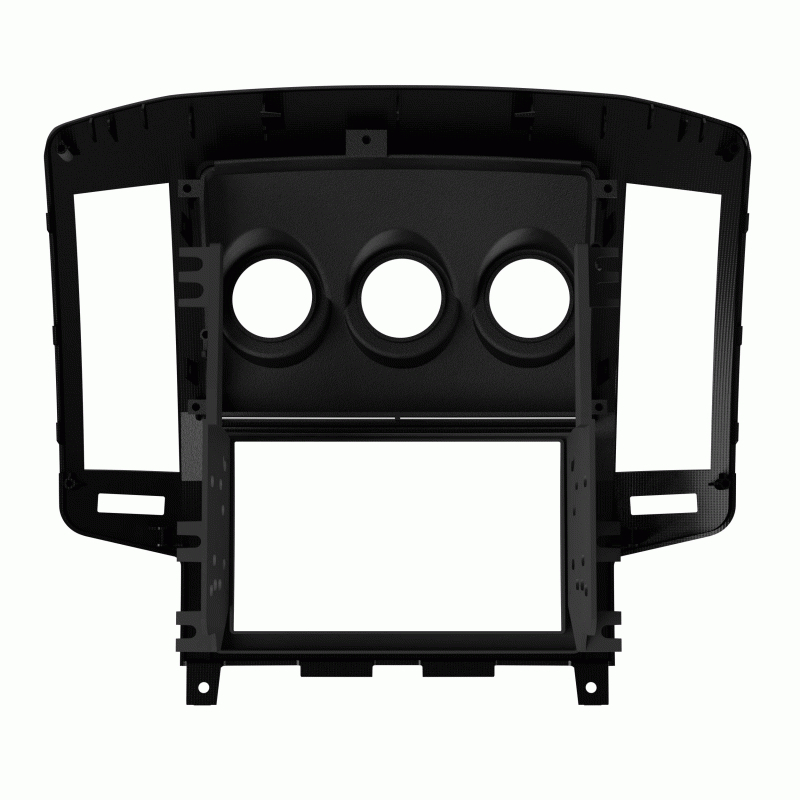
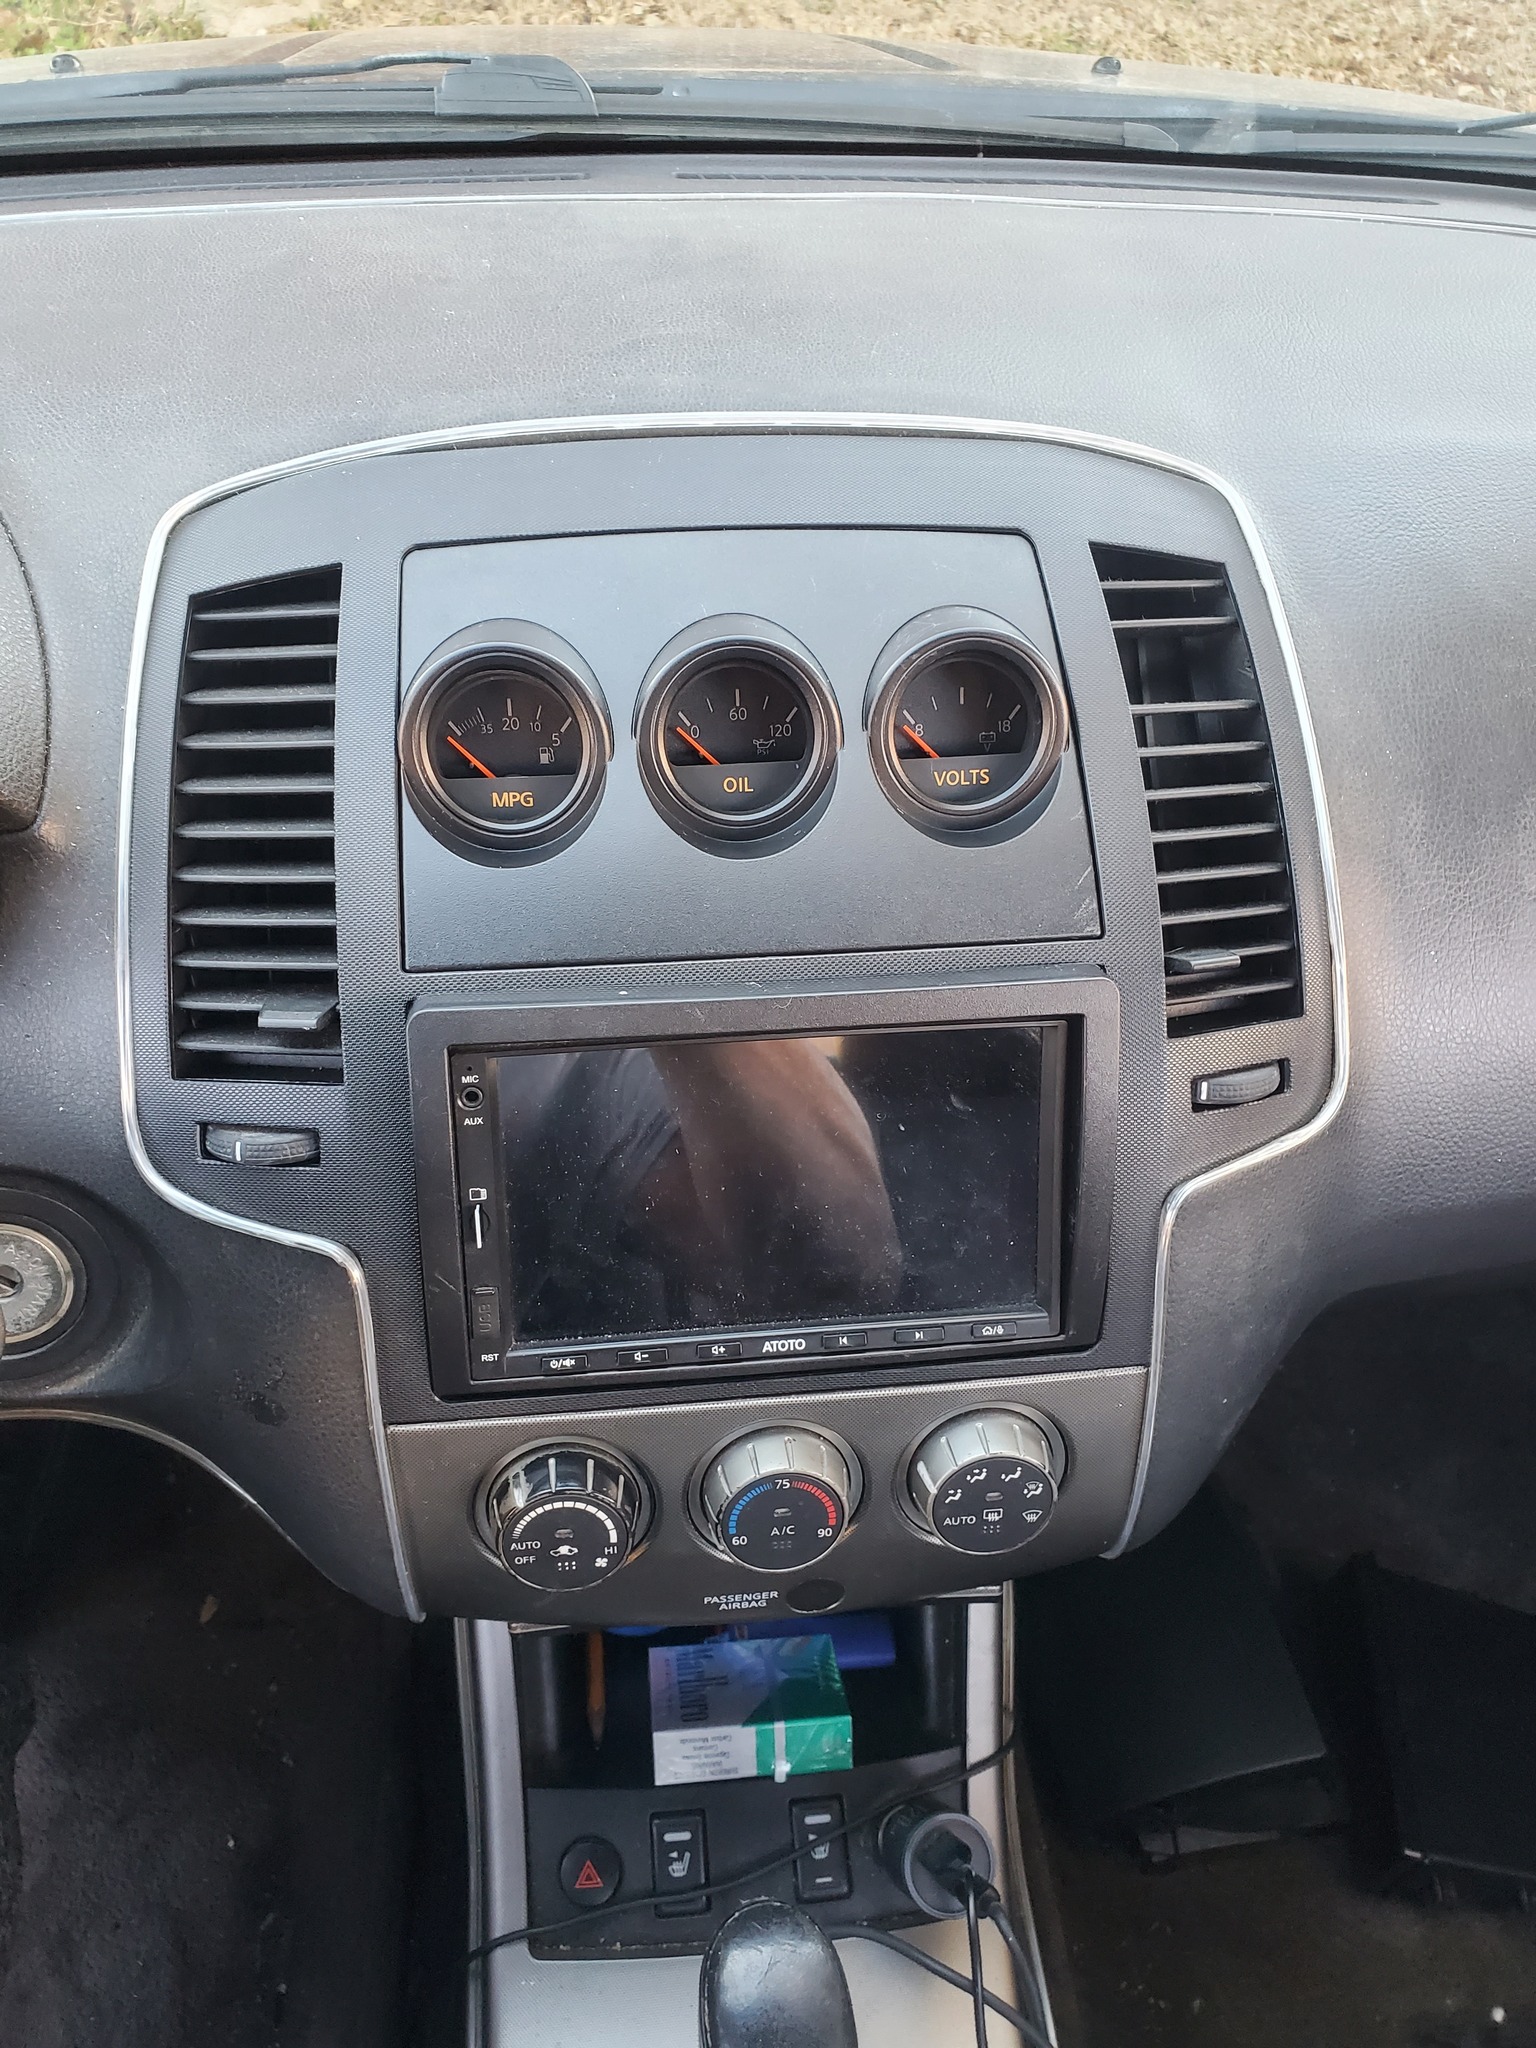
Alright, I went ahead and bought it for $129. It looks better than what I had up there, and I’m planning to get another one for the Grey SE-R. I’d give it a 7/10—would recommend!


 Now this shows an exact picture of the wiring I have done. The RED wire from the SCANNER connects to the Yellow/Red wire. The YELLOW wire from the SCANNER connects to the Green Wire (The picture shows me splicing a black wire, that is because I had to extend the original yellow wire from the scanner.) The last wire left on the scanner is BLACK, that I just grounded to the sunroof bolt under the sunglass holder. No need to extend that wire all the way down to the clock unit for NO reason.


")

")