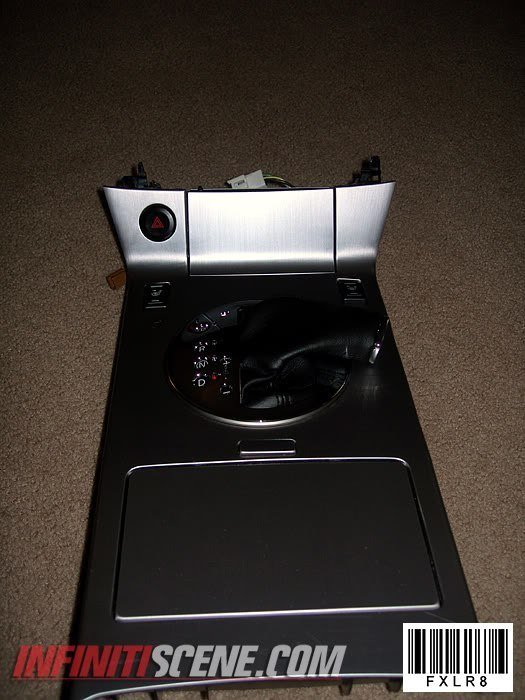
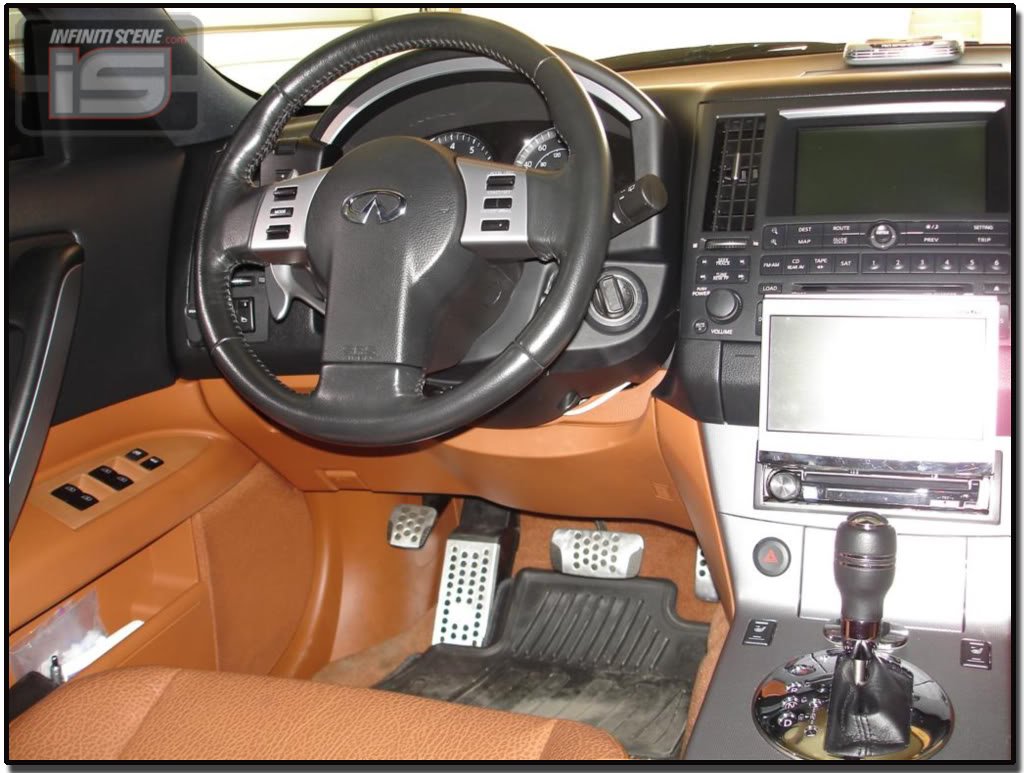
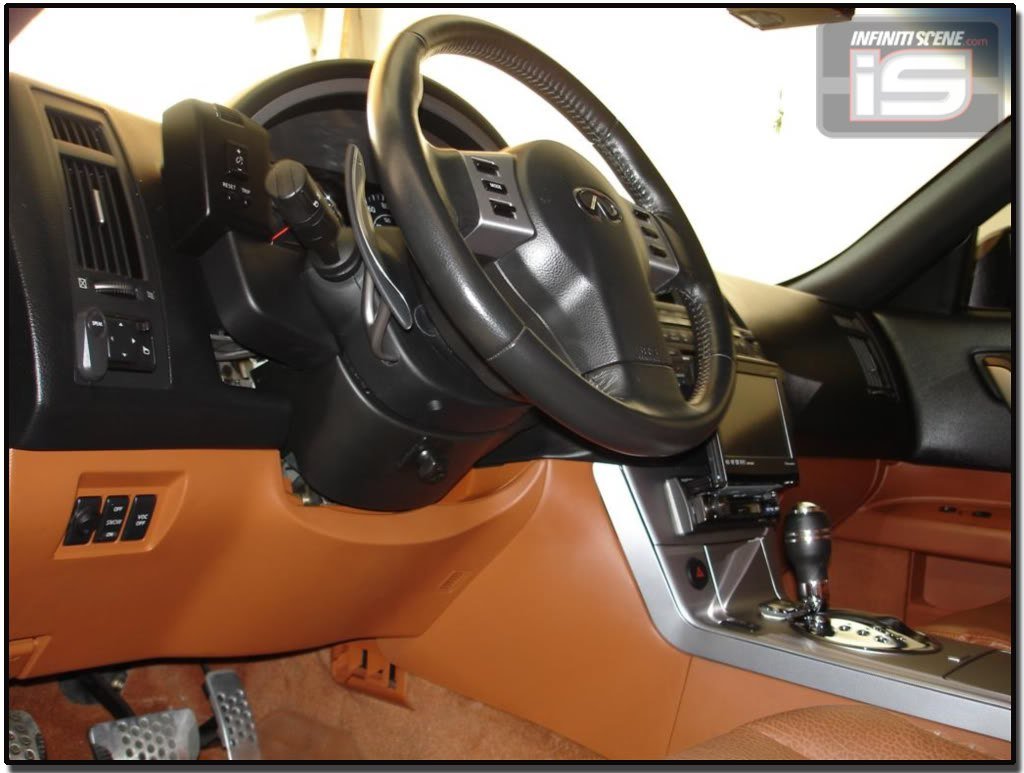
2. Remove old shifter panel top and bottom by unscrewing the screws on the underside of the old panel.
3. Put the new 2006 shifter panel and bottom boot together in the hole and screw the two pieces together with the 3 screws in red.
4. Now you are going to align the new shifter, on the two I did I pushed them all the way forward towards the front of the car and then centered it left and right.
Align the panel in a way where you can shift through all gears smoothly…..and then do the next step.
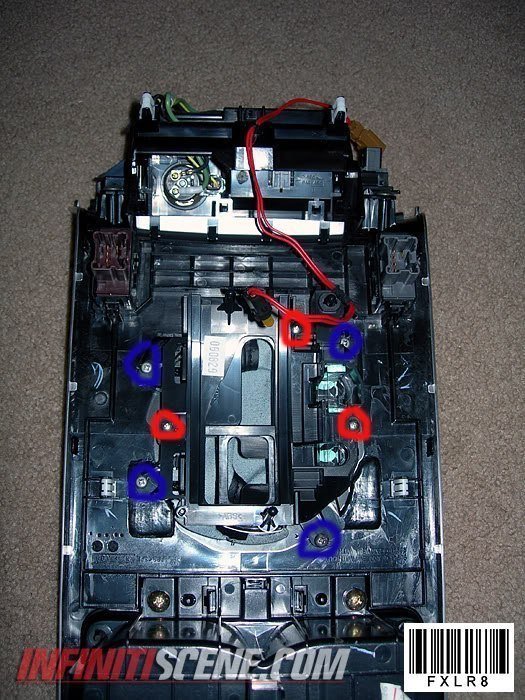
5. You then are going to figure a way to keep it from sliding around while you shift. I used 4 screws on each of the tabs shown in blue…you can use double-sided tape but I am not sure how well that will work while trying to align the piece.
REMEMBER: Do not screw the screw all the way in or you might go through the metal on the other side.
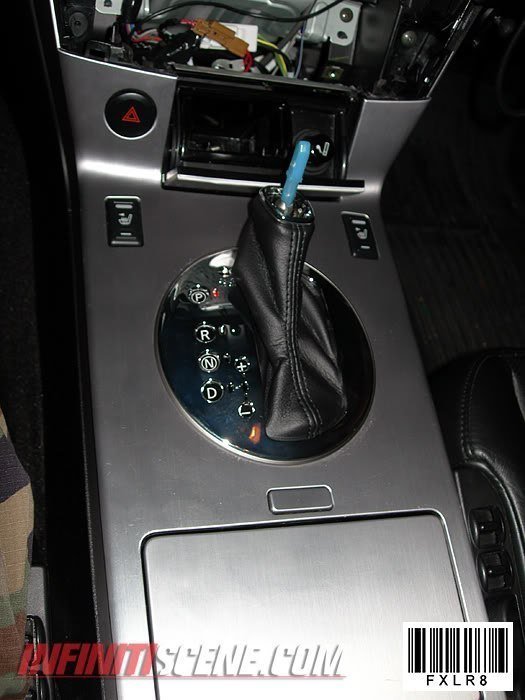
(MAKE SURE YOU ATTACH THE LIGHT UNDER THE SHIFT PANEL)
6. Put the completed panel and console back on the car, what I did was reattached all the wires…. make sure all items on the console work (lights, hazard signal, seat warmers, etc.). I then put the shifter in neutral and then slid the console on the shifter making sure I go through the shift indicator slider on the shifter panel.
7. Put your shift knob back on and make sure you can shift through all gears… after that put all your console pieces back together and your done!!
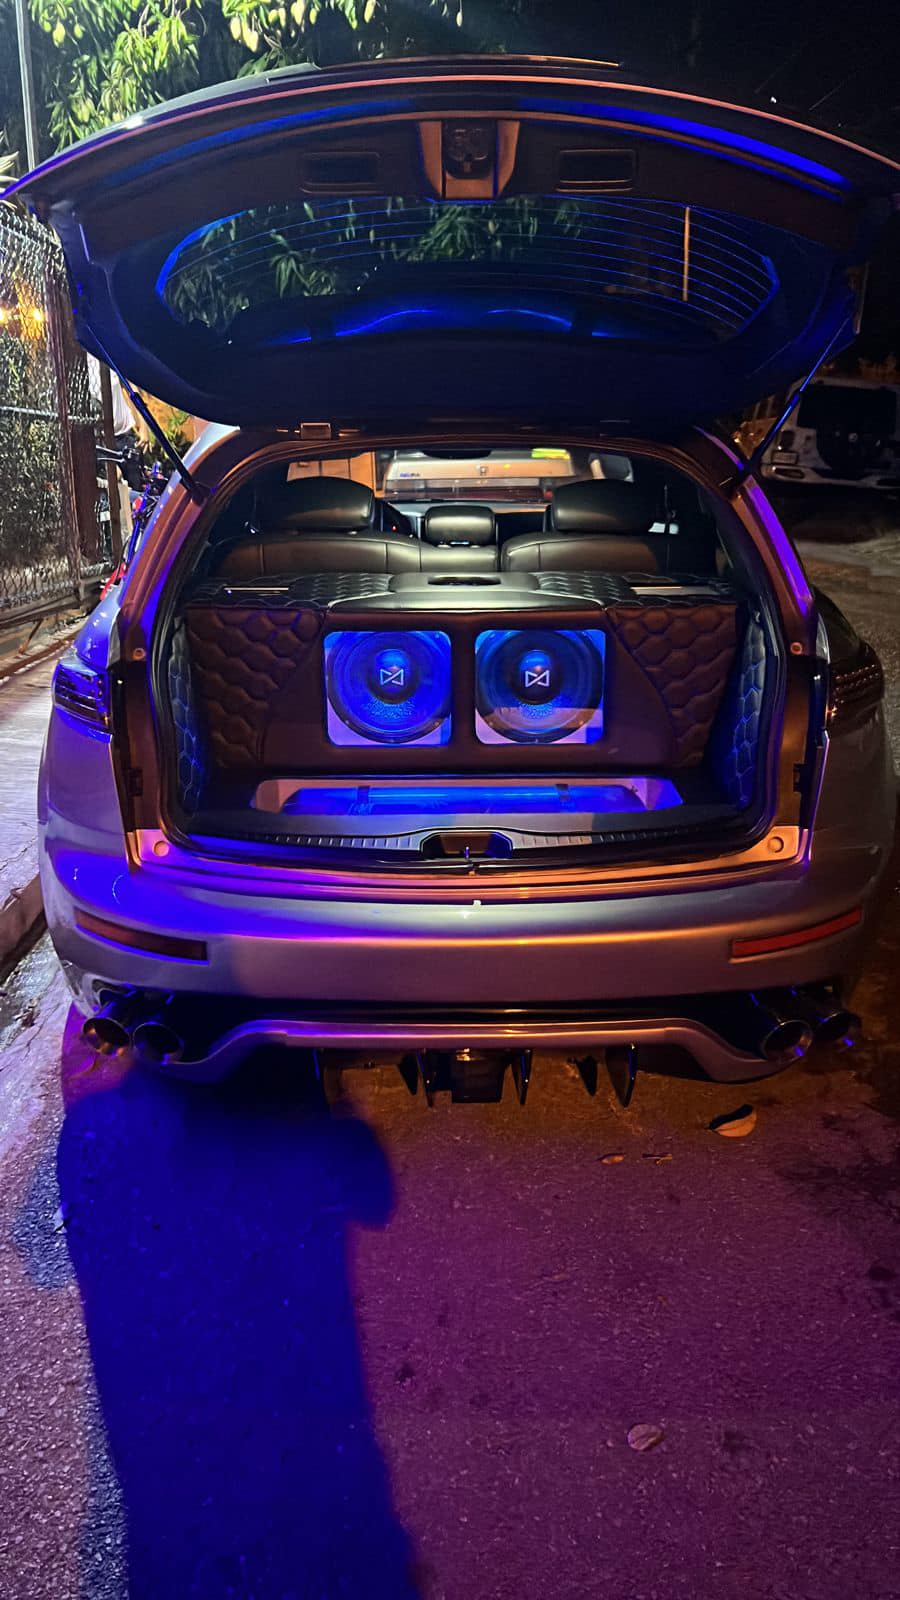
This came about because I had to get rid of my lunker of a sub (12″ ported) and reclaim half of my trunk space. I didn’t want to spend $400 on Wicked’s box and wanted to learn to lay fiberglass. I am mounting an Alpine Type R 10″.
Difficulty: Moderate
Time: For me, it took about a week since I only worked on it here and there in between work
Cost: I spent a little over $100 on materials
Required Materials:
Respirator!
Masking tape
Aluminum foil
1 gal. fiberglass resin (I bought mine from Home Depot but you could use your preferred brand. I went the cheap route but the box has been holding up)
Fiberglass mat (I purchased from Tap Plastics by the yard, I purchased 5 yds but ended up having extra)
1 yd. fleece fabric
Wood to build mounting ring
Interior carpet for the finish (I used Wool from a local fabric store)
Super 77 spray adhesive (to wrap carpet)
Instructions:
1) Wse masking tape to generously mask off the area you want to set the sub box into (commonly the nook near the trunk door). Some people remove the compartment below (see WickedCAS box) but I didn’t want to cut my trunk mat so I just did it in the corner.
Mask a lot of areas. Afterward tape the aluminum foil on top. This will allow easier removal of the first layers of fiberglass. Cover a lot of your interior and car in general, with some Kraft paper, anything that even has the remote chance of getting fiberglass resin dripped onto it.
I don’t have pictures of the aluminum foil or laying the fiberglass. See tutorials on how to lay fiberglass, that’s a whole new thread in and of itself.
2) Lay 3-5 layers of fiberglass mat (I did 4 because I was using some lighter density mat)
3) After this first layer has cured, remove it and trim the edges to your desired shape and contour, I used a jigsaw.
4) Now your mounting ring should be cut, or purchased, you’ll want to cut some pieces to act as leg supports to hold the mounting ring at the required depth (I measured the internal box volume by using packing peanuts and a cardboard box with my required internal volume [0.75 cu. ft])
5) Use the fleece fabric and stretch it over your mounting ring to the back of the shell and use the adhesive spray to hold it to the entire edge of the shell as well as to the outer edge of the mounting ring.
6) Lay resin onto the entire fleece (except for where the hole of the mounting ring is) and before it hardens, use a razor to trim the fleece from the mounting ring face.
7) After the fleece hardens, lay 3-5 layers of fiberglass over the fleece.
8) The final stretch…Once it all hardens: sand, trim, grind, fill, primer, whatever you have to do to finish it up. I had to do a lot of trimming since it was my first time using fiberglass, I made a mess with my edges so I did some grinding to make it sit flush in my trunk.
9) Unless you are painting, go ahead and wrap the box with your carpet or wool using the super 77 adhesive mounting spray.
10) Mount your sub, I drilled a hole and silicones the edges after I ran my wires through the hole. And mounted my amp in the spare tire on a wooden board cut to fit.
Enjoy the music and satisfaction of your custom box!
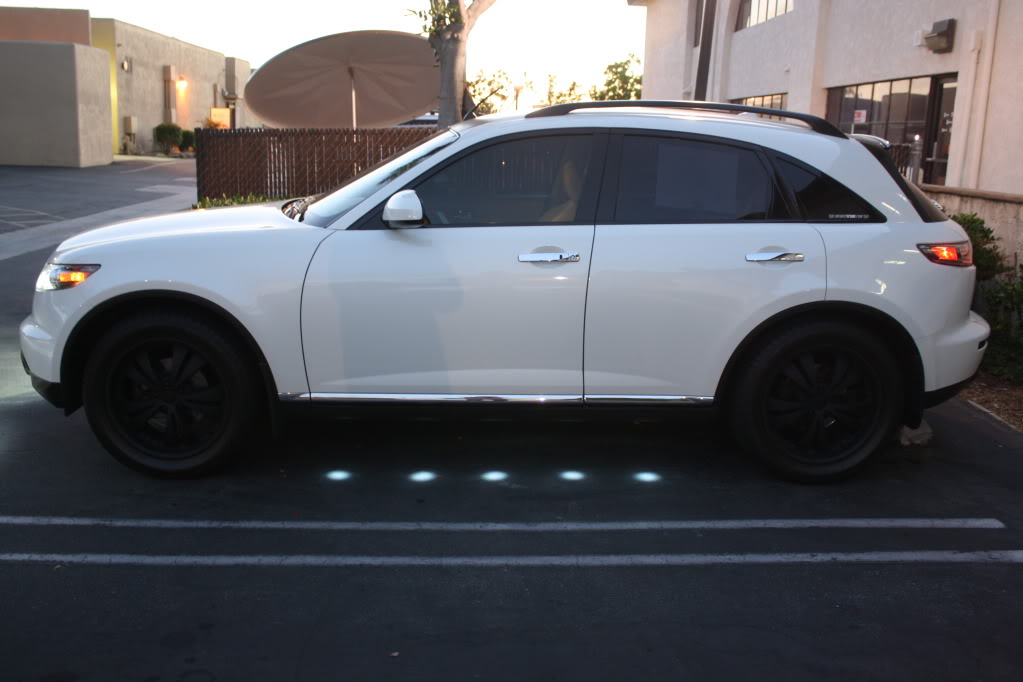
Product: JDM VIP style Puddle Light Kit Cost: $100 including shipping to US address Tools Needed: Power drill, drill bit, hole-saw, screwdrivers.
Optional: A few fancy tools (see below), relay switch, wire terminal, splice wire connector, extra wires.
Installation time: 4 hours when sipping some beer and enjoying the installation. Probably can be done in 2 hours for you hard-core DIY people.
Warning: Always use caution as you are working with electrical wires. When connecting to the car’s electric wires, disconnect the battery to ensure your safety.
Introduction
So, I’ve seen these puddle lights in person on a Z & Lexus IS and they looked really good. The only concern I had on buying this for my FX was how it was going to look on a car that wasn’t slammed, let alone not even dropped. After many weeks of debate, I finally decided to just take the plunge and go for it. After many hours of research, I decided to go with JDM puddle lights from Elite Auto Style (I have no affiliation with this company). Several things set these apart from the other puddle lights that I’ve run across. These were pre-assembled for easy mounting. The LEDs are made of high quality (based on the reviews I’ve read). The last thing I want is for one of the LEDs to burn out or change color, etc. That would be a major PIA, especially with a flush installation that I was going to do. The lights are focused and do not spread out like some of the other brands. And lastly, it arrives from Japan at my doorsteps in 3-4 days from the date of the payment. How can you go wrong with that?
Anyway, so here’s a DIY on the installation process, and I took lots and lots of pics and tried to be very thorough. Hope you enjoy it as I’ve had a lot of fun doing it and wanted to share it with everyone.
Instructions
1. So I got the package and this is how the puddle lights came in the box. Nice chrome plates and the led bulbs had a thick coating of some sort, I guess for extra protection against rocks and all that good stuff on the road.
2. Back of the puddle lights…This is what I mean by pre-assembled. Some of the other lights I’ve seen online didn’t have these housings with screw nut for an easy flush install. Some just comes with 3M mounting tapes (Ewww). Now back to the ones I got, you can choose to use the mounting brackets that come in the box. I wanted a flush install because I don’t want anything sticking out of the side skirts as well as exposed wires.
3. Side Skirt Removal – Remove the screw located at the rear of the side skirt. I used this fancy tool that my friend had, but if you don’t have it you’ll need to remove the rear wheels because the space is too tight to work with a screw driver.
4. Remove these 5 screws located underneath the side skirt.
5. Remove this screw connecting the side skirt to the front mud flap.
6. Remove the three screws behind the front mud flap and the mud flap should just fall off of the car.
7. Pry apart the side skirt using a flat screw driver (cover with towel if you want, I didn’t and it was fine). I found that starting from the back of the side skirt (near the rear tires) was the easiest in taking these off. You’ll need to apply firm but gentle pressure. Once you pop the first two clips off, the rest will pop out pretty easily.
8. Here is the clip ‘housing’ that is on the car.
9. Here is the clip ‘insert” that is on the side skirt. Sometimes, it helps to use a thin screw driver to push down on this clip insert so you won’t break the clip housing when prying it apart.
10. I still managed to break a small part of two clip housings (red arrow)…But the skirt went back on fine and there was 0 rattle so don’t worry yourself too much if you break these.
11. Now comes the fun part for all you math wizards. Mark the side skirt so that each light has equal distance from each other and from the front and rear ends of the side skirt. You can measure the length of the side skirt and do some crazy math formula and figure it out yourself. For me, I just made sure that the distances between the lights were equal and the distance from the edge of the skirt was equal. Make sure that you are marking on a place that will be parallel to the ground once the skirt is back on the car (so the light reflected on the ground maintains the circular shape) and also make sure that your marks are in A STRAIGHT LINE!!! If not, they will look staggered on the ground.
12. Once you’ve made all five marks, drill a small pilot hole.
13. Select the right size hole-saw and drill through the pilot hole from the OUTSIDE. I think I used a 3/4″ hole-saw, but make sure you measure your light base and drill appropriately. You only get one chance. (The hole can be slightly bigger than the base since there are tightening nuts for these lights.)
14. VERY IMPORTANT – Before doing anything else, grab yourself a cold one and pat yourself on the back for having gone this far without breaking anything.
15. Insert the puddle lights through the hole and tighten with the provided nut.
16. Connect the red wires together and do the same for the black wires.
17. Your packet should have 2 of the 10 lights that have only 1 red / 1 black wire connectors. These will go to the end of the side skirt. If you only have 1 or none with single connectors, (I only had 1) don’t panic! You can just tape off the ends with electric tape and you’ll be good to go.
18. All lights are now connected and exposed metal connectors covered with the rubber transparent cover. This is important as you don’t want any part of the red connector touching the black connector when the lights are on.
19. Put the skirt back on with the red/black wire ends out. Remove the side kick panel.
20. Remove the door step and say hi to the dried out bug that somehow managed to get in there.
21. As with the side skirts, gentle but firm pressure should pop the door step out without breaking the clips.
22. Now, before screwing the skirt back on, test out the lights. I used the battery of my drill to temporarily power the lights. Then, remove the remaining plastic parts near the side kick panel and lift up this black rubber/foam liner so you can put the wires through them and continue the CLEAN installation.
Follow the above steps for the other side.
23. Use the provided extra wires to connect the left side of puddle lights to the right side of puddle lights.
24. I used a flashlight to figure out where I can make the connection (underneath the dash).
25. A-ha!
26. I used another one of my friend’s fancy tools to carry the wire through this opening. But a coat hanger will do the trick just as well.
27. Connect the wires and tuck them in under the carpet.
28. Back on the driver’s side, cut the extra wires off and join the red to red & black to black. You can try to tap the conjoined black wire to the ground wire in the fuse box, but I just decided to ground the wire to the metal frame of the car (wire terminal sold at radioshack).
29. Now this is where you can go off on your own. You can certainly use the provided switch to create a switch that you can use to turn on/off the puddle lights, or tap into any 12v source such as side kick door lights, parking lights, etc. As for me, I wanted to tap into the doom lights. Then, the puddle lights will come on when I press unlock and go off when I press lock with the remote. It will also go on when the doors are open and go off a few seconds after the door is closed, as with the doom lights.
In order to do this, create a relay switch (radioshack) similar to the one shown here. I don’t know too much about wiring so my friend did this part for me, but it seems pretty simple. Put the red wire into the relay switch, make a loop with the white wire, and take the other white wire to the fuse box. Also take the blue wire to the fuse box to tap into the dome light wire.
30. Tap the white wire to the red wire shown.
31. Tap the blue wire to the purple/white wire shown. The purple/white wire is the dome light.
32. Make sure no wires are exposed and the newly created connections properly taped off with electrical tape / zip tie. Put everything back on.
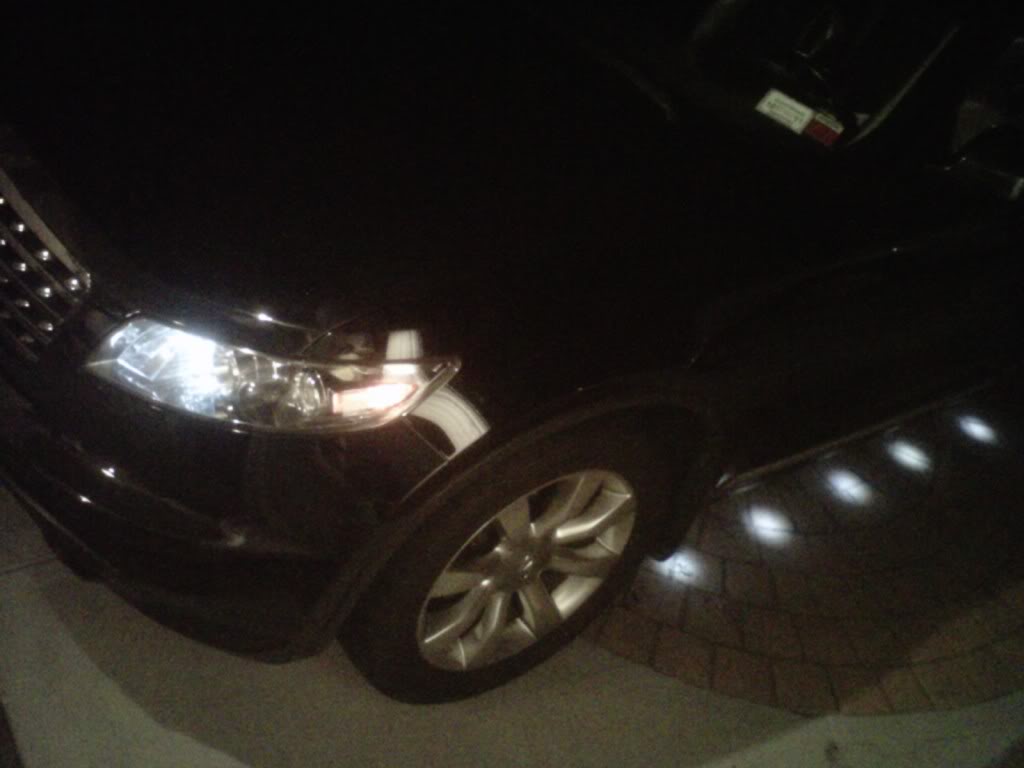
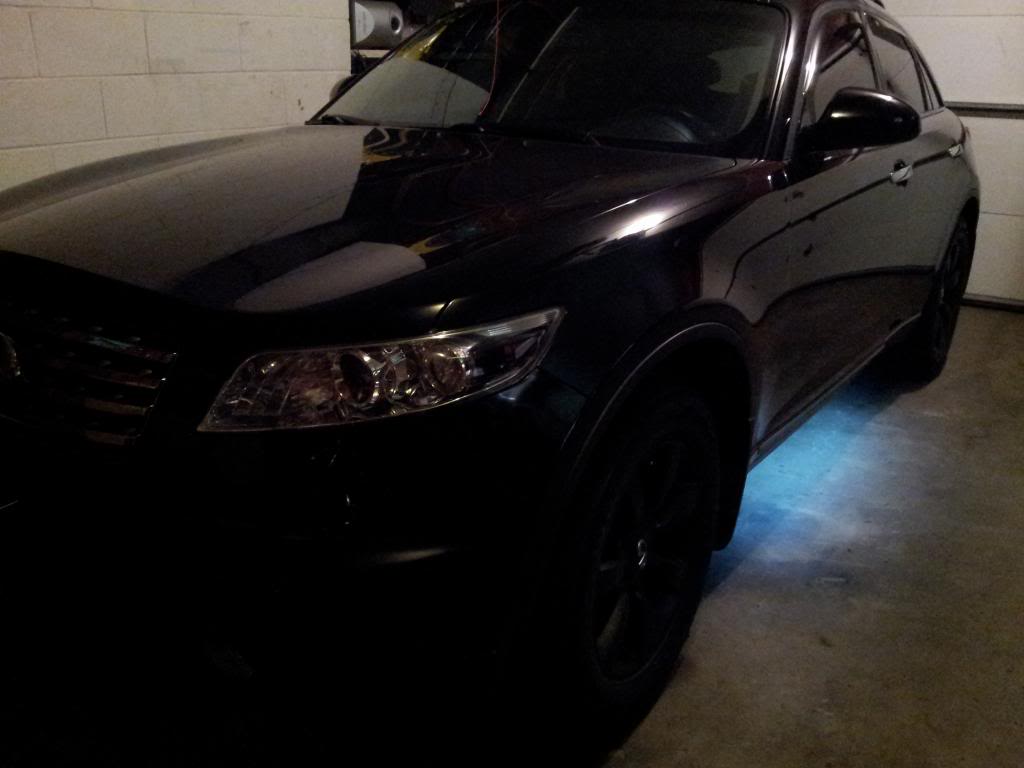
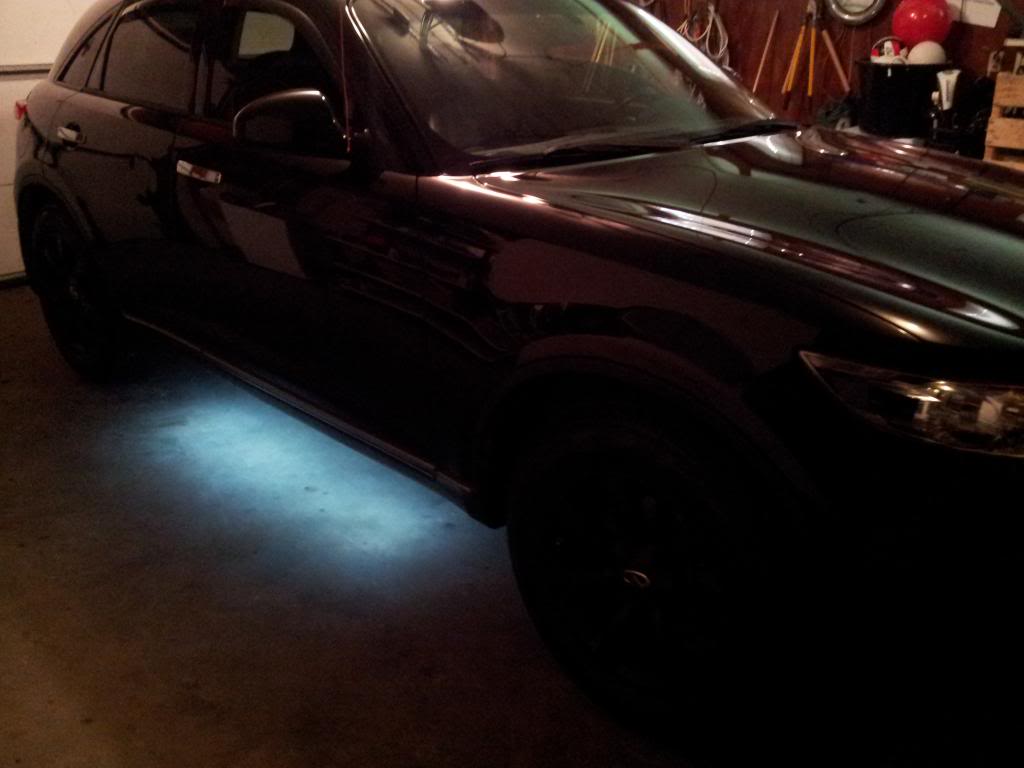
This is how each puddle light looks with the flush install.
And inside the garage, with the dome lights.
I tried taking the picture out at night, but I didn’t bring my tripod so couldn’t take the pictures with proper night camera settings. You get the idea. I’ll take some proper night pictures later when I have the time. The lights look a lot better in person.
Thanks for watching/reading, I hope everyone enjoyed this DIY!
PROCEDURE WAS DONE ON MY 2008 M45. PROCEDURE SHOULD BE SIMILAR ON MOST INFINITI VEHICLES. MAKE SURE TO CHECK YOUR OWNERS MANUAL FOR PROPER FLUID SPECS AND CAPACITIES.
TOOLS:
JACK STANDS
JACK
10MM HEX SOCKET
SOCKET WRENCH
TORQUE WRENCH (FT/LBS)
BREAKER BAR (IF NEEDED)
SUPPLIES:
2 (QUART) BOTTLES DIFFERENTIAL GEAR OIL (75W-90 SYNTHETIC IS WHAT I USED)
FLUID PUMP
DRAIN PAN
RAGS
SAFETY:
NEVER GET UNDER A CAR WITHOUT OUT QUALITY JACKSTANDS OR RAMPS IN PLACE. NEVER EVER GET UNDER A CAR ONLY RAISED AND SUPPORTED WITH A JACK.
PROCEDURE:
LIFT AND SUPPORT ALL 4 CORNERS OF YOUR VEHICLE WITH JACKSTANDS. YOU WANT TO KEEP THE THE CAR AS LEVEL AS POSSIBLE SO YOU WILL BE ABLE TO PUMP IN THE CORRECT AMOUNT OF FLUID INTO THE DIFFERENTIAL.
LOOSEN AND REMOVE THE TOP FILLER PLUG FIRST (YOU’LL WANT TO REMOVE THE FILLER PLUG FIRST SO YOU CAN BE SURE THAT YOU WILL BE ABLE TO FILL UP THE DIFFERENTIAL AFTER THE FLUID IS DRAINED).
LOOSEN THE DRAIN PLUG. ALIGN YOUR PAN UNDER THE DIFFERENTIAL AND REMOVE THE PLUG.
LET THE FLUID DRAIN COMPLETELY.
AFTER THE FLUID DRAINS, CLEAN THE DRAIN PLUG AND REINSTALL THE DRAIN PLUG. TIGHTEN THE DRAIN PLUG TO 25FT/LBS.
GRAB YOUR FLUID AND PUMP AND FILL YOUR DIFFERENTIAL UNTIL THE FLUID STARTS COMING OUT OF THE FILLER HOLE. YOU MIGHT HAVE SOME FLUID COMING OUT SLOWLY THE WHOLE TIME YOU ARE PUMPING, BUT IT WILL NOT BE FULL UNTIL IT IS COMING OUT PRETTY GOOD (AROUND 1.7 QUARTS).
AFTER THE FLUID IS LEVEL WITH AND COMING OUT OF THE FILLER HOLE PUT BACK THE FILLER PLUG AND TIGHTEN TO 25FT/LBS.
CLEAN UP ANY FLUID THAT YOU SPILLED, ESPECIALLY OFF THE EXHAUST PIPES.
DONE!
MY CAR HAD AROUND 39,000 ON IT, NOT SURE IF THE FLUID WAS EVER CHANGED BEFORE I DID IT.
OLD FLUID ON LEFT / NEW FLUID ON RIGHT.
So I just took the plunge into my first tranny fluid change and took some pics. I used 5 quarts instead of flushing all of it.
Important Note:Nissan Matic J was replaced with S.
THINGS YOU’LL NEED:
Nissan Matic J transmission fluid (got lucky and found some on eBay but most likely you’ll have to go to a Nissan dealer and pay $15/qt)
10mm Socket
Bucket
Plyers
A friend to help
Funnel
Ramps/jack stands (so you can fit the bucket under)
STEPS:
1. Lift car and remove splash guard.
2. Remove the engine cover so you can get to the charging pipe behind the engine.
4. If you’re replacing X quarts of fluid, fill your bucket with X quarts of water and make a line at the water level. This way you’ll know when do stop draining.
5. Get all your Nissan Matic J transmission fluid opened and lined up so you or you’re friend can continuously pour. Start your engine (nothing will drain without the engine running).
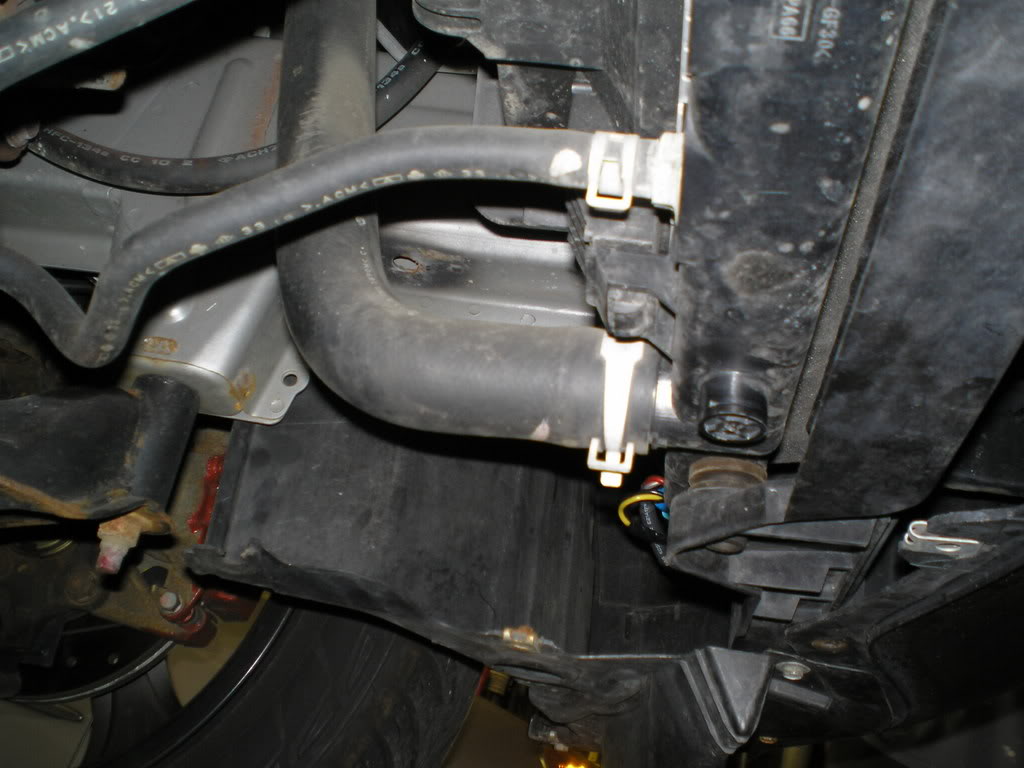
6. Get under the engine with your bucket ready. You’ll be removing the smaller hose from the radiator (see picture).
7. With your plyers, squeeze the hose clamp and slide it farther up the hose.
8. Put your bucket directly below the end of the hose and get positioned so you can watch the fluid level reach the line on the inside of the bucket.
9. Pull the hose off the radiator. I used plyers on this step but it might be easier to just use your hand. TIP: JUST AS THE HOSE RELEASES FROM THE RADIATOR, GIVE IT A PINCH TO STOP THE FLUID FROM SPRAYING ALL OVER YOUR GARAGE!. Otherwise you’re garage will look like this.
10. Yell to your friend to start pouring. Aim the hose at the bucket and stop pinching. Watch the fluid fill the bucket. As soon as it reaches the line in the bucket, pinch the hose again and reconnect it to the radiator. Hopefully all the old fluid is in your bucket and not on your body/garage floor.
11. Slide the hose clamp back to the end of the hose with your plyers.
12. Turn off your engine and give your friend a high five or a kick in the nuts, depending on his performance.
13. Put the splash guard back on. Screw the dipstick bolt back into the charging pipe. Put your engine cover back on.
14. Good work, now go drink a beer and order some more mods for your FX.
Drain Plug
Checking Fluid Level
Important Notes
Actually the transmission holds 10 3/4 quarts. The 30,000 and 60,000 mile services call for a drain and fill which takes about 3 1/2 quarts to do.
OP what I would do is buy 8 quarts, drain the pan, and refill with 3 1/2 quarts. Drive 50-100 miles and repeat the process. Give the car about 1-2000 miles and repeat. That way you don’t shock the tranny all at once with new fluid. I don’t think the tranny has been hurt unless you track your car but check your fluid ASAP. If it is dark or brown and smells burnt, you probably need to ignore my first advice and take it to the dealer for a complete flush and fill.
The tranny fluid is Nissan S-Matic, it replaced the J-Matic and is the only transmission fluid recommended for our engines.
—————————————
I had my tranny fluid changed last month. Me and my buddy did it with the car on the hoist. We used the drain plug on the tranny oil pan. Drained out about 4~6 qts. Then we filled another 4 ~ 6 qts back to the oil pan (depending on how much you drain out). The turn on the engine, with the brake on, shifting from P to R, to D, then D to R to P, each gear stays about the 20 secs to let the new fluid to mix out with the old fluid. Then we did the process again. After that test drive the car in manual mode for about 10 mins. Then measure the fluid level. If not enough, then top out from the tranny dip stick tube with a thin tube funnel.
I do my tranny fluid change about every 30k miles. The car is running fine, no issue with the tranny.
I started having issues with my rear trunk latch life gate on my 2004 Infiniti FX35. It just wouldn’t open. For some time, I was just removing the trunk 15A fuse where it would reset the latch. It would eventually open. But this ultimately got worse. I got tired of taking the fuse in and out whenever I wanted to open the trunk. Also, I really didn’t want to spend $100+ bucks on the part to fix it, so I figured I’d try whatever was out there.
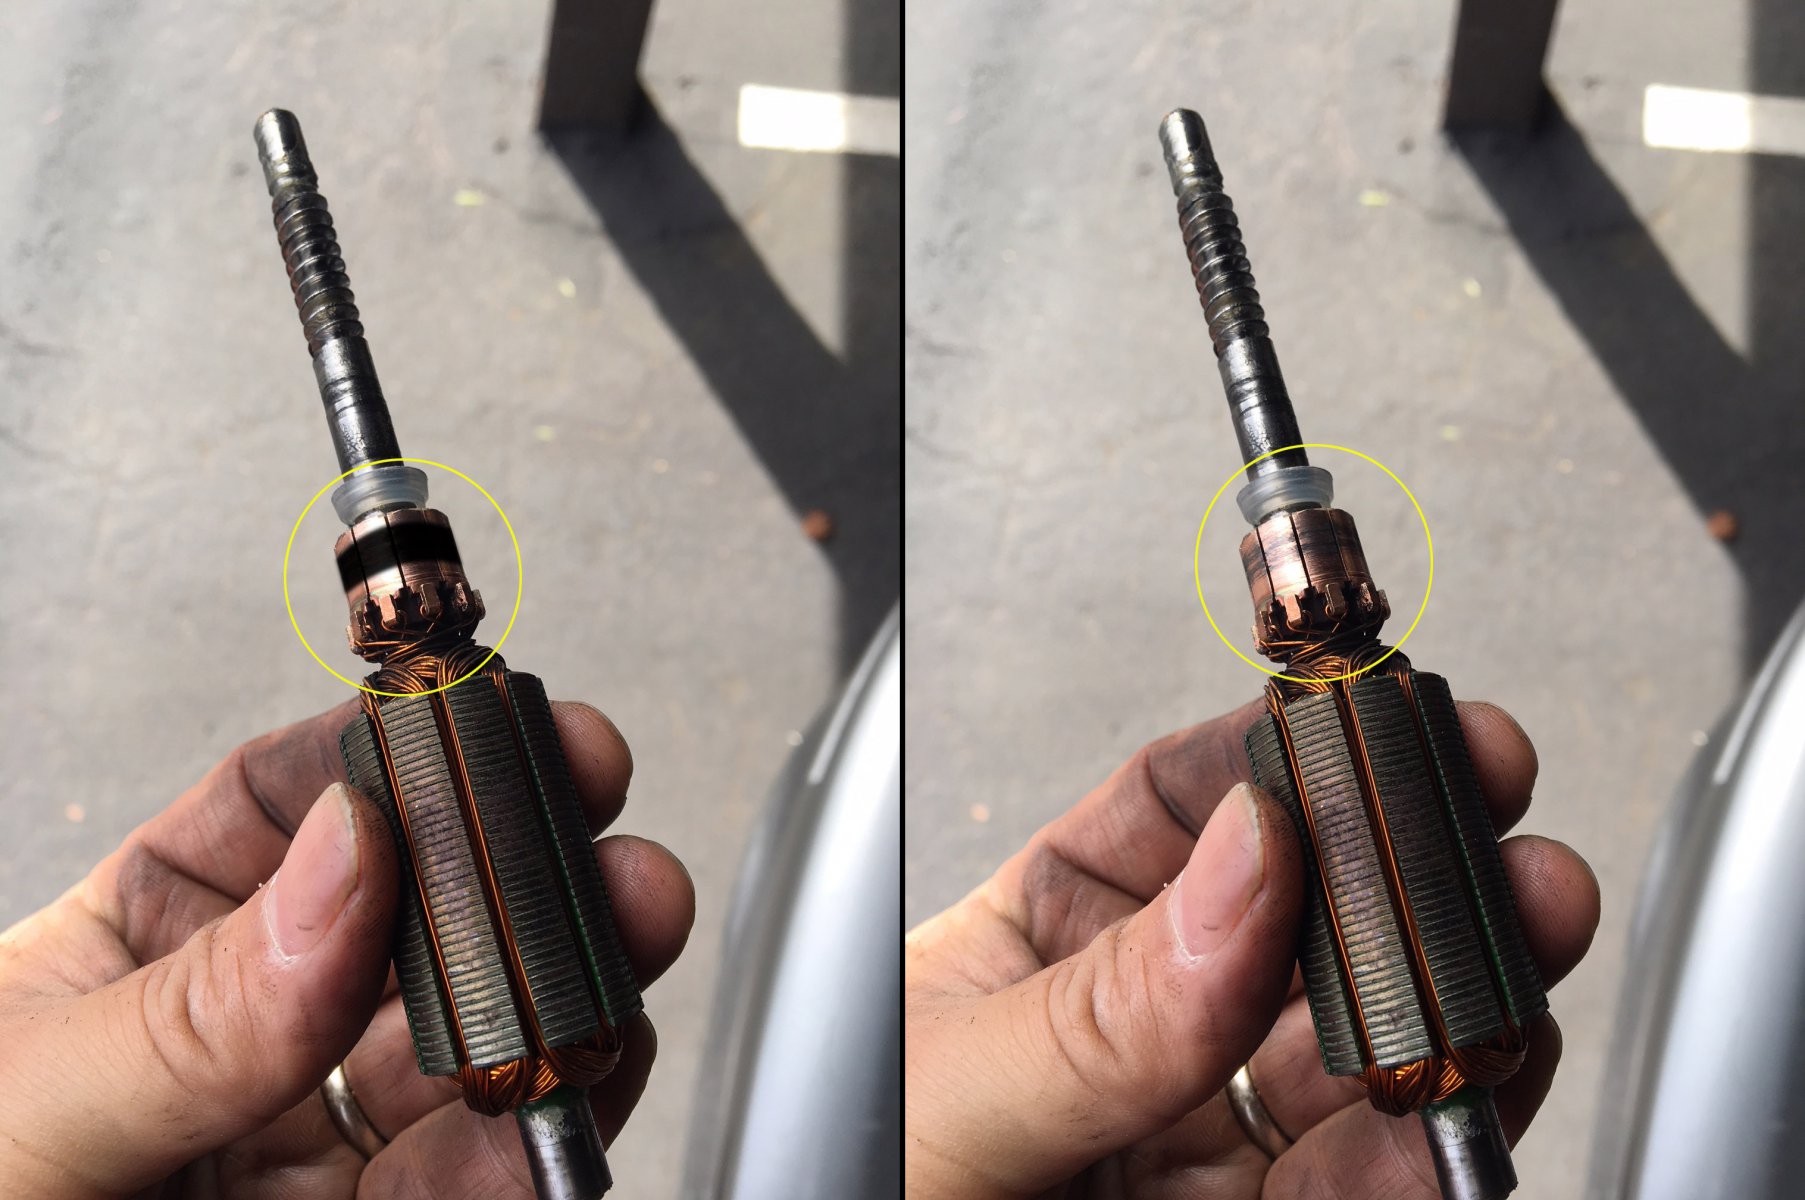
So I tried the solution in this write-up. I won’t take all the credit because I found some info on one of the FX35 forums (member Jim Lee). It took me about 20-30 minutes to do and WOW, everything works again. It’s been a few days now and all works fine. Basically, you turn your motor back to brand new again by following this how-to. The motor has something called a ‘commutator’. It needs to be super clean. When I took my motor out, it was very dirty and black. It is the common issue of the brushed motor. You can Google “Commutator” to learn more about it.
Update 4/9/2021:This officially resolved my issue. All is good and saved me a bunch of $$$.
Update 8/25/2024: I had to repeat the process, but it didn’t work right away. If you run into this, all you need to do is remove the “15A Rear Door Fuse” and then put it back; that should reset it. If the fuse is blown, make sure to replace it.
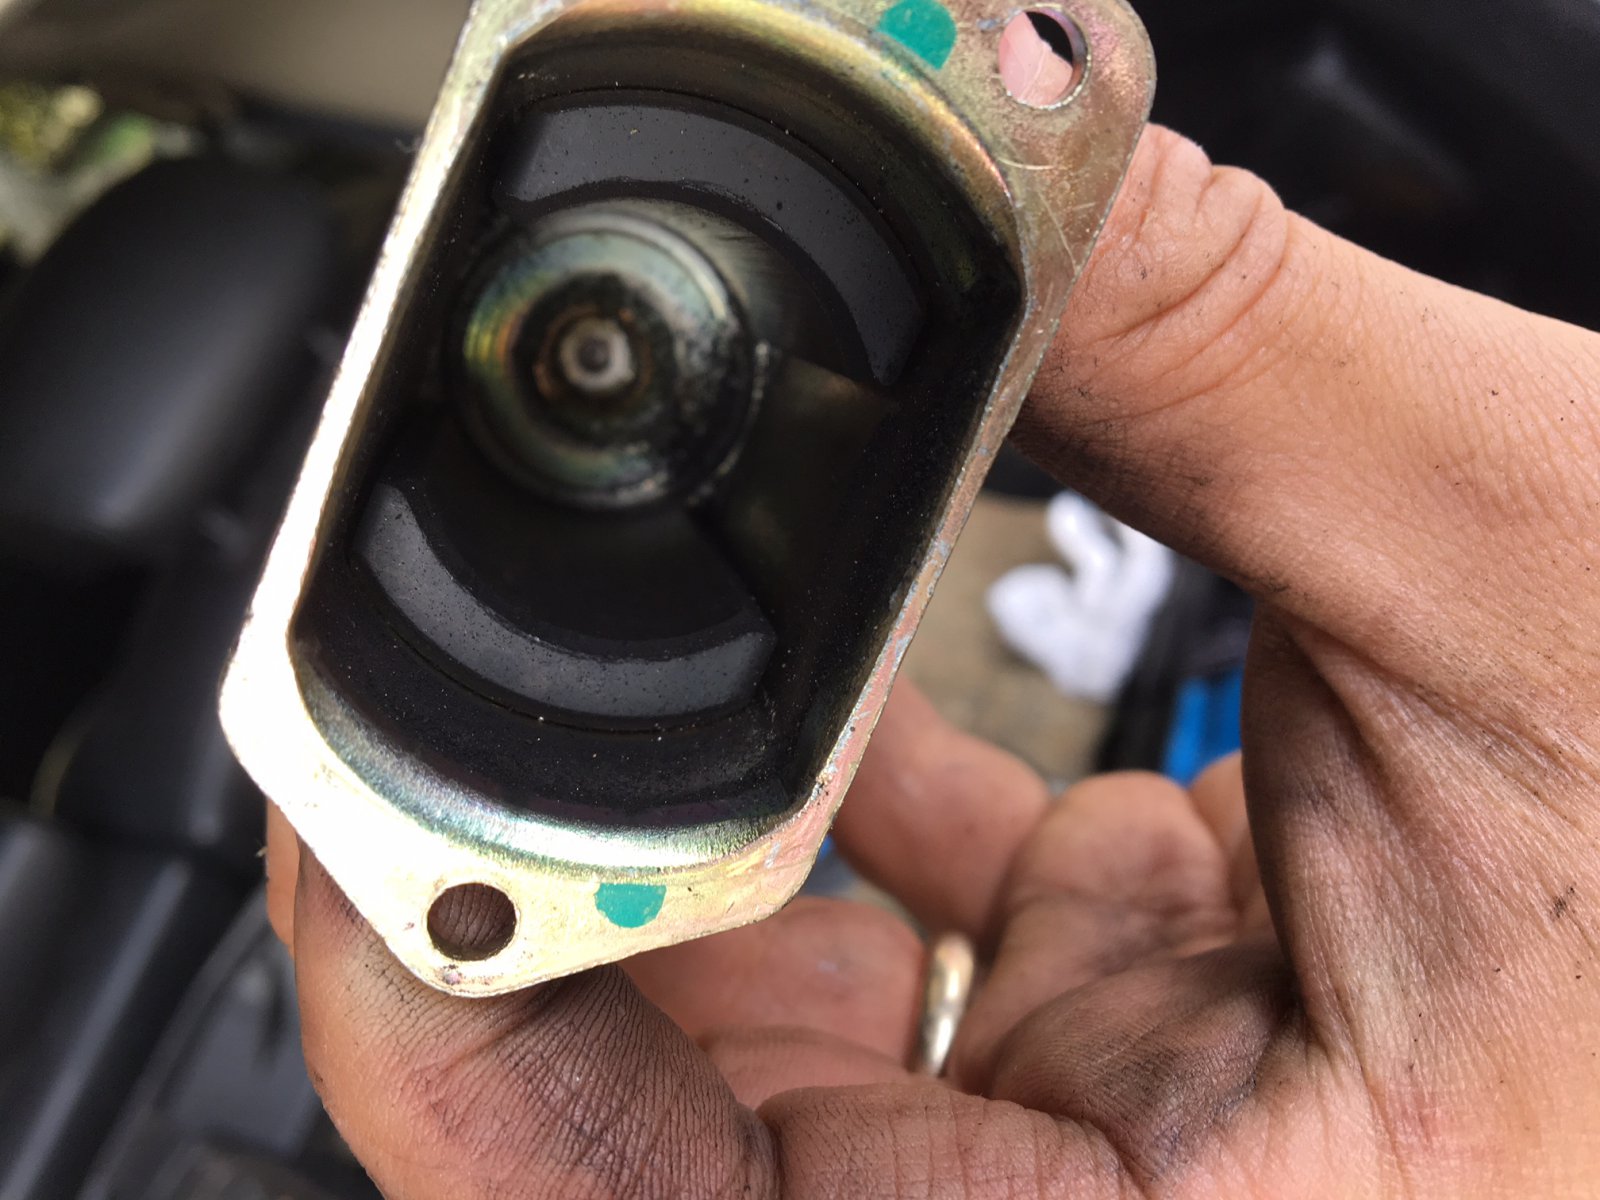
Commutator Reference Photo:
Summary: I would recommend try this how-to. It will save you a lot of money and it’s very simple to do. The part is about $100 bucks and labor may be another $100 bucks. This was FREE to me and just took 20 minutes of my time. Plus you learn a little about how these things work.
Nissan OEM Part Replacement Information
If you are looking to just replace and not attempt this how-to, below is the information you need to order the correct part for your FX35. Please cross-check the part number to ensure it works for your generation FX35.
Part Description: Motor-Closure, Back Door Part Number: 90554-AQ000 Price: $124.03
This video below will show you how to remove the plastic covers to expose and take out the latch motor.
How to Fix and Clean Motor “Commutator”:
Original Photo Credit: Jim Lee via FX Forums
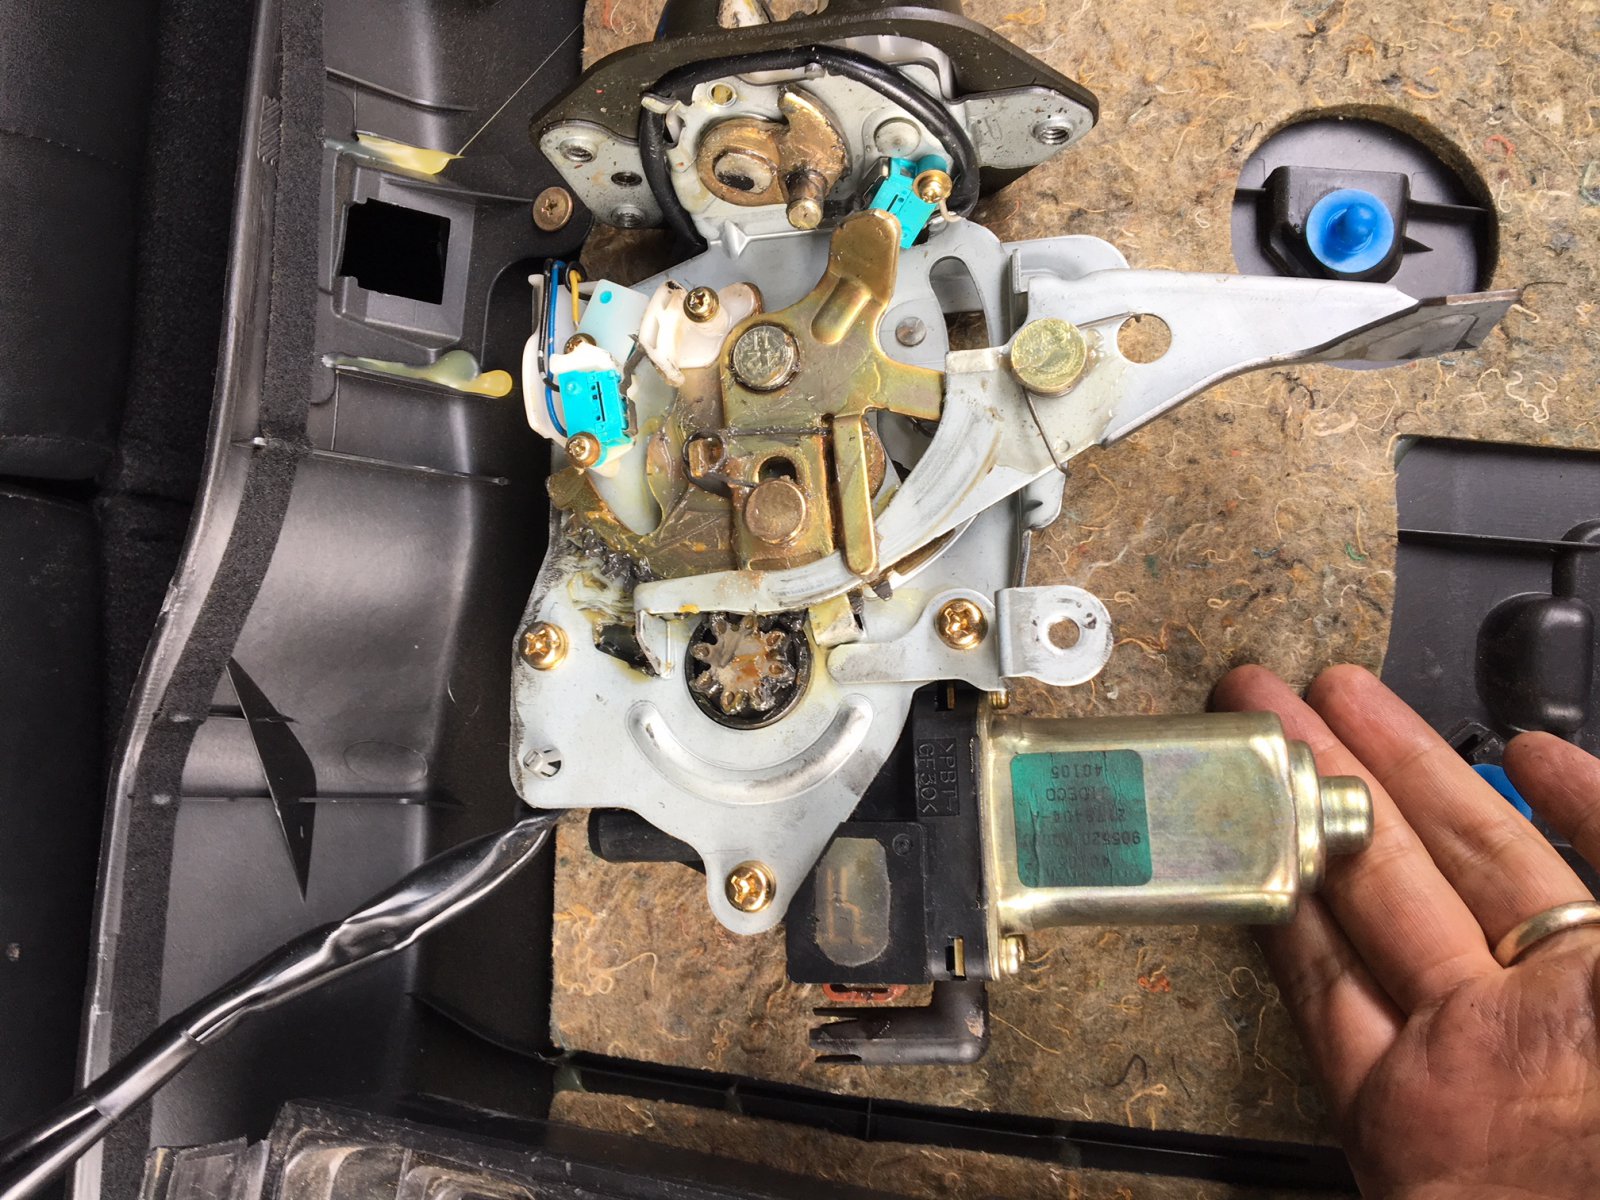
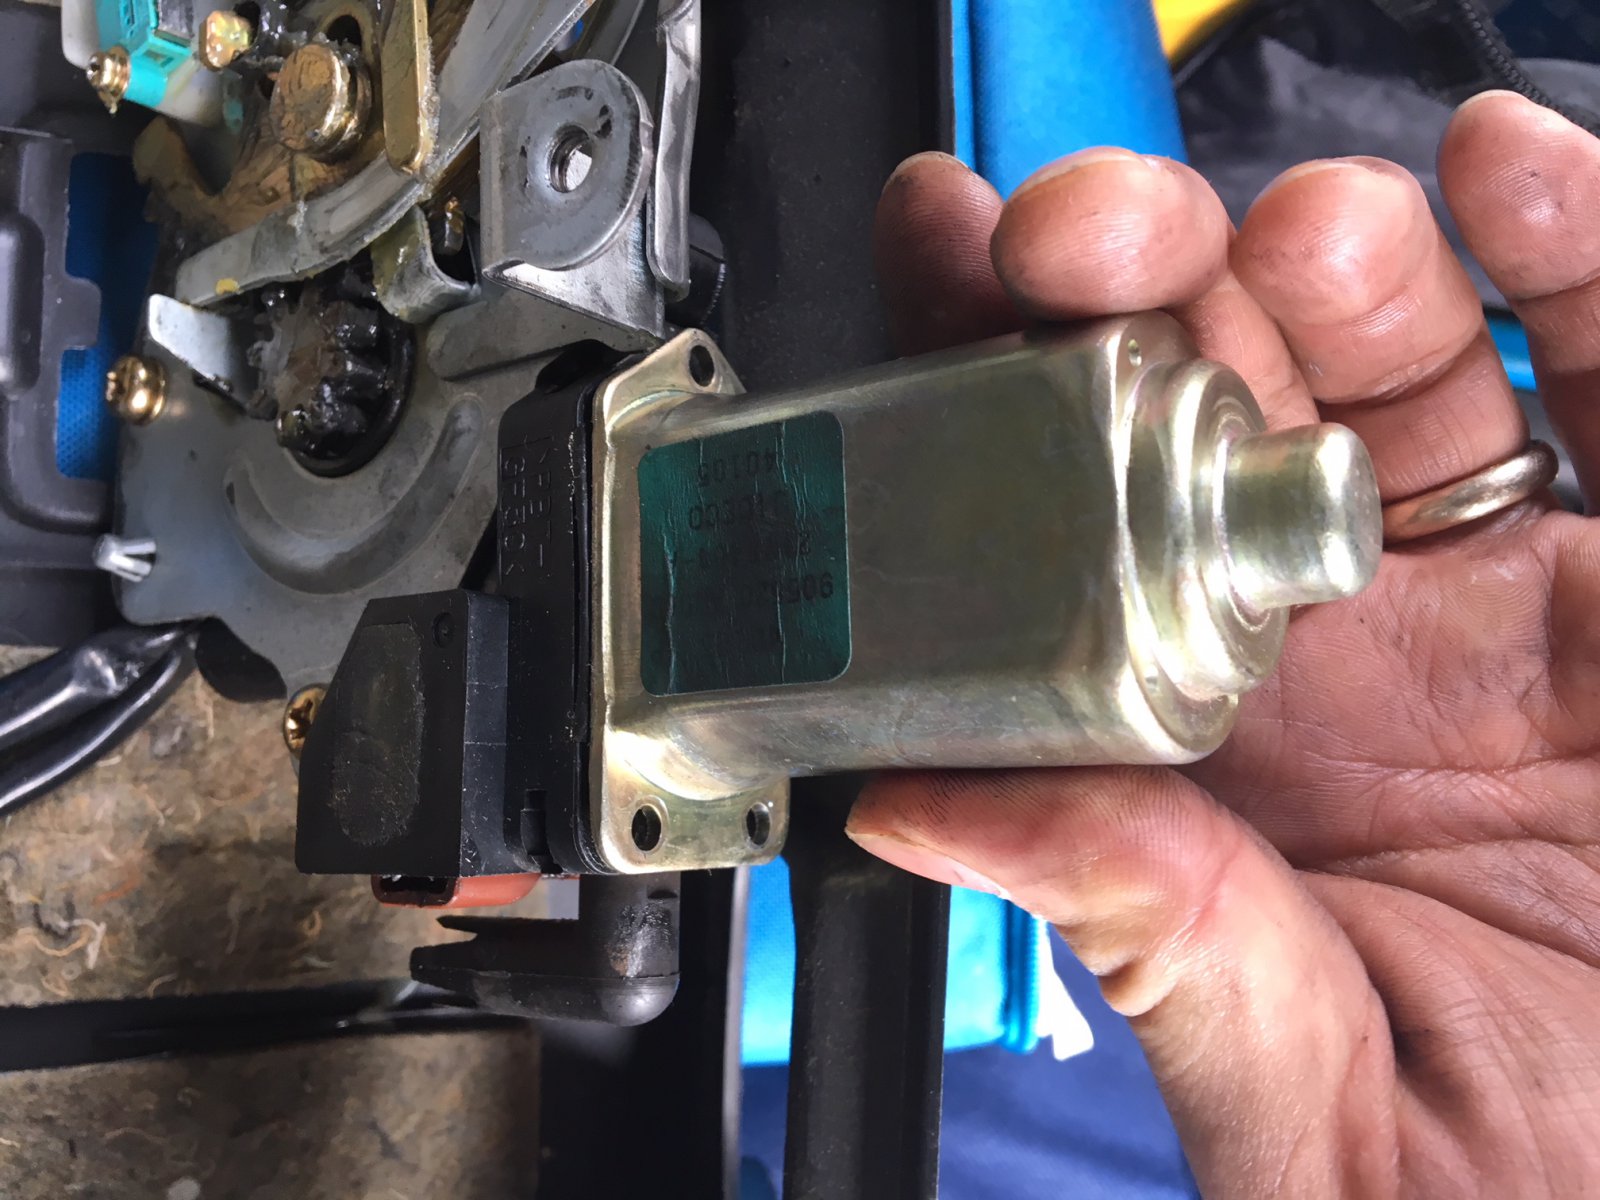
After doing the above and taking out the motor, you can follow the steps below:
Take off the 3 screws on the motor.
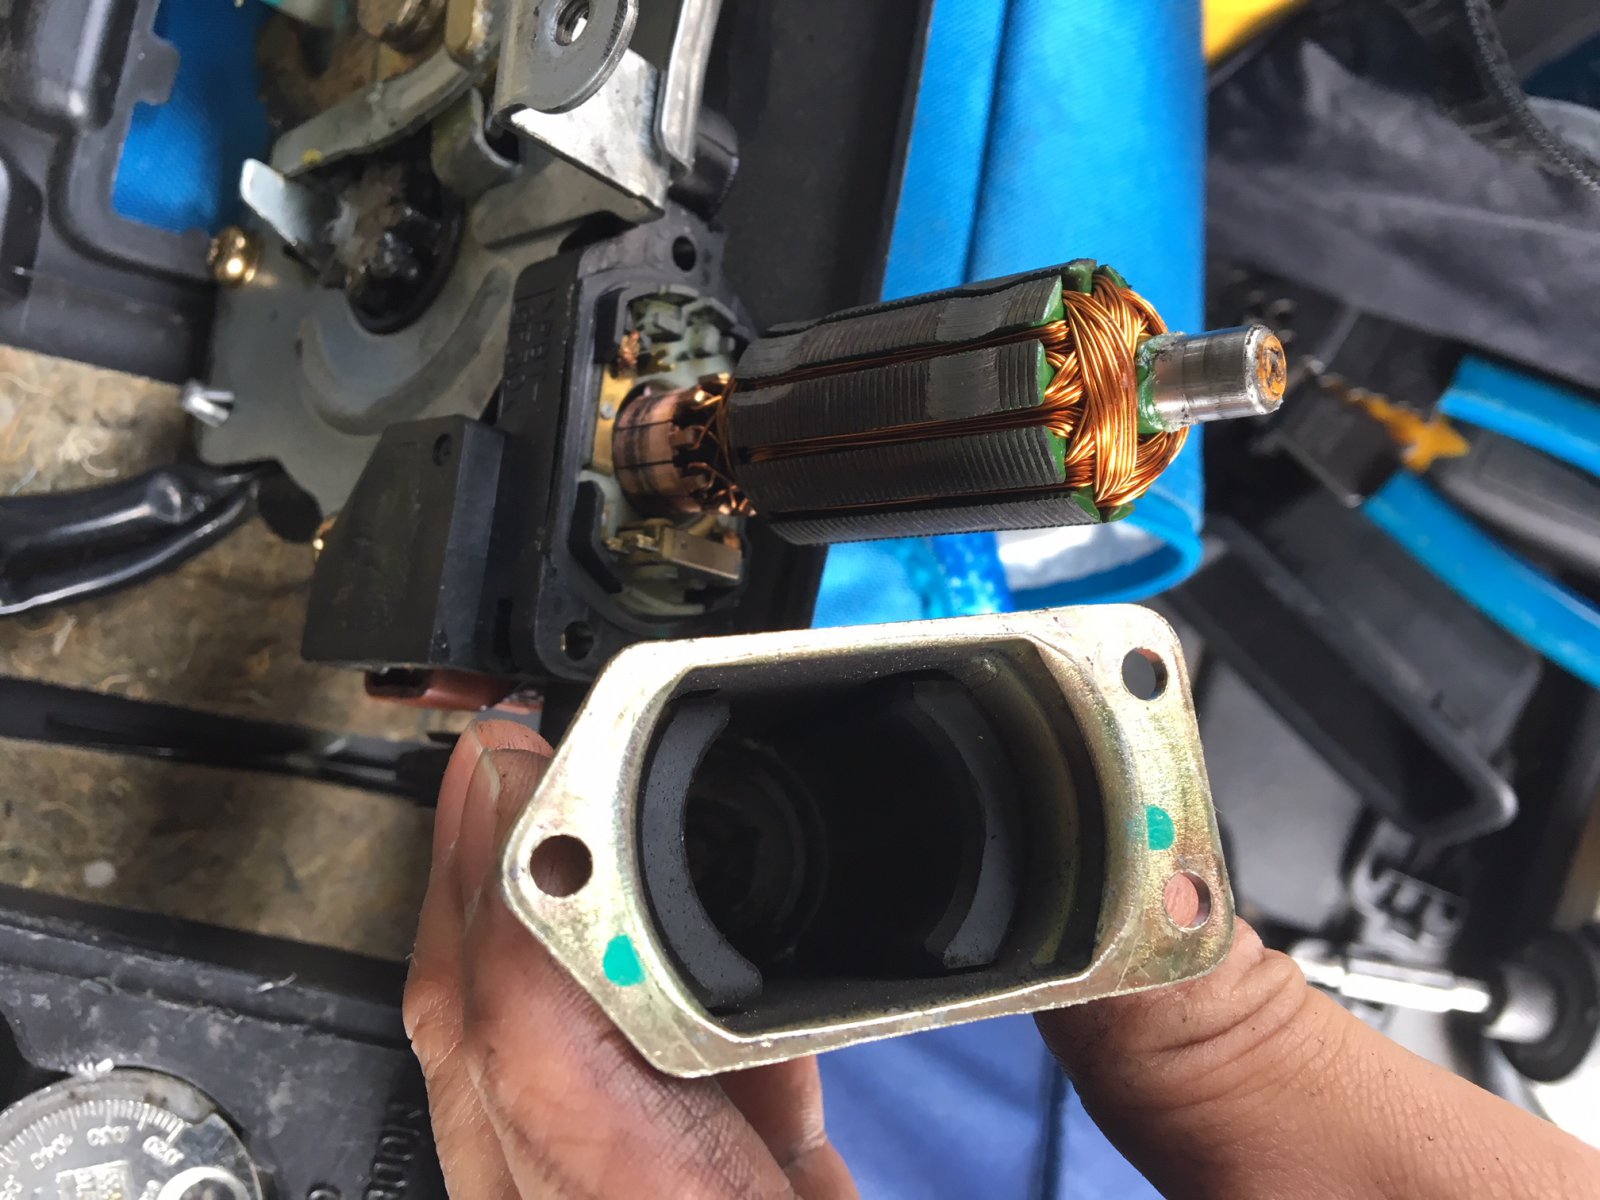
Pull the shaft out of the housing.
Simply use a terry cloth rag and apply some elbow grease back and forth to clean it.
These were actual pictures of my FX35. You can see how dirty it was as seen above. You can see the green cloth I used.
After cleaning it, it looks like this. Literally brand new again!
Put everything back together. AND NOW EVERYTHING WORKS AGAIN! Before I would have to take out the trunk fuse in order to reset it and hoped it opened. Now it opens consistently with no issues at!!
ORDER YOUR FILTER (MAKE SURE YOU GET THE ACTIVATED CARBON FILTER)
Part Number: FC35530
TOOLS:
PHILLIPS SCREWDRIVER
SAFETY
EVEN IF THIS PROCEDURE DOES NOT REQUIRE RAISING OF THE VEHICLE, WE CANNOT STRESS ENOUGH…NEVER GET UNDER A RAISED VEHICLE WITHOUT THE USE OF QUALITY JACK-STANDS
1. REMOVE THE DOOR SILL BY PULLING UP AND UN-POPPING THE CLIPS.
2. UNSCREW THIS PLASTIC NUT AND REMOVE THE SIDE PLASTIC PANEL. THE PLASTIC NUT SHOULD COME OFF BY HAND, IF NOT USE A WRENCH.
3. LOOK UNDER THE GLOVE-BOX AND REMOVE THIS PLASTIC PANEL, PULL DOWN ON THE FRONT AND IT WILL UNCLIP.
4. USING YOUR PHILLIPS SCREWDRIVER UNSCREW THESE 2 PHILLIPS SCREWS UNDER THE GLOVE BOX.
5. OPEN YOUR GLOVEBOX AND UNSCREW THESE 4 SCREWS.
6. YOUR GLOVEBOX SHOULD NOW COME OFF (DISCONNECT ANY WIRES NECESSARY – DO NOT DISCONNECT THE YELLOW AIR BAG PLUG/WIRE).
7. TO REMOVE THE FILTER YOU WILL PUSH ON THIS TAB TO RELEASE THE FILTER COVER.
8. PULL OUT THE OLD FILTER.
9. INSTALL YOUR FILTER **(NOTE THE DIRECTION OF AIR FLOW ON THE NEW FILTER – THE AIR FLOWS DOWNARDS IN OUR CARS, SO MAKE SURE YOU INSTALL YOUR FILTER PROPERLY).
NOTE: WHEN PUTTING THE FILTER COVER (DOOR) BACK ON YOU WILL NEED TO LIFT THE FILTER UP WHILE CLOSING THE COVER, THE DOOR HAS TABS ON IT AND THE FILTER NEEDS TO SIT ABOVE THESE TABS.


 Subwoofer Enclosure on Infiniti FX35 2003-2008")


")