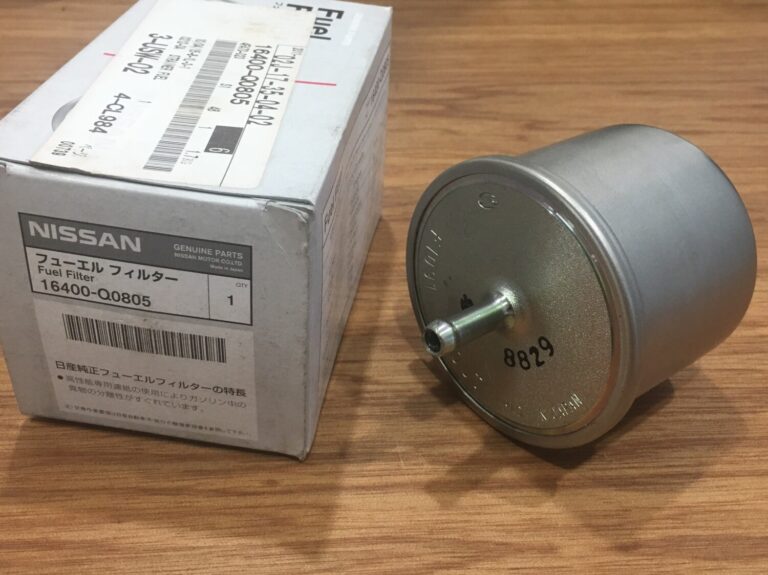
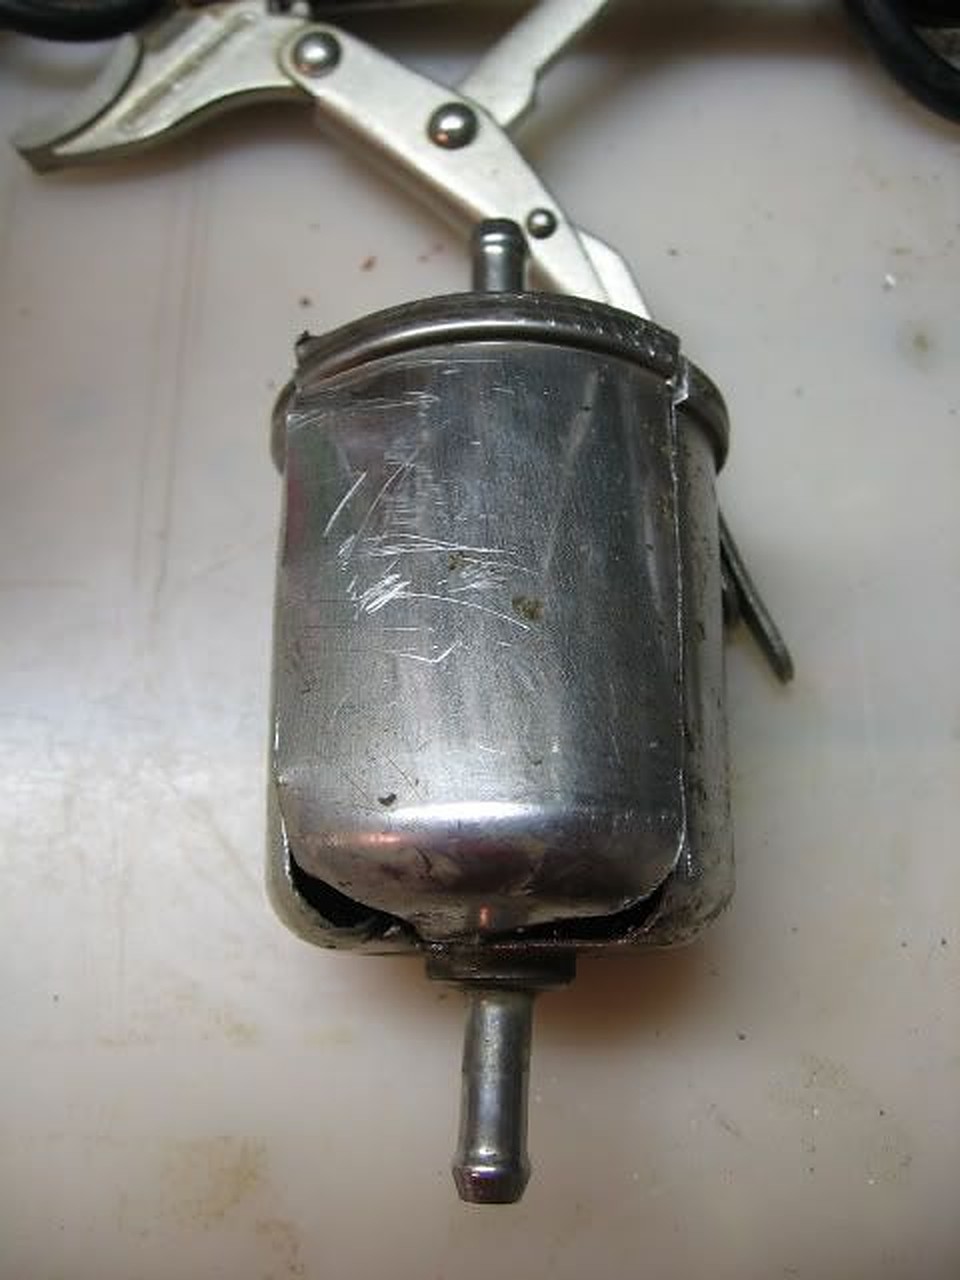
If you’ve never changed out your fuel filter on 4thgen Nissan Maxima, you should consider using the Z32 300ZX TT fuel filter. It’s a bit larger in size and is known to last longer than your Nissan Maxima regular OEM filter.
Please Note: The size of the fuel filter does not affect the amount of fuel delivered to the engine. It is controlled by the fuel pressure regulator, fuel pump, and injectors. The size of the filter only changes how long it will work effectively.
Part: Shifter Stabilizer Bushings – Nissan Maxima – 7.1115 Order Link: https://www.energysuspensionparts.com/7.1115
Here are the notes on removing the shifter trim and center console. Pictures follow.
Remove the ashtray and the screw behind the ashtray. (picture)
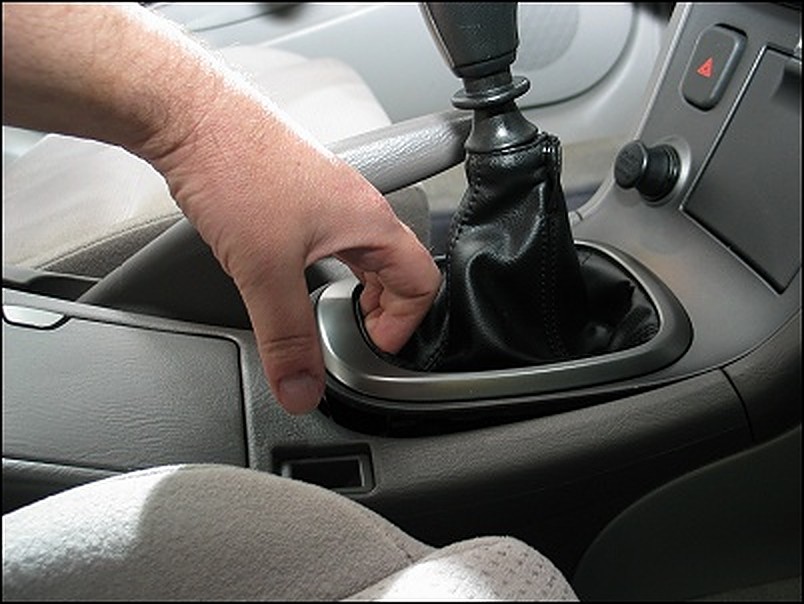
Unsnap the shifter trim by gently pushing your fingers into the leather on the back end for grip, then pull upwards to unclip it. (picture)
Lift the shifter trim from the back end, and wiggle it down from the front end. The shifter trim fits under the climate controls and will slip free with a little effort.
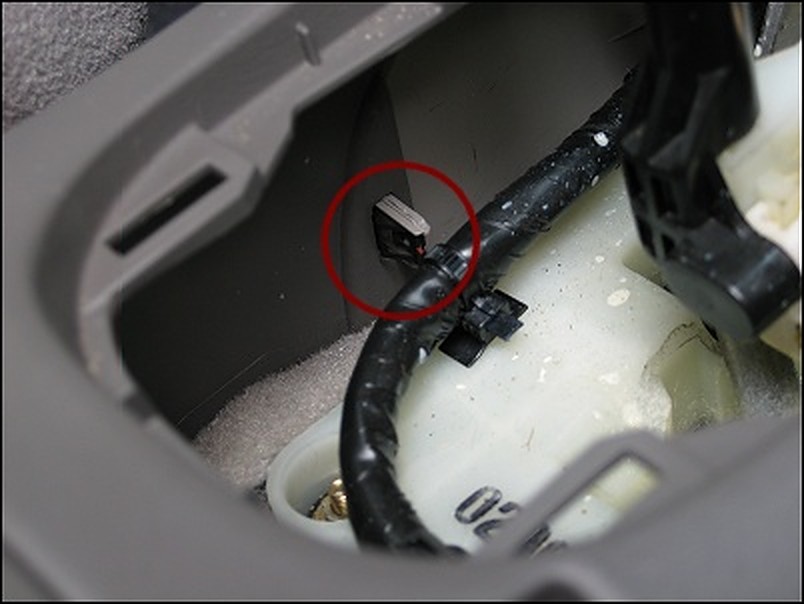
Once the trim piece is free, unclip the power connectors that go to the hazard lights, ashtray light, and cigarette lighter. (Yeah, there’s an ashtray light. Who knew?) Use a small flat-head screwdriver to help unclip these connectors.
Unsnap the leather boot and slip the entire trim piece off the shifter. Set it aside.
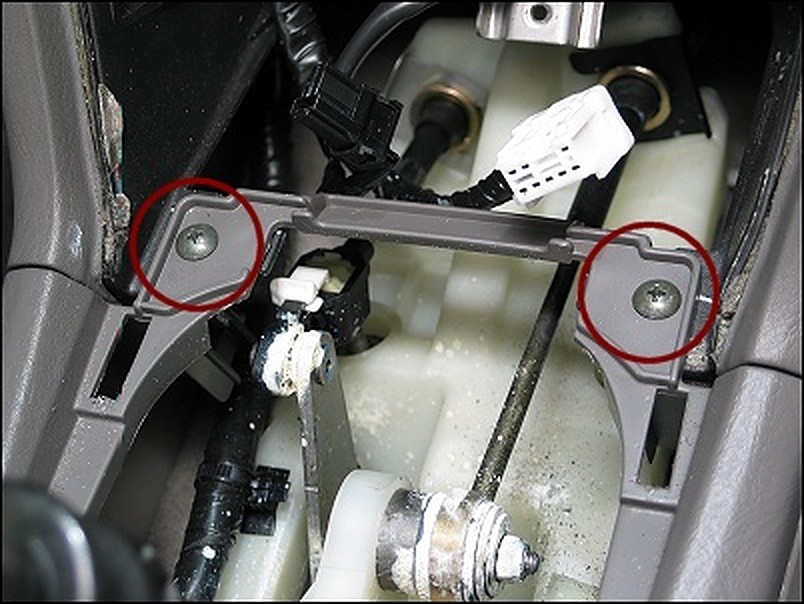
Now on to the center console. Unscrew the 2 console screws made accessible now that you’ve removed the shifter trim. (picture)
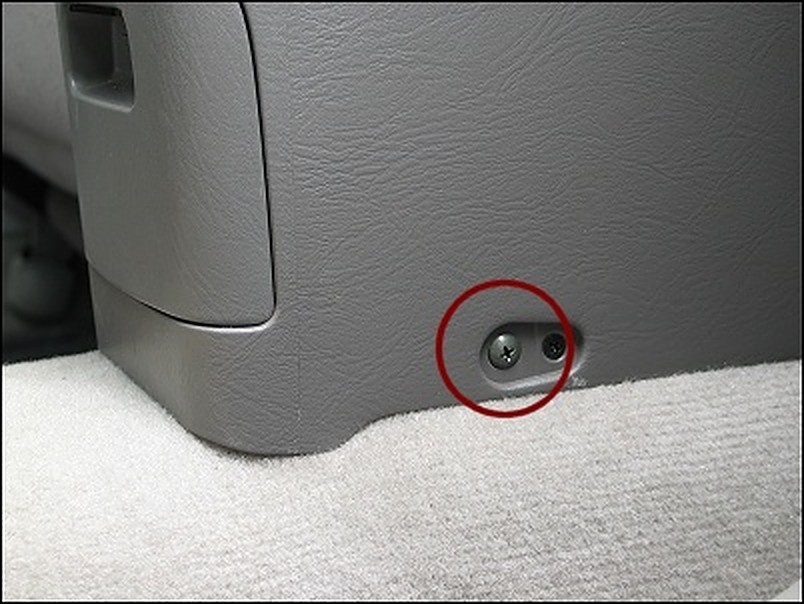
Unscrew the two (large) screws that are on the bottom sides of the console, accessible from the back seat. There are two screws here, you want the larger ones. (picture) I’m not sure what the other one is, but it’s not the one you want.
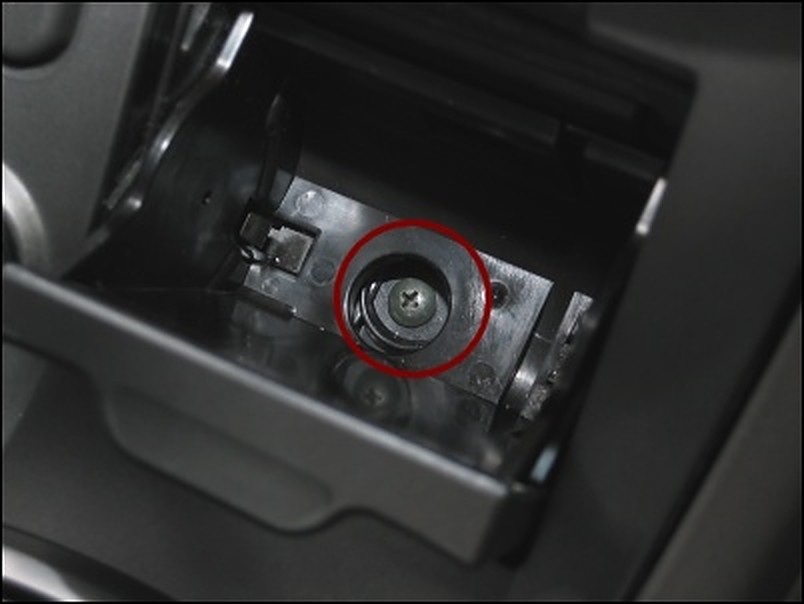
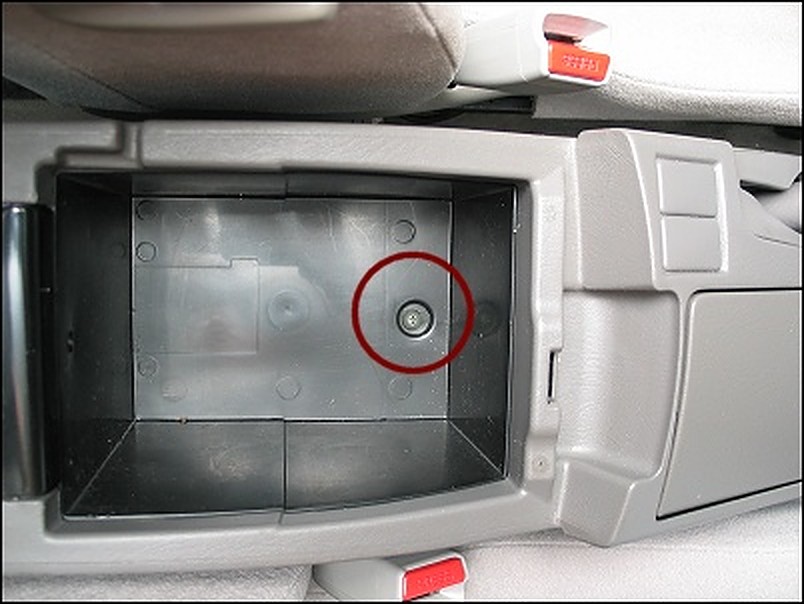
Unscrew the single screw inside the center console glove box. (picture)
Find the clips inside the front of the center console that attach the console to the side trim. (picture) Unclip the center console from the front-side panels, and lift the console up and out. It’s not a smooth process the first time you try to pull the console away, so take your time. Figure out how to remove it safely by adjusting the position of the hand brake.
Once the center console is free, unclip the power connector to the back seat cigarette lighter. Set the center console aside.
Next up are the steps I used to replace the bushings underneath the shifter assembly. eclid98 suggests wearing mechanics gloves for certain things. I don’t have any, and yes, I cut myself.
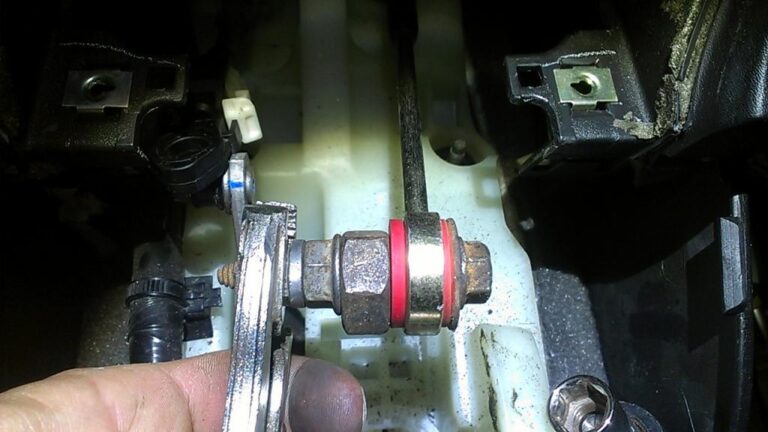
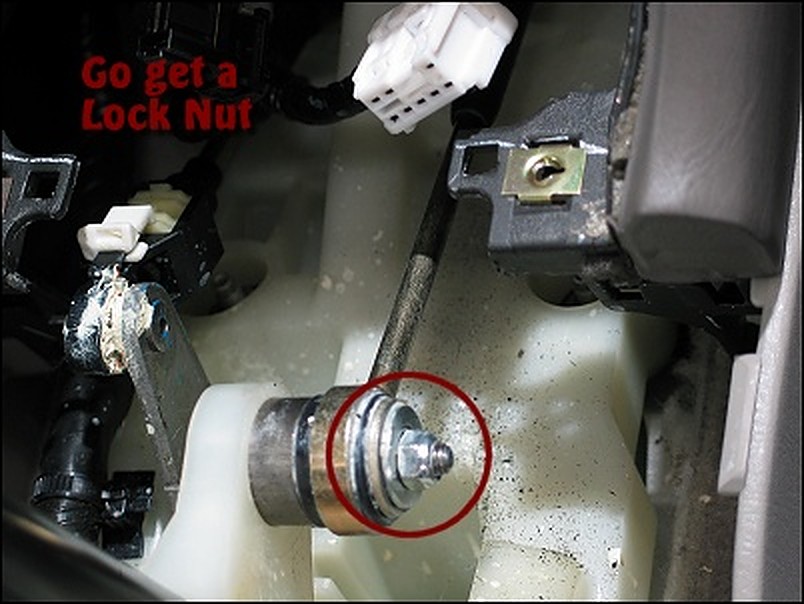
Disconnect the shifter cable from the shifter arm by removing the nut over the OEM banjo bushing. (picture)
Take out the OEM banjo bushing and replace it with the new ES banjo bushing. It can be difficult putting the new bushing in — use channel locks, or a couple of fat washers, a nut and bolt, screwing the washers together until the banjo bushing slips in. Do the same at the transmission end, under the hood. (I’m brushing past this part, because I already did this a while ago, and my playtime today consists of the bushings underneath the shifter assembly.)
Don’t put the cable back on the shifter arm just yet. However, when you do, do not use the OEM nut. Go buy a replacement lock-nut… the kind with plastic in the threads. You see, now that you’re loosened it, the OEM nut will just back off again in the future, and it’s been known to do so on a number of people. (Me included, but I was lucky and felt it getting sloppy before it completely fell off.) Use a lock-nut so you don’t have to deal with that worry.
Unclip the side-to-side articulating arm on the left side of the shifter. You do this by pushing it off its post, NOT by unclipping the white retention piece. That piece holds yet another plastic clip in place below it, who’s purpose is for fine-tune adjustment to the centered placement of the shifter’s left-to-right position. Play with it if you want to figure it out, but it’s not part of these instructions.
Now… you think there would be some kind of retention washer on this connector. The post is designed for it, but there wasn’t anything there. I’m thinking that was a manufacturing-line SNAFU on my car, so I bought an E-washer for that purpose, and used it when everything went back together. Go figure.
On to the shifter assembly. Use a 10mm socket to remove the 4 nuts that are holding the shifter assembly to the floor.
Wiggle and lift the shifter assembly off those four bolts. You don’t need to remove the entire thing; you just need to establish clearance one bolt at a time.
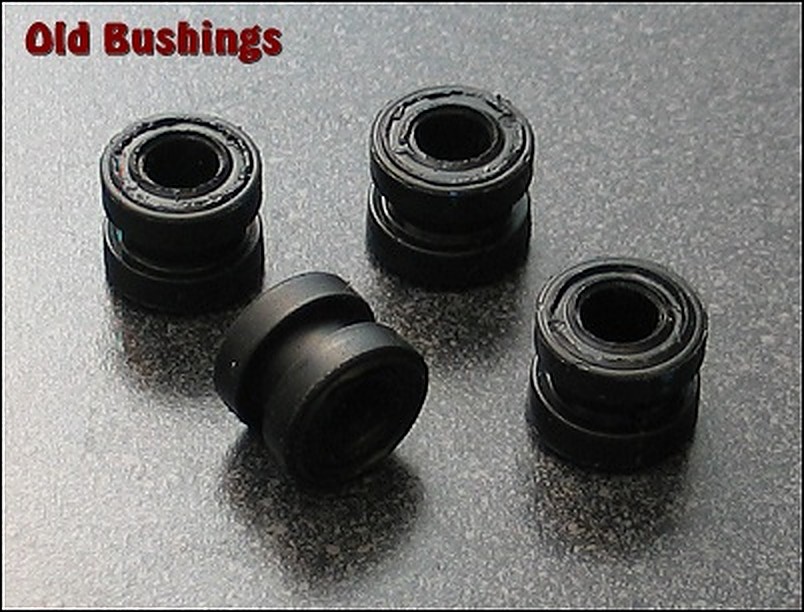
Working on one corner at a time… start by slipping the OEM metallic washer-tube-thingy (hereafter referred to just as the “washer”), off the OEM rubber bushings. Use a small flat-head to do this, prying the washer downward from the underside of the shifter assembly. Be careful you don’t lose this thing into the floorboards. That would be bad.
Once the washer is removed, use pliers or a big screwdriver to force the OEM rubber bushing out of the hole. You can pull it upward (difficult), or push it downward (easier).
Take the normal looking ES bushing and push it over the washer’s post (with a little force.) It’s probably easier to do this in your hand now, rather than after you re-install put the washer. (Thanks to eclid98 for that tip.)
Now slip the metallic washer back on the bolts. Note, you’re still working on the underside of the shifter assembly.
Repeat this step on the other 3 corners. You’ll probably cut yourself, bleed and swear a lot. It’s all part of the fun.
Now slip the shifter assembly back down over the four posts.
With the assembly back on the floor flat, slip the other ES bushing piece into the one of the holes, small end downward. Select one of the 2 more accessible corners as your first one. Don’t worry about forcing it down into the hole… that will happen next.
Put the OEM washer/nut over the bushing and screw the bushing down into the hole. Don’t tighten it all the way just yet, just enough to push the bushing down into the hole. (Thanks again, eclid98.)
Repeat this step on all four corners.
Last step — tighten down all four corners evenly.
Reference Photos
Additional Insight from: AWeb80
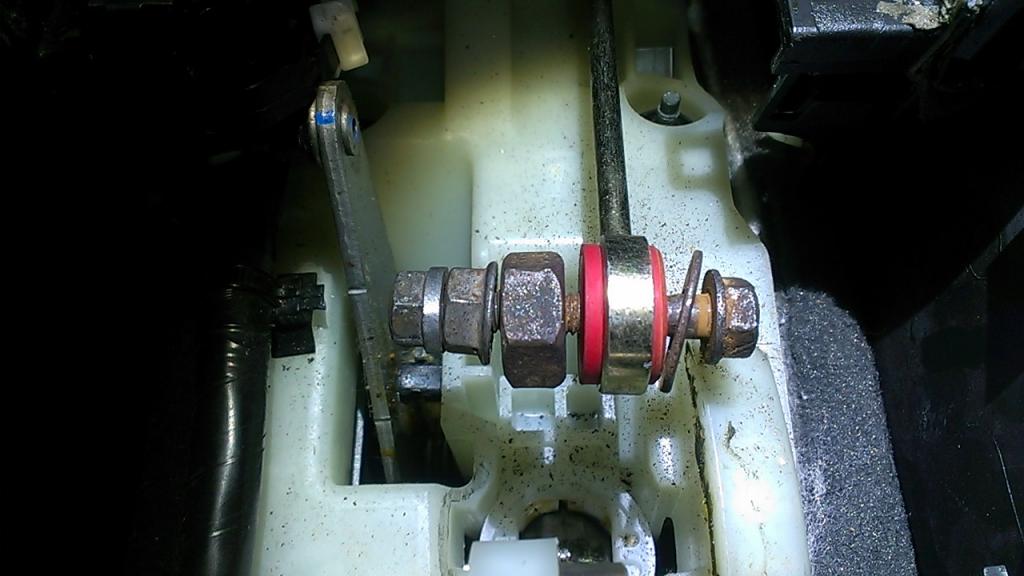
I do have a tip to put the banjo bushings in. Put a bolt that is smaller, not snug, through the bushing and use a nut to tighten it in place. I think the pictures explain themselves. It took all of 2 minutes per bushing. It pushes it in square and is MUCH easier than trying to squeeze it in w/ pliers.
*don’t mind the extra nuts I have on the left side….they are just there as spacers so I didn’t have to thread the actual nut on so far. *
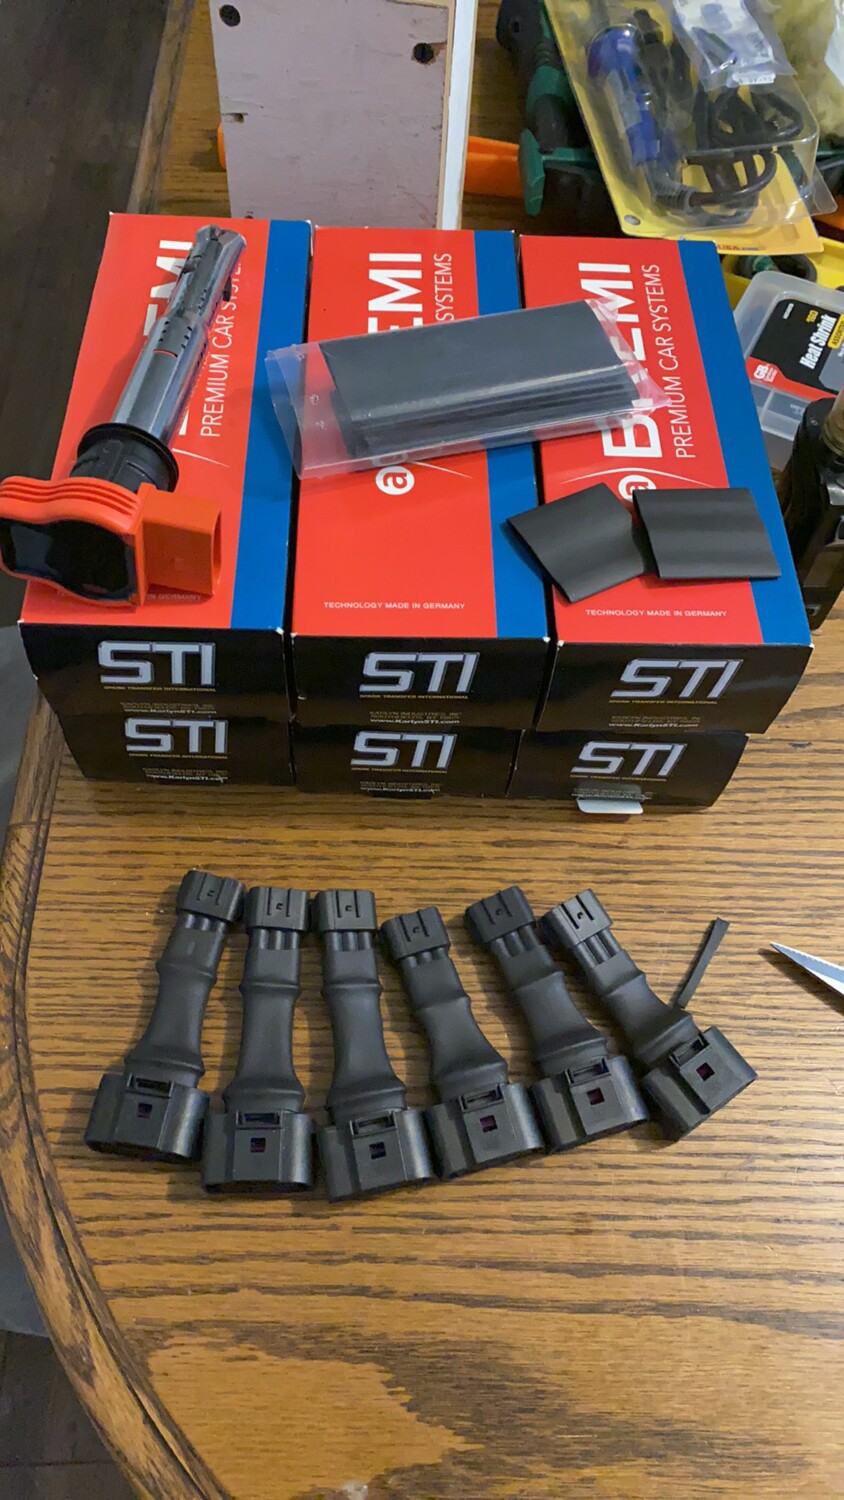
Big shout to Rico for spending countless hours in finding a cost-effective solution to coilpacks for the VQ35DE engine. This also works on other models and years.
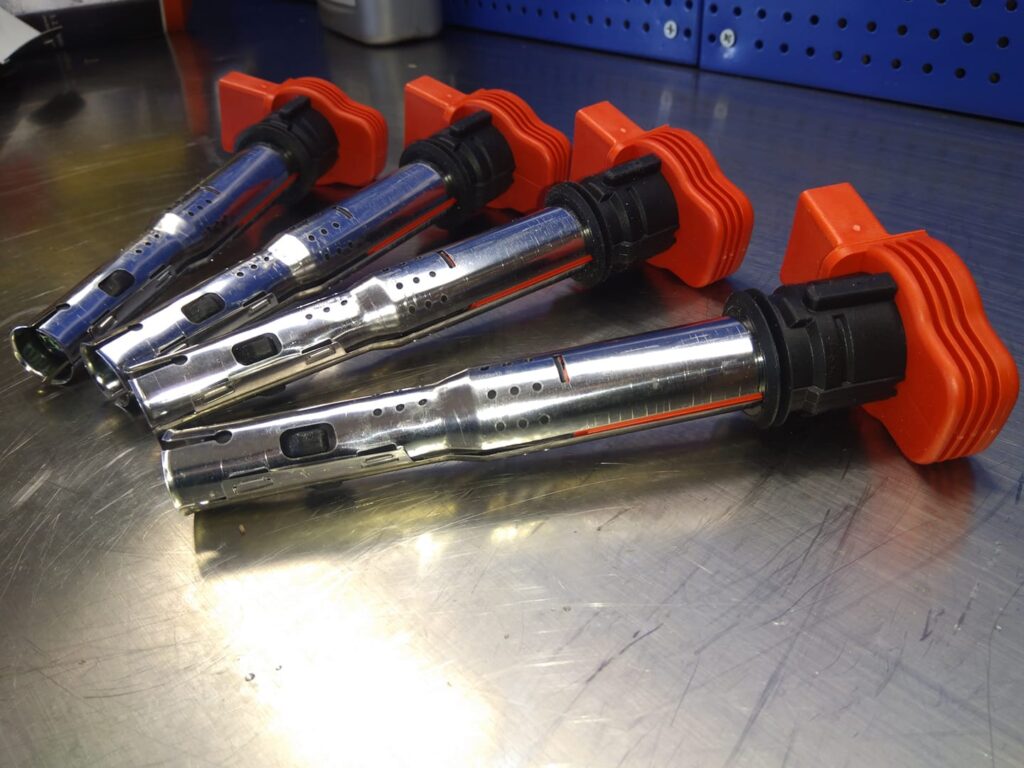
For those that don’t know, Audi coilpacks are stronger and better than Nissan coilpacks. They add better mpg and more HP/TQ. It works on bone stock vehicles or highly modified vehicles. Just rewire the OEM pigtails to Audi pigtails, plug it in and play!
Nissan Coilpack only has 1 coil. Audi has 2 coils as you can see in the picture below. By having 2 coils it doubles the spark output and can easily handle spark blow out that turbocharged vehicles suffer from. Because it’s outer exterior has a metal body it can dissipate heat ALOT quicker than Nissan rubber which helps with heat cycling. It’s also cheaper than OEM Nissan Coilpacks.
Audi R8 Coil Pack Advantages:
50,000 volts compared to Nissans/Infiniti 30,000 volts.
Some measure it with Kv so Nissans coils put out 21Kv while VW coils put out 30Kv
Quicker Heat dissipation. (Because of its metal body construction it can quickly dissipate heat. Nissan OEM body is made out of rubber that isolates heat instead of disperses it.)
More complete burn of the fuel mixture compared to OEM Nissan which equals to better MPG.
Idle Stability Improved
NO CEL (Check Engine Lights)
BEST PART ABOUT THEM IS THEY ARE CHEAPER $$$ than Nissan OEM yet they are much better.
Looks 10000% Cooler than OEM Coilpacks
Now the coil packs price varies due to different name brands. They range from $132-$216 for a V6 engine. Below is the link of the coil packs below so you can see the prices and brands. Doesn’t matter which brand you use, I’ve tested them all and they all make the same exact power.
Installed a 2003 Nissan Maxima (Credit: Altaf Rahaman)
Important Note: The 02-08 DE Manifold requires NWP spacers.
Important Note:The 2nd Gen Engine does not require spacers. Straight plug-n-play.
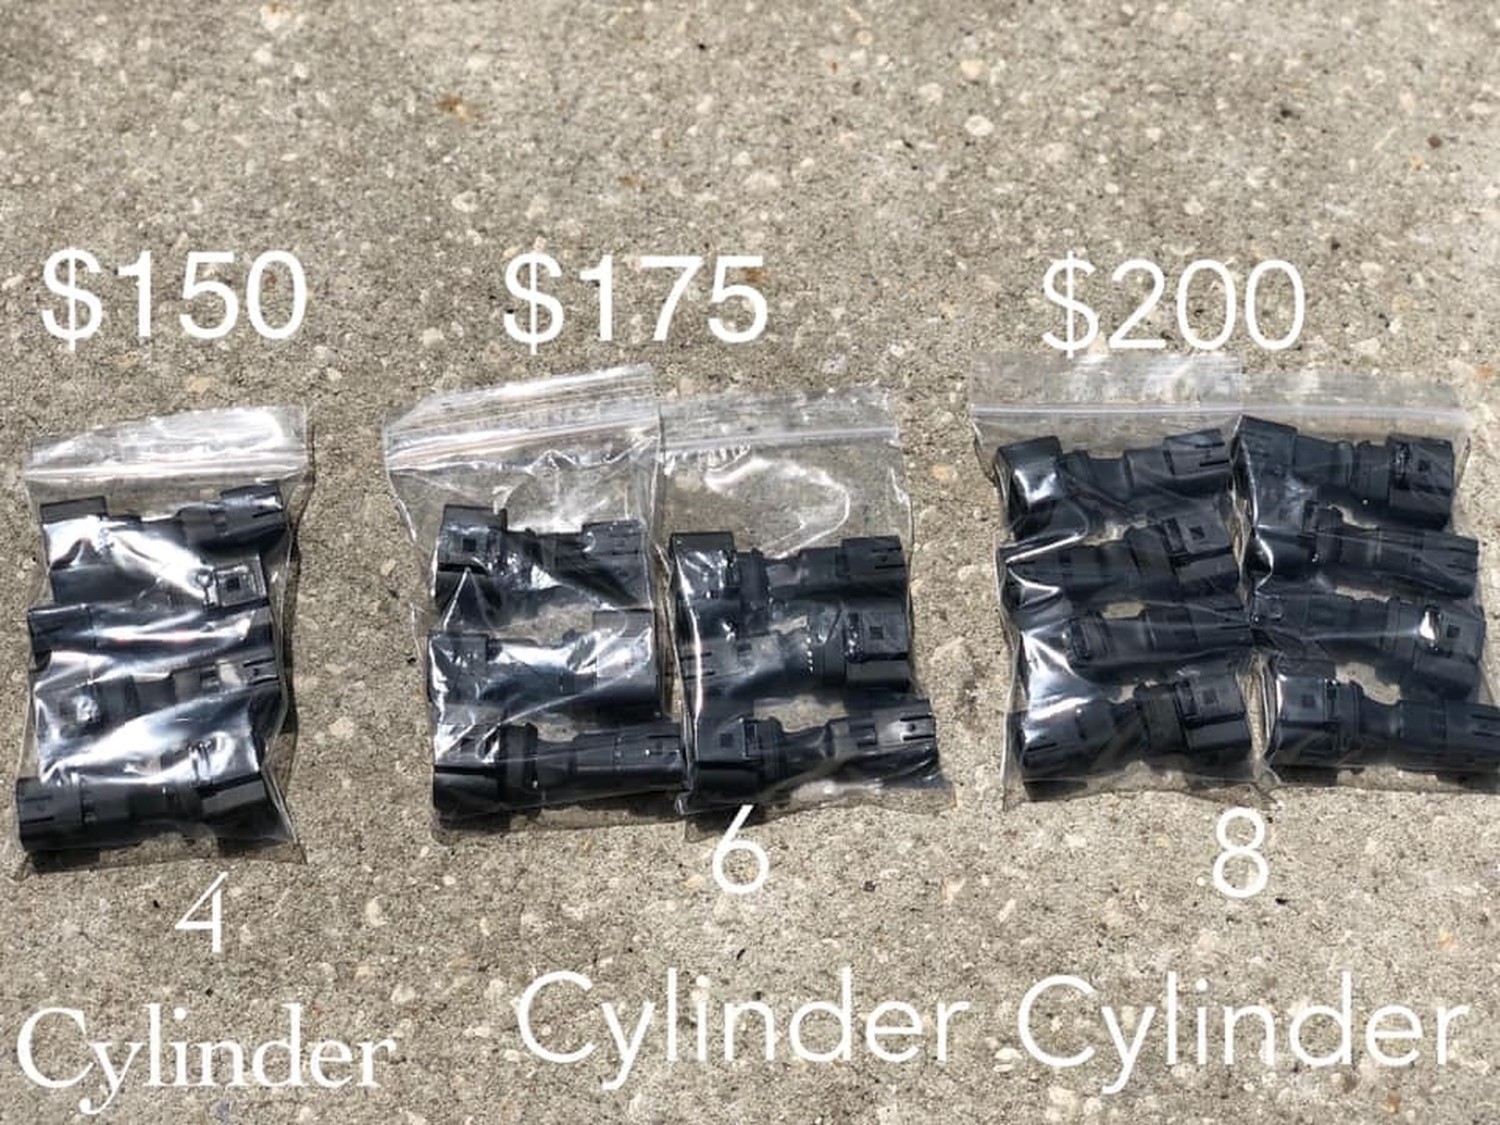
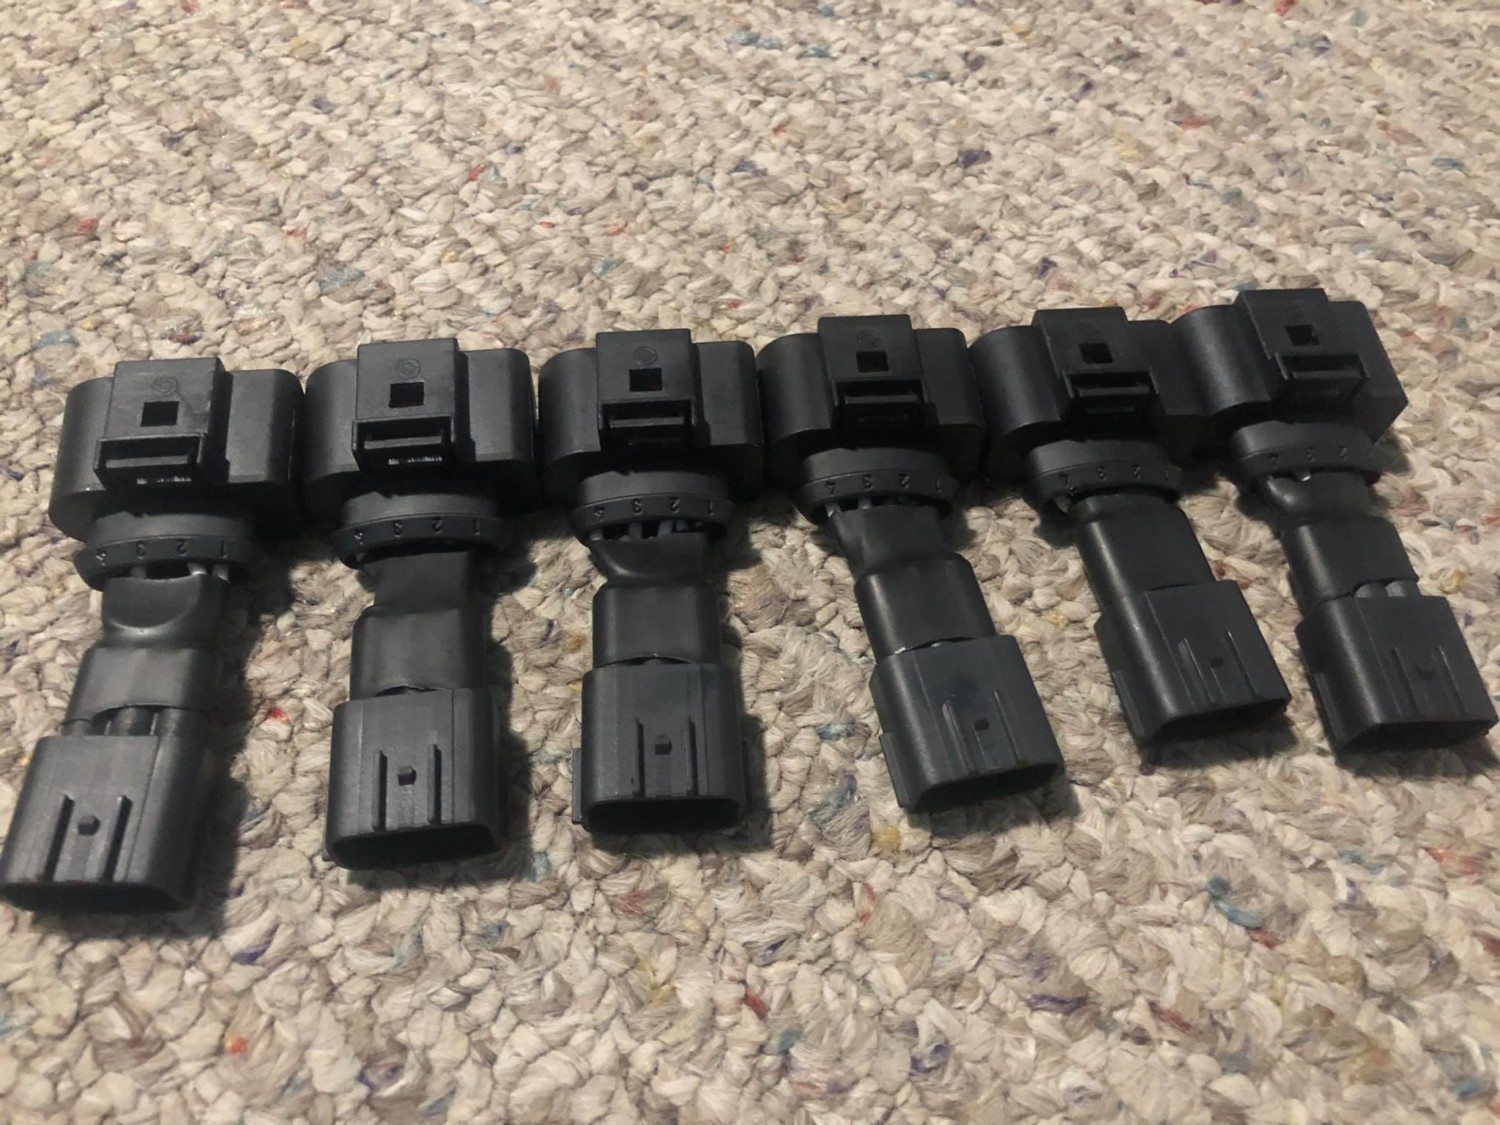
Adaptor Options:
You can also purchase the adapters directly from Rico. Below are the prices.
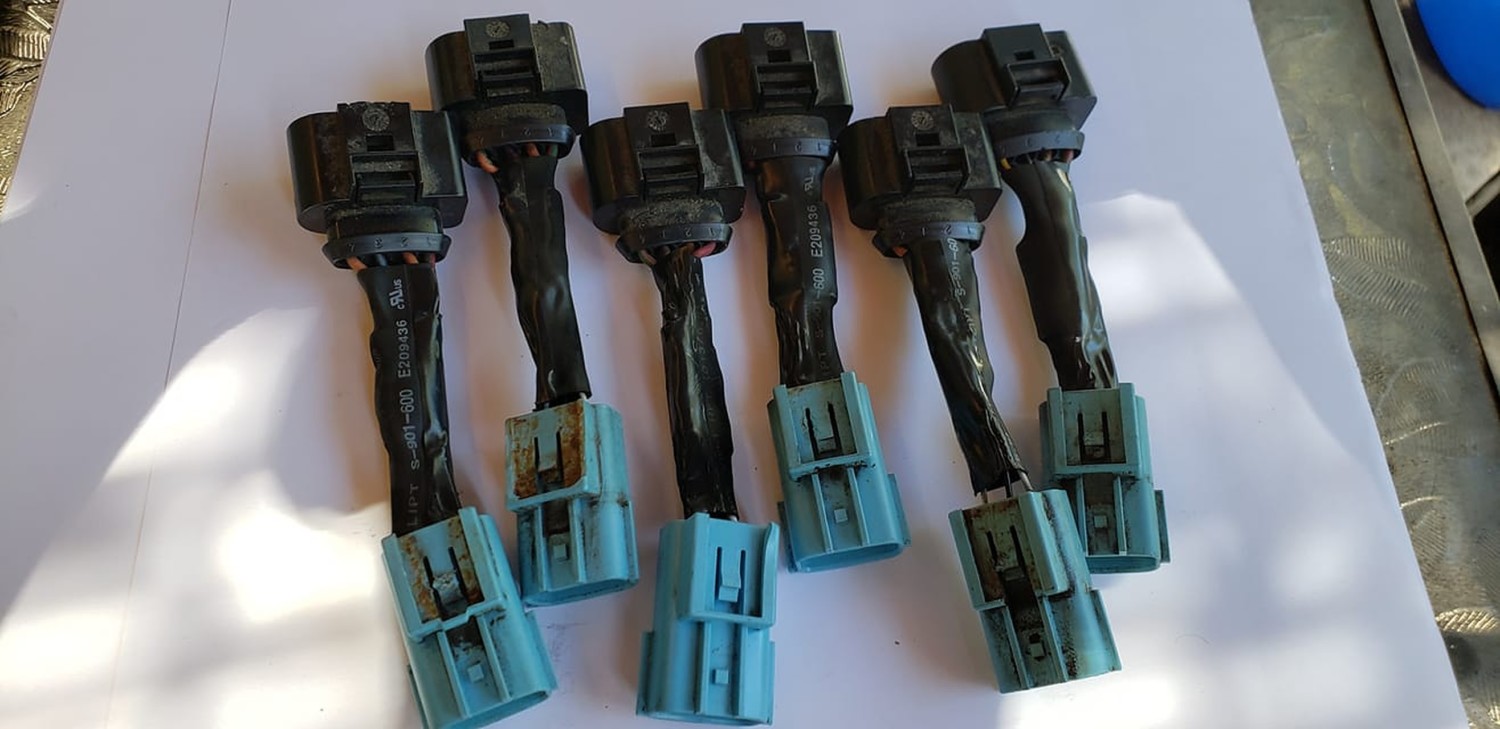
Create Connectors using O2 Plugs (Credit: Rob Tilley)
Finally got my R8 coils installed today and I must say it was definitely worth the time and money I spent. I installed them on my turbo 350z running 15psi with #7 plugs. Car runs so much smoother, especially under boost. It’s a totally different car. I used o2 plugs from a 02/03 Maxima to make the adapters for the plug. Just have to file down the alignment guide on the outside of the blue connector.
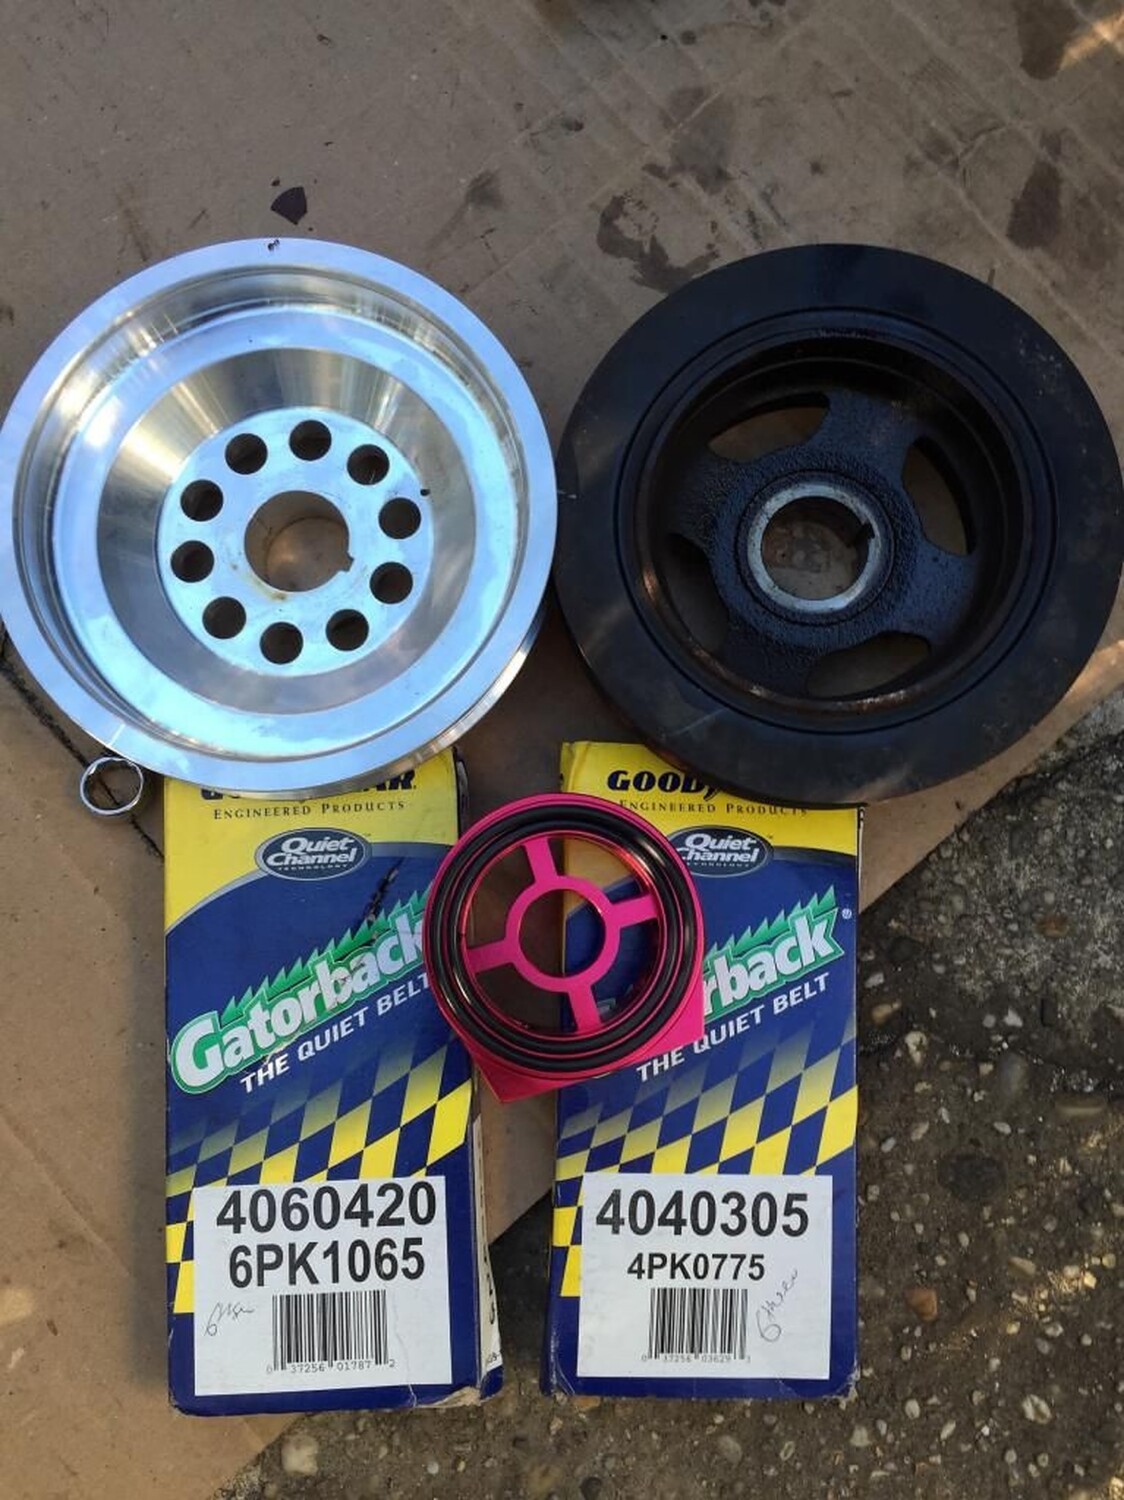
This is a popular upgrade for the VQ35DE Engine. Below is the information you need when ordering these pulleys. These pulleys fit the Nissan Maxima VQ35DE Engine from 2002-2008. Also applies to 4thgens if you have a VQ35DE Swap.
Ralco RZ pulleys are designed with a unique blend of performance and reliability. They are made from the highest quality 6061 aluminum billet. Ralco RZ pulley conversions are proven to produce maximum power gains with the performance benefits of weight reduction, which you wouldn’t receive from factory parts. Throttle response, horsepower, and torque are all increased with this great product.
Features:
6061 Aluminum Billet
Lightweight
Note: Crank pulley Polished
Stock-Diameter Ralco Pulley (Part #: RZ-914924)
Pulley Model: # 914870
Average Price: $125.00-$139.00
Recommended Belt Sizes: You use your existing stock belts for this one.
Well, I did the STS mod today using a bolt and did not like the final version. I originally posted my results in the Free STS post, but decided this was worthy of a new post due to finding the perfect parts to make a perfect STS for less than $2 dollars.
So being bored on this wet Sunday evening, I went to Lowe’s and found the exact part I needed for a DIYer STS.
My original STS was done by drilling a 5/16 hole through the shifter arm and then cutting off the threaded part of a long 5/16 bolt and drilling a small hole for the cotter pin. It was a OK job, but I noticed the bolt allowed for a lil too much play with the shifter cable. Not pleased.
I picked this up from Lowe’s. It is a 5/16×2 Clevis Pin. Just a slight bit bigger in diameter than the bolt and a perfect match to the factory shifter cable connector. Perfect match!
Part Name: Hillman 2-in Clevis Pin Item: 138646 Model: #881076 Description: Clevis pin – adjustable 5/16 x 2 1pc/bag Adjustable
Here is the Clevis Pin installed from below. I had to tap it in place from under the car due to a very tight fit from surrounding items. Look at how it is the same exact height as the factory pin.
Here is the final install with factory pin in place. I originally was gonna use a cotter pin but decided to use the factory one instead. Easier to remove if needed.
Additional Reference via trooplewis
Thought I would share some additional hints if you haven’t messed with stuff like this before, and post a few pictures.
First step, get rid of all the air intake plumbing!
You need to loosen the hose clamp around the pleated rubber that connects to the throttle body, you need to remove the breather hose where it connects to the block, you need to pinch the clip and pull off the MAF connector, and then you need to remove 4 screws to take out all the air intake plumbing.
That takes 5 or 6 minutes if you have not done it before.
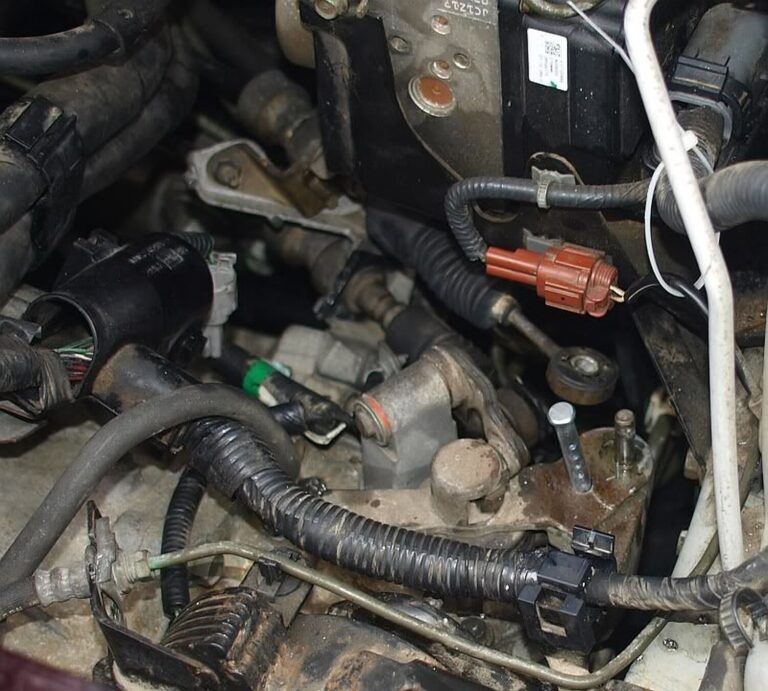
When that plastic crap is off, this is what you will see. The area you are going to be working in is in the lower right of this photo, under that red electrical connection you see. Speaking of which, watch your drill, make sure the chuck is not spinning against it. You don’t want to mess up the wires or the connector there.
The hole you are going to drill is DEEP, I don’t think anyone mentioned that before. It is about an inch of metal you drill through. I used regular 30-wt motor oil to keep the tip of the 5/16 bit cool, putting a few drops into the hole every couple minutes. I just took my time, running the drill at a slow speed with moderate pressure on it. If you drill on high speed, you better have some really nice bits or you are going to destroy them. Take your time.
Drill a pilot hole first with a 3/16 or 1/8 inch bit, but then you can use a sharp 5/16 to go all the way through. You do not have to drill the hole twice with 2 bits, just get your pilot hole set so the 5/16 doesn’t “walk” the surface metal. The drilling took about 20 minutes.
I got the same clevis pin at Lowes, but it didn’t fit neatly into the new hole, as there were burrs on the holes in the pin. I had to put it in a vise and take some crocus cloth to it to smooth it down, then it worked OK.
Here is a photo of the location where I put the hole. NOTE in this image the pin is upside down, just there for the purpose of seeing the location. You have to install the pin from below.
OK, I don’t know if anyone can put the clevis pin in from above the car; not enough area to get your hand into. I jacked up the front of the car (be safe!) and crawled under, still could not get my hand with the pin in my fingers up into that area.
I ended up using one of those long magnetic flexible things you use to get nuts and bolts out of hard to get places that they fall into. I put the clevis pin on the magnet and got it up through the hole then an assistant grabbed and held it while I got out from under the car.
I used needle nosed pliers to hold the lower part of the pin while I slid the linkage back over it, and installed the factory lock clip. You can see the end result in this photo.
Nothing binds, everything works well, and the “smile factor” is definitely there. I don’t think this mod affects the side-to-side movement of the shift knob, but it has a big impact on the up-down travel of the shift handle. Way shorter throw, I did not notice a change in ‘notchiness’, but it is a lot of fun.
You will notice I did not re-install the factory washer, I could not get it to fit under the hole the lock pin slides through. I don’t think that will have any effect on the shifting of the car or the life of the bushing in that location.
Took me about an hour and a half from the time I popped the hood to the time I drove out and tested it.
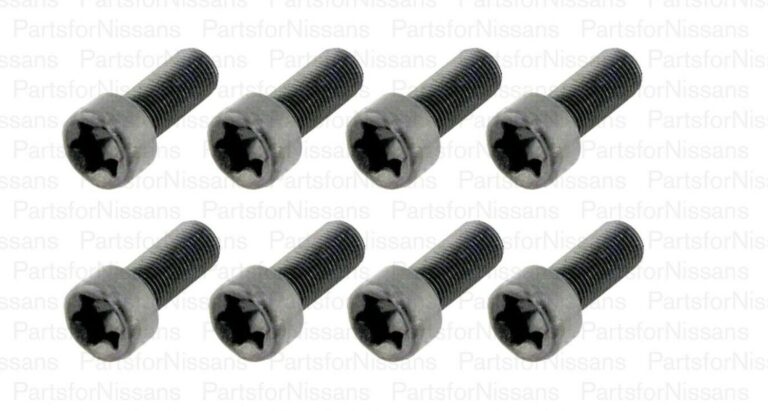
If you need OEM flywheel bolts, below is the information you need. It’s best to buy them in larger quantities due to the overall shipping costs. You will need a total of 8 bolts. These are honestly best to get from your local Nissan dealer to save on shipping.
OEM Part Number: 12315-8J100
Total Quantity Needed: 8 Bolts Price: $1.99 – $2.50 (each)
Torx Size: T55 FSM Torque Specs:61 to 69 ft lb
Cart Summary via https://www.rockawaynissanparts.com/p/Nissan__Altima/Clutch-Flywheel-Bolt/89394231/12315-ZA000.html
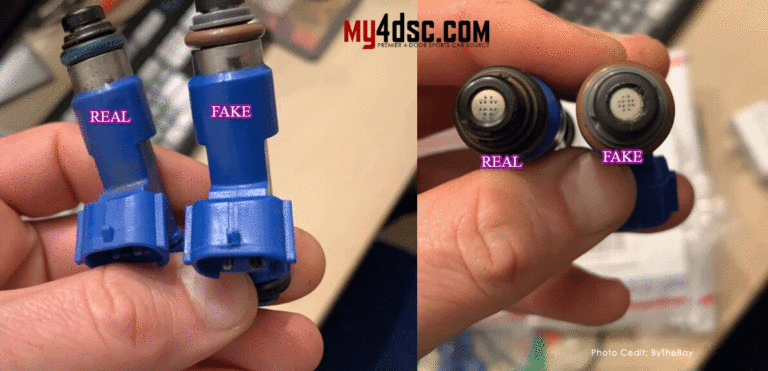
This is just a quick guide for those upgrading to R35 GTR injectors. They are many fakes out there in the market. While some have had success with the fakes, the majority have experienced issues. These injectors are most commonly used for running E85 on Nissan Maxima builds.
Your best chance is to buy them used from someone who can verify they are genuine. However, if you ever plan to boost the car, it doesn’t make sense to buy the GTR injectors new because for about the same price you can get a set of new Injector Dynamics injectors that are good for more fuel delivery.
The real/authentic injector is on the left. The fake/knock-off injector is on the right.