Tag

Engine Bay Mods

Browsing

Community Member Credit: JIME

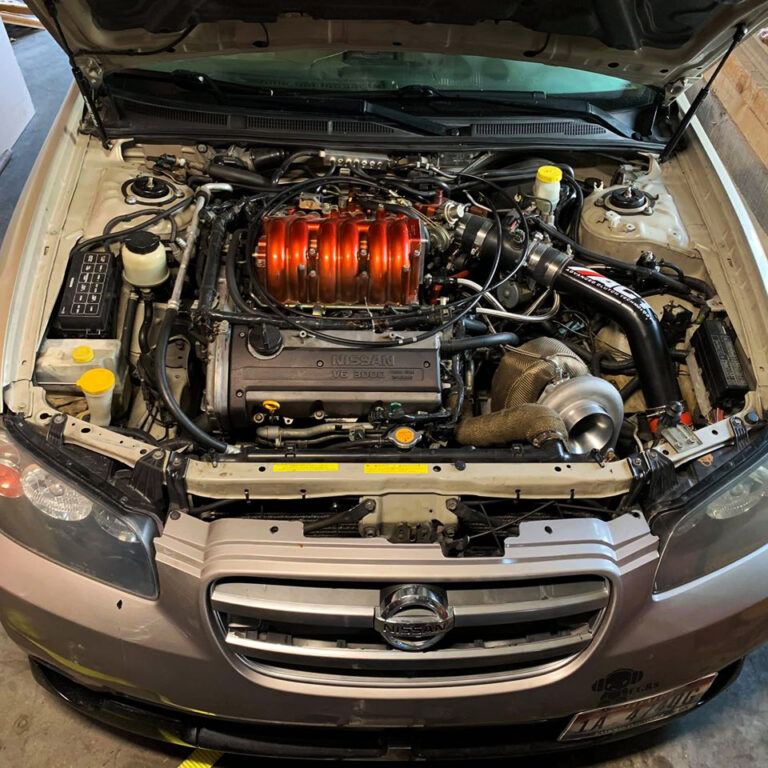
Not sure if this has been visited before but my Son recently brought it to my attention when we were discussing running a 200 shot of spray. He suggested that I use his nitrous test kit to ensure the fuel pressure remained constant when running a 200 fuel jet. So after a few minutes I soon found out that my 190 Walbro dropped to 30 psi, not good. He then mentioned that a lot pf VW and DSM guys rewired their fuel pump with a higher gauge wire to maintain a higher voltage. I measured the voltage at the pump with the engine running and found it to be just over 12v. I then ran a heavy gauge wire from the battery and conected it to the pump wire at the pump, the voltage went up to almost 14 and the fuel pressure went up by almost 10 psi.

So it was off to the store to buy some heavier wire. I decided on 10 gauge rather than something heavier because of the difficulty soldering heavier wire as well as routing. The stock wire at the pump is 14 gauge but if you strip the wire back a couple of feet you will find it increases to 12 gauge.

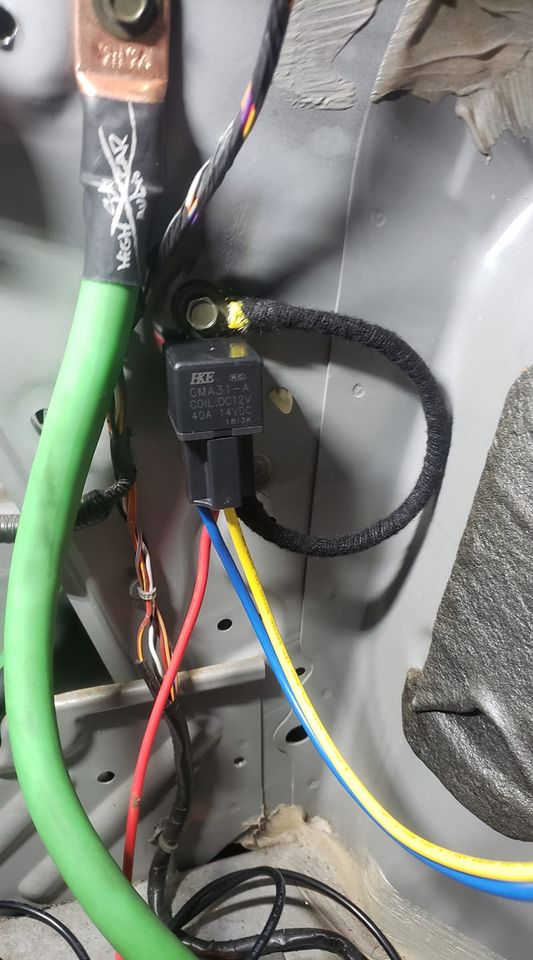
The easiest way is to run the heavier gauge wire directly from the battery with a fuse and use a relay to connect to the pump. Use the original pump supply wire to fire the relay and use the larger wire on the N.O contacts to run the pump.

Auto Performance has a couple of charts comparing 12v vs 13.8v and their corresponding flow rates and current draw.. Pretty impressive comparison. eg For my pump at 50 psi the flow rate increases from 36 to 46 gal/hr while the current draw remains the same.

I would suggest an adjustable FPR to compensate for the increased pressure.

A 255 pump was installed because even with the increased voltage the 190 pump would not handle a 200 shot. After installing the new pump my pressure increased to over 80 psi and took a lot of adjustment to bring it back into the 50 psi range.
Loading

Community Member Credit: Eddy

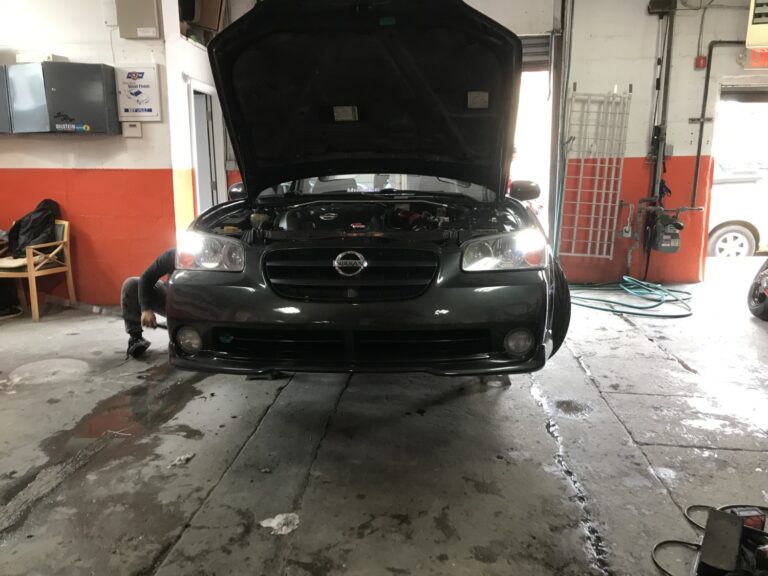
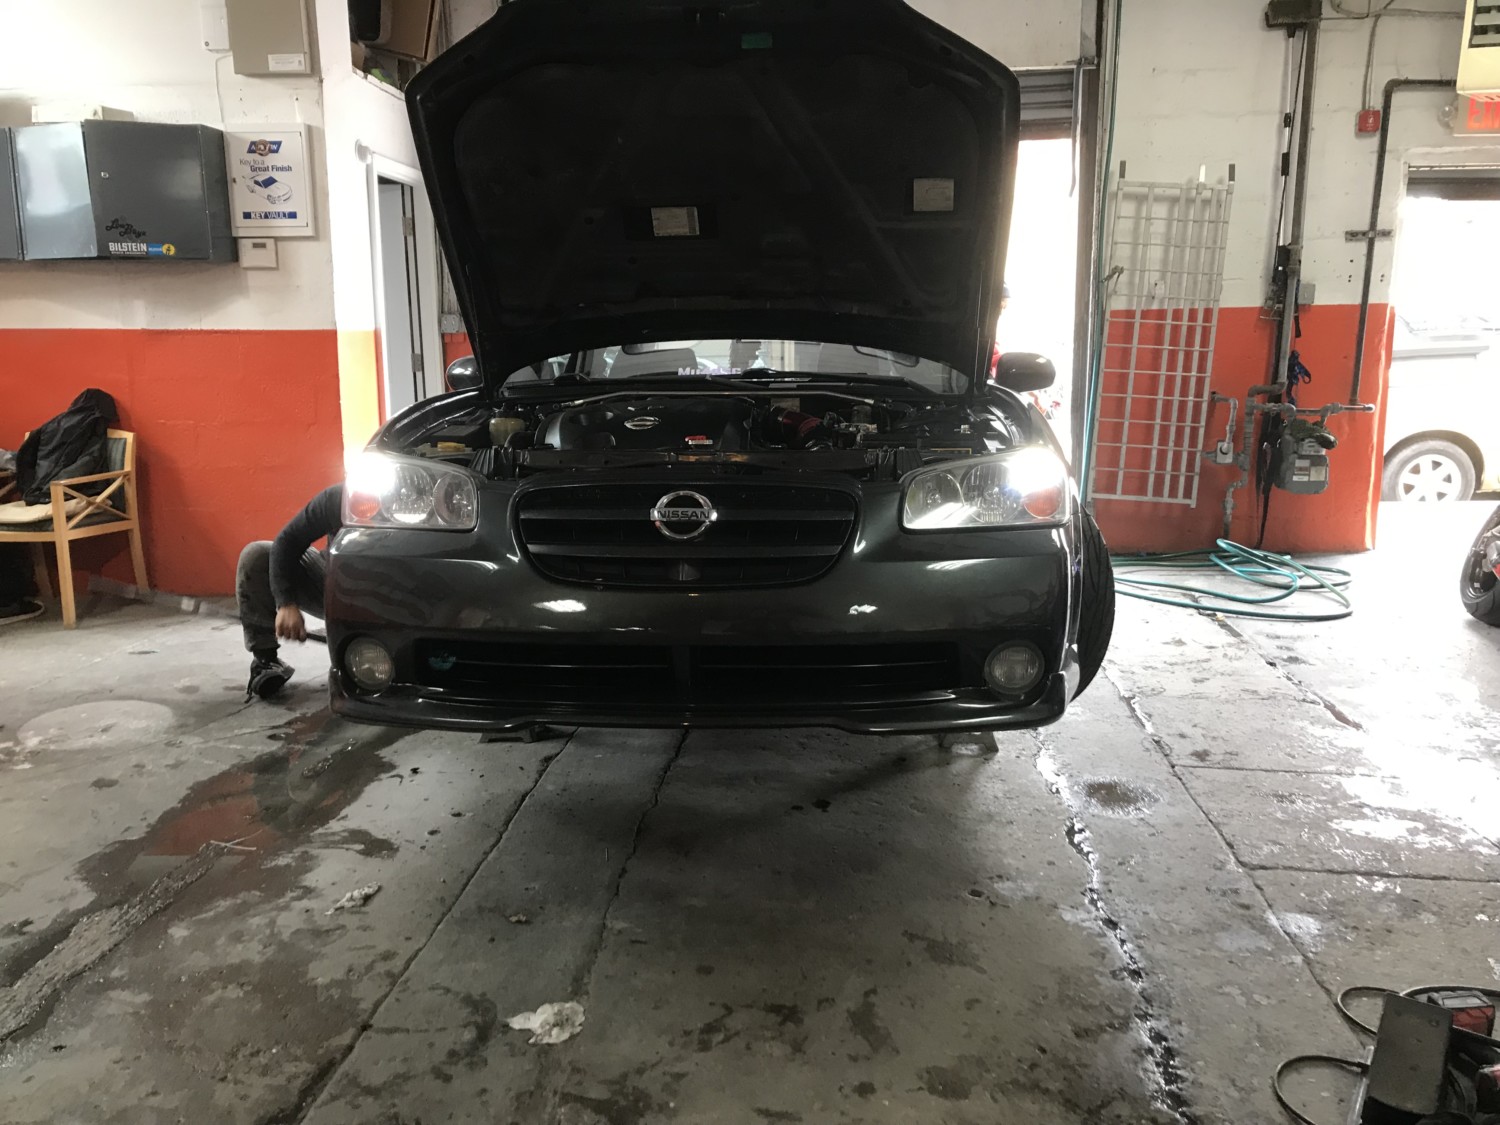
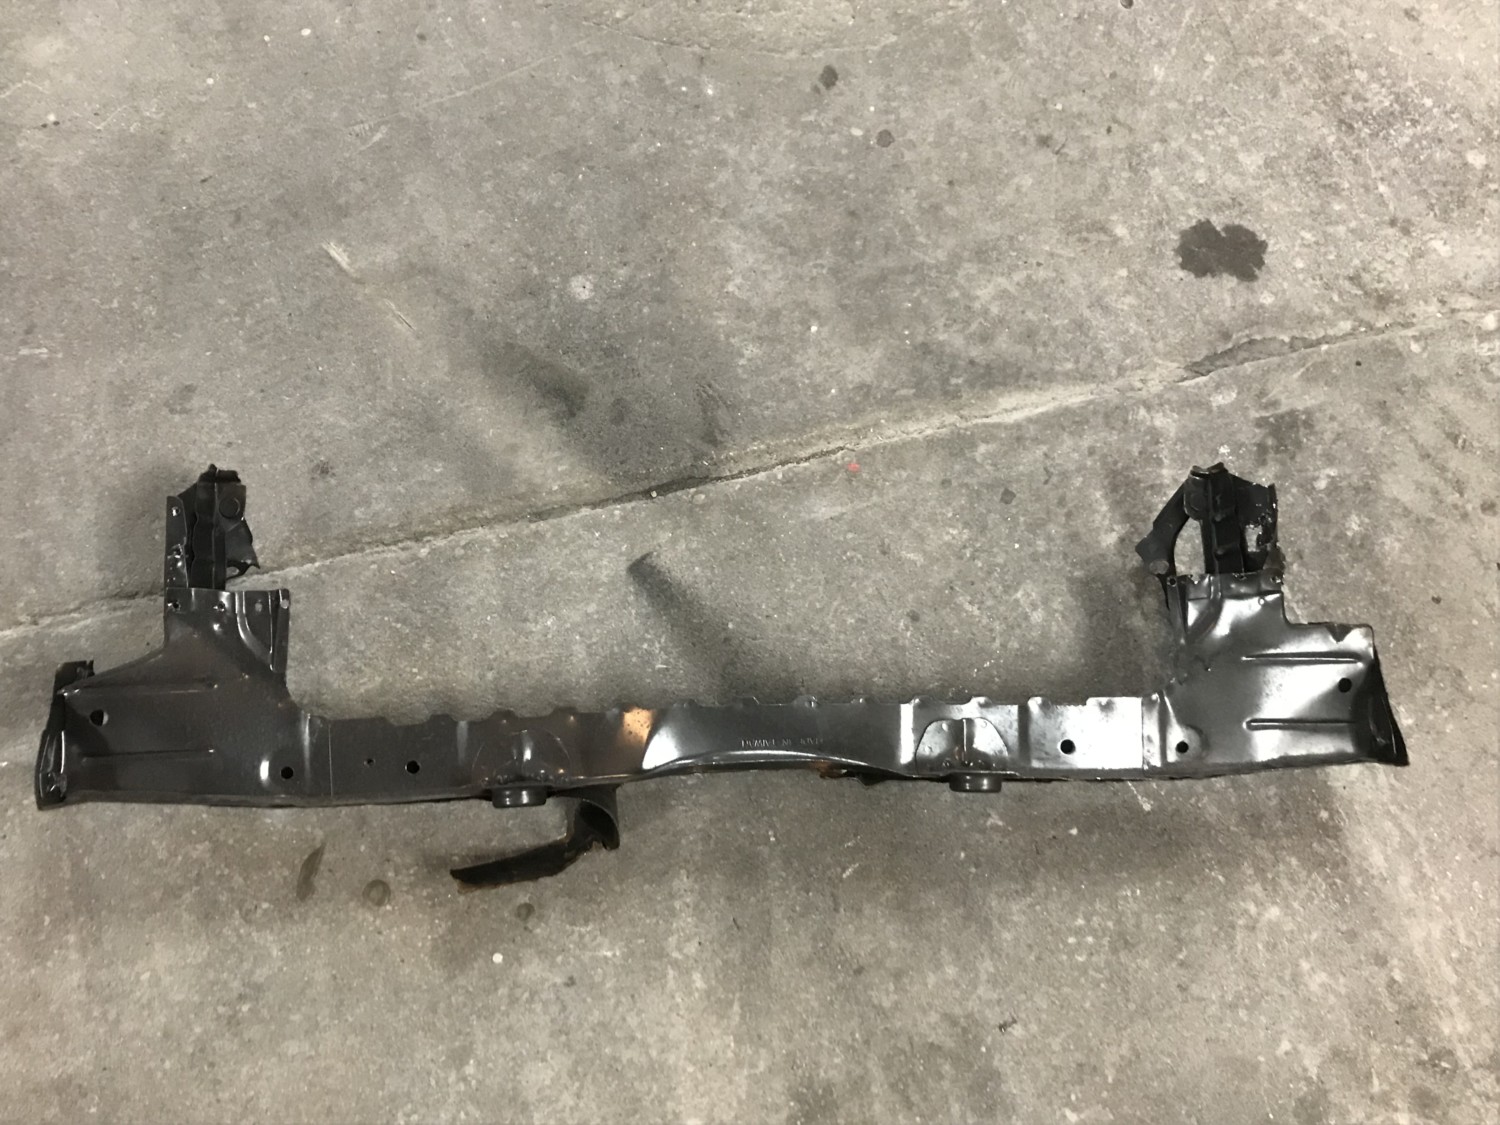
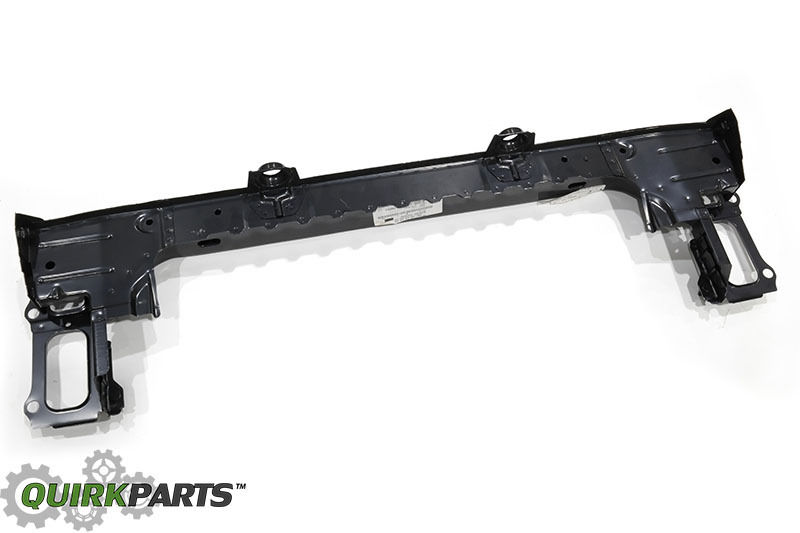
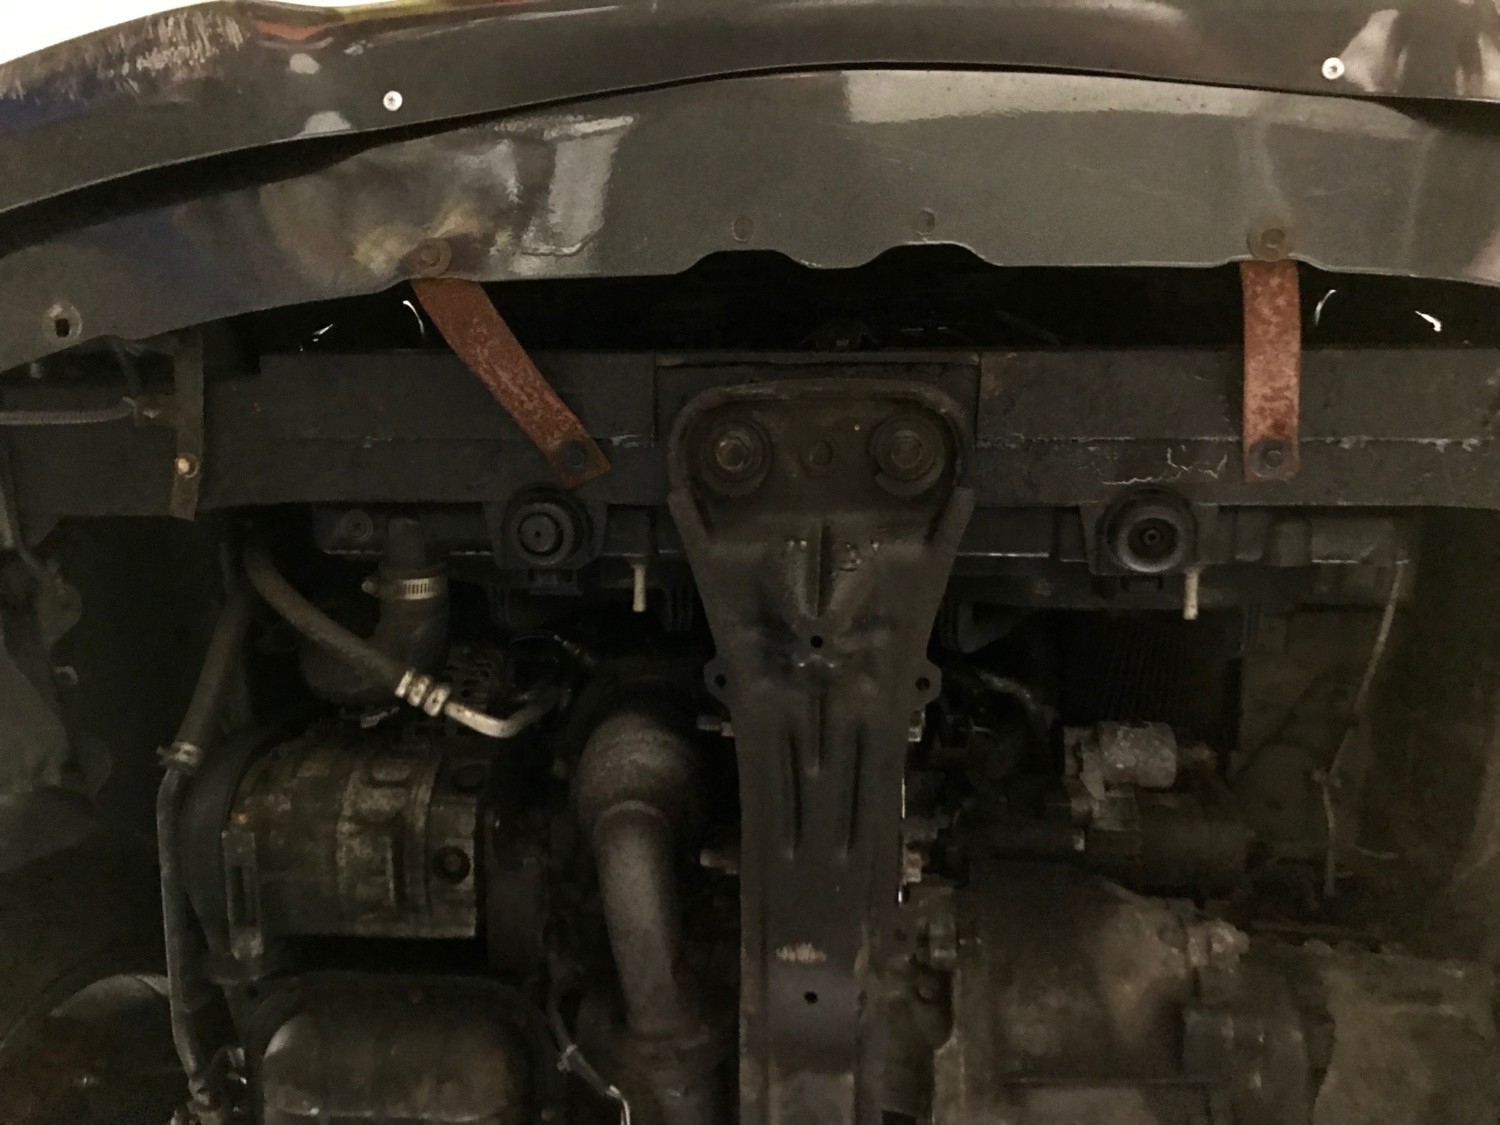
Before continuing to mod, I decided to replace the lower radiator support. The previous owners used the cheap flimsy one. I do not recommend this one. In fact, I felt unsafe driving around like that because upon hitting a bump the whole front would shake. It’s very thin. I decided to replace it with an OEM radiator support. I also reinforced it with a piece of steel from home depot. This increases its durability 4x. I don’t plan on ever having to replace it again!
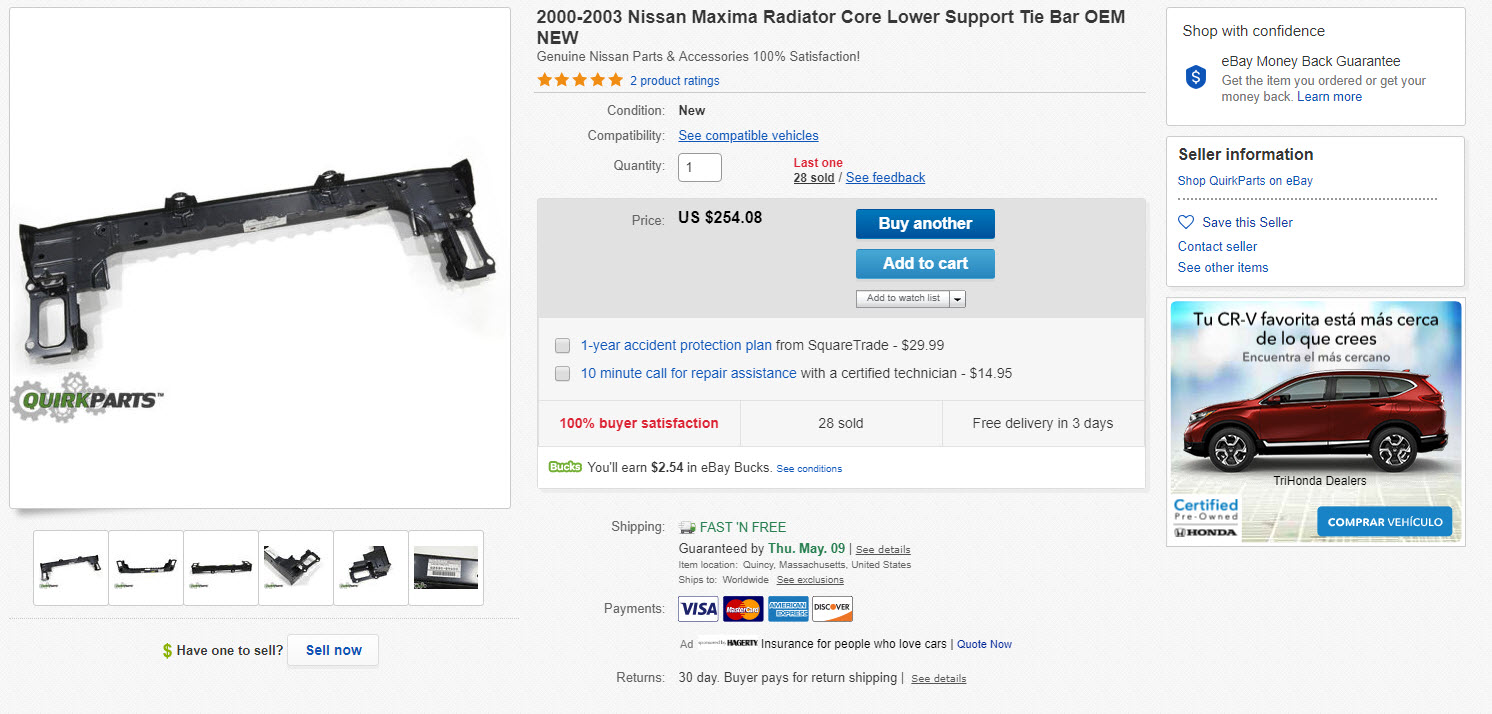
OEM Radiator Info

OEM Part Number: 62530-5Y000
Part Description: Support-Radiator Core, Lower
Price: $293.48 (Shipped)

Order Link: https://www.ebay.com/itm/192136232387

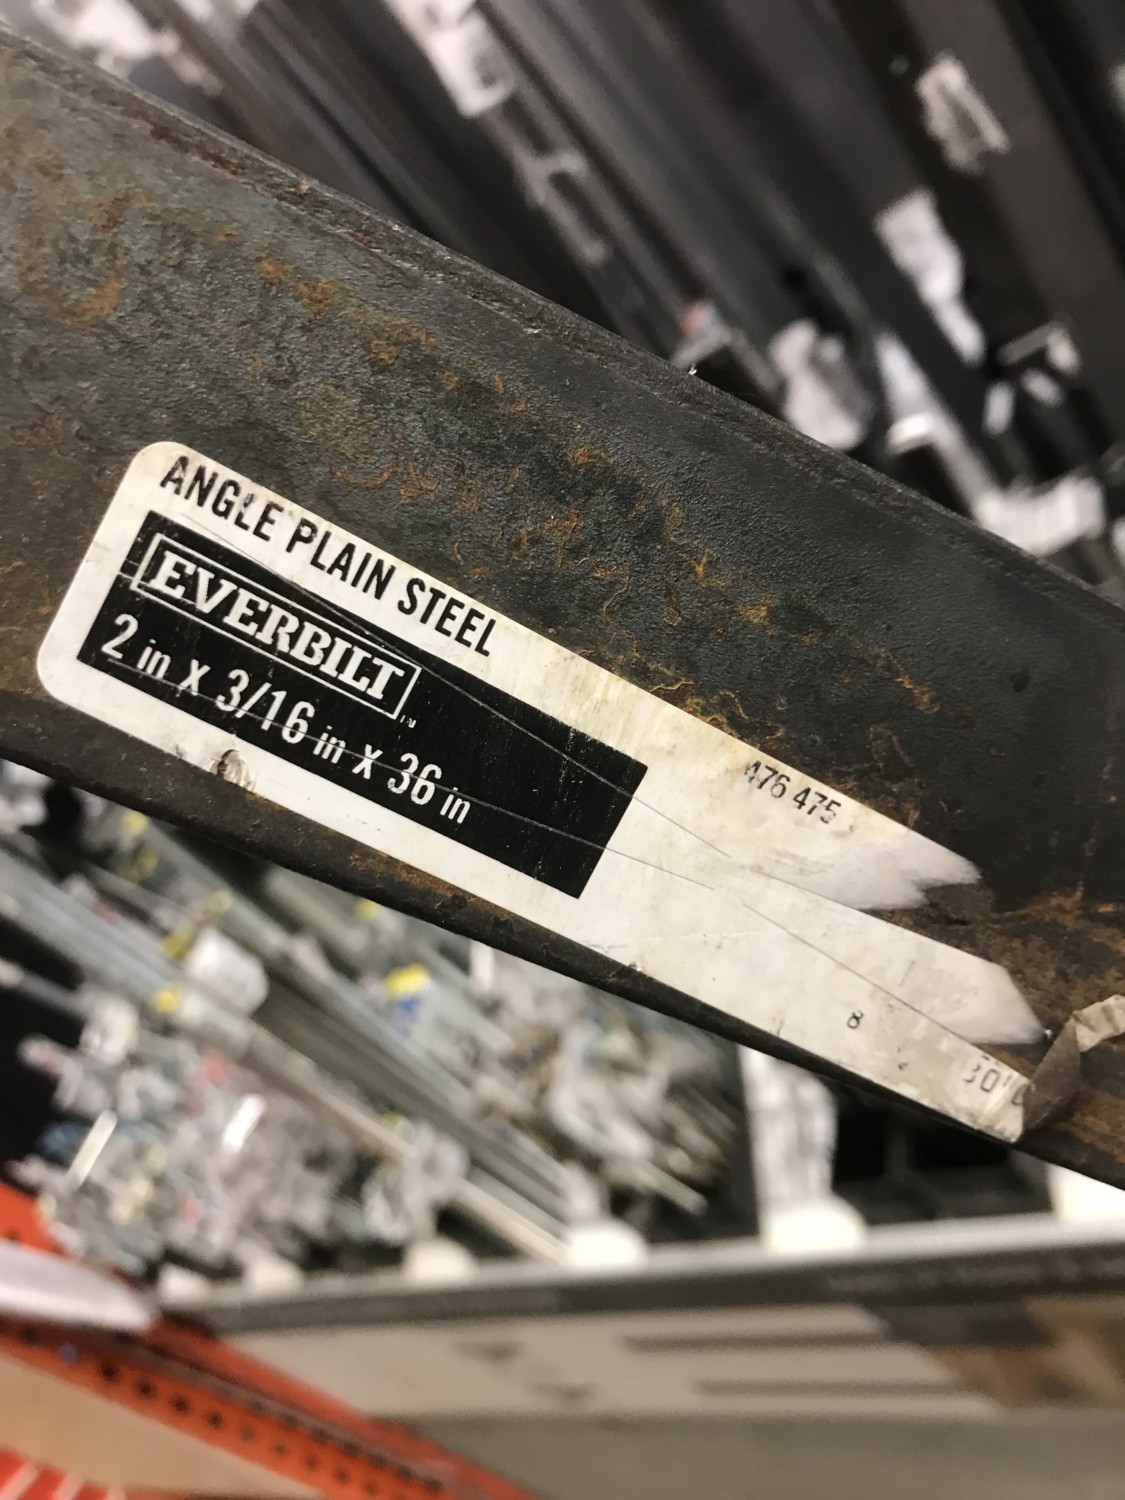
Home Depot Reinforcement Steel Bar

Home Depot Steel Part Number: Model # 803007 Store SKU #476475
Part Description: Everbilt 2 in. x 3/16 in. x 36 in. Plain Angle
Price: $16.47

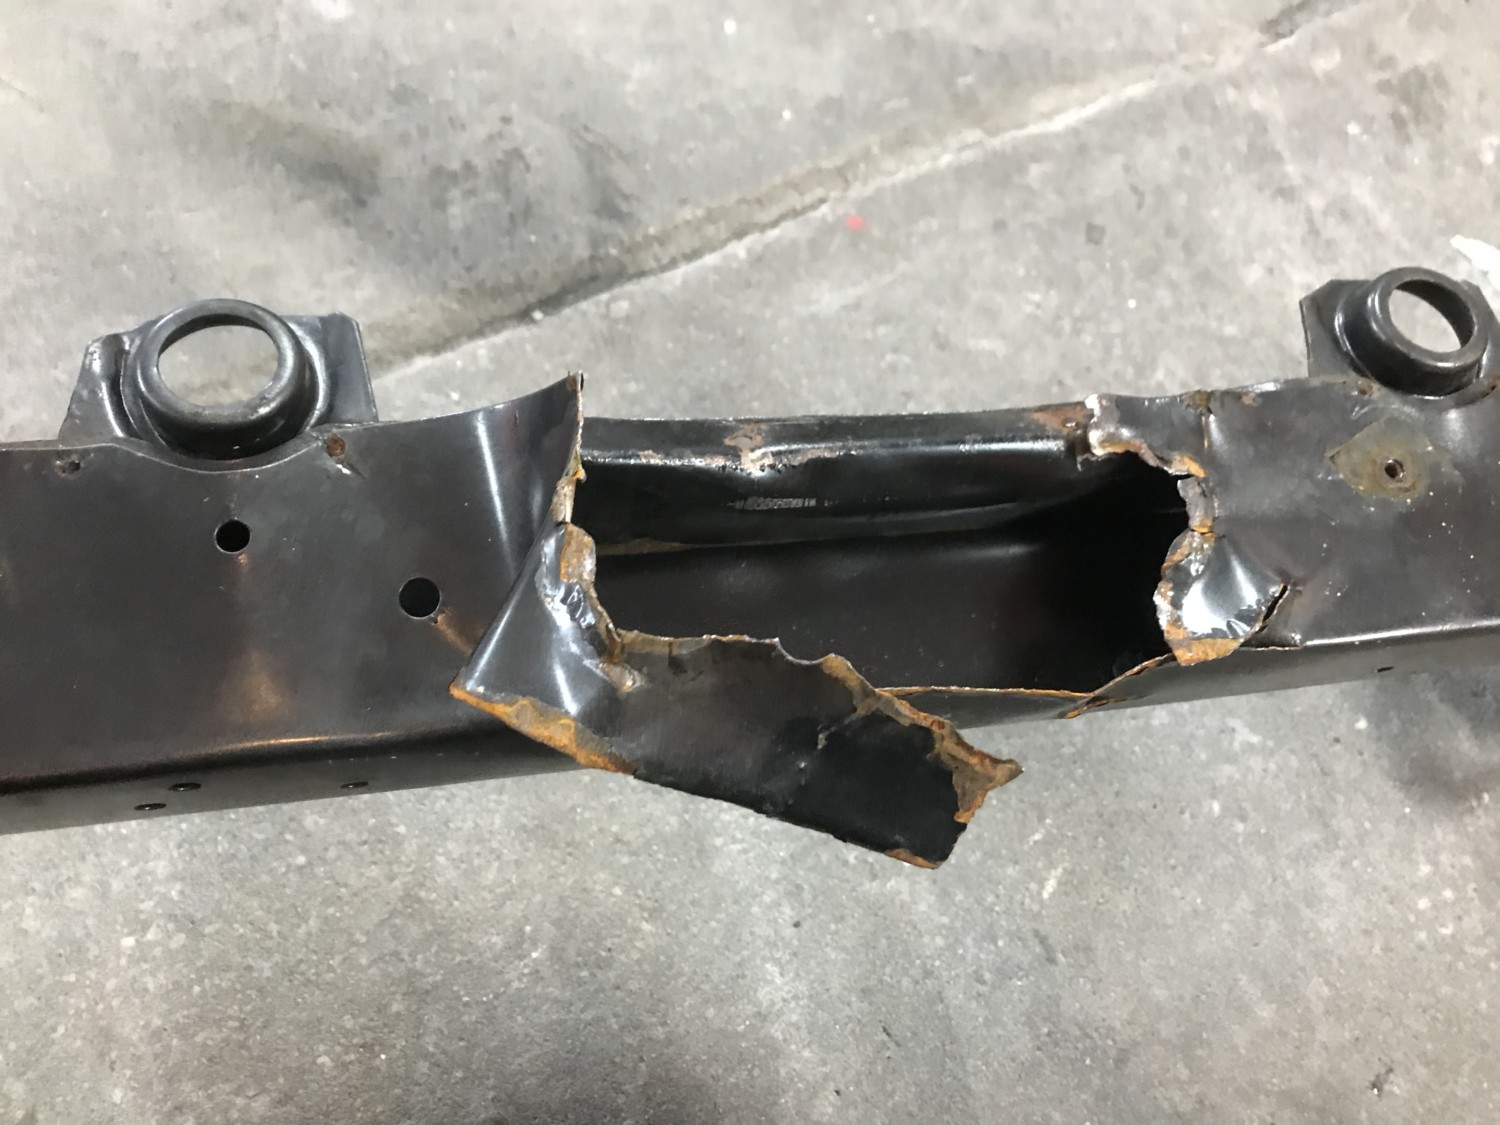
This is what happens to the aftermarket flimsy radiator support. It’s cheap and if you do it… you will have to do this job all over again at some point.

This is the reinforcement steel bar. It will strengthen the radiator support. Don’t forget to spray some Rustoleum on it to prevent any rust.

I got my OEM radiator support on eBay with quick shipping.

Finished Product:

Loading

Community Member Credit: luke95gxe

Tools Needed:

The first thing u wanna do is remove your intake to get some room

Then u need to hook a rubber hose to the bleeder valve on the slave and put the other end in a bottle to catch brake fluid.

Go ahead and open that bleeder 10mm take the cap of the master cylinder reservoir and let it drain out crack the upper bleeder open 12mm to speed up the process.

Then you wanna remove the slave cylinder (2 14mm bolts). You could probably leave it on to remove the old hose from it but it seems easier to remove the whole slave if you have a strut bar remove the driver side (3 14mm nuts) for room.

Once you get that out of the way go ahead and remove the 12mm bolt on the slave to remove the old hose then move up to the master cylinder.

Remove the old hard-line from the master cylinder 10mm. It’s tight right there but I managed it then you can hook the new ss line to the master cylinder mine was an 11mm nut yours may differ.

Then route the line where u want it and install the other end to the slave cylinder.

Once u do that you can do one of two things leave the old clutch lines on the car or remove them. I took mine out looks cleaner. I took some pics but remove them from the car is pretty easy here are the pics disconnect this

Remove the 2 10mm bolts here

There is a junction box right under the brake master cylinder where all this junk meets just unbolt and remove.

Now you need to bleed the line once that’s done enjoy a clutch line u shouldn’t need to replace.

Now let me say this I can deff feel a difference. wife drove it and says that the clutch pedal feels a lot tighter and more responsive best 25 bucks I spent. I recommend this mod to anyone with a 5 speed.

Loading

Community Member Credit: Eddy

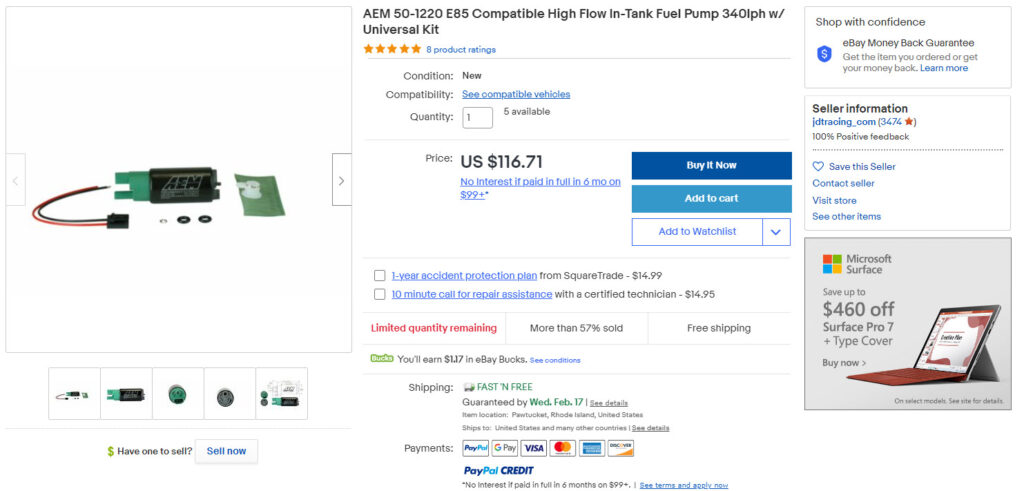
I just swapped my Walbro 255 Fuel Pump to an AEM 340LPH because I wanted something better suited for E85. I  also did not like the “whine” noise on the Walbro. The AEM 340 does not have the whining noise and works great. I also replaced my fuel filter. Nissan says that it is a “lifetime” part and never needs to be replaced. I disagree with that especially seeing how dirty and filthy my fuel filter looked. It’s very simple to change and the filter costs less than $30 bucks. This is just a reference post and not really a how-to on the AEM pump. I also added links to reputable AEM dealers where you can get it from on eBay. We recommend ordering from them as their pumps are 100% authentic (lots of fakes out there).

Fuel Pump Part Numbers:

  • 50-1200 (Price – $116.00 Shipped)
    This is the one used in this write-up. Works 100% perfectly fine with no issues. There is some minor trimming needed at the bottom of the sender. This is the same exact process for the folks that have ever installed a Walbro 255. So the trimming is not specific to this pump at all.Order Link: https://www.ebay.com/itm/330950170782
  • 50-1220 (Price – $116.00 Shipped)
    This one is a newer design from AEM that fits directly with no trimming. It is smaller in size but appears to work just the same. This was highlighted by a fellow EVO member who has a Maxima. While you will see the 50-1220 is specifically for 02-07 WRX STI / EVO X / GTR, it will work fine in the Maxima. We personally have not used it as the 50-1200 worked perfectly fine.Order Link: https://www.ebay.com/itm/274522031531

Recommend OEM Replacement Part Numbers: 

  • Fuel Filter Part Number: 16400-2Y505 (Price – $25.00)
  • Fuel Pump Sending Unit O-Ring: 17342-01A00 (Price – 16.00)

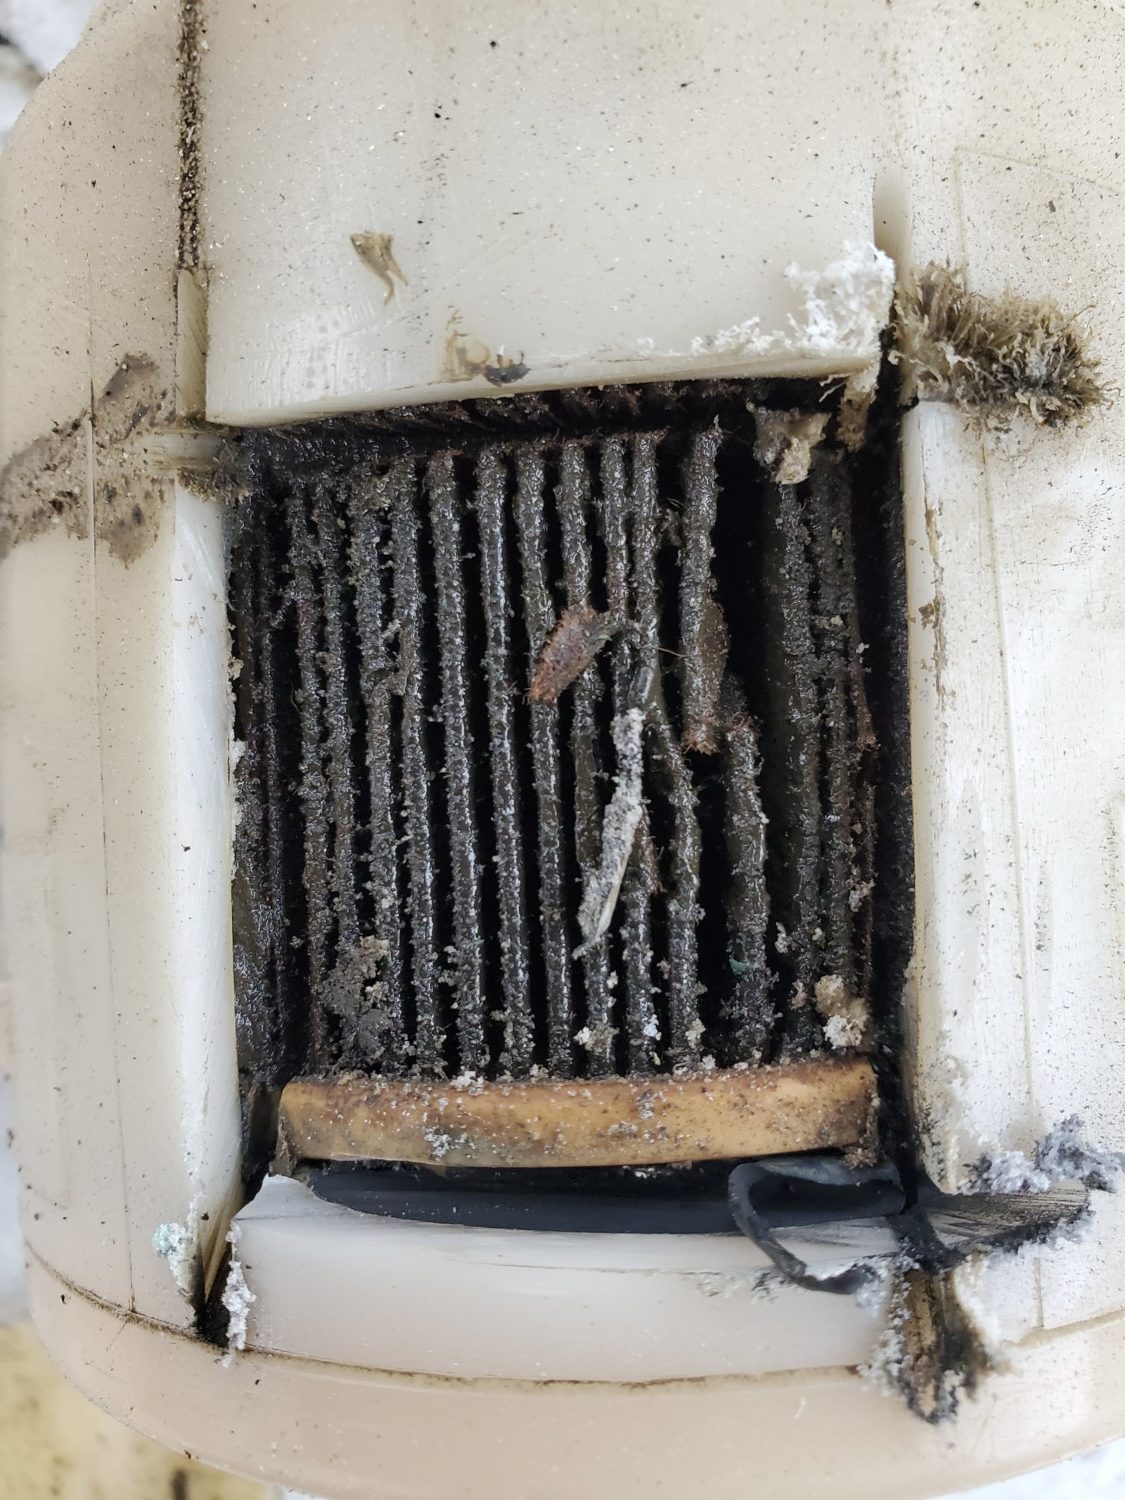
New OEM Filter vs Old Filter (Likely never been changed)

I cut the old filter so you can see how dirty and filthy it is. 

Fuel Pump Differences (#50-1200 Used for This Write-up)

Loading

Community Member Credit: Ben Garner

The ECU monitors the transmission-mounted speed sensor to determine vehicle speed. When the vehicle speed limit is reached, the ECU cuts the fuel flow to the engine to slow the car. Ok, in no way do I condone breaking any laws. I figured out how to get rid of the speed limiter on the 4thgen with automatic transmission. This also works on 5thgen Maxima with automatic transmission. 

The signal path for the vehicle speed sensor is as follows:

  • Sensor to Speedometer
  • Speedometer to ECU & Cruise Control

If the signal is interrupted at the actual connection to the ECU, speedometer, odometer, and cruise control functions are preserved. The ECU does not receive a vehicle speed signal, therefore it will not limit the vehicle speed. This modification is easy. But beware, it does include modification of the factory ECU wiring harness…not for the inexperienced.

Tools and Supplies Needed:

  • Socket Wrench
  • Socket Wrench Extension
  • 12mm Socket
  • Crimp Tool

Disconnect the negative battery terminal

Remove ECU cover from passenger side footwell.

Loosen bolt in the center of the main ECU connector using your 12 mm Socket / Socket Wrench and Extension.

Unplug the main ECU connector. Remove snap-on plastic cover from ECU connector.

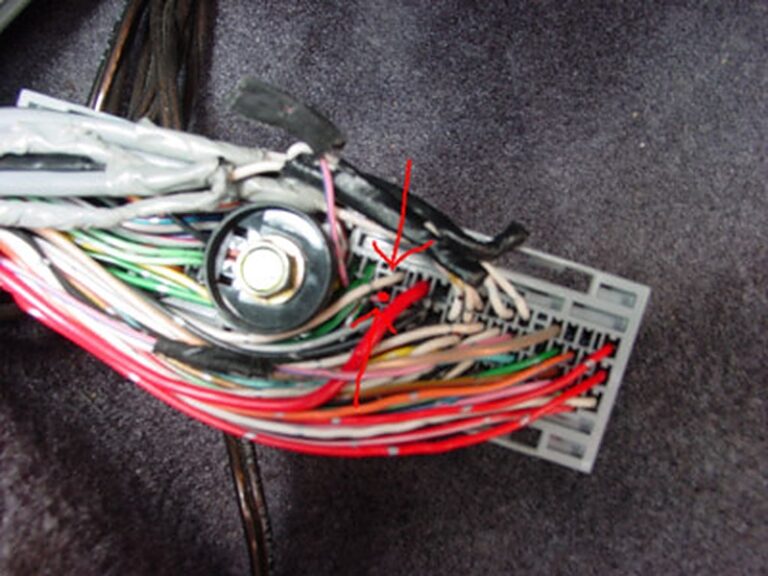
Locate PINK wire with BLUE stripe. (This wire is located on the right half of the connector when plugged in ECU PIN 29)

Cut PINK/BLUE Wire (It is recommended that you wire this up to a separate switch so you can turn it on/off when needed. Ensure that you do not cut the Fuel Temp Wire as it is also PINK/BLUE)

If you check the codes, you will get P0104 (Vehicle speed sensor fault) and P0504 (A/T control unit fault). To prevent the CEL you can use a switch to switch on/off for the quick burst for going over 120+ MPH. So far there have been no drivability problems associated with this mod.

Reassemble ECU connection and Reconnect negative battery terminal.

Verify the speed limiter/governor is removed by going past your previously limited speed.

Image result for 4thgen maxima speedometer

Disclaimer: This mod is entirely up to you so do this at your own risk. This modification will cause the “check engine” light to illuminate.

Loading

Community Member Credit: R&D Factory

Here are DIY instructions on how to replace the OEM seals on your Nissan VQ engine.

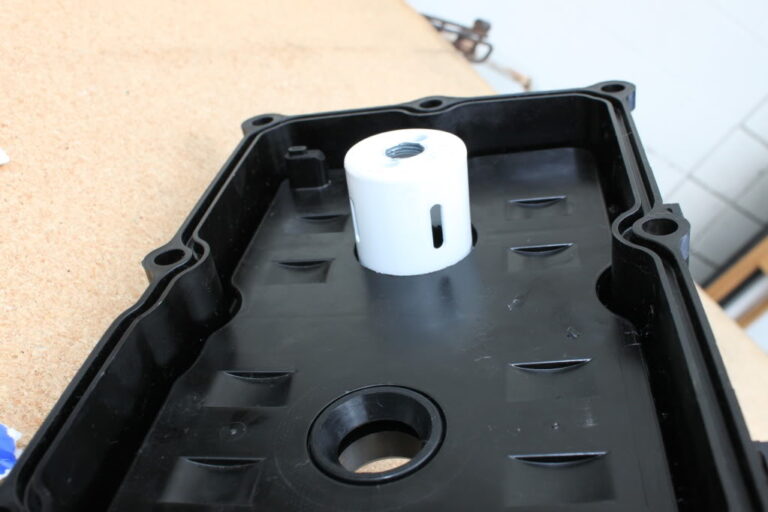
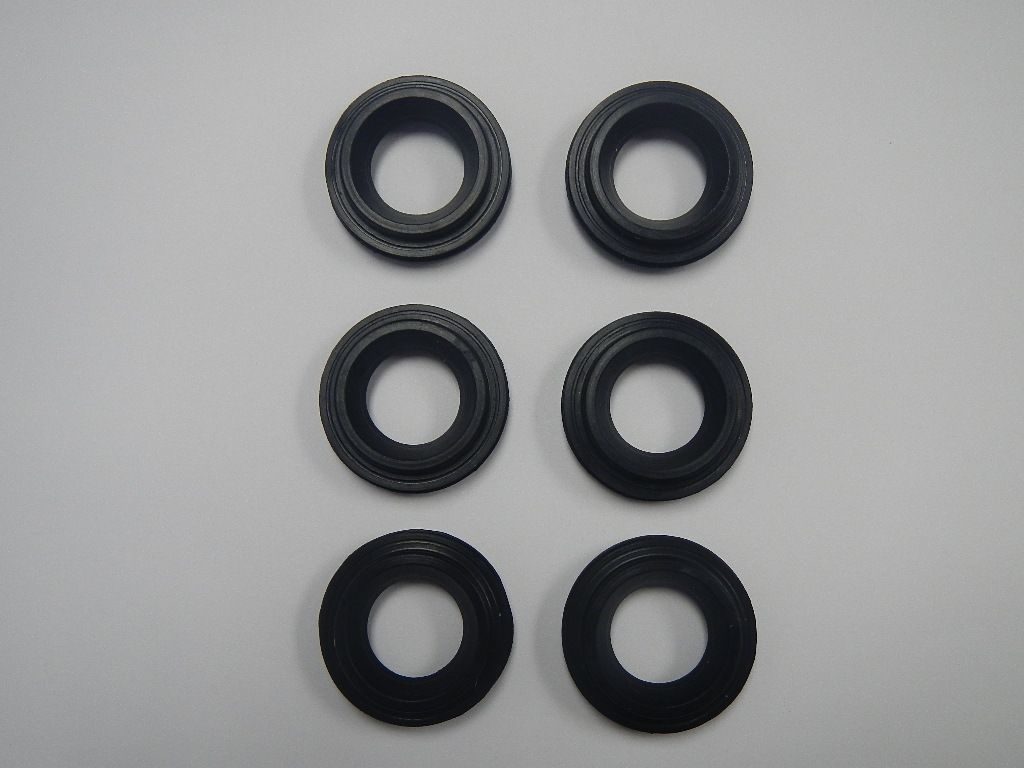
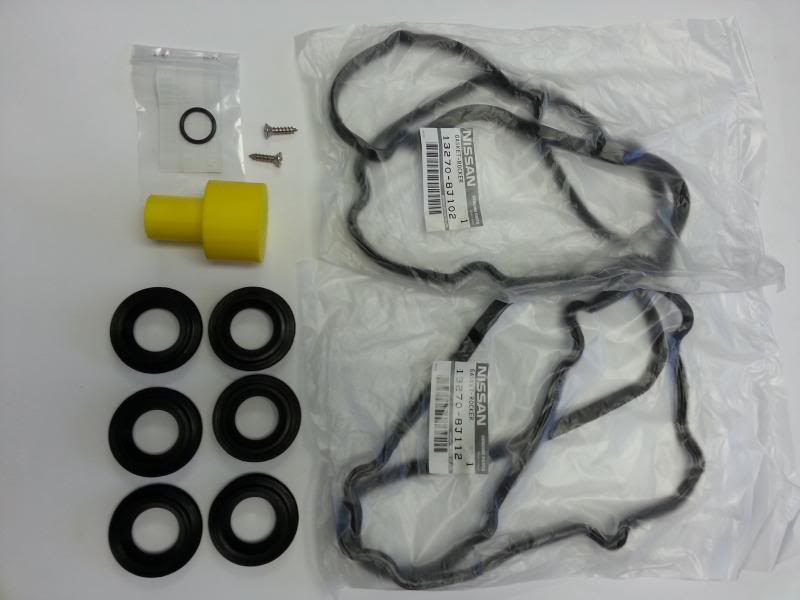
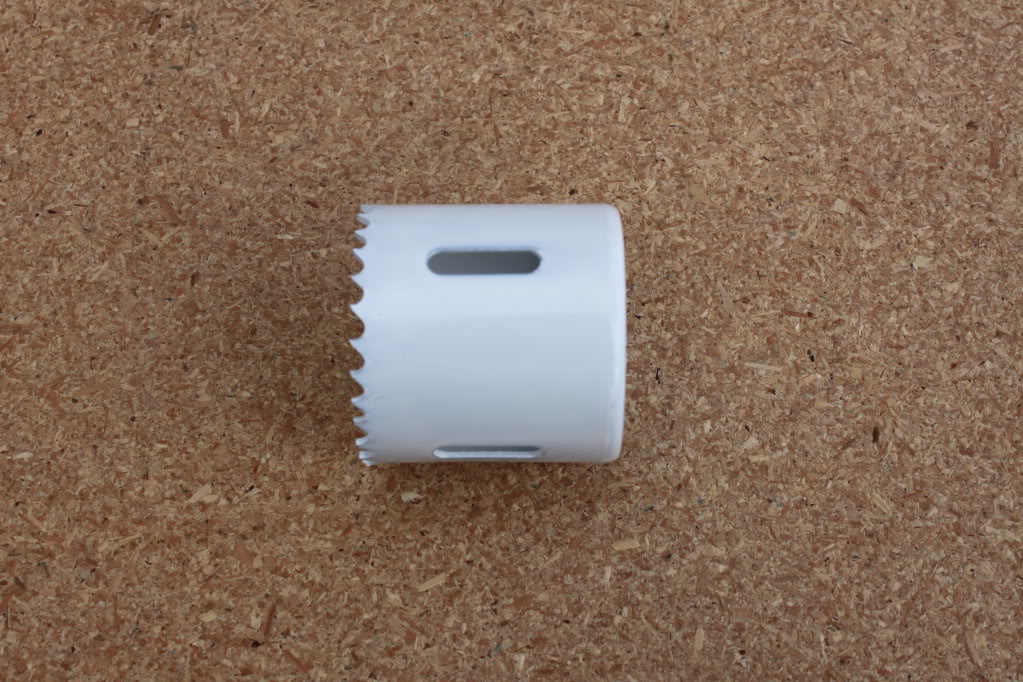
At R&D Factory, we service many Nissans and Infiniti’s daily and run into the same valve cover/spark plug o-ring leak. About 75% of the vehicles that we serve have the same problems. Even though it’s money out of customer’s pocket after spending so much money on these valve covers we were thinking there has to be a way to cut the cost so here we are. R&D has come out the kit will come with both driver and passenger side valve cover gasket, six o-ring gaskets, and simple instructions on how to replace them. Your warranty should and will cover leaking valve cover o-rings grommets. we do advise you to check for a leak before your warranty is over…. the whole idea of us making these o-rings grommets were for those who have leaking o-rings grommets yet their warranty is already over. We do drill out the old o-ring grommets with the hole saw size 2 inch. It is slightly bigger than the existing hole and slightly smaller than the o-ring

Part Needed

$75 for 6 Grommets (O-ring gasket)

$120 for 6 Grommets (O-ring gasket) and OEM valve cover gaskets (both side), PCV Valve o-ring

Instructions

1- THIS IS A SIMPLE HOLE SAW (SIZE 1 7/8 INCH) THAT YOU CAN BUY FROM MOST HARDWARE STORE. WE GOT OURS FROM ACE HARDWARE AND IT WAS $7-11

Name: IMG_4589.jpg Views: 592 Size: 181.8 KB

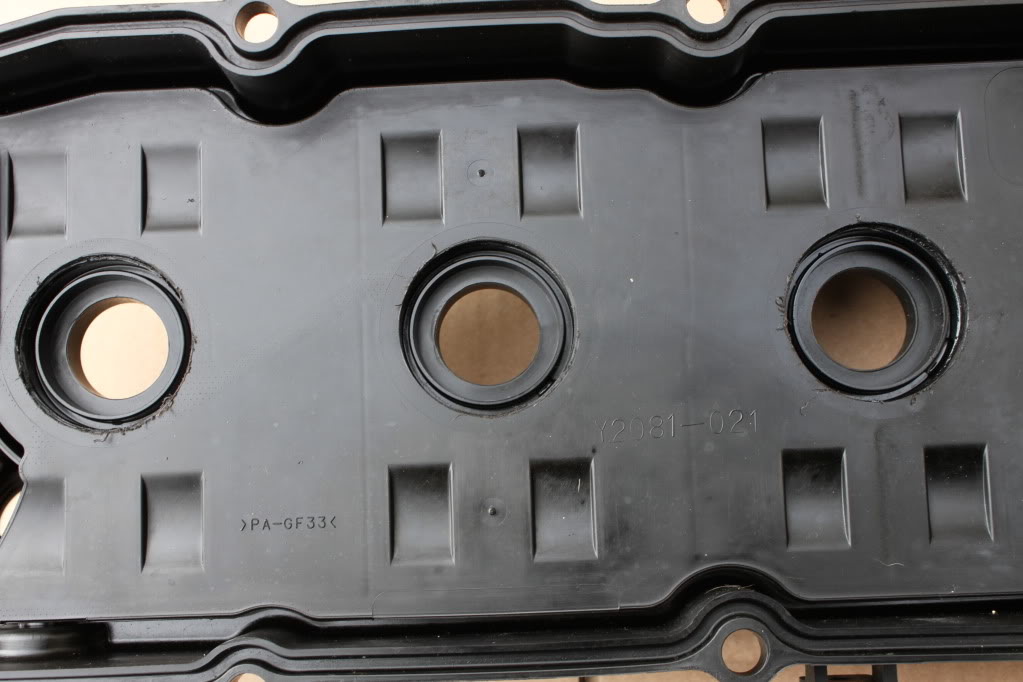
2- THIS IS HOW YOUR VALVE COVER LOOKS WHEN YOU TAKE IT OFF OF YOUR ENGINE

Name: IMG_3.jpg Views: 735 Size: 149.7 KB

NOTE PICTURE SHOWN MOST LEFT SPARK PLUG HOLE DRILLED.

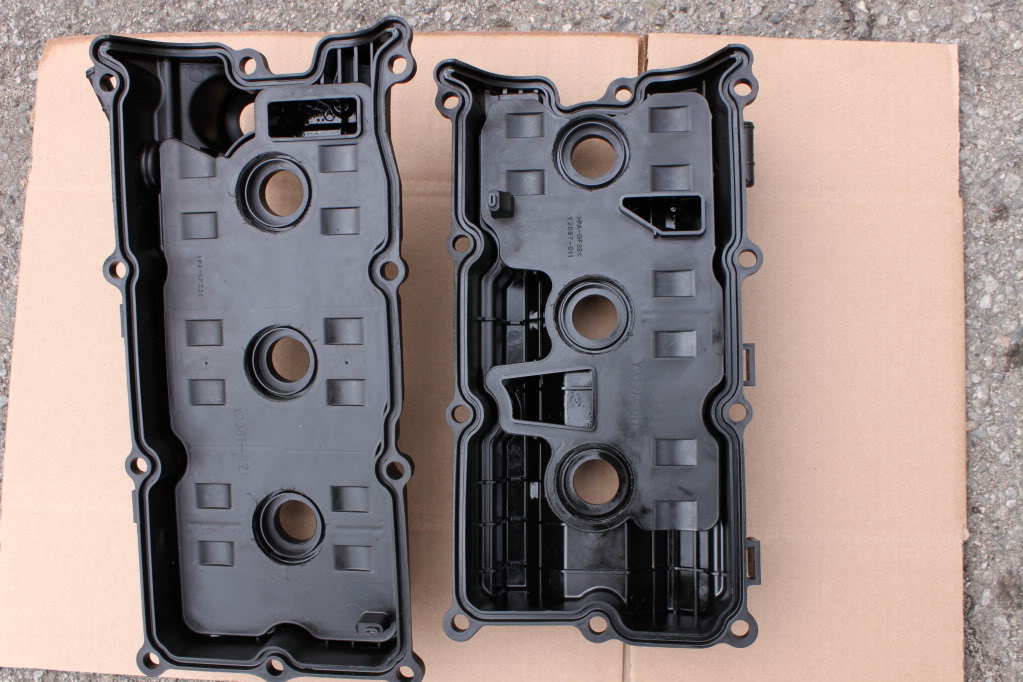
3- WARNING “PLEASE DO NOT REMOVE BAFFLE PLATE” WARNING

Name: IMG_4.jpg Views: 648 Size: 142.1 KB

4- POSITION THE HOLE-SAW CONCENTRIC TO SPARKPLUG HOLE AND DRILL BAFFLE PLATE SLOWLY AND CAREFULLY.

Name: IMG_4590.jpg Views: 623 Size: 72.6 KB

Name: IMG_4591.jpg Views: 607 Size: 65.9 KB

5- YOU WILL ONLY NEED TO DRILL JUST ENOUGH TO DRILL THROUGH THE BAFFLE PLATE (WE CLEANED UP ALL THE DEBRIS TO SHOW YOU CLEAR PICTURE DRILL ALL 6 POSITIONS AND CLEAN OFF DEBRIS WHEN DONE.

Name: IMG_4607.jpg Views: 562 Size: 81.7 KB

Name: IMG_4608.jpg Views: 605 Size: 119.6 KB

6- NOW YOU WILL BE ABLE TO POP OUT THE OLD O-RING GROMMET OUT OF THE VALVE COVER. PLEASE REPEAT 6 TIMES.

Name: IMG_8.jpg Views: 682 Size: 120.1 KB

7- THIS IS WHAT IT WOULD LOOK LIKE WITH THE O-RING GROMMET OUT

Name: IMG_4607.jpg Views: 562 Size: 81.7 KB

8- USE BLACK RTV SILICONE ON TOP SIDE OF THE NEW O-RING GROMMET (WE USED CLEAR ON OUR DEMO PICTURE SO YOU CAN SEE BETTER)

Name: IMG_10.jpg Views: 701 Size: 128.7 KB

9- PLACE THE NEW O-RING GASKET IN TO THE HOLE. NOW YOU ARE READY TO RE-INSTALL YOUR VALVE COVER GASKET TO YOUR ENGINE.

Name: IMG_4609.jpg Views: 594 Size: 97.9 KB

Name: IMG_4610.jpg Views: 600 Size: 106.5 KB

Video:

Loading

Community Member Credit: ViperVadim / Eddy

This will allow you to use a newer Mass Airflow Sensor to your 2002-2003 Nissan Maxima.  This upgrade has been available for many years in the Maxima community. The newer MAF sensor is pretty much the same as 90% of the newer Nissan Models. Much cheaper and easier to find. You just need to be sure you also use the newer MAF housing when installing.

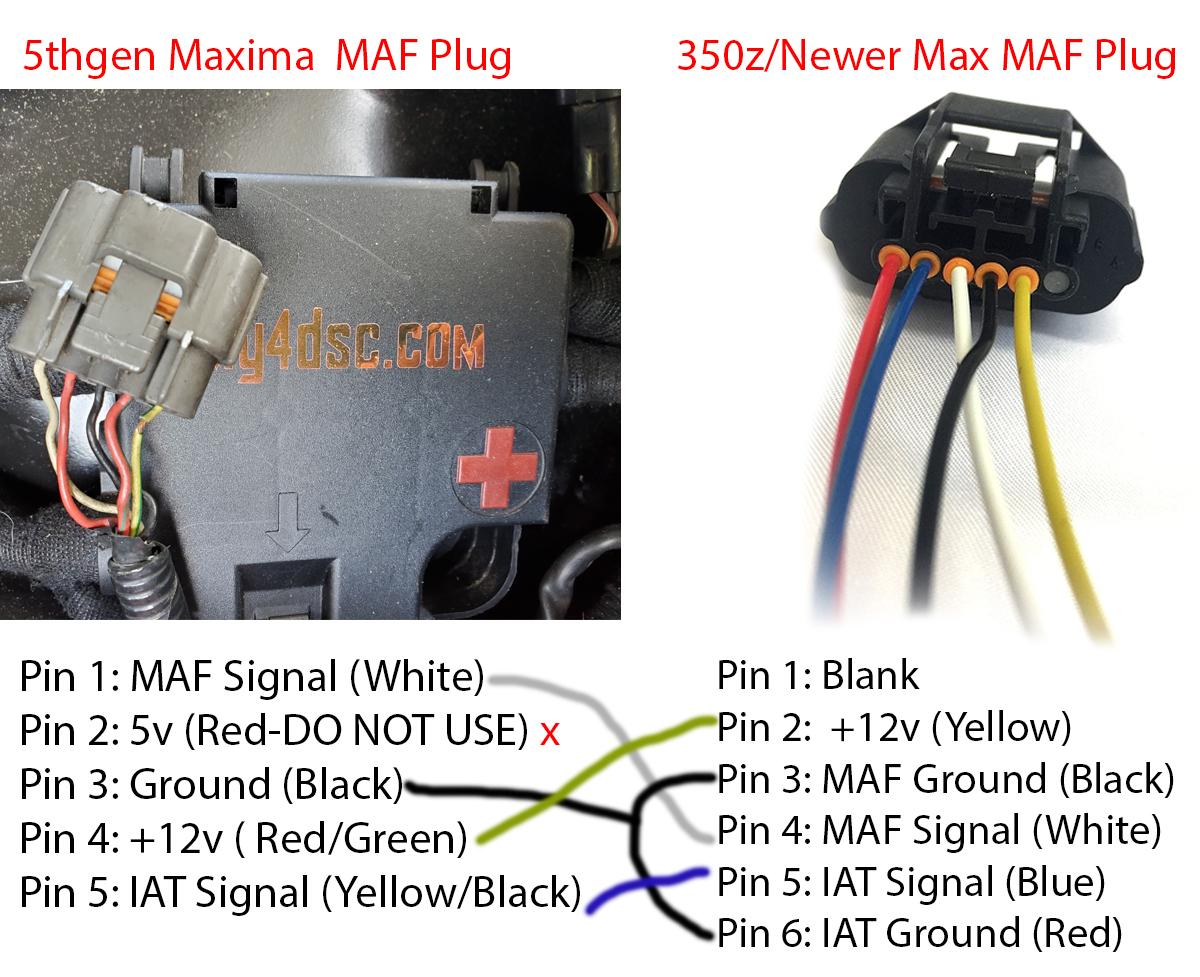
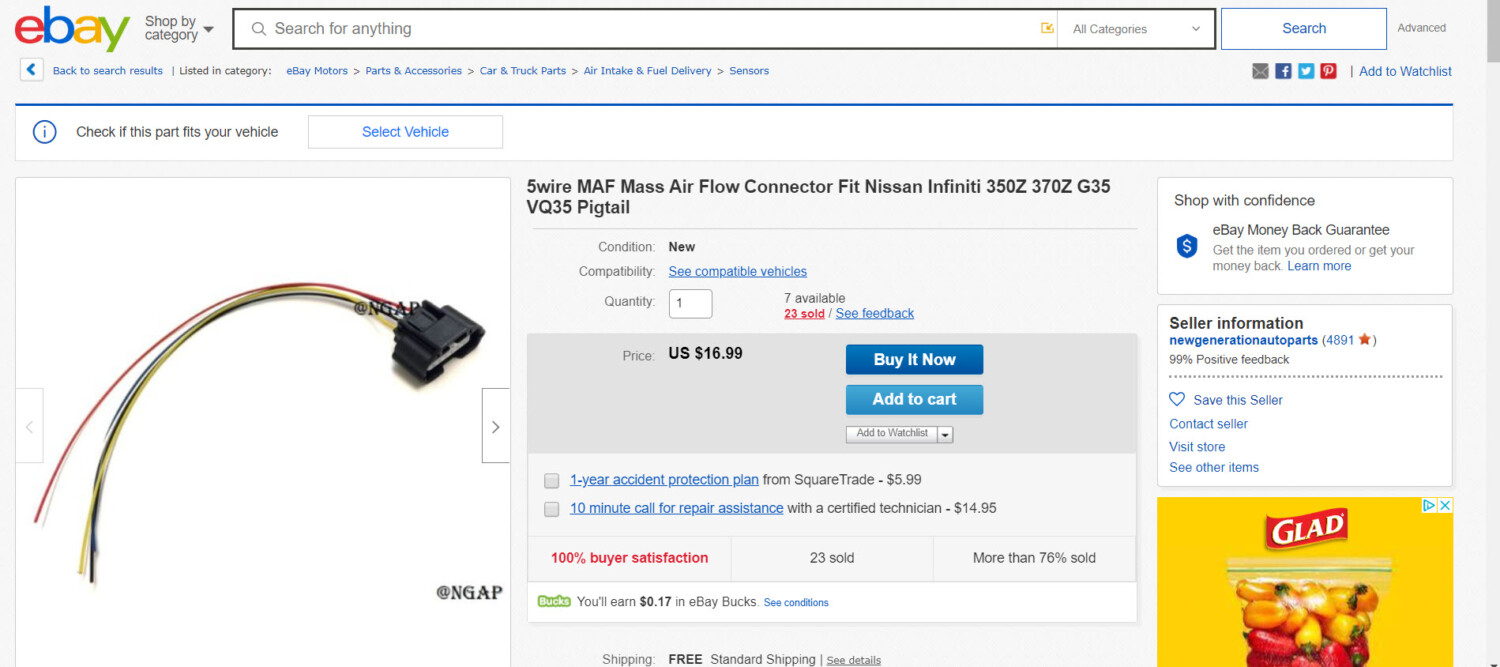
You can either get an OEM pigtail or use the one from eBay below. I went with the eBay pigtail which costs around $16 bucks shipped. The most important part is that you follow the pin order (wire colors do not really matter as long you follow pin order).

Pigtail eBay Link: https://www.ebay.com/itm/173475047847

*********************************
Important Note: In order to properly use this new MAF, your car will require tuning. The car will drive OK but your idle will be off and may fluctuate. If you’re preparing to get an ECU tune using stock ECU, make sure to let your tuner know so new MAF can be factored in.
*********************************

For installing, you just need to match the wires as noted below. Very simple but please proceed with caution.

2002-2003 5thgen Maxima MAF Pinout

Pin 1: MAF Signal (White)
Pin 2: 5v (Red-DO NOT USE) x
Pin 3: Ground (Black)
Pin 4: +12v ( Red/Green)
Pin 5: IAT Signal (Yellow/Black)

350z / Newer Maxima MAF Pinout

Pin 1: Blank
Pin 2: +12v (Yellow)
Pin 3: MAF Ground (Black)
Pin 4: MAF Signal (White)
Pin 5: IAT Signal (Blue)
Pin 6: IAT Ground (Red)

eBay MAF Pigtail

For reference, once you swap to this MAF… you can use MAF’s from any of the cars below. They all share the same exact MAF which makes this a better option.

NISSAN
 
350Z 2003-2008
370Z 2009+
Altima 2004+
Armada 2004+
Cube 2009-2012
Frontier 2005+
GTR 2009+
Maxima 2004+
Murano 2003+
NV1500 2012-2014
NV2500 2012-2014
NV3500 2012-2014
NV200 2013-2015
Pathfinder 2005+
Quest 2004+
Rogue 2008+
Sentra 2004+
Titan 2004+
Versa 2008+
Xterra 2005+
 
INFINITI
 
EX35 2008+
EX37 2011+
FX35 2003+
FX37 2013+
FX45 2005-2008
FX50 2009-2013
G25 2011+
G35 2004-2007
G37 2008+
JX35 2013+
M35 2006-2010
M37 2011+
M45 2006-2010
M56 2011+
Q45 2005-2006
Q50 2014+
Q60 2014+
Q70 2014+
QX50 2014+
QX56 2004+
QX60 2014+
QX70 2014+
QX80 2014+


Loading

Community Member Credit: ViperVadim / Eddy

This will allow you to use a newer Mass Airflow Sensor to your 2000-2001 Nissan Maxima.  This upgrade has been available for many years in the Maxima community. The newer MAF sensor is pretty much the same as 90% of the newer Nissan Models. Much cheaper and easier to find. You just need to be sure you also use the newer MAF housing when installing.

You can either get an OEM pigtail or use the one from eBay below. I went with the eBay pigtail which costs around $16 bucks shipped. The most important part is that you follow the pin order (wire colors do not really matter as long you follow pin order).

Pigtail eBay Link: https://www.ebay.com/itm/173475047847

*********************************
Important Note: In order to properly use this new MAF, your car will require tuning. The car will drive OK but your idle will be off and may fluctuate. If you’re preparing to get an ECU tune using stock ECU, make sure to let your tuner know so new MAF can be factored in.
*********************************

For installing, you just need to match the wires as noted below. Very simple but please proceed with caution.

2000-2001 5thgen Maxima MAF Pinout

Pin 1: White = MAF signal (White)
Pin 2: 5v (Red-DO NOT USE) x
Pin 3: Ground (Black)
Pin 4: +12v ( Red/Green)
Pin 5: Blank

Separate IAT Sensor Plug
Pin 1: IAT Signal (Light Blue)
Pin 2: Ground (Black)

350z / Newer Maxima MAF Pinout

Pin 1: Blank
Pin 2: +12v (Yellow)
Pin 3: MAF Ground (Black)
Pin 4: MAF Signal (White)
Pin 5: IAT Signal (Blue)
Pin 6: IAT Ground (Red)

eBay MAF Pigtail

For reference, once you swap to this MAF… you can use MAF’s from any of the cars below. They all share the same exact MAF which makes this a better option.

NISSAN
 
350Z 2003-2008
370Z 2009+
Altima 2004+
Armada 2004+
Cube 2009-2012
Frontier 2005+
GTR 2009+
Maxima 2004+
Murano 2003+
NV1500 2012-2014
NV2500 2012-2014
NV3500 2012-2014
NV200 2013-2015
Pathfinder 2005+
Quest 2004+
Rogue 2008+
Sentra 2004+
Titan 2004+
Versa 2008+
Xterra 2005+
 
INFINITI
 
EX35 2008+
EX37 2011+
FX35 2003+
FX37 2013+
FX45 2005-2008
FX50 2009-2013
G25 2011+
G35 2004-2007
G37 2008+
JX35 2013+
M35 2006-2010
M37 2011+
M45 2006-2010
M56 2011+
Q45 2005-2006
Q50 2014+
Q60 2014+
Q70 2014+
QX50 2014+
QX56 2004+
QX60 2014+
QX70 2014+
QX80 2014+

Loading