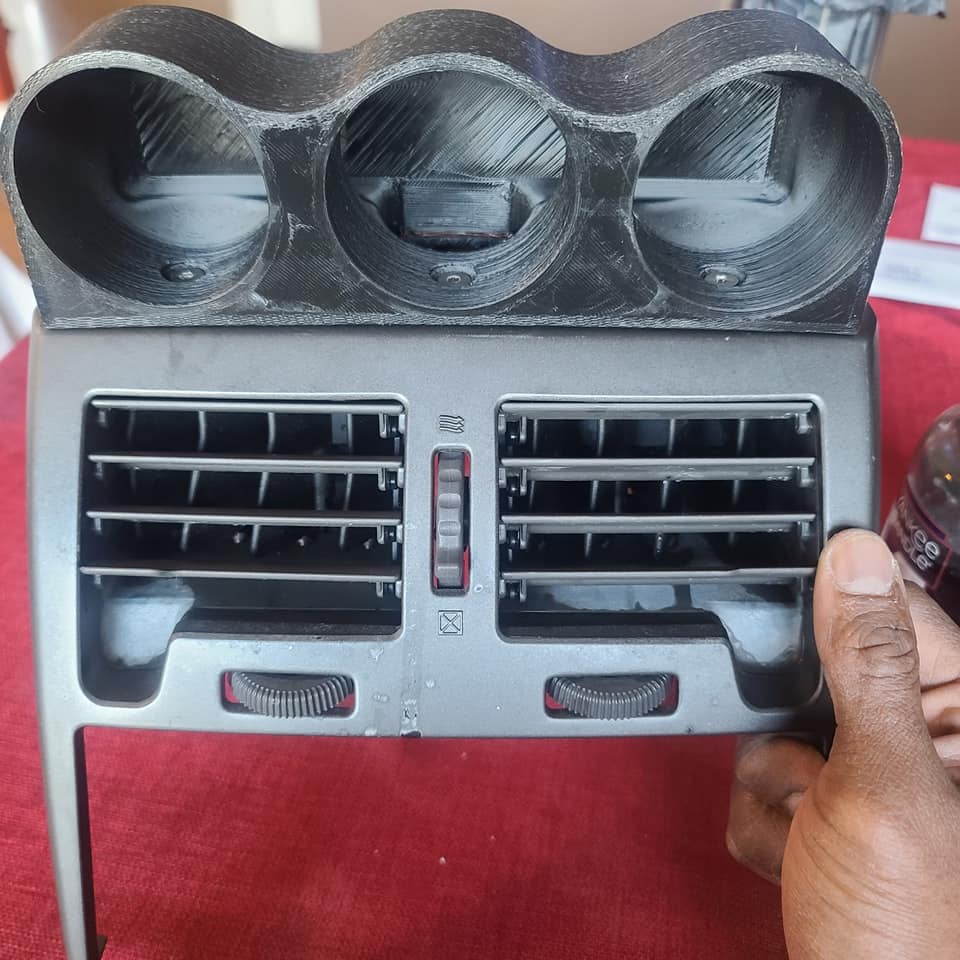
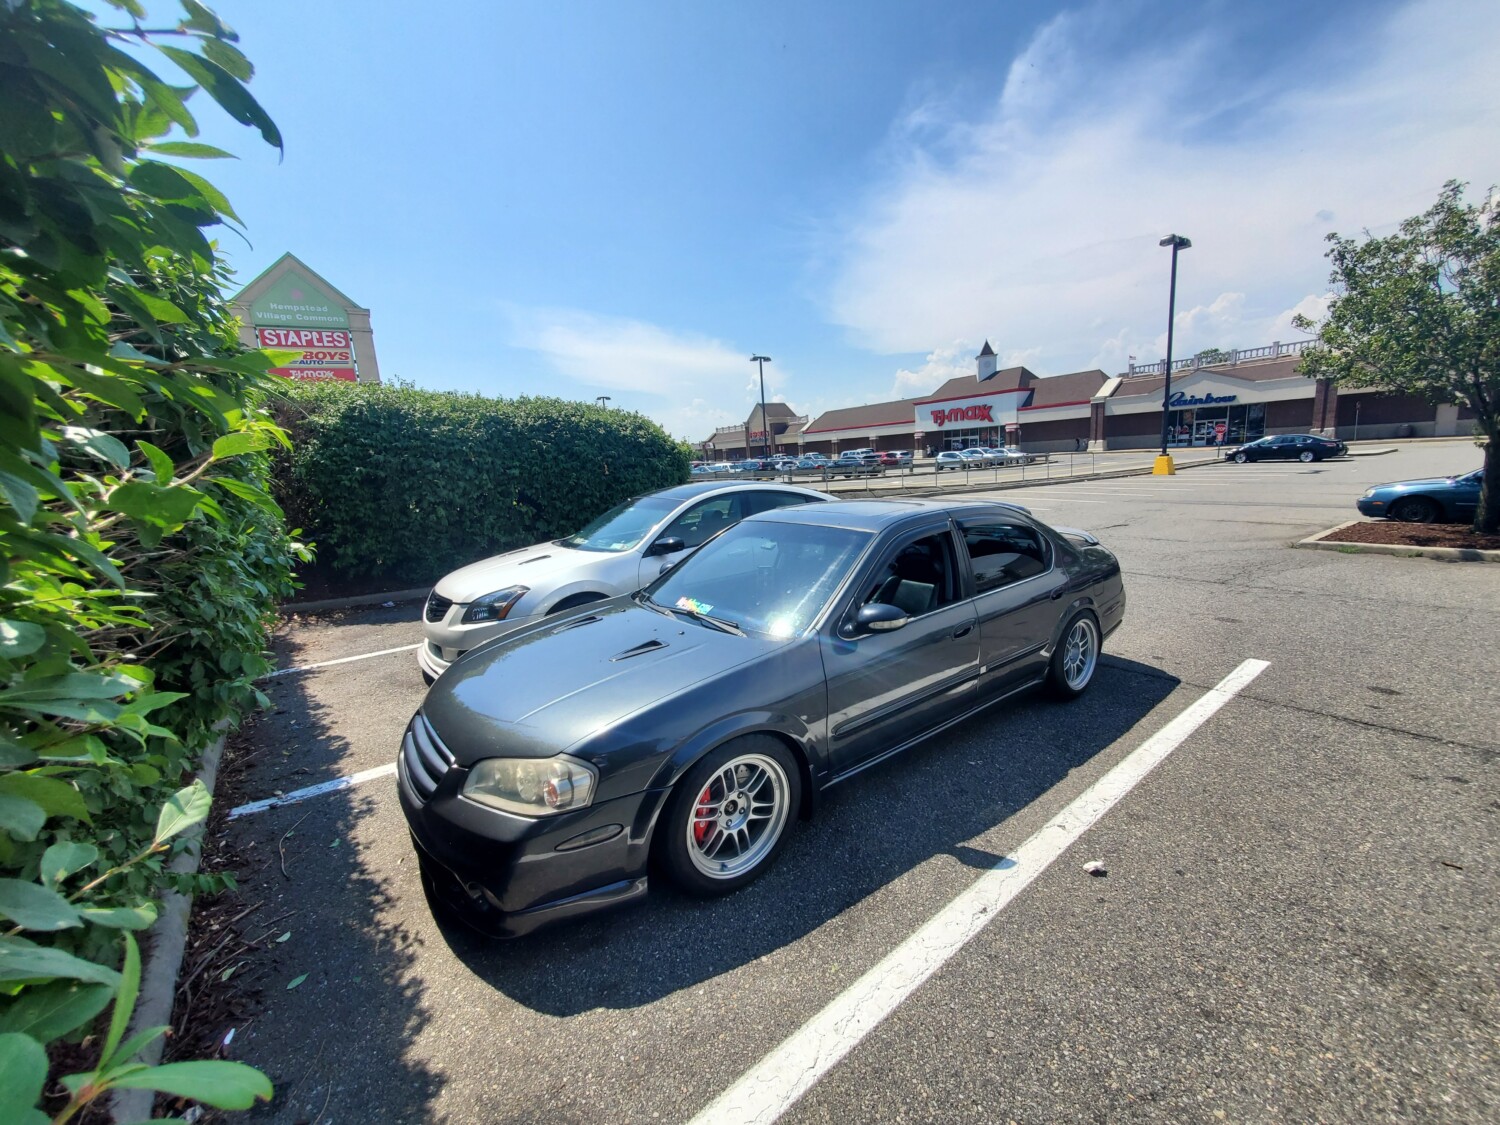
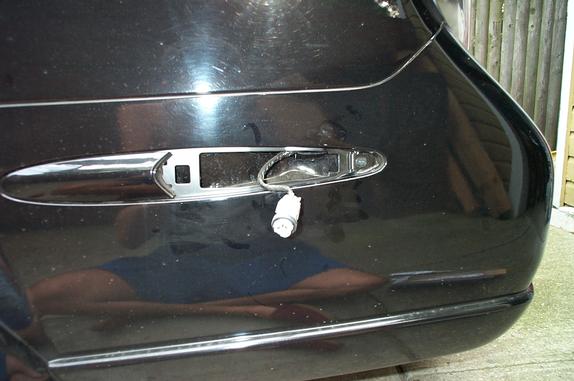
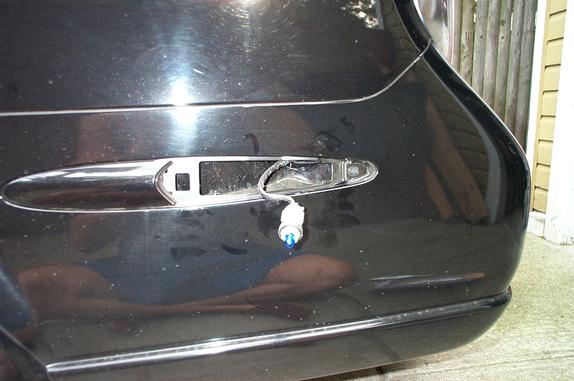
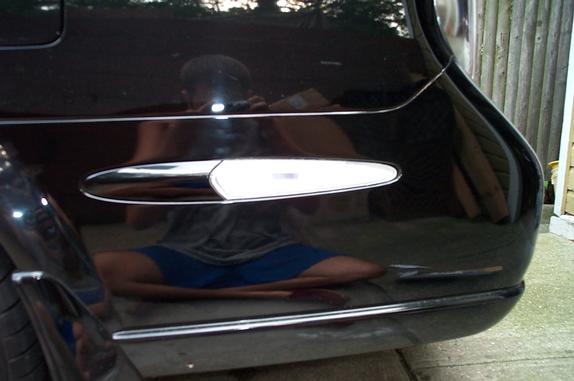
Community Member Credit: Douglas Sands / Leonard Bellgardt IV
![]()


")
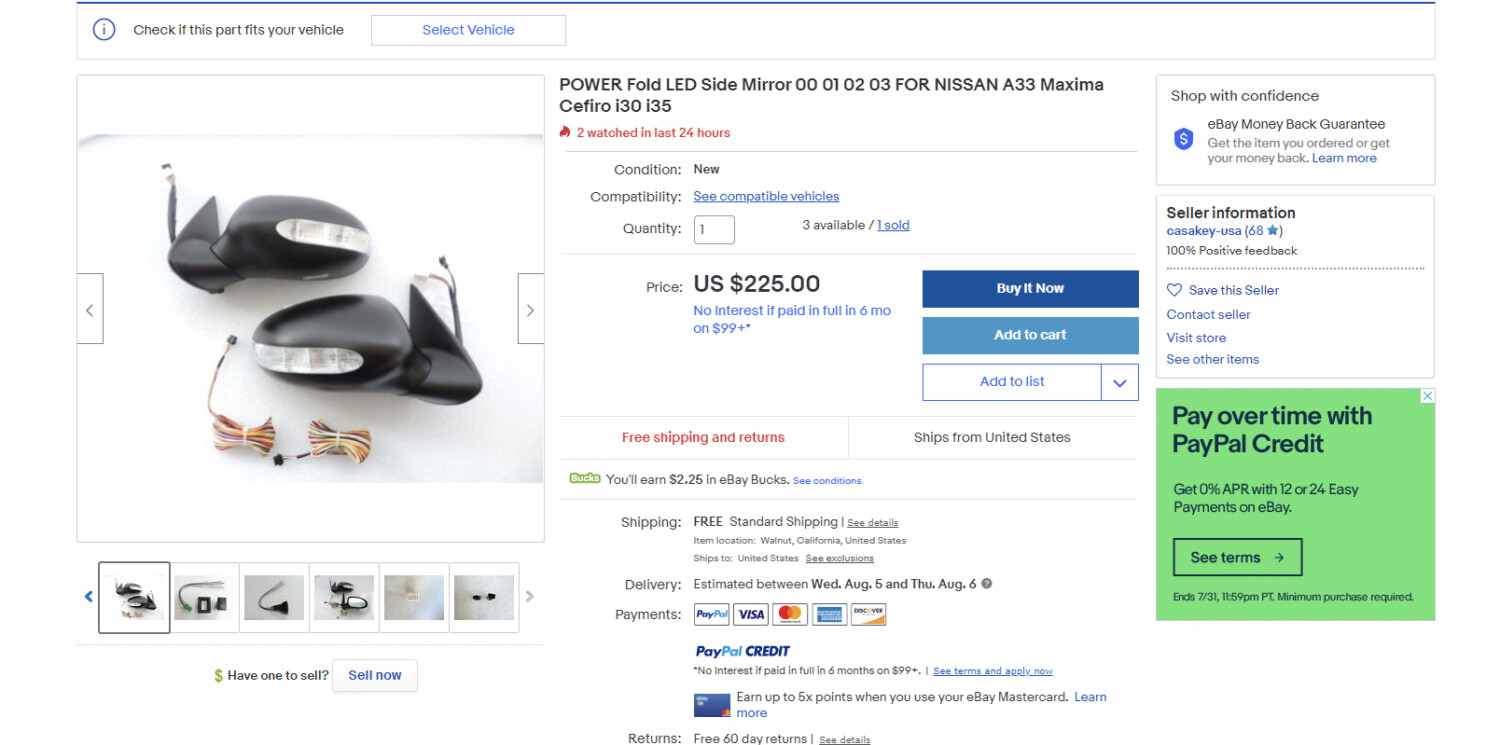
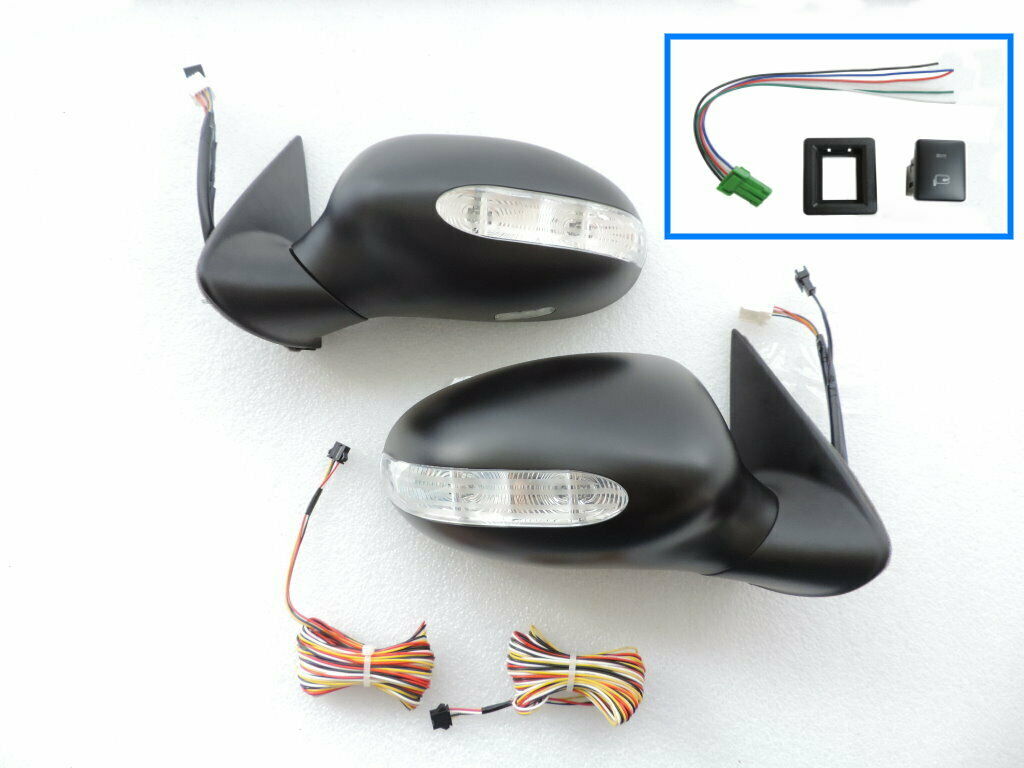
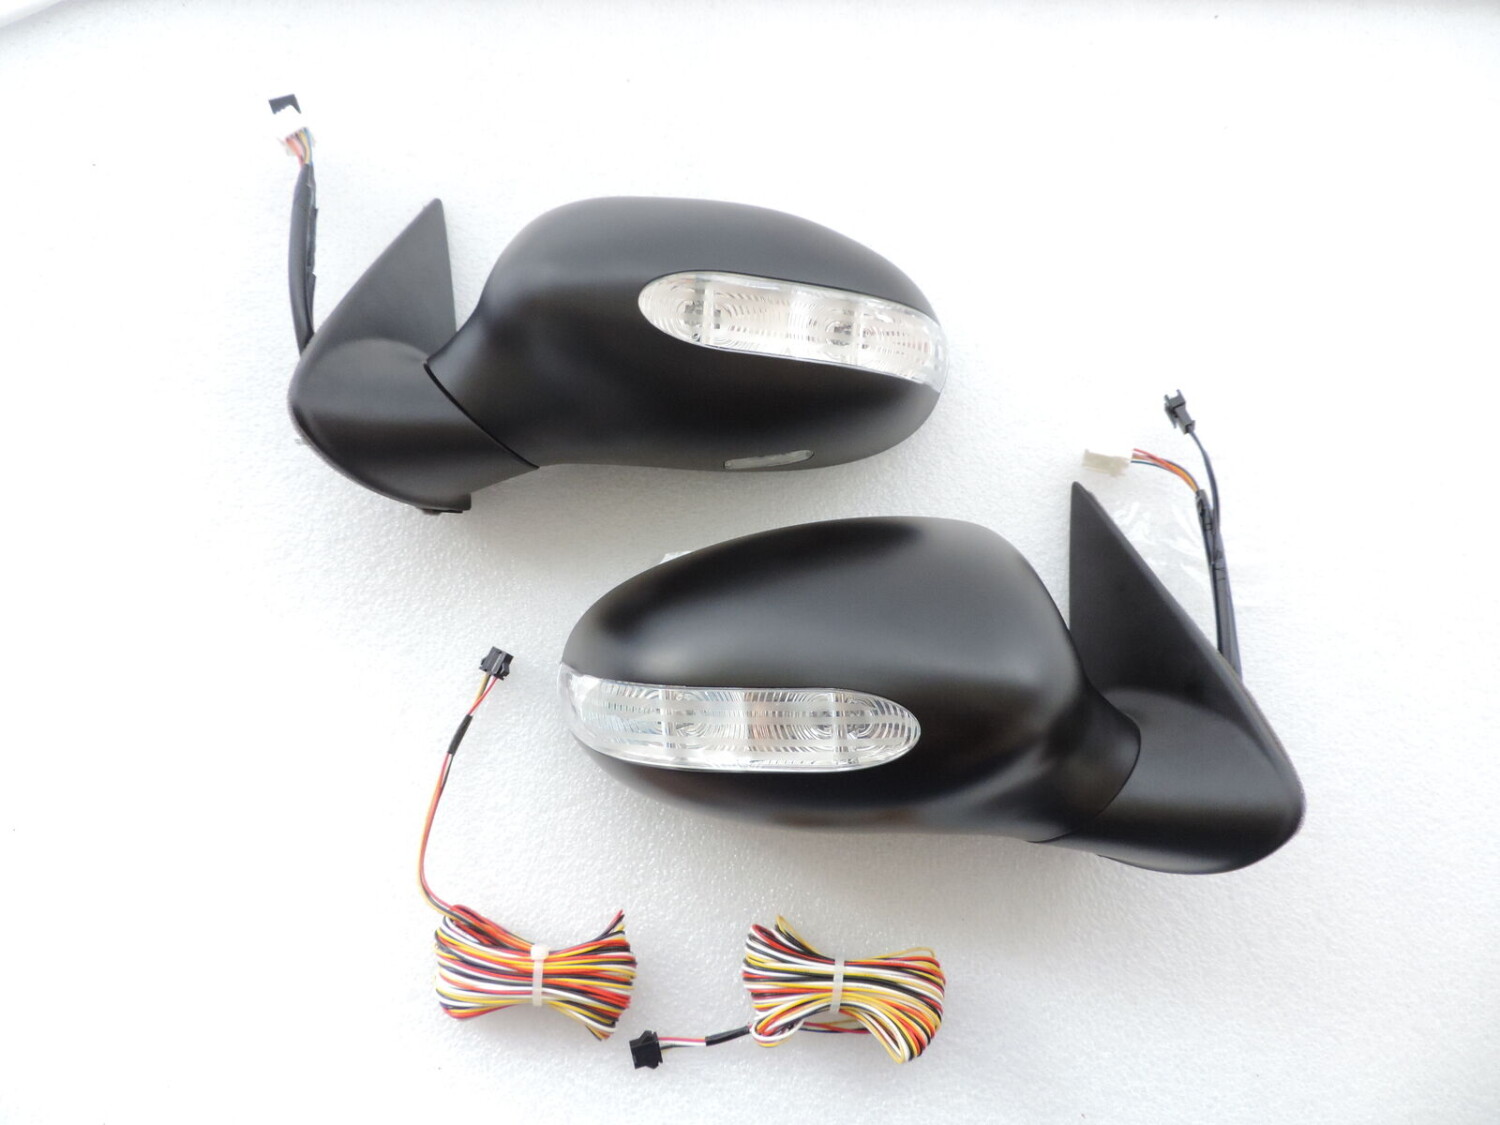
If you have been looking for these, now is the time to get them. The pricing is great and gives the car a very nice look.
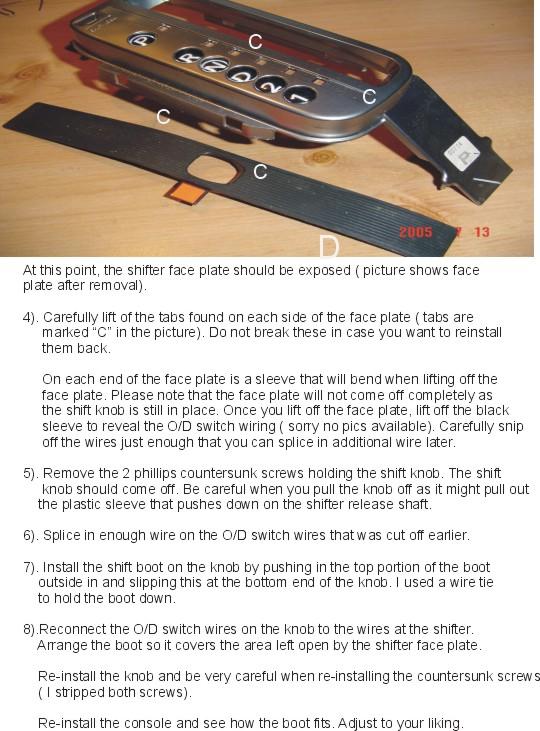
Update 1/3/2021: Just ordered a set for our 4thgen Nissan Maxima. Will post an update once received.
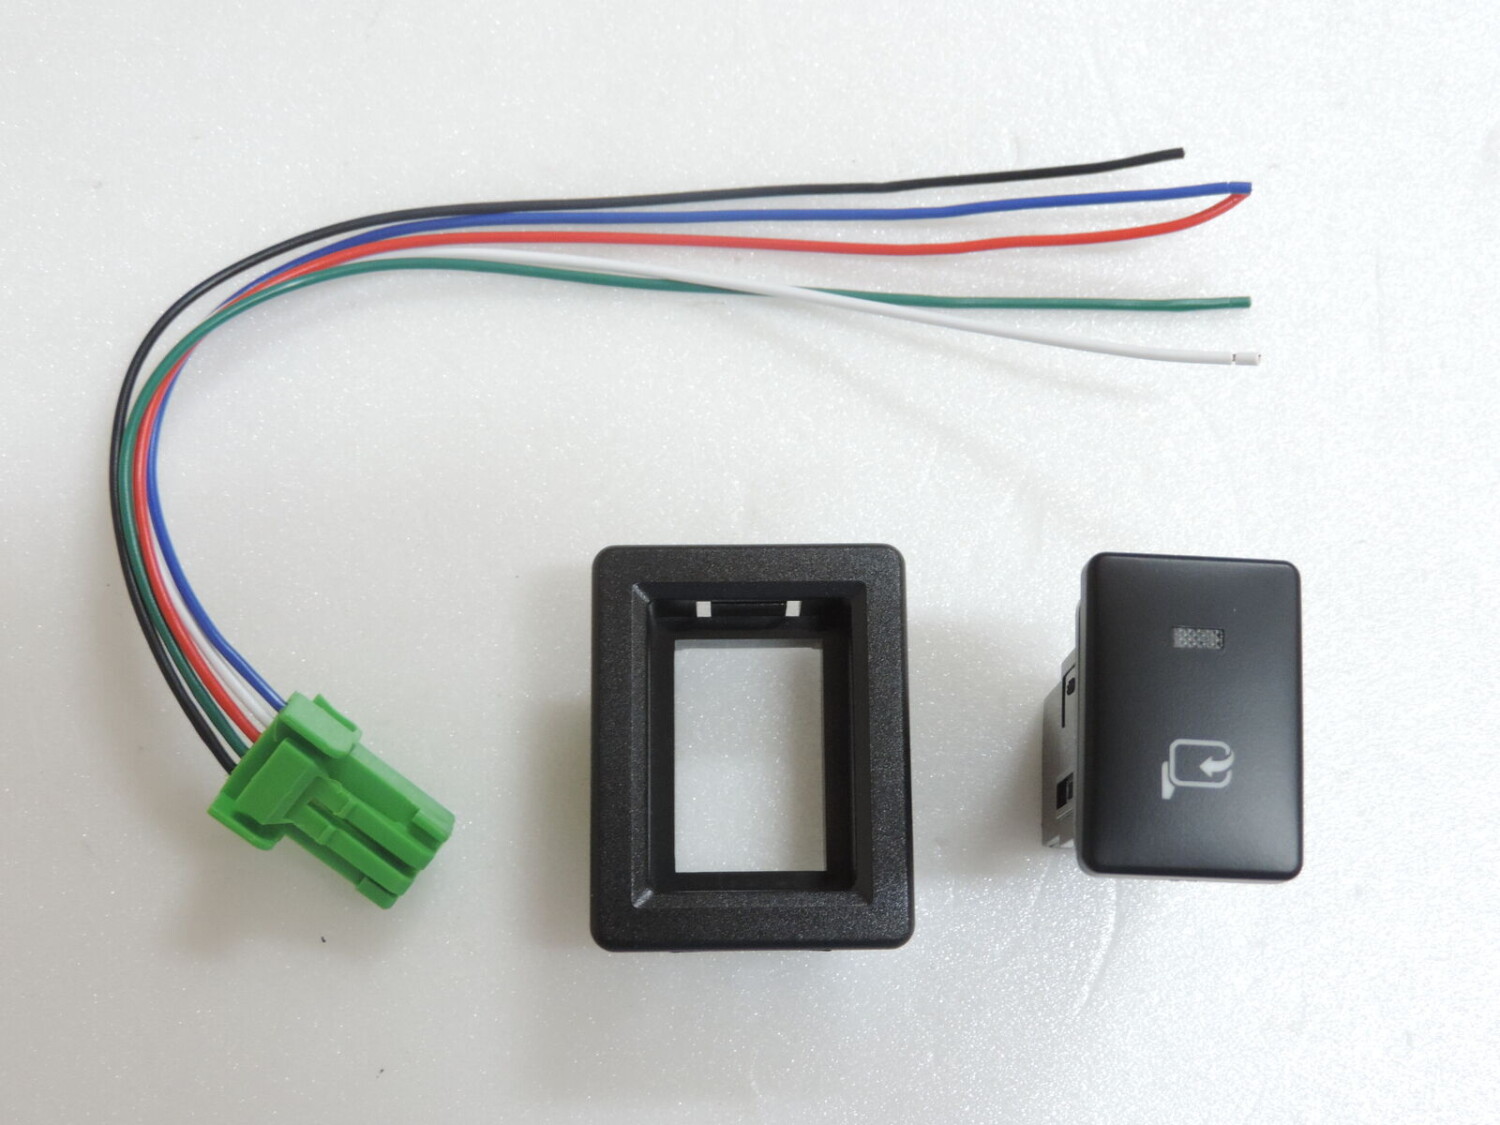
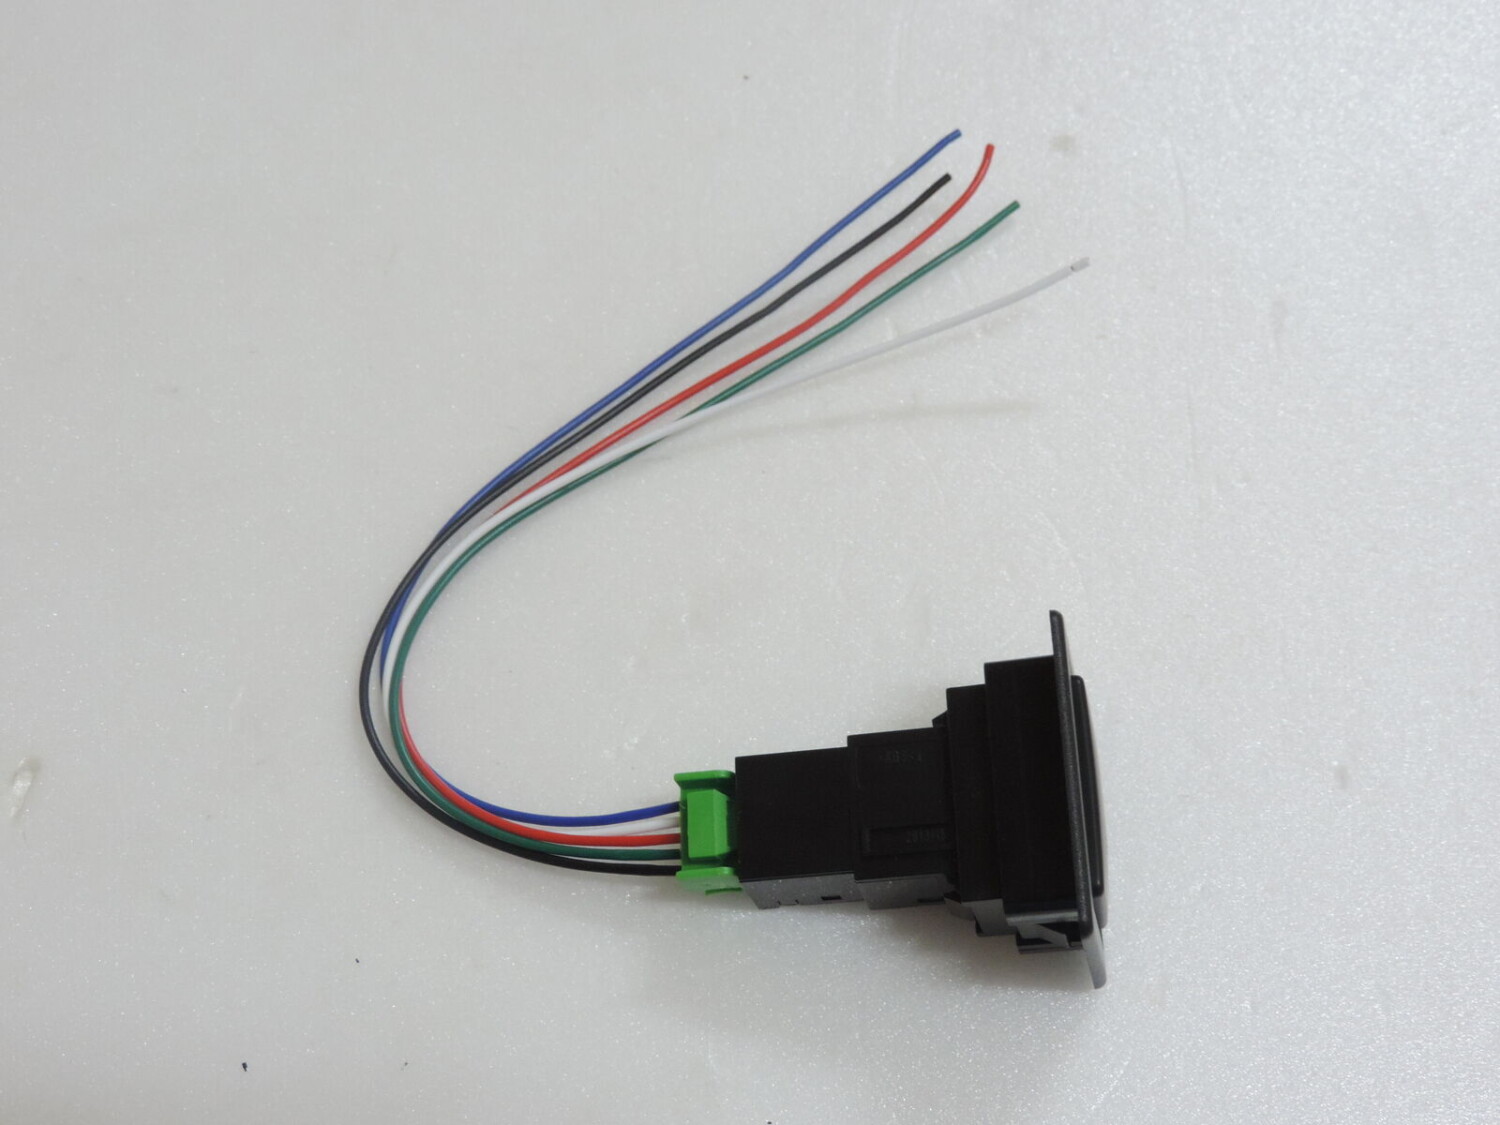
Purchase Link: https://www.ebay.com/itm/POWER-Fold-LED-Side-Mirror-00-01-02-03-FOR-NISSAN-A33-Maxima-Cefiro-i30-i35/184349382026
Price: $225.00 Shipped
Description: POWER Fold LED Side Mirror 00 01 02 03 FOR NISSAN A33 Maxima Cefiro i30 i35


![]()

Credit: redlinegoods
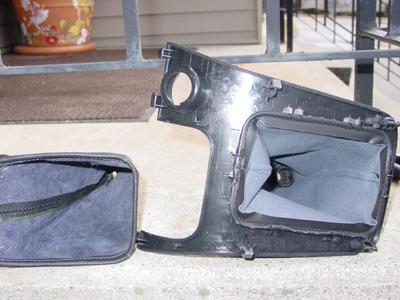
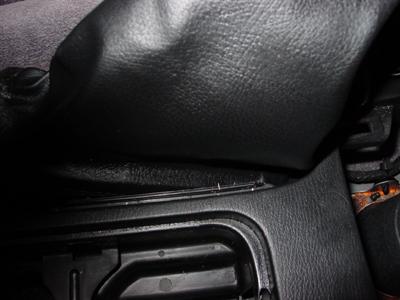
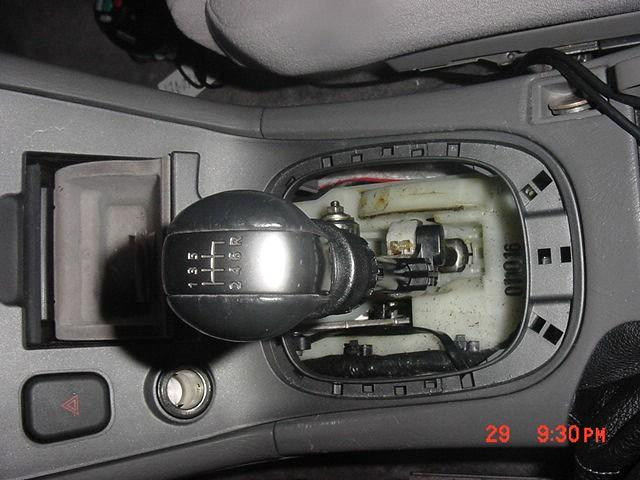
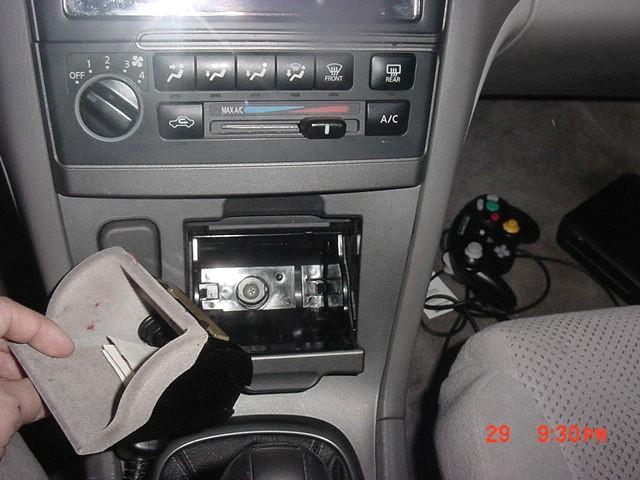
1. Start by removing your Shift Console.
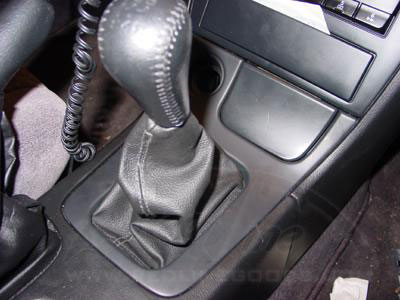
2. Pull the the rear of the shift console towards you and slightly lift.
3. Pull the console slowly until it separates from the lower portion of the radio.
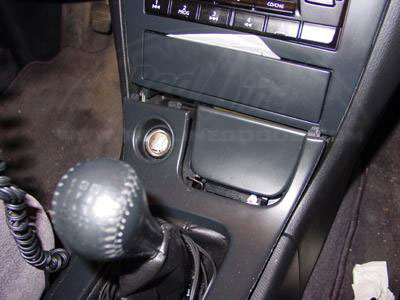
4. Turn the shift knob counter clockwise to remove it. You will need to remove the shift knob before you can remove the console. If it’s never been removed before, it’s going to be very tight. Use vise-grips to remove it but make sure to protect the surface of the shift knob with a towel.
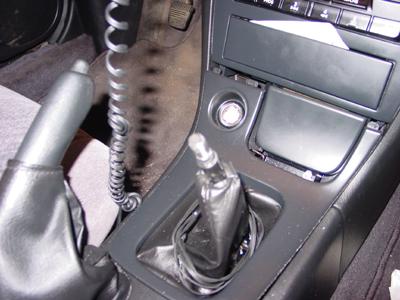
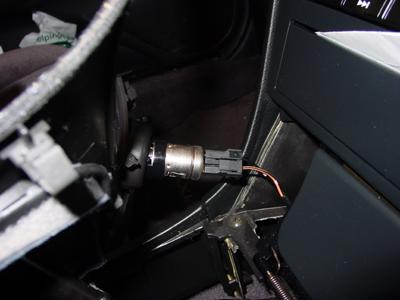
5. Also remember to remove the attachment for the Cigarette lighter.
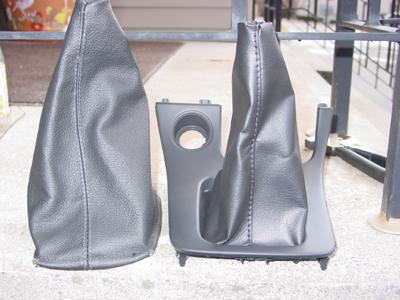
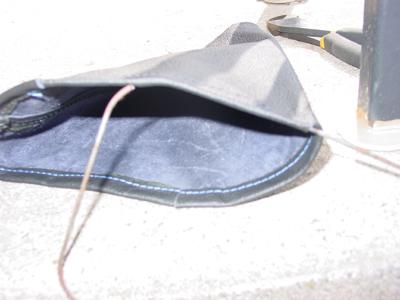
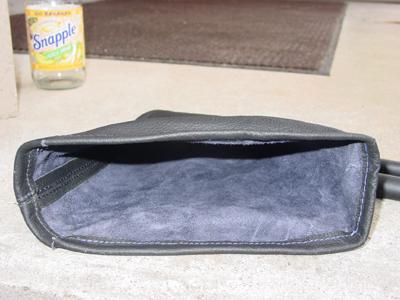
6. Here is a picture of the new boot next to the console and old boot.
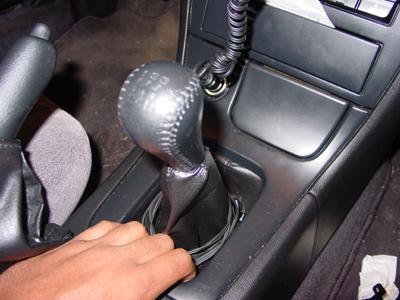
7. Turning the console upside down you will see grooves where the old boot is secured into the console.
8. Pry the old boot out of the grooves under the bottom of the console.
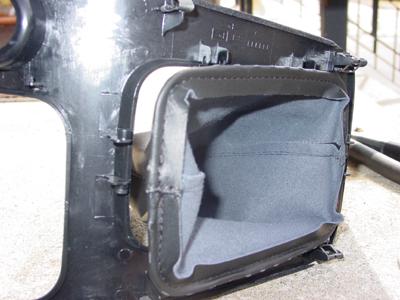
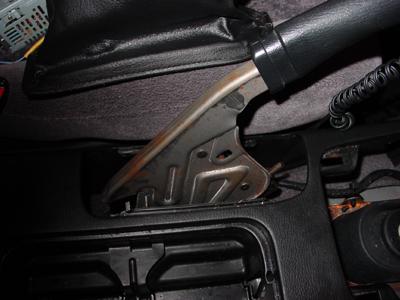
9. Remove the metal rods in the bottom of each boot.
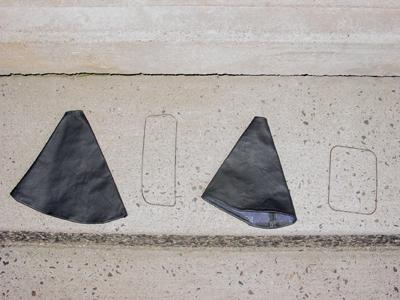
10. To install the metal rods for securement, you will have to cut the rod to insert it into the new boot.
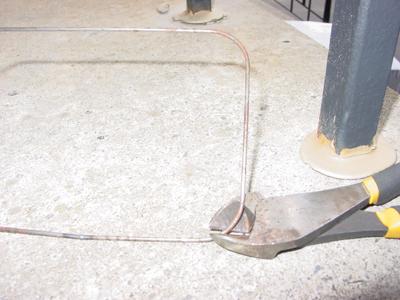
11. Here is shot of the Rod going in the new boot.
12. Here is a shot of the metal rod inserted in the boot. You maybe have to use JB Weld to keep the Rod perfectly in place.
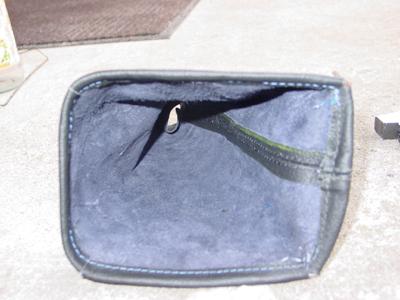
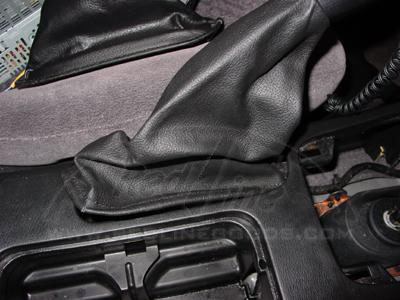
13. Once you have the metal Rod inserted in the boot, turn the console upside down and install the new boot into the grooves of the bottom of the console.
14. Here is a shot of the new boot in the console.
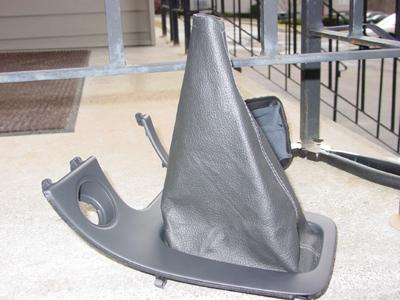
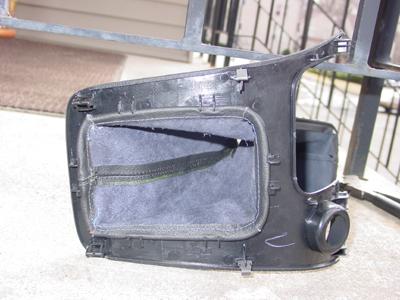
15. Repeat in reverse order the instructions on Removing the Shift Console and slowly slide the boot and console over the shifter and slide the console its place.

16. To remove the E Brake boot you will have to press down on the front of the boot by the opening of the shift console.
17. Once you have lifted the E Brake boot out of its grooves you can slide it over the top of the brake lever.
18. Now its time to install the metal rod in the E-Brake Boot. With the boot facing towards the car, the thread stitch goes on the bottom of the brake. We would advise you to line it up in the car before cutting and inserting the rod. Try to get a very good idea of how you are going to mount the boot.

19. Here is a picture of the rod installed in the boot.
20. Re-insert the E Brake Boot and rod as before.
ENJOY YOUR NEW LEATHER BOOTS!
Useful tip
You have installed a product made out of genuine leather. As you know, to maintain a leather product in good condition, you should take care of it. We suggest occasionally (every 4-6 week for example) applying some leather conditioner/UV protector to keep your leather from drying up in the sun and cracking.
![]()

Credit: redlinegoods
To install on an automatic, you need to wedge the shift boot between the shifter assembly and the trim piece surrounding it. Therefore it is necessary to remove that surrounding trim.
When removing the trim piece surrounding the shifter, hazard switch and power outlet, the thing to be cautious about is the shifter trim (the silver piece with the gear labels). If you hit the front of that with the underside of the trim piece you are removing, it may get scratched.
Take time & care when doing this, and you should be OK. If you’re really concerned about it, you can put tape or something over the edge of the silver piece first to avoid scratching it. Now, take a very small flathead screwdriver (as in a glasses repair kit) and wrap the tip in an old t-shirt or rag. Then carefully worm it between the large trim piece and the rest of the console starting at the rear nearest the cup holders. You will be able to lift the trim up enough to squeeze another screwdriver in there. Work your way around left and right until you can get your fingers under the trim. Then slide your fingers under and pull up to disengage clips. There are clips to the left and right of the shifter and then closer to the climate control. You will be able to pull up/back and disengage all of these clips. Then you have to worm the trim out from under the climate control. I found it to be easier to remove the trim with the shifter in either the 3rd gear or 2nd gear position.
Once you have the large trim piece free, you can either turn the piece carefully to one side or the other, or you can remove the trim entirely by disconnecting the hazard switch, power outlet, and compartment light harnesses. Now open the Velcro strips from each other so you can slip the boot over the shift knob and pull it down snug around the silver shift indicator piece, making sure to get the stitched seams positioned at the four corners. Carefully reinstall the trim piece (with black gasket in place) back over the shifter and under the climate control. It will take some effort to get the trim & gasket back over the leather and shift plate, but if you start at one corner and work your way around it will go on. The snug fit between gasket & leather will keep the boot in place. Now snap the trim back in place. Here is a more pictoresque documentation! 🙂

![]()

Credit: redlinegoods
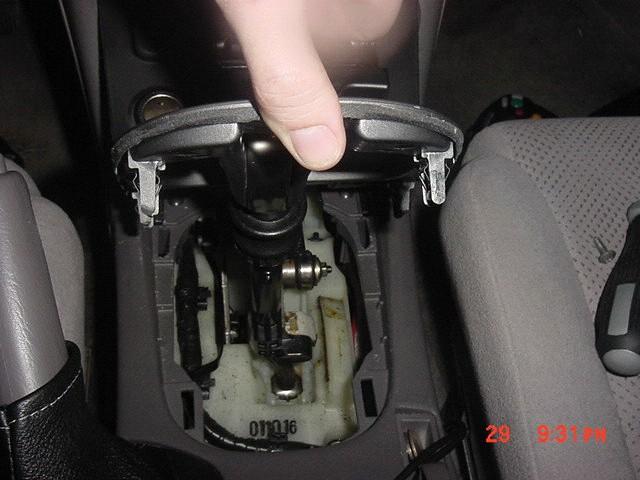
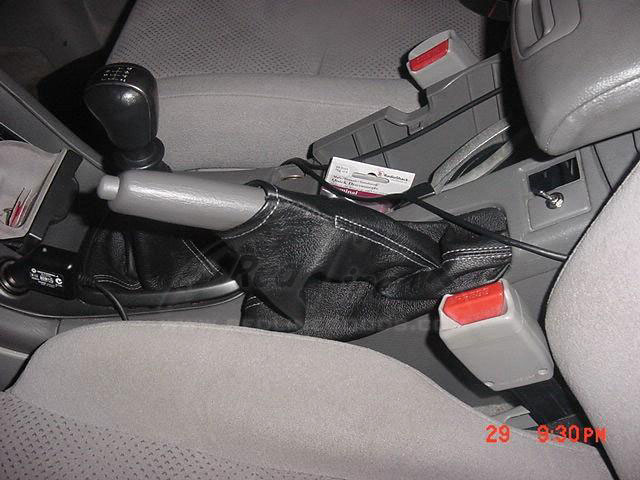
1. In order to remove the front section, you must first remove the shift knob (just unscrew it from the shifter shaft – if it’s difficult, use vice grips on it after wrapping it with a towel to protect it from scratches). Then remove the liner of the shifter. That is easy, just pull on your shift boot and it pops up…picture shows this.
Replace the old boot with the new one installing it to the trim pieces taken out from the old boot. VERY simple and straightforward.
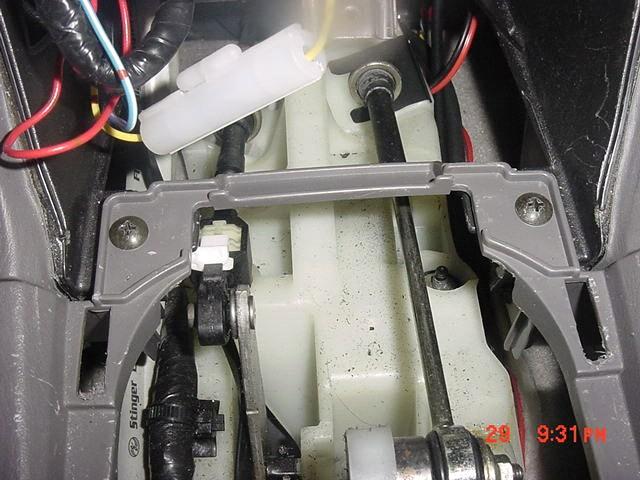
2. In order to install the ebrake boot, it is better to remove the armrest console. This will make it look easier since you need to attach the boot to the same holes/slits as the stock rubber boot. There is a screw inside the armrest, accessible from the back…
3. … and two more, one on each side of the console.
4. Next you need to remove the cloth ashtray cover. Underneath it there is a screw you need to remove.
5. Now simply lift the lower section of the center console. It will snap off and you will see 2 screws located below it.
6. Remove those 2 screws. You will also see that the armrest console is connected with 2 snap-ins from the sides of the center console. You can pull those on the side to separate them. It sounds confusing, but once you do this… the whole armrest console comes up.
7. When installing the ebrake boot, we suggest you take the rubber boot off and put the ebrake boot on it’s it place. It’s obvious which side is which, since one side is all slits, and the other side is a line of studs. once you have it in, put the the rubber boot back on…. It will hold the leather boot in place. It feels like a tight fit, but it’ll make the leather nice and snug.
Putting the center console on is the reverse order of removing it: put the 3 back screws back in (1 in armrest, 2 on the rear sides) and then the front 2 screws under the shifter, 1 in the ashtray and the 2 clips on the sides of the center console.
If you want to have the top of the ebrake boot at a certain point, here’s a suggestion: the boot is folded on the top. if you make a small slit on the underneath of the fold, you can fit a cable tie through, line up to where you want it, then tie it up, and one is the wiser. It can’t be seen since it’s on the underside of the ebrake handle.
ENJOY YOUR NEW LEATHER BOOTS!
Useful tip
You have installed a product made out of genuine leather. As you know, to maintain a leather product in good condition, you should take care of it. We suggest occasionally (every 4-6 week for example) applying some leather conditioner/UV protector to keep your leather from drying up in the sun and cracking.
![]()

Community Member Credit: phi11yphan
Hi, everyone. First time site post, long time reader. I still love my ’02 Maxima SE, 6-speed manual! Thanks to everyone for all your stories, advice, and wisdom.
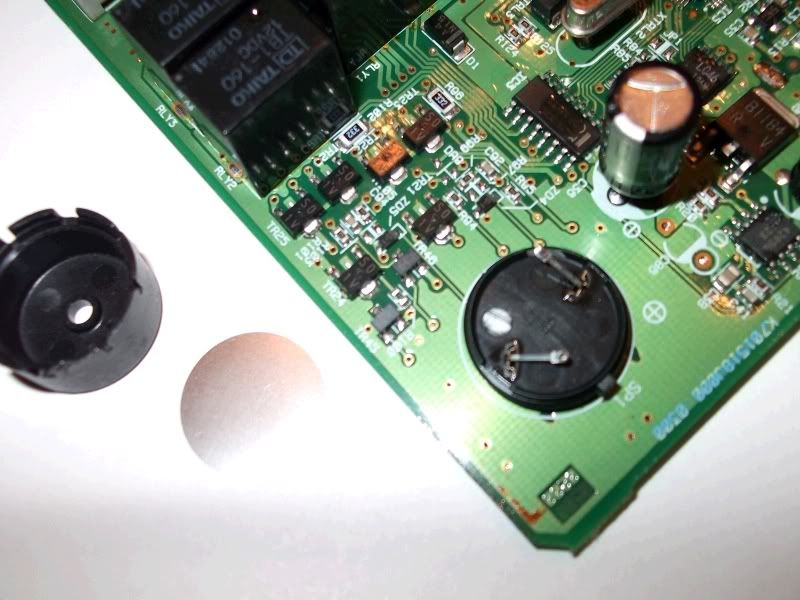
I read the above suggestions, but chose an alternate sound/chime/buzzer/speaker solution. My option took me less than an hour; (I cut some corners.) I wanted to share my approach for those who don’t like cutting wires, disabling the door button, and want to easily reverse the “fix” in the future. I hated when I wanted to play music with my driver door open and the keys in the ignition for the radio — that annoying chime would beep non-stop, interfering with my music. But I didn’t want to lose the car’s ability to know when the door opened/closed (for lock and alarm purposes.) I still like seeing the “door-open” visual indicator; and i don’t like cutting OEM harness wires if I don’t have to.
My method involves removing the piezoelectric plate (thin silver element) from the ECM’s buzzer. It may not be the perfect solution, but it’s much easier than it sounds. Remember taking apart your old digital watch to replace the battery, and noticing the tiny spring that makes contact with the silver element in the battery compartment? It’s kind of like removing that element — the watch no longer made sound if the plate was missing/damaged, and that’s what this fix does. It removes the plate.
The only drawback is that now I won’t hear ANY sounds that the ECM tries to make for me, because the speaker is incomplete. One useful warning sound I will miss, for example, is when I leave my headlights on after I take the keys out of the ignition. (It could happen after driving through a long tunnel or a parking garage during the day, and forgetting to turn them off at the end of the trip.) That loss aside, this is what I did to silence my annoying door-open sound:
1. It’s probably good to disconnect your car battery’s negative terminal at this point. (I didn’t bother, but I’m a risky nut.) Your ECM (engine control module) is important; so use your better judgment.
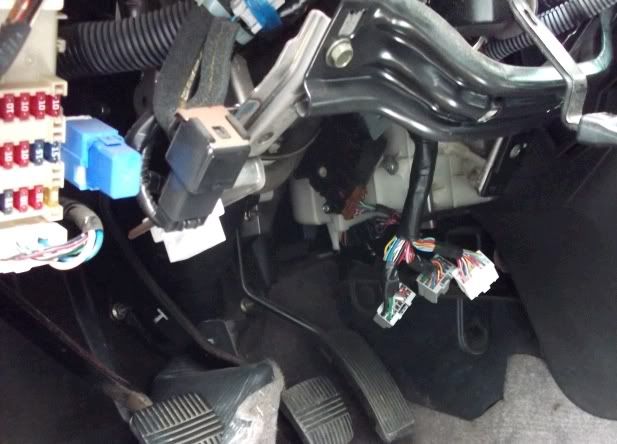
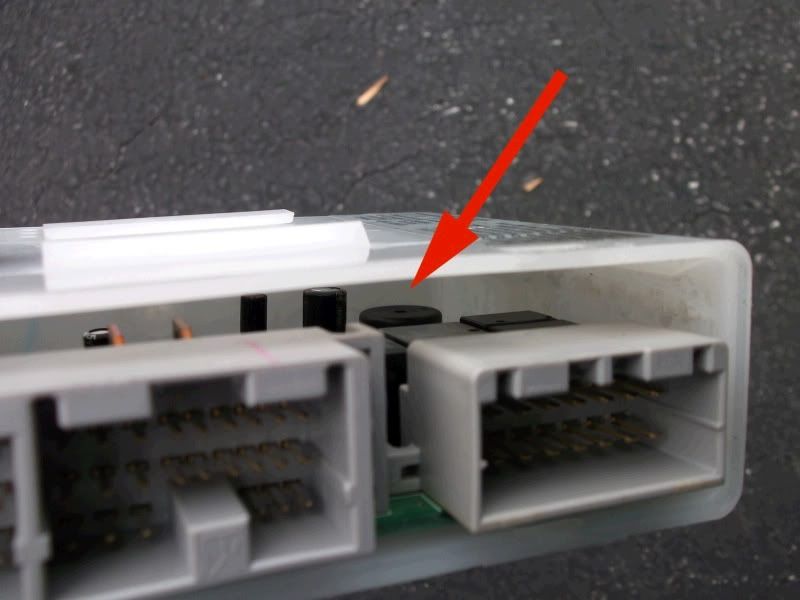
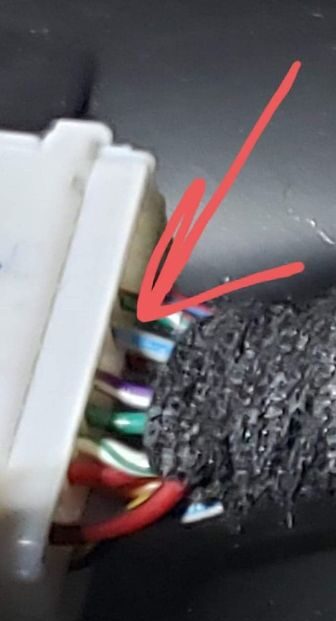
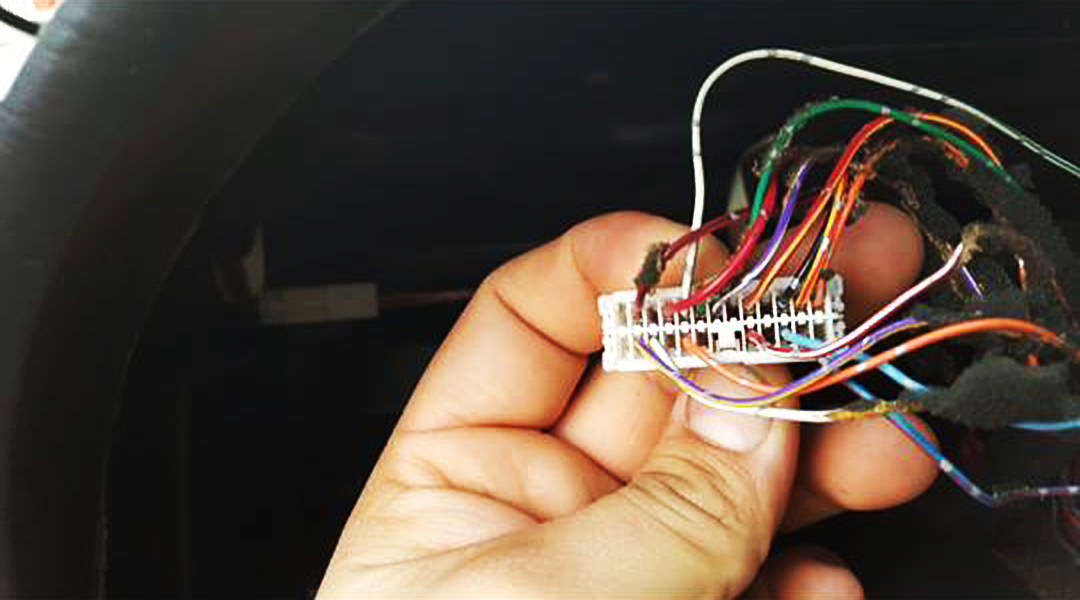
2. Under the steering wheel and behind the lower dash, locate the ECM module mounted on a flat metal post. The ECM is a white rectangular box mounted tightly, that slides off easier when a flathead screwdriver is inserted between the ECM plastic and the metal mount. (A circular nub on the plastic keeps it secure by pressing against the metal mount.) Remove the ECM and then disconnect the 3 harnesses.
Location of the 3 ECM wire harnesses:
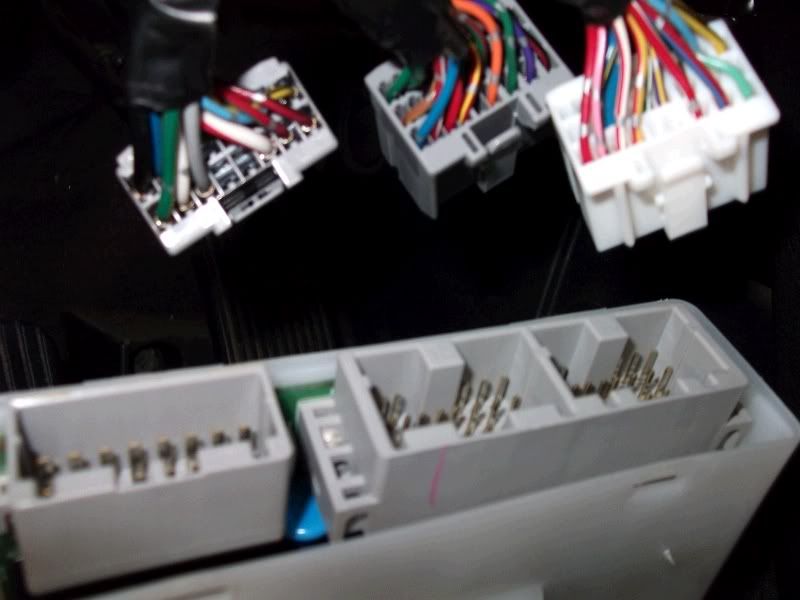
 Closer look at harnesses:
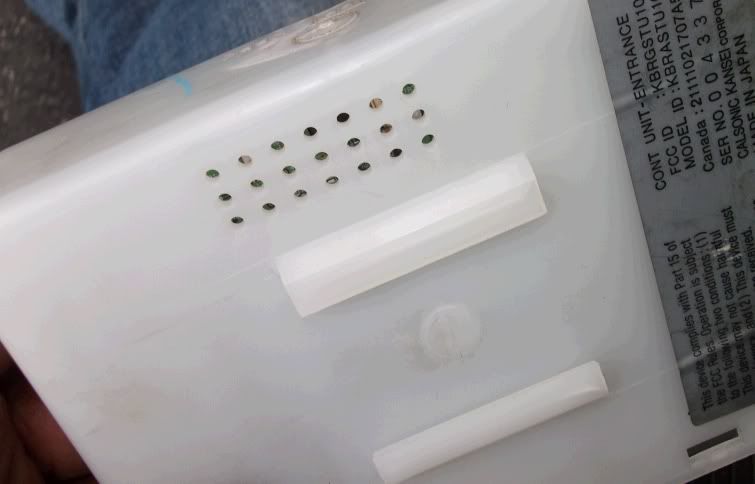
 Plastic nub on ECM:
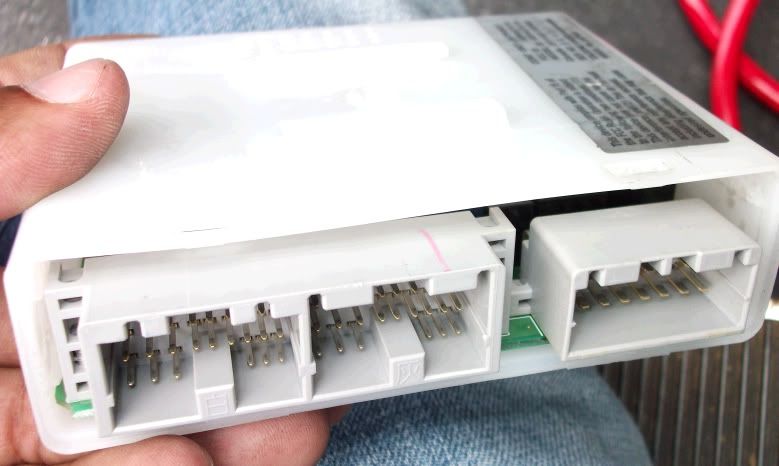
 ECM in hand:
 There’s the piezo buzzer we want to get to:
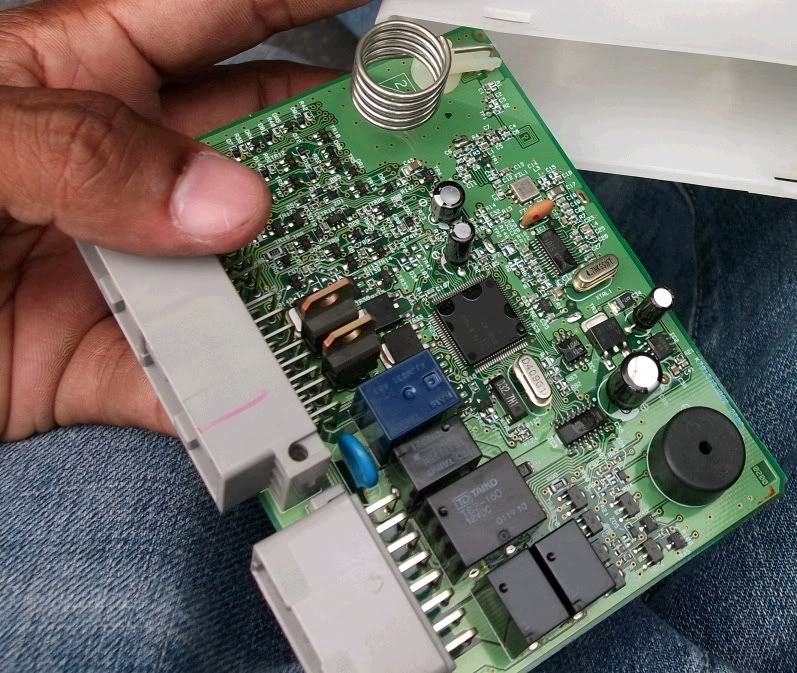
 3. Slide the ECM circuit board out of its plastic protective case. Don’t rush, since you don’t want to damage the board or the case. It requires some cautious strength to wiggle the board free from the plastic guides. Easy does it. Used a screwdriver or needle-nose pliers if you need to. It’s probably good to ground yourself free from electrostatic charge before doing this, as not to damage the electronics with a static charge. (Again, I’m a nut and so I didn’t bother.)
 4. With board in hand, find a clear table so you can take apart the piezo speaker without losing any pieces. Carefully pry the black cover off the underlying base of the piezo buzzer, to reveal the inside:
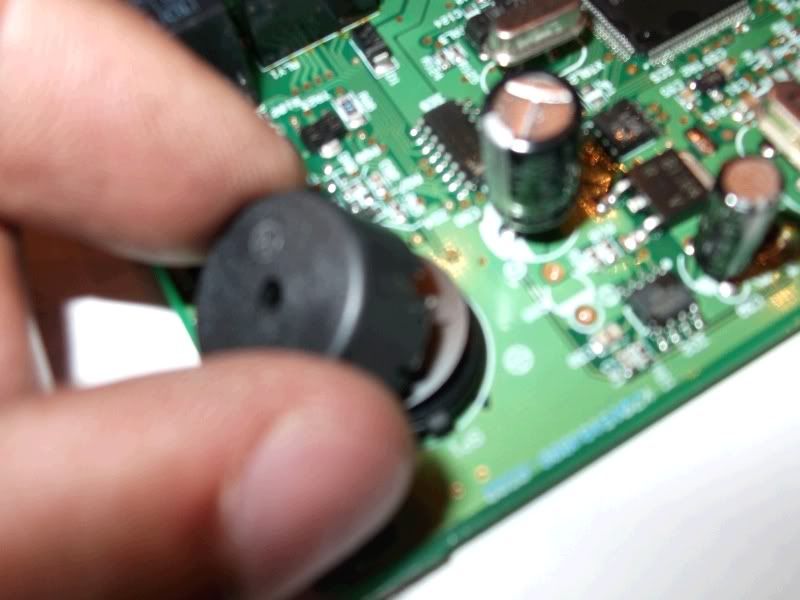 5. That shiny, thin, silver disk is the piezoelectic element that you want to remove. Take it off. (It’s unsecured, and will easily fall out once you take the black cap off.) This is the critical component that makes the chimes/sounds/warnings. Save it somewhere, in case you ever want to reverse the procedure down the road.
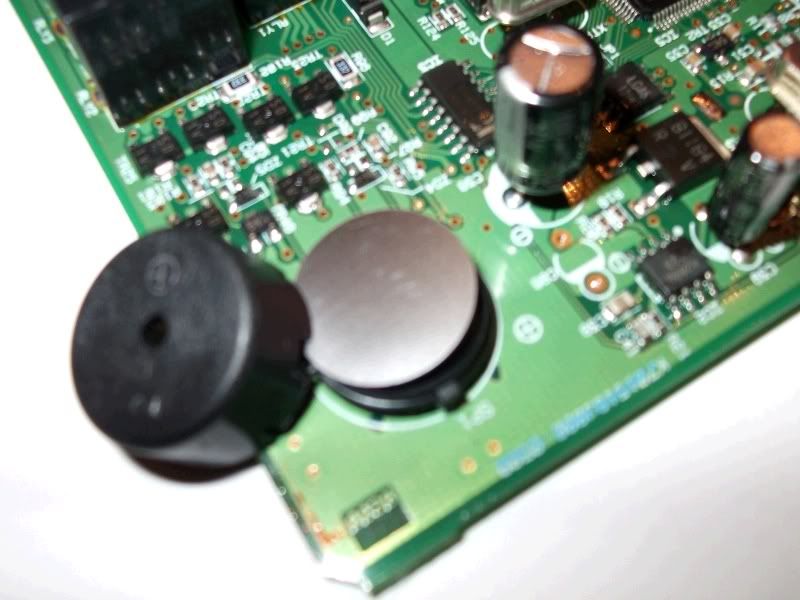
 6. Replace the black cap (or not — it’s optional), and put everything else back together. Don’t start the car without the ECM wire harnesses back in their expected receptacles.
7. Test, and enjoy a quieter ride!
![]()

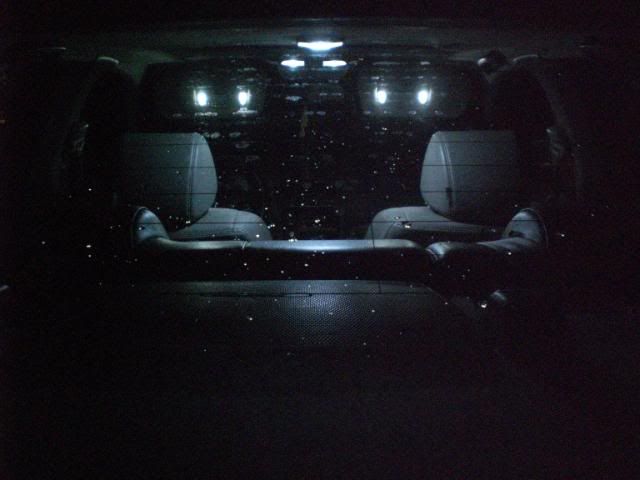
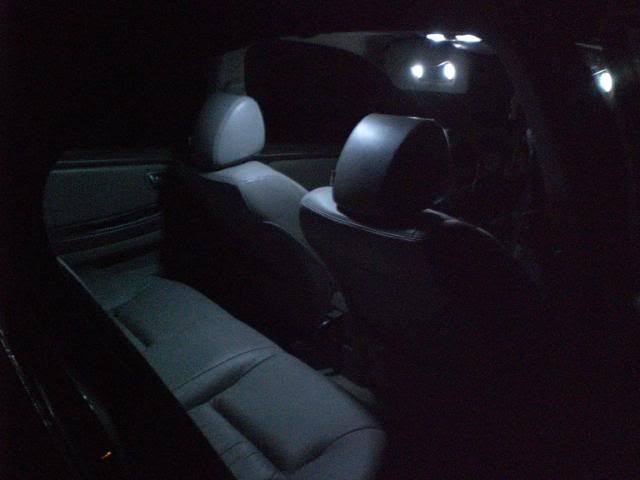
Community Member Credit: mist max2000
I just wanted to throw this together so people can see what what an LED interior looks like…in post number 2 and 3 ill put some detailed pics up.. Let me know what you think.. any questions feel free to ask…
DAYTIME:
NIGHT TIME:
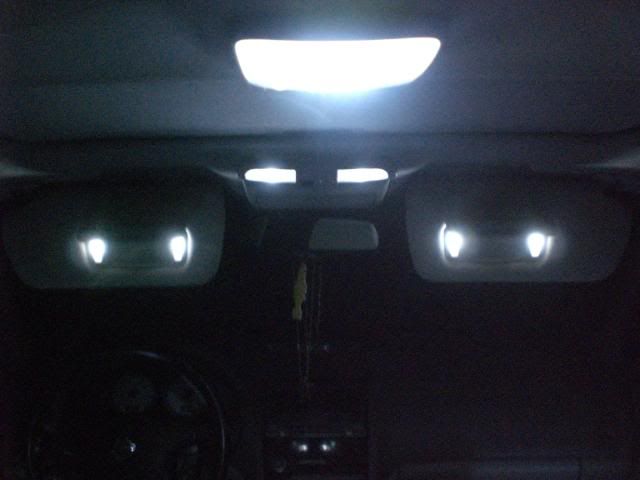
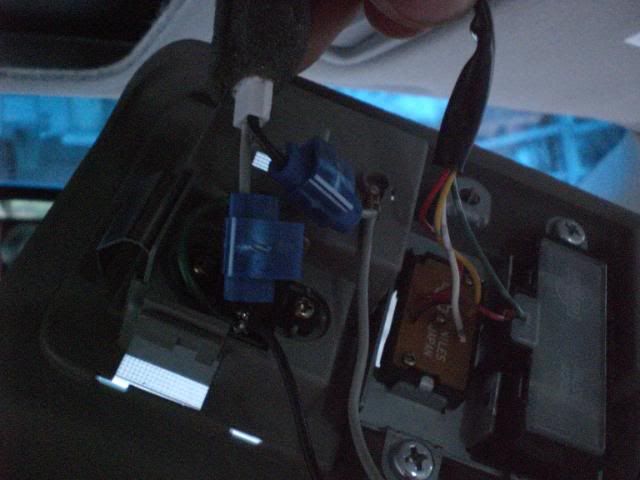
to get the map lights to work you need to reverse the polarity..once you remove the map light/sunglasses holder (2 phillips scerws in sunglasses holder then it pops off) you need to switch the – and + wires.. i did this by using quick taps as can be seen in this pic…
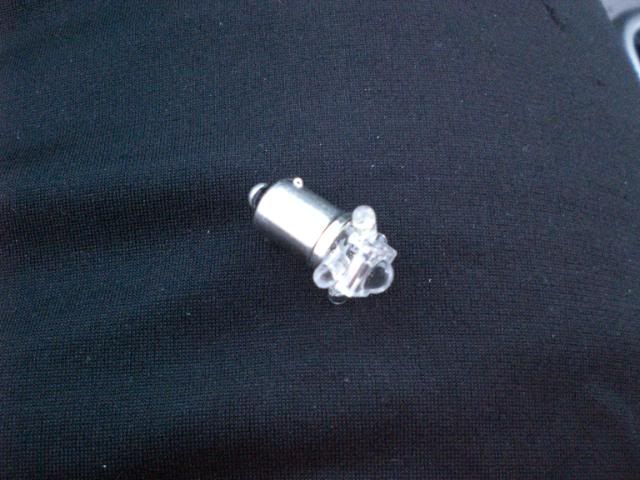
Heres the bulb I used,… Its a BA9 5 LED
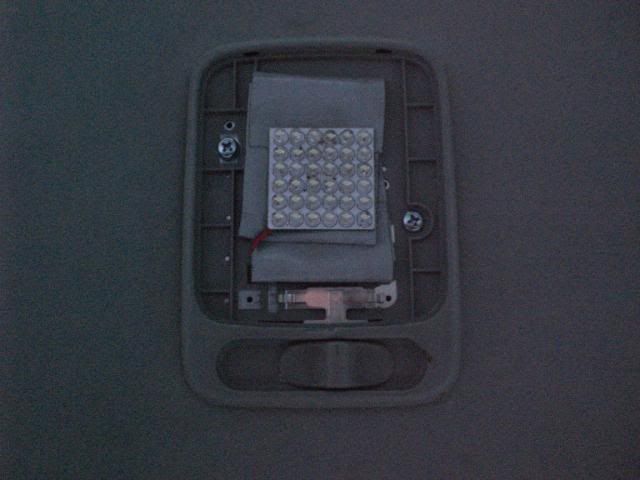
heres the Dome light.. i got a 36 LED circuit board that had a adapter on the end the fit in the festoon bulb i dont remember the exact size sorry…and yes thats duct tape lol
heres the bulb for the personal mirror lights…3 SMT vanity bulb
and the bulb in the doors.. 6LED bulb 194 wedge bulb
I used 194 wedge bulb that had 4 LEDs flat faced like the previous 6 LED picture above…. heres the license plate LED’s
oh and i also put the same LED’s in my running lights as my license plate lights 194 wedge 4 led-flat,..also in the pic..paired with 5K HID fogs
![]()
 Infiniti i35 Cluster Swap into 5thgen Nissan Maxima (2002-2003)")
All you need to do is re-pin the wires. No need to extend them. It is best to start with the M34 Plug and then do the M32 Plug.
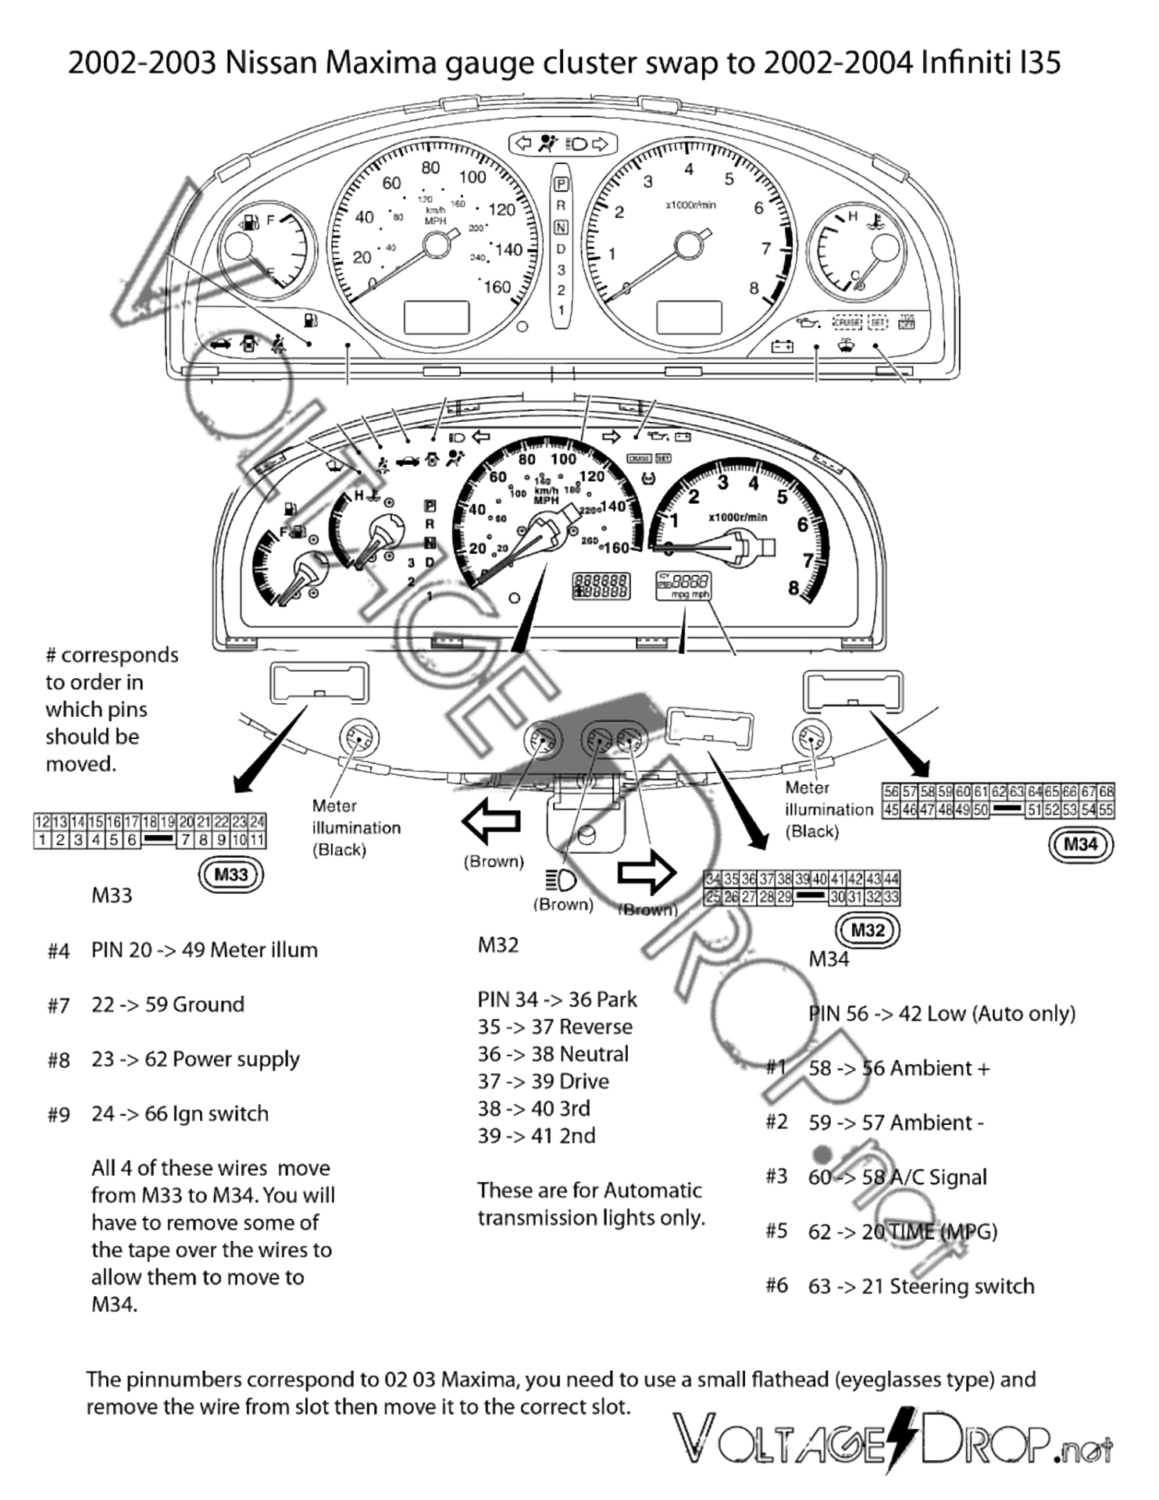


The Infiniti i35 has a single light source which makes it easy to swap to an LED strip. Below is what is commonly used since it allows you change the color as you want. I went with blue but good to have options. I tapped into an ACC power source for the lightening.
You can read more on how to do it here: https://www.my4dsc.com/how-to-add-led-lighting-to-your-infiniti-i35-cluster-for-5thgen-nissan-maxima-2002-2003/


![]()

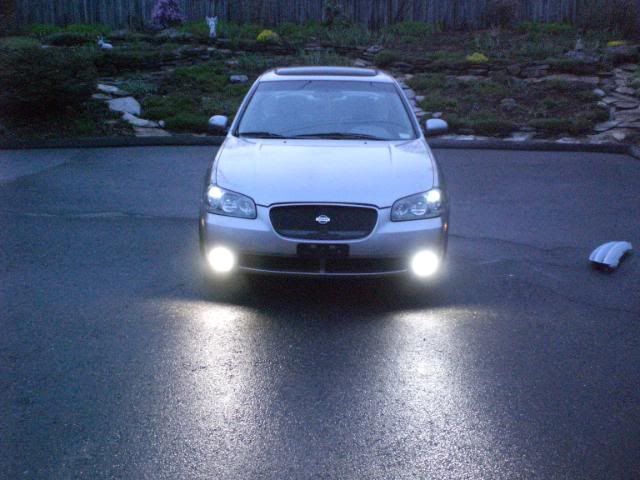
Community Member Credit: pmas76
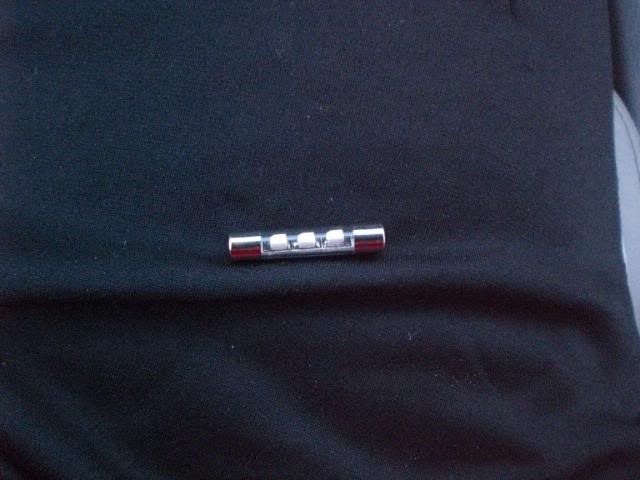
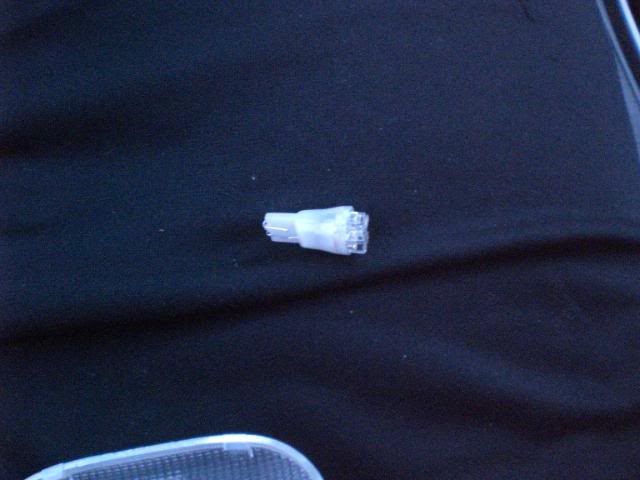
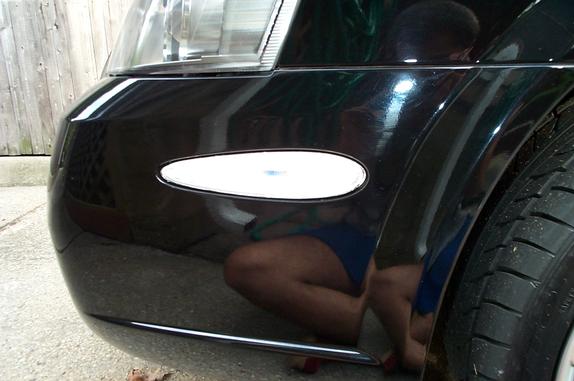
The lights that I use to illuminate the clear corners are the PIAA Xtreme Whites (194 Wedge Bulb) which you can also get from Custommaxima.com. I got the PIAA Xtremes because of their recommendations from fellow Maxima.org members and the fact that I use PIAA Xtreme Whites throughout the rest of the car. I wanted the entire car to use the same brand & style bulbs. The PIAA Xtreme Whites are brighter than stock bulbs yet give a slight tint of blue.
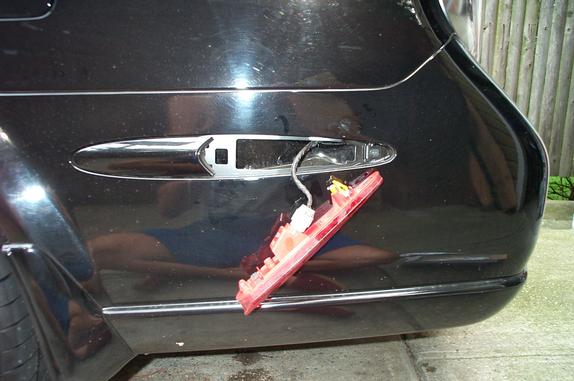
The clear corners are very easy to install. First remove the original front amber corner light by taking a butter knife wrapped in a paper towel and pry gently behind the thinner side of the oval light toward the rear of the car.
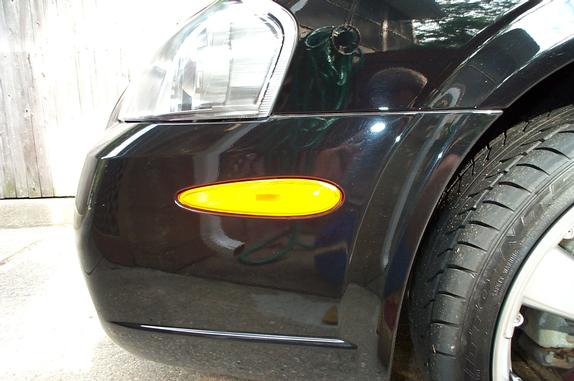

Once the stock front amber corner light is removed take the bulb housing off of the back of the corner light by turning it 90 degrees clockwise. Then remove the stock bulb and replace it with you new bulb of choice.
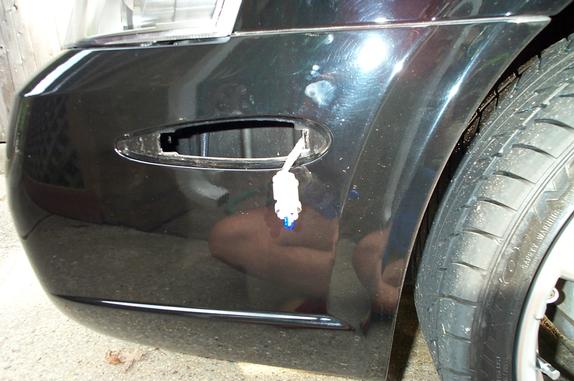
Now, what I would suggest doing, is place a thin bead of clear silicone sealant around the edge of where the plastic and the reflector of the corner light meet so that you can reduce the chance of condensation build up from rain. Next, put the bulb housing back in the corner light by turning it 90 degrees counter-clockwise. Then, just pop the corner light back into place.
 \
\
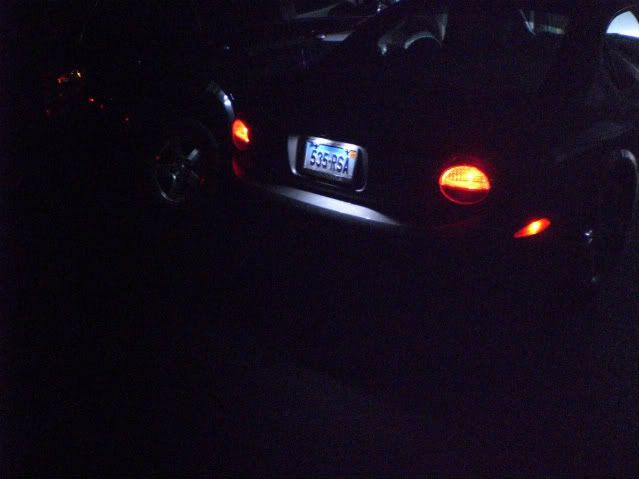
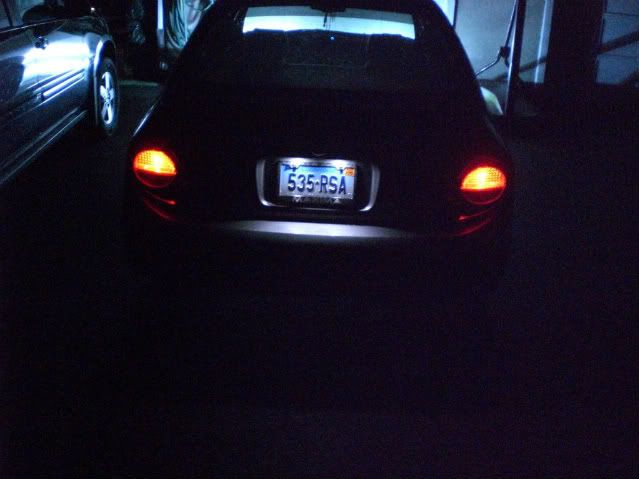
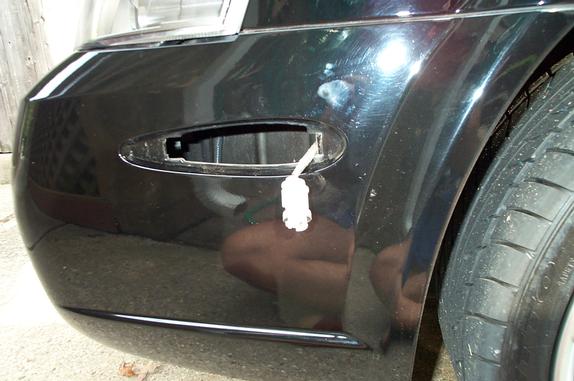
As for the rear clear corner light you more or less follow the same steps as above. The only difference is that I would suggest prying the larger side of the oval closer to the front of the car because it is easier to remove that way.
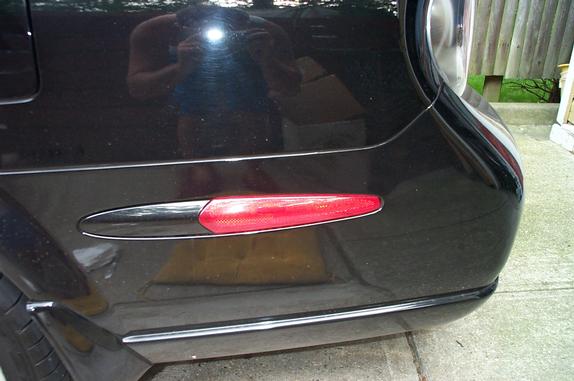
At Night
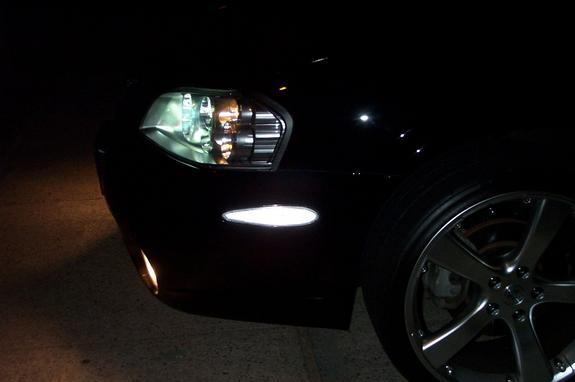
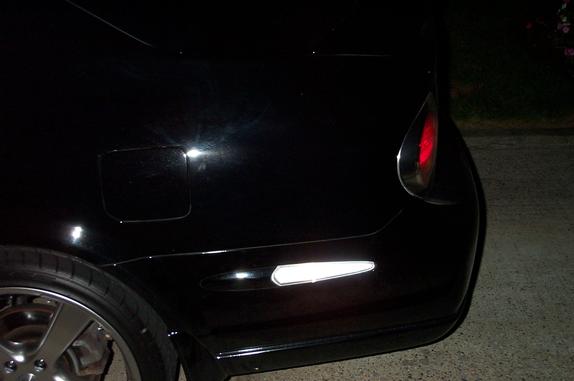
For a inexpensive price tag the clear corner lights give the car that euro racing look and a nice contrast from the black paint on the car. I feel the clear corners look much better then those ugly stock amber and red corner lights that come stock on the car.
![]()