Credit: Kristan Clarke
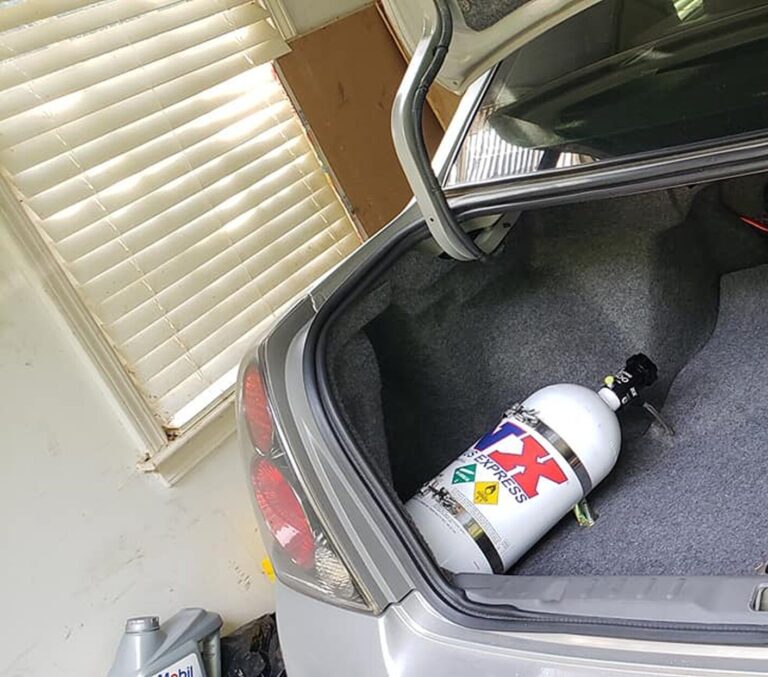
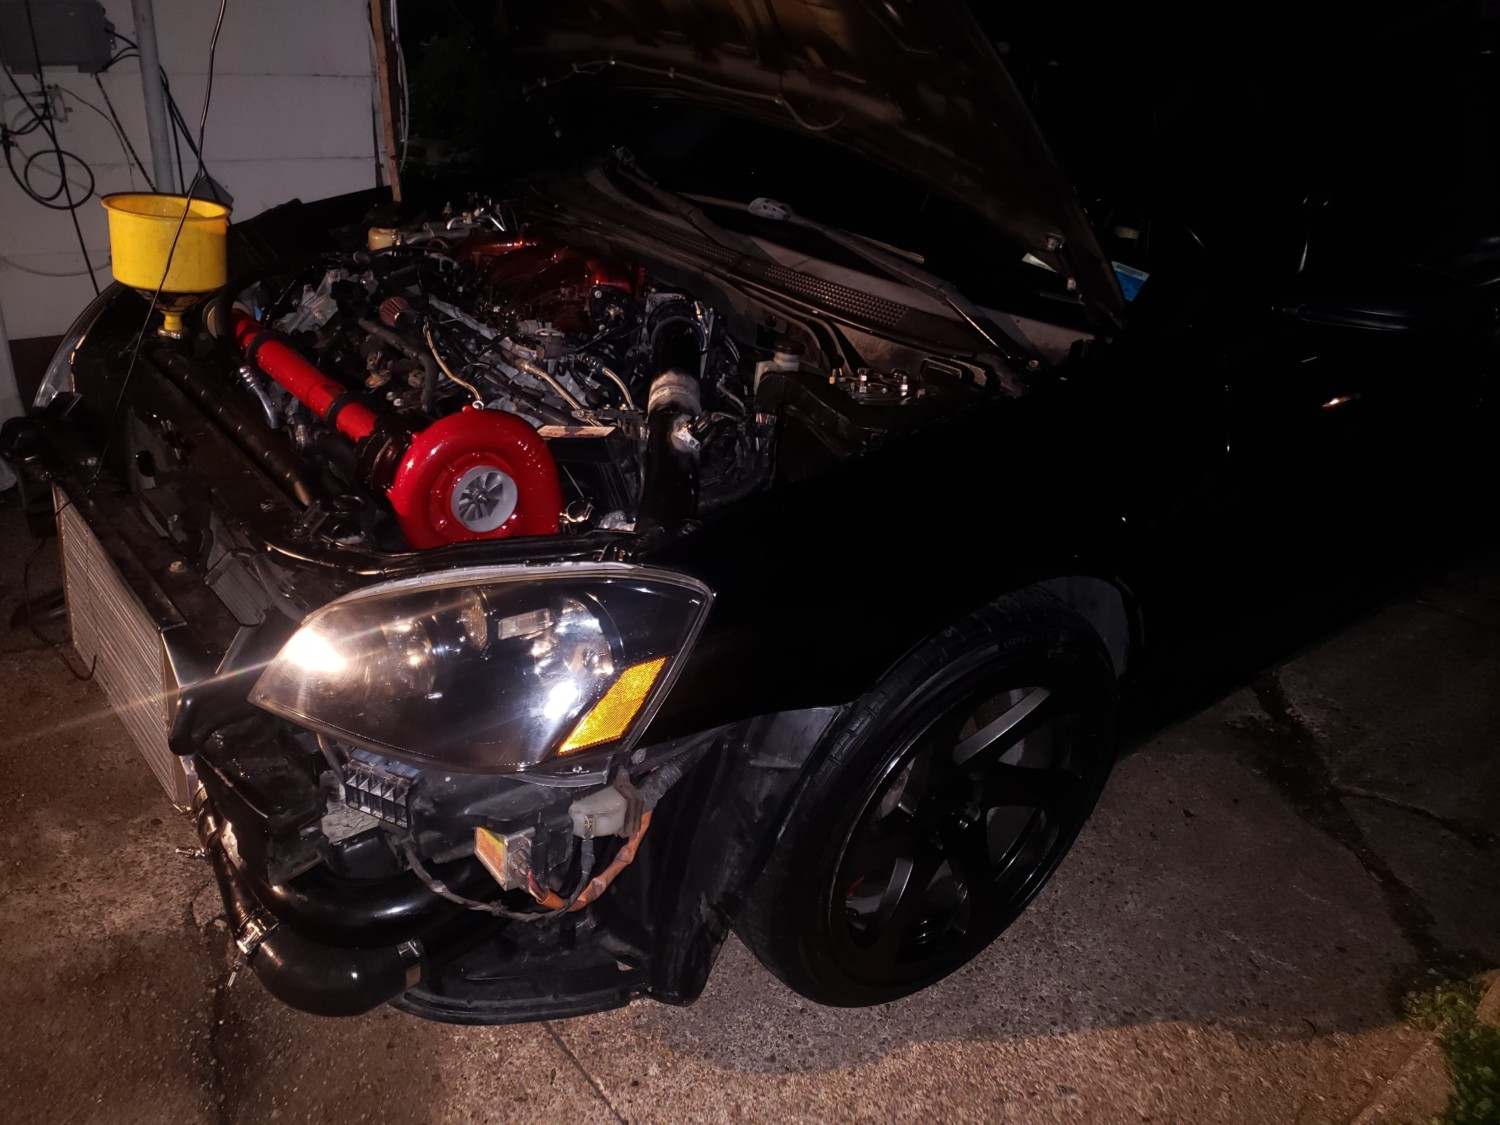
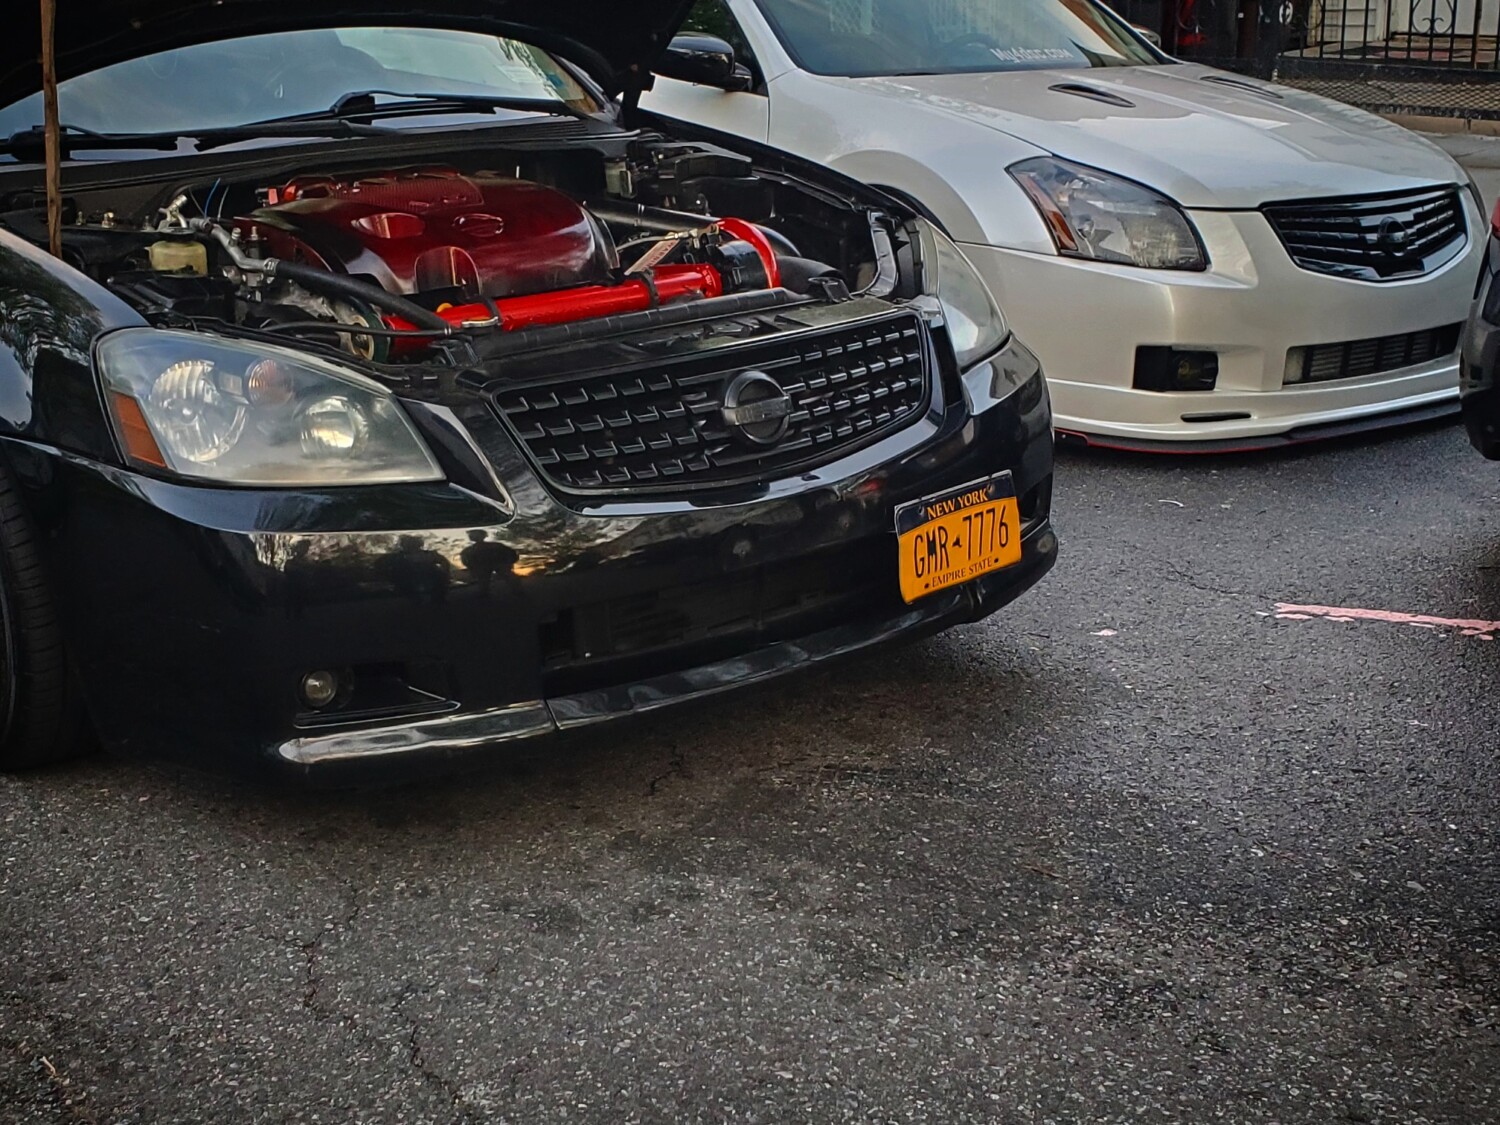
I’m currently using a 100 shot wet kit that produces around 400 WHP. The nitrous is injected near the throttle body in the intake;.




Credit: Kristan Clarke
I’m currently using a 100 shot wet kit that produces around 400 WHP. The nitrous is injected near the throttle body in the intake;.
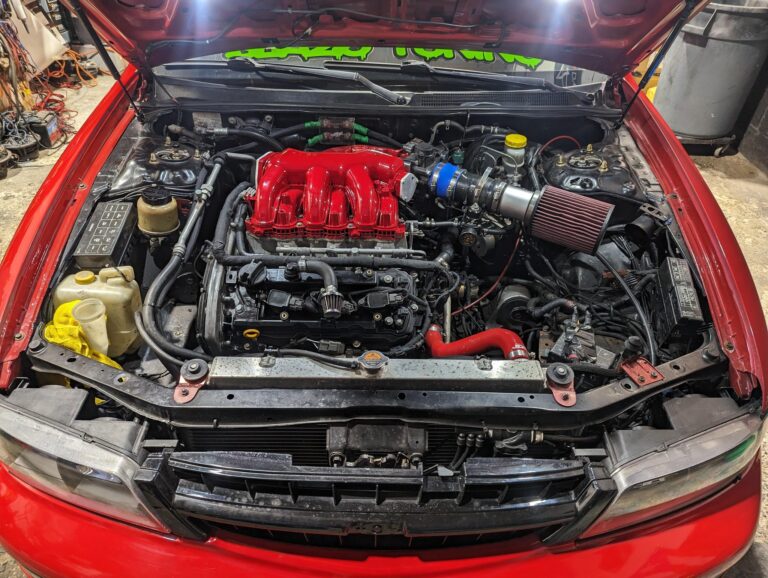
Every engine swap requires tuning. Why? Without proper tuning, the engine control unit (ECU) will operate on a low timing map up until around 5000 RPM. After that, it starts to add more timing, and you’ll notice the vehicle suddenly accelerate. However, performance will be suboptimal—expect lower power and reduced fuel efficiency.
For those driving engine swaps without a tune, your perception of the car’s power is likely inaccurate. However, if you’re satisfied with an untuned swap, just imagine the significant improvement a tune can make. In the past, enthusiasts would install new engine swaps without tuning them and then compete against first-generation cars, often losing by significant margins.

Credit: Victor Dragos
Credit: Rick Eggers
Credit: Rob Tilley

Credit: Weimar Ben
This guide assumes you will be using the 3.0 wiring harness with a 95-01 ECU.
Acronyms used during write-up:
Tools needed:
To use the 3.0 ECU, you must use the 3.0 inner and outer timing cases, chain, and sprockets. You can use the 3.5 cams you will need to enlarge this hole in order to use the VQ30 timing cases. You need to enlarge the corresponding hole on the left side of the timing chain case as well.
(Credit: Nismo3112)
 Drill the intake cams in order to reposition the dowel hole or you may purchase an spacer piece by StephenMax for $75.

To use the 3.5 cams, you must use cam spacers. (Credit: japmaxSE)

You will need to modify the TB to be cable driven or use the 01-02 Pathfinder TB. The cable plate from the 4G maxima bolts onto the 3.5TB butterfly rod PERFECTLY, you just need to add a small washer for it to clear. This is much easier than finding a Pathfinder TB, and cheaper. It saves $100-200 from having to buy a Pathfinder TB for the swap.
(Credit: Nismo3112)

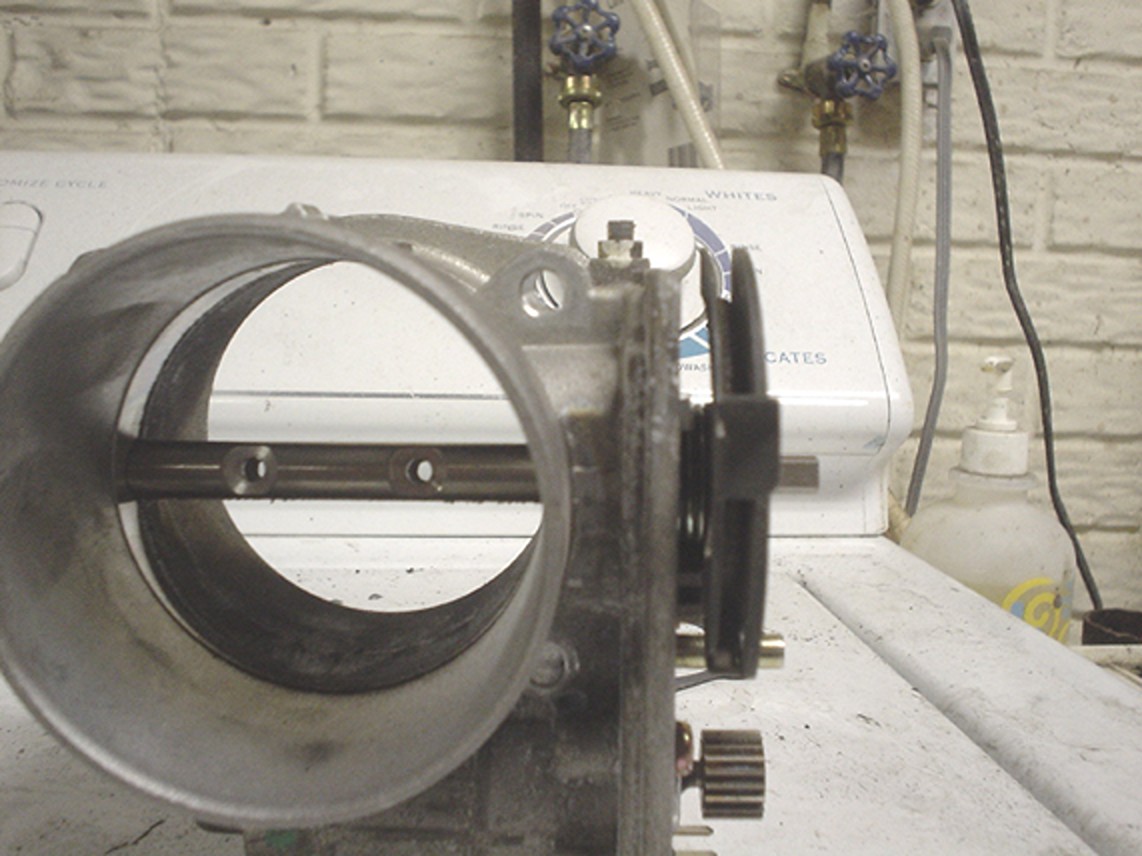 Things to make it work:
1. The TB is flipped upside-down
2. You need to dremel a little off of that gold piece that goes with the TPS, and make a bracket for it to work. The gold piece to the left of the TPS you see in the pic, will go on the rod before the nut.
3. A stopping nub is shaved off, the other stopping nub was shaved some.
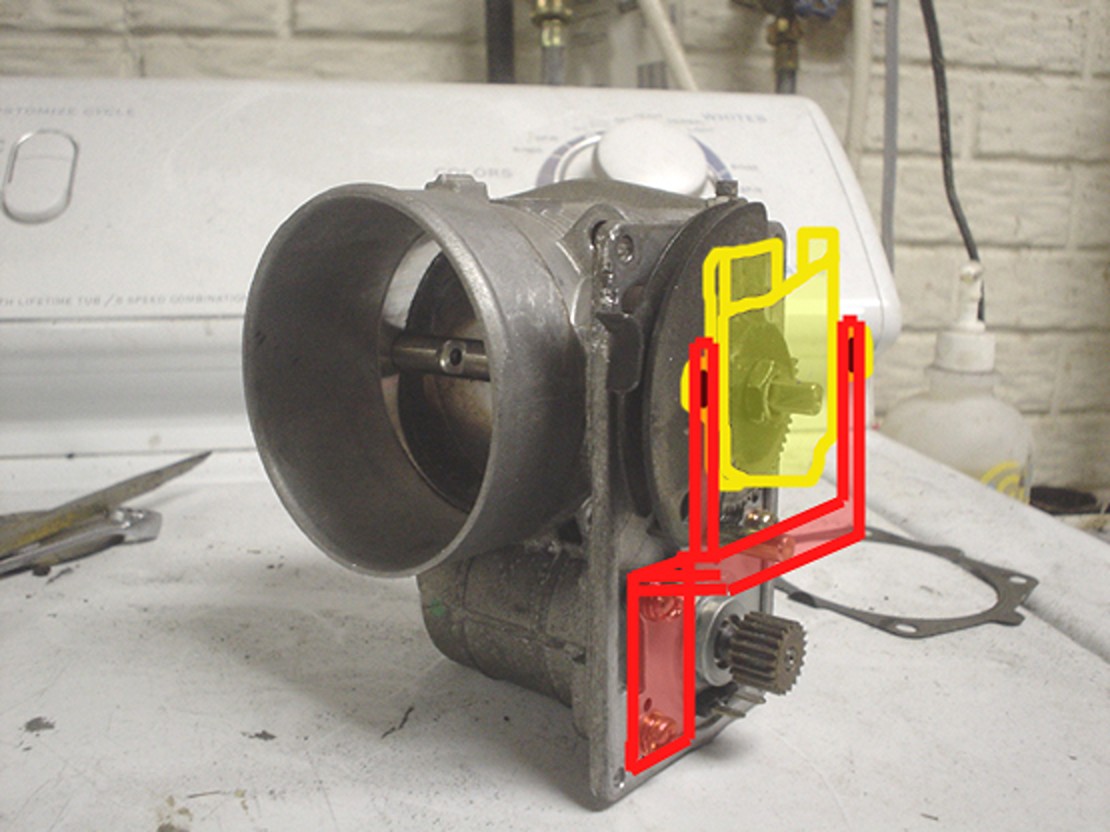
 Getting the TPS to turn nicely with the throttle rod is the hard part.
Completed Fabrication of TB/TPS: When mounting in the vehicle, do not mount it on the firewall, your car will jerk like there is no tomorrow!
NOTE: This isn’t the only way to do it, be creative. (credit: Nismo3112)


If you want to use the 3.5 injectors and fuel rail (and you should), you will need to convert your fuel system to returnless or you will need to add a FPR in place of one of the 5.5gen dampers.
(Credit: Nismo3112)
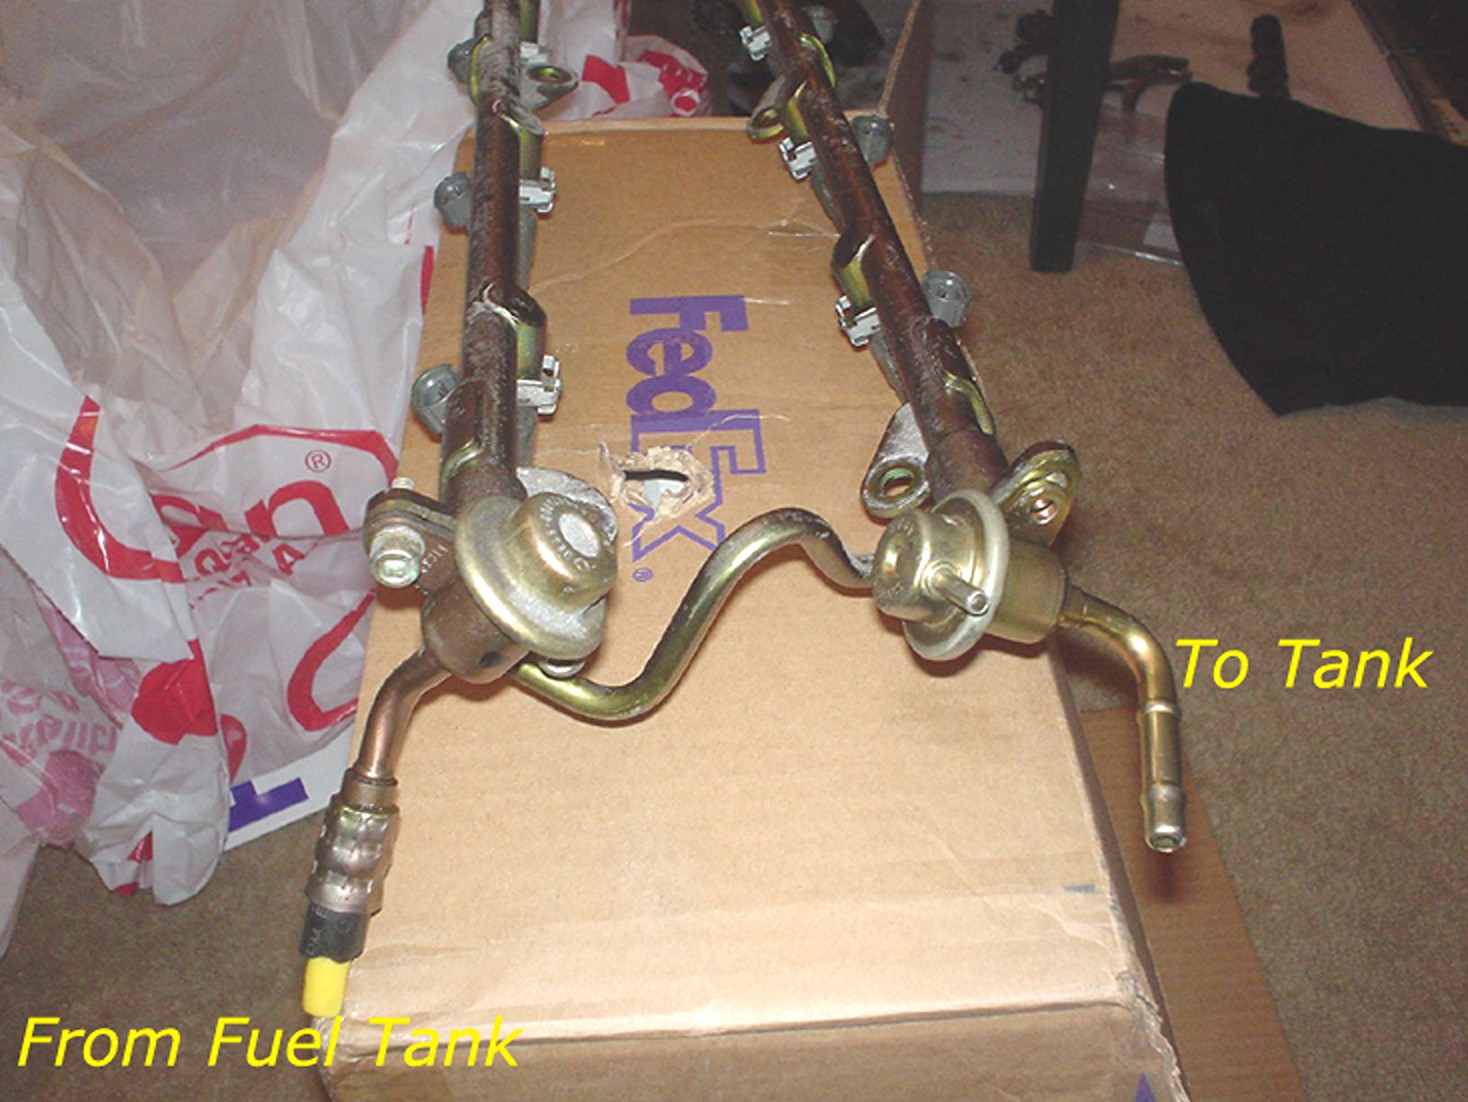
All you would need to do is put a tee in the fuel line between the fuel filter and the fuel rail. One leg of the tee goes to the (unmodified) fuel rail, the other leg goes to the FPR and from there to the return line to the tank. Voila, a returnless system, as far as the fuel rail is concerned.
(Credit: Stephen Max)
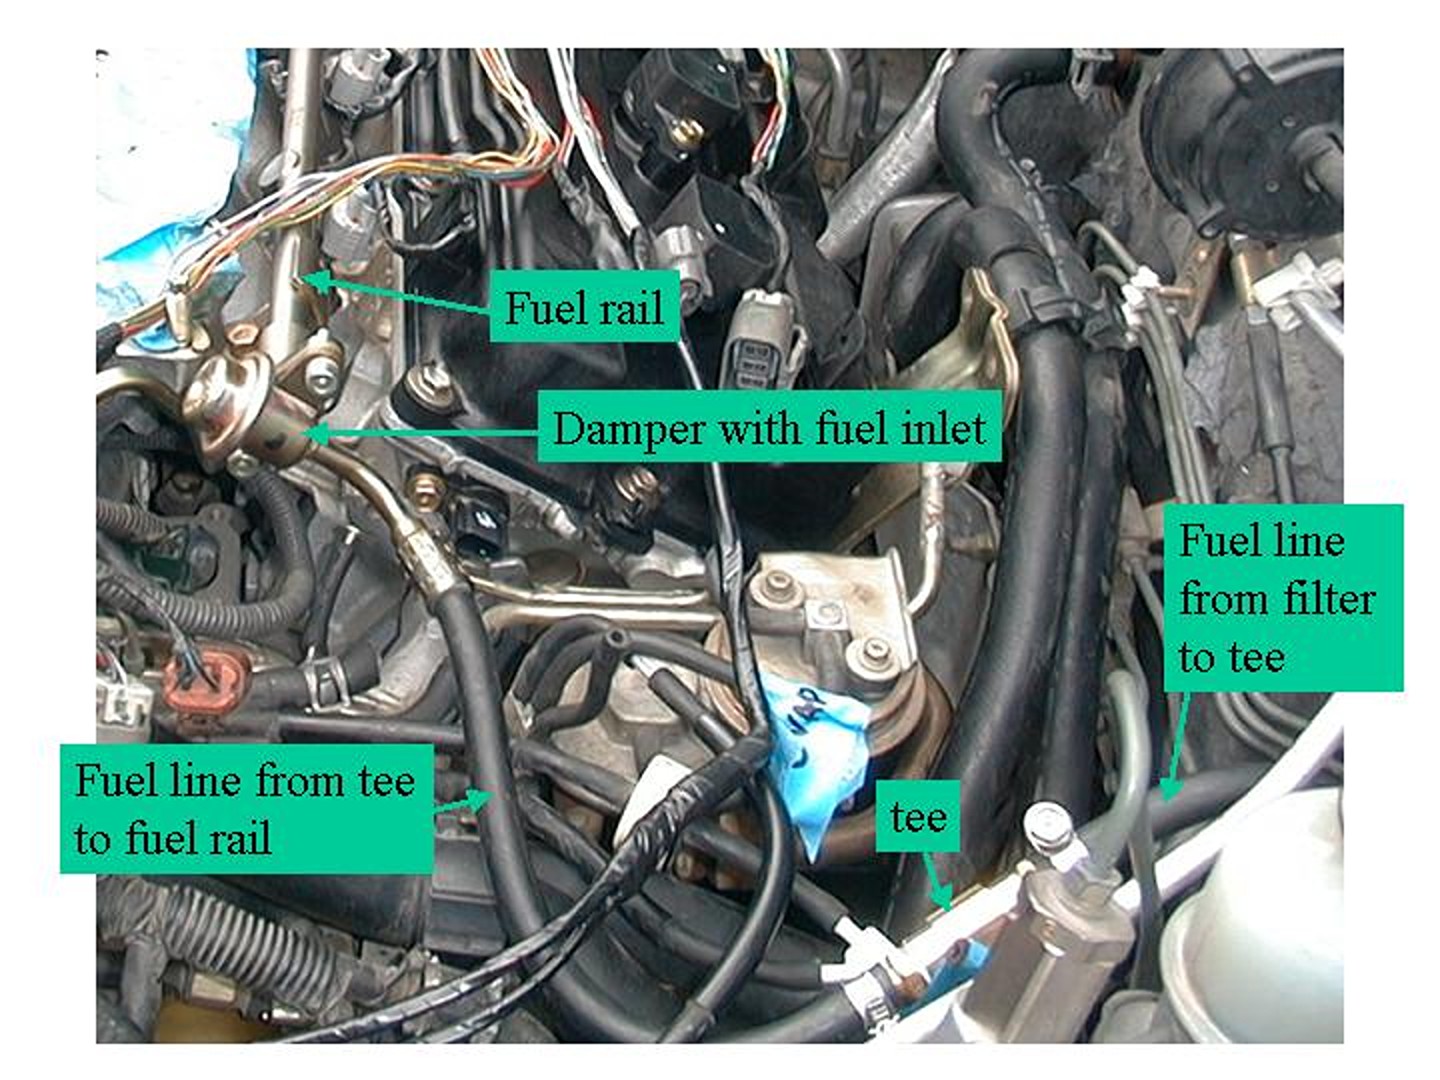
The FPR needs to be around 51PSI or be adjustable for this to work properly. There is a NISMO adjustable one at CourtesyParts for $127. A generic one with a dial on it from of Ebay for $45 will work just fine.
(Credit: JClaw)
“You can keep the VQ35 oil pan and all the accessories will still bolt on. You can use the 3.0 oil pans and still retain the 3.5 oil cooler. The oil cooler bolts right on to the 3.0 oil pan. This way, you don’t have to remove any material to have the 3.0 CPS sit at the right distance from the signal plate and you don’t have to plug the coolant hole. If you use the 3.5 oil pans, you have to shave about 1/4 inch off where the CPS at trans goes, If not the sensor is too far away to read the flywheel. I would rather not remove the lower and upper 3.5 oil pans. That’s more work than just shaving 1/4 of an inch off.”
Replace all injector harness connectors with VQ30DE-K(2000-01) or VQ35 connectors.
Make a mounting plate for the 4G IACV and route the idle air hose to somewhere into the intake manifold.
Remove all of the ignition coil harness over wrap in order to be able to connect the ignition coil harness connectors to the coils. Rewrap with electrical tape once you have them rerouted. While in the motions you should replace the hoses, belts, and fuel filter just to be safe.
(Credit: Dubbya)
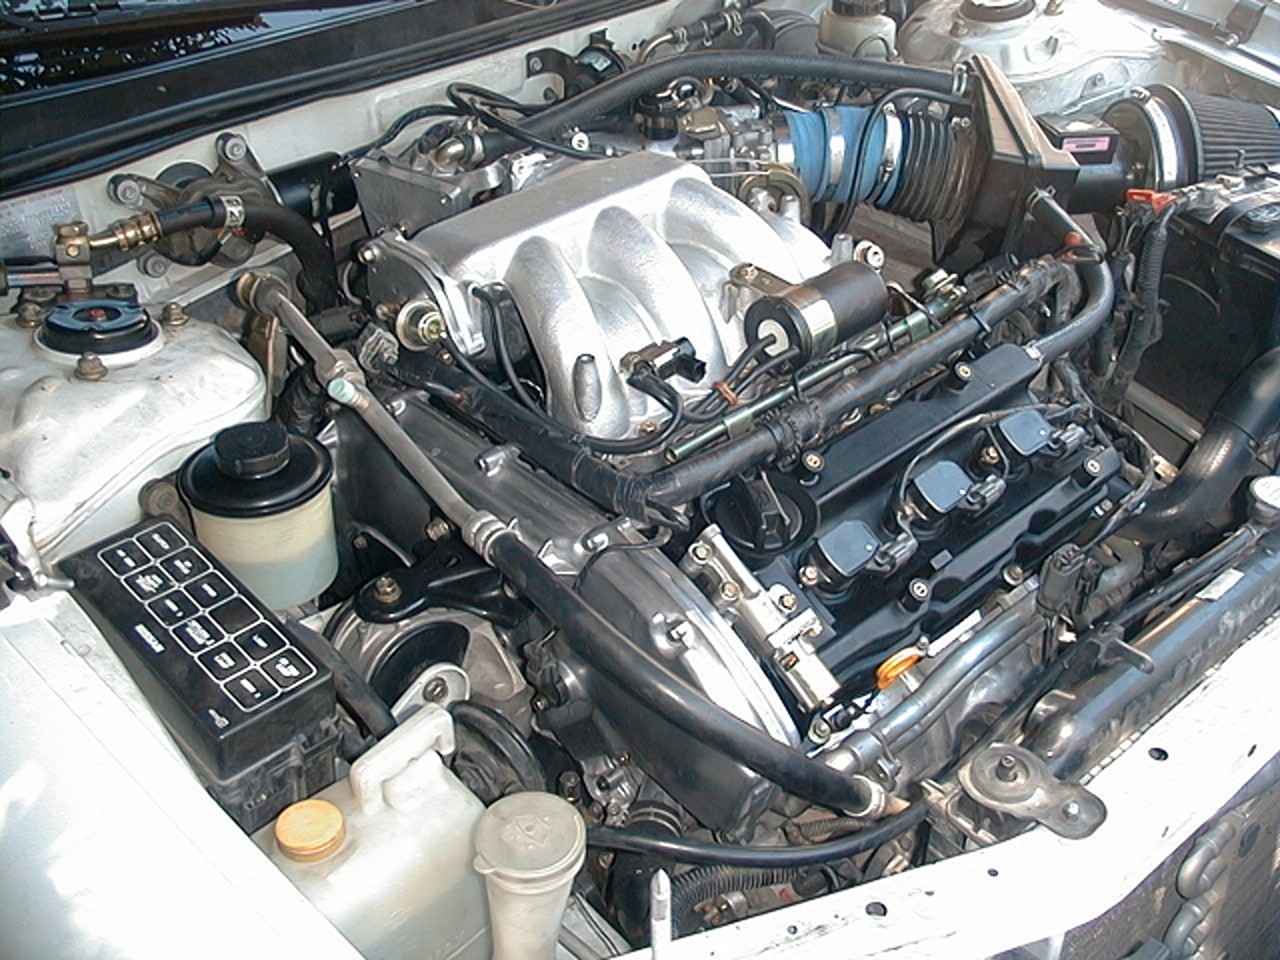
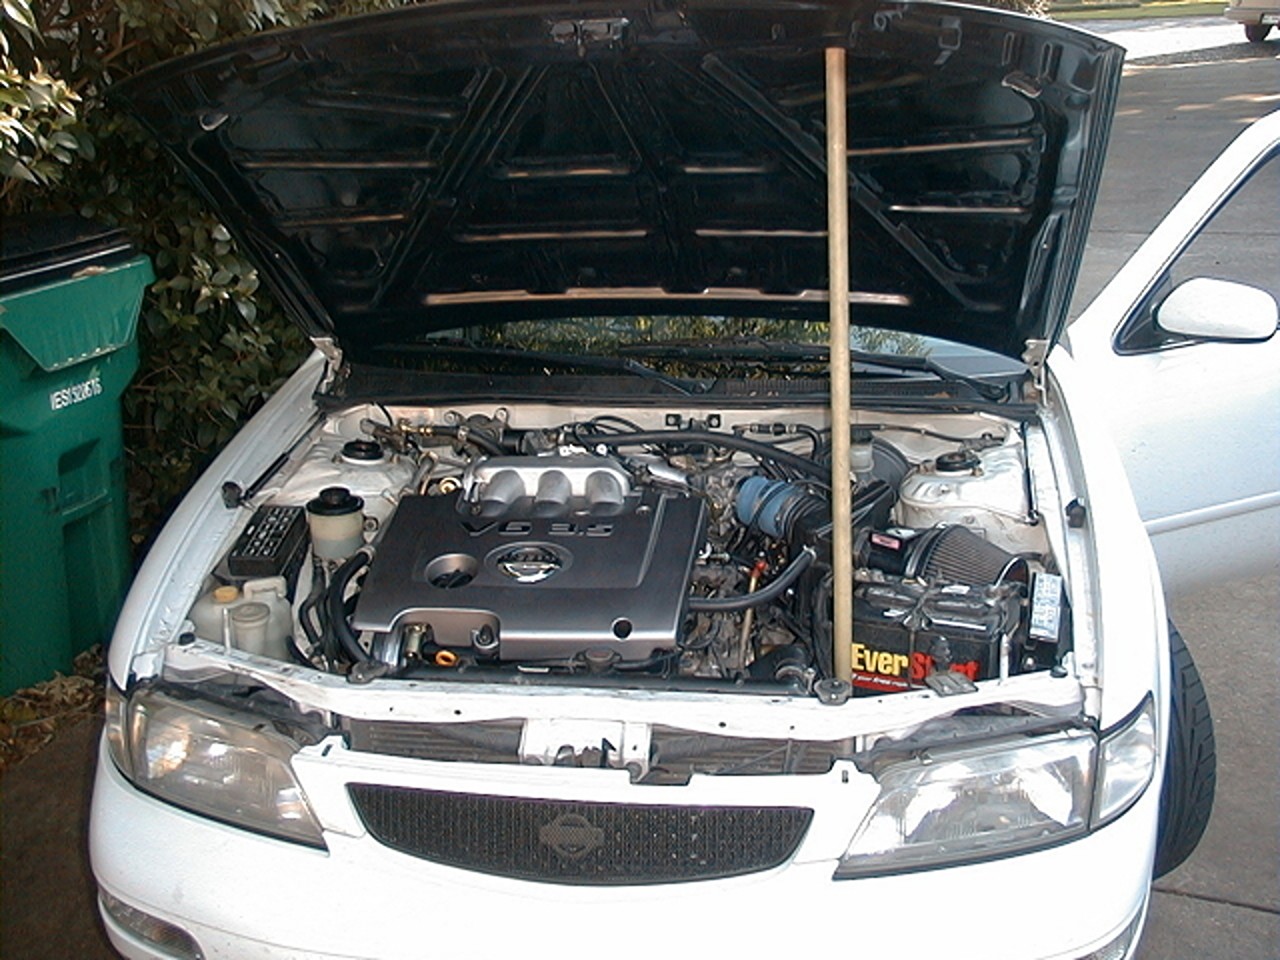
(Credit: Nismo3112)
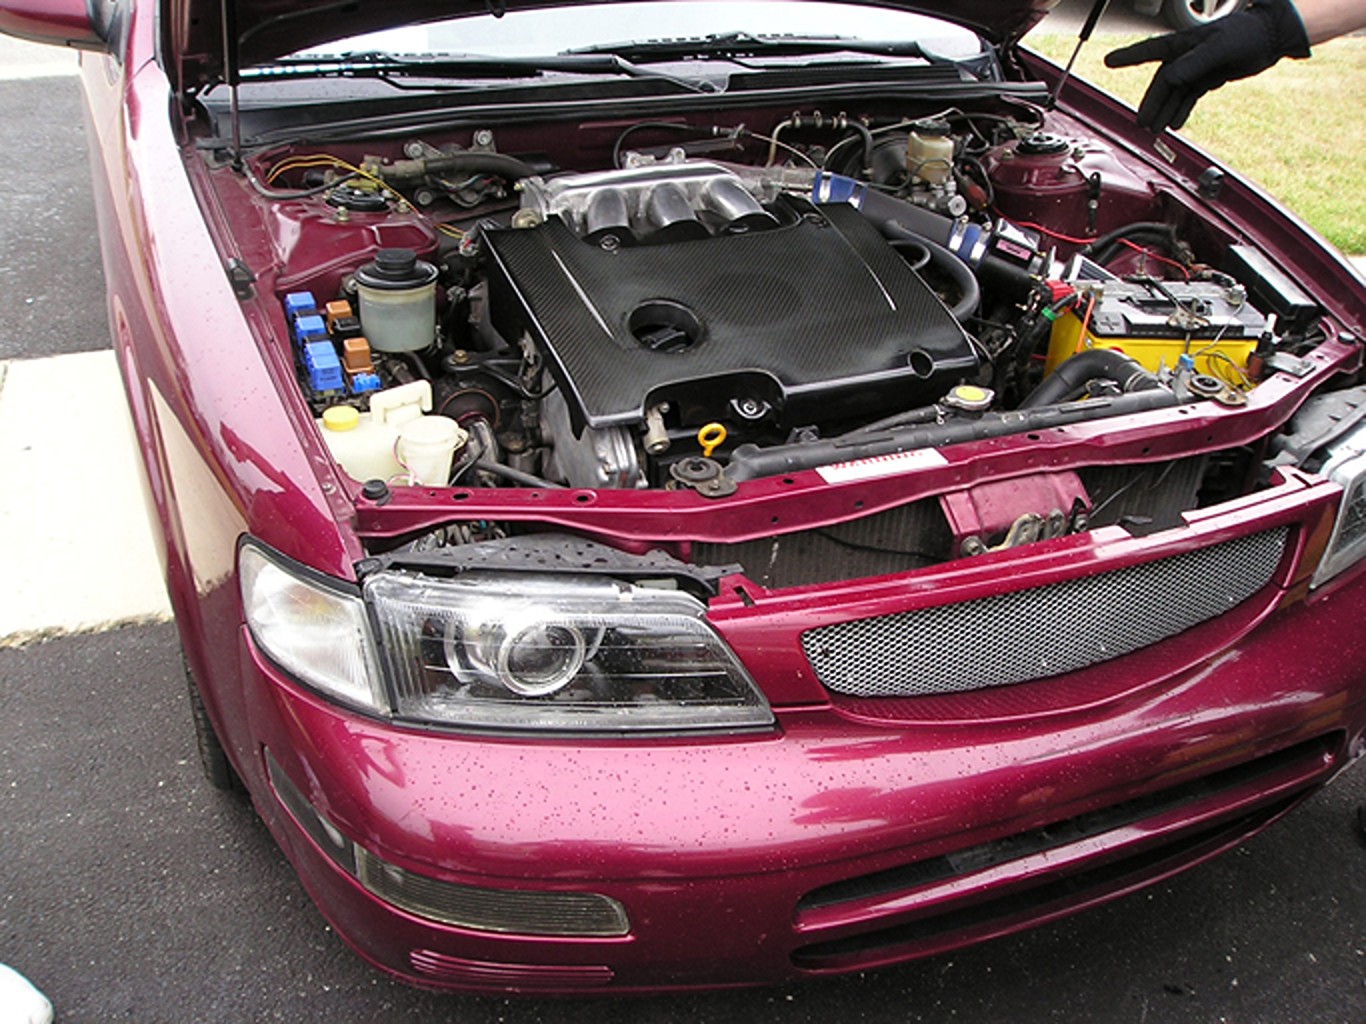
What does it cost?
Where can I get an engine?
A local junkyard would be best. If you can’t find something locally that is suitable try Car-part.com(link is external). Tilleys99 sells prepped 3.5’s that are ready to drop in for either $1500 or $2000?
Can I use the 02-06 ECU?
Yes, but it’s a pain in the rear end and you basically have to rewire the car. If you choose this route, you’d better have a wrecked 02-06 that you can cannibalize parts from.
What are the pros of using a 02-06 ECU?
Better timing, E-gas, variable cam timing, 5-10whp more.
What are the cons of using a 02-06 ECU?
Wiring, higher cost, shitty fuel maps above 6000rpm, 100% throttle at 6000rpm really means only 80%. The fuel maps and E-gas problems are fixed by ECU upgrades.
What are the pros of using the 95-99 ECU?
Easy wiring, lower cost.
What are the cons of using the 95-99 ECU?
Crappy timing, fuel maps, lack of variable cam timing.
How hard could the wiring for the 02-06 ECU really be?
Here’s what JCLAW had to say about that…..
“The thing that really f*cks everything up is drive by wire. Sure, you can simply swap in the main harness and not worry about anything else, but then oh no, the drive by wire harness is part of the body/electrical harness, a bunch of taped-together wires the size of your d*ck, pick and choose, find the good one, then you have to buy the steering column from a 02 Altima or Maxima, rip both apart, and try to fit the ignition equipment from the newer car in the older column, which leads to another problem.
Oops, the airbags are on the same harness, so won’t work. Then oops, you’re trying to fit the 02 Altima drive-by-wire gas pedal and it wont fit, it should be on the floor right where the steering column base is. No problem, just try to shape/weld some complex bracket there so the gas pedal is where it should be.
Then you have to drill 2 1-1.5″ holes in your firewall, because the 02 Altima has more electrical hardware in the front than your 4th gen does, and those harnesses are essential because, remember, the drive by wire (10-12 wires I believe) is part of it, so you have to use it, that means you have to rip apart your entire interior, and hope to hell that the 02 Altima you got it from has a sunroof if you have one, if not, no more sunroof.
Then, you have to hope as hell the wires will plug into your electric door motors, and oops, they don’t, so you have to buy the 02 Altima door motors for your electrical windows to work, that’s in addition to the engine (1 grand), and another grand’s worth of ECU, 3 complete wiring harnesses and an electronic gas pedal whose signal no one can crack. So you hope like sh*t that the electrical door motors from the Altima will fit in your 4th gen, but the f*ckers won’t! So now you gotta weld complicated brackets into your doors (!!), thus adding weight to your car, just to make the f*cking window motors work!
Then you have to rewire all connectors for every single light in the car, and hope to hell the gauge cluster from the 02 Altima works in your dash… oops, it doesn’t. No problem, right? Just cut the dash apart. Then you have to fit all the electrical hardware in the engine bay, in a platform that wasn’t made for it.
Fans? Radiator? AC? Forget it. And the transmission? Nope, not the same sensor, plug is different, aw sh*t car won’t start, you need the immobilizer. Big black box.
No problem, go back to a junkyard, if you can find one that’ll sell it to you. Oops, sold. Get the immobilizer from another car, right? Sh*t, the ECU, ignition key, and immobilizer ALL MUST come from the same car, so if the immobilizer doesn’t match the ECU and ignition key of the very same car, it won’t start, ever, and since you don’t have the same exact immobilizer, means you’re quite completely f*cked now, doesn’t it?”
But, but, I’d really like to have the better timing, better fuel maps…….
Get a Technosquare or JWT ECU and have them advance the hell out of the timing. Alternatively, you could get a E-manage Ultimate and do the same thing and be able to alter the A/F ratio.
Where can I get the 4G FSM?
a32
What comes with a junkyard engine?
Full wiring harness, coil packs, exhaust manifolds, IM, TB, water pump, all sensors. They usually do not come with any of the accessories-starter, alternator, PS pump, A/C compressor.
How much power will I get?
Stock: 200whp/220wtq
Some mods: 230-240whp; 230-240wtq
How fast will it be?
With mods, low to mid 13’s in the ¼ and 5’s 0-60. No mods, high 13’s. low 6’s for 0-60.
Is it a direct drop in?
Yes, and no. Externally the 3.5 and the 3.0 blocks are pretty much the same and everything bolts right up. The sensors, fuel rail, and fuel injectors are not the same.
Can I use my 5 speed?
Yes, it bolts right up.
Can I use the 6 speed?
Yes, it bolts right up, but it’s a lot of work. The consensus is that it’s not worth it unless your 5 speed has assumed room temperature.
The 5 speed is rod-driven and the 6 speed is cable driven. In addition, the flywheel is different. The 4th gen ECU will not be able to read the 6 speed flywheel. You need to hack a 6 speed flywheel to have the 5speed CPS ring to use it with the 4th gen ECU. You will also need to get different axles (CV joints). You will need to get the 6 speed tranny mount and bolt it to the frame. You will also need to get the 6speed shifter assembly.
Do I need to upgrade my clutch?
YES, at least a stage 1 clutch, stock 5.5gen, or Altima 3.5SE clutch. The stock 4th gen clutch will not hold the TQ the 3.5 puts out.
Can I use my autotragic?
Yes, but they’re some debate whether the 4G auto can handle the power. Some say the 95-03 4spd autos are all the same and some say the 02-03’s are beefed up. Autos in general usually take more TQ well and I think that a 4G auto should work fine, assuming it’s in good mechanical condition.
What mods are recommended for the swap?
Headers or the 4th gen exhaust manifold with a y-pipe are highly recommended. This frees up around 20-25whp. Intake is maybe 5whp. UDP is also a good mod. I recommend the Motostorm UDP. The UDP for the 3.0L is the same except the 3.5L UDP doesn’t have the timing ring.
Do the 3.0L headers (exhaust manifolds) fit on the 3.5 block?
Yes, everything matches up perfectly. If you’re not using aftermarket headers, I highly recommend that the 3.0L headers be used since they don’t have any precats in them.
3.5L stock headers with the 3.0L stock Y-pipe would be VERY restrictive. Don’t do this unless you want to have potentially less power than your 3.0L had.
Can I use other 3.5 engines other than the maxima 3.5?
You can use the 3.5 from the Maxima, Altima, Murano, Quest, and I35. You CANNOT use the G35, 350Z, Frontier, or Pathfinder engines because they are RWD.
Does the Altima SE-R and the 04-06 Maxima engines really have more power? What are the differences?
The consensus is that they have a little more power due to ECU tuning and a slightly different IM. The difference is probably 5hp or less. The 04-06 Maxima engine has an external EGR valve, so it would be easier to pass emissions in most states with an external EGR than trying to convince them that the exhaust cams do it in the 02-03.
Can I use the TB (E-gas) that comes with the engine?
If you use the 02-06 ECU, you can use the E-Gas TB. If you use the 95-01 ECU, you will need to mod it to be cable-driven or use the 01-02 Pathfinder TB.
If you want a better 5th gear for highway cruising or want a more aggressive final gear, you can do what jclaw did and swap out the final gear and 5th gear from other transmissions. I’ll have to find jclaw’s thread for that.
Can I use the 3.0 heads on the 3.5 block?
Yes, but this is not what you want to do. The 3.5 heads flow better and get better HP and TQ.
Can I use the 00VI on 3.5 heads/block.
Yes, but the ports don’t match up. Many think the 00VI flows better, but no one’s done a dyno yet. If you want to go this route, you should get pathfinder heads that have ports that line up with the 00VI IM. Putting the 00VI on the maxima 3.5 heads may lose you some power. I recommend using the 3.5 maxima heads and waiting for a decent IM from Kinetix.
Can I use the 350z/G35 IM?
NO, it won’t have the TB in the right place and it won’t fit under the hood. In addition, the mounting holes don’t line up and the ports don’t match up. Thank you Nissan!!! The 350z IM may line up with 04/05 maxima engines, but you would still have to find a way to get it to fit under the hood and make a mount for the TB.
Will I still have cruise control?
You can keep cruise control no matter what TB you use, as long as your TB has the CC throttle cable attachment.
Credit: Weimar Ben
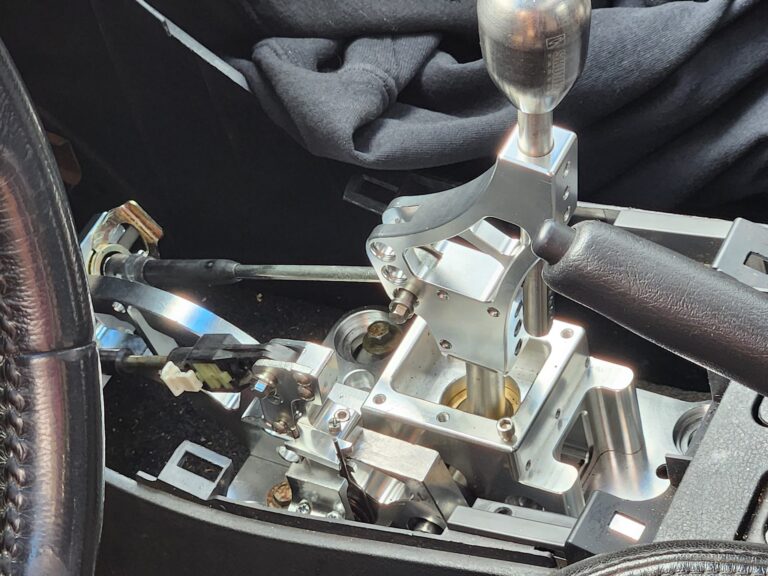
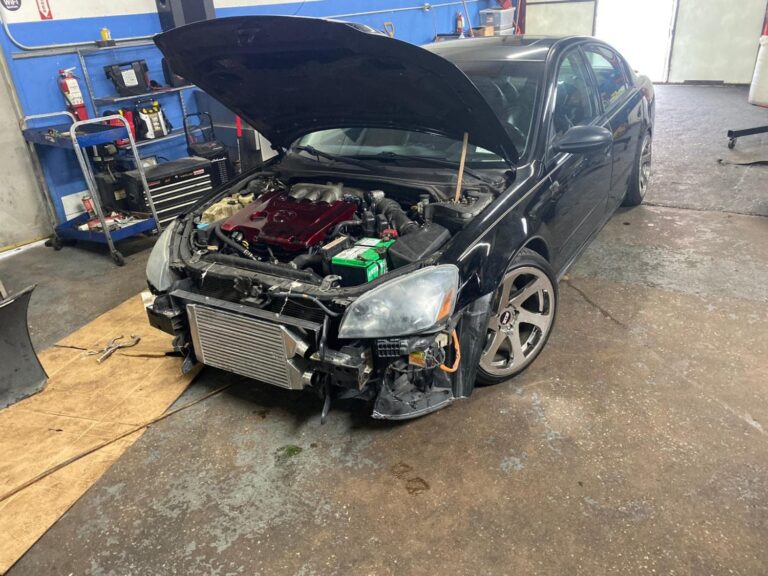
Credit: Shawn G. / EddyMaxx
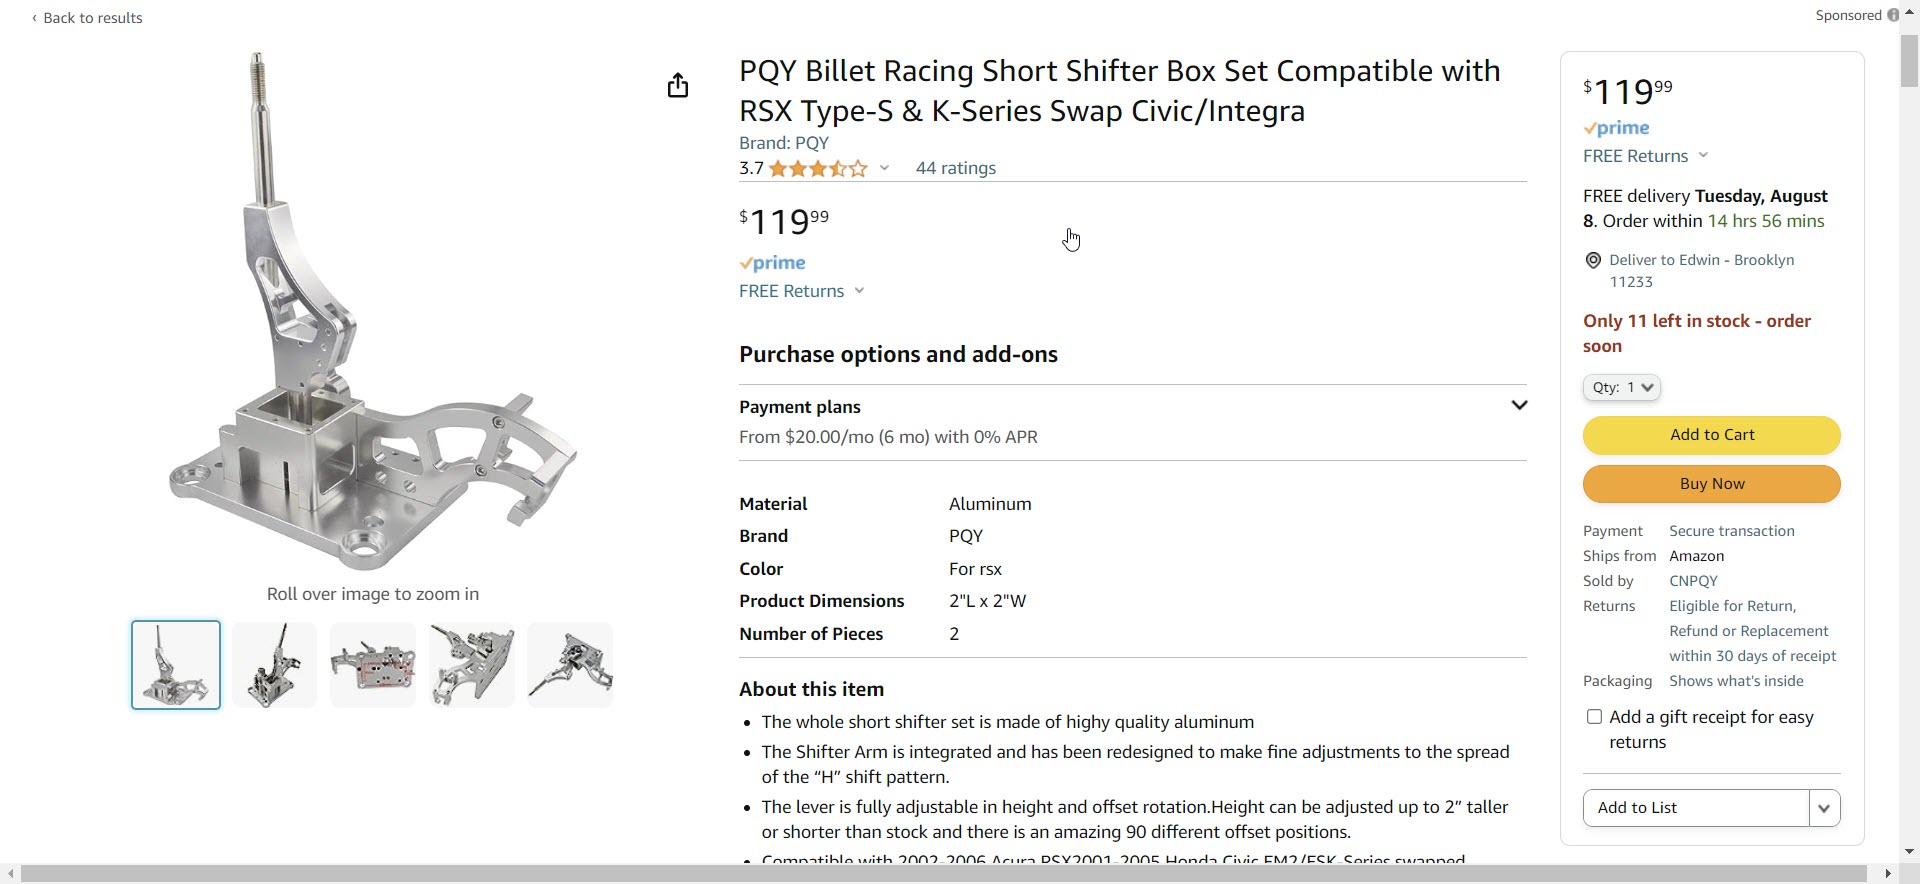
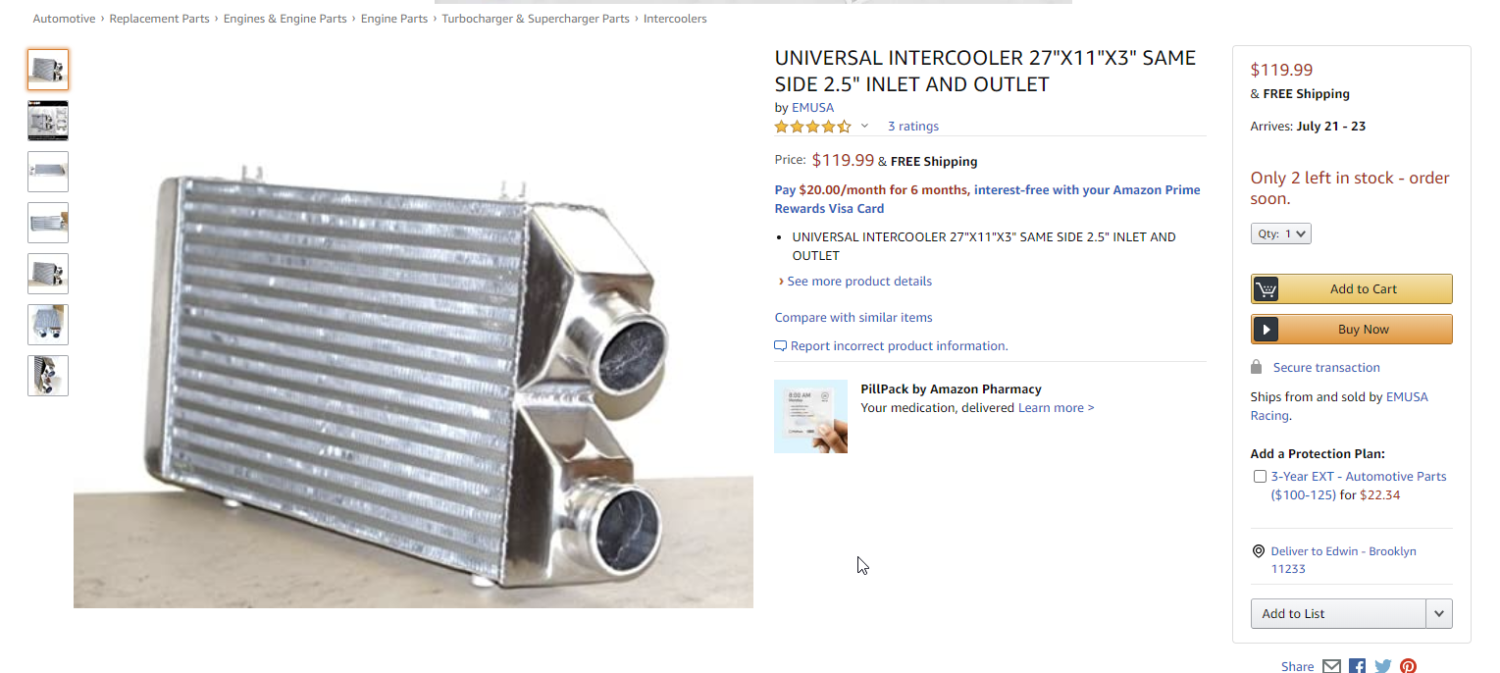
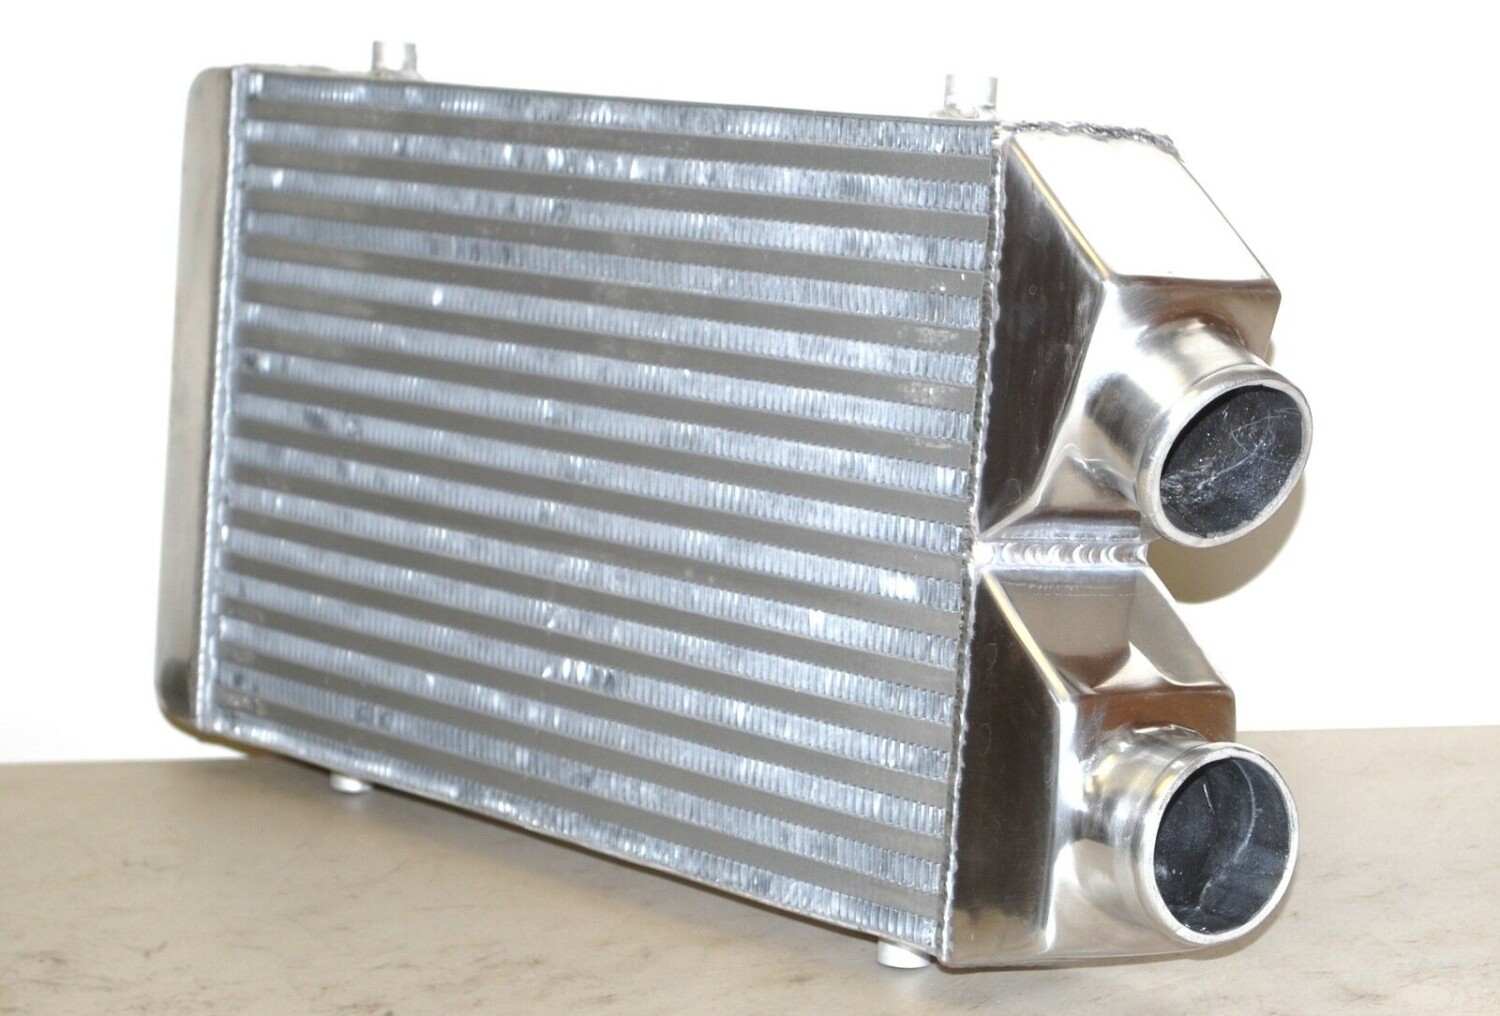
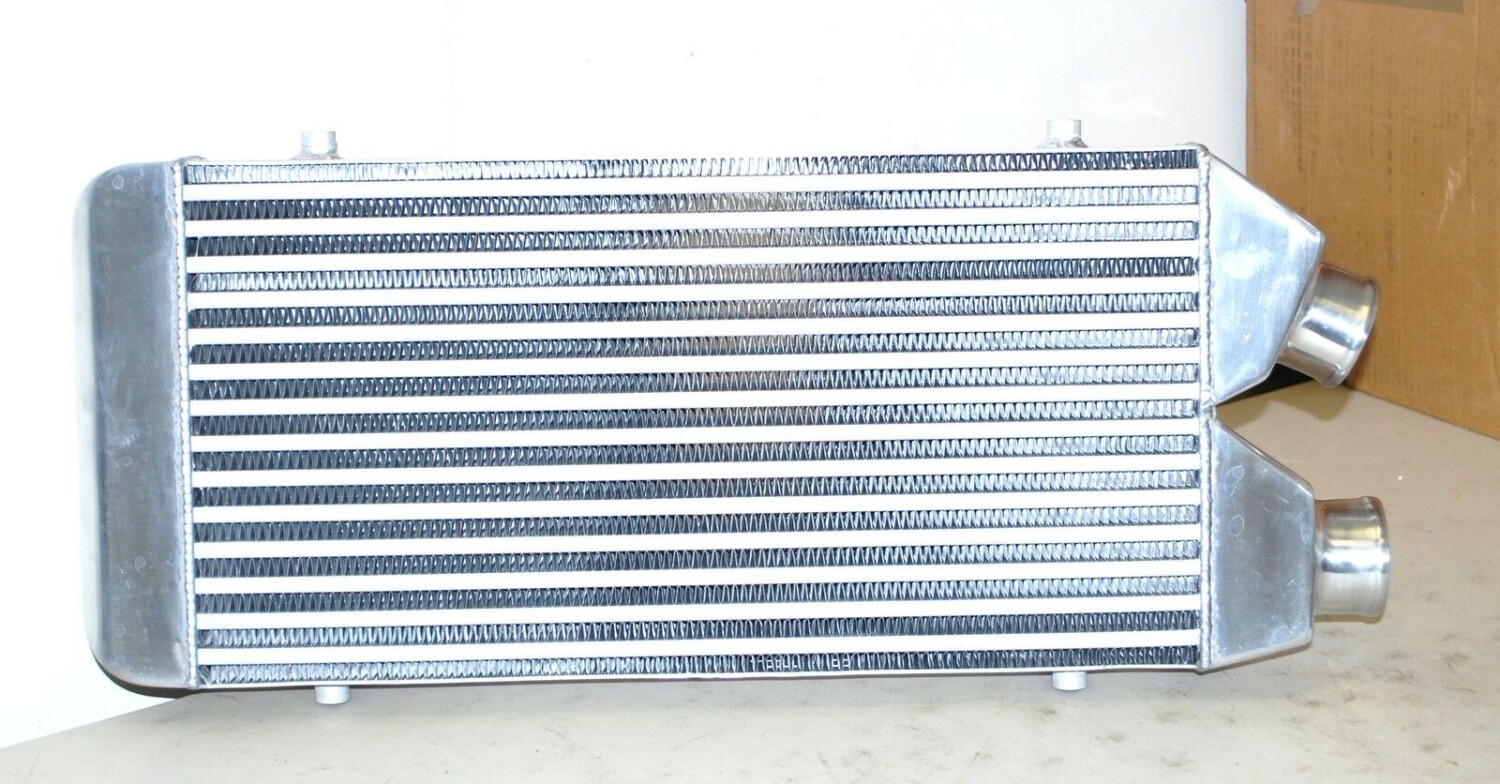
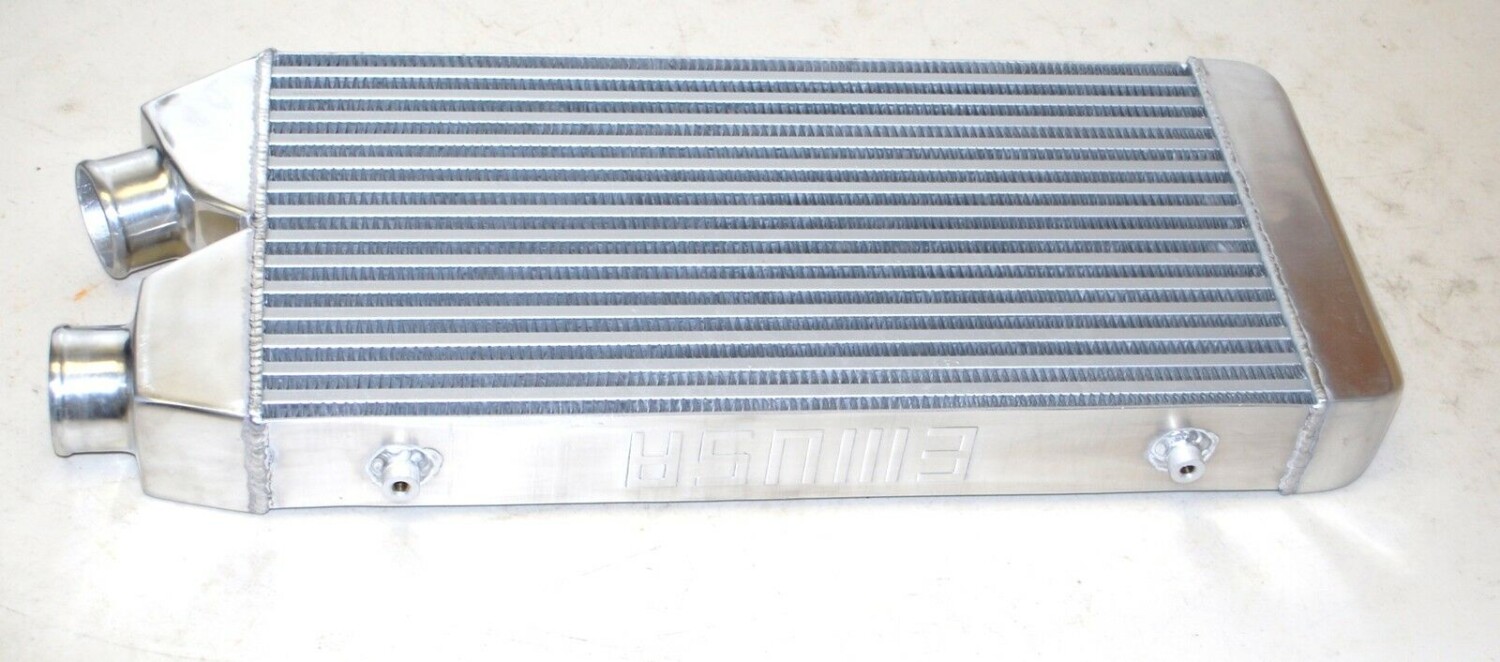
For those looking at boosted setups and want an intercooler, below is one that fit good. It needs to be same-side because trying to route piping on the passenger side will be very rough. Plus with this setup, you can retain your fog lights. It just requires modifying the crash bar for it.
Manufacturer: EMUSA
Price: $119.00 + Tax ($130.00)
Amazon Link: https://www.amazon.com/gp/product/B077QH74JC/ref=ox_sc_act_title_1?smid=A1K0UU5ZLPKT3U&psc=1
Intercooler Specs:
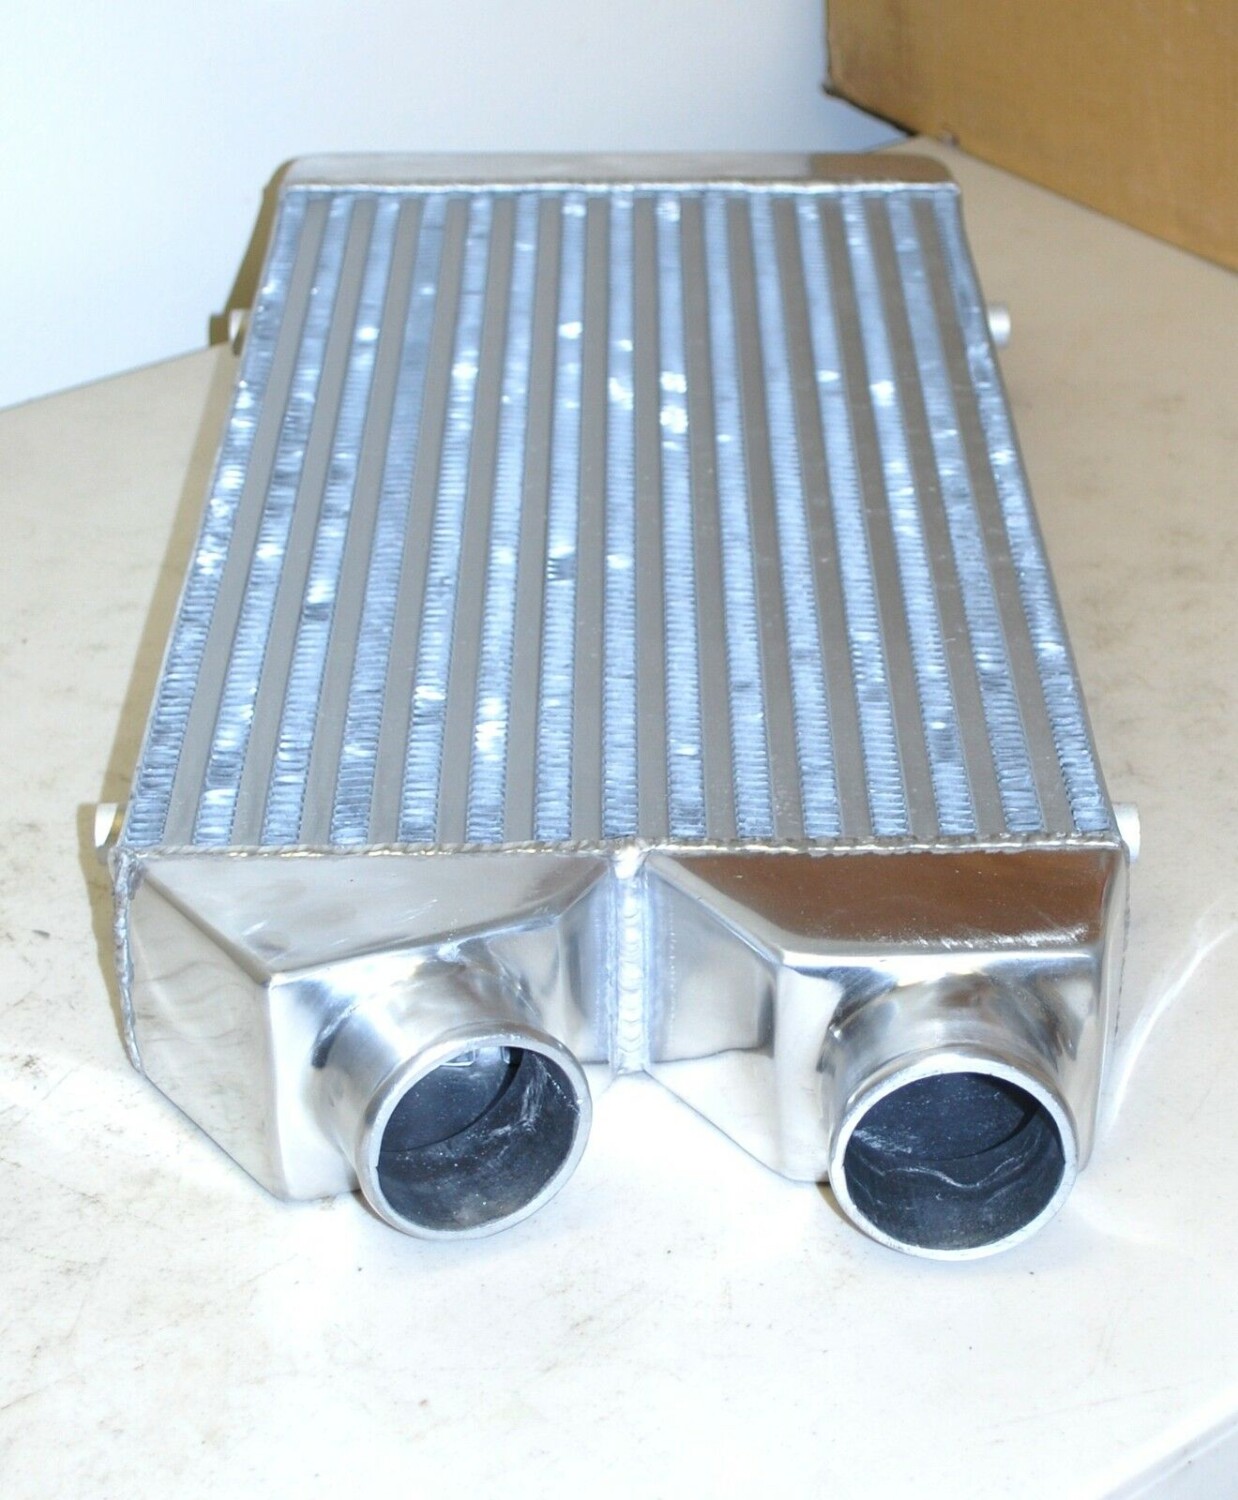
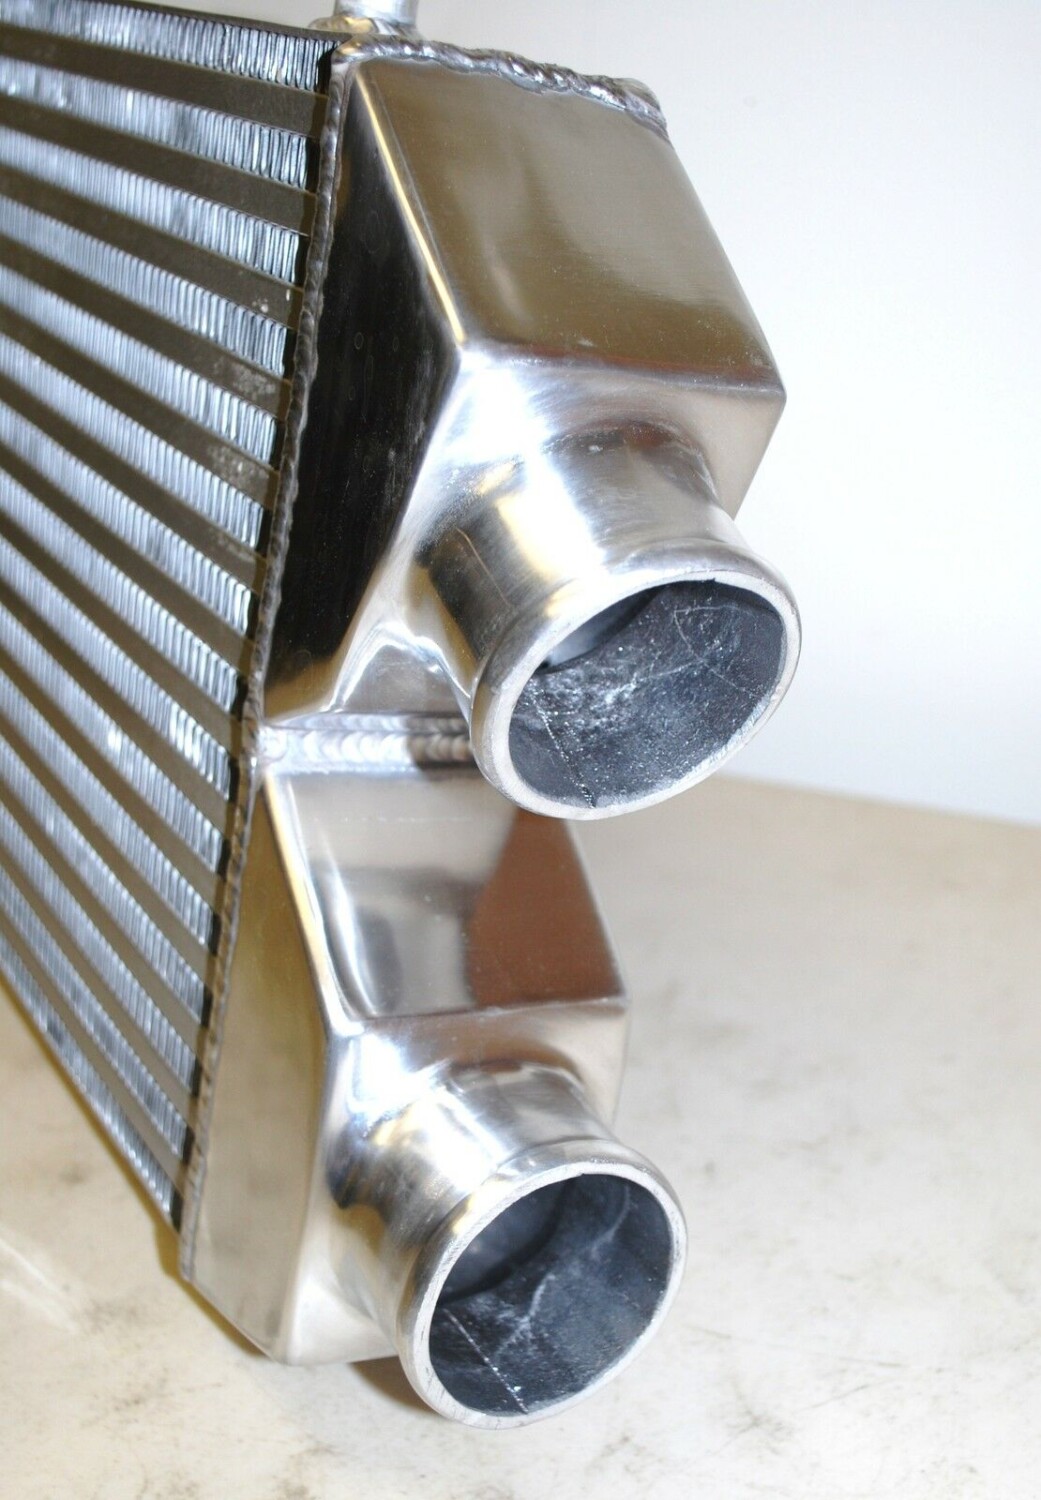
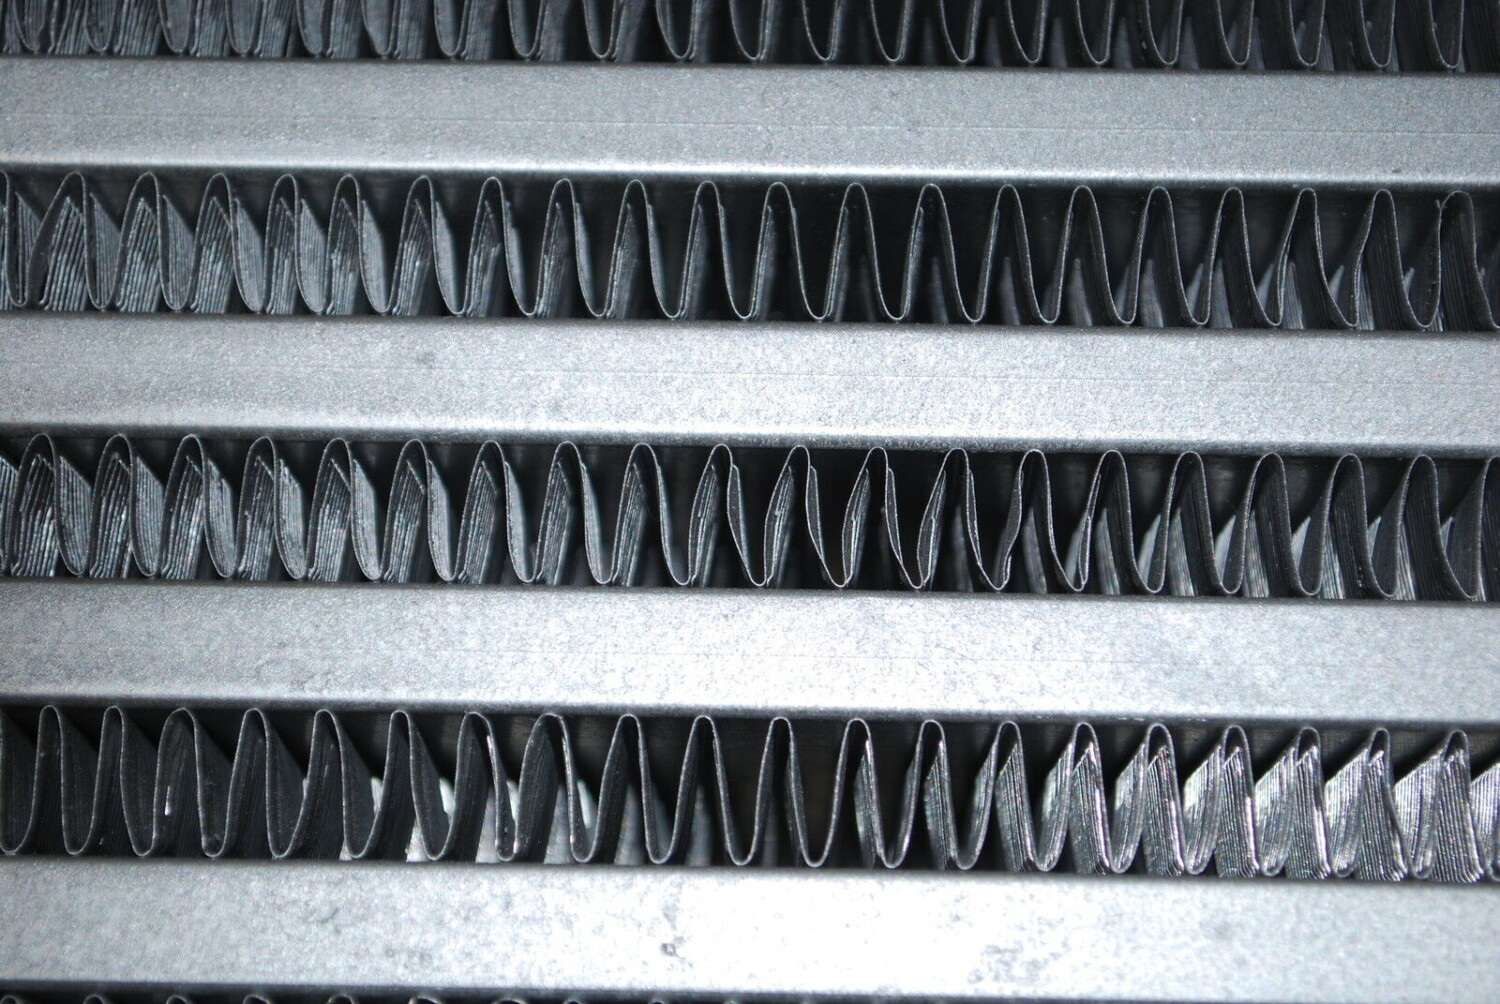
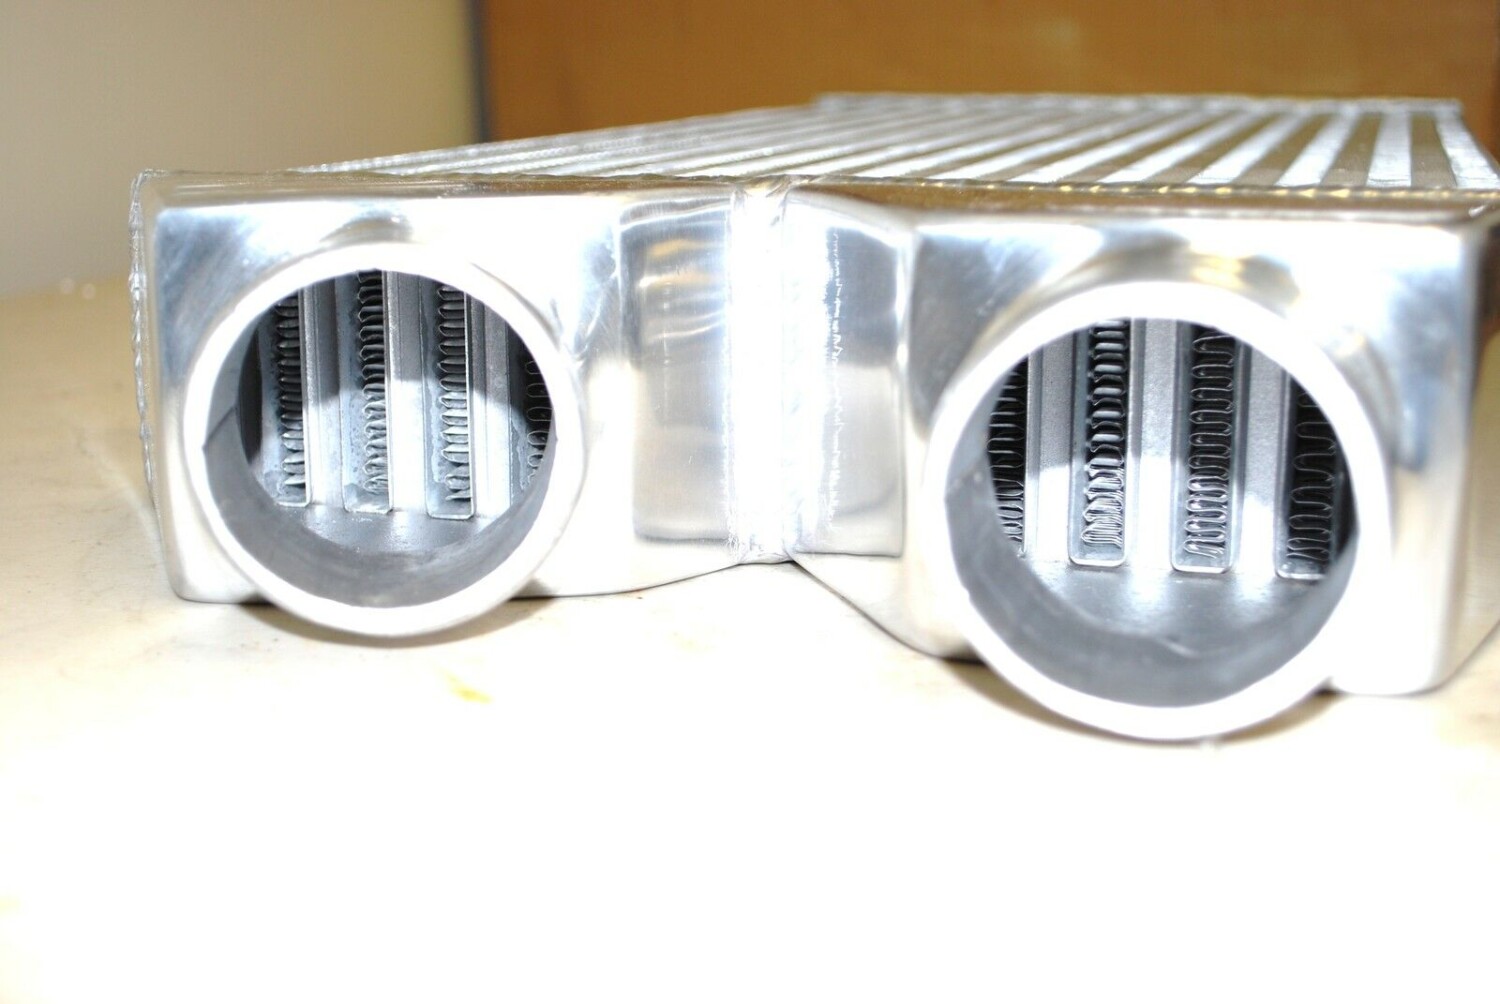
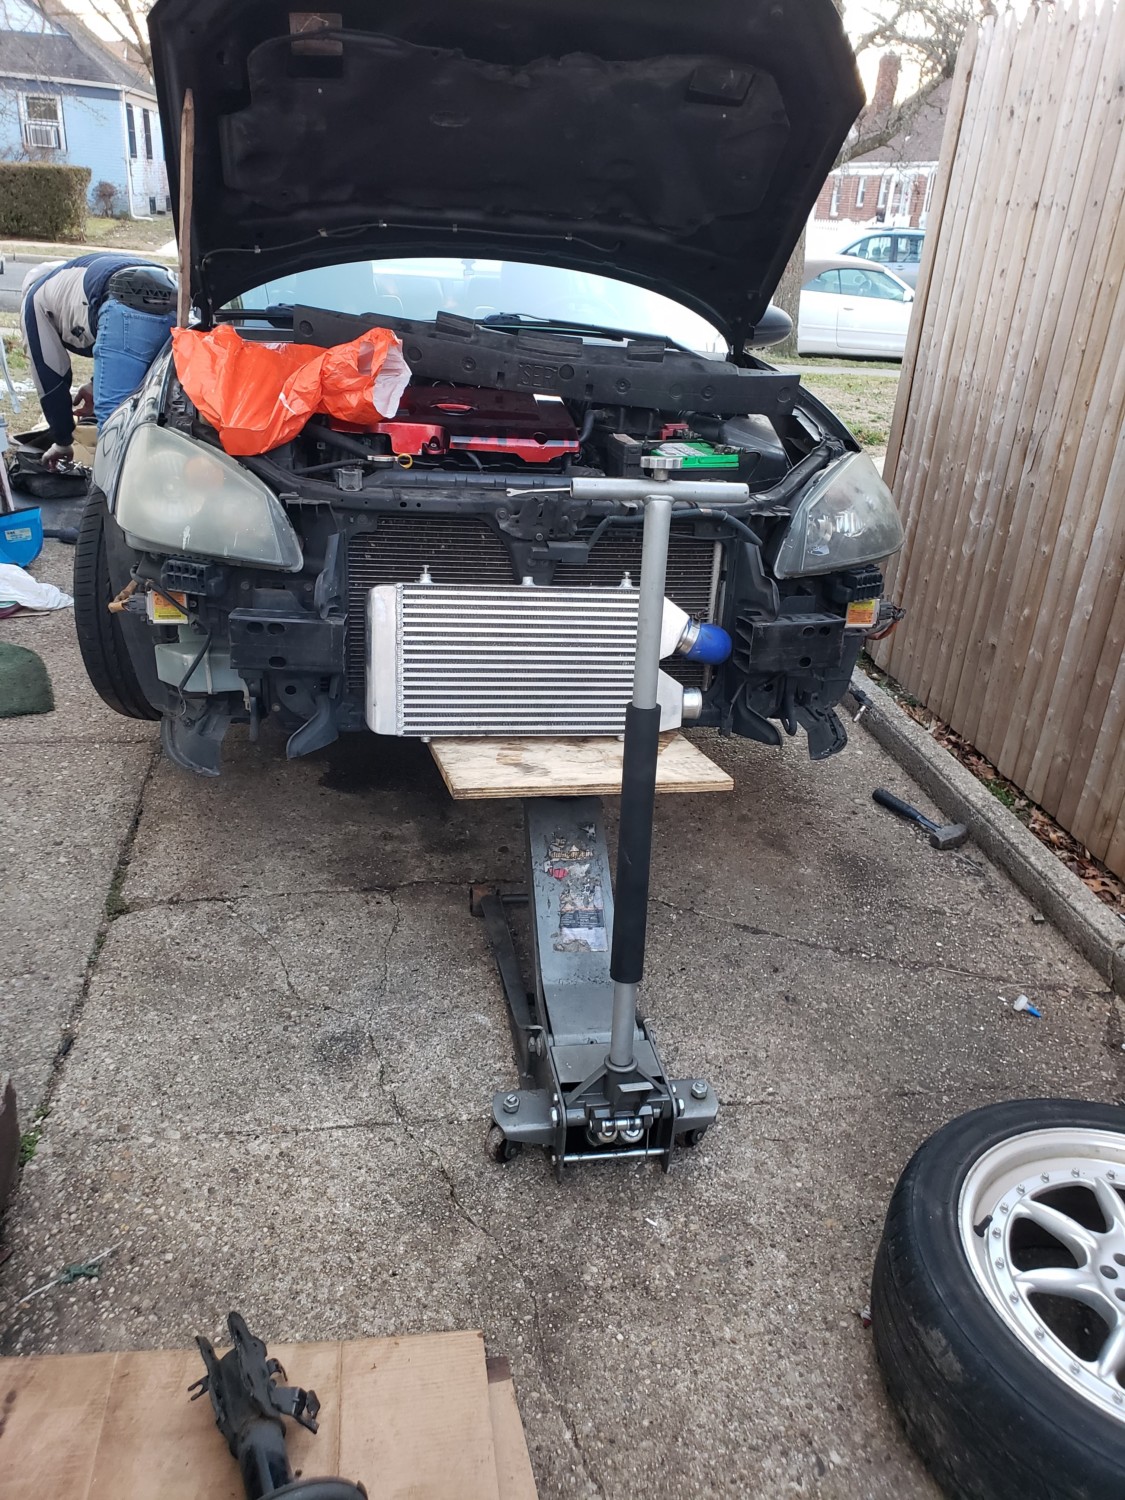
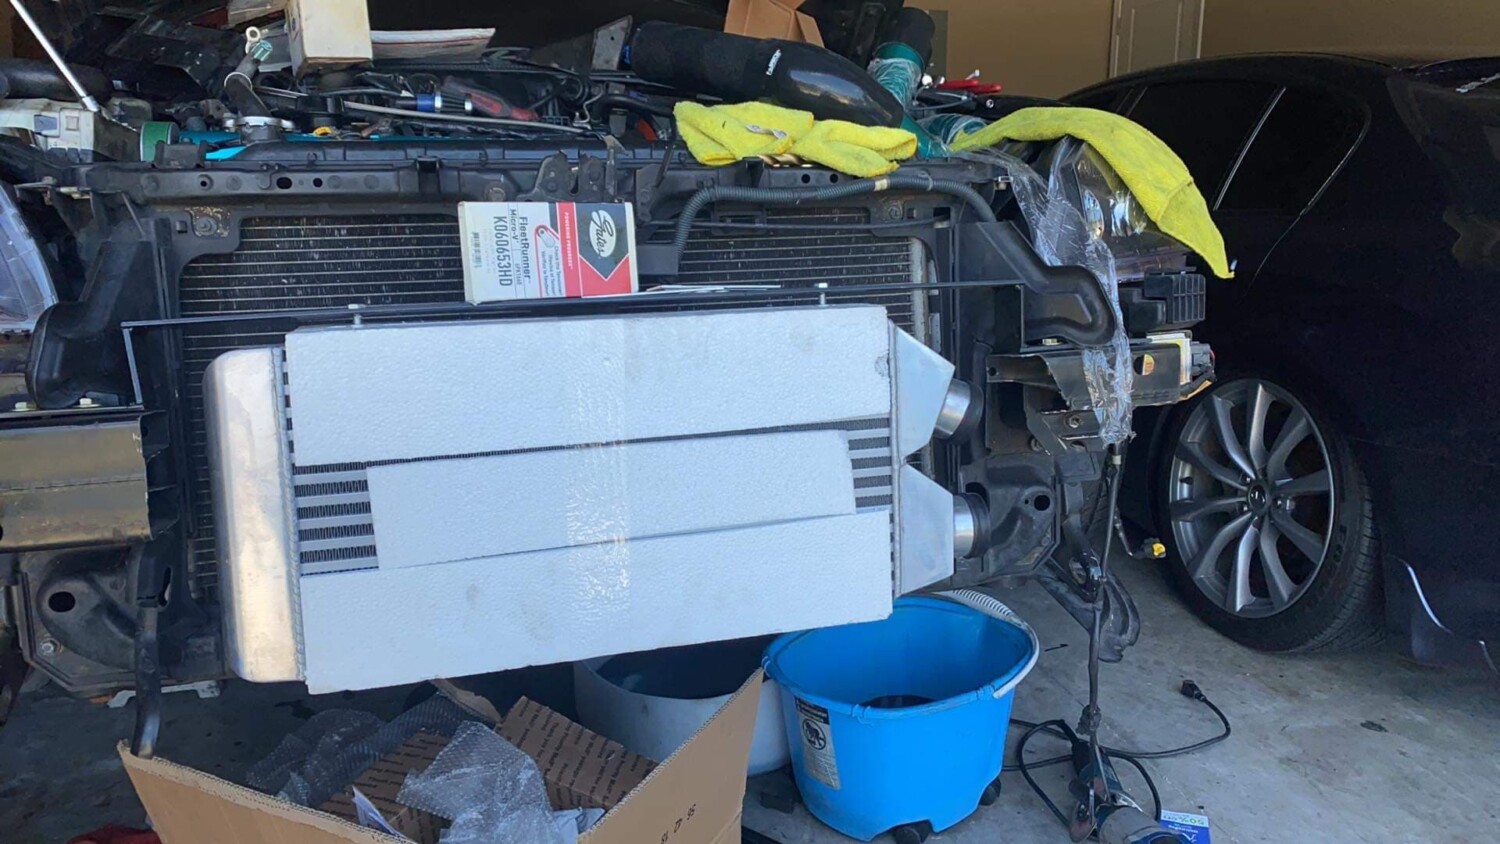
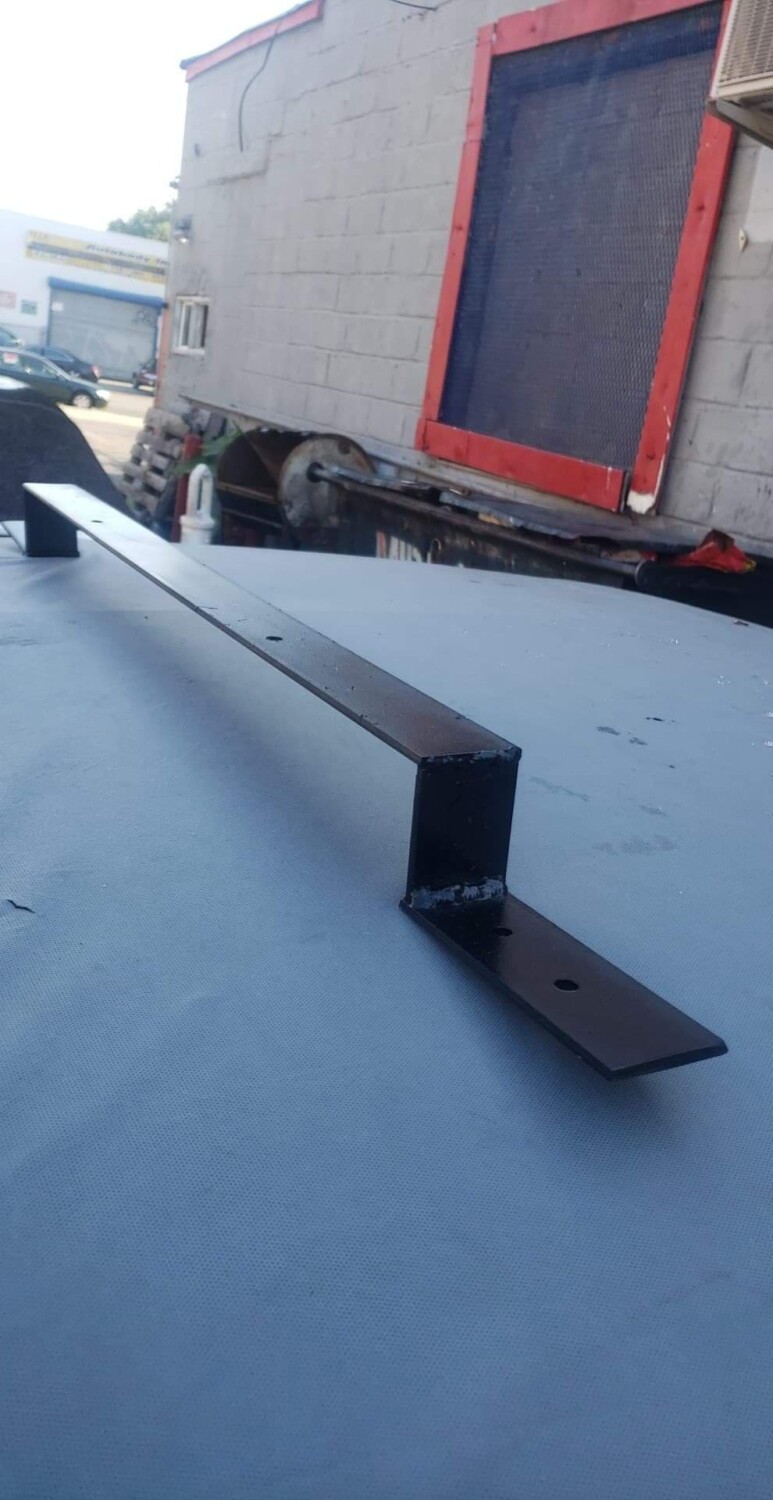
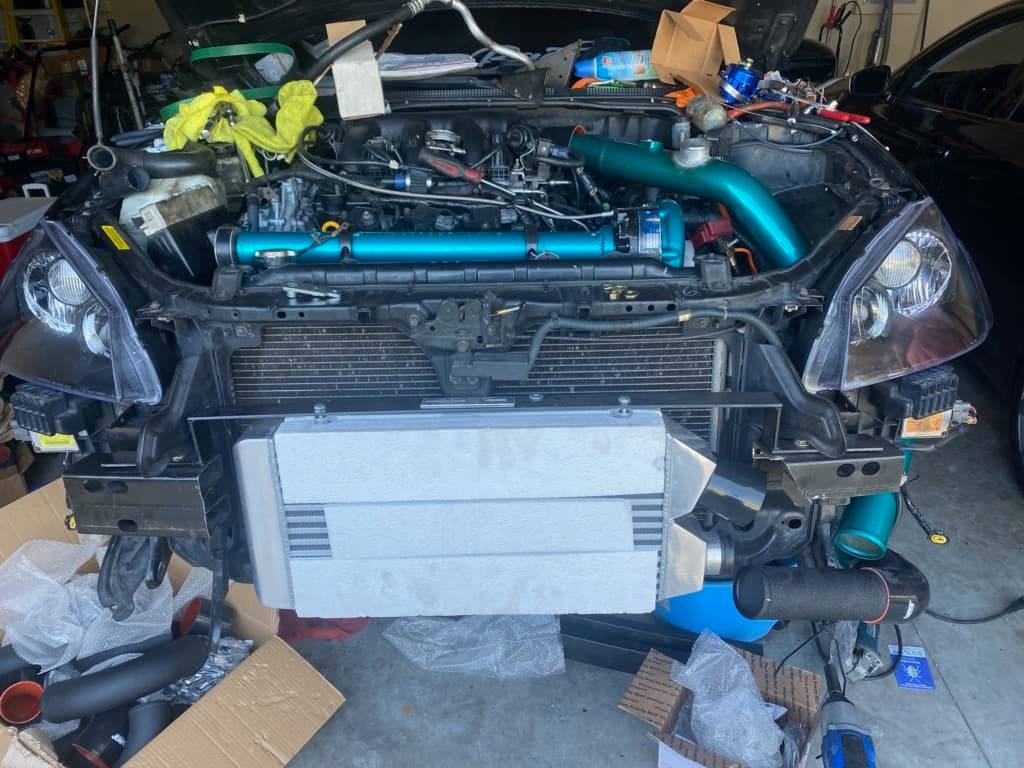
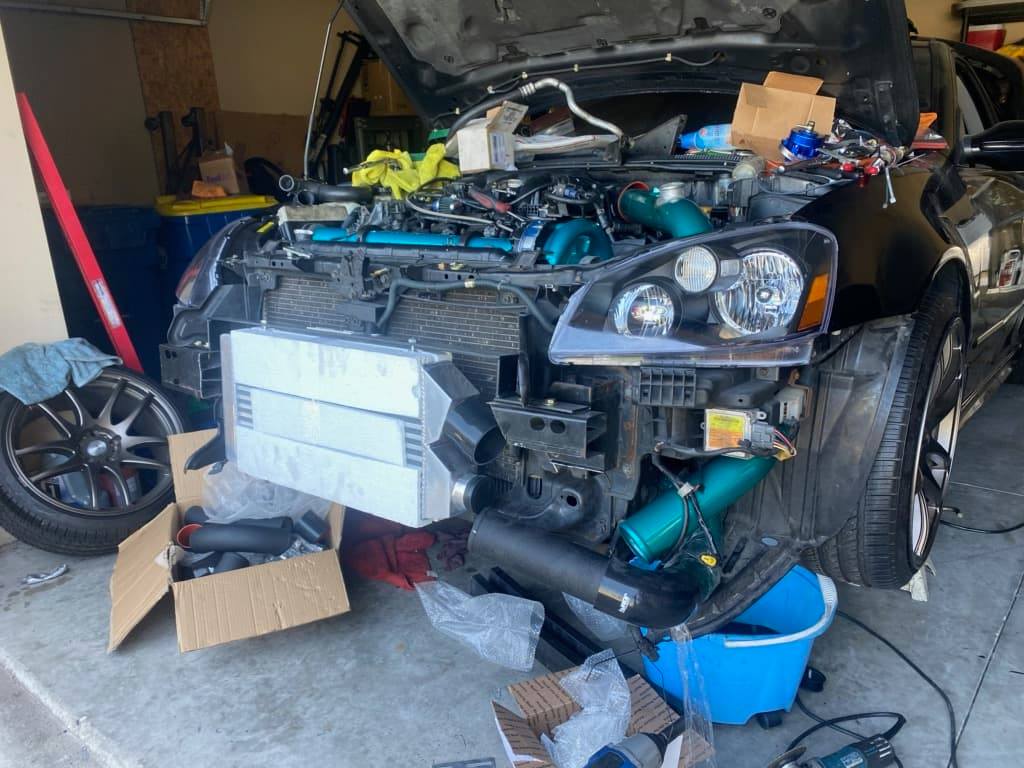
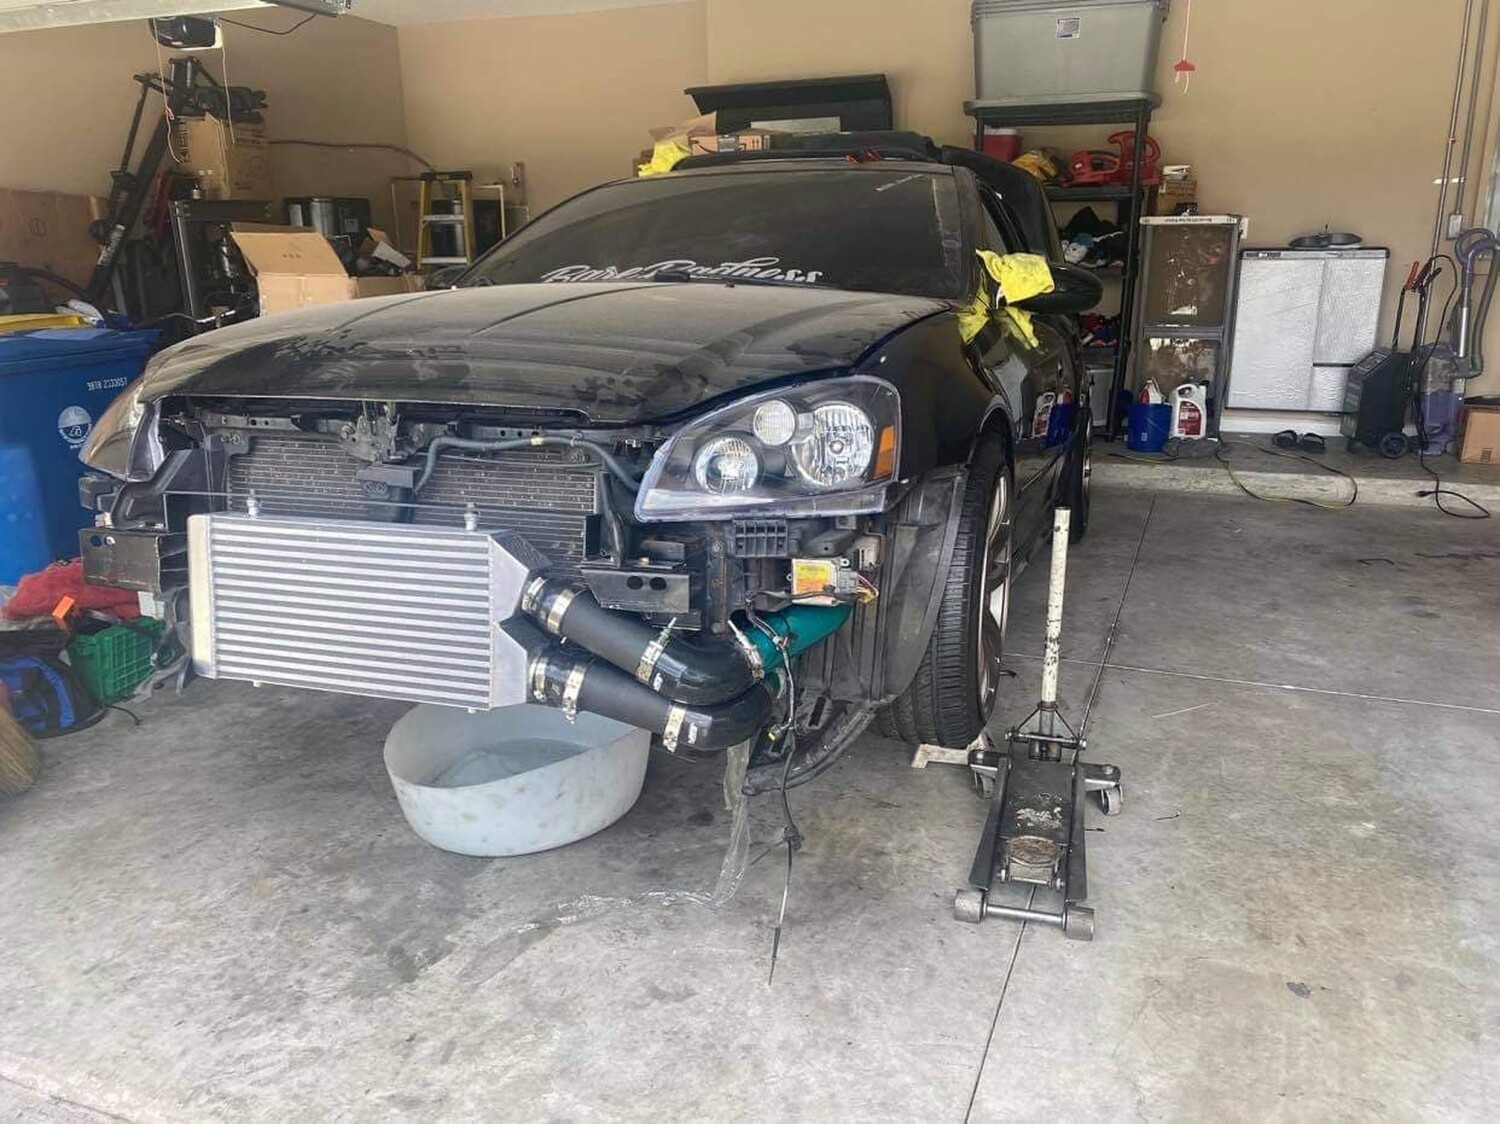

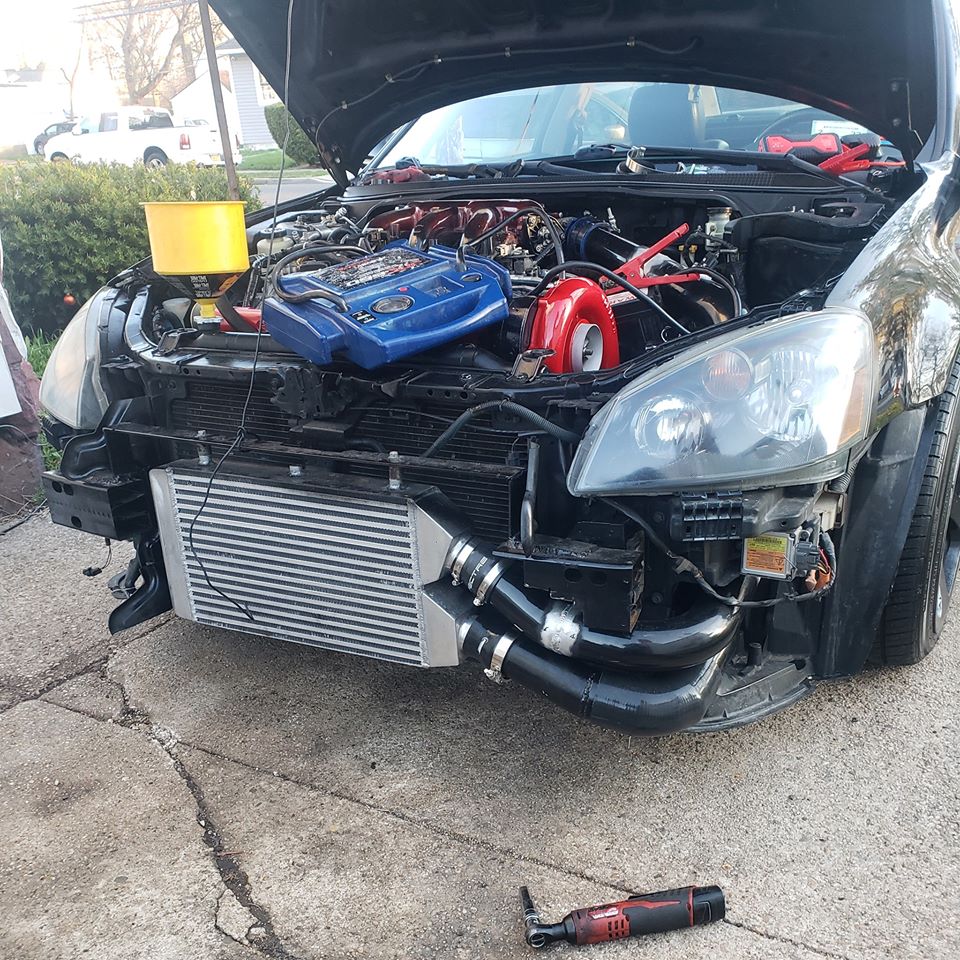
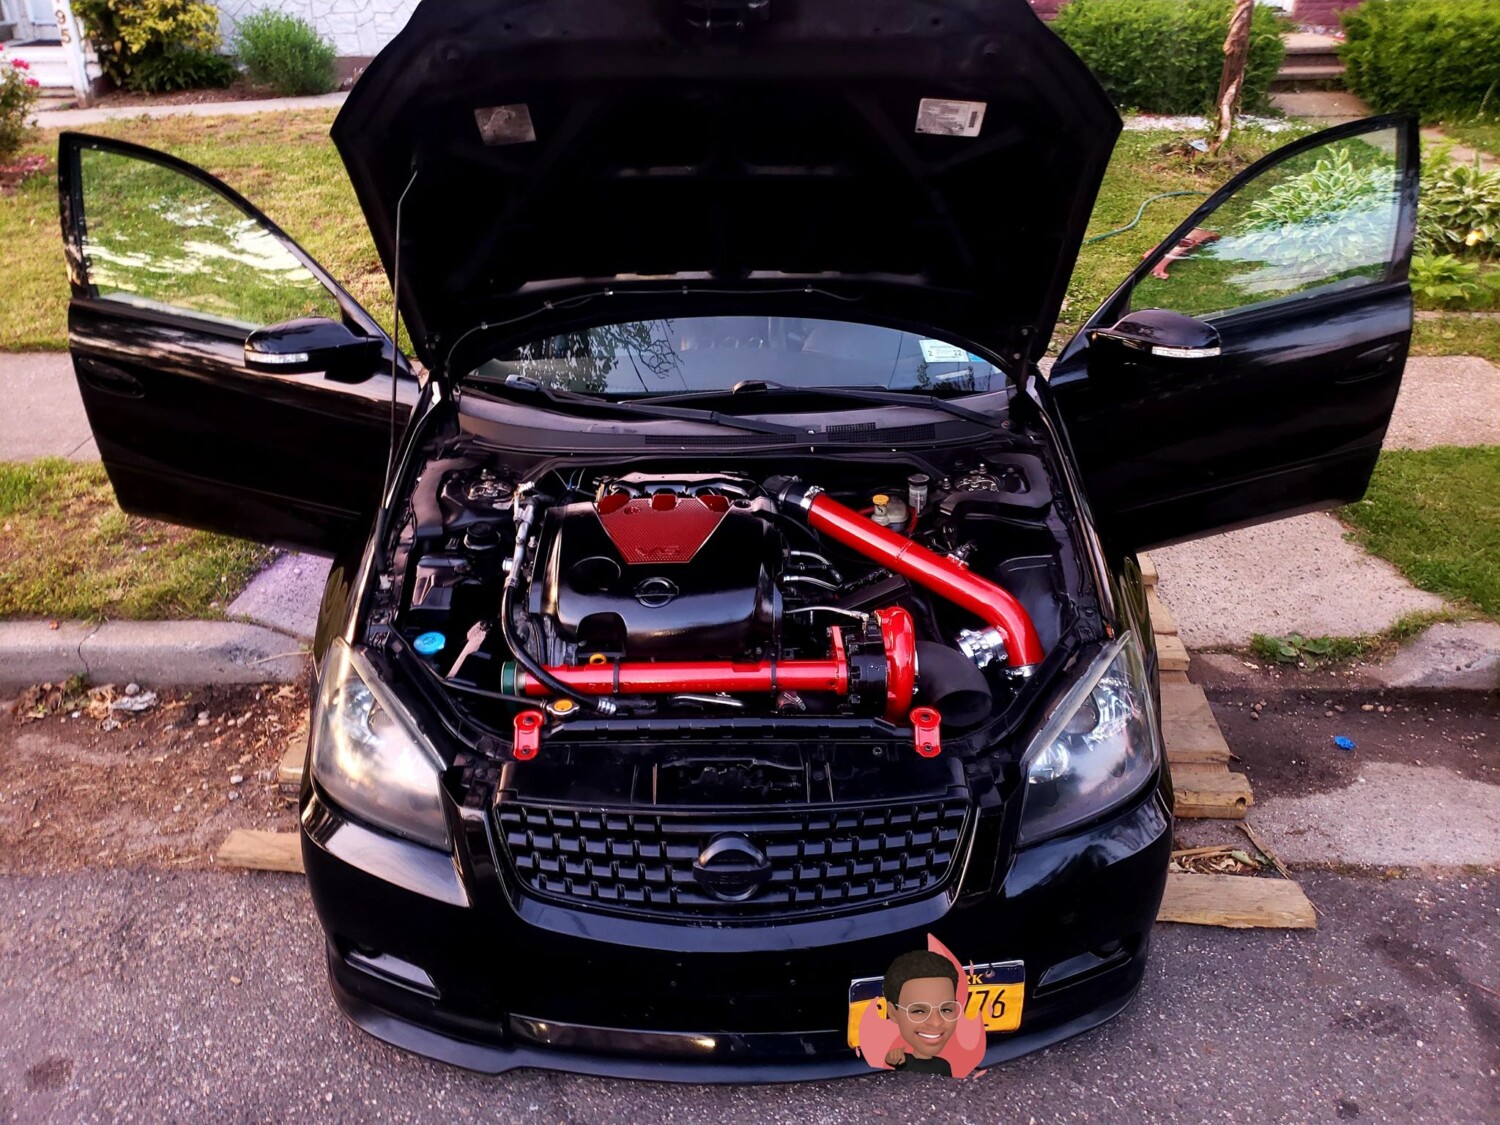
Credit: Henry M Perez
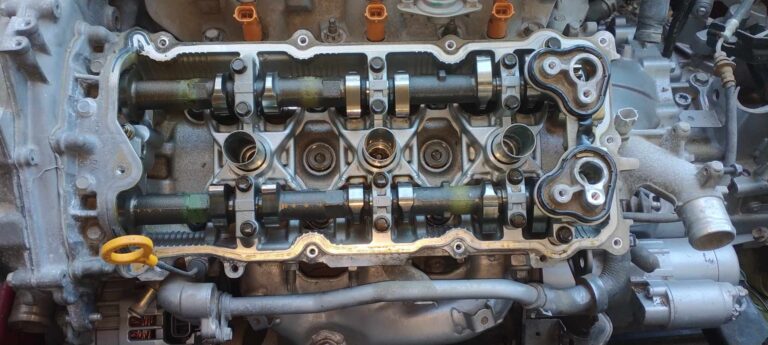
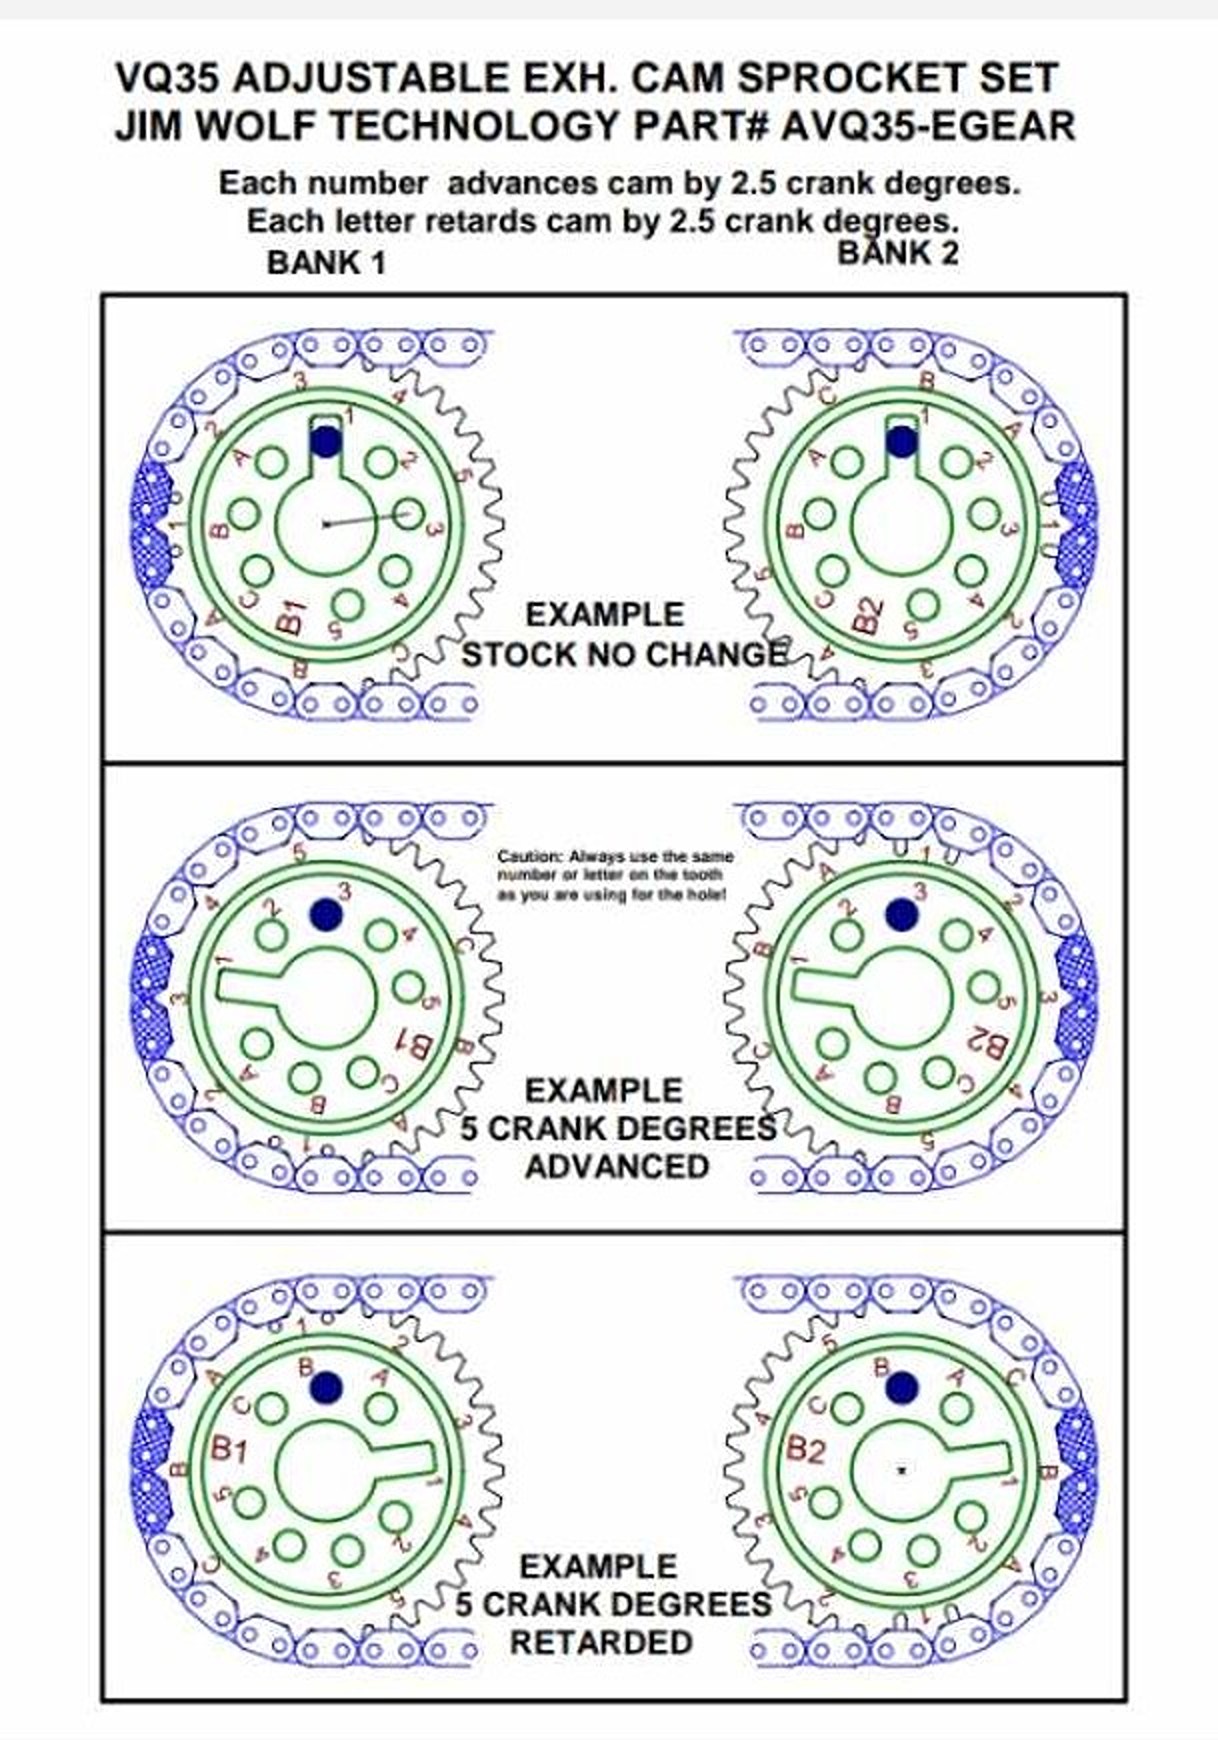
Henry installed a Tomei 274° 11.3 lift intake set in his new engine, a 2017 Maxima engine with 30,000 miles, into his 2016 Nissan Altima 3.5 SV. He noted that HR engines have longer exhaust duration cams, typically 254°, similar to RWD HRs. He mentioned that the 2007 Altima has a VQ35DE engine with specific cam data:
He found that VQ35DE Nismo Spec-1 and Spec-2 cams offer increased operating angles and lifts. His setup aligns closely with Nismo S1 specs, opting not to use Tomei’s exhaust cams due to lack of EVC control in his ECU. He compared his setup with VQ35HR and ‘Revup’ cam data, and provided Tomei cam specs:
Henry also customized his timing setup, used Tomei oval wire springs, and incorporated various other parts like VQ30DE intake cam bolts, 3gen exhaust cams, and VHR components. After extensive work, he successfully started the engine, highlighting additional upgrades like a 6-speed swap, NISformance stage 2 clutch, and Borla X pipe.
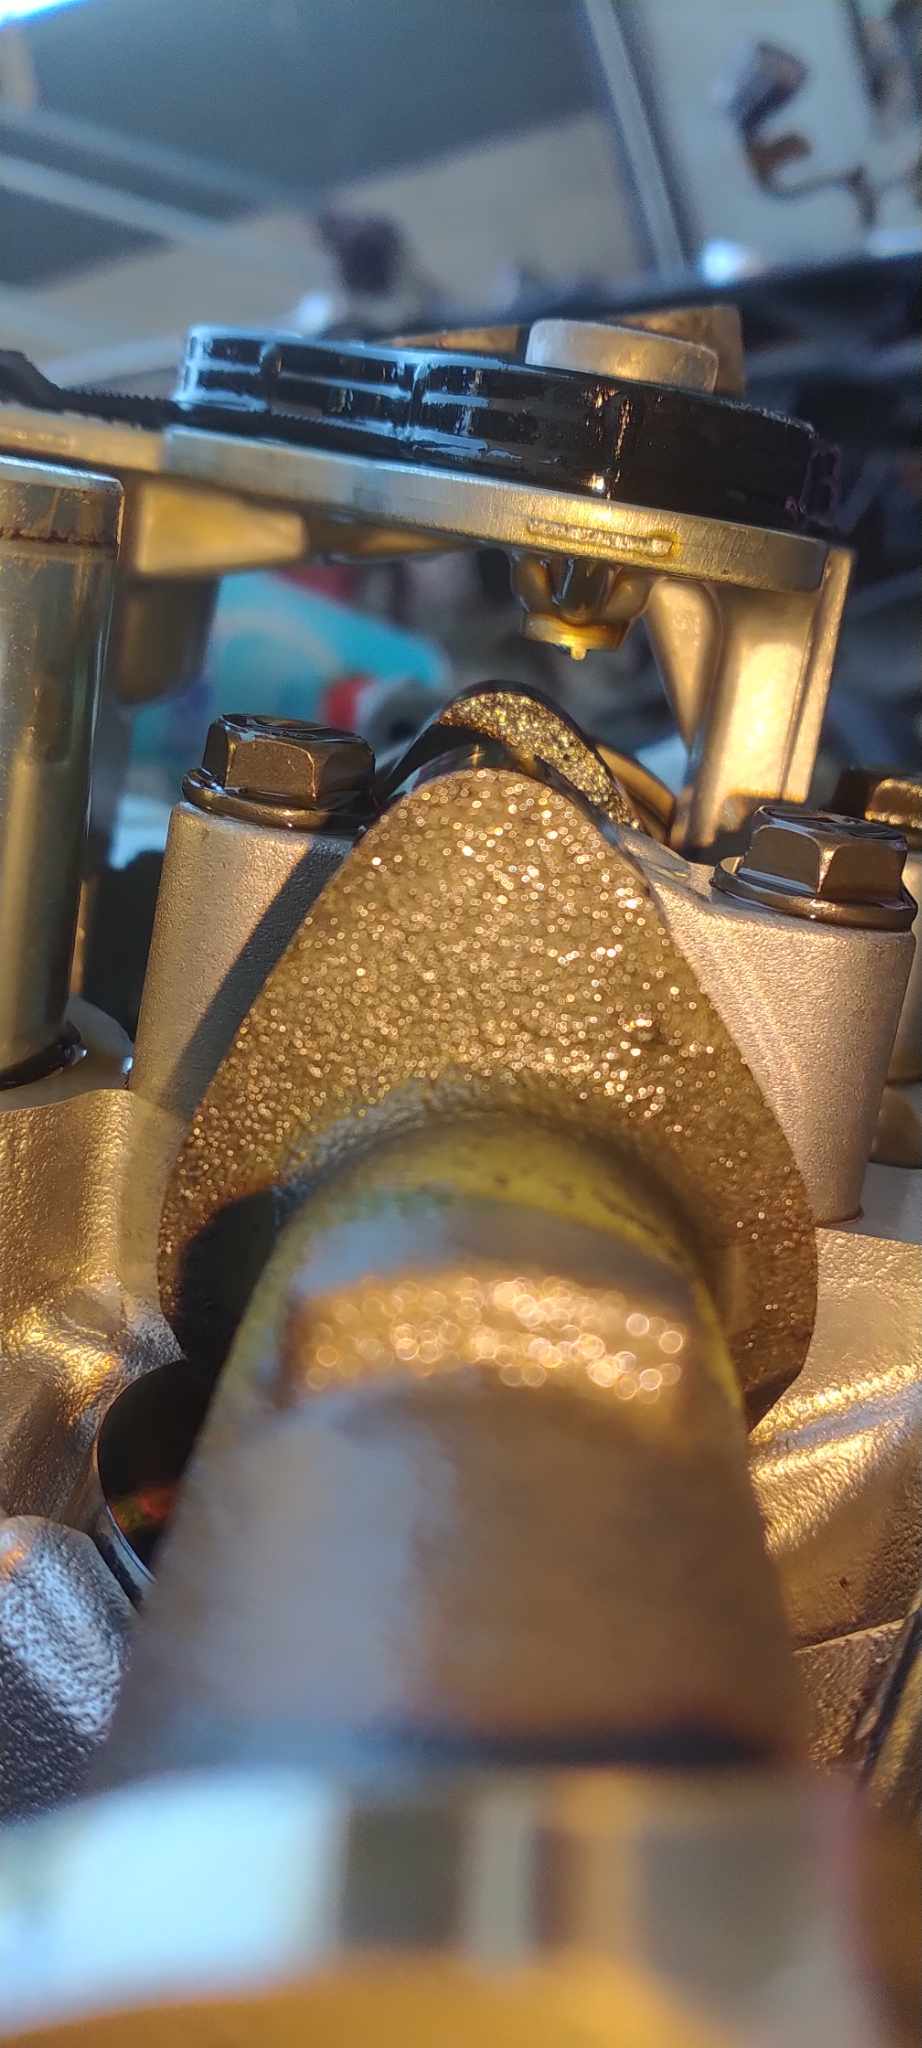
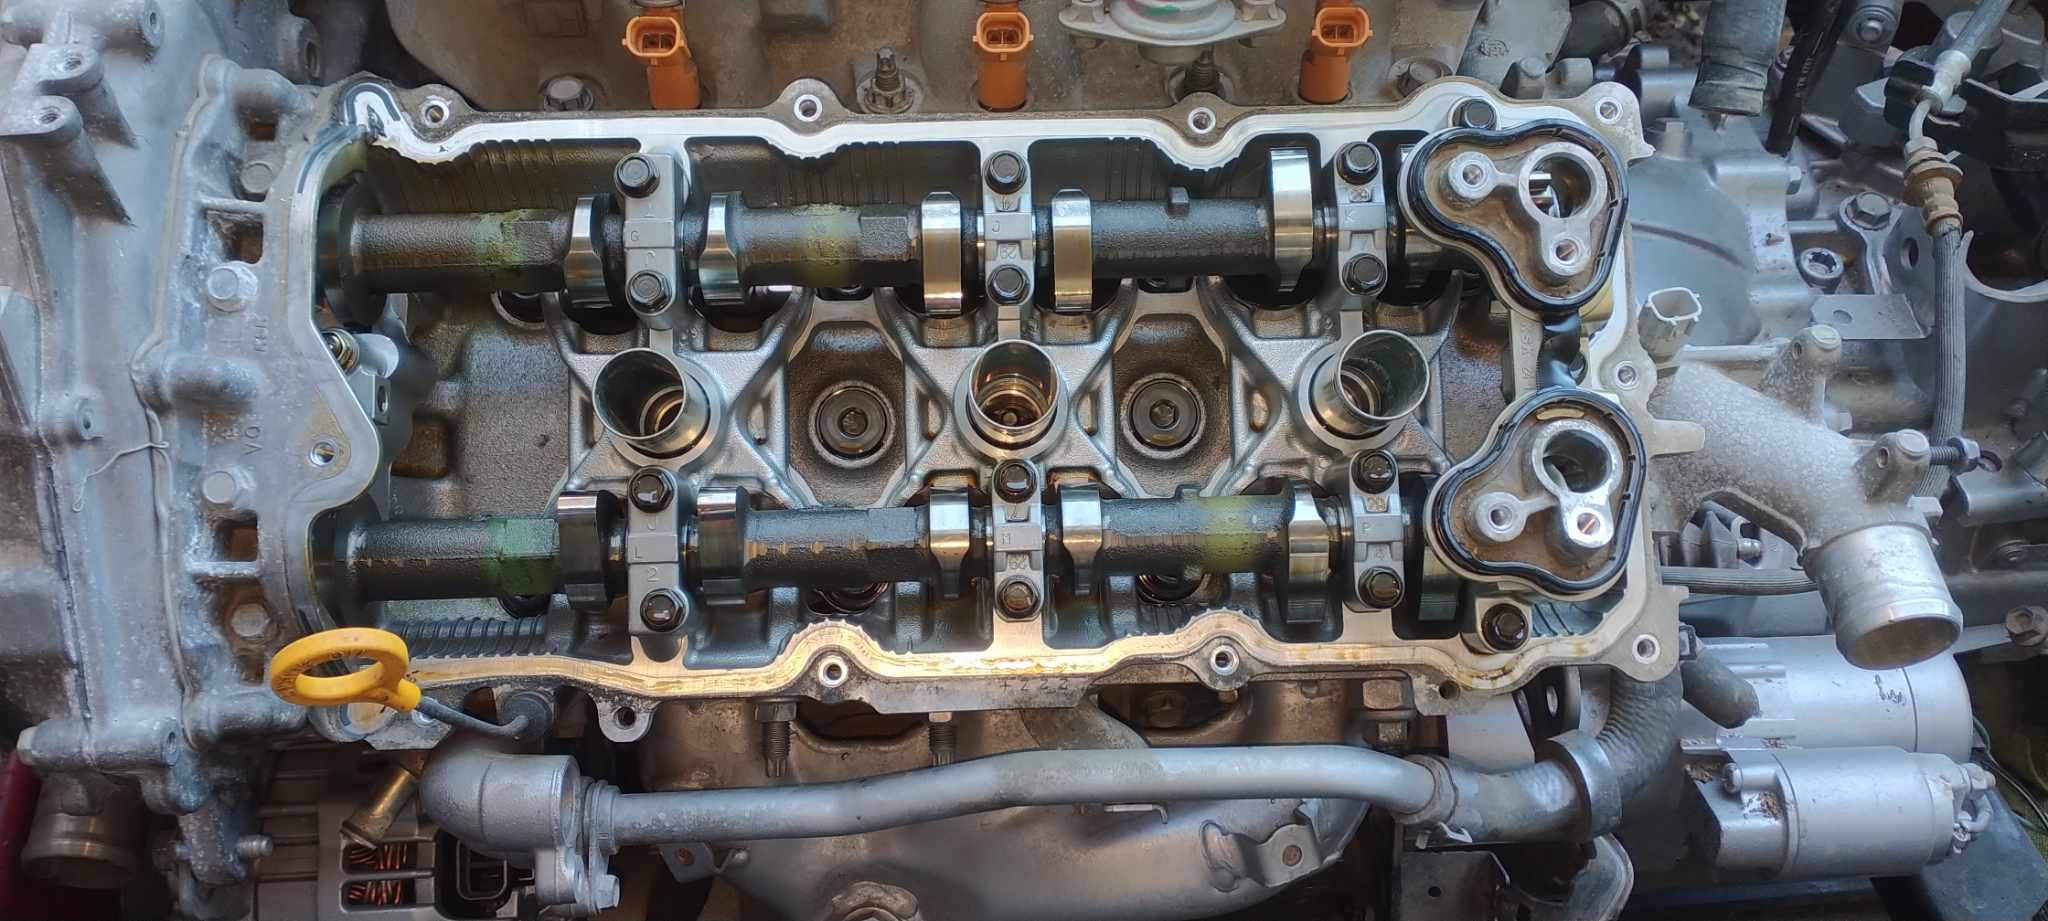

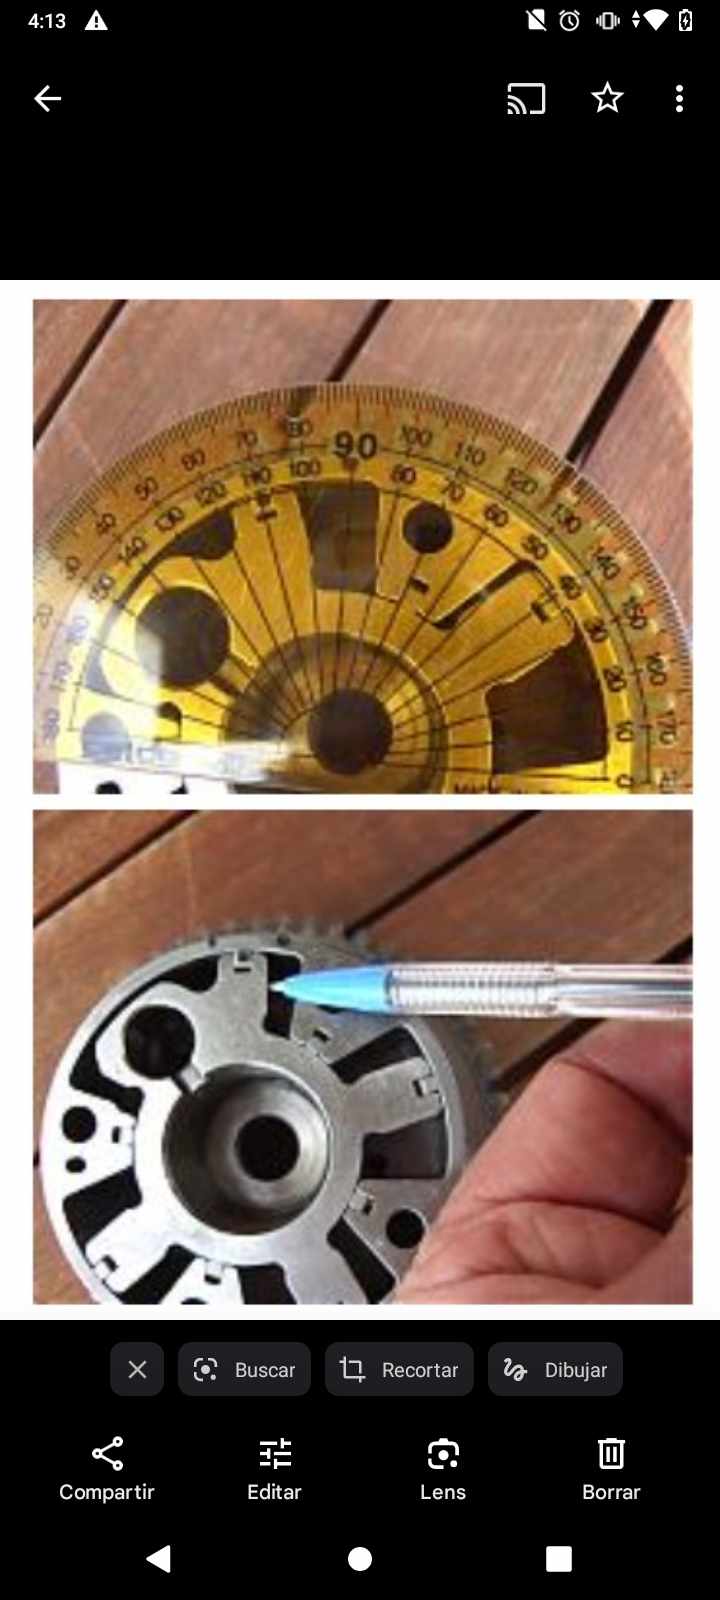
I adjusted the intake trigger wheel to match the standard position found in third-generation models.
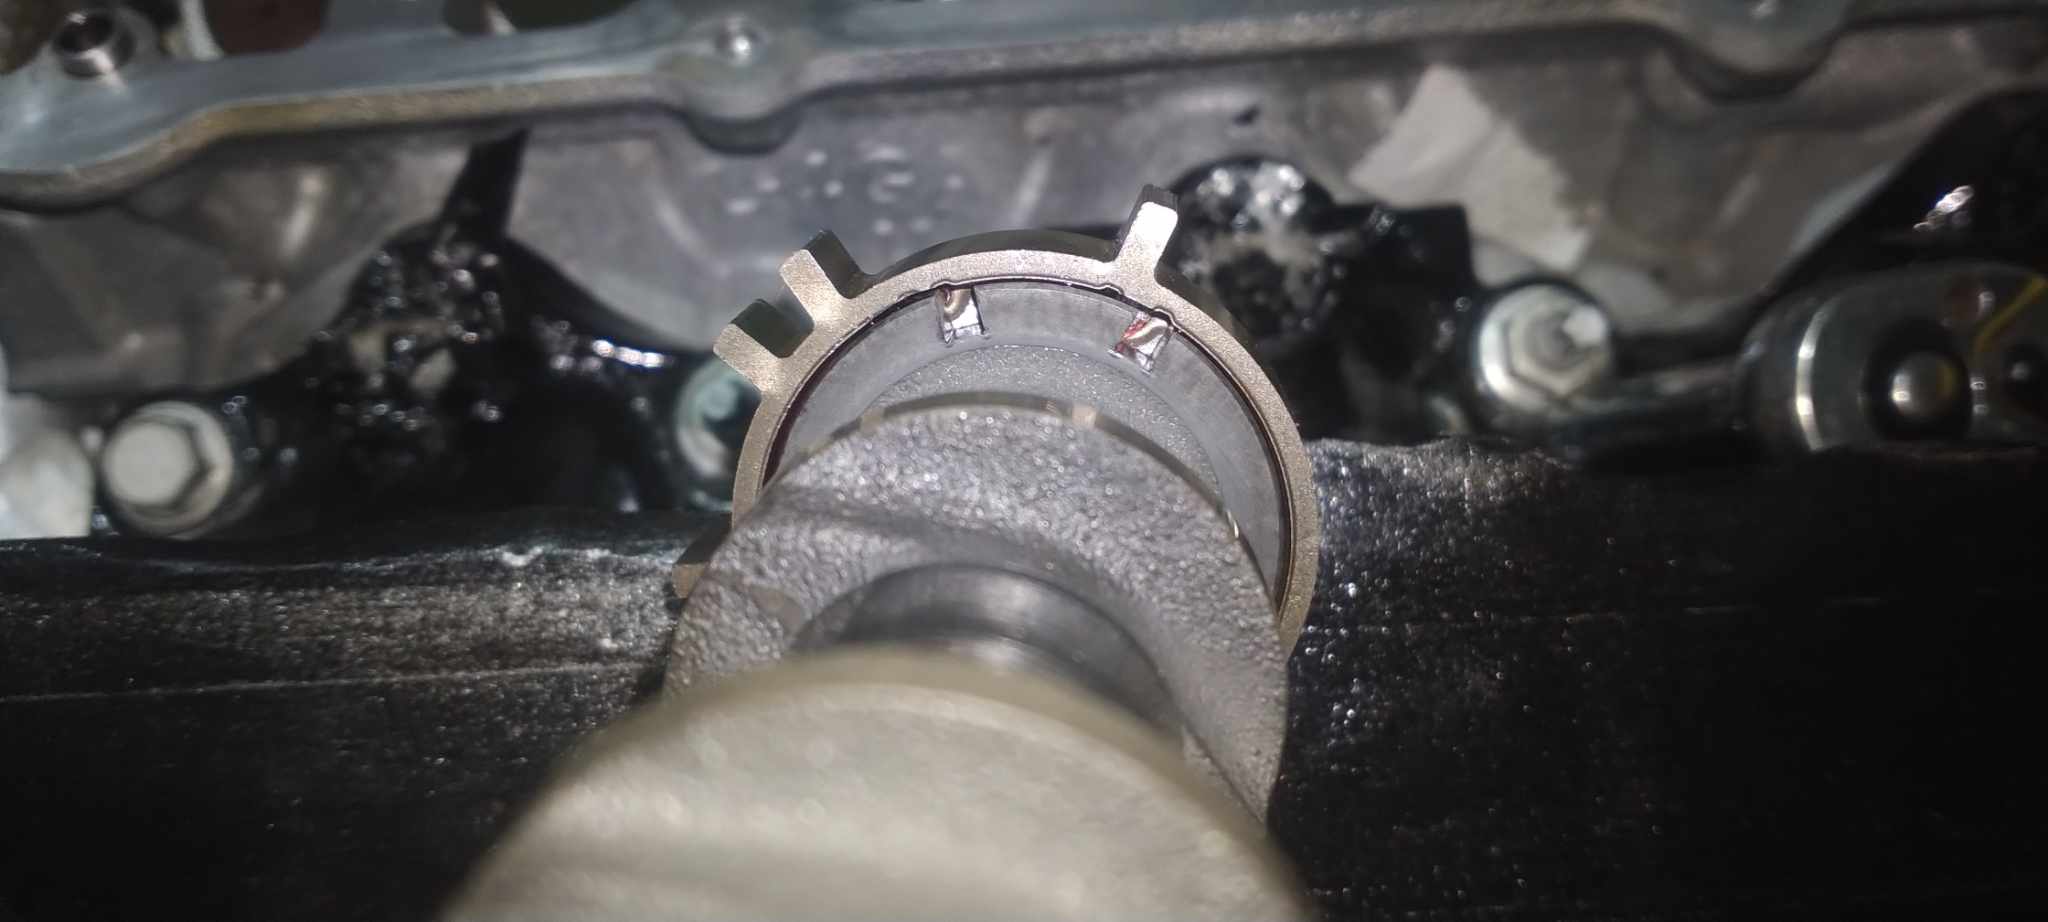


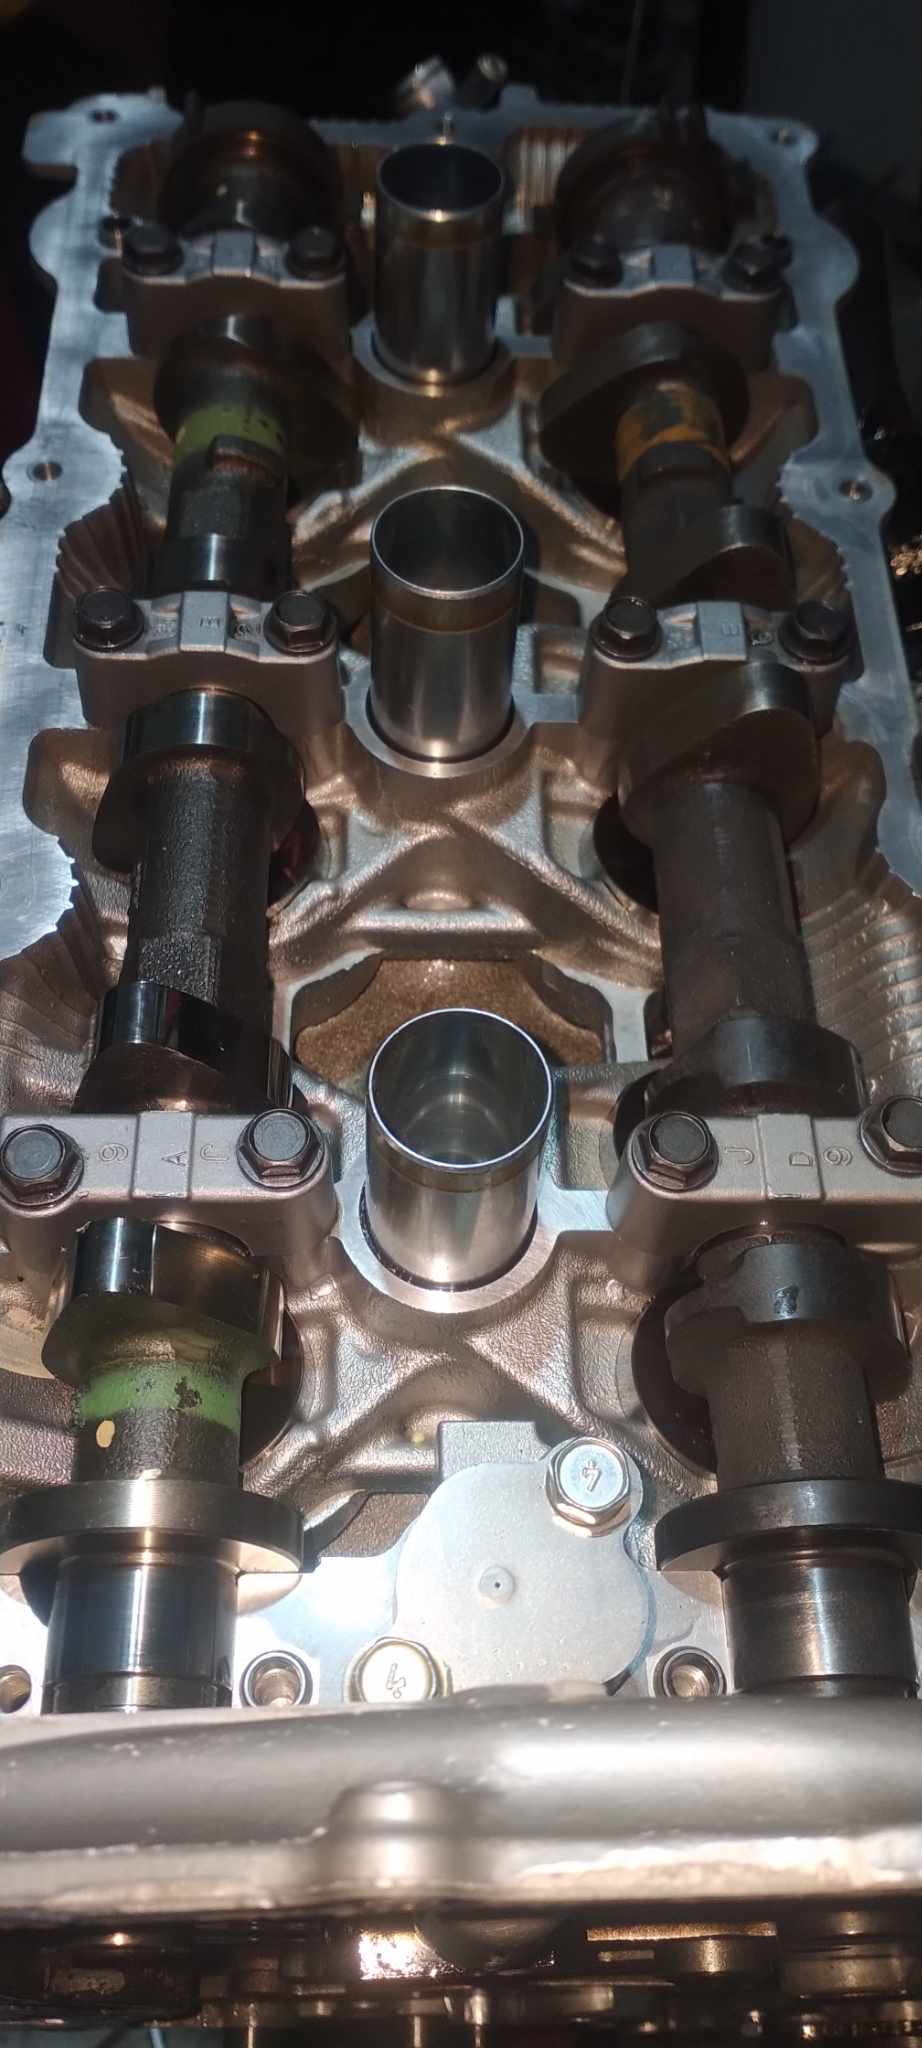

I grinded down the wheel as is typical in an HR engine swap.
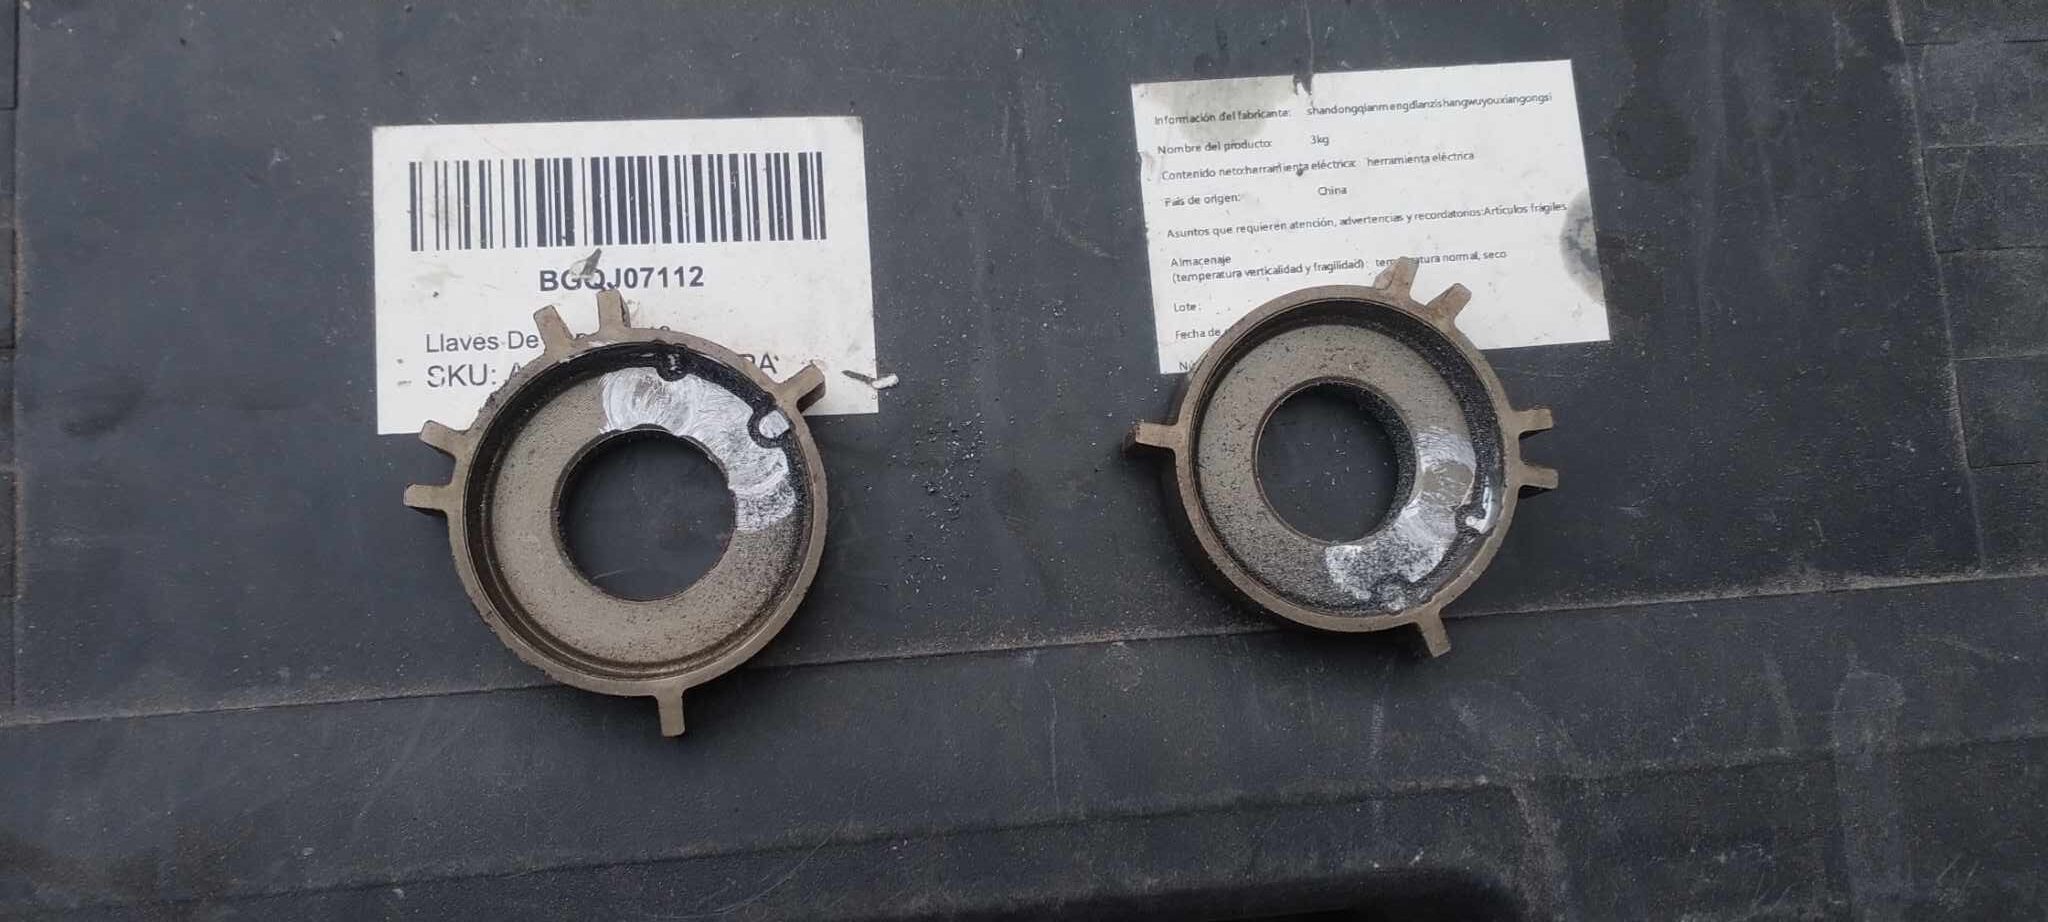

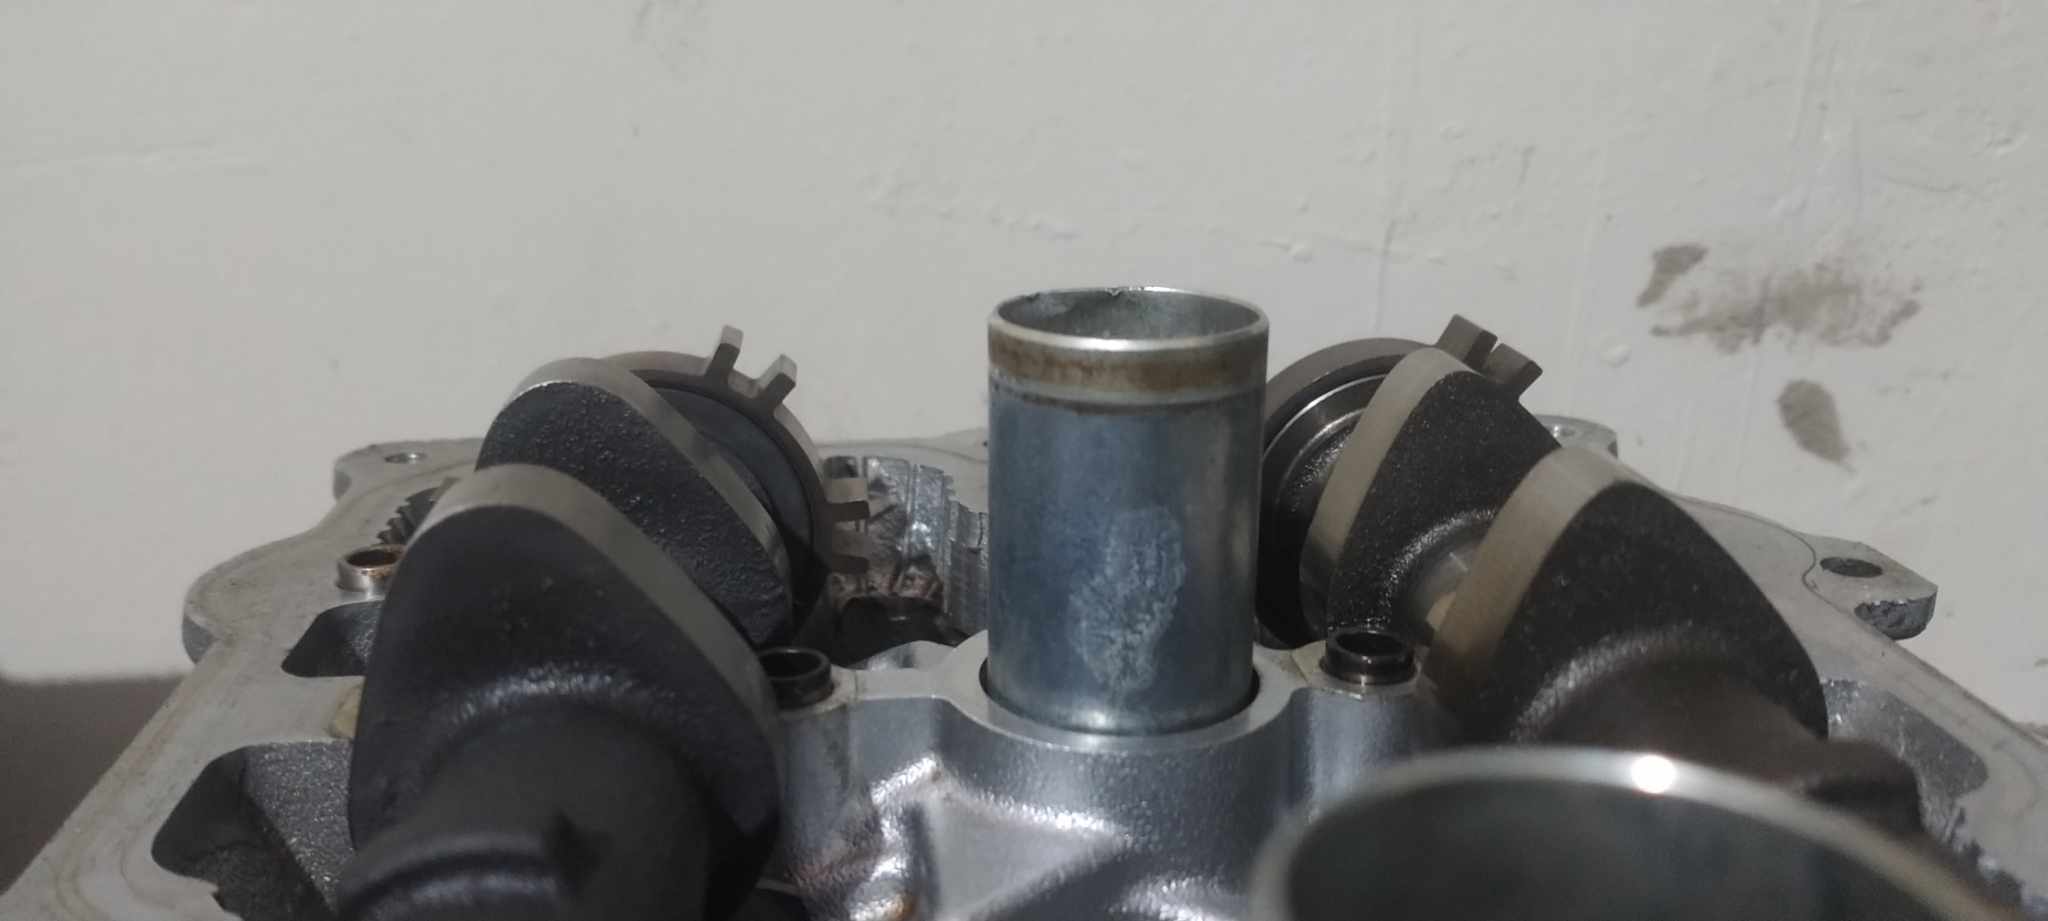
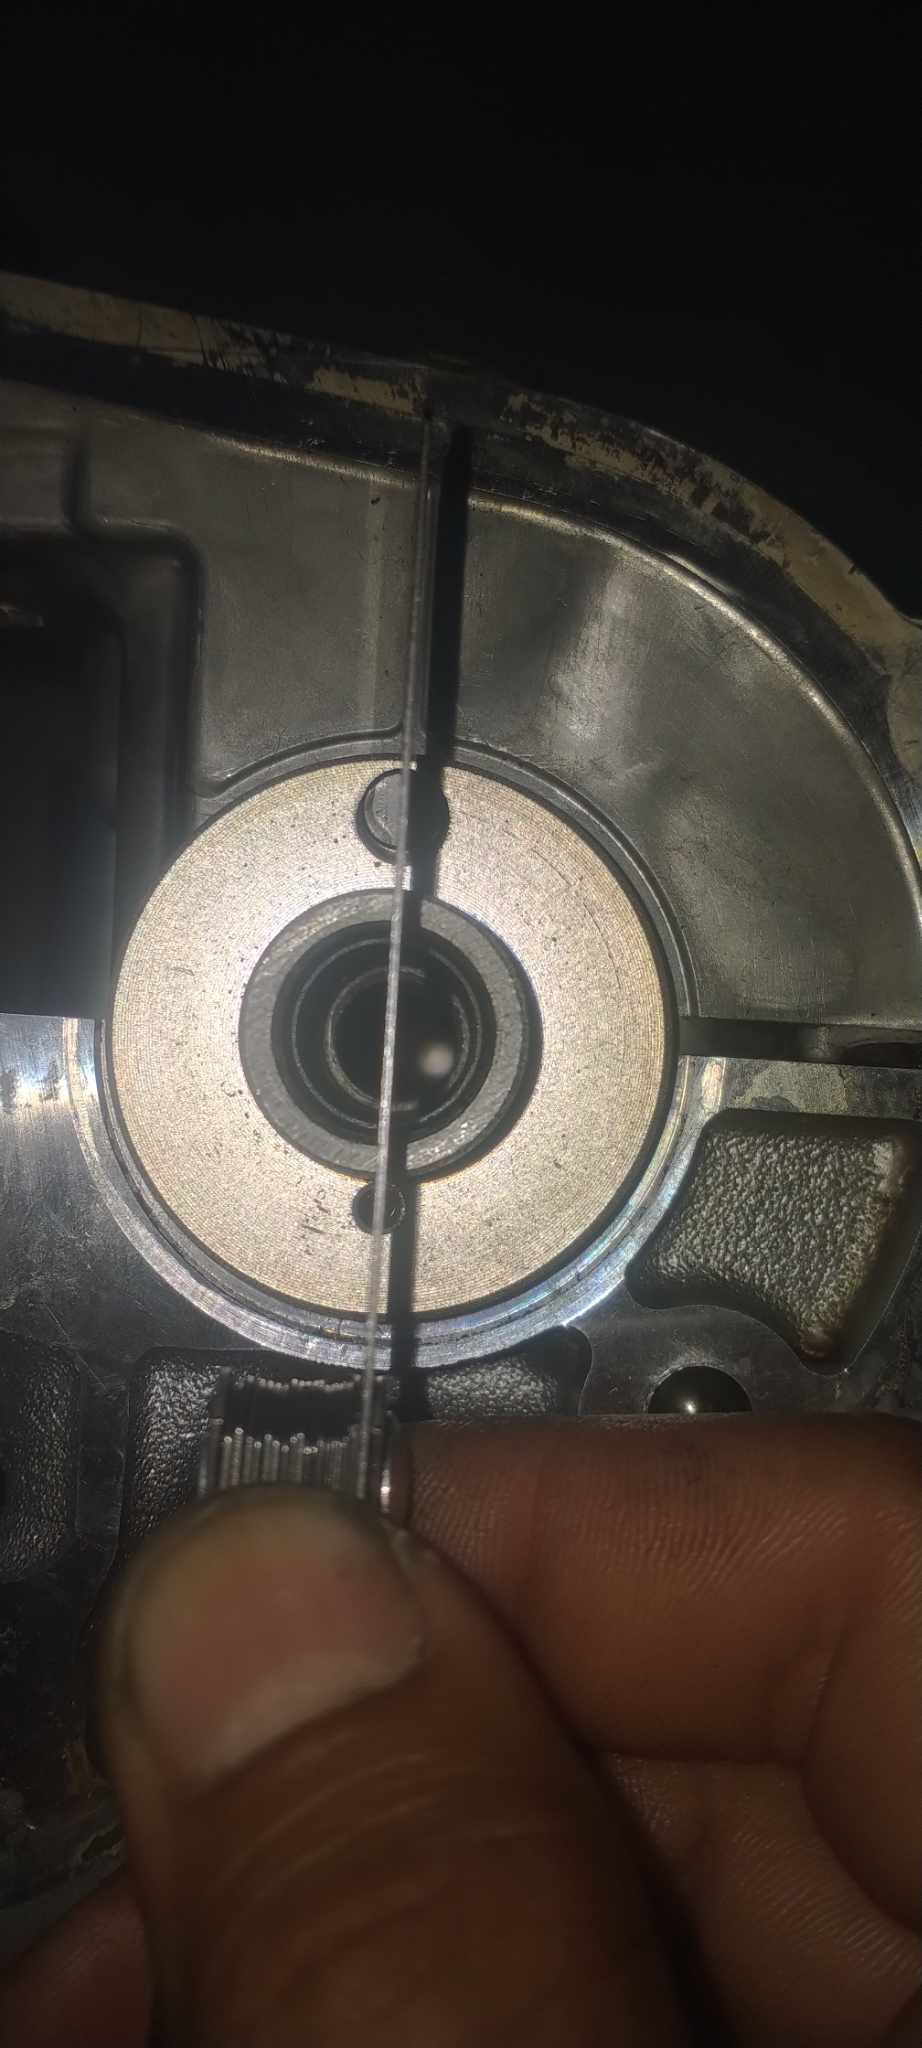
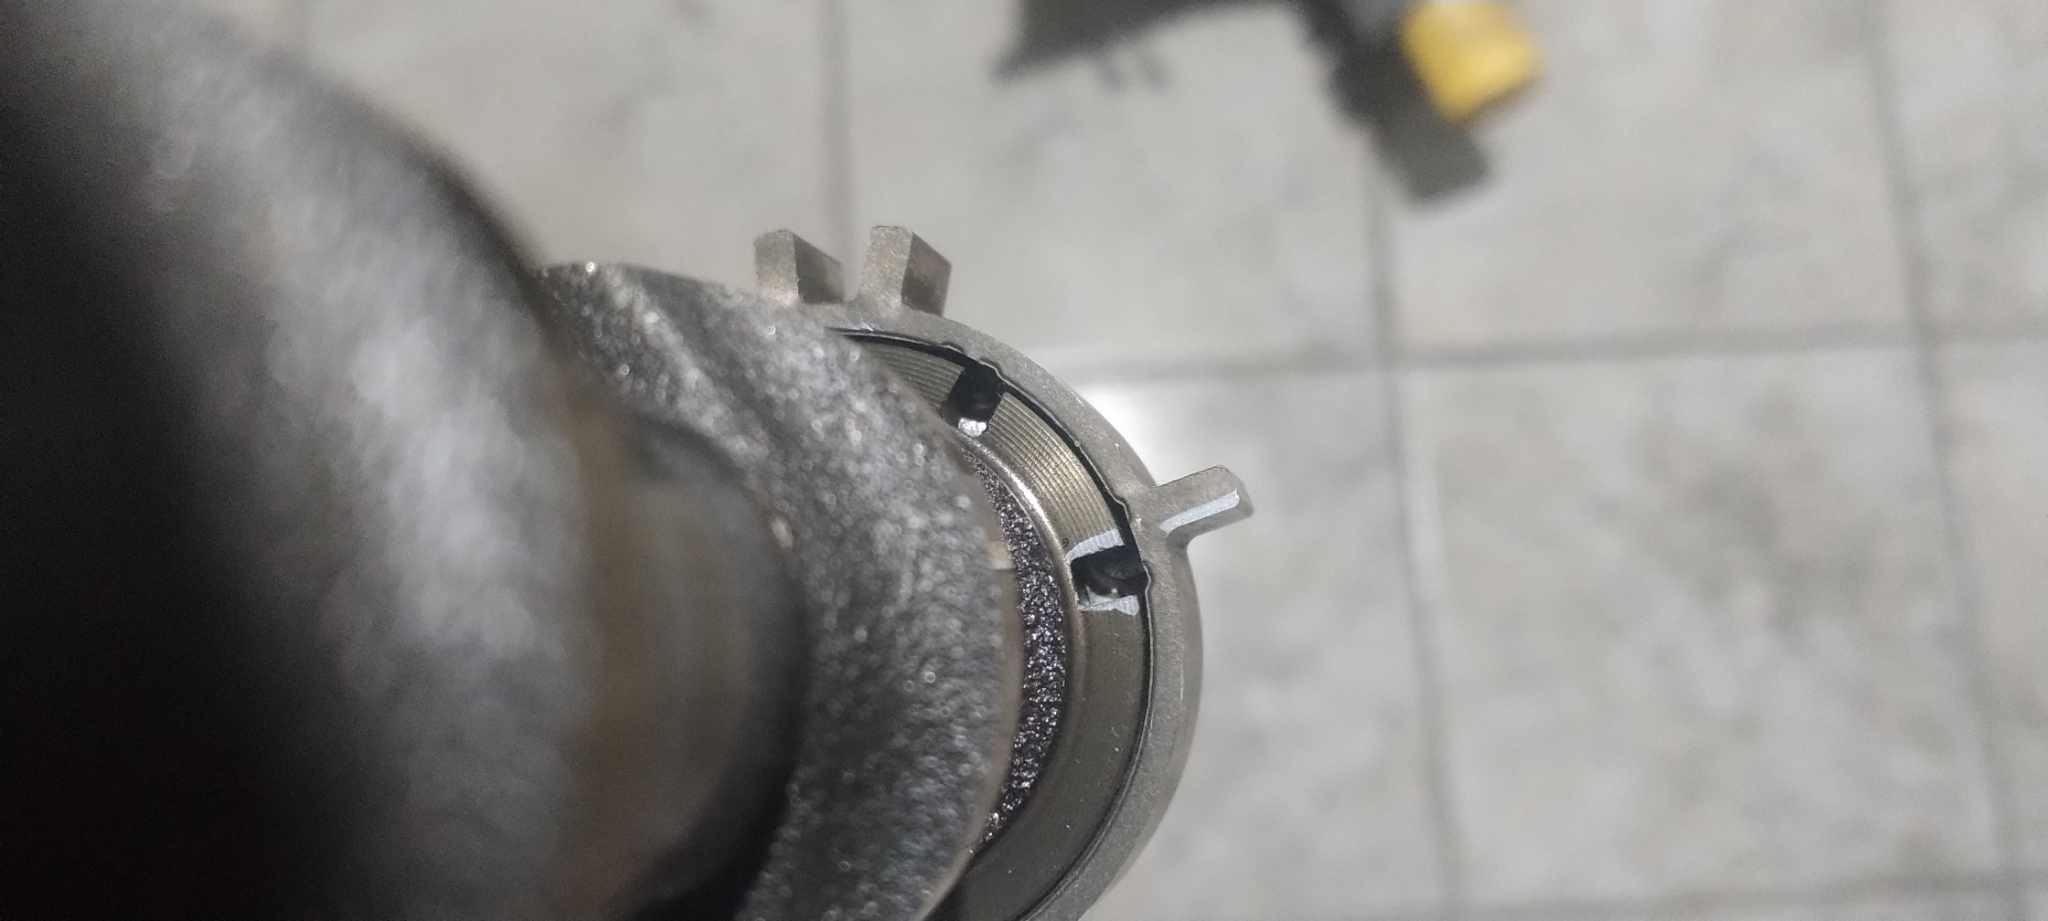

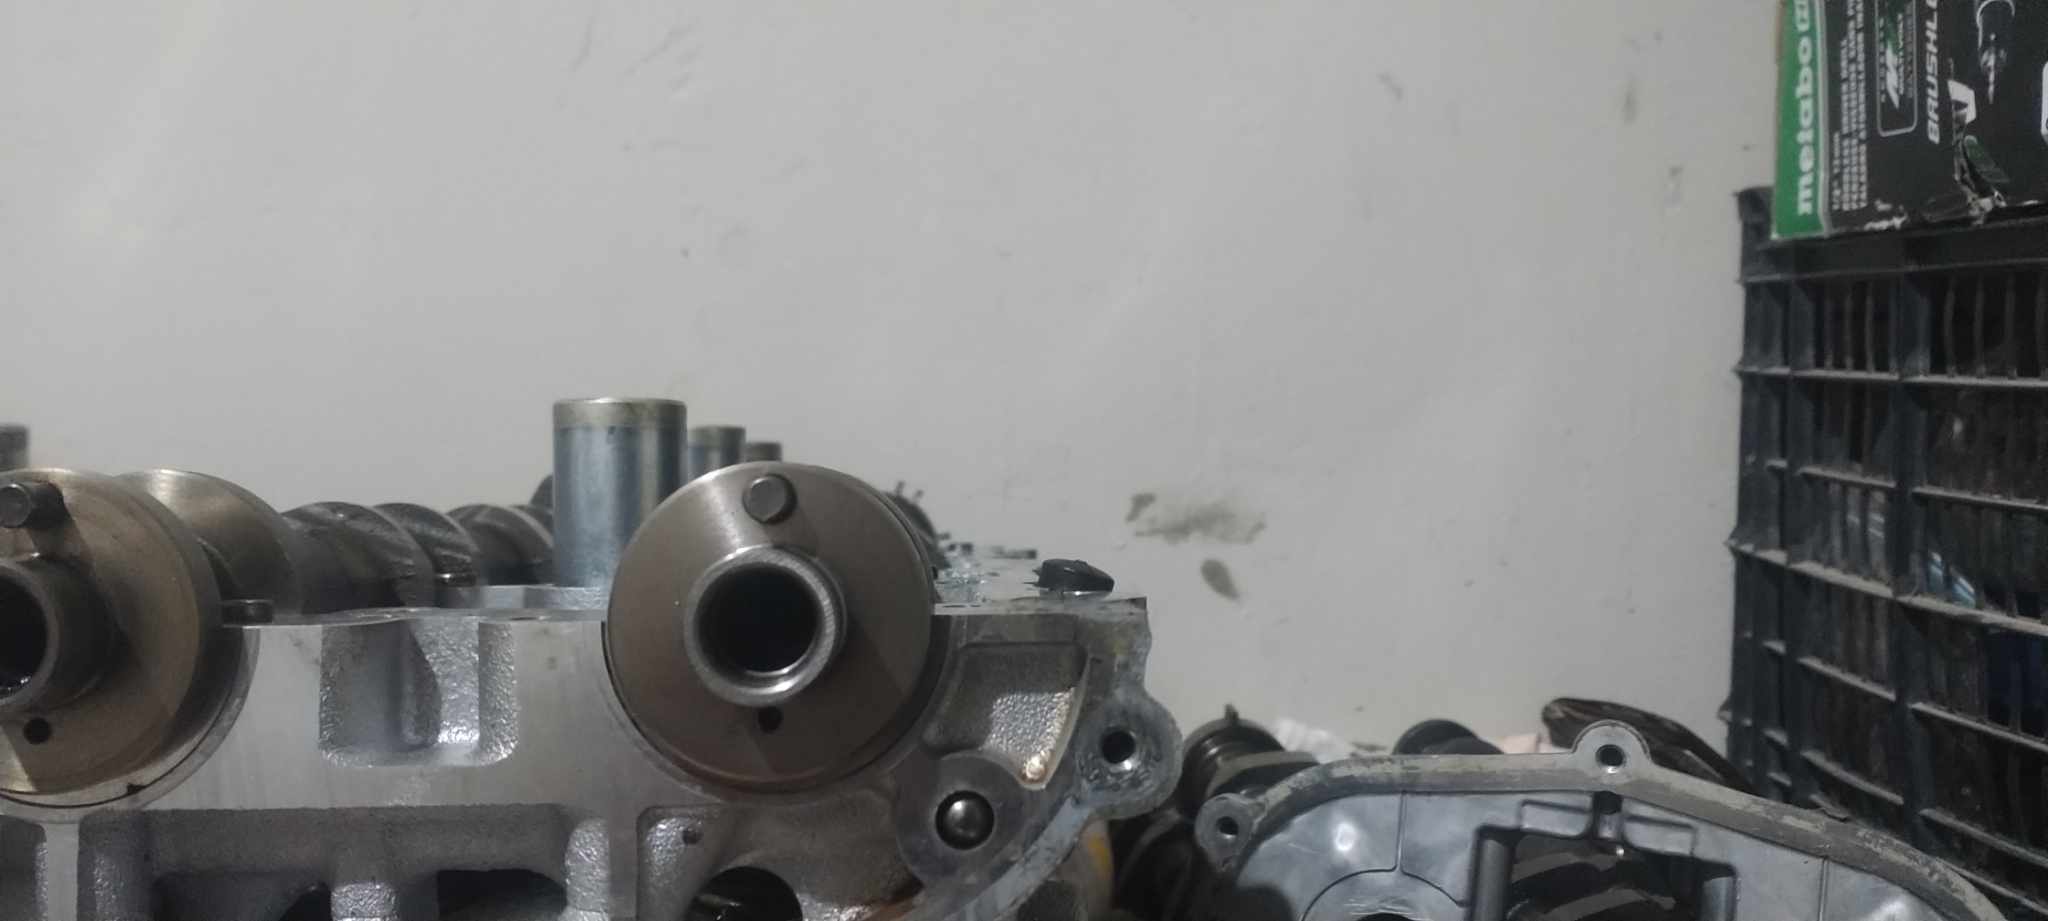
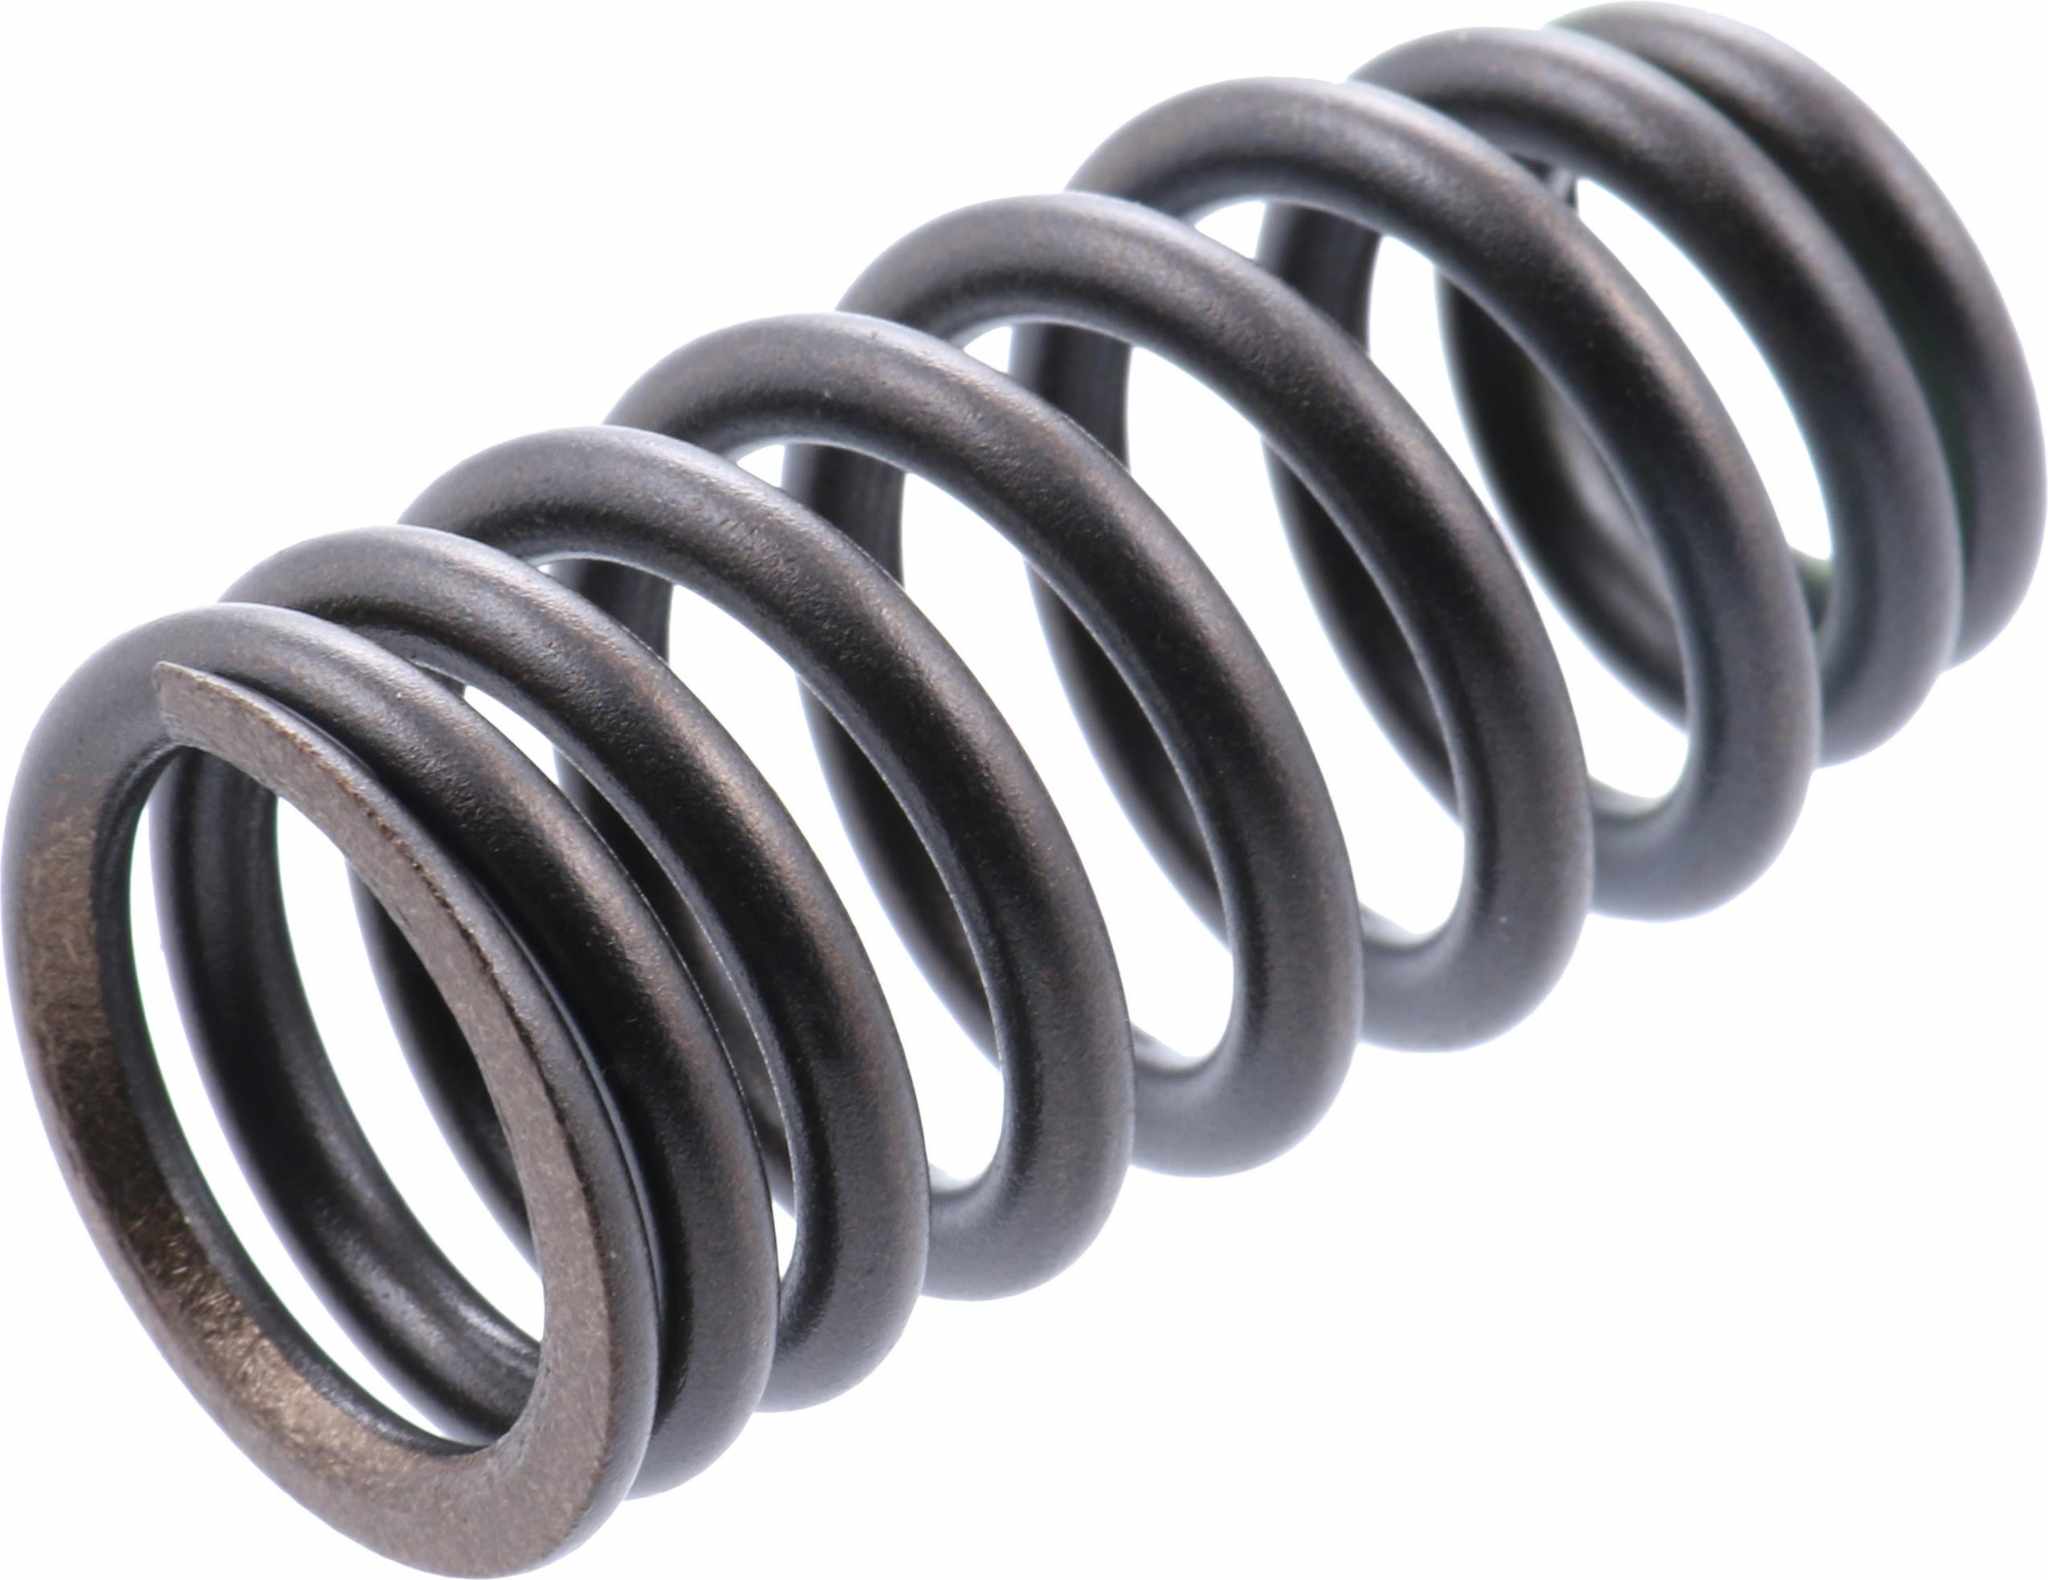
I utilized Tomei oval wire springs for the setup, which are taller than those in RWD HRs and match the height of third-generation models.

Additional Install Photos
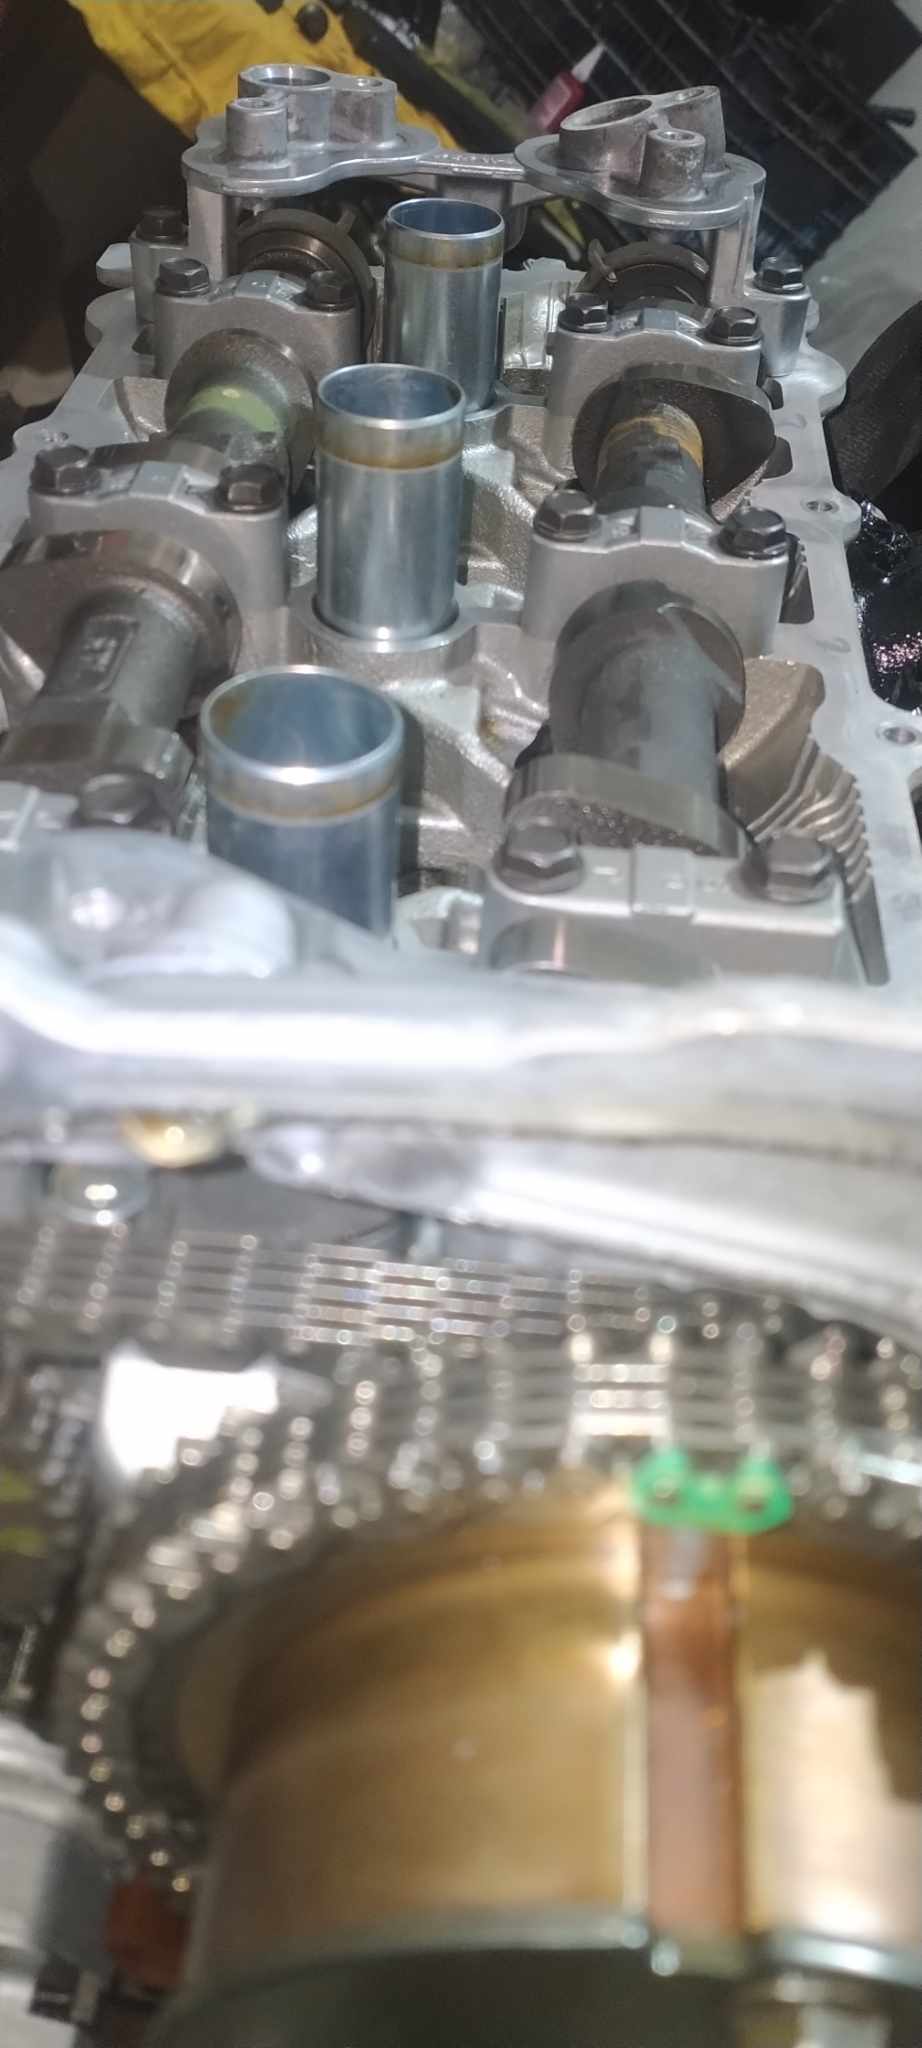
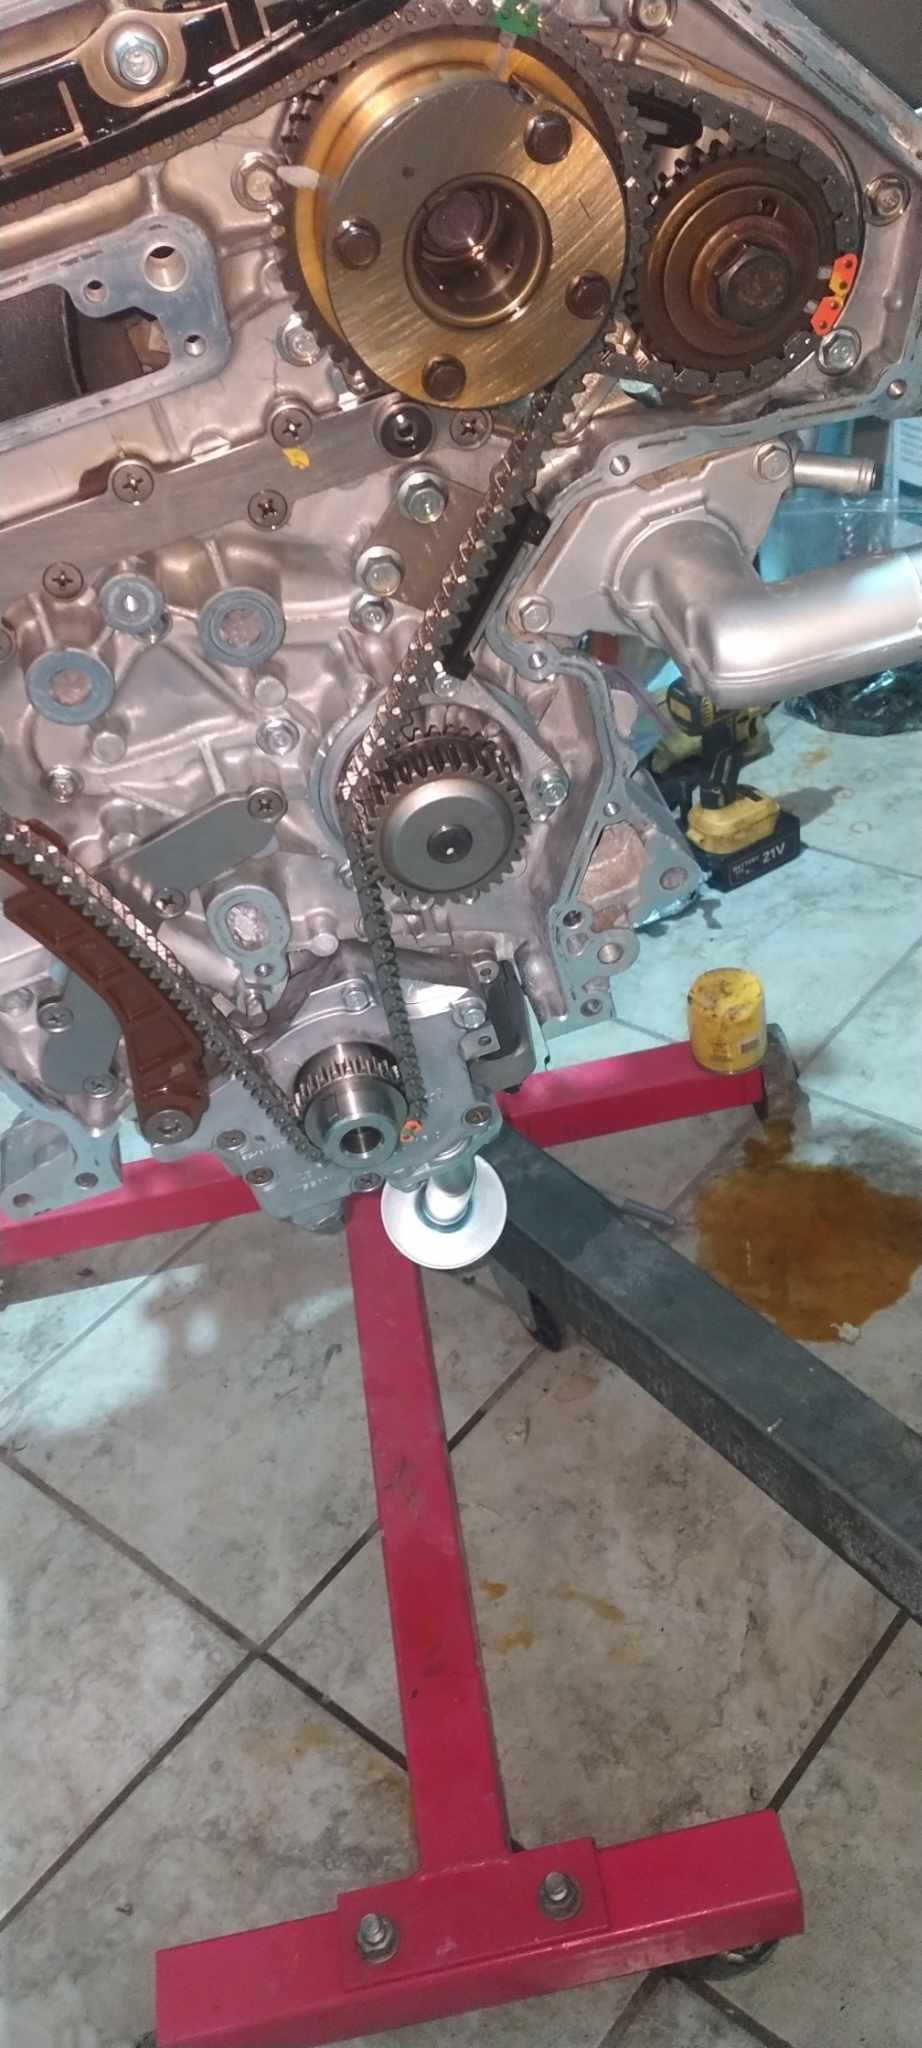
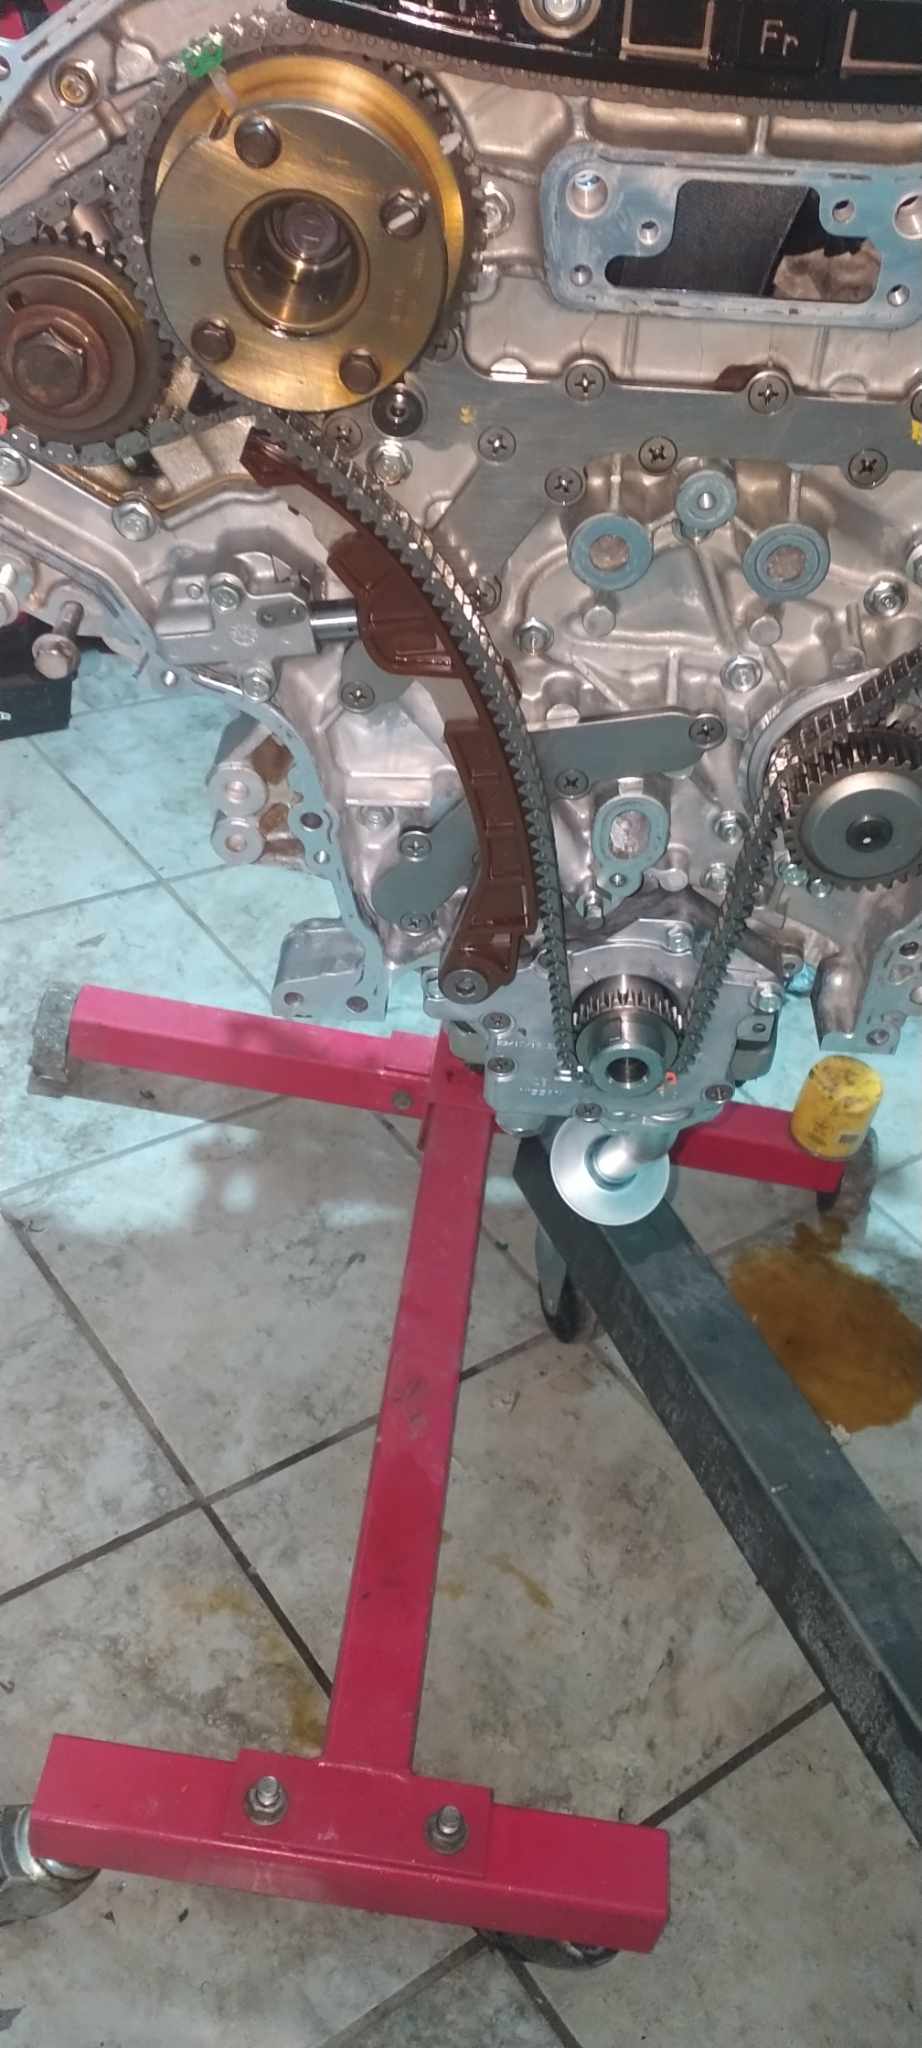
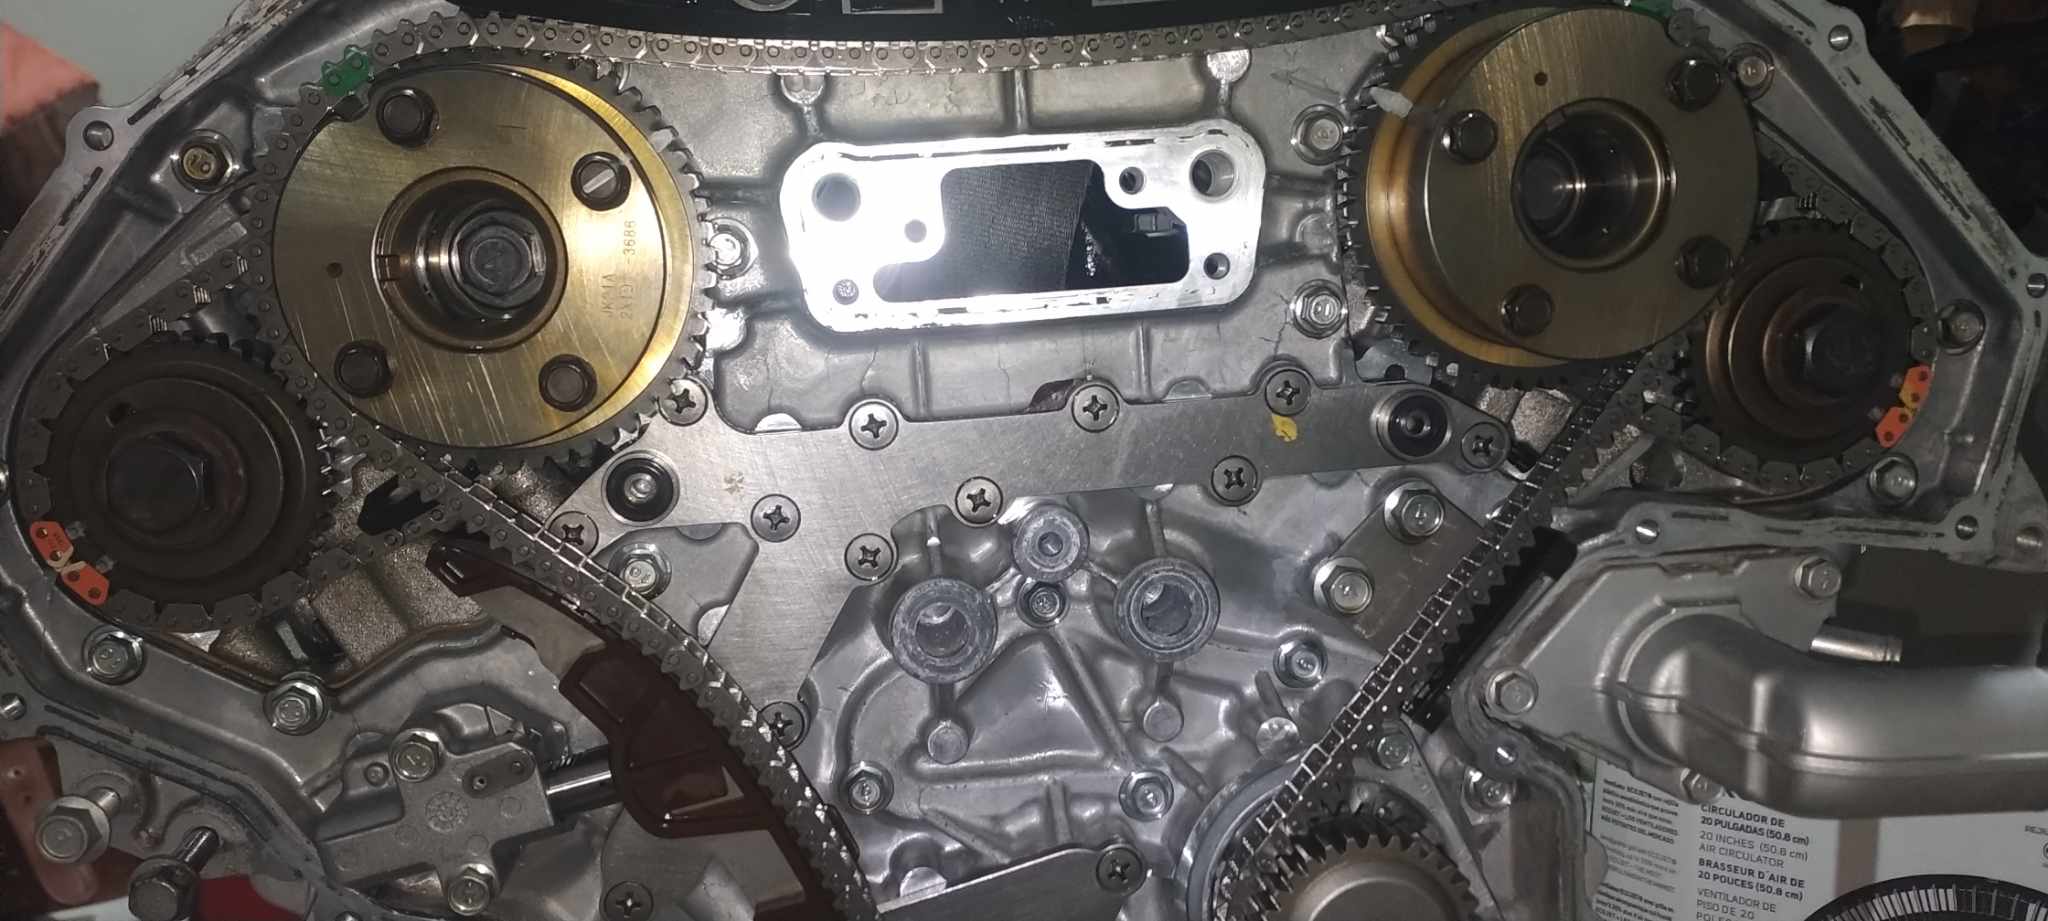
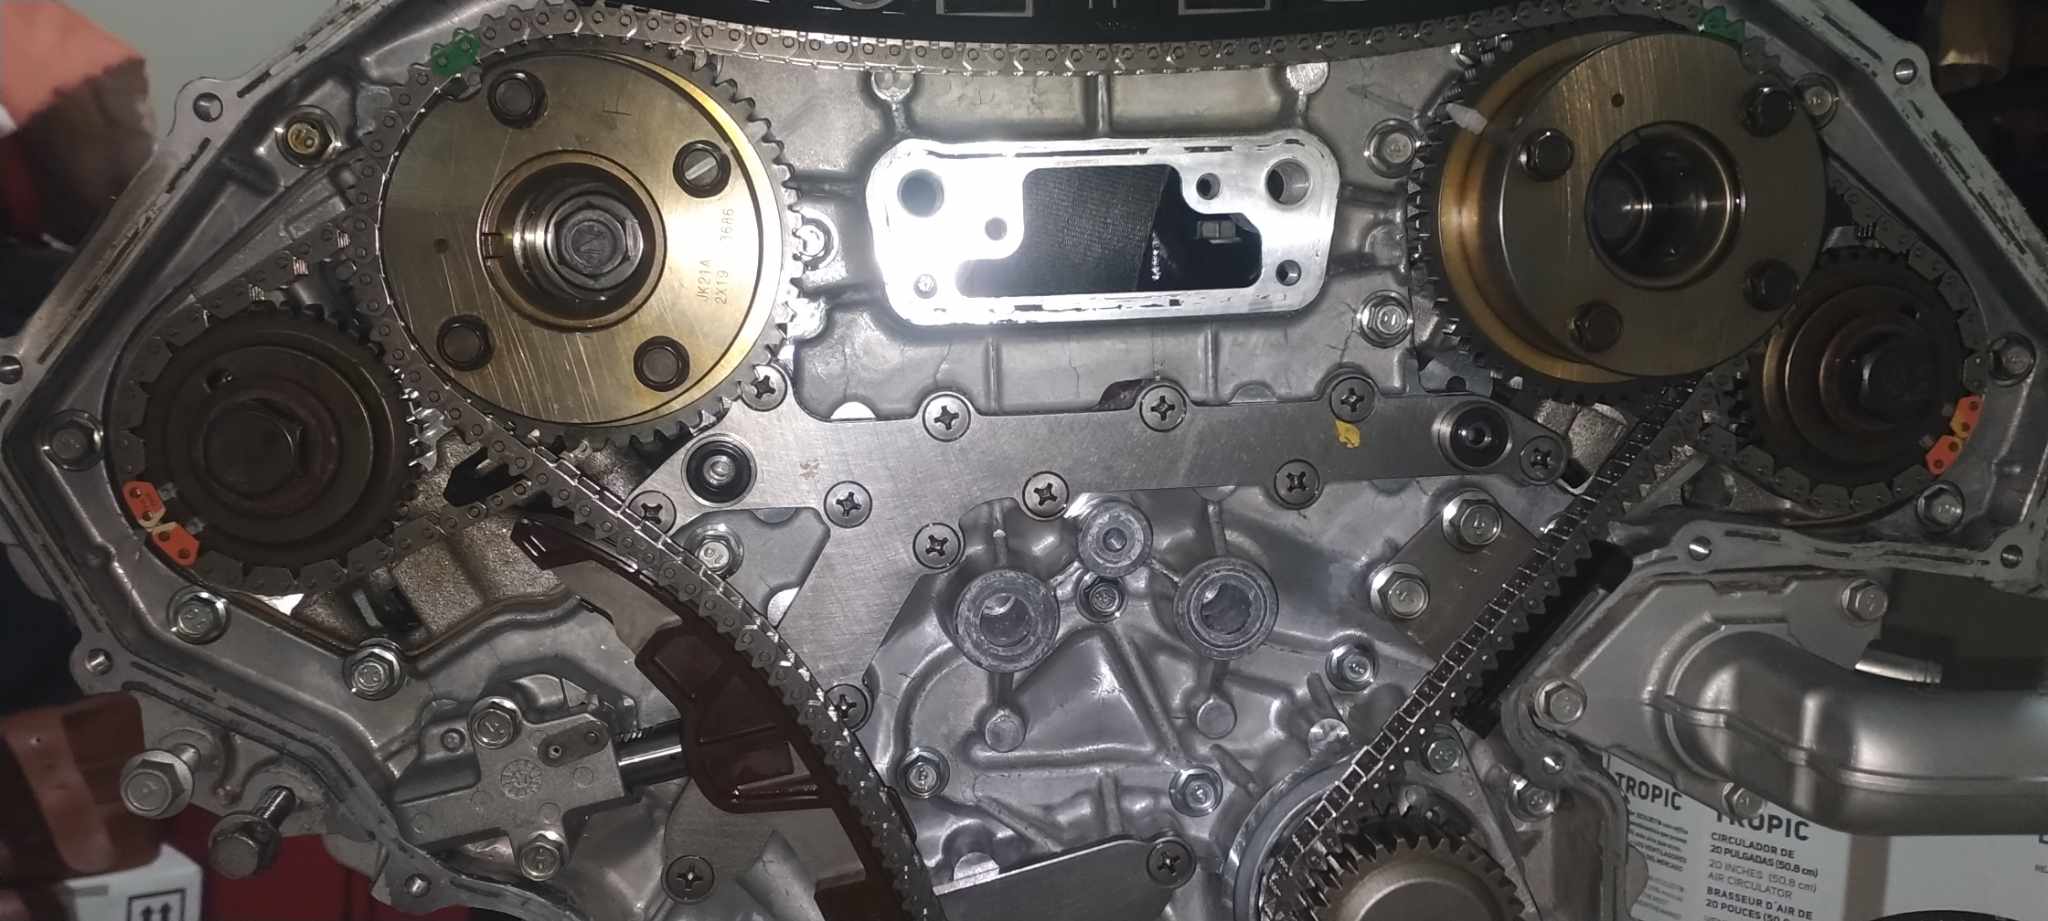
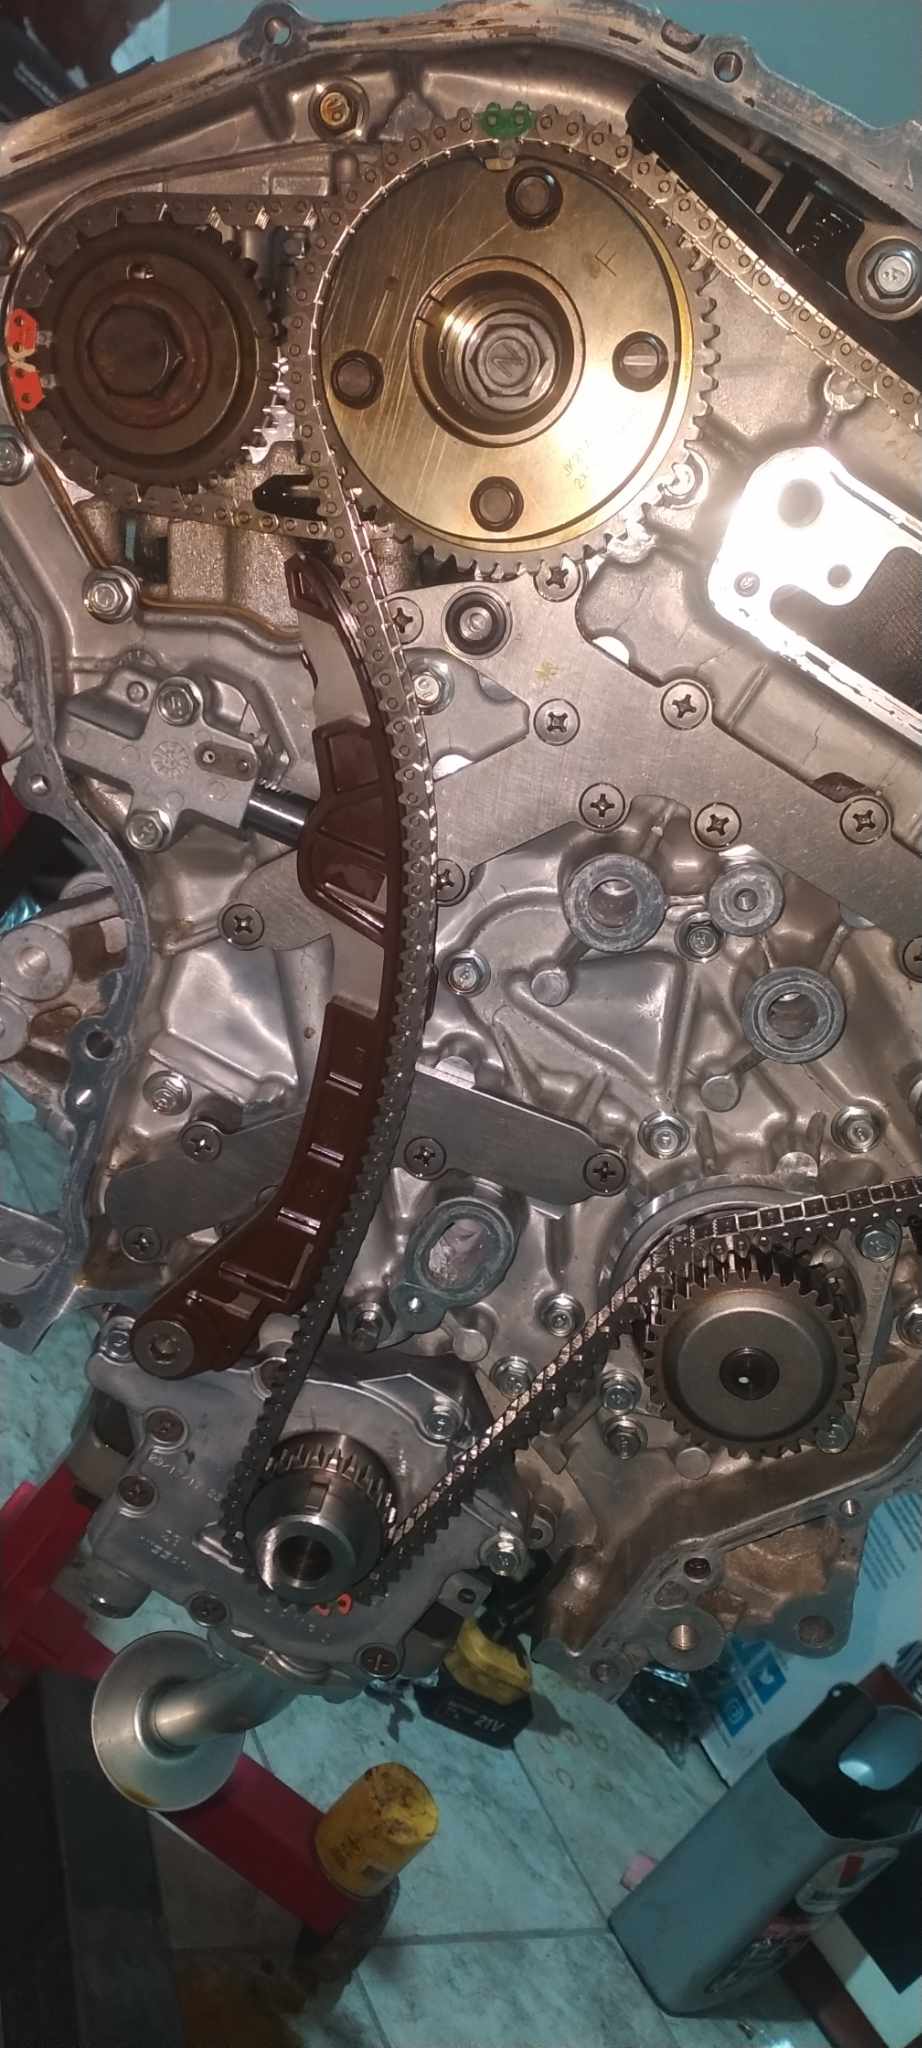
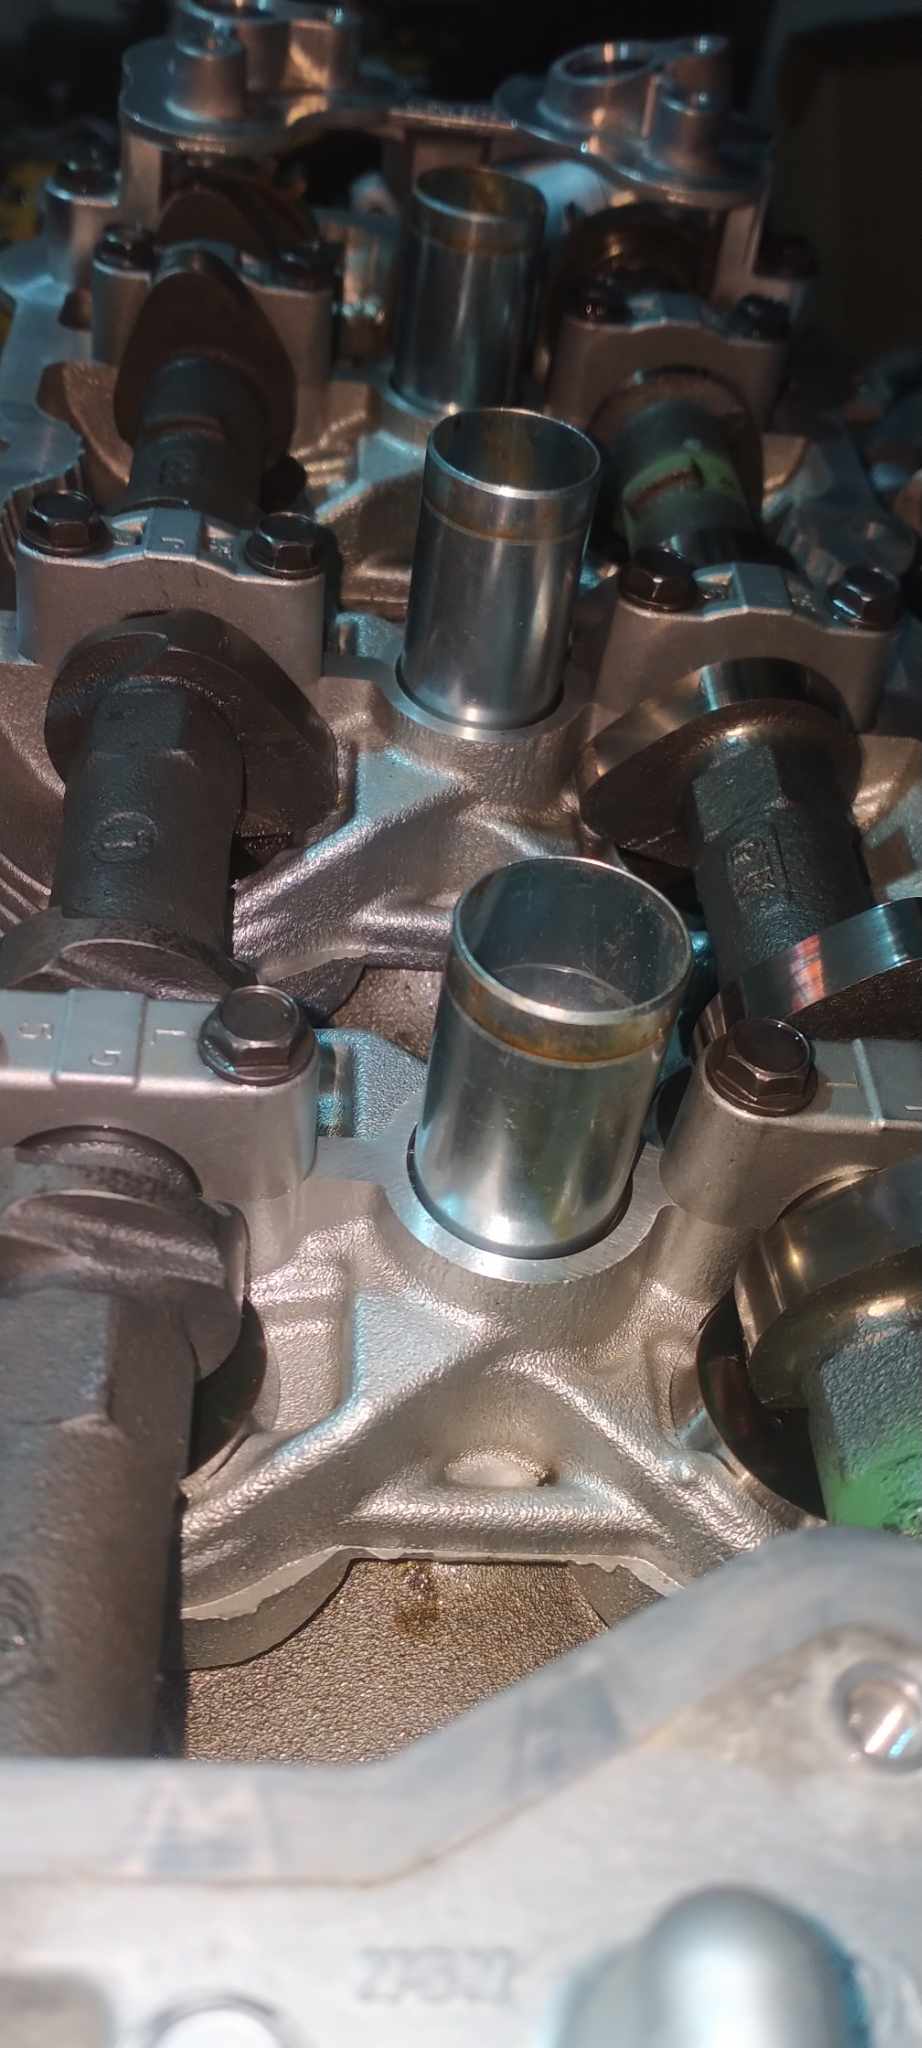

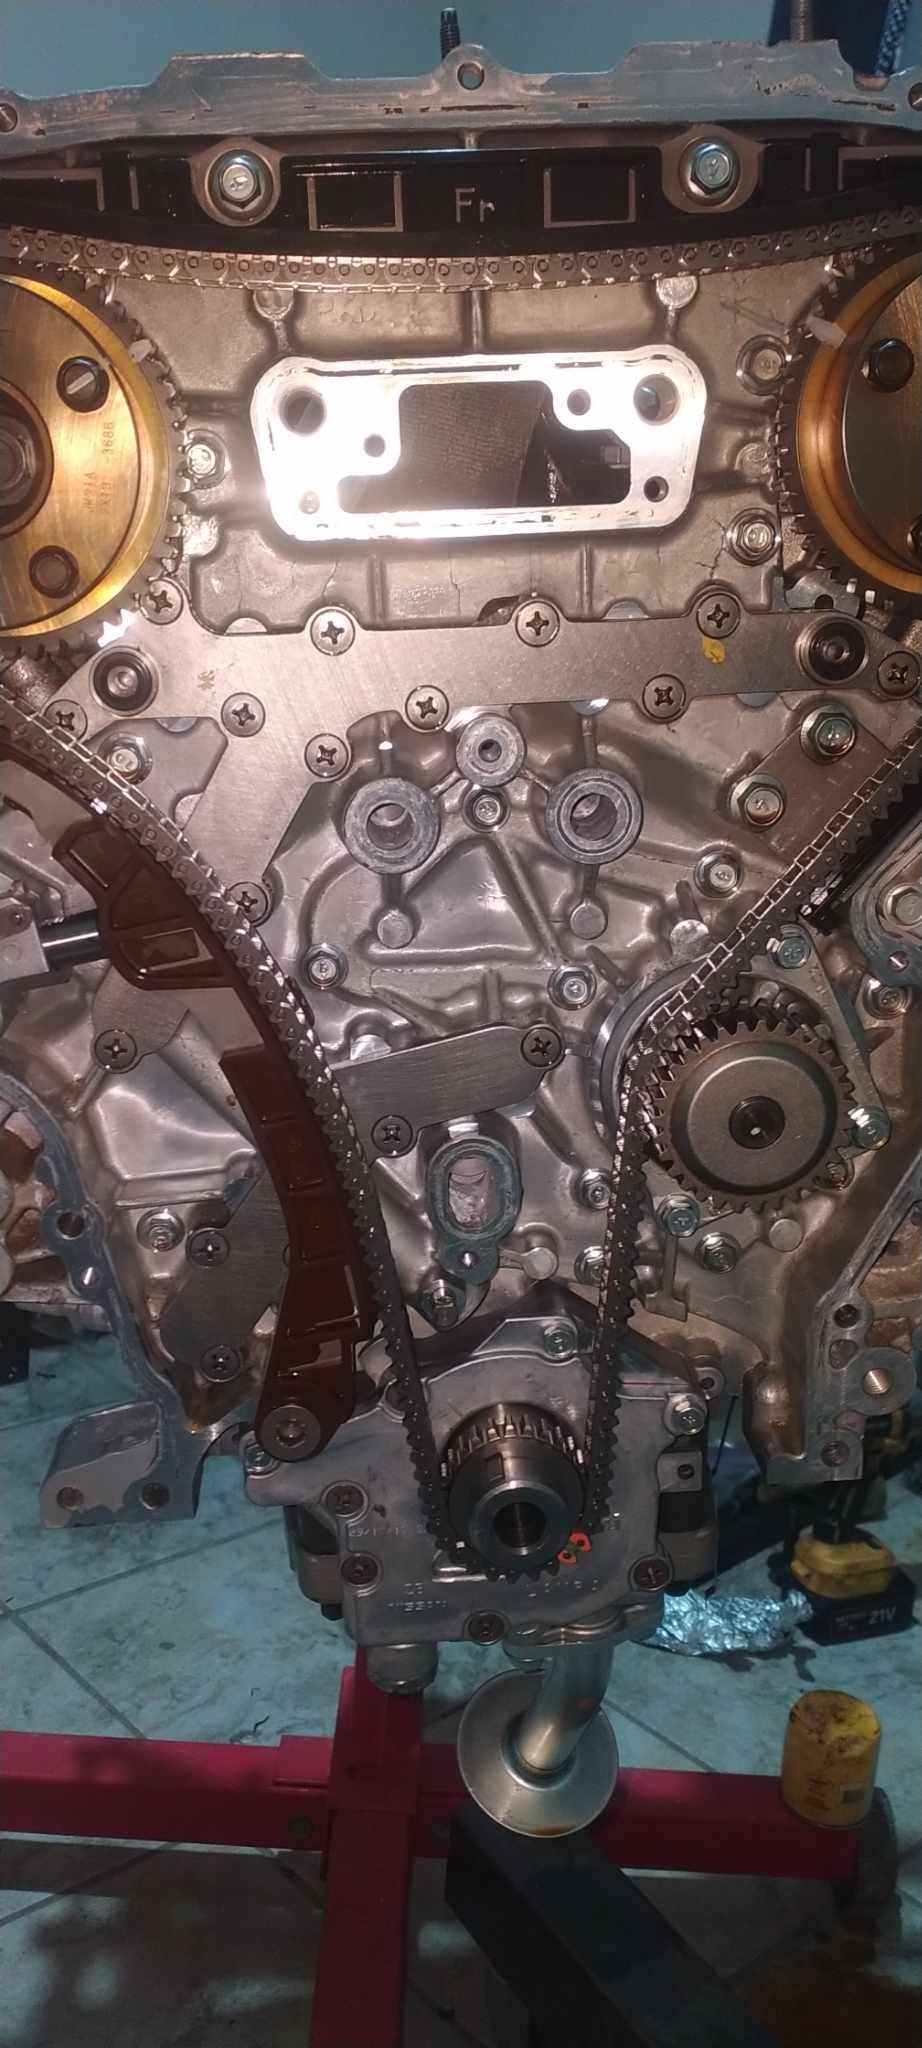

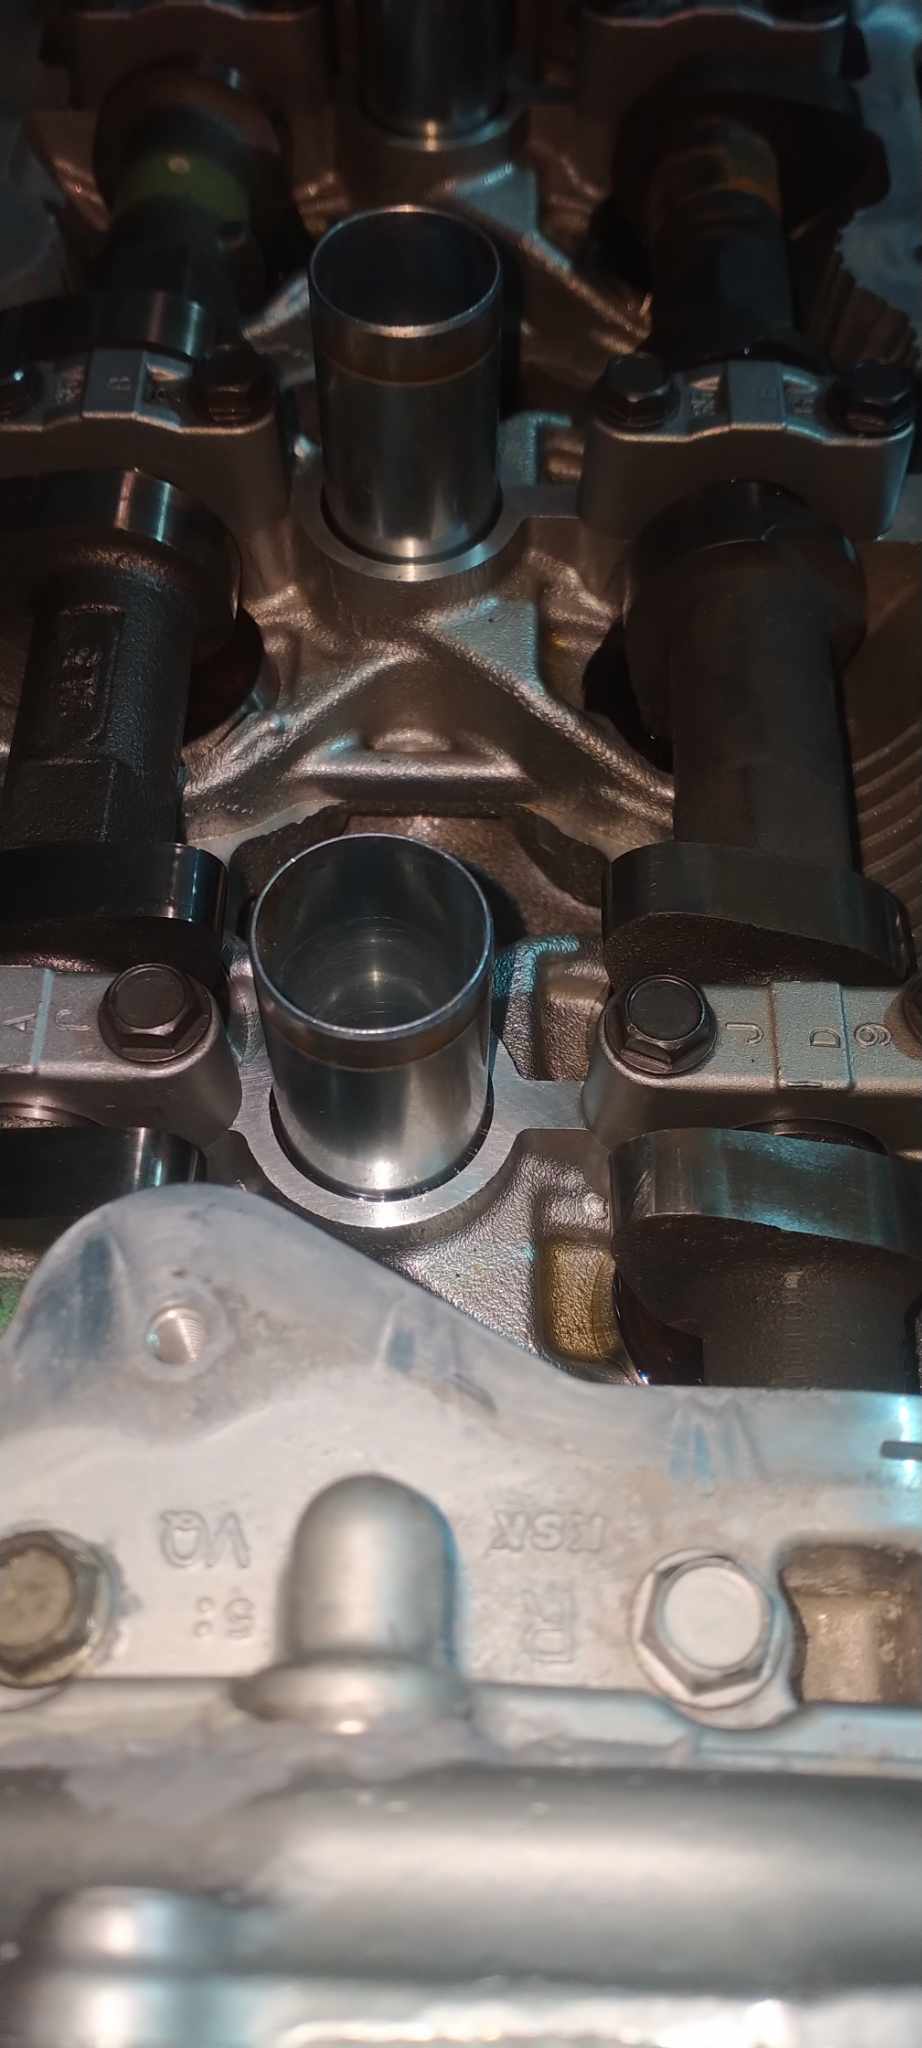

I’ve added more pictures of the timing setup. I had to use VQ30DE intake cam bolts for the third-generation exhaust cams. I also painted the timing cover and opted to use the cover from my original engine because I prefer the style of VVT covers, similar to those found on GTRs and VHRs.


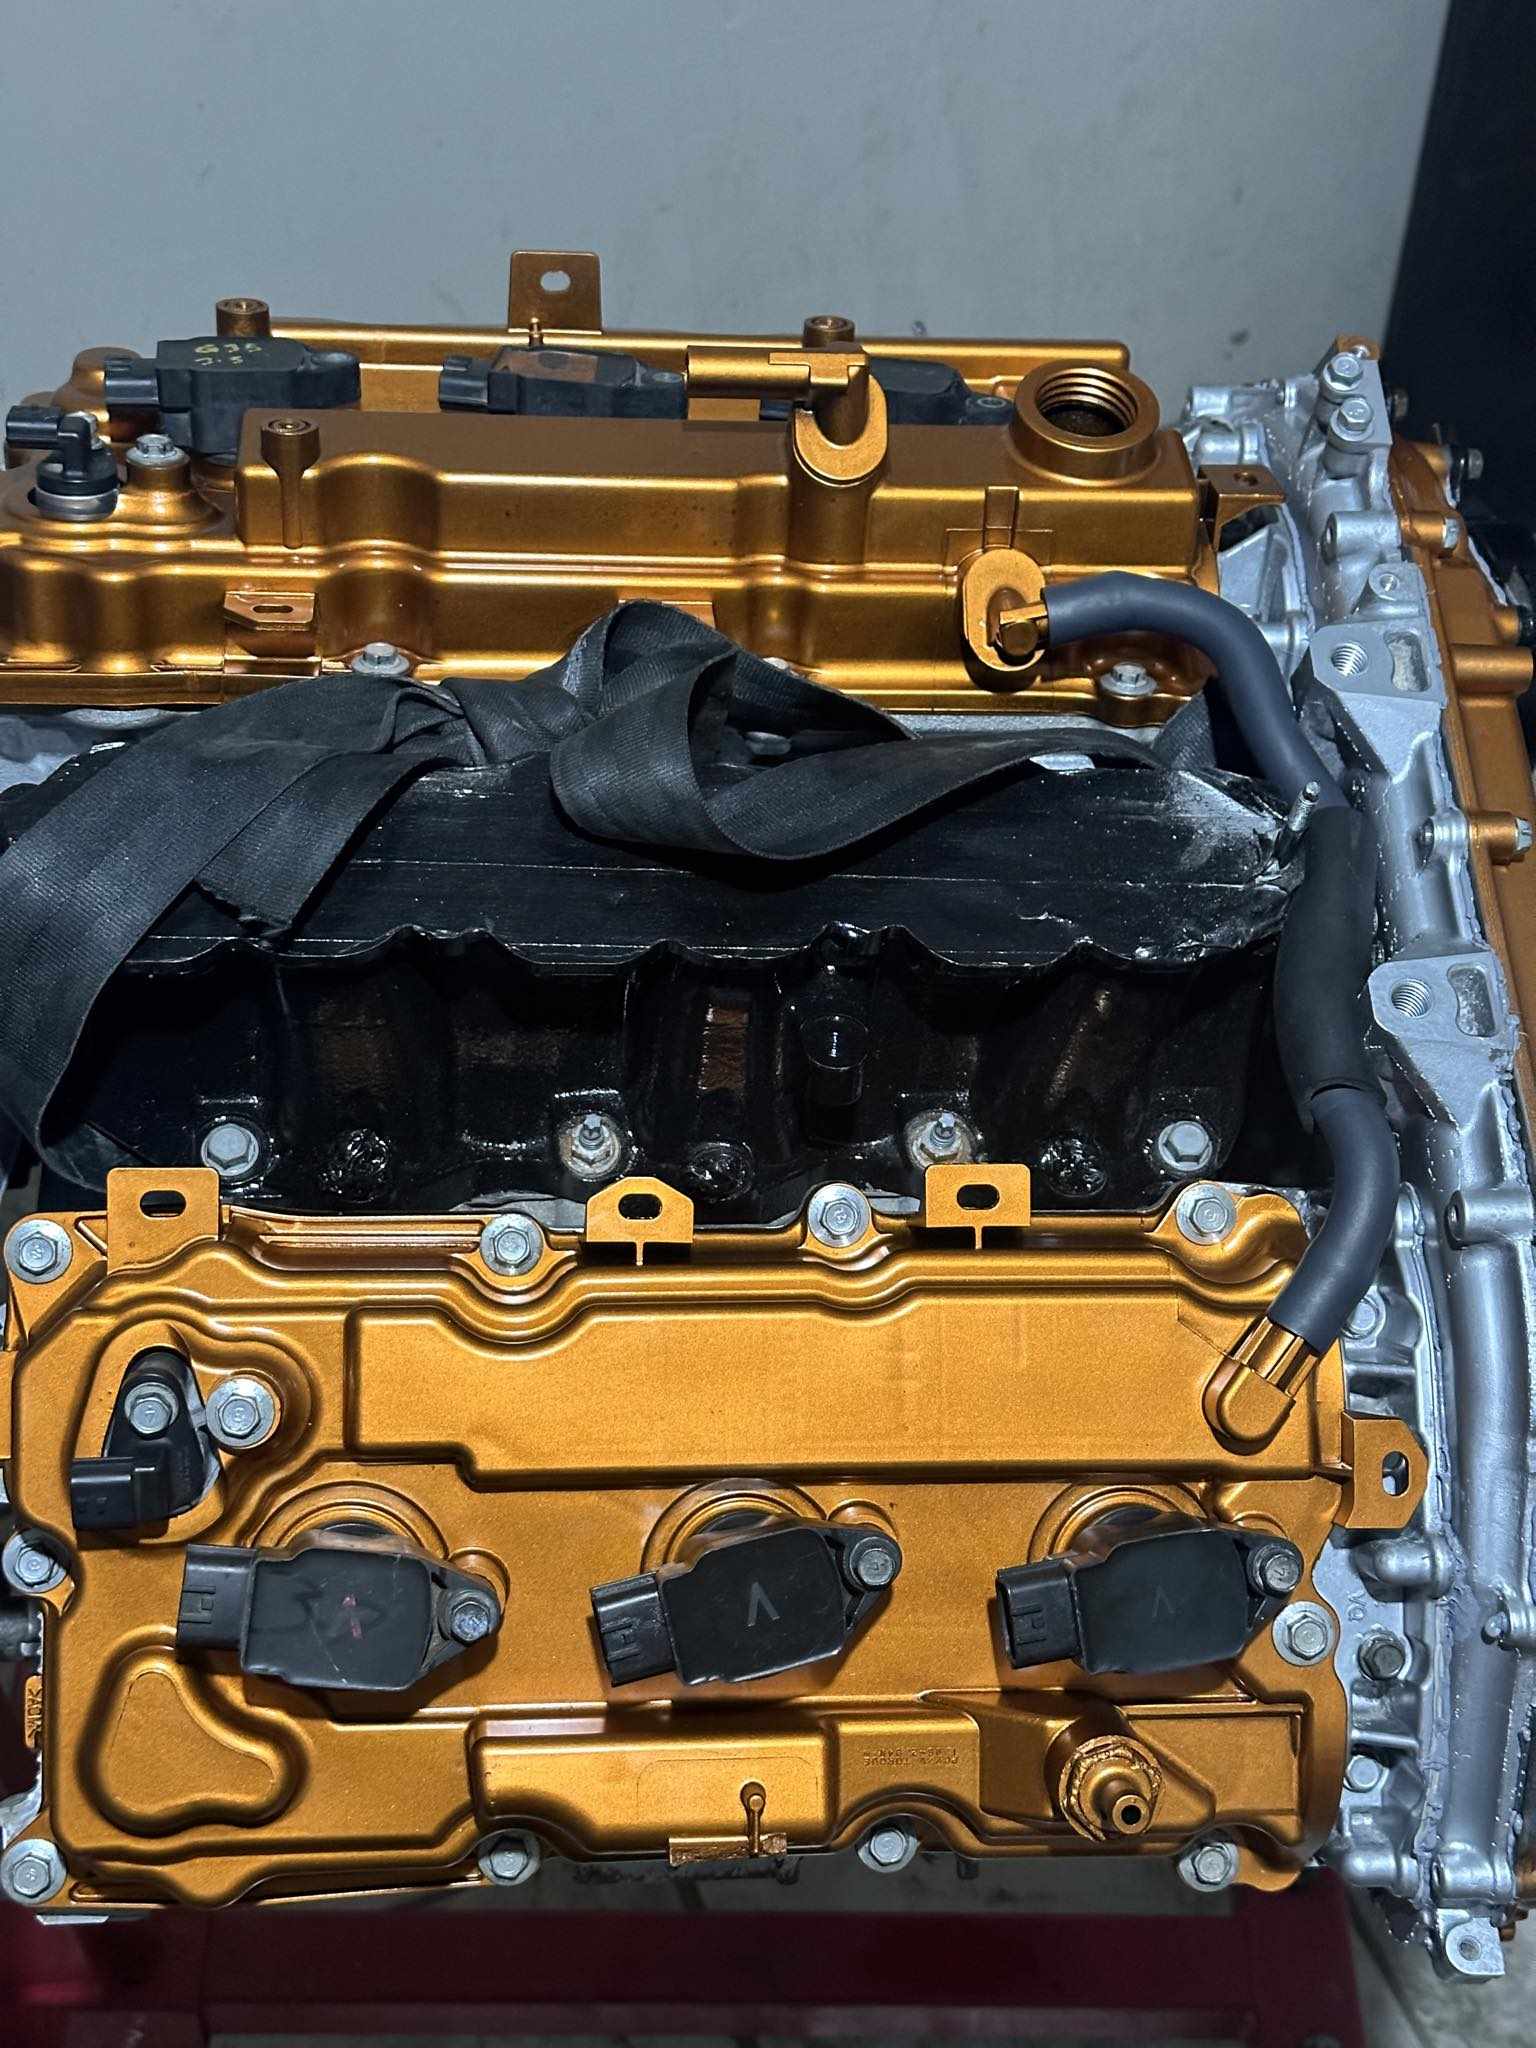


After countless hours of challenging work, it finally operates successfully. The initial startup was for the cam break-in, and it has a lopey idle.


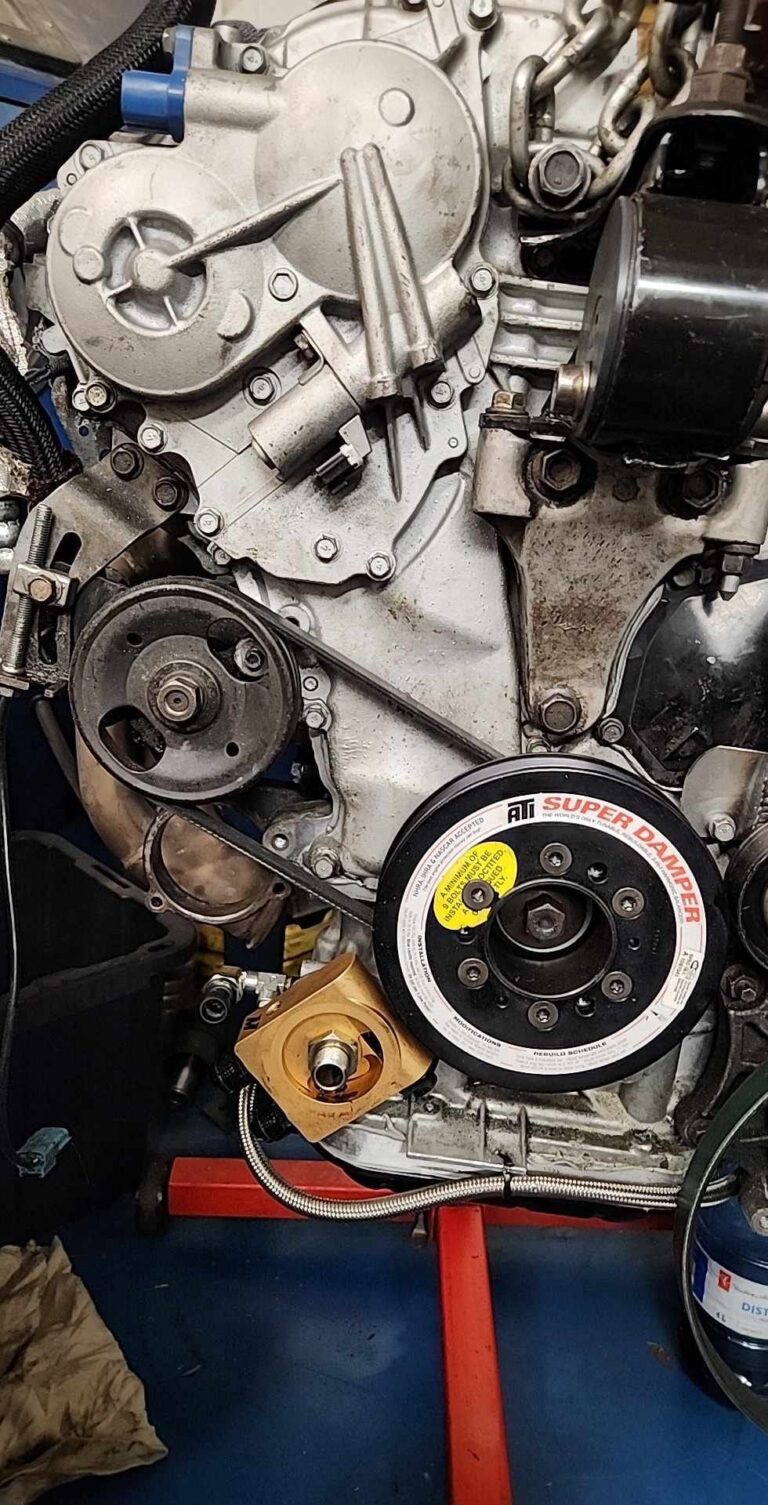
Credit: Rene Saran
For anyone who uses or has figured out the ATI damper [machined to fit FWD offsets], the belt size is 1/4″ to 1/2″ shorter than stock. With an HR swap, you must ensure that the power steering pump can move the full range on the adjuster. If it does not loosen to the bottom, you haven’t trimmed the new power steering pump ear enough on the HR inner timing cover.
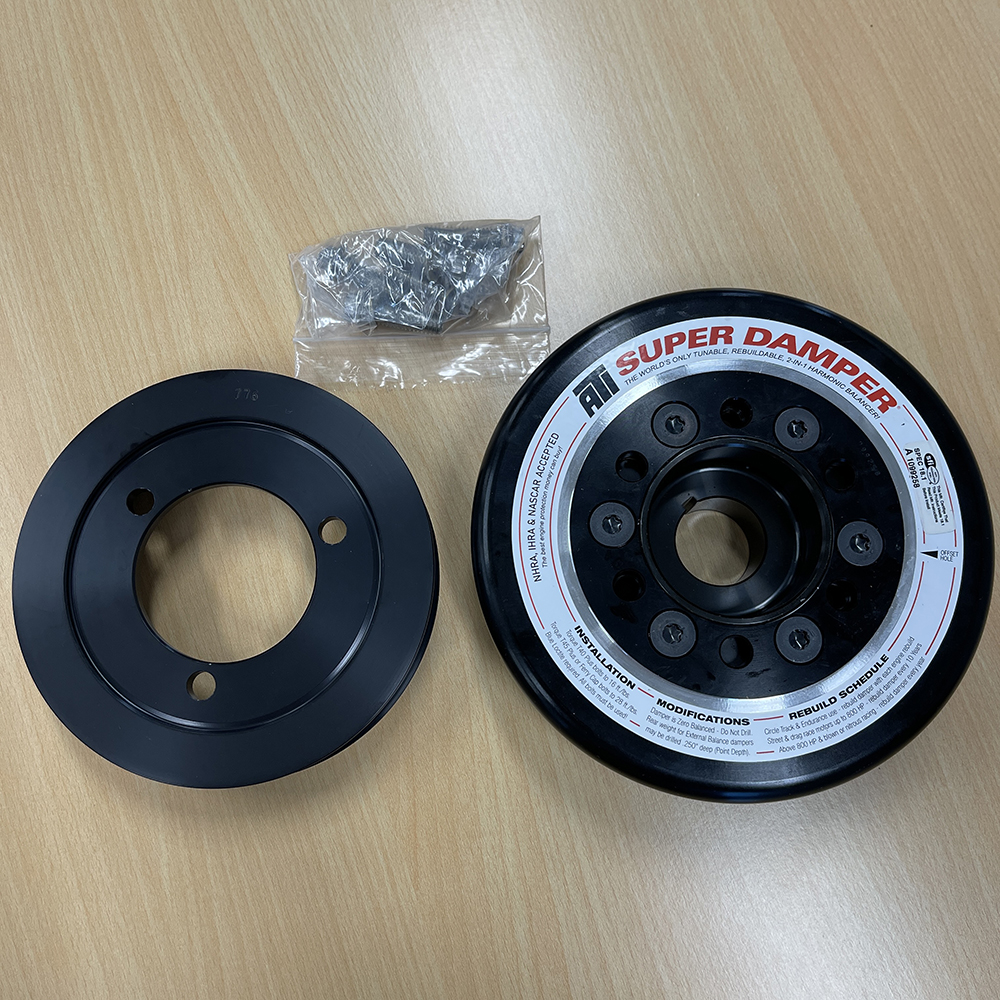
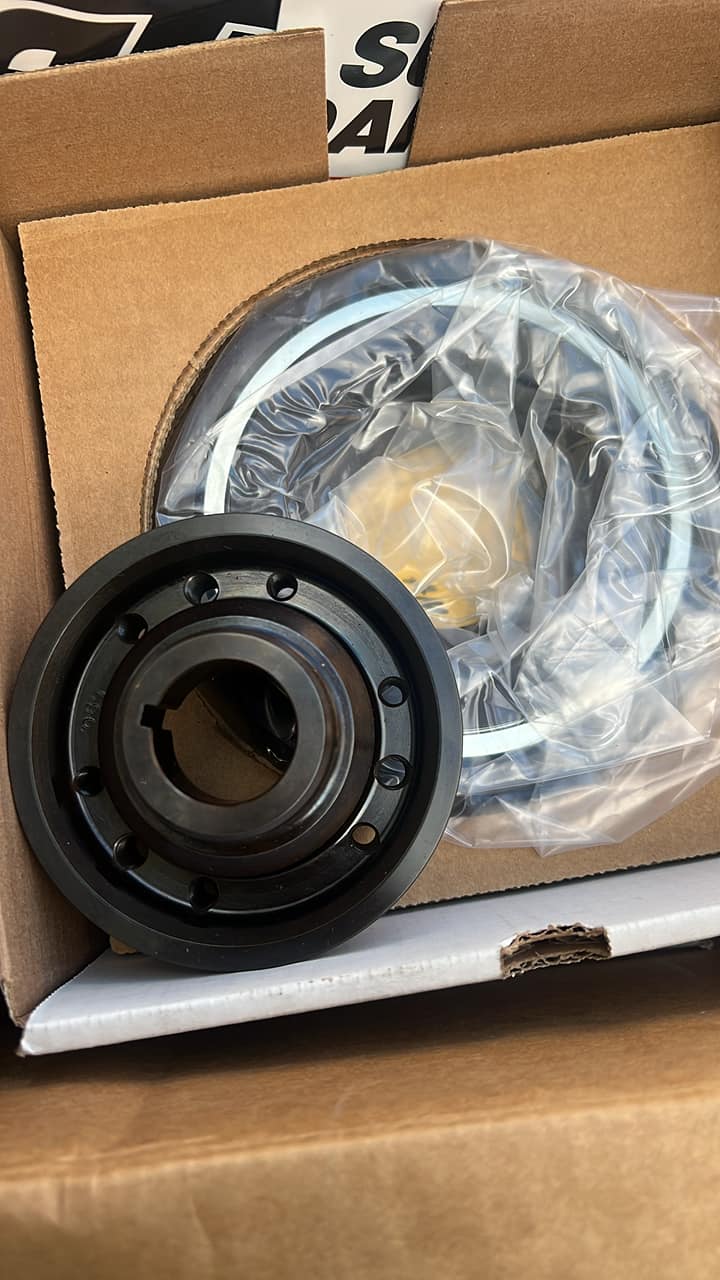
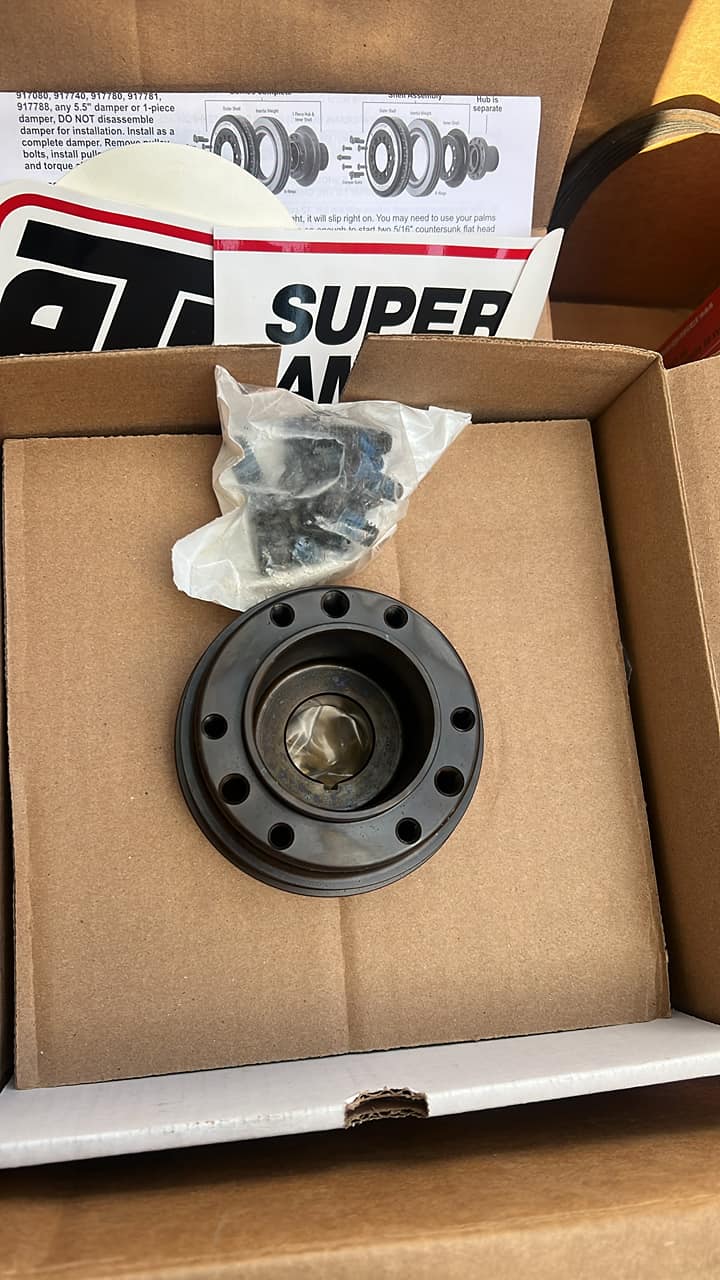


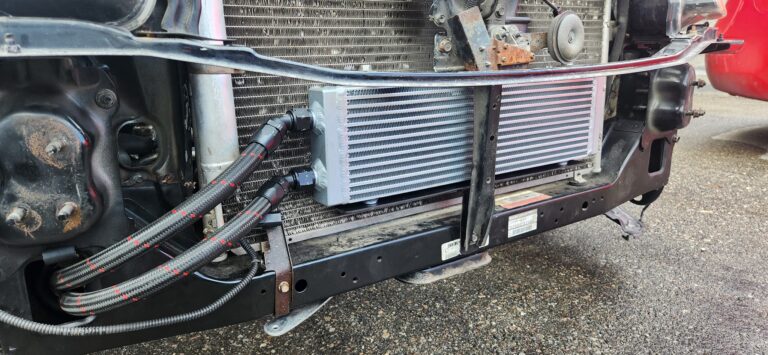
Credit: Rene Saran
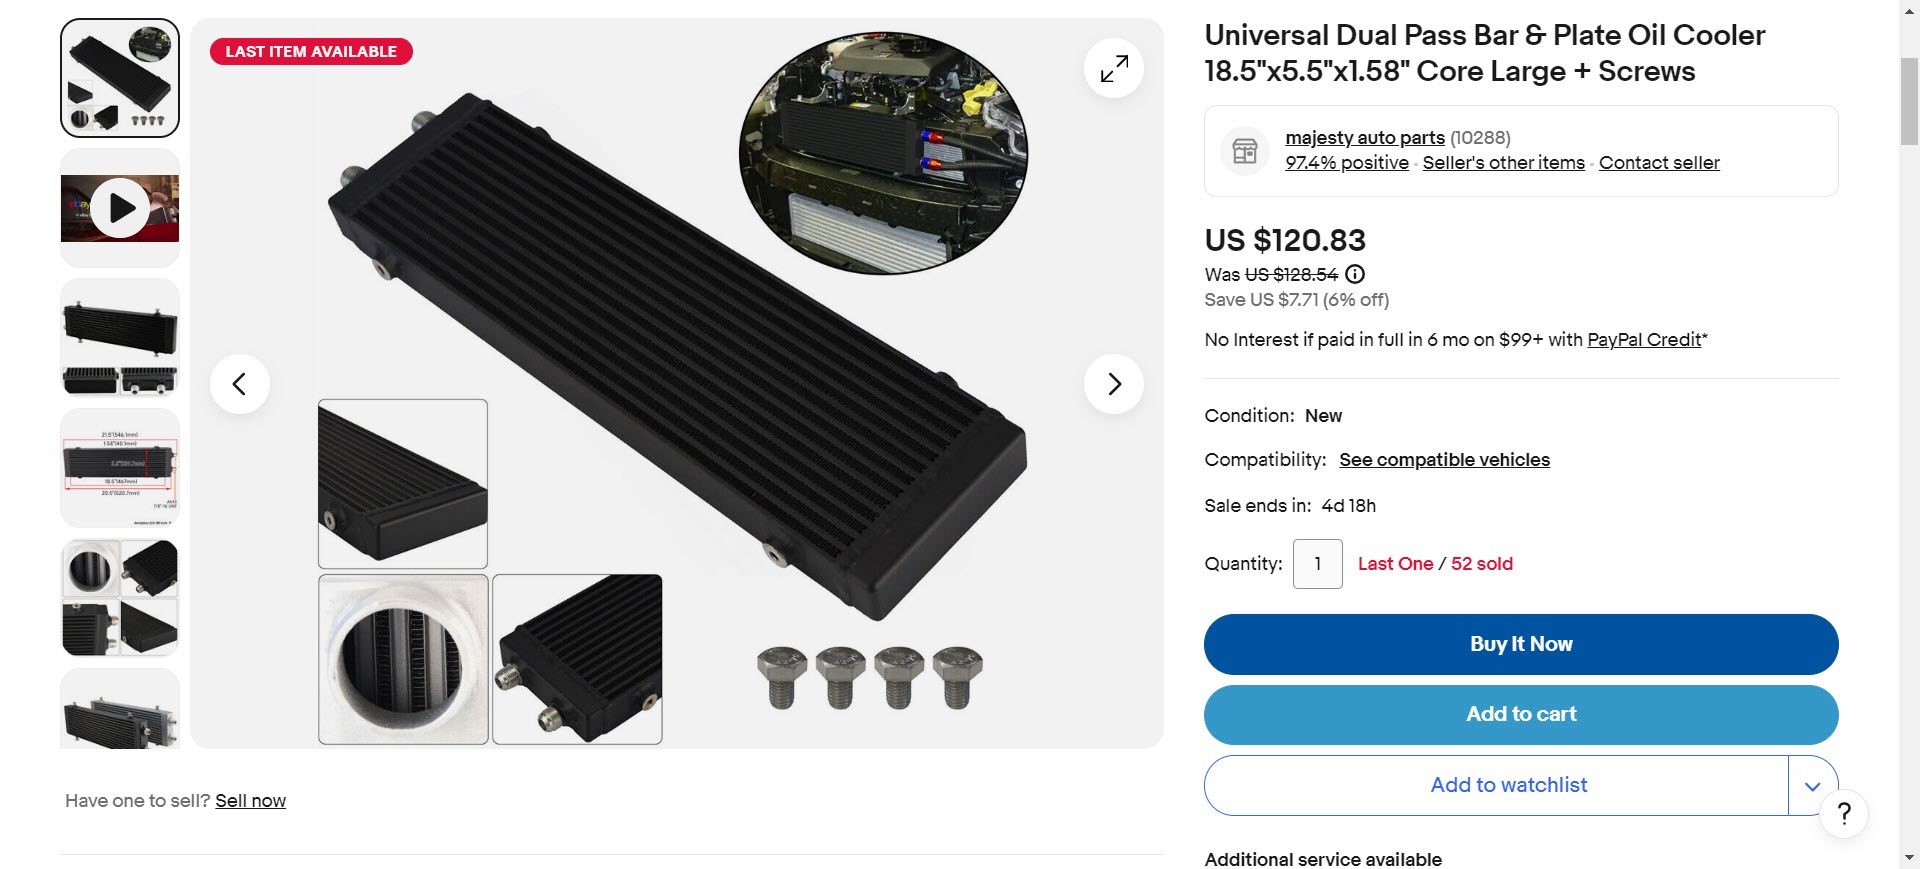
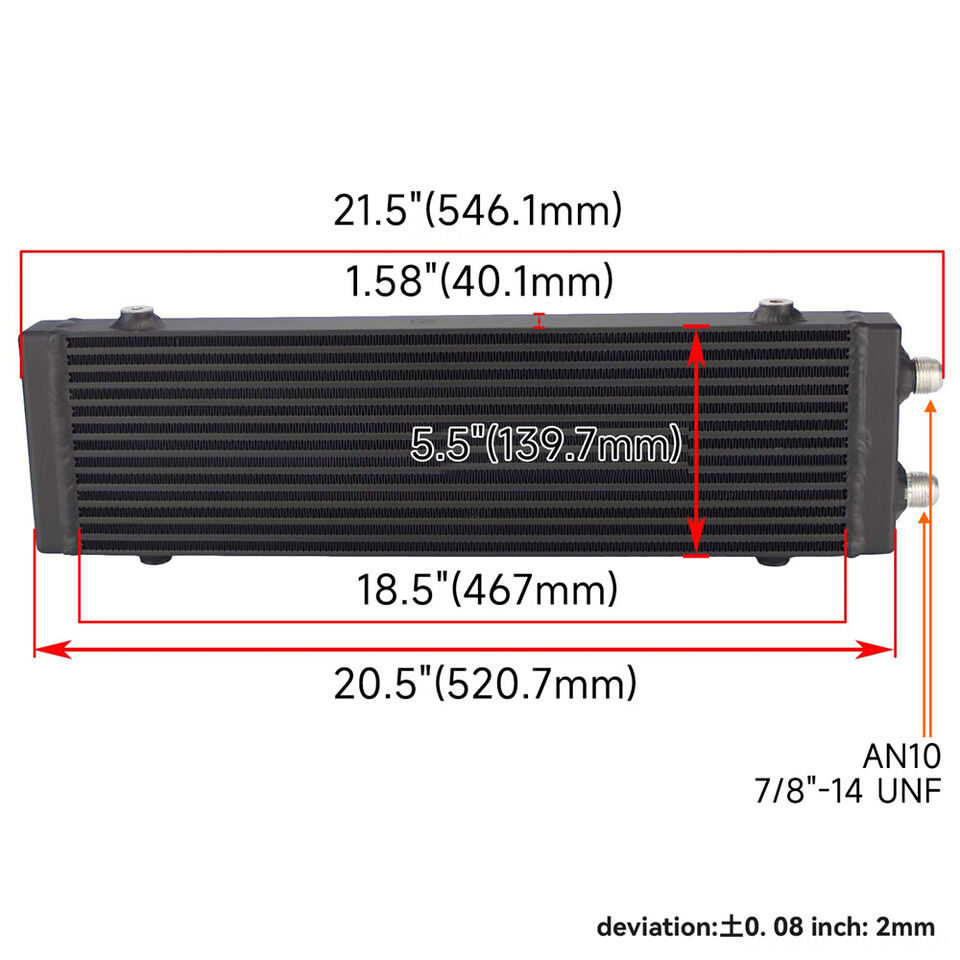
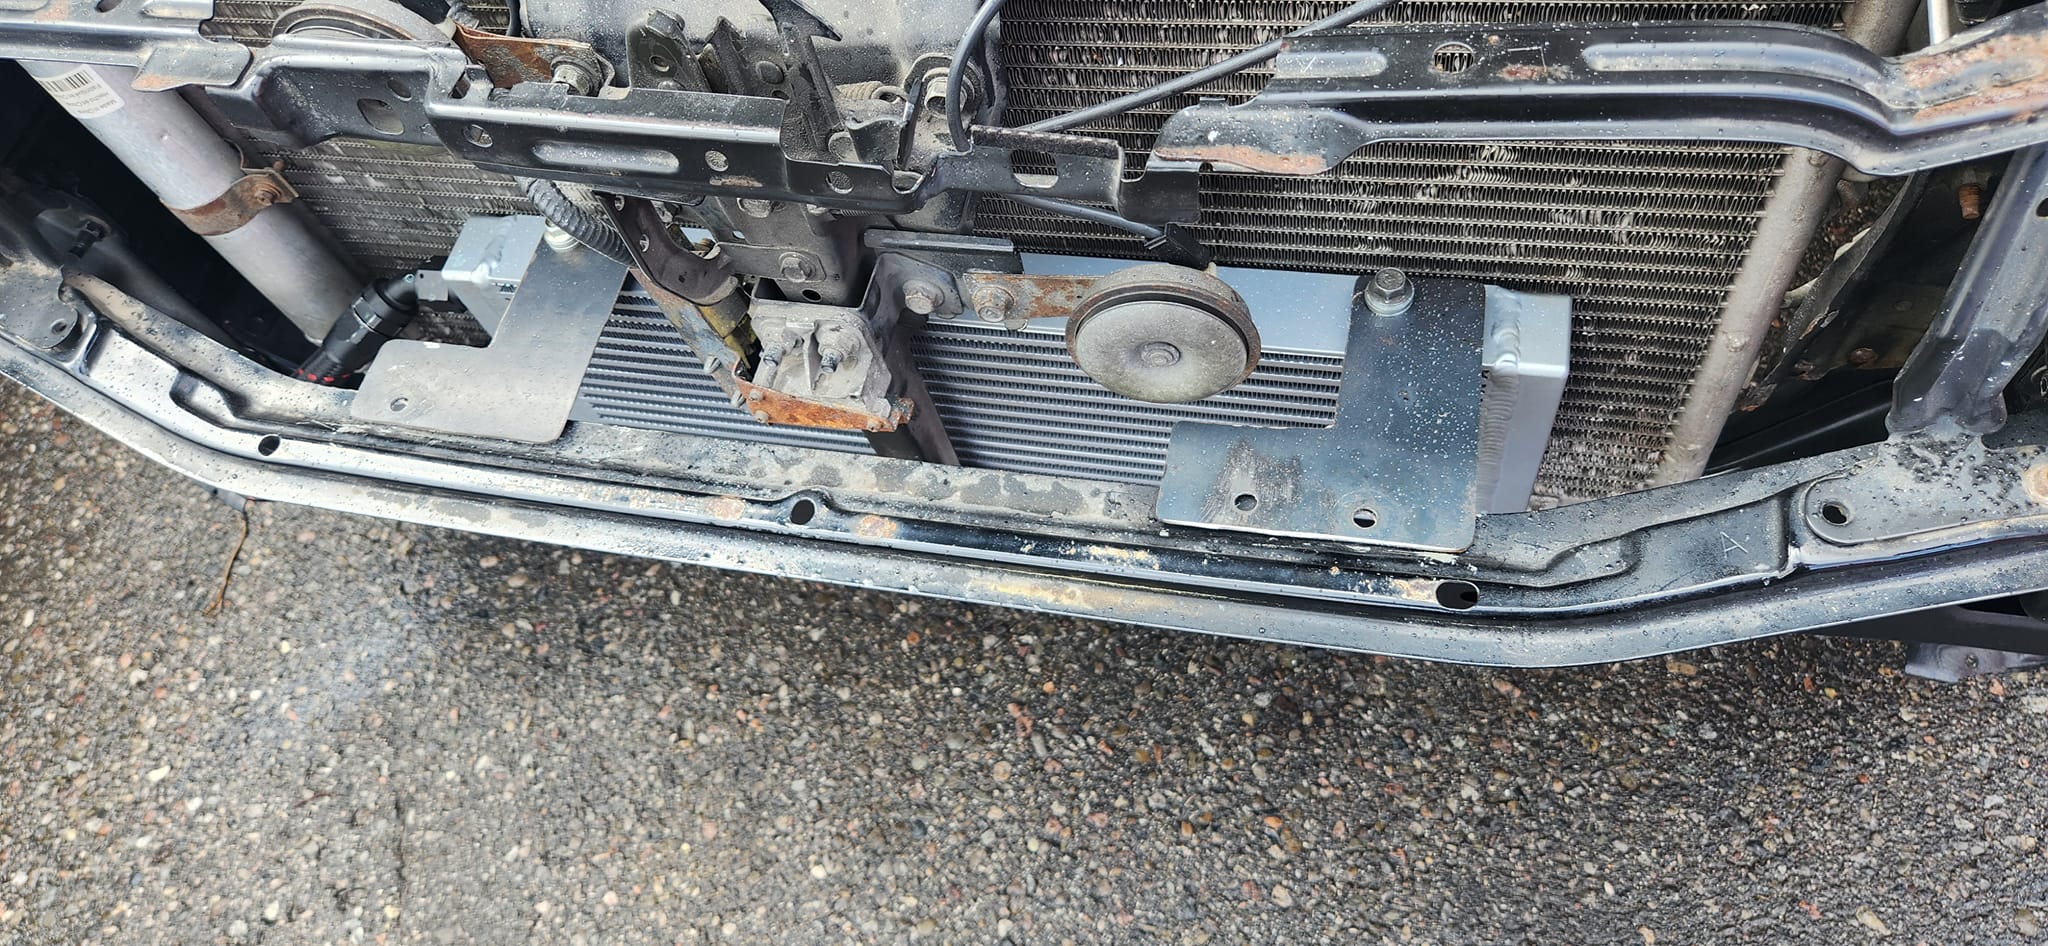
If anyone is interested in an idea for mounting an oil cooler, this dual-pass one fits snugly between the latch support and the condenser, while still leaving space for the intercooler.
Core: 18.5″ x 5.5″ x 1.58″
Order Link: https://www.ebay.com/itm/20271225253
Price: $120.83


Member Credit: MAXSE5SPD
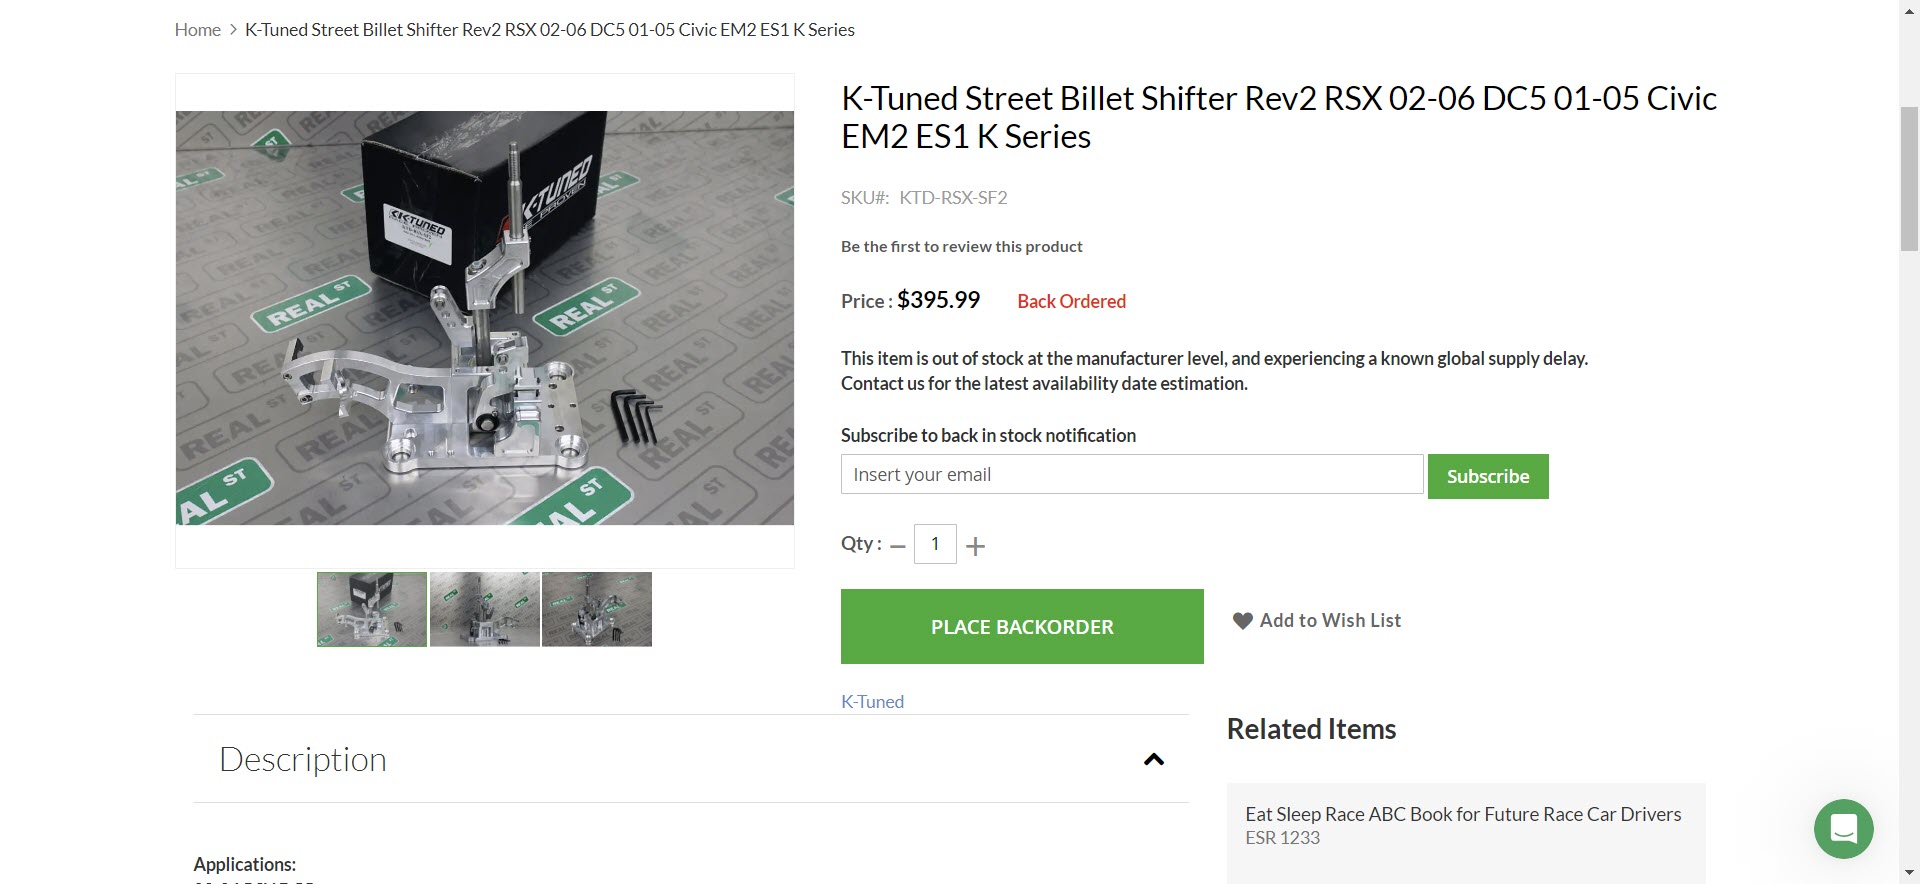
REQUIRED PARTS
OPTIONAL PARTS
PROCEDURE
I’m not going to go much into detail about removing the 5spd parts because if you are taking on this project, you can handle that.
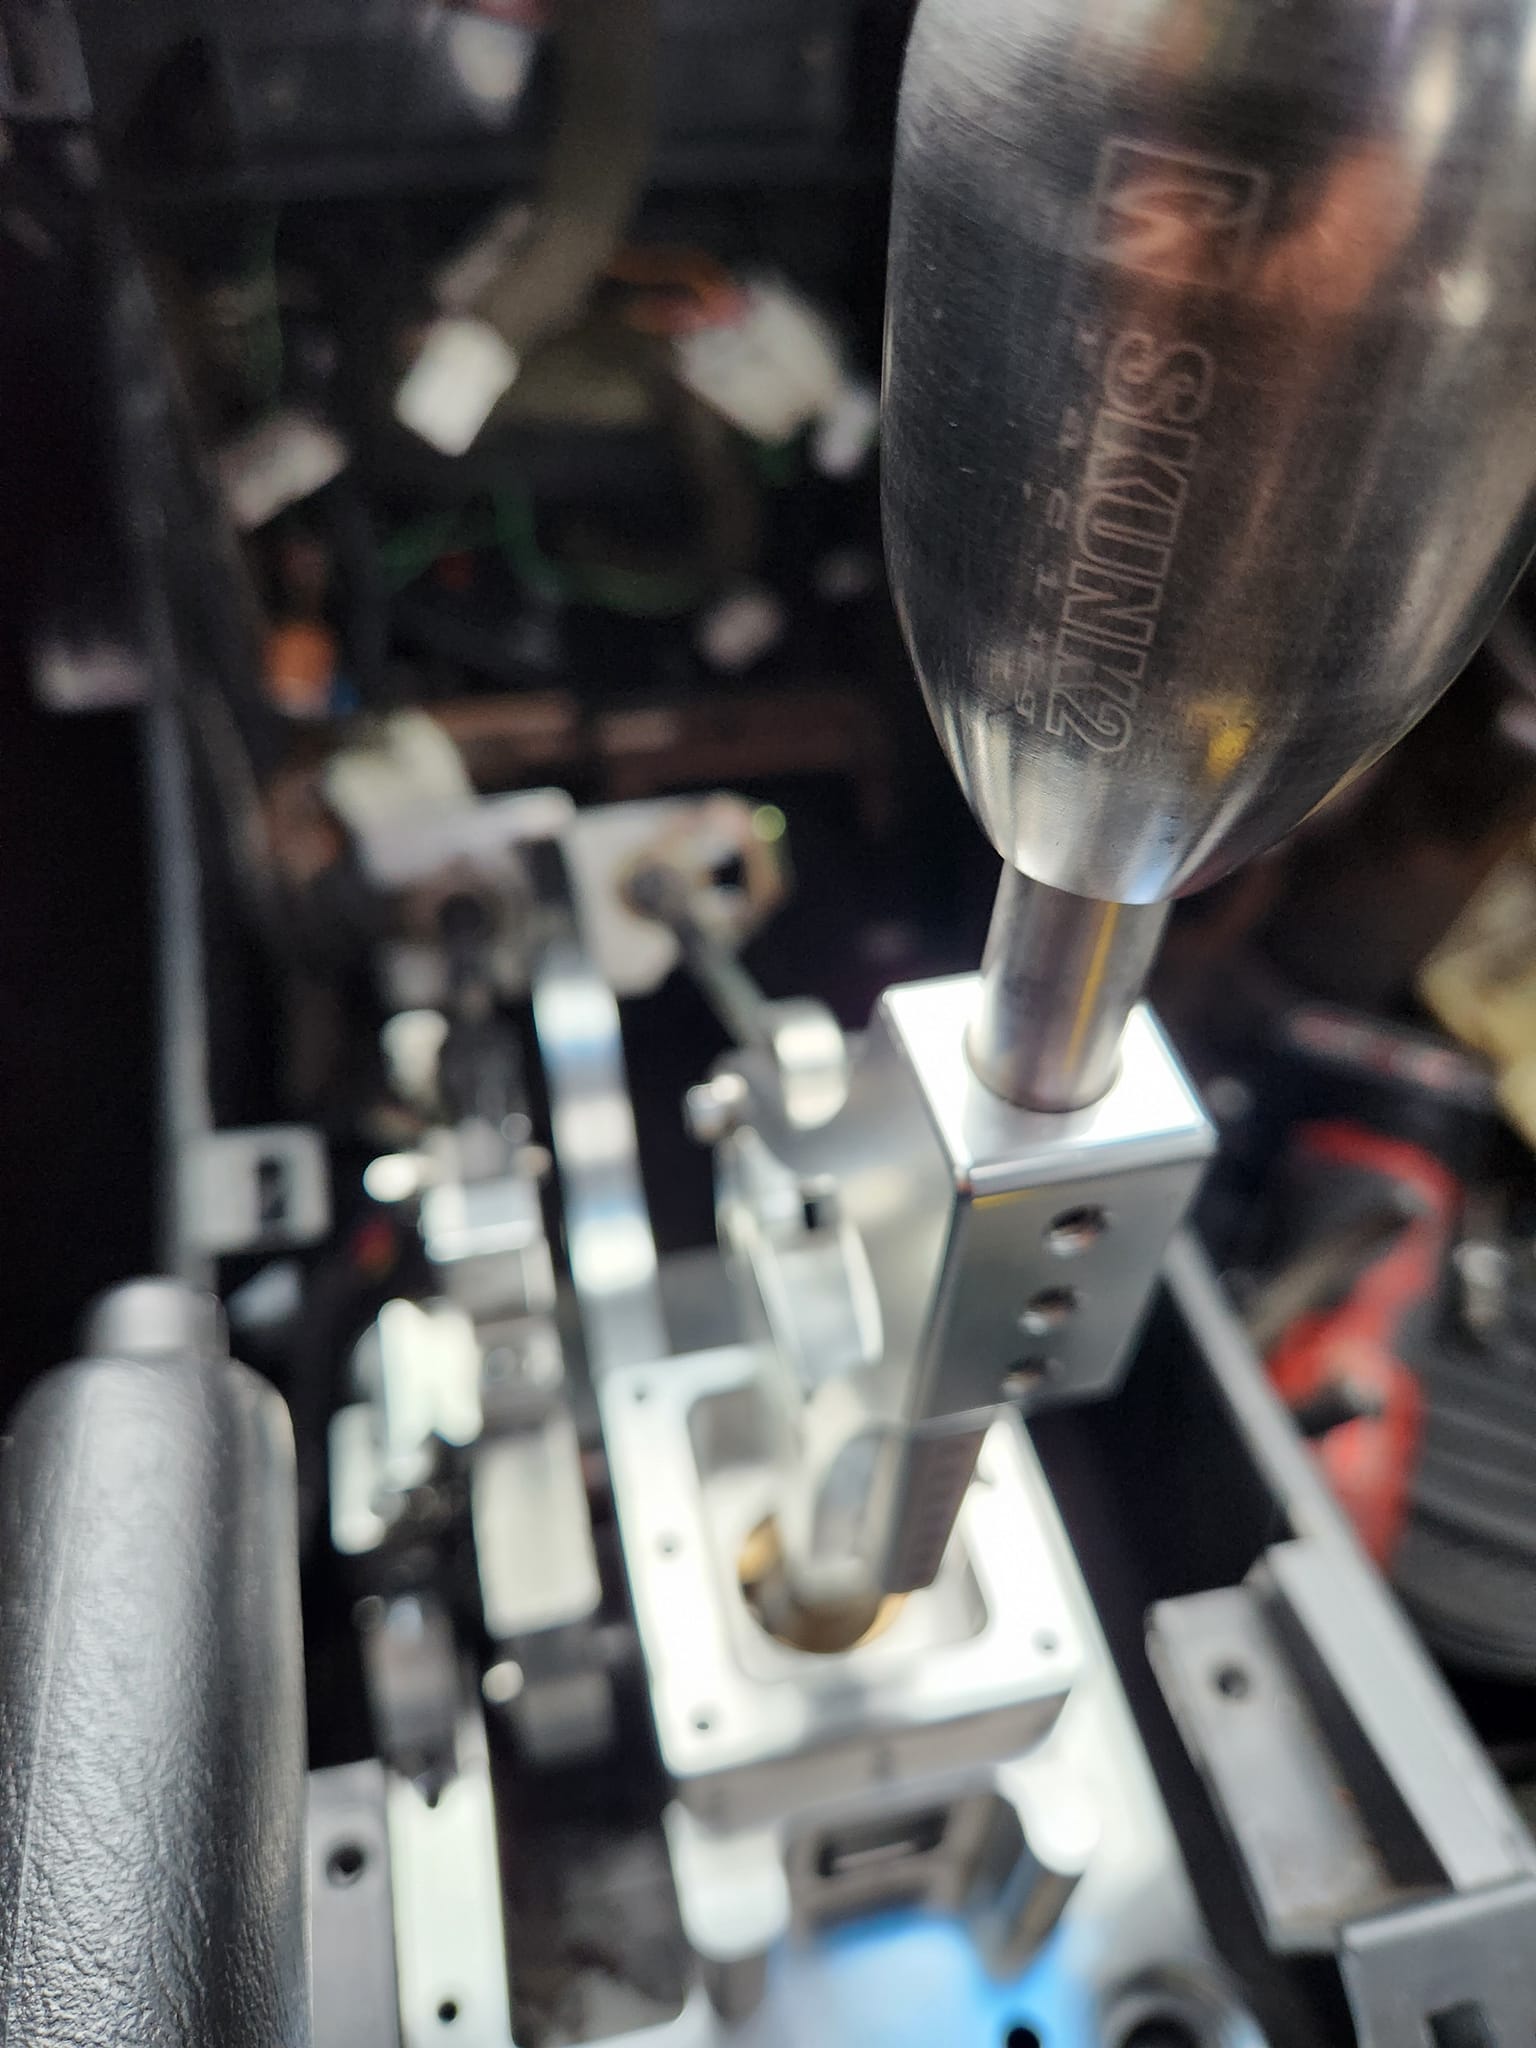
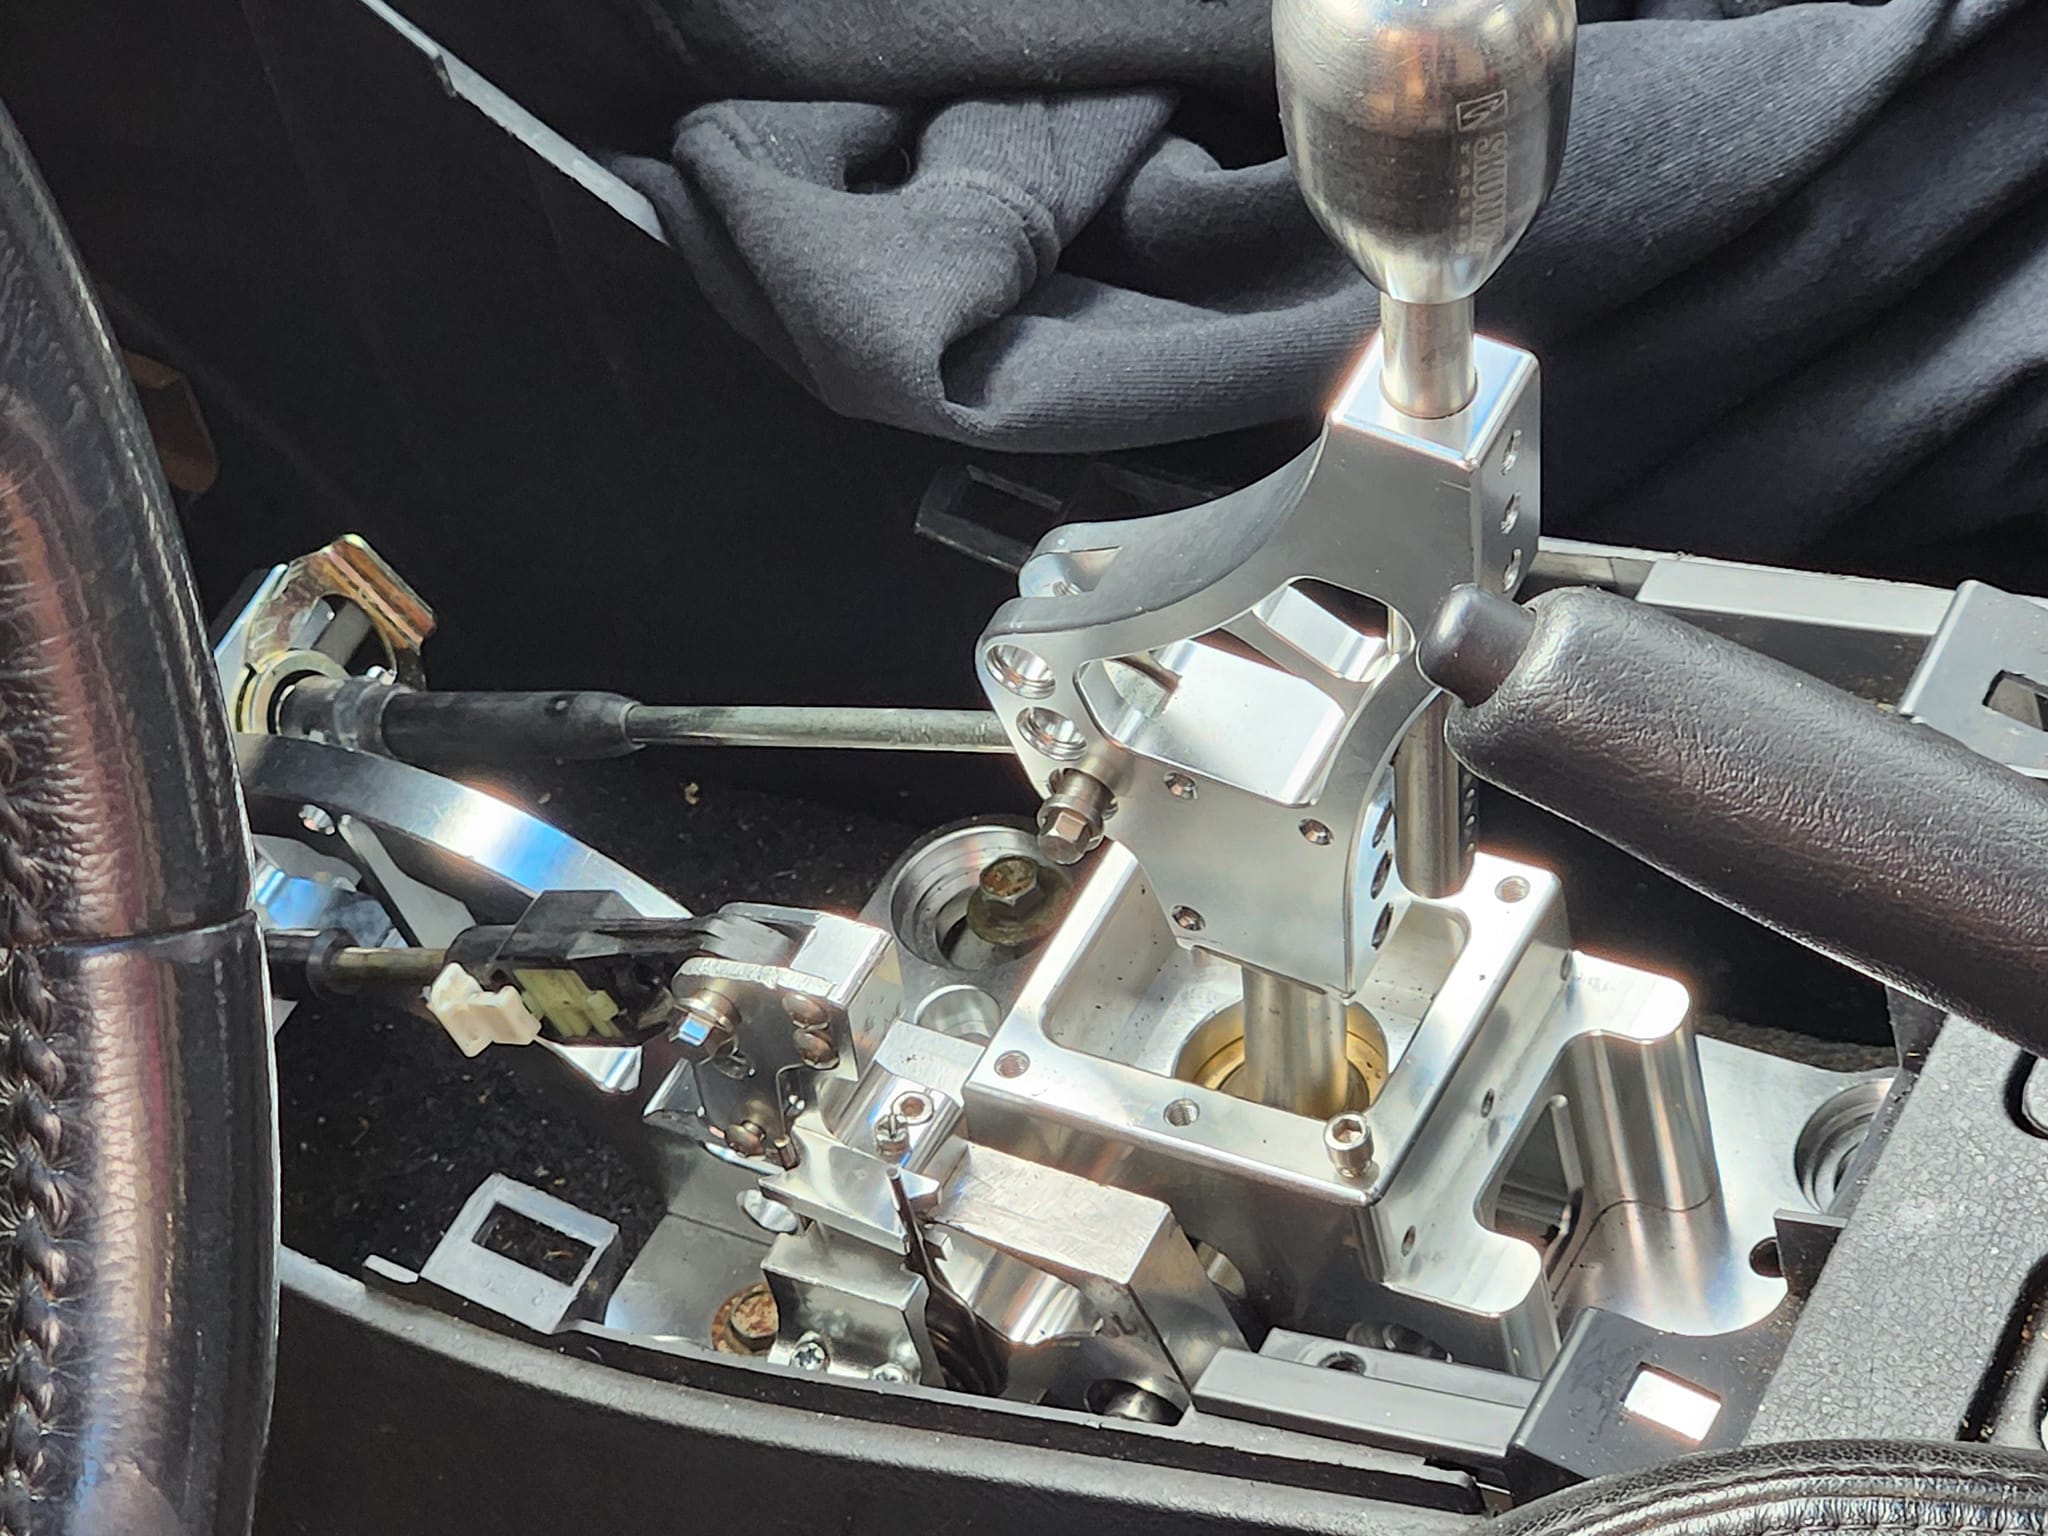
Install shifter cables– pretty self explanatory, pull off the control cable cover, snake the cables in. I routed them to the pass side, above the ECU. boring out the hole wouldn’t be a bad idea, as it can be hard to move and bend the cables to route them correctly.


It will be necessary to drill into the cover as the pre-drilled holes wont line up. i got the bottom one but not the top to line up.


I put dynamat on there to quiet the road noise, and keep water out.
Mount shifter assembly– pretty easy to do also, but it needs to be slightly modified. there are bushings on each of the 4 bolt holes, these bushings must be taking out in front because, if not, the bolts attached to the floor wont be tall enough to be used. you will need to 2 nuts and bolts for the back holes.
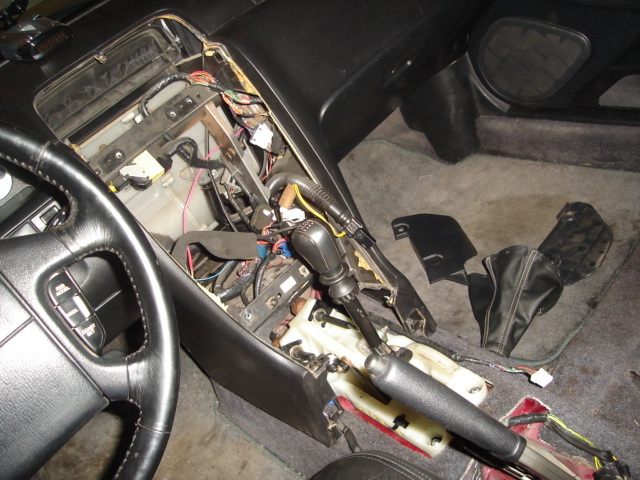
Taking off the old 5spd mount- the old mount is held on with 8 spot welds, 4 on top and 4 on the side. either drill them out or grind them off.
Install 6spd flywheel– if you chose the route i took, you will take the 6spd cps off your aftermarket, then align that timing ring with your 5spd one from Travis, and drill out the corresponding holes. then reattach the timing ring with the supplied bolts and some blue locktite. since, you are using a 5spd cps, you don’t need to clock the timing ring, so just install the flywheel by aligning the dowel pin and tightening the bolts in a criss-cross pattern, to the torque specs
Correct fidanza maxima flywheel

POS XTD 350z flywheel

The clutch disk and pp are easy to install, just make sure to clean the pp and flywheel well, and torque the pp to the correct specs in the correct sequence.
Trans mount install- you can either weld this mount to the frame or bolt it to the frame. i decided to bolt it to the frame, because i didn’t have access to a welded. but if you bolt it to the frame, you will need to cut a small, rectangular hole in the outward facing side of the frame to be able to anchor the bolts with the supplied nuts. you will need to install the transmission on the engine to align the mounts. get the transmission on, use a couple bolts to get the trans flush with the block. Reinstall the front cross member if unbolted. bolt on the trans mounted bracket on the transmission, then attach the frame mounted mount with the supplied bolt. then set the frame mount flush on the frame and mark the holes. unbolt both brackets, lower the front cross member, and uninstall the transmission if necessary. drill the holes for the mount. then cut the rectangular hole on the outward facing side of the frame. then tighten the nuts on the bolts, securing the frame mount.


Moving the abs modulator– modulator is bolted to a bracket, that bolts to the inner frame rail. this bracket needs to be gotten rid of. i used zip ties to pull it upwards by the master cylinder.

Transmission install– its easiest to do with someone under lifting it up and someone up top helping. the shift assembly should be pushed down and inward, and the shifter cable bracket should be uninstalled to make installation easier. make sure mating surface between block and bell housing is clean, to avoid starter grounding problems. torque the trans bolts to spec and in the proper sequence. reinstall the shift cable bracket. raise the front of the sub frame, so the cables can be attached to the shift assembly using cotter pins and the cables installed in the bracket using the appropriate clips.
Attach mount bracket to transmission, then jack up front sub frame, so the 2 mount parts can be joined. torque the front sub frame and the mount bolt to spec.
Starter install– the 6spd starter ground cable is a female connector, so is the connector on the engine harness. i cut both connectors off, and wired them together. then bolted the starter in, and connected up the pos. cable.

You can see the heat sink in the lower left of the pic.
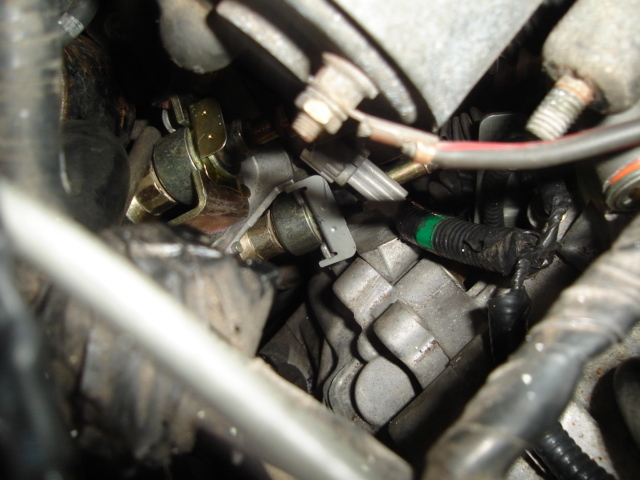
Relocating cps– the RWD 6spd flywheel has a different offset than the FWD 6spd flywheel, so the cps hole will need to be enlarged, and a new hole for the bolt will need to be drilled and tapped.

sr20den said it was 6.7mm (If I remember correctly). i didn’t actually measure, I drew a line on the bell housing and on the cps, just bored the hole out to the drivers side, until the car would start and run. then mark, drill, and tap the hole.
Here is the what the 6speed flywheel bolts look like. You will need these to bolt most aftermarket flywheels on and maybe the stock one too!


================================================== ========================================
Note:
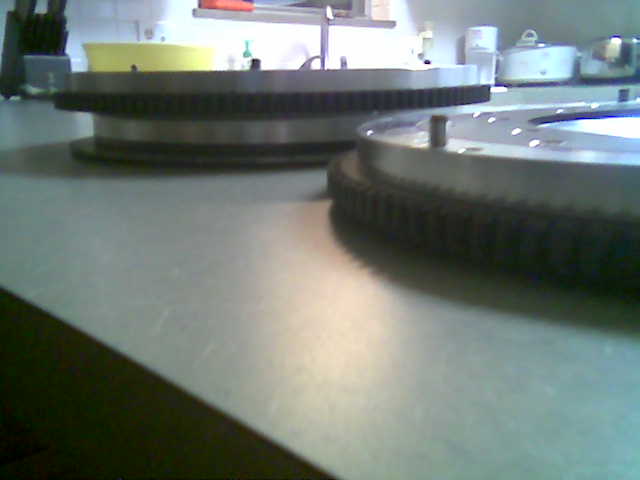
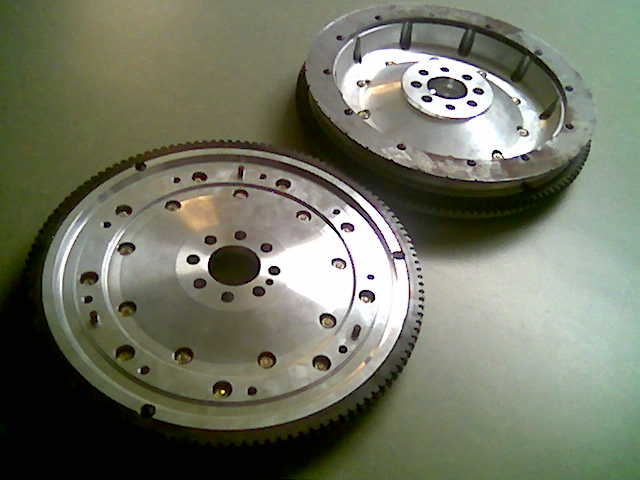
For what it’s worth, I thought I’d post up pics of the size difference in the 3.0 and 3.5 flywheels: These are Fidanza flywheels. The 3.0 is a little over 11lbs, but the 3.5 actually weighed in at 15.6 according to my scale (2lbs more than the advertized 13.5lbs).
3.5
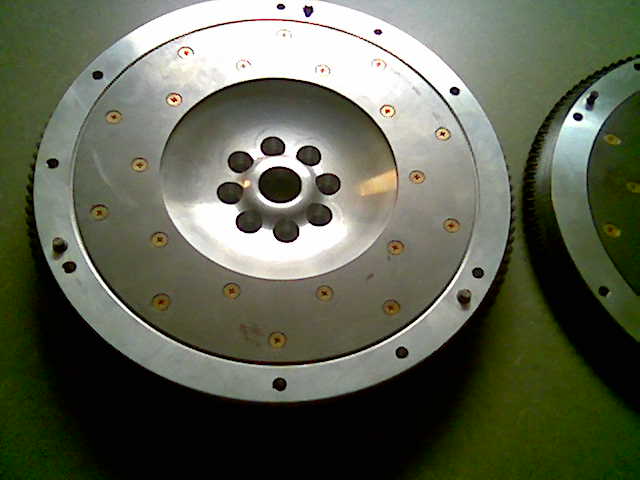
3.0

Undersides, 3.0 on the left

Offset difference: