Tag

Maintenance

Browsing

Credit: Smooth Operator

I hope it is of use to some of you thinking about swapping out your “standard” wiper switch for a variable intermittent wiper switch (standard on GLEs; included in GXE’s and SE’s S&C package).

My 97 SE 5sp is a stripper. It does not have the variable intermittent wiper which is available only in the SE Security and Convenience package. I did it for several reasons:

  • The “standard” wiper looks like something from a Kia parts bin, whereas the variable intermittent wiper switch matches the shape of the “combo” switch and is more aesthetically pleasing.
  • I truly miss not having the feature of a variable intermittent wiper.
  • Its a simple and relatively cheap “mod”

I did the swap in about 10 minutes. It is a direct swap. You don’t have to mess with any relays, fuses, etc.

Here are the simple steps to swap out the standard wiper switch with a variable intermittent wiper switch:

  1. Remove lower dash cover (held by 2 screws on each bottom corner, and snap-in clips across the top edge of the cover)
  2. Remove metal knee bolster (held by 2 10mm screws)
  3. Remove steering column cover (Held by 6 philips screws; 4 in front and 2 in the back)
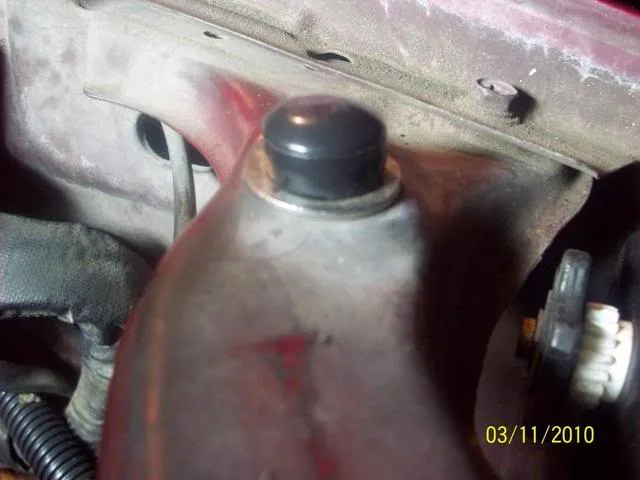
  4. You will expose the column switches. The wiper switch is held by two gold-colored screws. Remove the screws and slide out the wiper switch (direction indicated by the blue arrow).
  5. Unclip wiring harness.
  6. Install wiring harness onto new wiper switch
  7. Install is reverse of removal.
  8. Finish Product:

Note that if your Max is a 97-99 you MUST source a wiper switch from a 97-99. The pin outs are different. (Same goes for 95-96 Maximas).
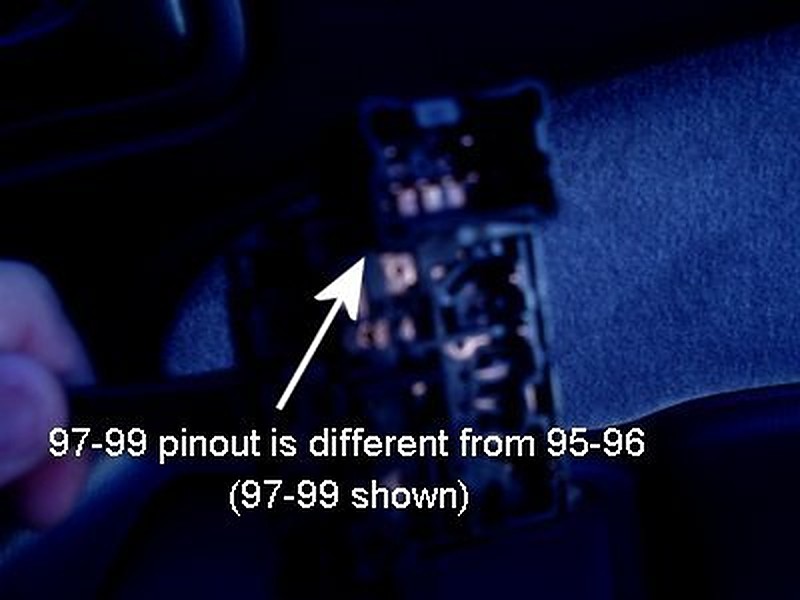
 

Loading

Community Member Credit: z_maxima

Hey Guys, I’m sure you have seen this over and over here. I just thought I share my photos as well. I should of replaced the support 6 years ago when I first spotted the rust during an inspection. I had no idea it was a common problem at the time.

After getting some expensive pricing on replacing the support, I decided to do this on my own. Many of the pictures that the owners posted here were very helpful in guiding me to complete this task.

Bumper Removal

1. Remove the center grille.
2. Remove side light first. A small screw on the top. Pop from the front out.
3. Remove main headlights, 2 side bolts, 2 10mm nuts from the back.
4. Remove the lower signal lights. Pop the smaller side marker light first, remove the screw, then remove the main signal light. Disconnect all wires.
5. Remove the 3 bolts holding the center bumper.
6. Remove the left and right retainers on the bumper that were under the Main headlights. 6 10mm bolts total.
7. Remove all the engine covers attach to the bumper underneath
8. Remove front wheels to open the liners to access the 3 10 mm nuts holding the side bumper to the fender. 6 total.
9. Bumper should be free to come off. fog lights are attached to the inner reinforcing bar. no need to remove them. Just disconnect wires.

Photos:

1: 98 SE
2: As soon I remove the lower covers, rust!
3: Front view of the support
4: Underneath view of the support
5: Bumper and wheels removed

6: Complete removal of front end parts
7: Removing the spot welds, 32 total and 6 others I use a sawzall.
8: Removing the old support
9: The mess
10: The old and new support side by side.

11: New support in place
12: New support welded in place.
13: First coat of POR 15 rust preventive paint.

14: Second coat of POR 15 Chassis Coat Black
15: Painted all front end parts before the bumper.
16: Done, 2 days later. A total of 14 hours, due to additional painting and cleaning that a body shop probably wouldn’t do.


Loading

Credit: Eddy

OEM Part Number: 21430-7999C
Price: $12-$15.00

While the radiator cap is just a tiny component of your vehicle’s cooling system it plays a critical role in helping the engine keep its cool. If you’re wondering whether a bad radiator cap can cause overheating, the answer is a definite yes.

Air pockets in the cooling system from an ineffective seal (such as one in a bad radiator cap) or a lack of sufficient pressure can cause the engine to overheat. The latter lowers the boiling point of coolant which makes it unable to absorb enough heat from the engine. If you see the temperature gauge on the dashboard rise, it’s wise to stop driving as soon as it’s safe to do so and wait for the engine to cool before continuing (or call a tow truck).

If you notice an unexplained coolant from your vehicle’s cooling system or you find your vehicle’s engine is running a little hotter than usual, there could be a problem with the radiator cap.

Please note: Since the cooling system is hot and under pressure when the vehicle has been running, it is very important that you never open the radiator cap until the vehicle has cooled completely. If you attempt to remove the radiator cap while the engine is warm, the coolant (likely as hot as boiling water) would shoot out and could seriously injure you; third-degree burns are a very real possibility.

Additional Info

Loading

Credit: Joseph Carsella

Finally got rid of the old hood bumpers. The hood was sitting about half an inch lower than the fender. I wasn’t too sure how to put them in originally but I covered the ‘threads’ in soapy water and pressed them in at a slight angle while turning. Turns out they actually screw in or out once you get the first layer in.

Alternate Solution

Loading

Community Member Credit: KP11520

As it turned out, I did remove the center A/C vent and clock cluster and then the climate control/bose cluster. And found nothing even close to what I was hoping to find. So I went back under the dash on the driver’s side and looked up higher, BINGO!

What a PITA to get up in there and remove it. I ain’t that skinny kid like I was decades ago. And I have long arms! I did almost invent some new curse words though!

How to replace a Mode Door Motor in a 95 to 99 Maxima:

So, if anyone else winds up having to do this too, all you need is:

The new Mode Door Motor
A Stubby #2 Phillips screwdriver.
An Offset #2 Phillips screwdriver.

There are 3 Phillips screws that hold the motor bracket to the side of the white ducting box. You’ll need to twist and contort yourself to get access and leverage to remove the screws. Then it will hang by the wire. Now it’s easy to find the release on the plug and remove it completely.

When it’s out, remove the 2 screws that hold the motor to the bracket. Replace the motor and make sure to align it in the bracket as the old one was and reinstall the 2 bolt/screws (tight).

When you reinstall the new motor mounted in the old bracket, notice the two connection points on the white arm of the motor and move the assembly metal arm on the duct box to align correctly with these two points. Hold it in place while you set in the middle screw. Reinstall the other 2 screws and then tighten all of them well. Then re-plug in the connector. Voila! Done!

Good luck with this miserable job. Contorted and tight. But probably would save you Hundreds of dollars at the dealer.

Loading

Credit: VQpwrdSE-R

OEM Part Number: 25070-CD00A
Price: $75.00-$80.00

So I finally buckled down and added info in here for how to change your oil sending unit also known as an oil pressure sensor. Hoping this helps some of you guys out. The beginning of my problems was when I noted 0 psi on my oil pressure gauge (stock on SE-R) after running diagnostics and checking to wire I discovered that the sensor was bad.

The sensor can range in price for you VQ guys depending upon a SE-R or just SE. The difference between the two is 2 (SE) and 3 prongs (SE-R) for the oil pressure gauge.

So I finally buckled down and added info in here for how to change your oil sending unit also known as an oil pressure sensor. Hoping this helps some of you guys out. The beginning of my problems was when I noted 0 psi on my oil pressure gauge (stock on SE-R) after running diagnostics and checking wiring I had discovered that the sensor was bad. The sensor can range in price for you VQ guys depending upon an SE-R or just SE. The difference between the two is 2 (se) and 3 prongs (SE-R) for the oil pressure gauge.

Links for units:

Given that I drive an SE-R I had to pony up the extra cash for the $80+ unit

Ok onto the install. There’s a lot of bad info out there telling you that the only way to remove it is going through the passenger wheel well after removing the wheel. I originally did this then found out I wasted my time. We have a grease pit in our garage. If you guys are lucky enough to have a lift or pit in your garage this will make installation a breeze. If not pull out your jack stands or ramps and set your car up for an oil change. By draining your oil you can avoid a mess when you unthread the sensor.

You will need:

  • Oil changing materials socket, drain pan, filter, new oil
  • Deep 24mm socket to accommodate the sensor to fit inside when threading
  • 1/2 in drive small breaker bar( I found a ratchet too big and didn’t give enough space to fit, I tried extensions and articulated drives as well without success. They just didn’t work)

Onto the pics:

Breaker bar 24mm socket and sending unit

Location of sensor is above oil pan and drain plug to the right side ( sensor is still plugged in and wire loom can be seen.

After unplugging sensor and using socket to remove I used Teflon pipe tape on the new sending unit threaded it in by hand and used the socket the rest of the way. Be careful not to overtighten and set the sensor so that the harness and plug can be easily removed if needed later.

That’s it! A pretty easy fix to something that would cost over $140 to have done at the dealer. Once the car was on the pit and I had my tools the job was done in under 25 mins.

Additional Photos:

Loading