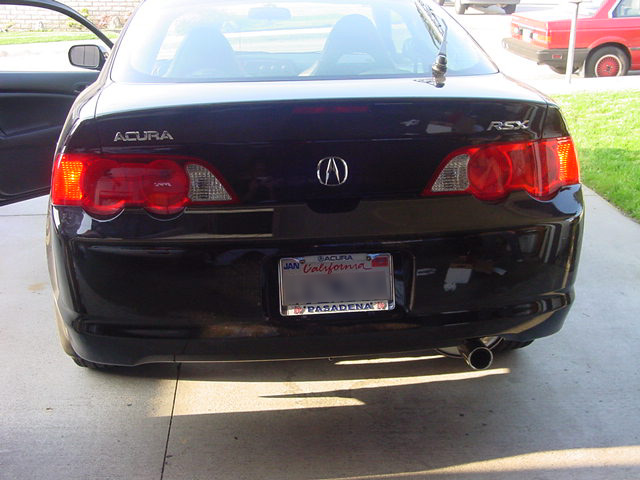
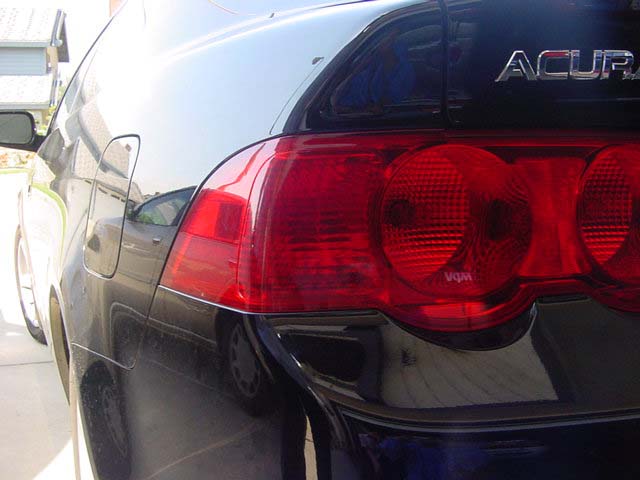
With the 6000k HIDs you wont really be able to see the halo rings. the lenses that they use give off a slight glare which actually make the HIDs look a little brighter than they are, which to me isnt a bad thing at all. i would post a pic of them lit on my car but its in the shop.
One of my buddies here in MI bought the ebay projector head lights and his bulbs weren’t seating properly. The right bulb was bouncing in the housing. They didn’t fit properly and just were cheap quality. So I personally wouldn’t recommend them.
Are people trolling by trying to buy ebay headlights? Only thing they’re good for are the lens lol
Ebay halo’s suck… ZERO light distribution. Youd have more light on the road getting 5th gen headlights and silverstars lol.
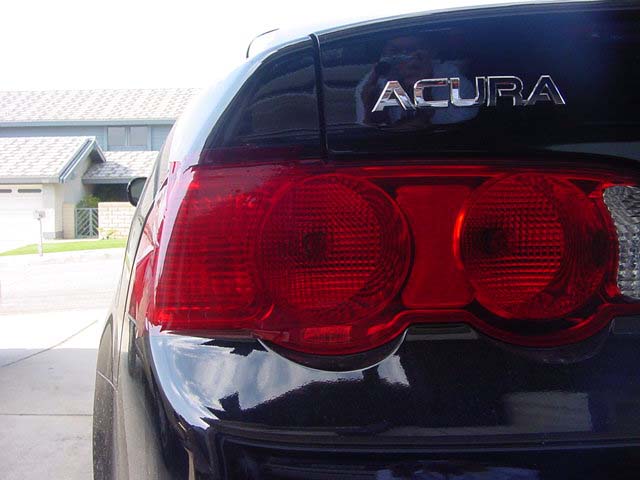
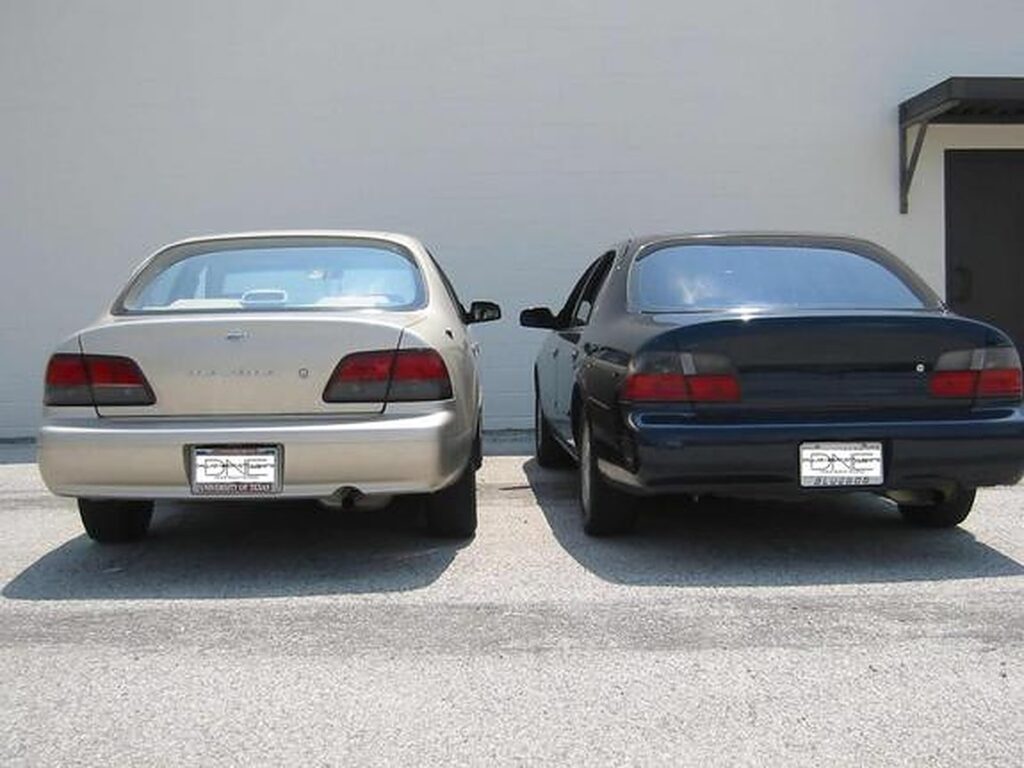
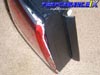
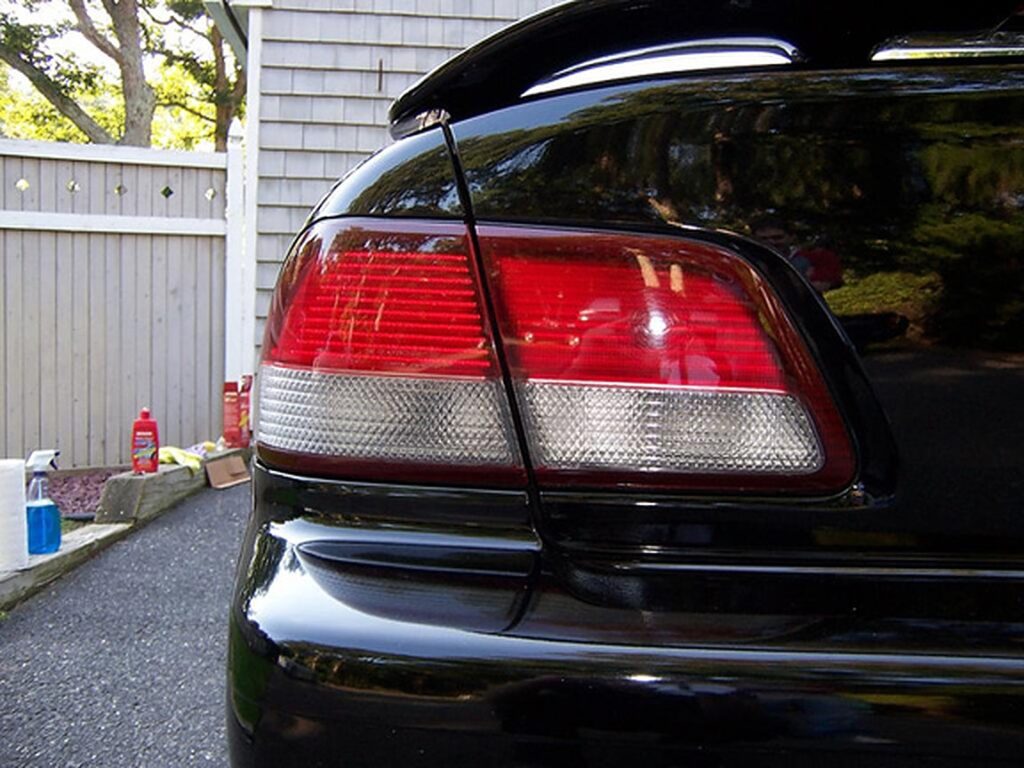
Basing our review on a 1995 Nissan Maxima, this application for years has been in great need of a taillight upgrade that did not take away from the car but gave it a very classy and sensual look. Despite the “demand” for the atrocious looking Altezza taillights on the market, Custommaxima has conjured up a way of bringing back the o-so-wonderful Clear/Red Taillights which until now have been sported by only a select few who could get their hands on them. Being that we were one of the lucky ones to have a set on hand we will be testing these new CE Taillights up against an old and sought-after rival “David L Clear/Reds”.
Here is what CustomMaxima (a CustomEnterprise group) had to say about this product, Our customers have been asking for red and clear taillights for their 1995-1996 Maximas and we answered. Now you can eliminate the orange turn signal found on stock taillights and replace it with our new red and crystal clear tails. Sold as a 4 piece set replacing your trunk lights also. The trunk lights need to be replaced as our new lights have a crystal look to them on the clear lens and not the “cloudy white” clear lens found on the factory backup lens. We are sure you will be pleased with the excellent fitment and superb quality of this product. Installation is easy as we include all necessary bulbs and wiring harnesses”. We shall see about that.. read on
Our Take:
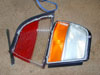
With an almost 11yr old car, lighting equipment is certainly looking dated and not appealing to the more modern style lighting equipment. There is noticeable differences with this new system in that there is a reflective diamond-like backing to better illuminate the housing and also provide a better light output when reversing. Not only is the reflective backing more esthetically pleasing to look at but they also provide the brake light area with a much darker and pronounced red glow when the brakes are applied and when the parking lights are illuminated. These new light assemblies are also prepared with a nice but could be better-applied weather-stripping around the outer edge for those times when you do not need water entering your trunk compartment. Most aftermarket taillight assemblies are lacking very important details such as reflective material which is used to draw passing motorists away from the vehicle if you happen to park on the side of the road. This is a safety requirement, and we give a thumbs-up to CE for adding these to their product. Lastly, a key difference between the CE Taillight and the Factory (David L) is that the rear backing is completely redesigned, which may not be for the better.
Pros:
Crystal clean look
Crisp Red color for brake lights
Smooth Installation
Chrome bulb standard for turning signal (lights amber)
Cons:
Possible seal problem
Requires purchasing new bulb for side reflectors
Fragile plastic posts may break while securing to car
Possible wiring issue, check for breakage in ground before installing.
Factory bolts not exactly made to fit these
Application:
95-96 Nissan Maxima’s
Additional Note:
2825 (W5W Bulbs) for side reflectors
Part Number Information:*
95-96 Maxima Red/Clear Taillights
9596RCT
$199
Tools Required for Installation:
Sockets and Wrenches
Short and Long Extensions
Flat-head screwdriver
Patience
Materials Provided for Installation:
2 Outer Taillights
2 Inner Taillights
2 Mirror Chrome Turn Signal Bulbs
4 Wiring Harnesses
Removal/Installation Process: Outer Taillights
Removal is quite easy with basic tools. Before you begin, we would like to emphasize that the key should be out of the ignition before removal/installation with the parking/driving lights in the off position. Going against this advisor could lead to electrical short, or much worse. ALWAYS CHECK ALL POWER IS OFF BEFORE WORKING!
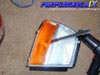
To begin locate the tabs which hold in the trunk lining to the body of the car, remove these with a flathead screw driver, they should come out fairly easily. Remove both side linings to give you space to work on the taillights. When removed they should expose to you the rear end of the taillight housing, locate the four(4) bolts on each end. Two of the 4bolts are hidden underneath the hanger holding the wiring harness after removing the yellow wire hangers from the inner two(2) bolts. Disconnect all wiring from the back of the housing and proceed to remove. Removing the taillight itself is quite the task, so my suggestion to you is to work each corner one at a time pushing as hard as you can from the inside out without damaging anything.
Installation is the reverse of installation, but we will not be using the backing plate of the OEM taillights, we are given a new harness which for some very strange reason has a different sized side marker bulb then what the factory comes with, which we aren’t supplied. When mounting the new CE assembly make sure to keep watch of surrounding seal so that it seals tightly into place for water not to reach inside your trunk compartment. Although possible it is very hard to maneuver the very loosely applied weather-strip to seal properly, I would recommend laying the light in place, and then pushing in the strip while someone secures the screws (factory screws are not exactly made to fit on these) so we would recommend CE supplying new bolts/washers to fit these. Make sure not to over tighten these bolts to the assembly as they are very weak and can easily break if too much pressure is applied *hint*strengthen posts*hint*.
Removal/Installation Process:
To begin locate the four(4) bolts on each end of the tail light, unbolt all and disconnect all wiring from the back of the housing and proceed to remove. These lights are very tight and uneasy to manage, so if you can try and wedge a wrapped flat head screwdriver between the trunk and the tail light and slowly pry the two apart. Sure enough, the light will slowly come apart from the trunk and you are on your way to replacing the new CE light in its place. Installation is the reverse of the removal, but as with the outer lights we will not be using the factory backing plate, but the supplied CE plate.Final Product: Make sure all mounting points are secured properly, all harnesses connected fully, turn the lights on and enjoy.
So while I was doing the Window Motor, I took the time to do my LED Mirror Covers and add LED’s to the side door pockets. The MAXI-LED mirror covers were created by a fellow member years ago. They were a limited run and are no longer made. I think they look great and clean. Some people did the 7thgen Mirror but they are not heated and do not have not auto-fold.
Note: These were the best picture we could get on this one.
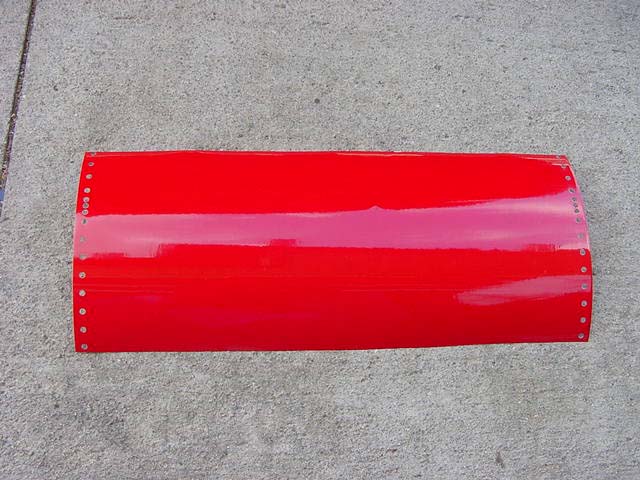
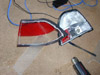
The first step in modifying your taillights is to remove the taillight from the vehicle. Begin by removing the interior lining in the trunk. Some of the tabs that hold the lining in require a flat head screwdriver while others come off with a Phillips screwdriver. There are 2 plugs that need to be unplugged from the tail light. They both have white connectors. There are also some plastic pieces that hold all of the wiring to the nut. These may be tough to yank off. I used a pair of pliers to pull them off. There are 4 8mm nuts that hold the taillight in. Remove these using an 8mm deep socket. The only thing holding the taillight is some black sticky adhesive. There are a few ways to get the taillight out. One method is to gently heat up the adhesive using the heat gun so that the adhesive softens. Then push on the taillight. Another way is to gently tap on the 4 studs that hold the taillight in the vehicle. Lastly you can push the taillight out of you are strong enough. Place the bottom of your palm on the flat part of the taillight and push hard! Be careful of the adhesive so that it does not get on your hands or the taillight.
1. Remove the 5 small black Phillips screws that are located around the taillight.
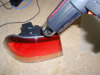
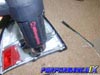
2. To separate the taillight lens from the housing you will need to heat up the glue that holds it together. It will most likely take at least two passes on each side of the taillight to get the glue warm enough.
3. Some heat guns only have a ‘low’ and ‘high’ setting. This particular one has 10 different setting. As you can see a setting of 8 was used. The key is to not overheat any one particular spot because it will melt the plastic housing or taillight lens.
4. Pick one side to begin with and hold the heat gun about 1″ away from the black housing. DO NOT HEAT UP THE TAILLIGHT LENS AT ALL! It will begin to fry like an egg. Heat up that spot for 7-10 seconds. Do this on every spot on this particular side of the taillight.
5. Working your way slowly around the tail will ensure no damage to the housing or lens. This is the most time consuming step in the entire process.
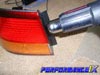
6. One you have gone around the taillight twice, it may be soft enough to pry open. Using a knife or some type of prying tool, try to pry on a corner of the taillight and see if it gives. If it does, slowly pry the tail light open until it separates from the lens. If the glue still seems cold, apply some more heat with the heat gun.
7. Be Careful of the lens beginning to separated.
8. The lens is completely separated. Make sure that the glue does not stock to the outside of the lens. It’s quite messy.
9. Use the knife or pry tool to remove the orange lens. Use some heat if necessary.
10. Cutting the acrylic lens can be a bit frustrating. Don’t let it get you down. Here are some tips on cutting the piece out. Some people use the orange and red lens and trace it out on the acrylic sheet. Others try to make a paper template that will fit in the taillight lens and then use that template to cut the acrylic. Some tools that can be used to cut the acrylic lens are a rotary tool, acrylic cutter, or a soldering iron.
11. Once the lens is cut, you need to wedge it into the taillight lens. Use a bit of heat the curve the lens. Use very little heat or the lens will melt!
12. Removing the red lens is up to you. I chose to remove it. Some don’t. Your call. Simply remove the Phillips screw.
13. Once the new lens is in, you are ready to put the taillight back together. Reheat the glue until it is soft and then put the lens into the housing. Hold it tight for about 15-20 seconds so that it seals properly. Put the screws right back in so that it helps seal the taillight the way it originally was.
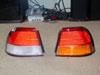
14. Isn’t that beautiful! One note. There is a size #194 wedge bulb behind where that small red lens was. That light is just a driving light that turns on with one turn on the light stalk. I chose to remove the bulb so that it wouldn’t show. Again, user discretion. Put the taillight back in and re-connect everything. Put back lining too!
Alright, so I know this isn’t a complicated procedure, but a lot of people like to know exactly what they’re getting into when they go to do a mod. I’m one of those people. I had found a tutorial before, but it seems it has gone offline or I can’t find it anymore. So I decided to take pictures and write one up while I did the mod myself.
Time: 5-10 min.
What you need:
Clear Bumper Lenses
Two 1156 Amber Bulbs
Two 194 Amber Bulbs
And these tools:
Step 1) Take off the outer light housing using the 1/4 Flathead Screwdriver wrapped in the cloth. Pry from the left side of the housing because the clip is on the right.
Step 2) Unscrew the one Phillips head screw holding the inner housing as seen in the above picture.
Step 3) Remove lights from housings, simply grab the Grey connector and twist, then remove.
*Note* Some states require amber bulbs (NJ does not) to be installed as well since our stock ones are clear, if this does not apply go to Step 4:
Step 3a) For the outer bulbs simply pull the bulb and it comes out
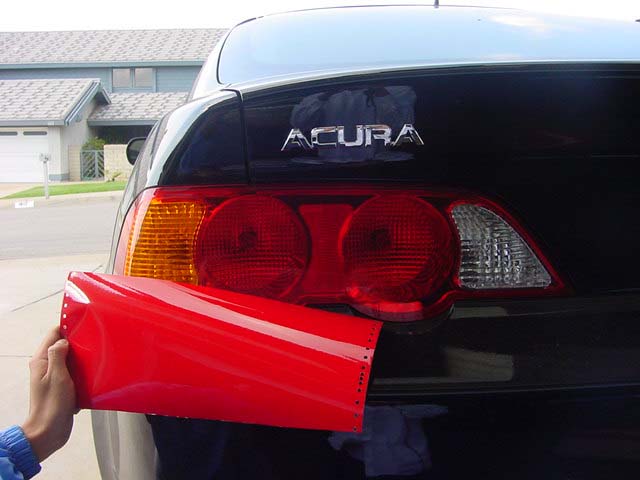
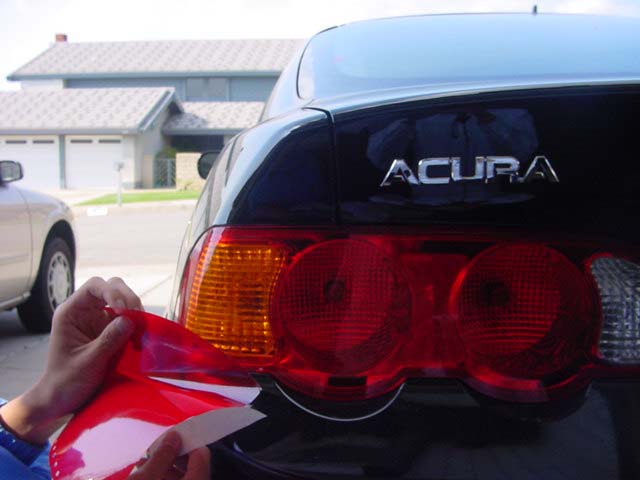
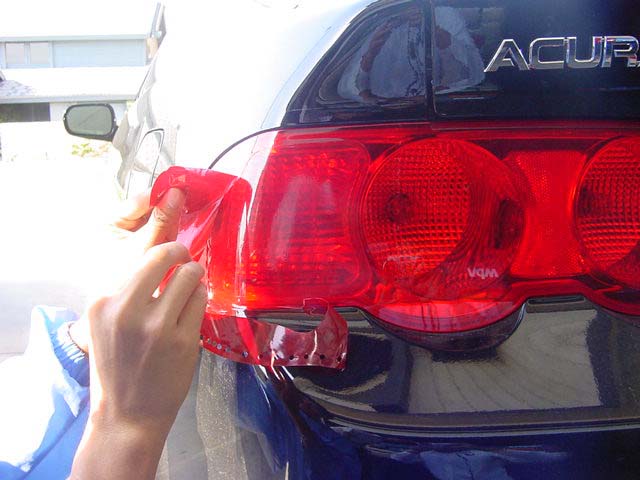
I’ve explained this a lot of times but i thought I’d write a clean explanation on how to “red-out” your tails. This really goes out to all the 95/96 owners who want to at least get rid of the ugly ambers on their tails. This process requires some effort but is worth it in the end. There are 2 ways to red them out… using red tape or painting them. This is how to use the tape. Of course the real red/clears look great but this is a pretty simple $3 cosmetic mod!
Things you need:
HeatGun or BlowDryer (heatgun works better)
Soapy water (water mixed w/ dishwasher fluid works)
Red Translucent Vinyl Tape (can be purchased at a hobby store or from Oracal.com – 8300 High Performance
Translucent (link is external)… one sheet would be enough to cover both ambers; $3 per sheet)
something flat and hard… a credit card works perfect
Procedures:
1. Wash/Clean both tails so that there isn’t any dirt on them
2. Now, apply LOTS of soapy water on the tails… let it run down, it doesn’t matter, but they need to be wet as you apply the tape. The reason for the soapy water is to avoid any air bubbles or having the tape annoyingly stick onto the surface where u don’t want it to be.
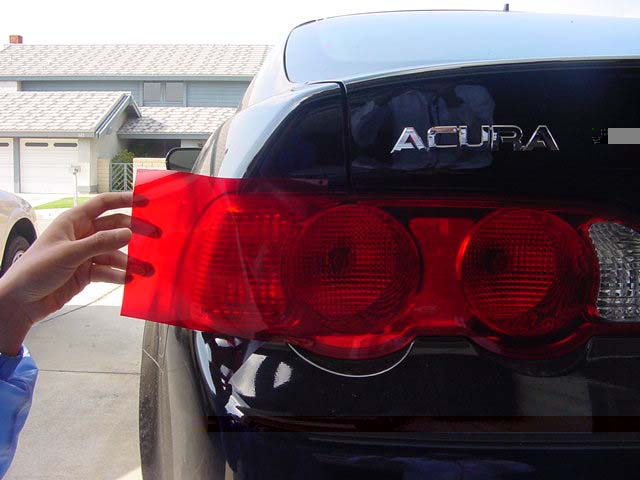
3. Now place the tape on the ambers and position it. With the water under the tape, you will be able to move the tape and adjust it properly.
4. After adjusting it, use the credit card to squeeze out the water underneath. Start from the middle, then move outwards. Keep scraping the top of the tape so that the water underneath will squeeze out from the ends of the tape. Don’t worry, the adhesive will still be 100% sticky.
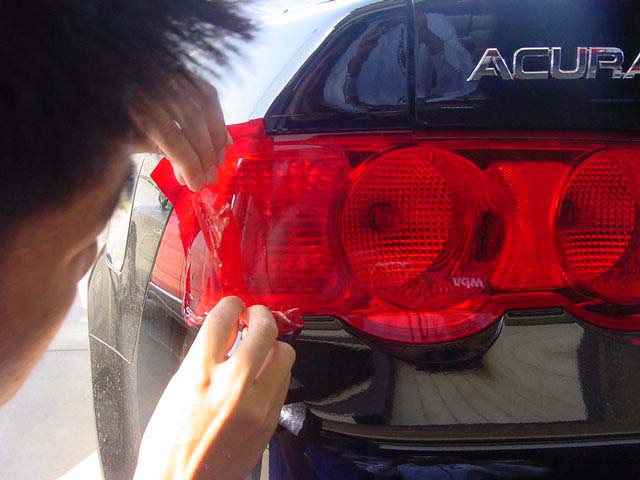
5. Now that you’ve squeezed out as much as u can on the most flat surface and the tape is stuck to the ambers, you will realize that u have to do the outwards of the ambers where they curve. For this to be done properly, use your heatgun/blowdryer to heat the tape so that it “melts” or become softer and stretchable.
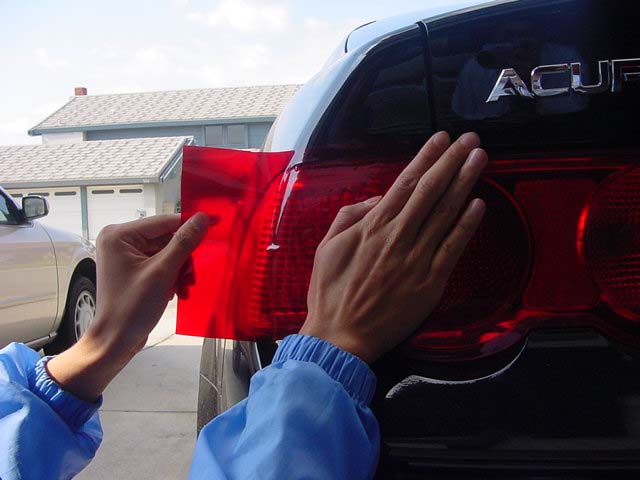
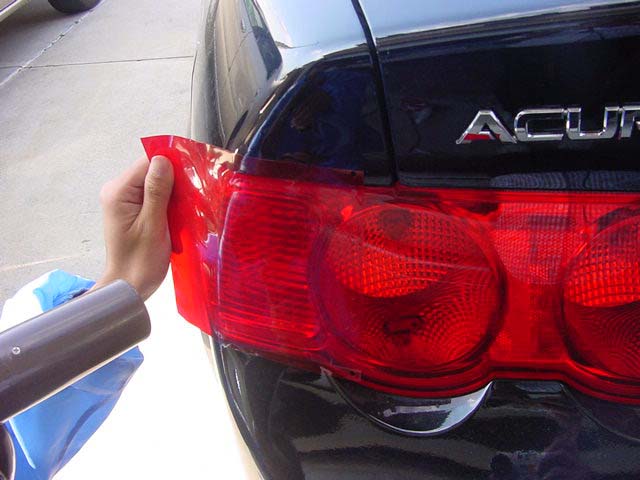
6. As you heat up the curved parts of the tape, stretch the tape out as hard as you can w/o ripping it hopefully to wrap around the curve and not form any air bubbles. CAUTION: Don’t burn your fingers!
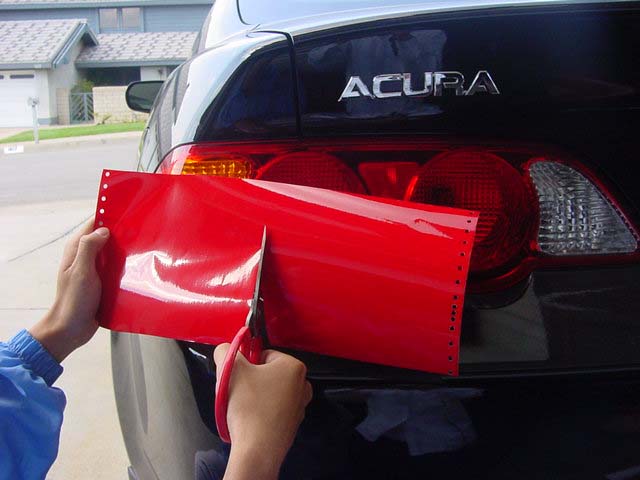
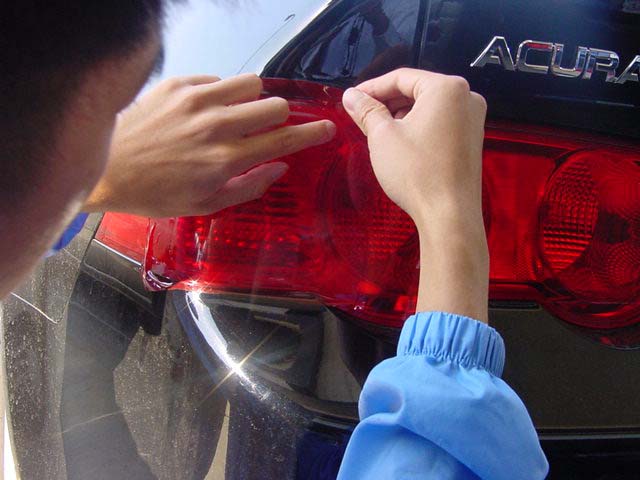
7. After doing a satisfactory job w/ the tape stuck to the ambers, use an exact-o knife or razor to cut the excess tape off. CAUTION: Don’t cut yourself in this process.
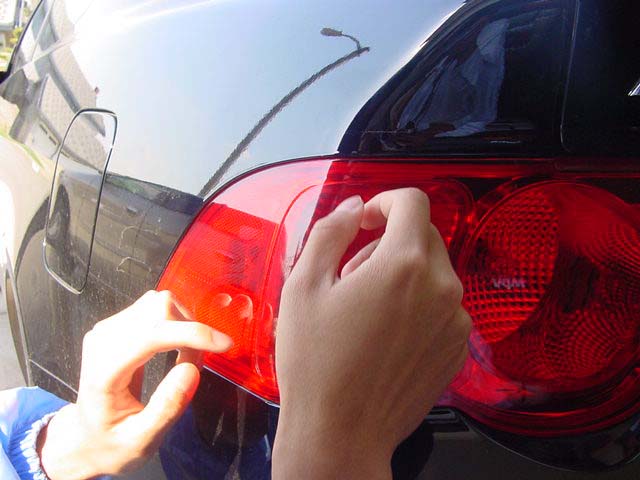
Voila! No more ambers.
As you read this instructions, you may start to realize this is EXACTLY how tinting windows are done. Basically you are doing a tint job on your ambers. Good luck!
ACURA RSX RED OUT TAILLIGHT INSTALLATION
Tools Required
Xacto Knife
Hair Dryer
Red Transparent Vinyl
Step One
Get your sheet of transparent red vinyl.
Step Two
Put the sheet up to the signal light and see how much you will need.
Step Three
Start cutting the vinyl so u have enough for one side.
Step Four
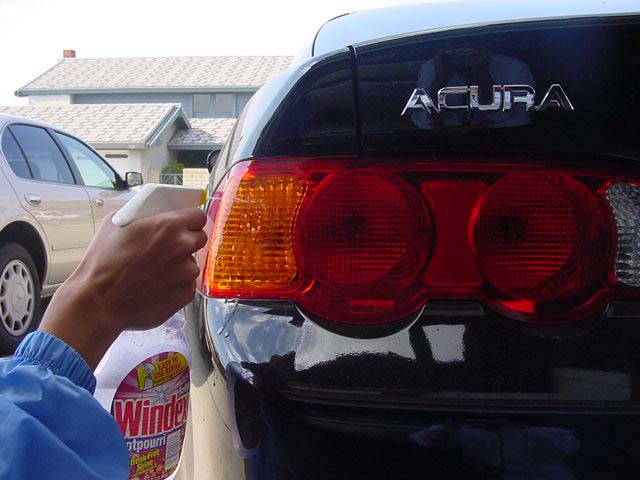
Mix water and dishwashing liquid in a spray bottle and spray onto the tail lights.
Step Five
Peel off the vinyl, exposing its sticky side.
Step Six
Apply the vinyl flat and parallel to the tail light.
Step Seven
Flatten the edge out as much as possible, while pushing outwards towards the borders of the vinyl. Doing this will push out all of the soap water underneath. If you fail to push out most of the water, theirs a chance of small bubbles forming. Now do the same to the sides of the signals. This part is a bit trickier because the vinyl might wrinkle a bit on the sides.
Step Eight
This step is optional, but it is highly recommend. This will help get rid of wrinkles, giving you a smoother, cleaner look. Use a blow dryer and aim it towards the edge of the vinyl. You will notice that the vinyl quickly becomes more flexible. Use this to your advantage. Pull the vinyl outwards and stretch it so that it is taut (not slacked.) And use flatten it down. It helps to have another person help u at this stage, but not necessary. The vinyl should be on nice and smooth over the amber signal area.
Step Nine
With your exacto blade, begin lightly tracing the shape of the signal. You should be able to see the shape through the vinyl.
Step Ten
Once you have traced the entire outline of the amber tail light, start peeling off the excess vinyl.
Step Eleven
Once you have gotten rid of all the excess vinyl, flattening it out again with your hand to get rid of any left over water/bubbles.
Step Twelve
Wait about 5-10 minutes to ensure its dry.
If you ever want it back, all you have to do is peel it off. The vinyl is very strong and will withstand the weather and car washes.
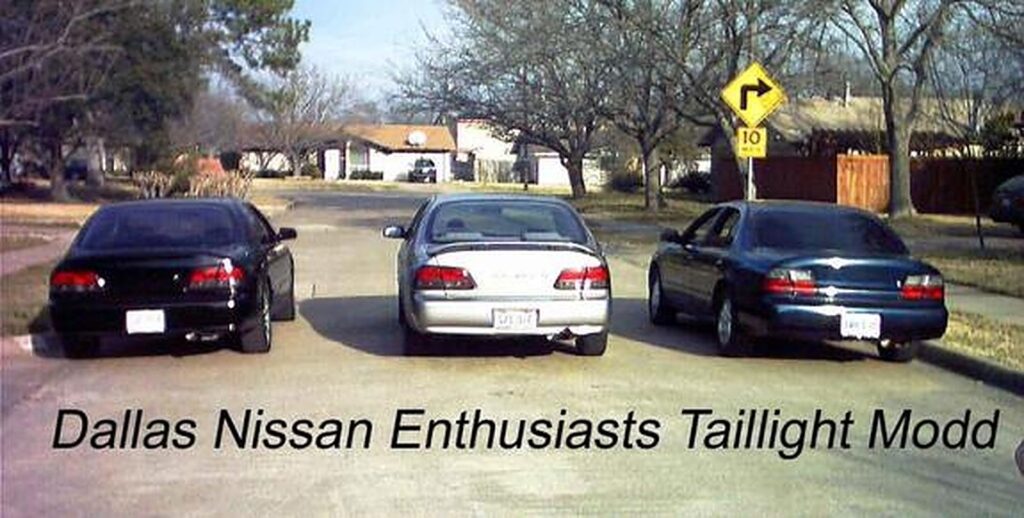
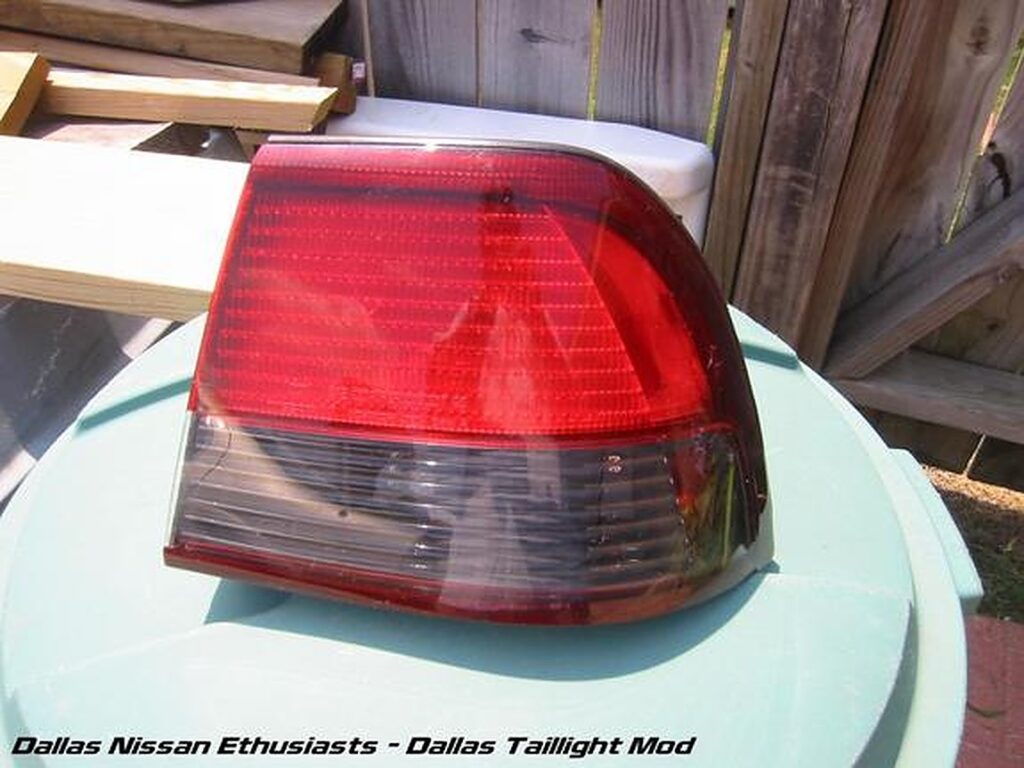
Community Member Credit: Dallas Nissan Enthusiasts
This write-up below is a step-by-step set of instructions with pictures on how to do the Dallas Taillight Mod. It is similar to the 97-99 Red/Clear mod but with a twist.
Things you will need:
Good size flat head screwdriver
8mm deep socket
Needle nose pliers
Heat Gun (not necessary but helps a lot)
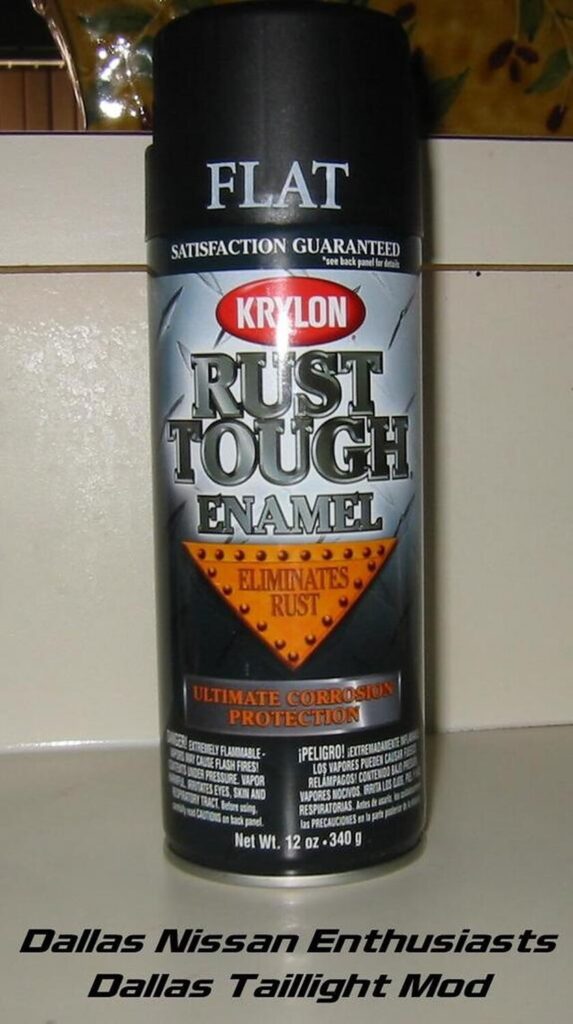
Can of high temperature flat black spray paint. (AutoZone)
This is the paint we used.
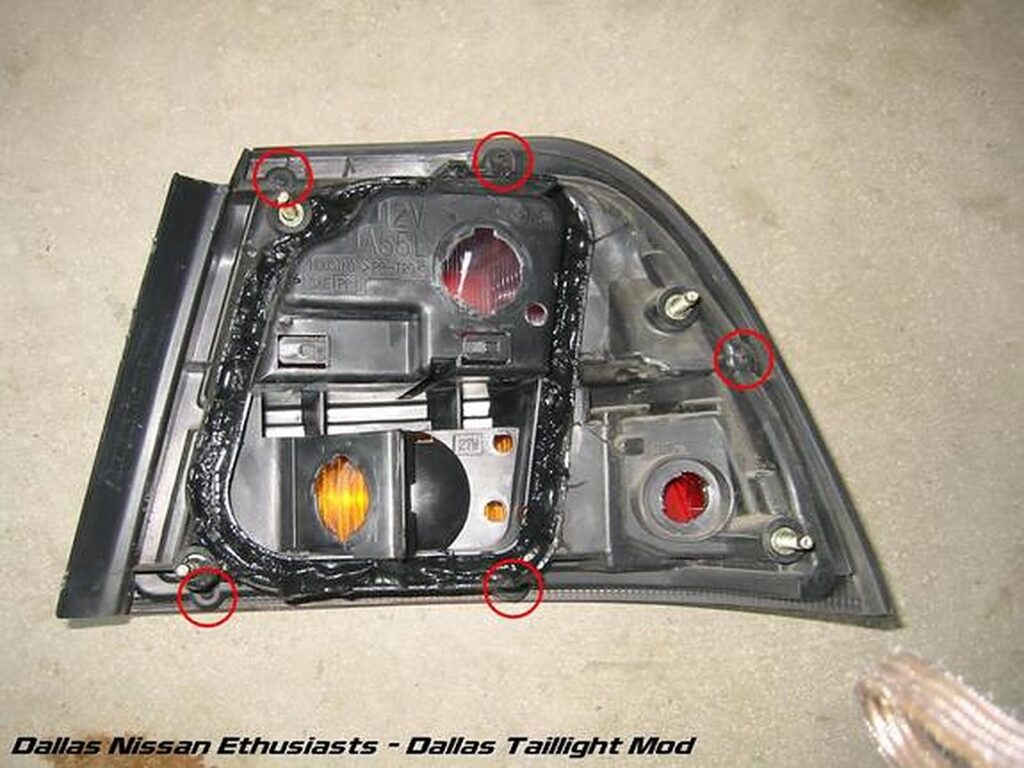
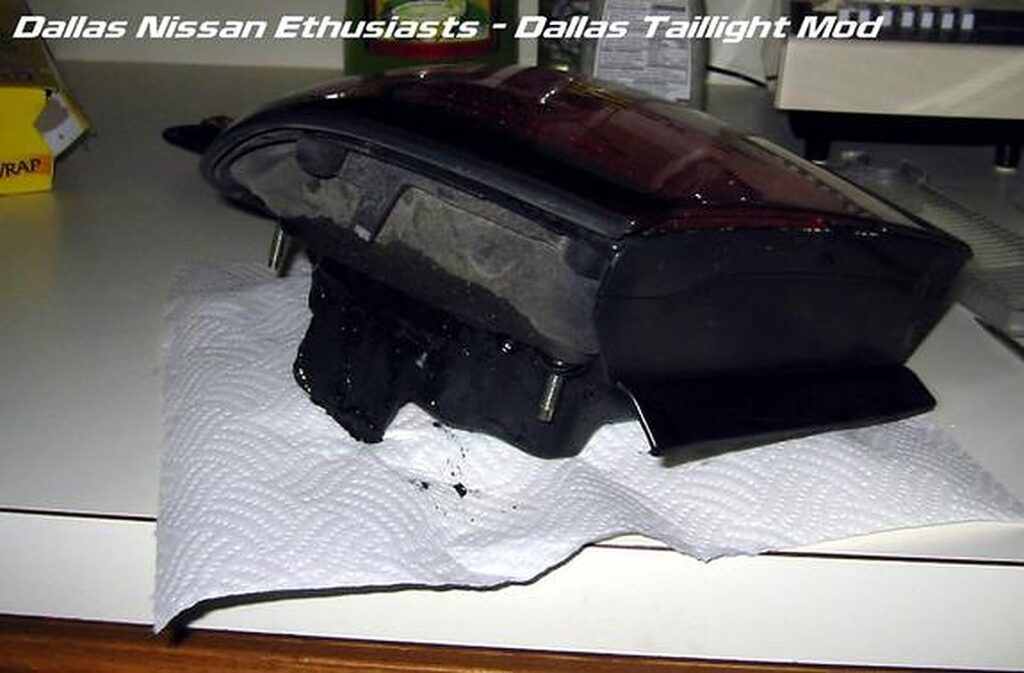
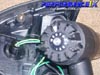
We will start with the reverse light assemblies.
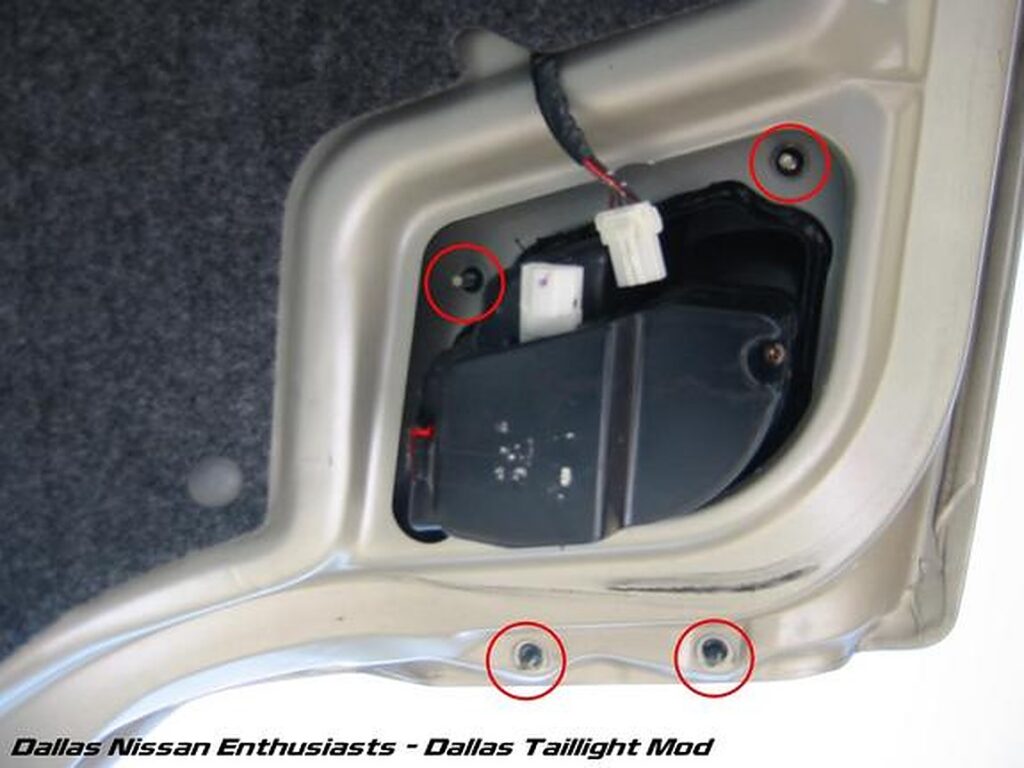
First, unscrew the 4 8mm nuts that hold the reverse light assembly onto the trunk lid. All 4 are highlighted by the red circles. Once these nuts are removed, remove the screw that holds the plastic cover on the back. You should now be able to pull the small plastic cover off which hides the bulbs and sockets. Go ahead and unplug the wiring harness located at the top of the pic.
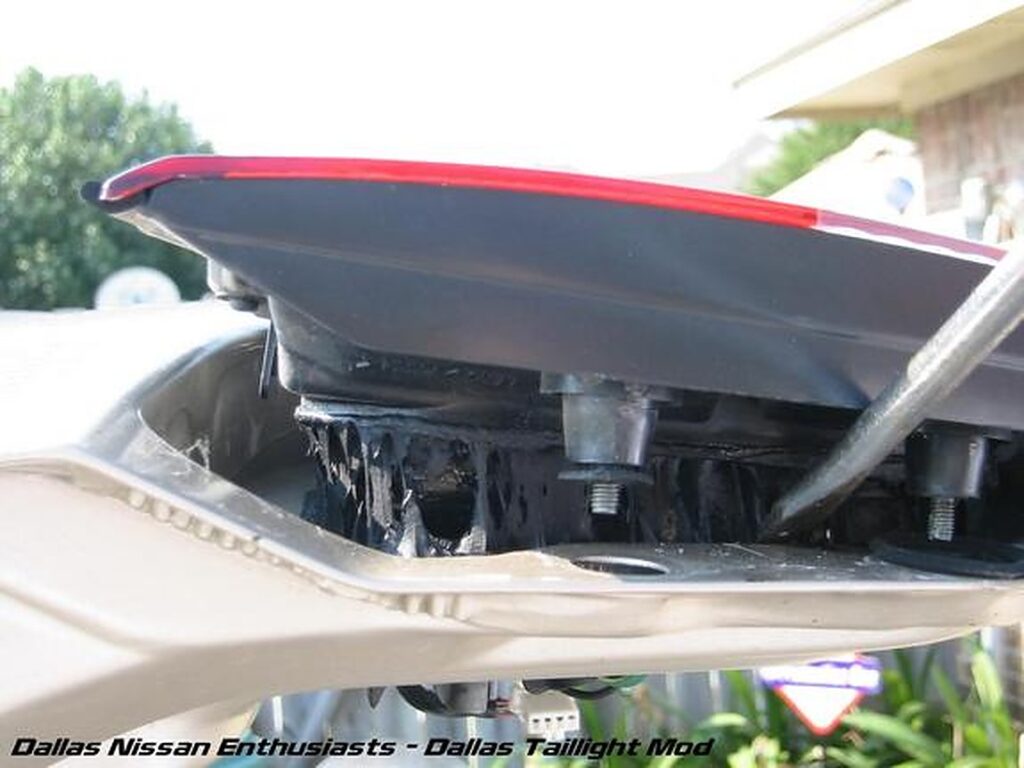
You can now take the flat head screw driver and stick it in between the taillight assembly and trunk lid (as shown on the left) and pry it up (as shown on the right). As it comes up, you can use the heat gun to heat that black goo up which will make it easier to pull it off and make the assembly cleaner once it is off.
Once you have pried that end up, you can use your hands and lift the assembly straight out of the trunk lid.
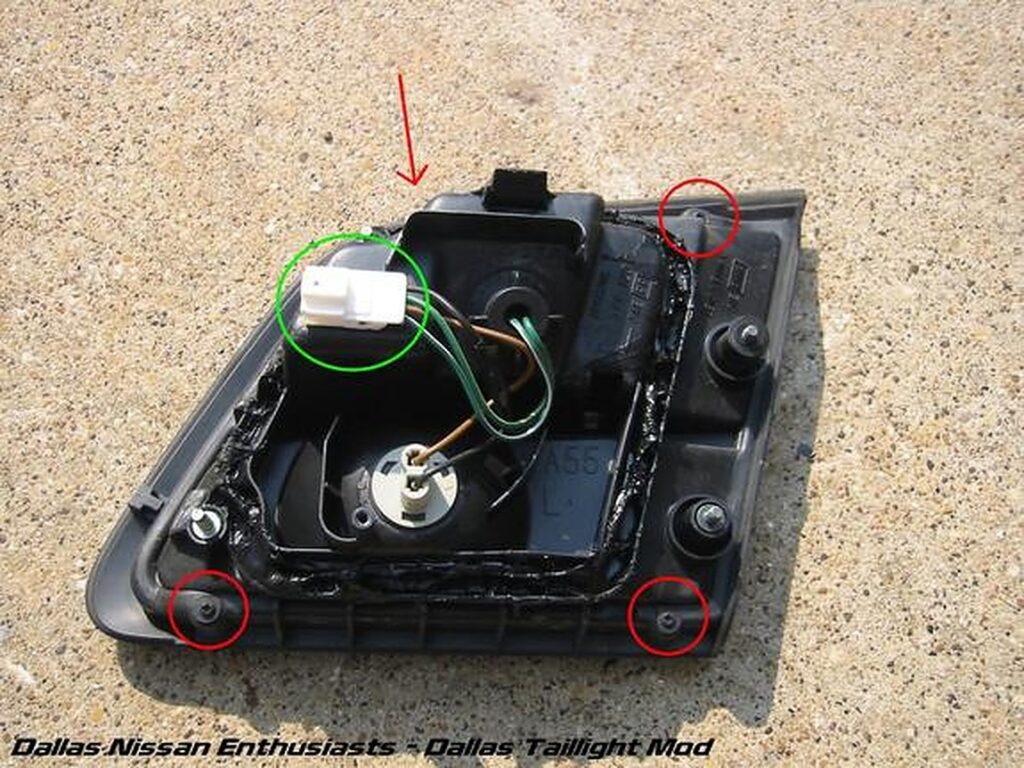
Now that the reverse tail assembly is out, you need to remove the lighting wiring plug from the assembly and remove the four screws. The plug is marked by the green circle and the four screws are marked by the red circles and the red arrow. Using the flat head you can pop the plug off by pushing on the plug from the ride side with a fair amount of force.
Now we can begin on the turn signal assemblies. Again, unscrew the four nuts which are marked by the red cirlces and the red arrow (didn’t get picture of all four). You will have to pull those white plastic things off the two inner bolts to remove those nuts. A set of needle nose pliers can help if you can’t pull them off with your hands. You can now use the screw driver again and pry from the trunk side, use the heat gun again if you want (makes things easier and cleaner), and pull the assembly straight out (as shown on the right).
For the side, there are two light harness plugs to be popped off (left) and 5 screws that you must remove (right). You can see I am using a big flat head screw driver and a very small sledge hammer to remove the plugs. This is overkill, but it was close, available, and it worked.
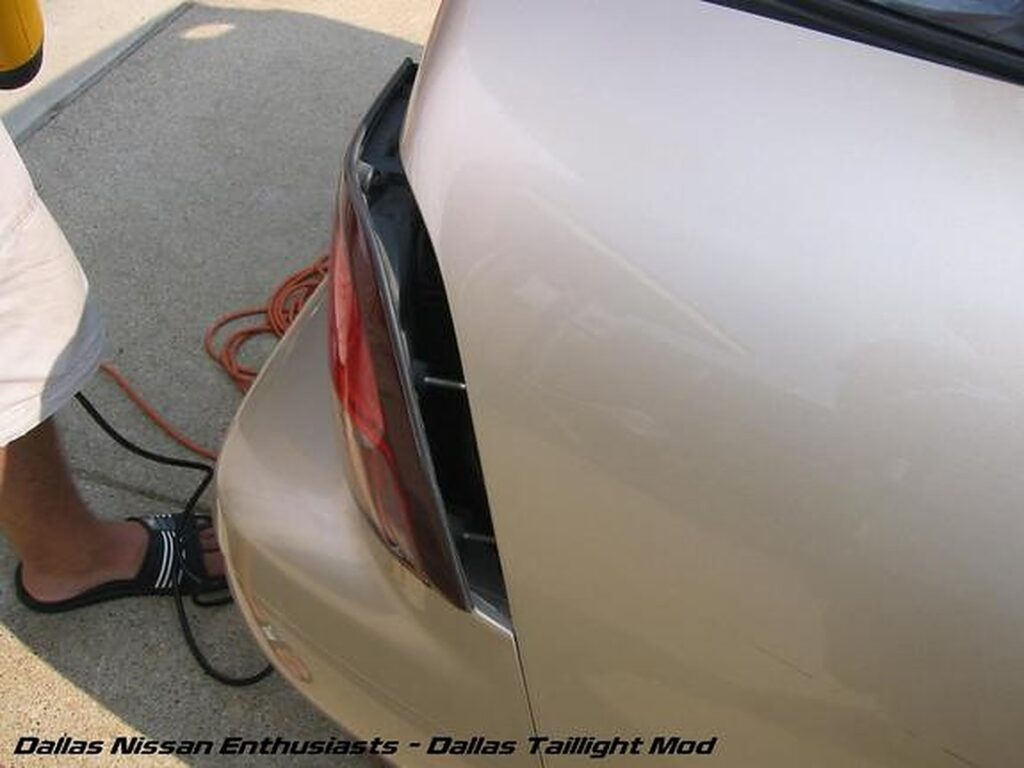
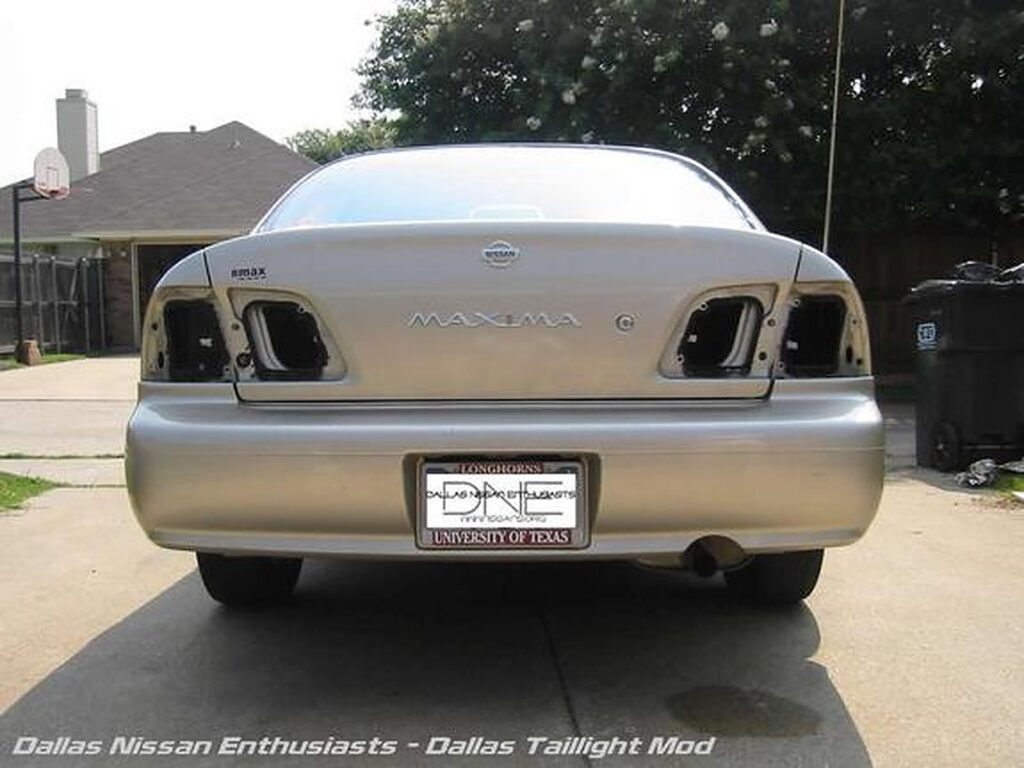
Your ride should kinda look like this now. Pretty huh?
Now with all the tails removed, all the screws removed from each assembly, and all the lighting wiring remove, we can go inside and begin the hard part.
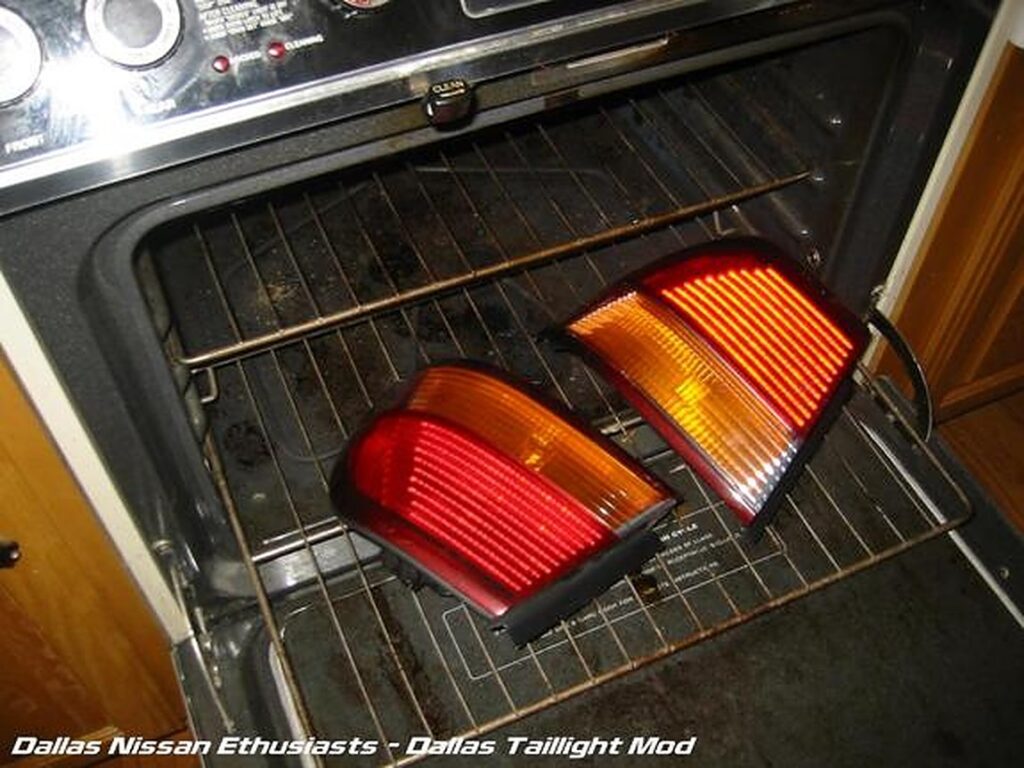
From this point, some people have chosen to sit with a heat gun and heat the edges of the assemblies but that seems to difficult to me, so I use the oven. Set your oven to 200 F degrees. Once the oven has heated up for a bit, place the reverse tail assemblies or the signal tail assemblies in the oven. We did the reverse first, but it doesn’t matter. The pic shows the signal tail assemblies on the lowest oven rack to really get them warm.
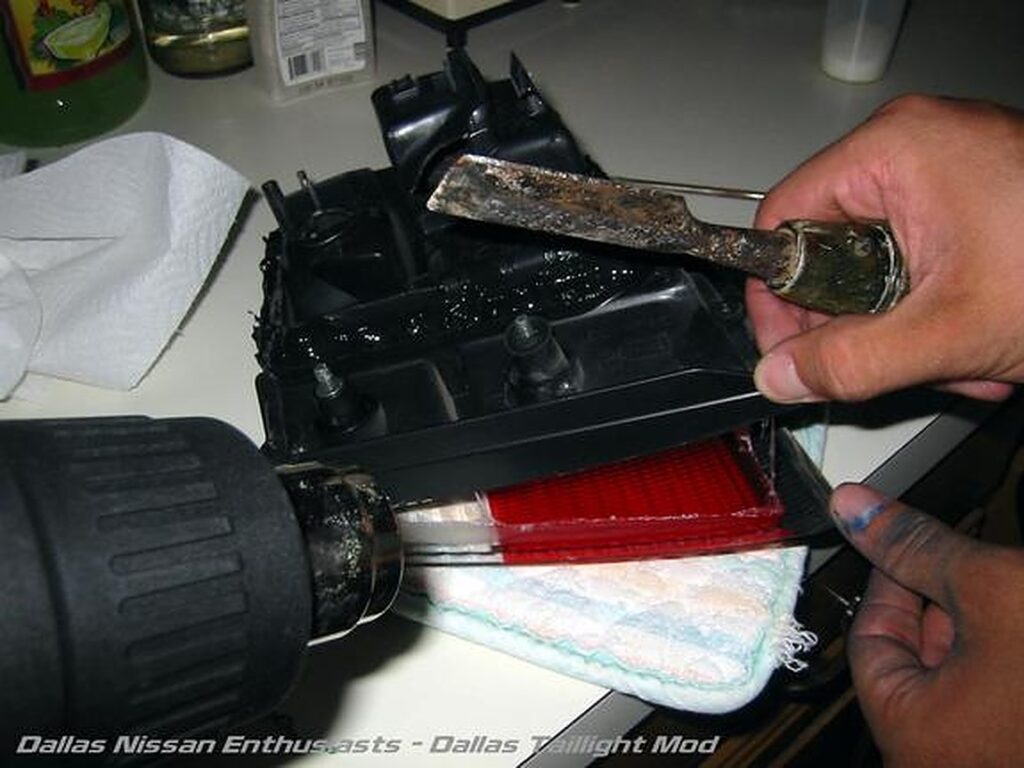
The tails should be in the oven for 10 mins (a little longer won’t hurt). Once 10 mins has passed, pull your tails out (WARNING: They will be VERY hot). Use something with a long flat tip (I ended up using that large untensil in my right hand in the pic on the right) to pry the lense from the plastic assembly (left). Be very careful not to crack your lense. You will have to pry fairly hard, but don’t over do it. Be patient. If possible (a friend is helpful here) use the heat gun at the same time to keep the glue hot and keep things cleaner as you pull the two apart (right).
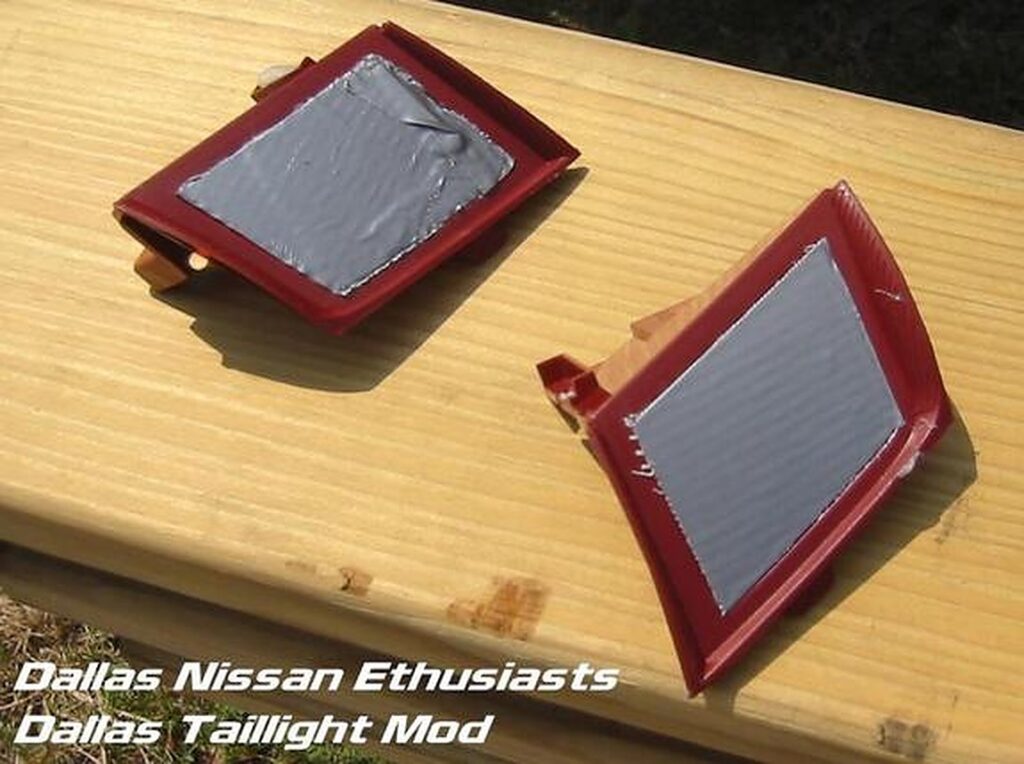
Opening the turn signal assemblies are a bit more difficult. Start by pulling the lense off from the straight edge. Once the lense is most of the way pulled apart from the housing, pull it straight out. The bottom left corner is a little weird in its design. Be careful with this part as to not break your lense. Now you must pull the orange piece of plastic out of the turn signal assemblies and the clear piece out of the reverse. You should be able to just pull. You will not need these again. Do not pull the clear pieces from the upper half of the tails where the brake lights are. This makes the light spectrum more spread out.
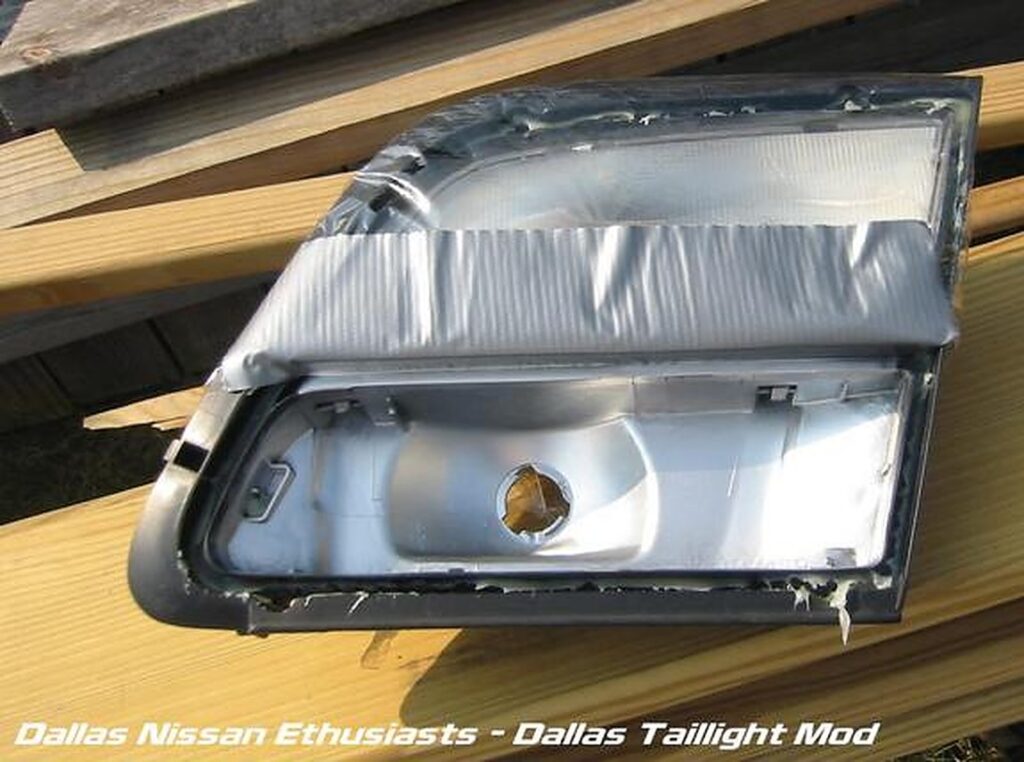
Now that all your lenses have been removed from their housings, prepare the housings to be painted. The best thing would be to use painting tape and some paper to cover the areas you do not want painted, but all we had at the time was duct tape and saran wrap. You can pick up painting tape at your local Home Depot or Lowes.
Now, for the turn signal assemblies, you must remove the little red side light cover by removing the one screw that holds it in (sorry no pic). Using the painting tape (or duct tape in our case) cover the reflective part. As to not paint it black. Some people have chosen to leave these covers out completely, but that is your choice.
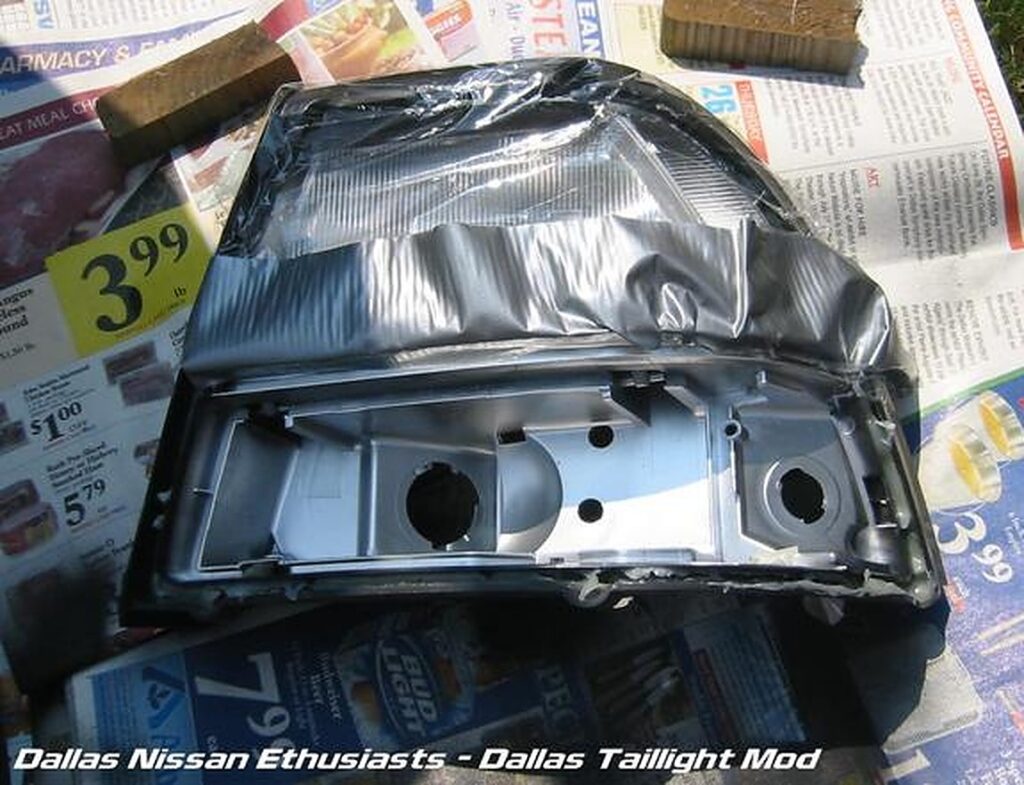
Once you have the protective stuff all put on the tails, you can spray paint your tails. Be sure to get all the corners and hard to get areas for that clean look. I recommend holding the can 12 to 18 inches away from the housing itself as to not get overspray. We put two coats of paint to make sure we got everything. This is what your tails should look like.
Now take your paint turn signal tail assemblies and your painted reflectors and put them back in. Don’t forget to put the screw back in (red circle).
Once the paint has dried, you can put the lenses back on the housings. Use the heat gun to heat up the glue a bit first. Once they are back together, put them in the oven for about 5 mins at 200 degrees. After 5 mins pull them out. The glue has been reheated so that you can push the lenses onto the housing more for a better seal. Once all together, your tails should look like this.
Now all you have to do is put the tails back in and you’re done! What a nice a$$ you have. 🙂
Info:
This modification is a very easy process that allows the fog lights to be on with the parking lights. It also allows the fog lights to remain on with the high beams. This process was done on my 1997 Nissan Maxima SE, automatic.
Let’s Begin:
The relay box is located on the passenger side of the engine bay, right next to the coolant reservoir. Close up of the relay box. Notice the Fog Light relay is marked.
In front of the relay box is the coolant reservoir. Remove the coolant reservoir by removing the two hex head screws. You can use a large Philips head screwdriver or a 10mm socket. Place the reservoir out of the way. I put it in between the engine and the radiator, it’s sits there without disconnection the hose. Remove the top of the relay box. This is easy, there are only a few clips to undo. Put the top on the side. >
Now you can see the relays.
The three relays highlighted in yellow need to be remove in order to remove the relay box. I believe if you have a manual transmission that there is a forth relay that needs to be removed (it would be in the upper right of the relay box)
**These relays should all be the same, but just in case make sure you remember where they originally were.**
This is what the box looks like with the relays removed.
Turn the lights on and test the relay with the voltmeter (or other electrical device). The marked terminal should give around a +12V reading. You can use the terminal across from it as the ground. The two hex head screws need to be removed. You can use a large Philips head screwdriver or a 10mm socket.
^^FENDER WALL SIDE^^ ^^ENGINE SIDE^^
Once the relay box is remove from the frame, it need to be taken apart. There is an upper and lower piece. In order to take it apart there are three clips on the side that faces the engine and two of the same clips on the fender wall side. But on the fender wall side there are also two additional clips. I used a small screwdriver to unlatch all the clips, be careful not to break anything. All the clips are marked in the two pictures above.
Here is a picture of the two pieces of the relay box apart. With the relay box open, you want to locate the +12V terminal of the Fog light relay. It’s the green/yellow wire. I’ve marked it with an arrow and outlined it in yellow. You want to cut this wire, make sure to leave yourself enough wire on the relay side of the wire to splice into. Once the wire is cut, tape off the +12V wire with electrical tape (this is the half of the wire that isn’t attached to the relay)
^^WIRE TAP^^ (Radio Shack). Splice into the green/yellow wire with a long wire, around three feet. I used a wire tap to do this, but it can be done in other ways. Make sure to wrap it with enough electrical tape. The new long wire needs to be run out of the relay box. So I cut a small hole in the bottom to run the wire out of. You can also see in the picture the original +12V wire that is cut and wrapped in black electrical tape.
Put the relay box back together.
Reattach the box to the car with the two hex head screws.
**To test the lights: Turn on the parking lights, then touch the new wire to the positive terminal (RED) of the battery. The fog lights should turn on when the wire touches the battery. They should also remain on with the high beams.***
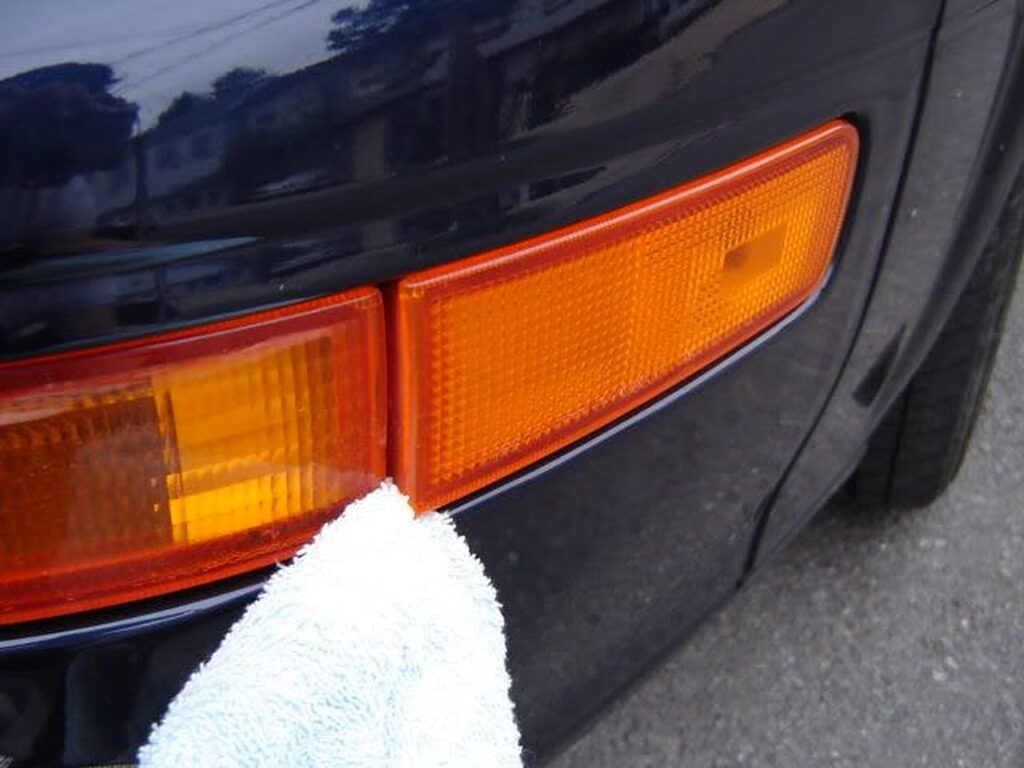
Remove the corner light with a screwdriver (wrap with a cloth to protect the lenses), it should pop right out. Run the wire through the fender wall to the corner light. Splice the new relay wire into the red/blue wire. Again, I used a wire tap and then wrapped the entire thing with lots of electrical tape. Push the lenses back into the bumper. YOUR DONE!!!
Turn the parking lights on and make sure the fog light switch is on too. Now your fogs will also be on. Turn on your headlights with your high beams on, your fog lights will remain on.


")


")