Tag

Engine, Trans, F/I & Tuning

Browsing

Community Member Credit: BULL

Hello everyone, I put this together to help others out when doing timing in these engines. As great as this engine is, internally it has some life-threatening issues that will decrease it longevity if not addressed.
These are in the timing chain area: Gallery gasket, Chain tensioners and guides

Note: Most will adopt the mentality of marking the removal and repeat the install and this is a great idea. Unfortunately this wont work for all. Turning the engine until all marks are aligned can be a waste of time due to the many times it might require and removal and resetting might just be the easiest.

Here are some simple picture explicit ways of how to double check your work. You can start by aligning the damper with this timing mark in the cover, if doubtful about the crank cog you can use the this method as confirmation
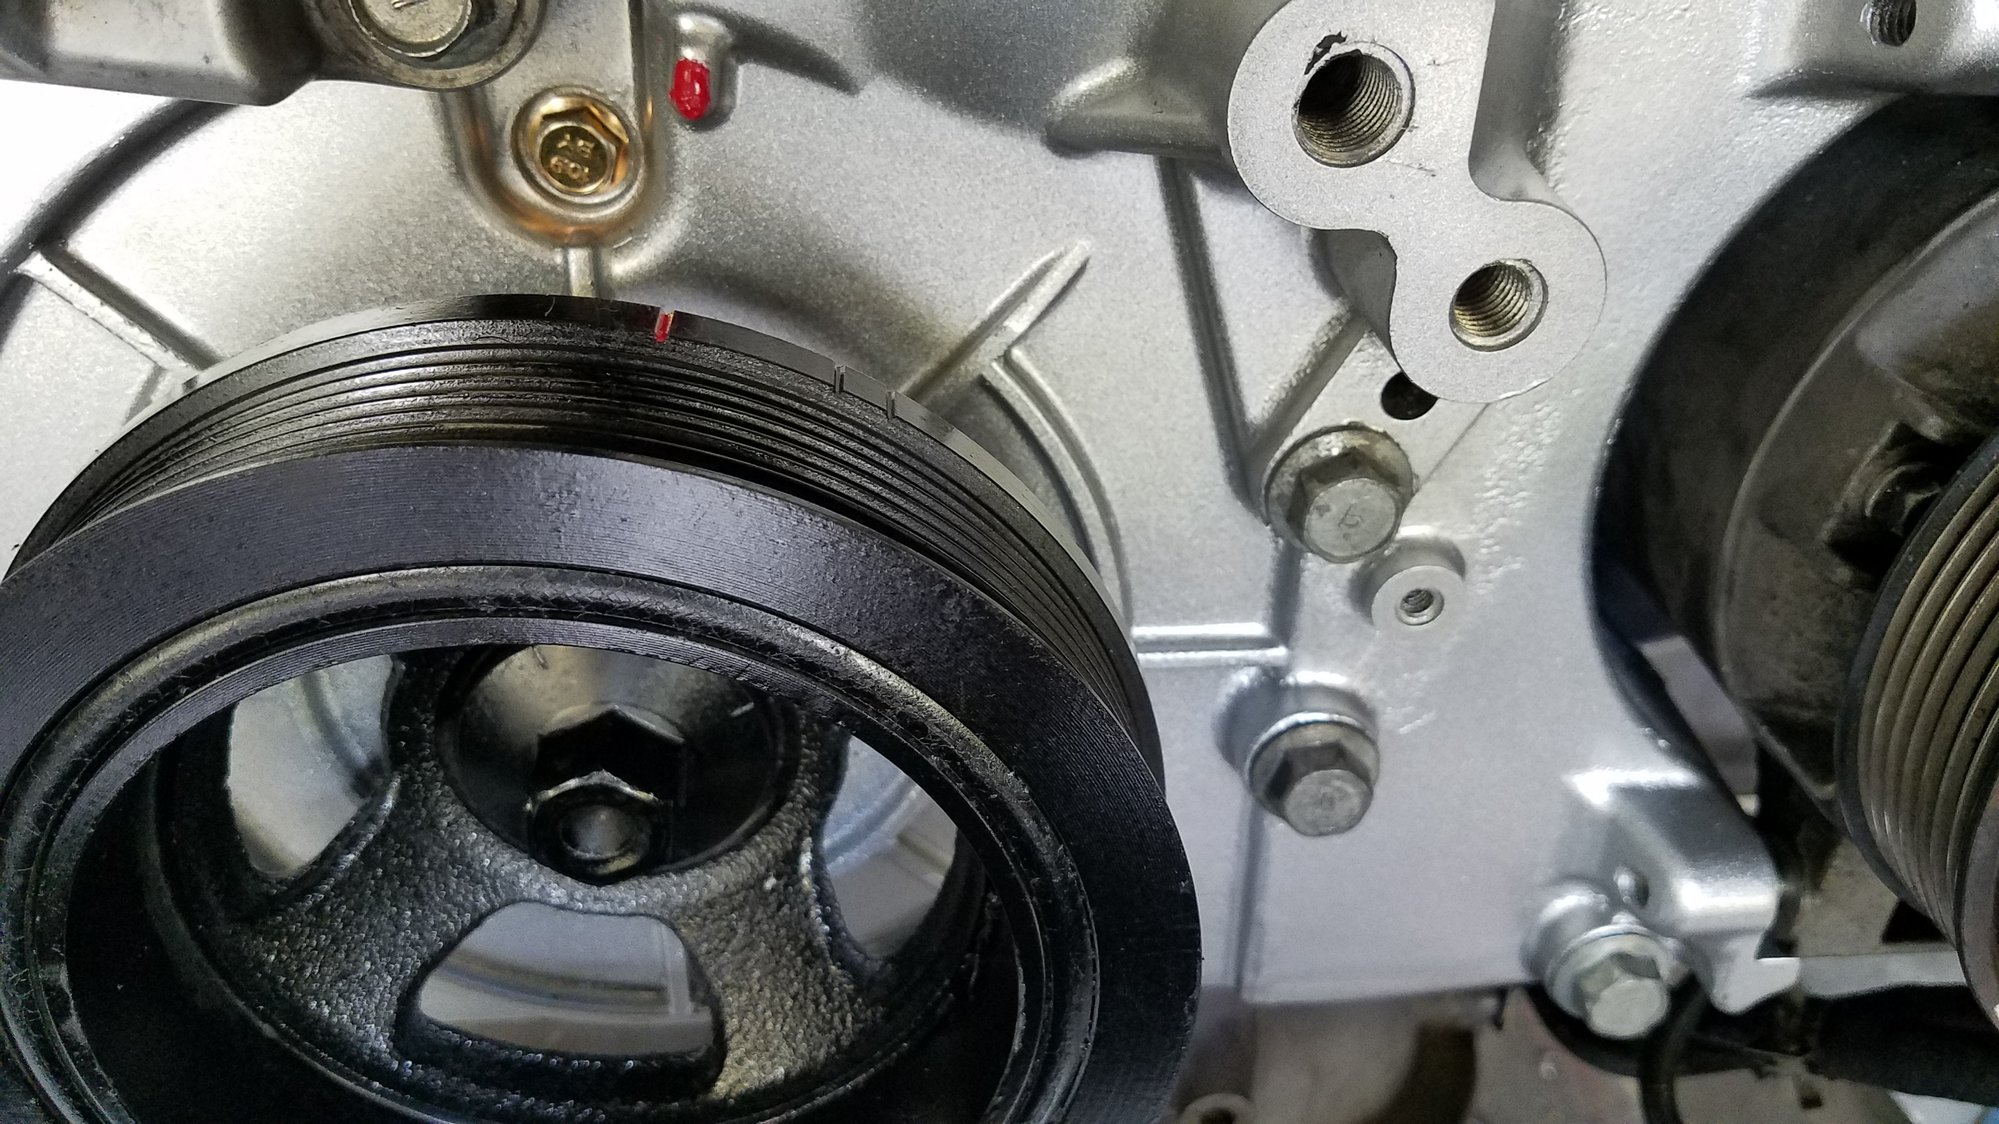
Once timing cover is loosened and removed you’ll be left with this view. As you all can see my gasket has broken.
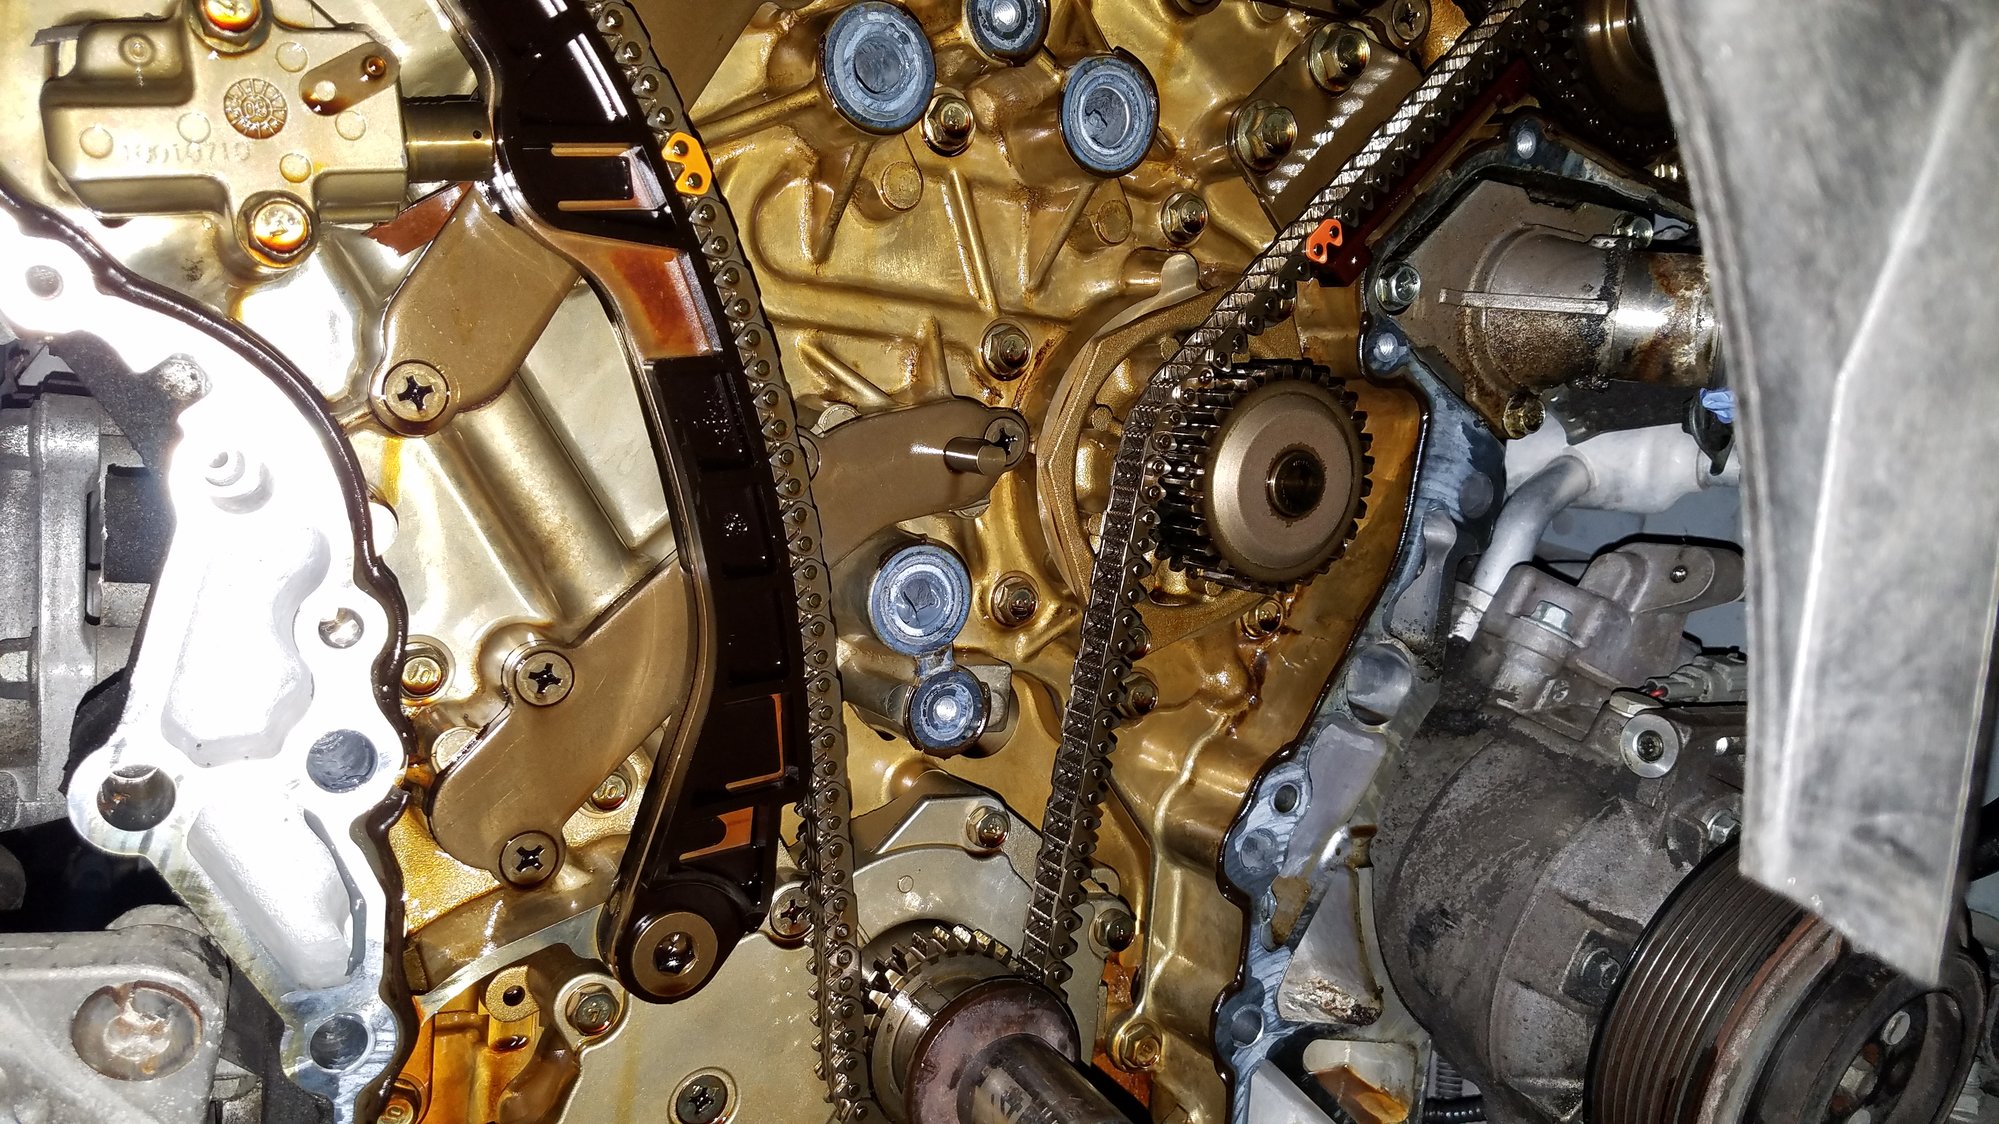
Then after everything comes off
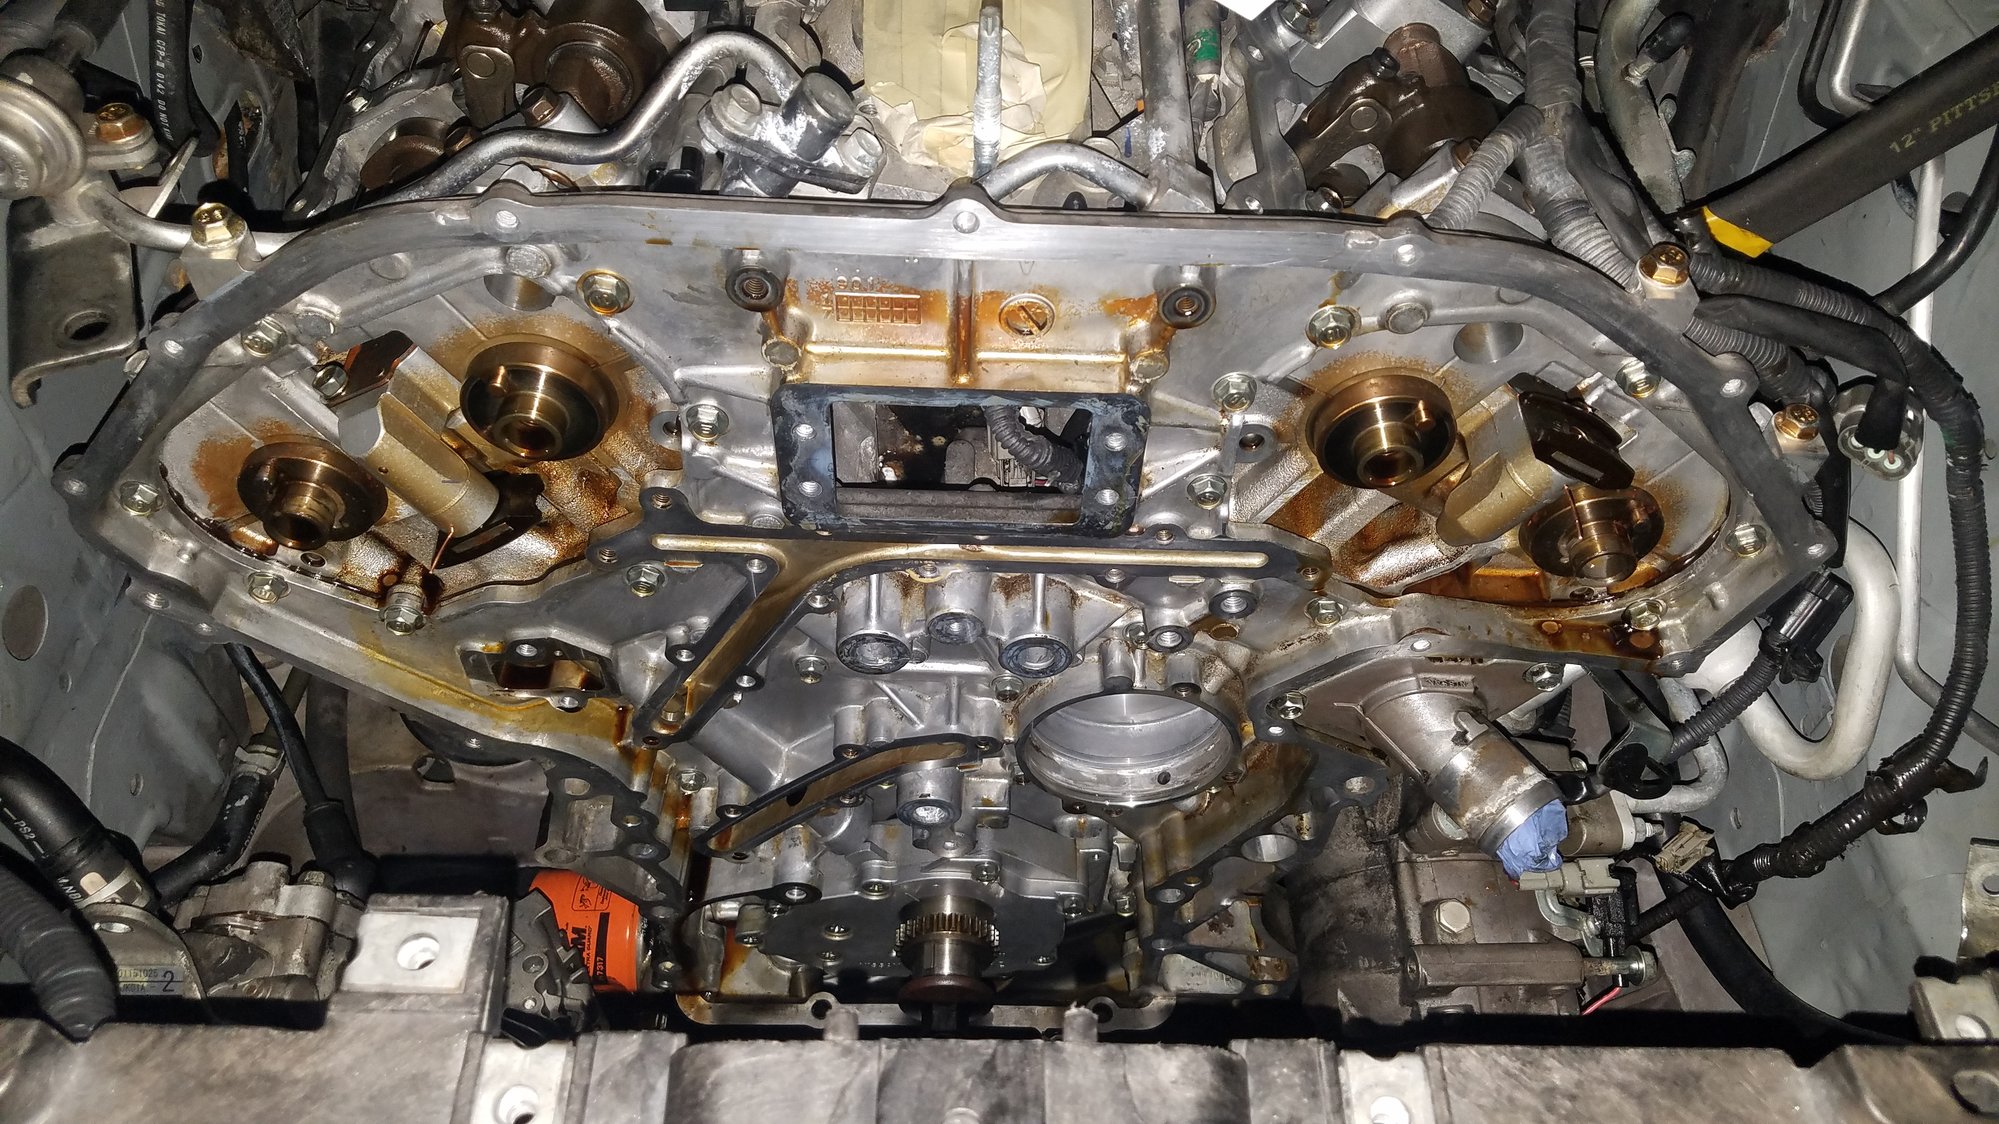
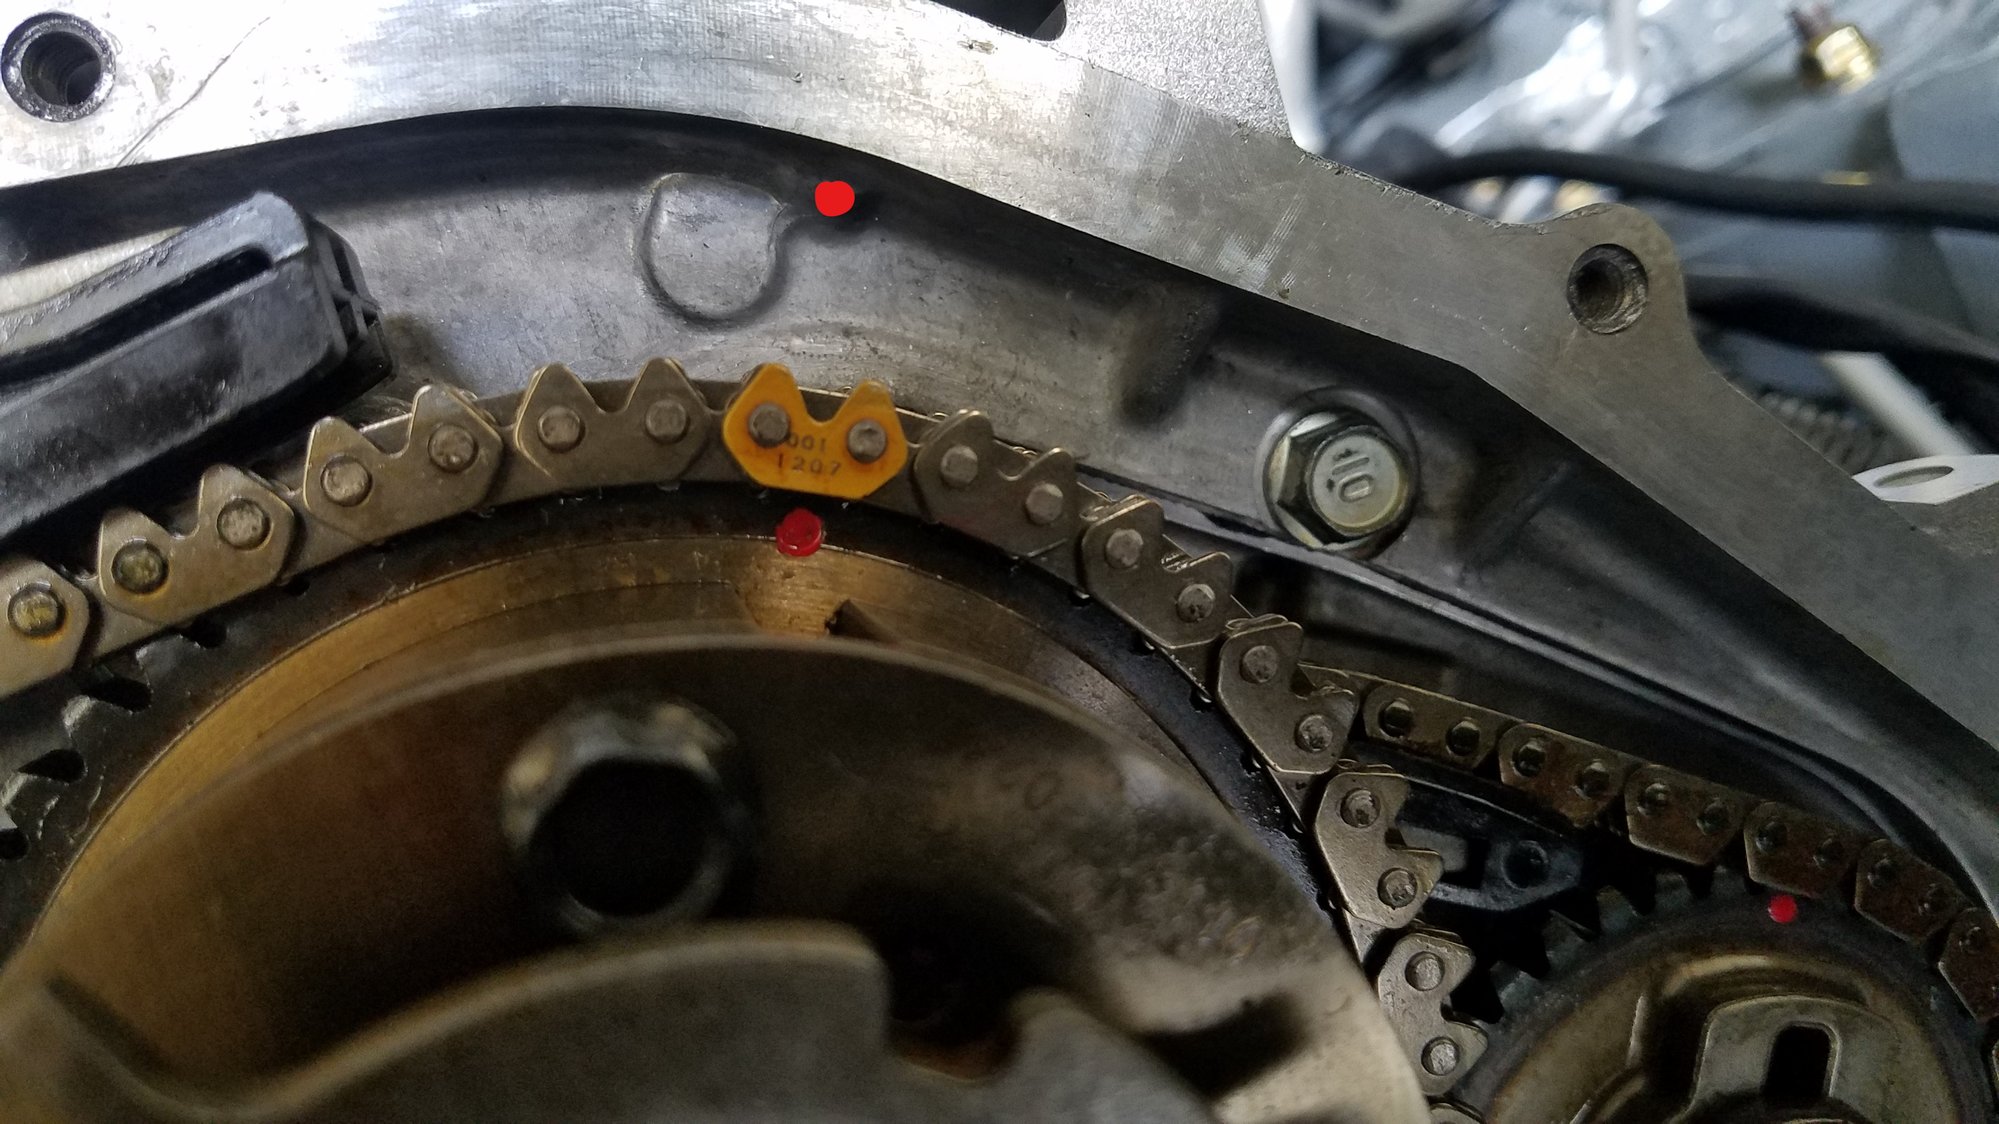
To make sure your cams are aligned the pin need will align with the indentation in the cam girdle like so:
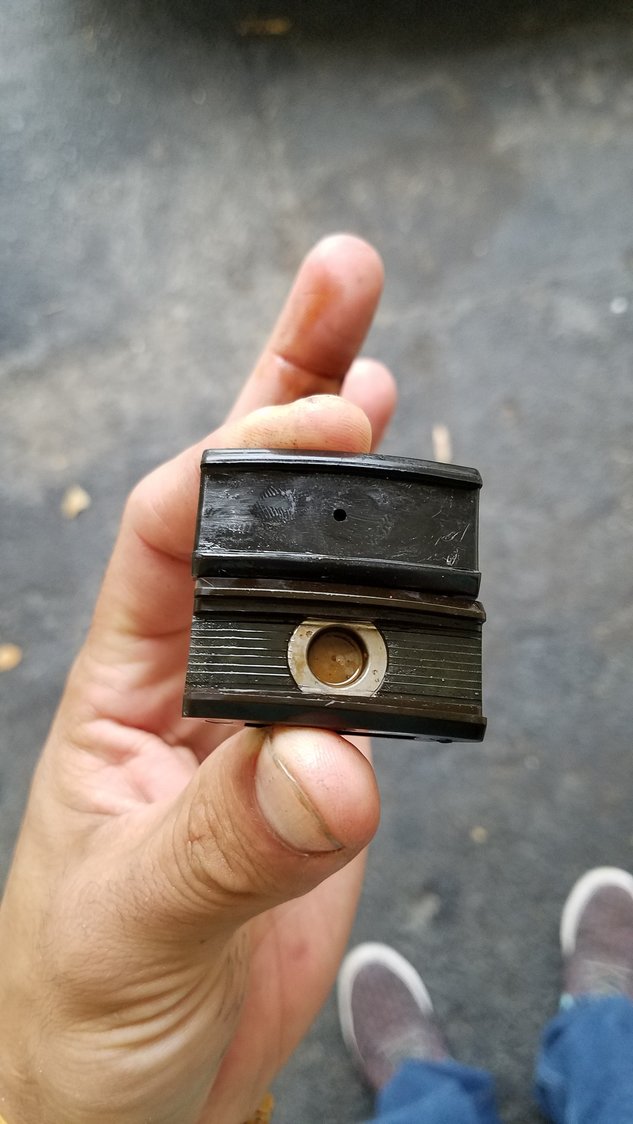
I learned that even that it had 120k miles this had happened: I had no suspicion of this nor heard any noise.
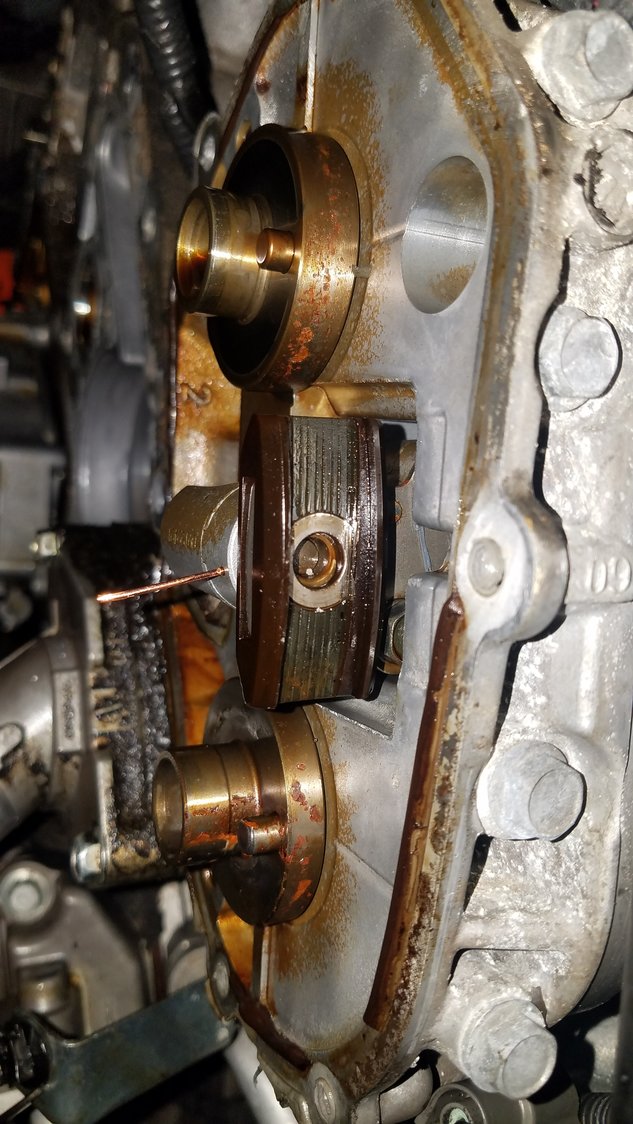
This job can be expensive to do. How expensive is entirely up to you.
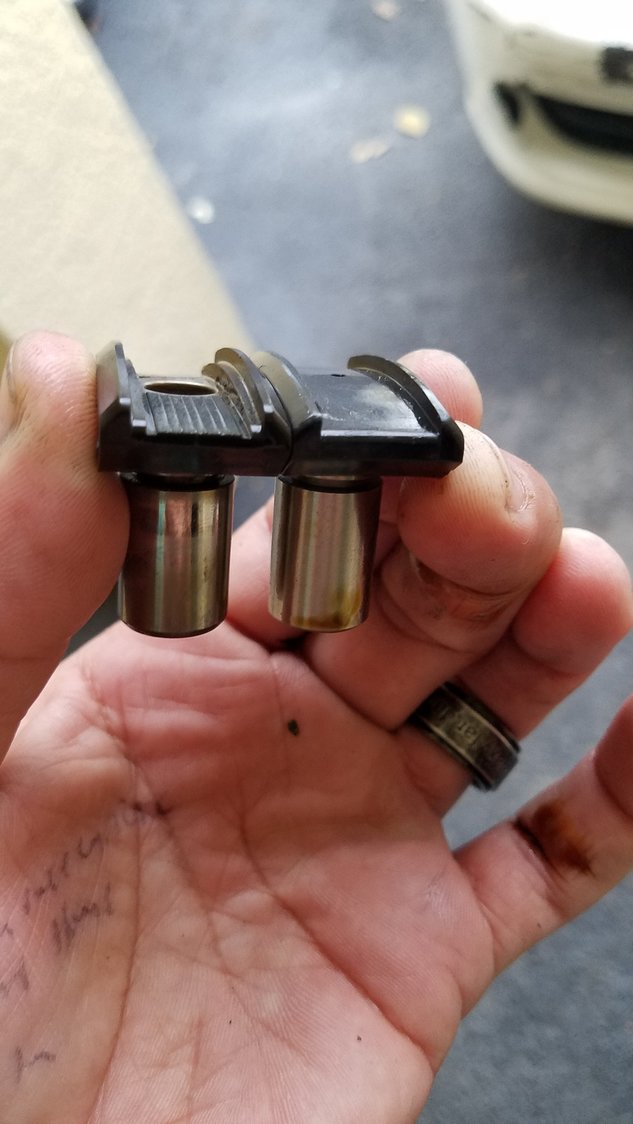
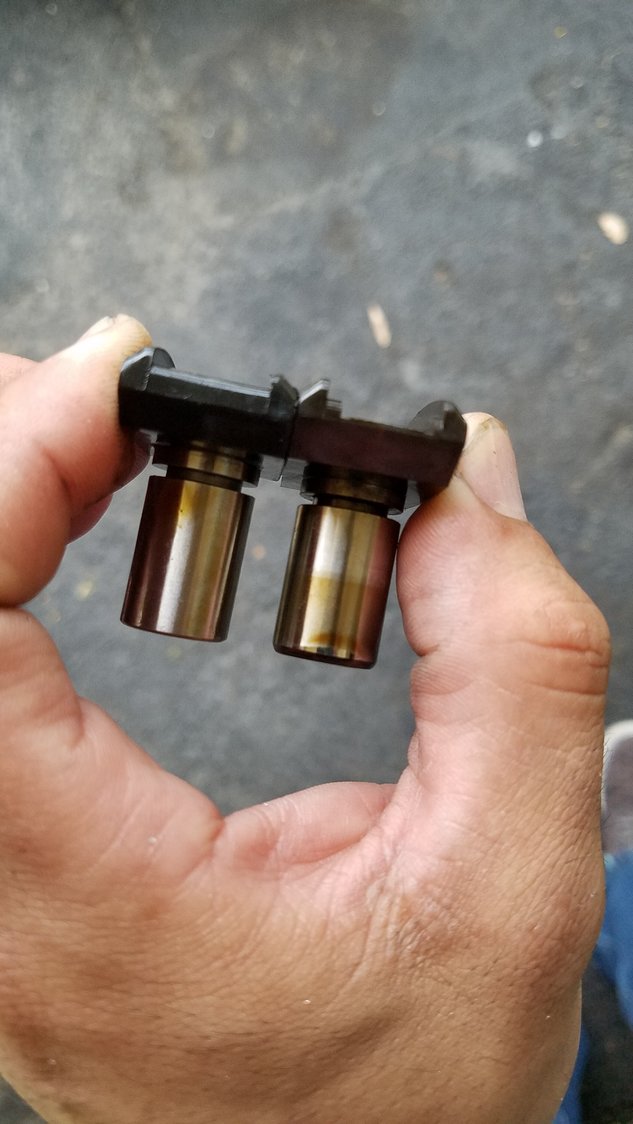
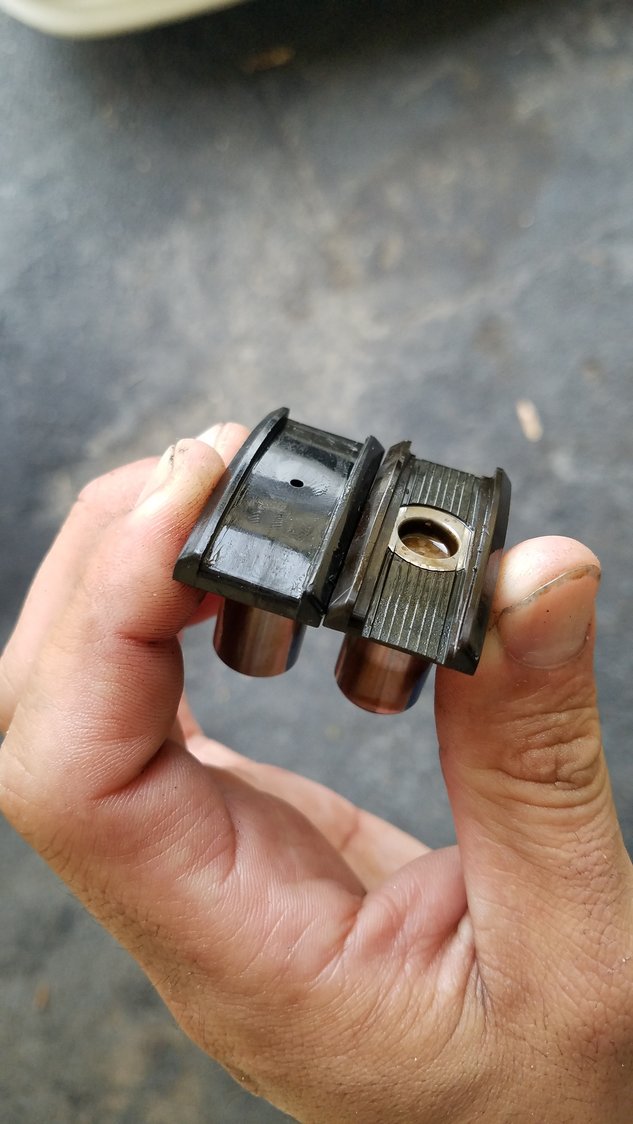
to fix these the proper way OEM tensioners are a $120 + option that requires the removal of the camshafts girdle and removal of the VVEL Eccentric shaft that I had no interest in doing. With the VQ40 nissan sells replacement cam shoes but not for the VQ37 . The plunger part of the tensioner does not go bad so soon.

The plunger/Shoe from a VQ35 DE is the same part and can interchange. These parts are $27 for the pair. The shoe appears to be made from the same material of the OEM one so I’ll check it again in 100k miles
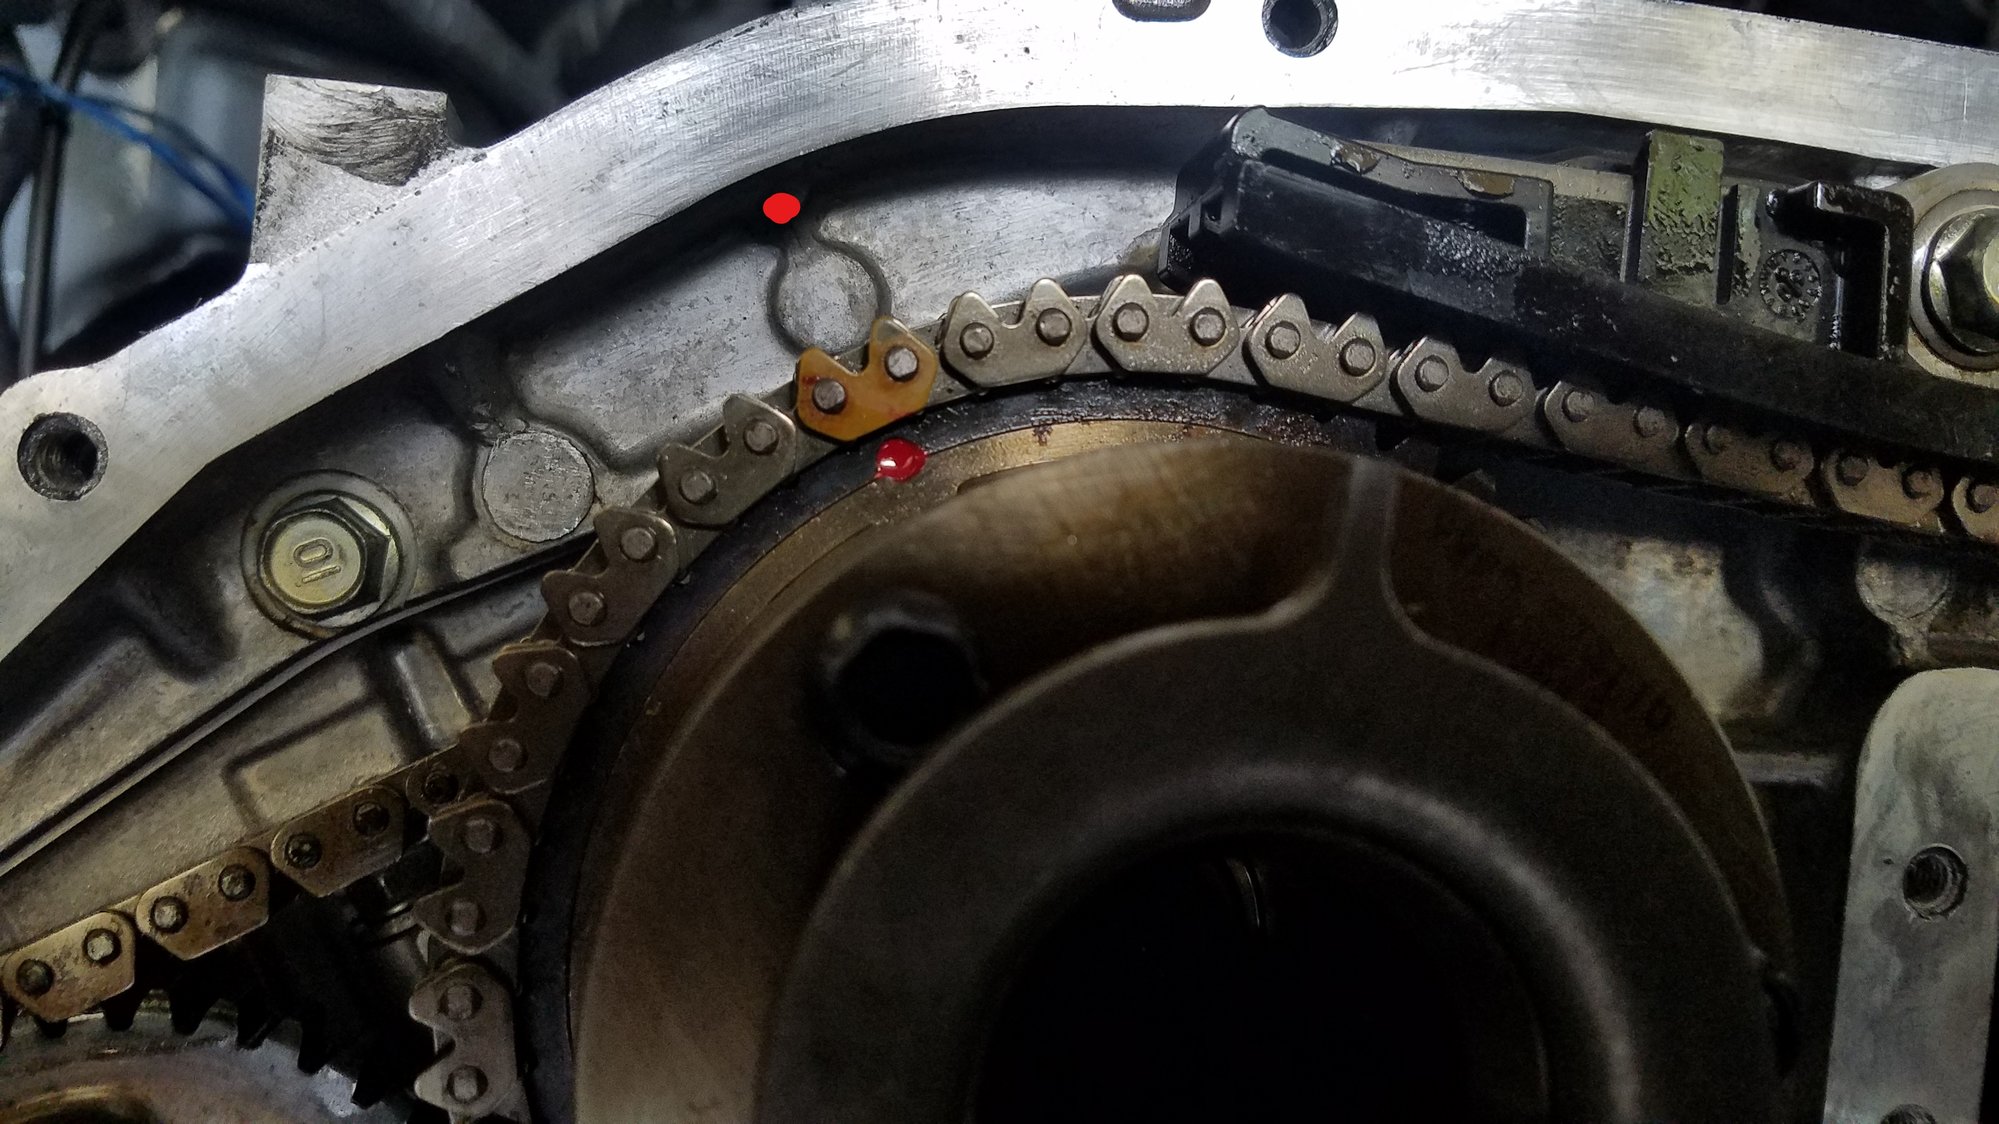
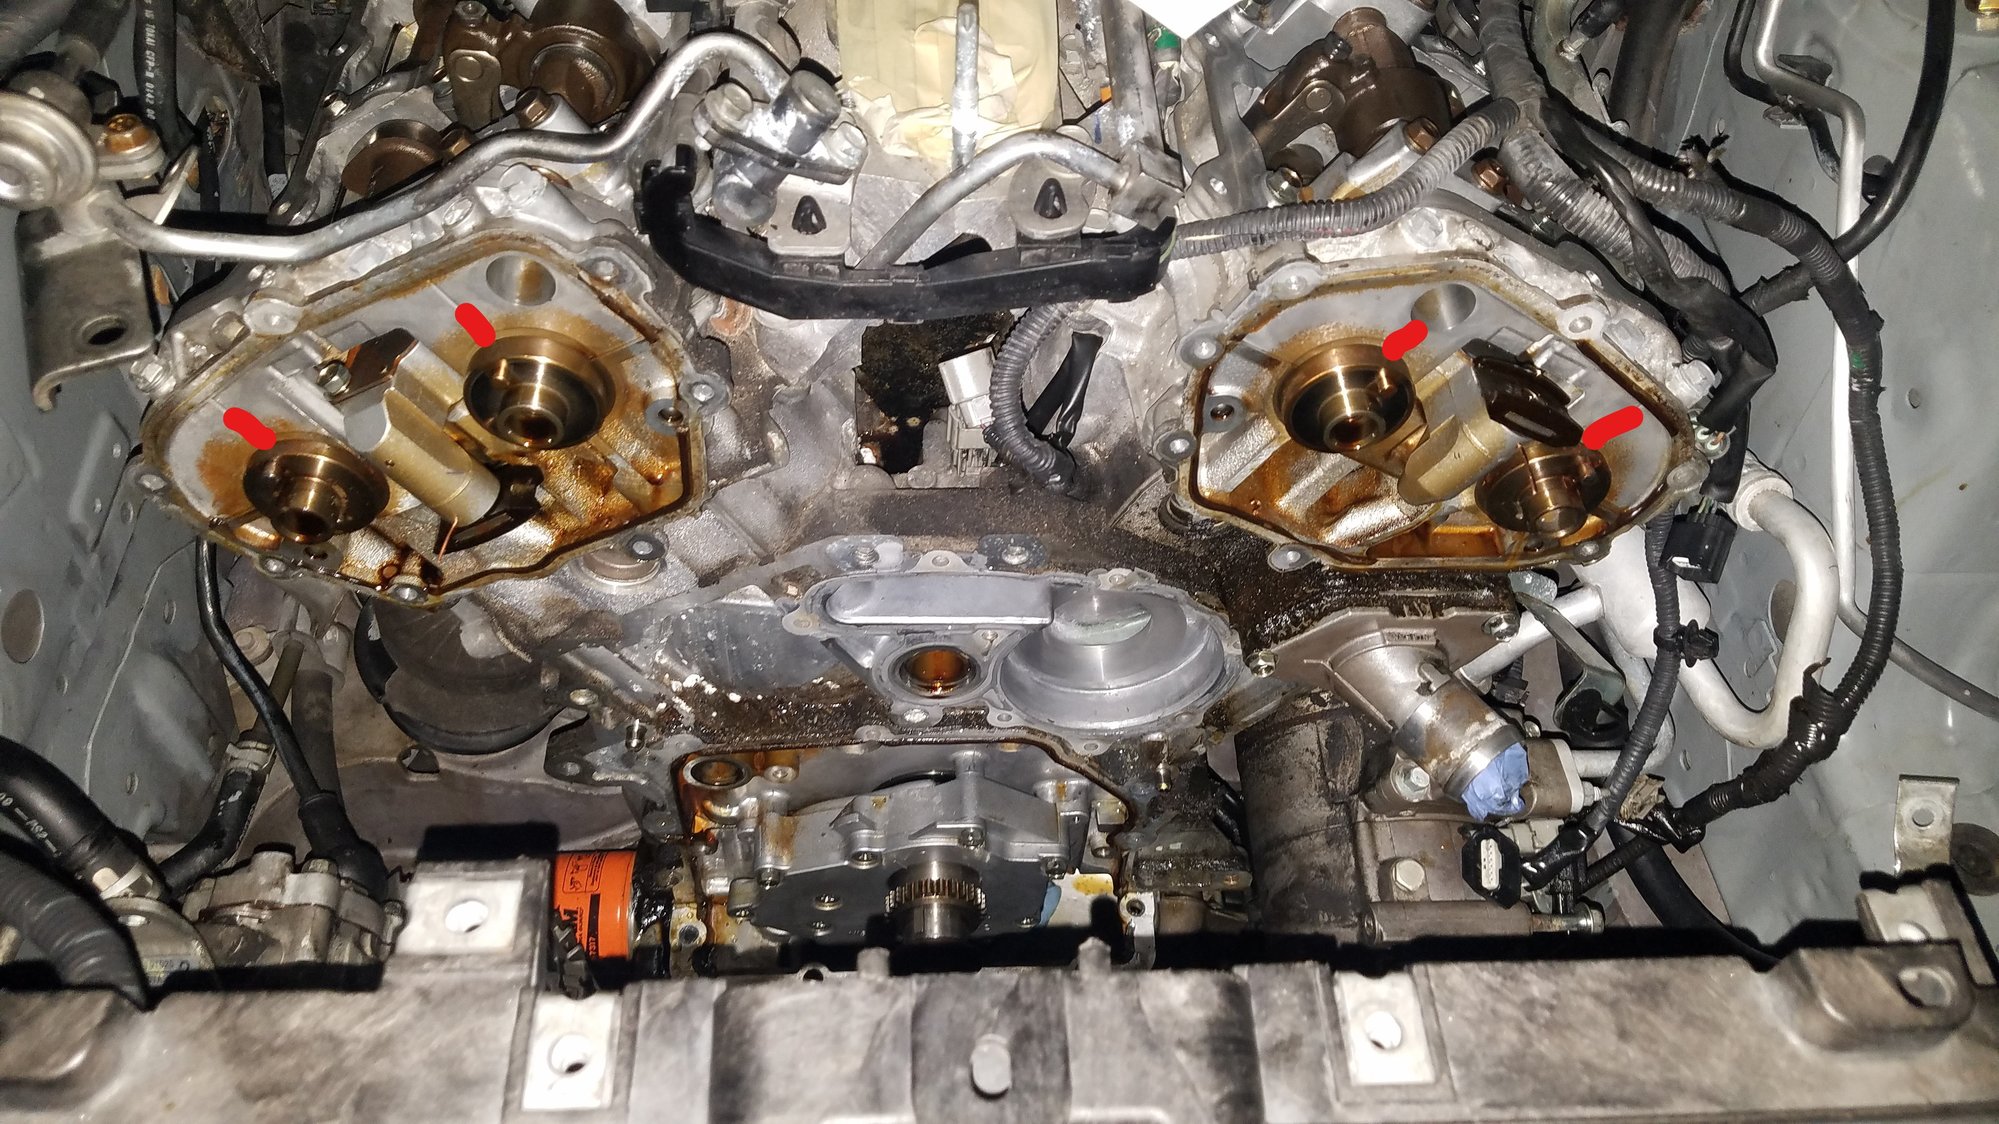
I painted the marks and between the FSM and other pictures I was able to find I confirmed. Final result was the start.
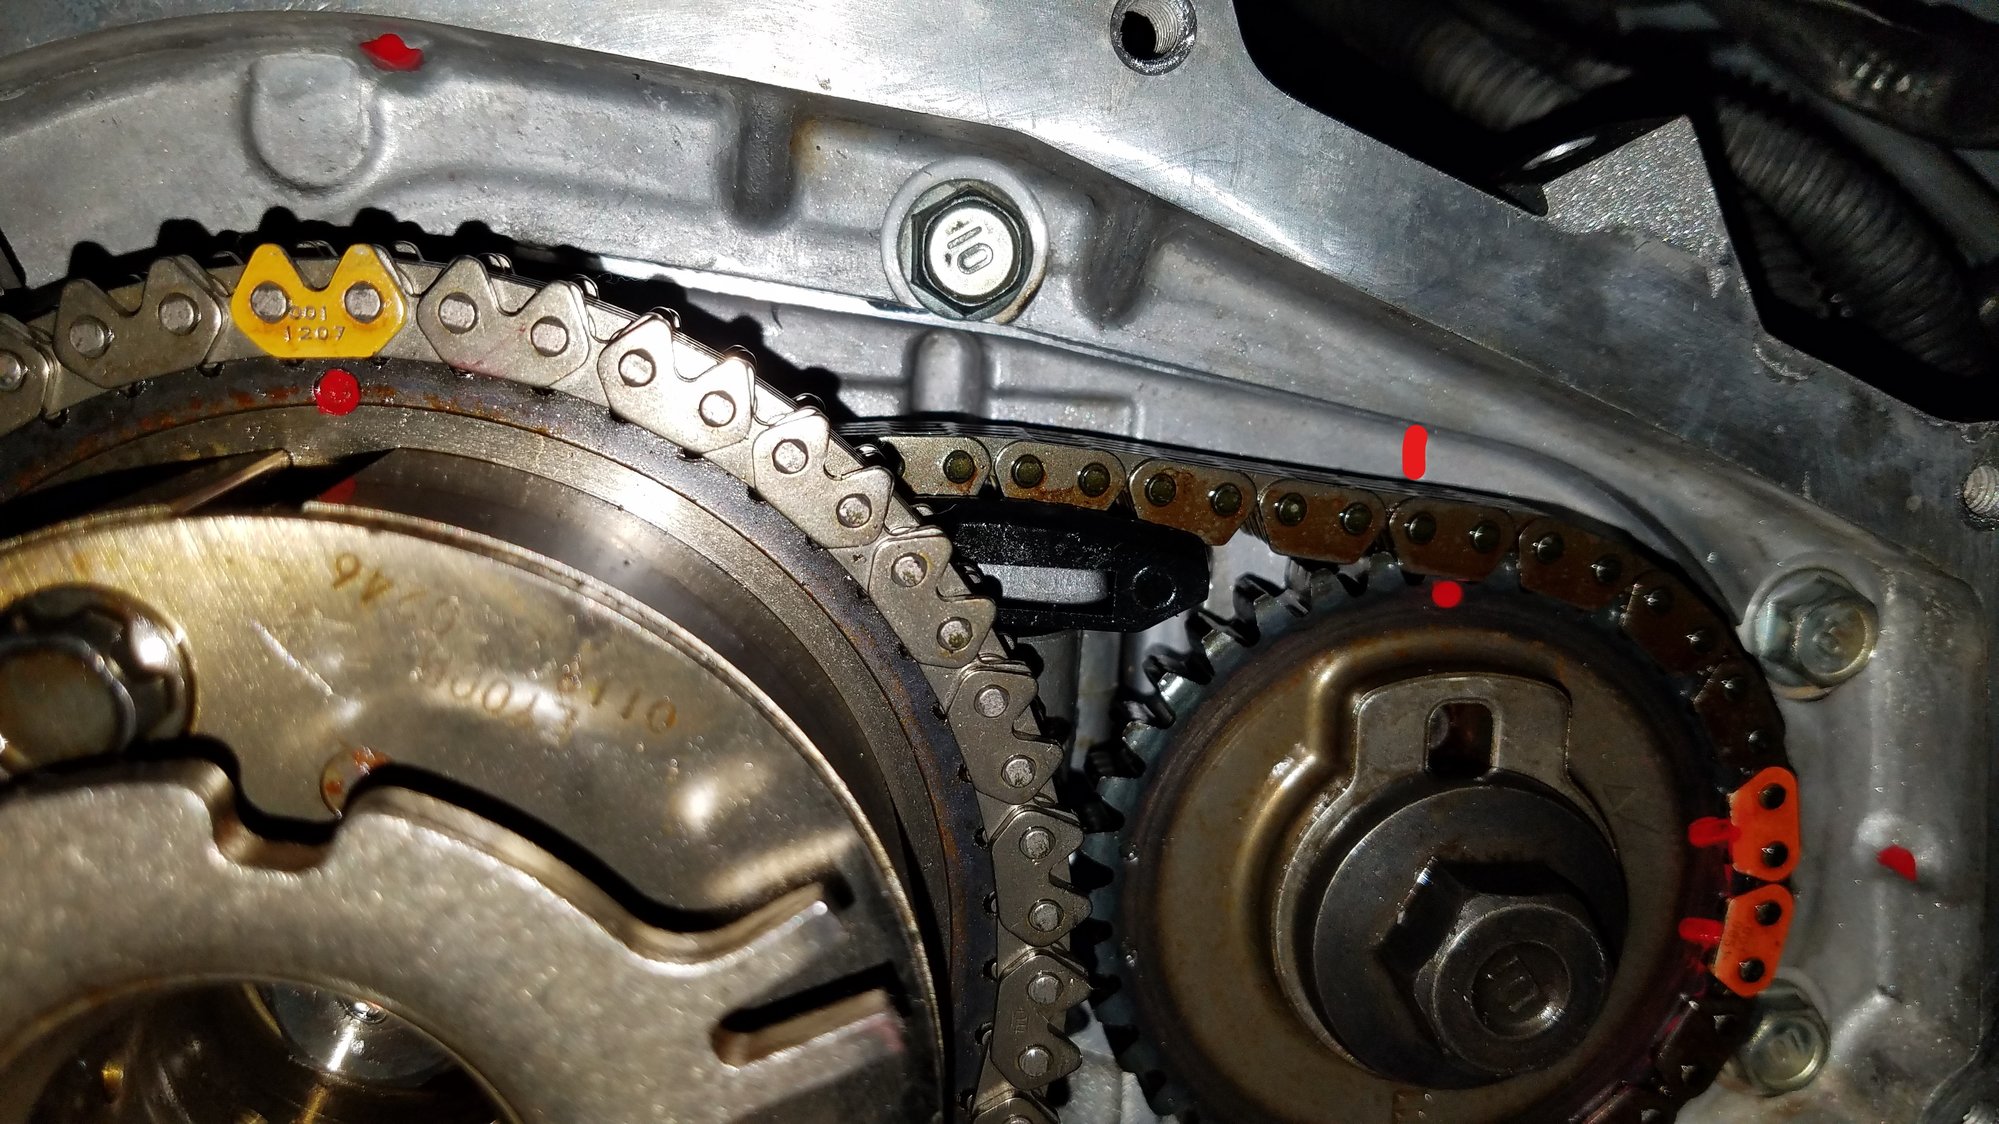
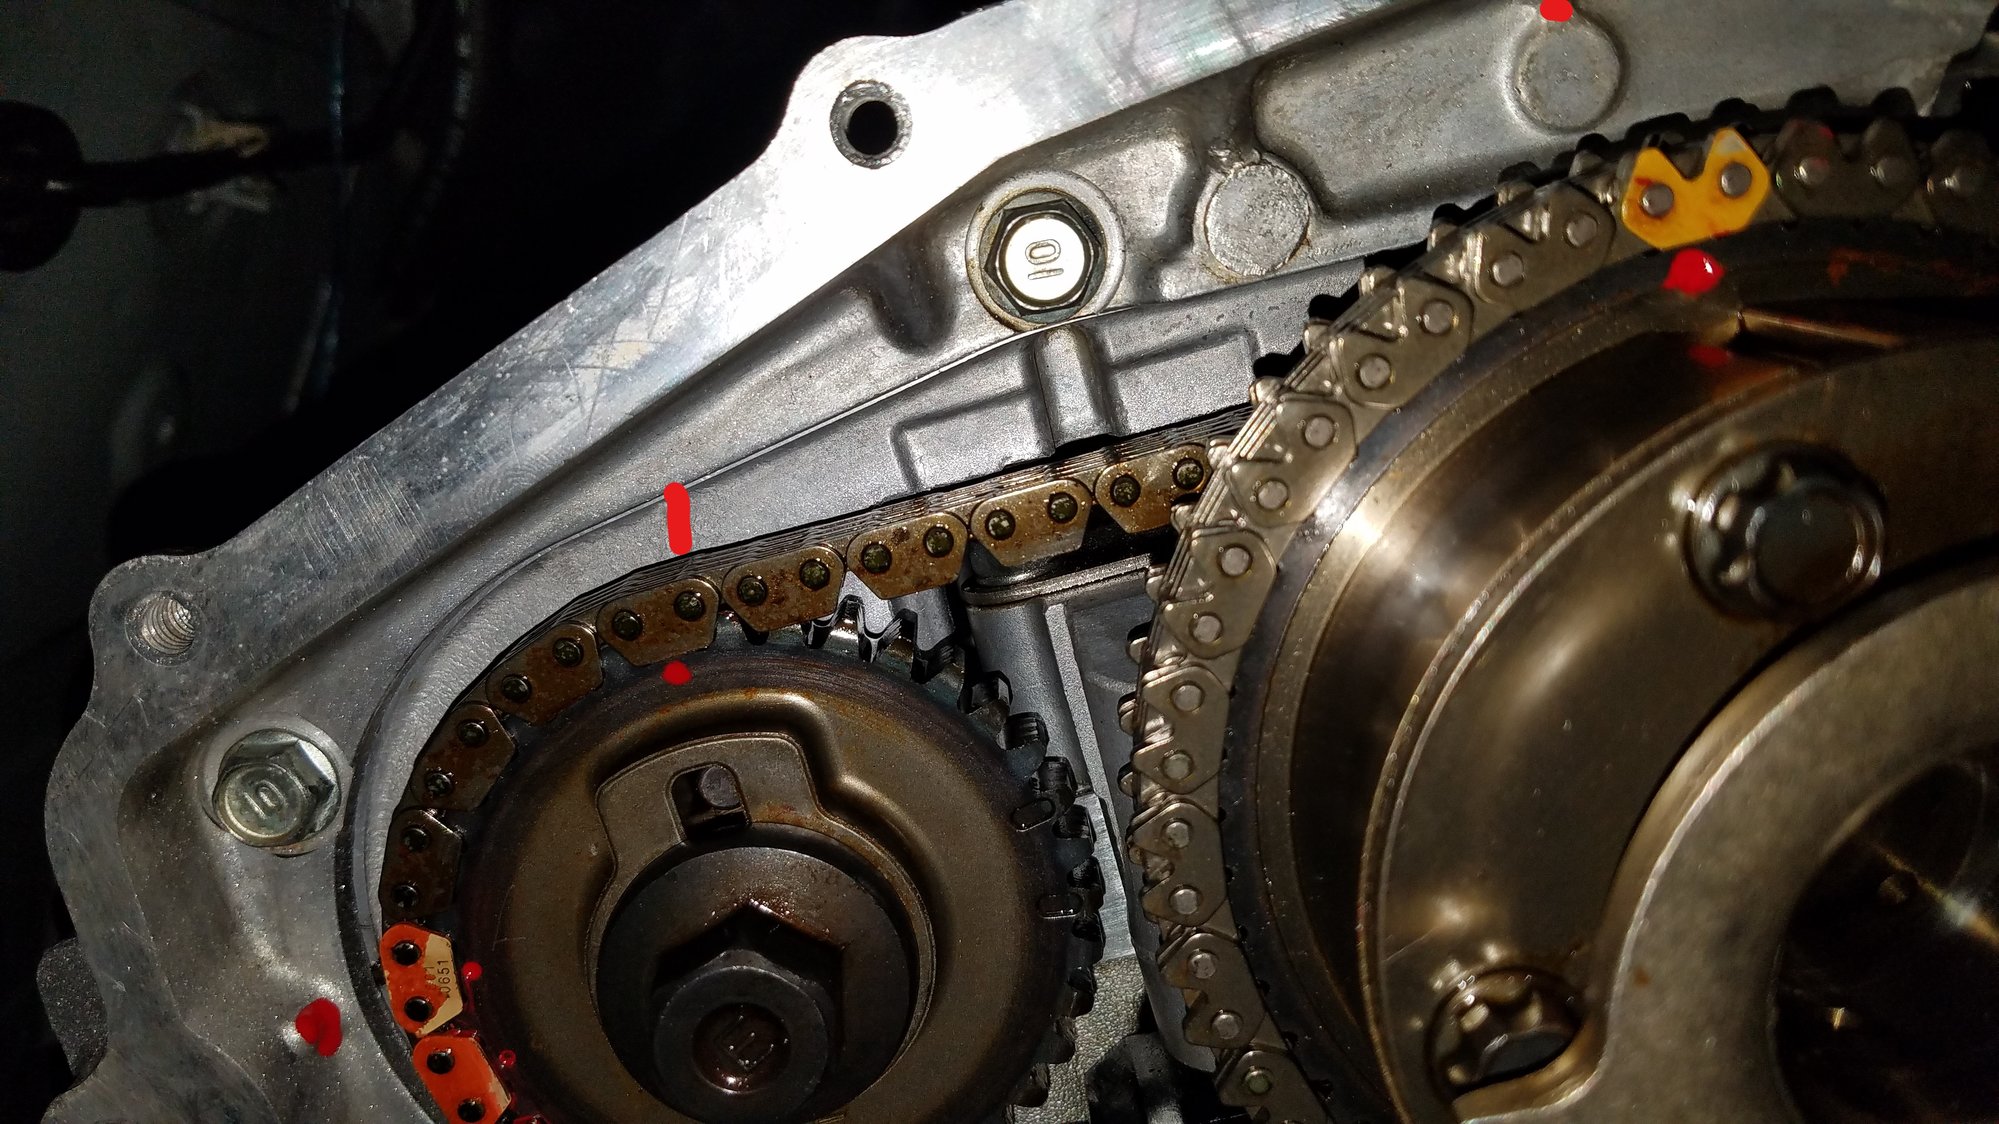
Remember:
Circle dots are for Bank 1
Oval dots are for Bank 2

These you will align with the two orange links on the cam chain, the single chain link with meet the oval mark on the VTC for bank 2 and circle on the VTC for bank 1
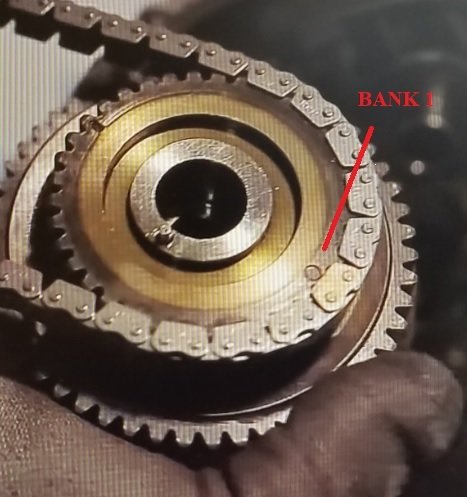
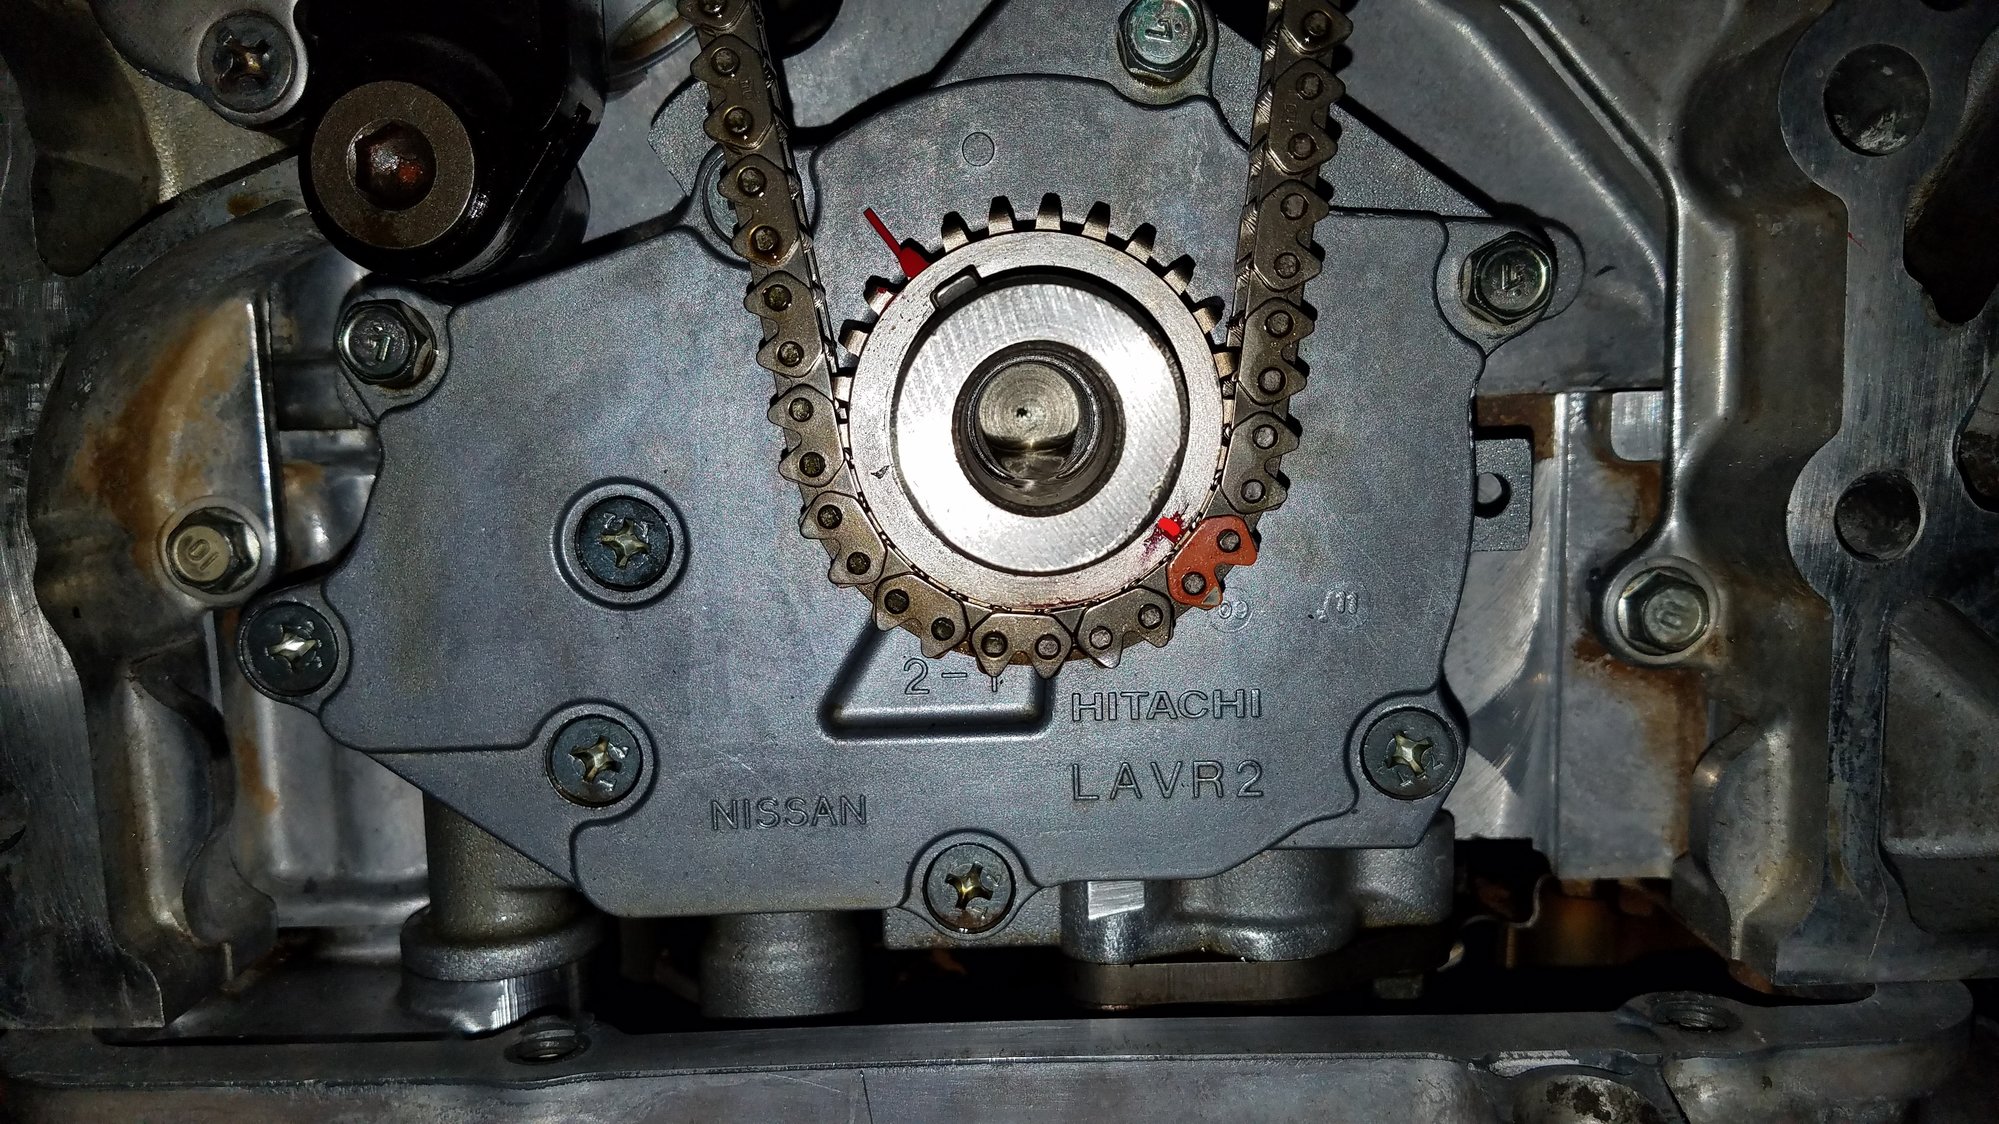
There are 3 ways to verify the crank, with the Damper like the first pic showed, aligning the crank tooth with the mark on the pump and with the chain’s orange link and the mark at 5 o clock on the cog.

Make sure you leave NO tension on the untensioned sides of the chain as any looseness can alter timing.

The last tension you should pull the pin from is the main cam, check tension and if it’s too loose use a bar to click the tensioner over one click

Loading

Community  Member Credit: Eddy

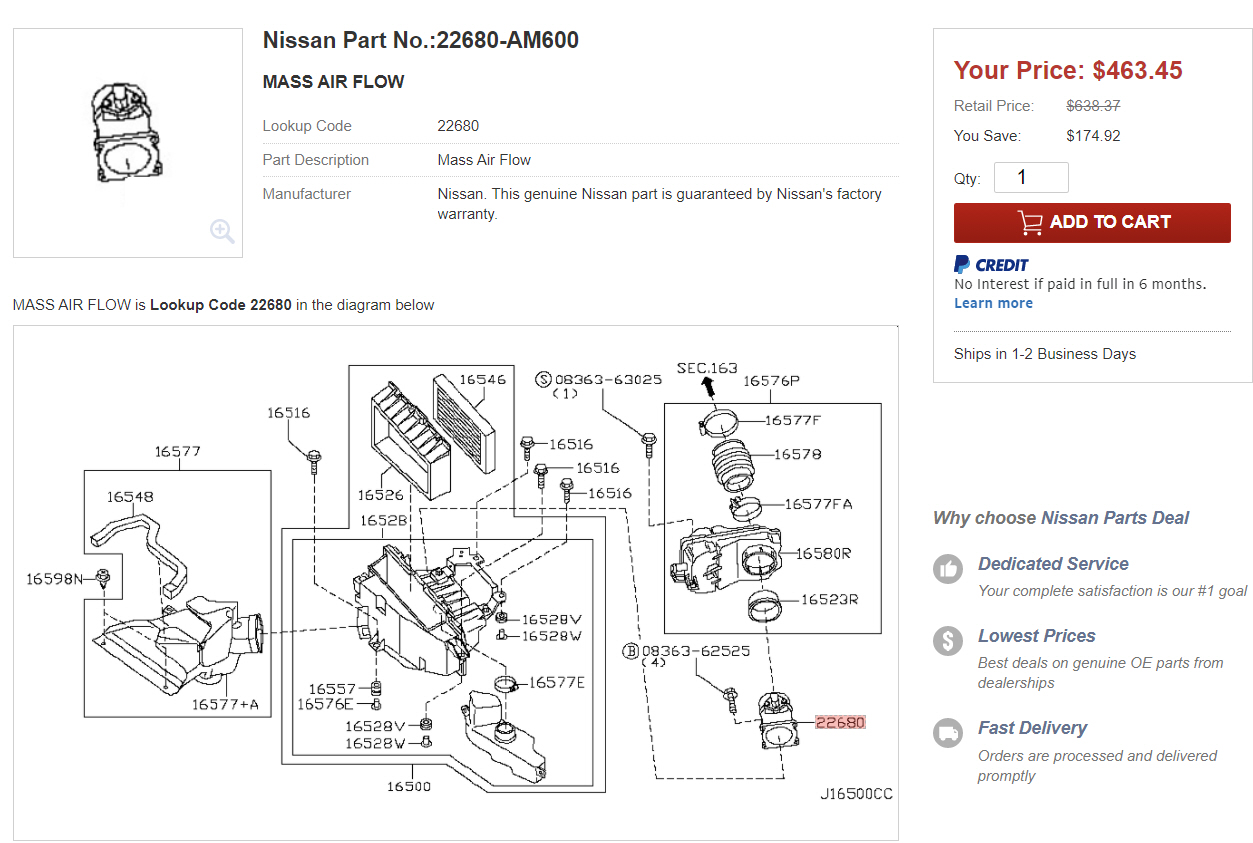
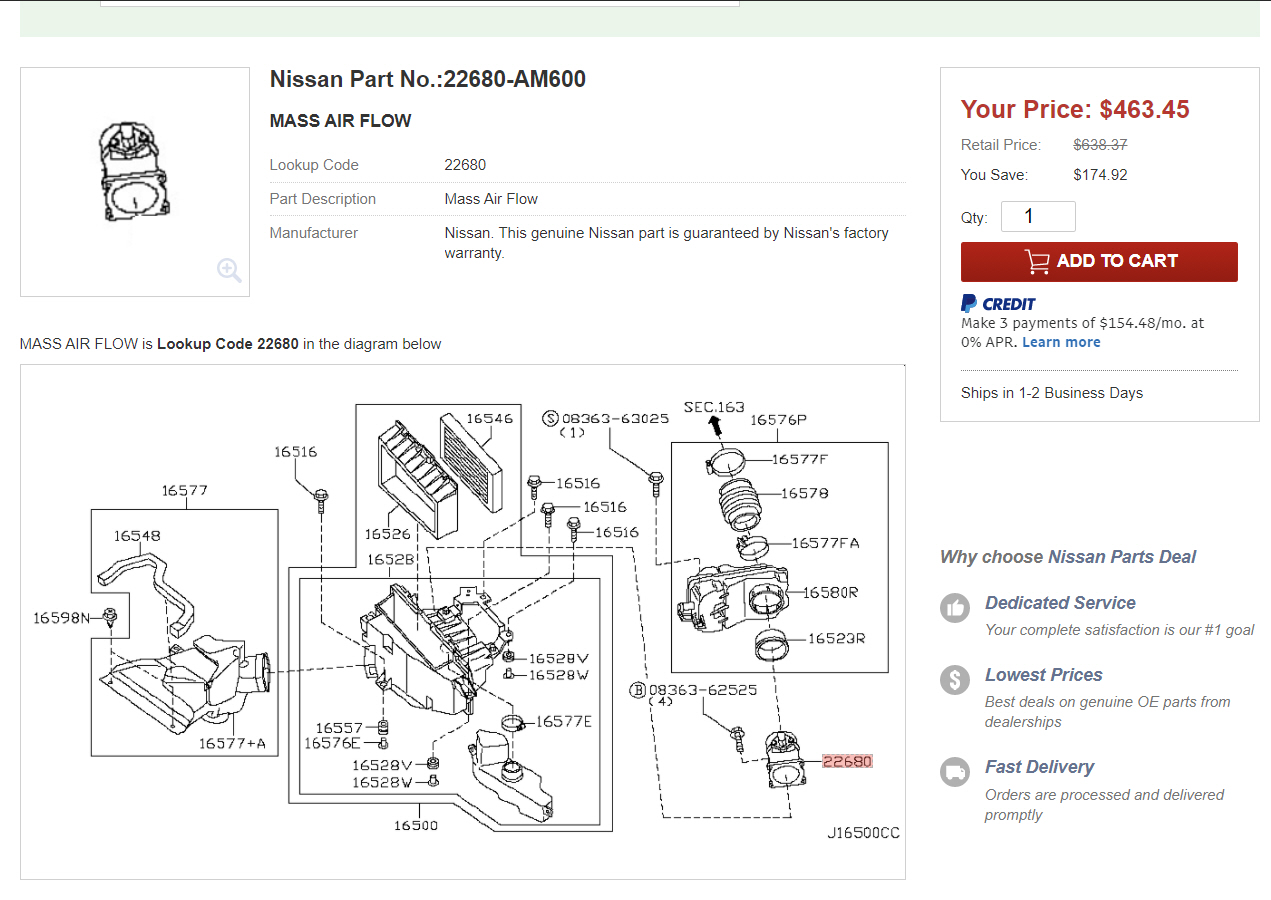
Wanted to make this reference post for folks that have MAF (Mass Airflow) issues and want to get an cost effective OEM replacement. I have to give credit to TallTom who gave me the idea to try this out. There are various aftermarket options out there but are known to have issues. OEM is the best replacement brand for MAF sensors. The main problem with buying from Nissan is the OEM (Part # 22680-AM600) heft price which is usually around $400 bucks (yeap insane).

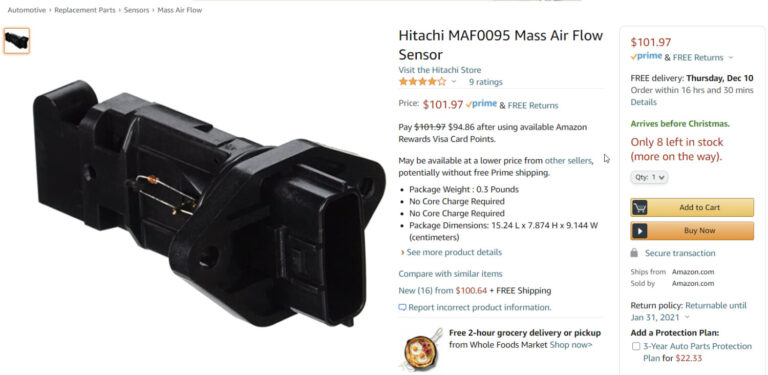
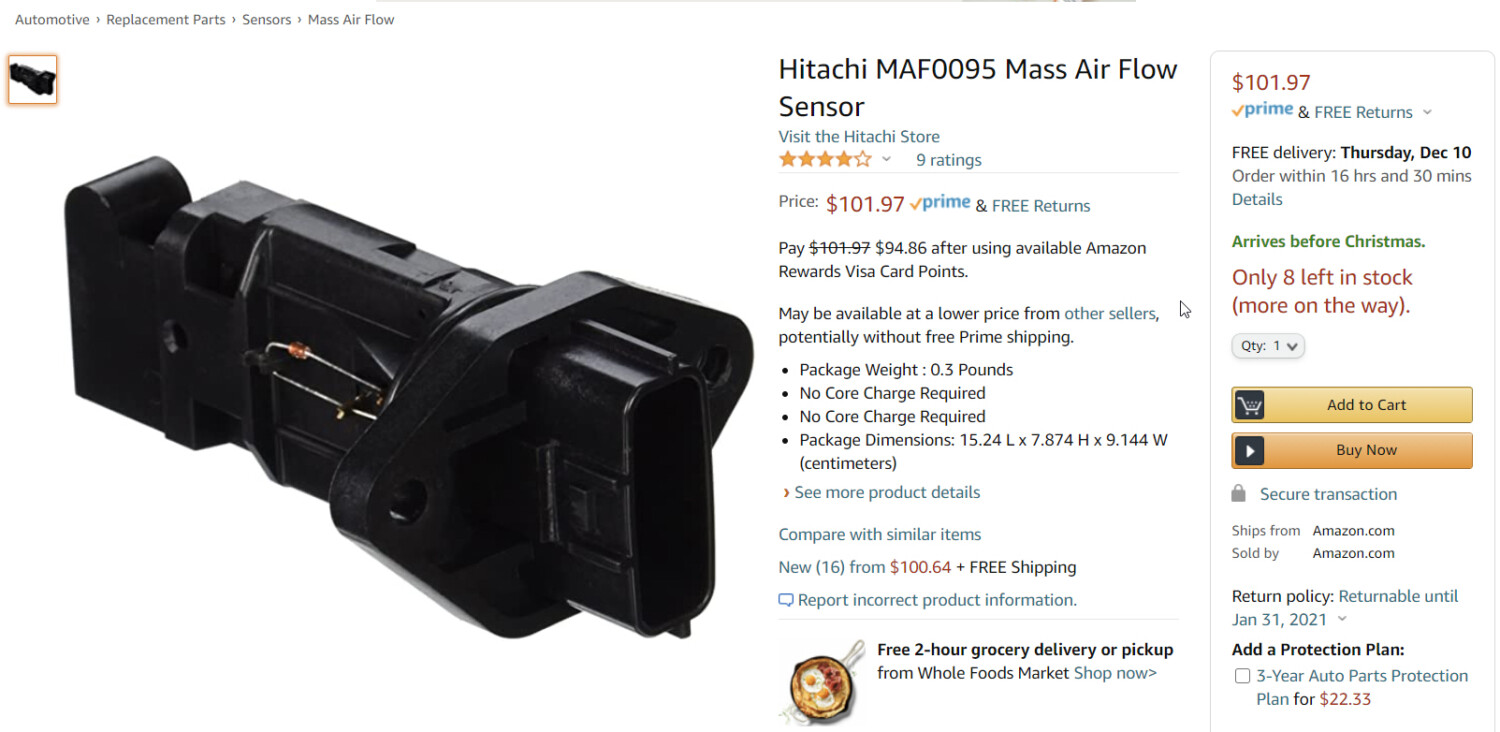
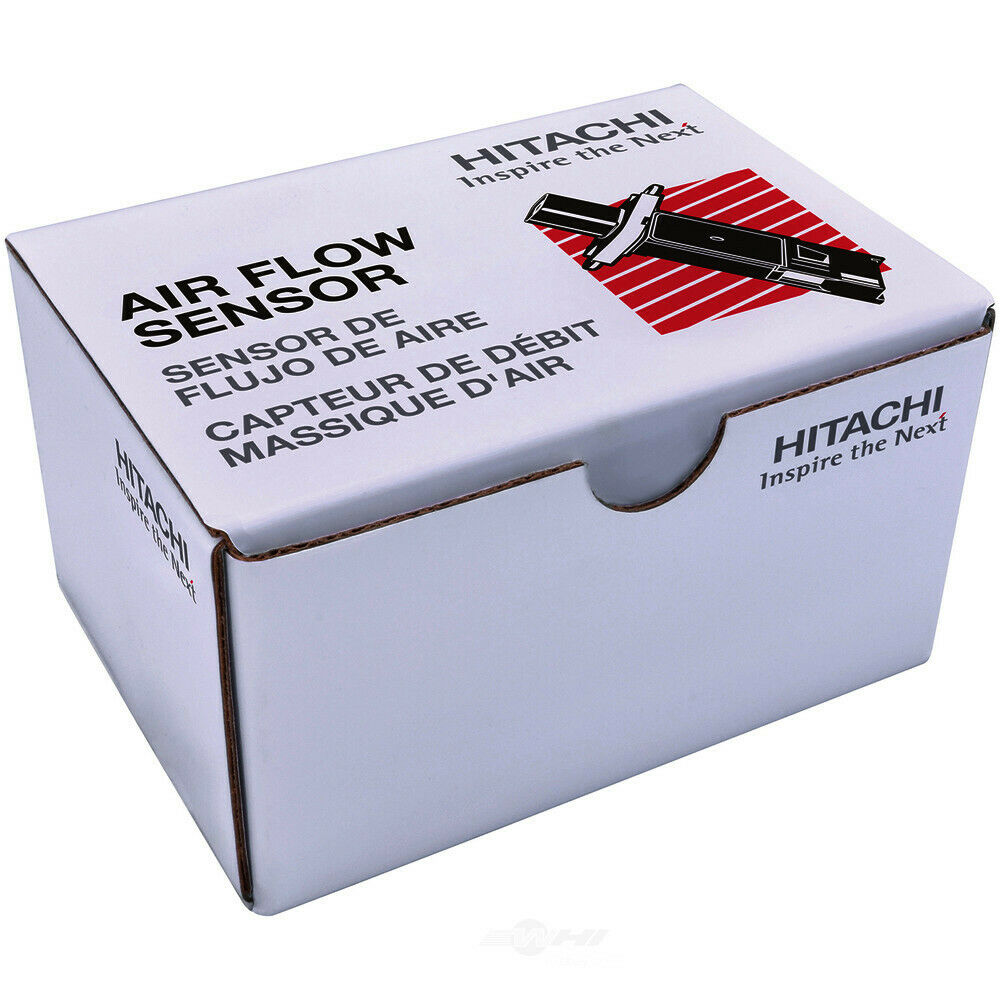
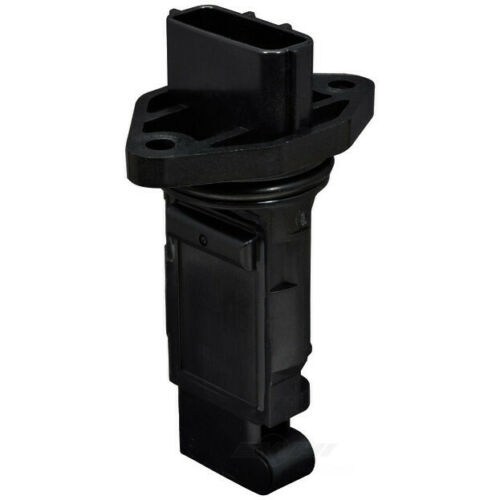
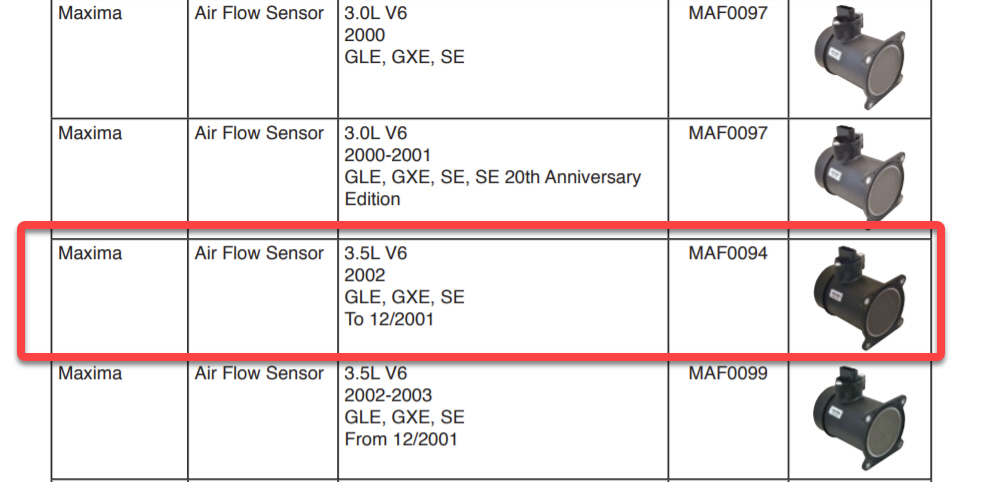
The good news is that you can buy an OEM brand for your 2002-2003 Maxima without the crazy price. Hitachi is the OEM supplier for many Nissan Parts. The part number you need is MAF0095. There is another listed as MAF0099 but its much higher in price so make sure to order the MAF0095. We’ve tried this on our own 2002 Nissan Maxima and it worked perfect with no issues. You will notice that it says “for Pathfinder” but this will work fine on your 2002-2003 Maxima.

Update 12/16/2020: Ordered this for my 5.5 Nissan Maxima. Works perfect and just as it would from the factory. 

Alternative Options

Another common option that I’ve noticed is that people  buy a 2k1 MAF which is cheaper and then do the thermistor/IAT swap. The 2k1 MAF is around $80 bucks and require the swap as mentioned. With the above you don’t need to do anything as it is direct plug-n-play. However, if you still want to save a few bucks can check the 2k1 conversion to 2k2 MAF write-up here:

The most ideal option is to swap to the 04+ Nissan Maxima MAF which uses the newer style slot. This is recommended for those who are going to do performance build and will get tuned. You can read more details on it here. Just keep in mind that this option requires proper tuning for optimal use.

MAF0095 – Where to Buy?

Amazon ($109.97): Hitachi MAF0095 Mass Air Flow Sensor: Automotive Amazon.com: Hitachi MAF0095 Mass Air Flow Sensor: Automotive

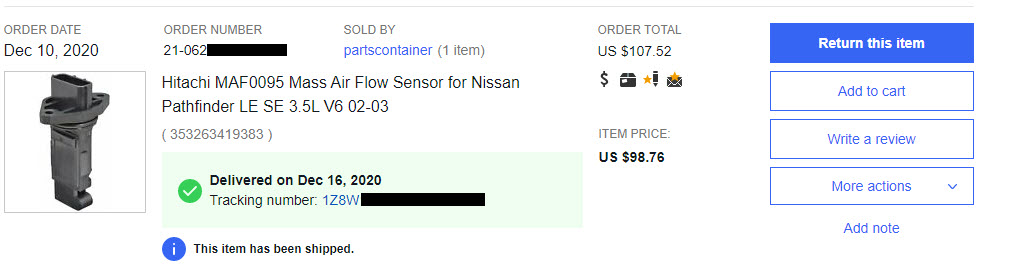
eBay ($98.76): https://www.ebay.com/itm/353263419383

From Hitachi Catalog

OEM Reference Price

Loading

Community Member Credit: Thrillho

In case you’ve disrupted your throttle body and need to perform the Idle Air Volume Relearn, you’ve probably noticed that it doesn’t “stick” , meaning it worked fine for the time being and then it didn’t.

I am using the Nissan Data Scan app with an ELM obdii Bluetooth adapter, the car’s 2000 Maxima GLE.

In order to make the Idle Air Volume Relearn stick using any of those apps and Bluetooth adapters, you can’t wipe any pending codes before/after Relearn is performed; for some reason when you use a third party app instead of Nissan Consult, it’ll write the changes onto the same partition as the error codes. What that means is you’re gonna write the IAVR over any pending existing codes in order to make it stay.
1. Don’t wipe any codes or clear the SES light
2. Perform idle air volume relearn

It’ll stay on your ECU as long as there is a pending code or the SES light is on. Once you clear the code and the SES light, your idle air relearn goes away as well. If you clear your codes and then do the relearn, your relearn will get overwritten once the code comes back. If you do the relearn with a pending code, it’ll stay there along with the code.

Loading

Community Member Credit: greghome

At one point on the Maxima message boards in late 1999 there was a lot of talk about increasing airflow through the Maxima intake by removing the screen from the Mass Airflow (MAF) Sensor. The screen is not a secondary filter as one might suspect. Its purpose is to “straighten” airflow going into the throttle body. The theory is that removing the screen will allow increased airflow and thus, more horsepower. Being a logically thinking person, the science behind the theory sounded good to me, and I am willing to give anything a try that sounds reasonable so…. I removed the screen from the MAF sensor (this process is irreversible!!) and ran with this mod for almost a full year. While I did not notice any harmful effects from removing the screen, I can say for certain that this mod does not increase horsepower in the slightest, and might possibly even screw up the MAF readings. Read on.

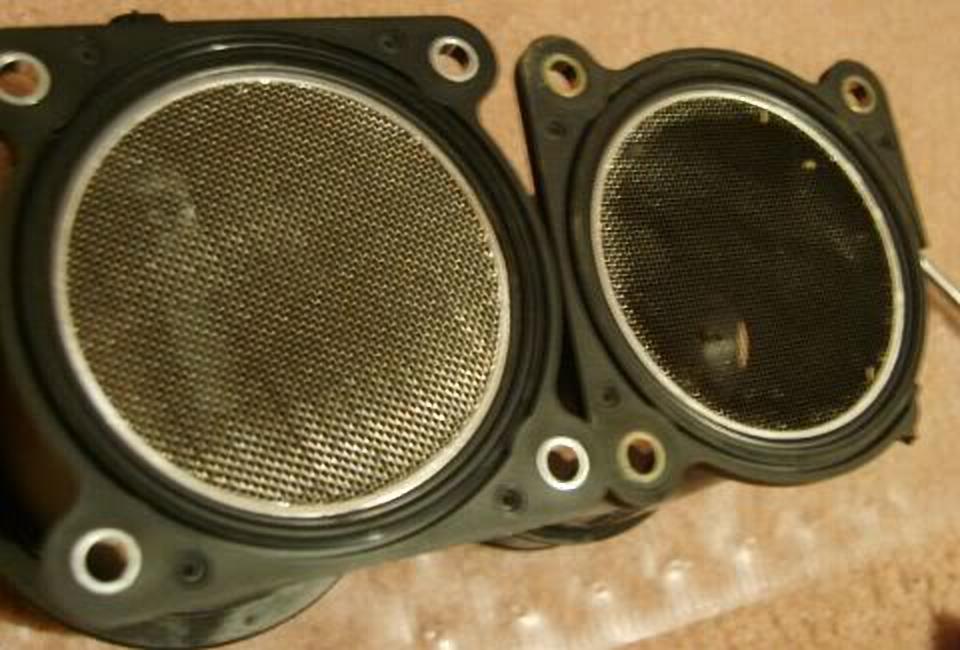
For comparison purposes, here are two Mass Airflow Sensors from a 4th-Generation Maxima. The one on the right has had the screen removed for (presumably) higher airflow. The one on the left has the screen intact.

The way the MAF sensor works is that it measures the airflow through a very small opening in the center of the sensor and sends a variable voltage out its electrical connector to the ECU. The ECU is programmed with the diameter of the sensor and computes the total airflow into the throttle body based on the flow through the center section. The reason for the screen is to ensure that the airflow going into the center portion of the sensor is straight and smooth so that the ECU’s computation will be accurate. If the flow is not smooth then the ECU computation of total flow through the barrel will be off. In my opinion, removing the screen will quite possibly allow a more turbulent airflow through the MAF sensor than without the screen.

In spite of my theories as to why the screen is there and what (I believe) could happen if it is removed, I still noticed no detrimental effects from removing the screen. However, since there was also no tangible benefit from this mod I chose to re-purchase a new MAF sensor and re-install it with the screen in place.

Loading

Community Member Credit: Nick
What a relief, after weeks of dealing with stalling max, she purrs like a kitten again. The fix took 10 min, by simply running extra grounding wire from MAF to the chassis. All stalling when coming to stop , shaking at idle, stalling in reverse and running rich is now gone !!!
If you experience stalling issues (with no CEL) and have tried all the basic troubleshooting like: clean TB, IACV, ECTS, plugs, filters, coils etc and nothing seemed to help, you need to check your MAF sensor ground.

Simply back probe the black wire on MAF connector with positive lead of the voltmeter and negative lead pressed to one of the ground connections on the engine block.

The voltage at idle should be less than 9mv (0.009v), if it is above the value the sensor should be re-grounded.

Once the sensor is re-grounded , the voltage should drop significantly. Mine was around 0.277 at idle and 0.187 with ignition on ( engine not running). After the fix, the voltage dropped to 0.005 at idle and 0.002 with ignition ON.

I’m glad that i was able to fix without having to take the car the mechanic/dealer.
I would still like to know what has caused my MAF sensor ground go out of specs, The sensor itself has passed the output voltage test listed in Haynes manual.

Also the manual says that the MAF can develop voltage signal problems that can’t be seen on the voltmeter, the PCM can see such signal faults and drive-ability problems will result.

In cliff notes, if you Max stalls when coming to stop, check the ground to MAF it should be less than 0.009mv

Nick.

Loading

Community Member Credit: maxirob

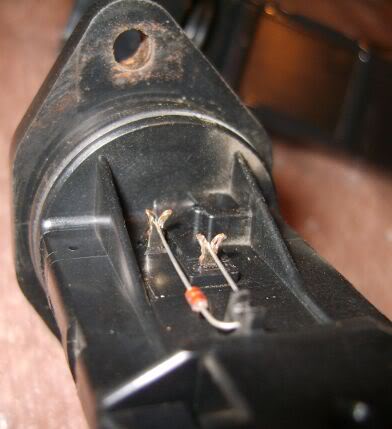
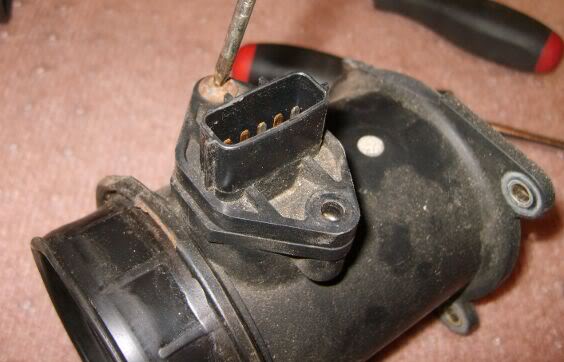
About 5 months ago just before I tore the intake down to replace the very leaky right bank rocker cover gasket she started stalling when idling, then bucking at higher rpm’s. Progressively becoming more frequent and then finally…got P0100 MAF code. After suspecting a poor ground, broken connection in the wiring harness and having a P0130 (right bank o2 sensor-firewall side) popping up during this ordeal and reading tons of post about this on this site and others I finally found the definitive cause. On the MAF the 3 pin connector is soldered internally directly to pins coming off the circuit board-creating an electrical as well as a mechanical connection. Not a good design!

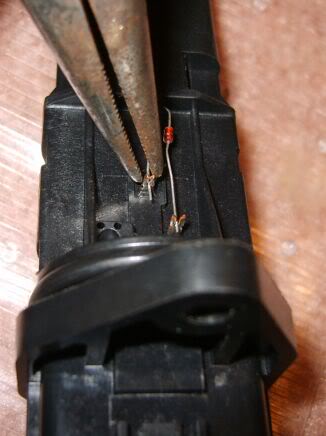
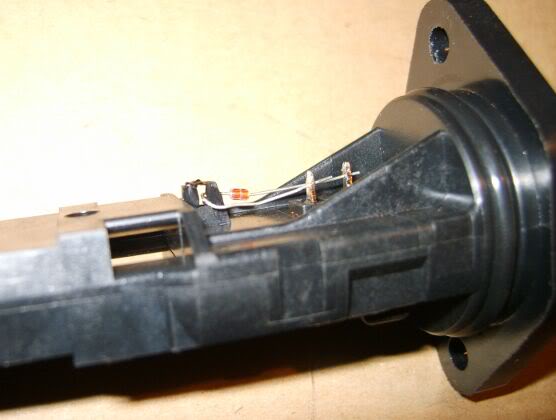
When I took the MAF apart the pins looked connected but were cold solder connections at this point. I modified the connections with short wire leads re-soldered and flipping the harness connector around – the engine is back to running rock solid! I suspect this is THE reason most 4 gen max’s and I30’s are exhibiting these symptoms and many have paid hundreds and/or thousands having mechanics chase down the cause. Hope this helps others.

i had to resolder these cicled points and it solved my issue but make sure U RESEAL THE MAF i did not and condensation got in and it made the car feel like i was misfiring i had another maf laying around put it in and solved that issue also could have saved the trouble by RESEALING THE MAF with some silicon hope this pic helps

One more thing I discovered relatiing to resealing the cover back with silicone so its air tight. I noticed that after I removed the MAF assembly from the car I could press on the circuit board cover and hear air whistling in/out of the plenum. I discovered there is a tiny vent hole above and just off center on the TB side of the sensor vane going into the circuit board area, so I figured the circuit board enclosure HAD to be sealed or air could leak in and throw the sensor reading off. I even put a thin bead of silicone around the harness connector when I flipped it and screwed it back in. I could see that if there was a crack or air leak around the connector and/or cover, extra air could leak into the throttle chamber a wreak havoc on the sensors accuracy to the ECU.

Additional Info via komik

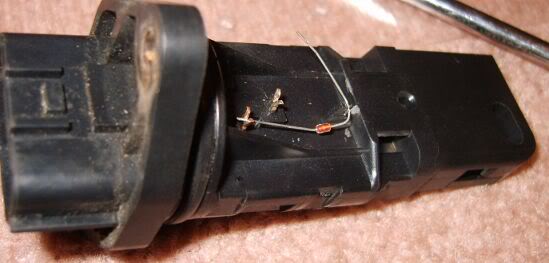
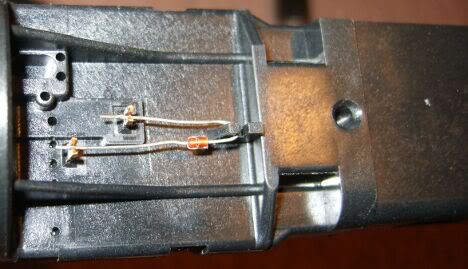
After reading this thread I decided to give it a try. I currently have a CEL for P0100 with only a few incidents of “bucking” prior to the CEL appearing. I went to the junkyard yesterday and picked up 1 complete and 2 partial MAF’s ($40 for all three). I installed the complete one on the car last night. The light is still on but I only drove to work and back. Tonight I opened up the MAF I pulled off my car and added some redundant jumper wires in the hopes they will literally “bridge the gap” wherever any broken solder joints may exist. I resealed the top with black RTV and will let that dry overnight before I reinstall it on the car. *fingers crossed* Later I plan to take the plug off the one with the broken case and attach it to the one with the complete case and missing plug to have as a spare in case my new, but far from expert, solder joints fail.

Stock

Jumper Wires Added

MAF Collection

Loading

Member Credit: ridinwitha35

I did a MAF swap today & the results were so drastic I was feeling nice & decided to do a little write-up of the swap. Flooring it knocks me in at least 6k rpms with no hesitation (only floored it twice though); I used to floor it & get 5k rpms with good pull and then at other times it was if there was a brick wall at 3.5k rpms & it would slowly accelerate from there. Many have done it & this isn’t anything new to the regulars, but for noobs out there like me who like seeing stuff step by step, here it goes…

I’m sure the elite can do this without taking everything apart like I show, but that’s just what I did. Whole process takes less than 15 minutes.

If you don’t know what this is about, this is a procedure for 5.5 gen Maximas [2002,2003] & I35s [NOT I30s] where you buy a basic version of the MAF and swap over a part from your old MAF to that new MAF, essentially making it a complete MAF as far as the ECU is concerned. This “basic version” does not contain a thermistor, which is a temperature-controlled resistor, known to the ECU as the IAT, or Intake Air Temperature sensor. The thermistor/IAT converts the air temperature into an electronic signal the ECU understands. This “basic version” is what is used on regular 5th gens & I30s without modification. A “complete version” can be purchased, but at the moment, there’s a $300+ price difference, making it more economical to buy a “basic version”, and swap the thermistor from your old MAF to it, turning it into a “complete version”. This basic procedure details how to remove the old MAF & swap the thermistor over, but it has pics.

Comparison:

  • 2000-2001 MAF: 22680-2Y001 (Price: 75.00)
  • 2002-2003 MAF: 22680-AM600 (Price: $450.00)

Parts:

  • MAF: 22680-2Y001 (2K1) replacing my 22680-AM600 (2K2) MAF
  • All bolts are 10mm/phillips-screw combos…I used sockets cause some of ’em were rusty
  • Collars are flatheads
  • MAF sensor is secured with T15 torx screws

New maf includes the sensor & housing:

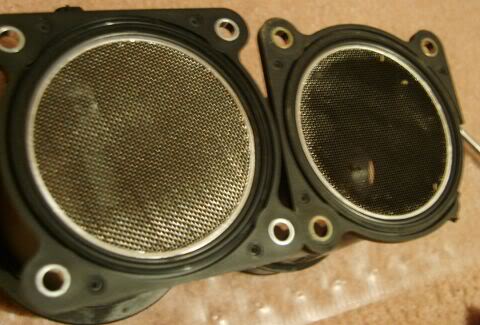
Good thing it includes the housing…screens side by side (new & old):

Steps:

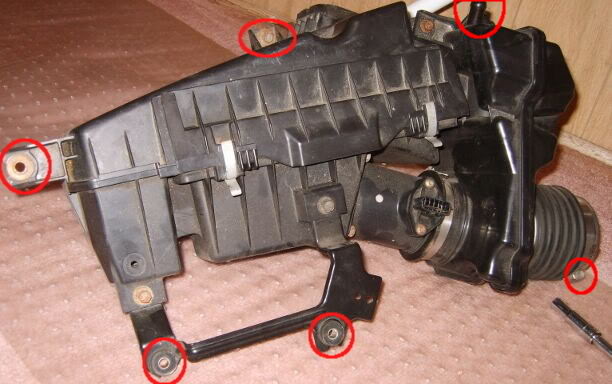
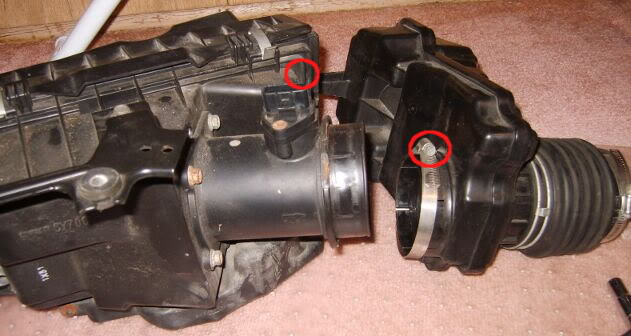
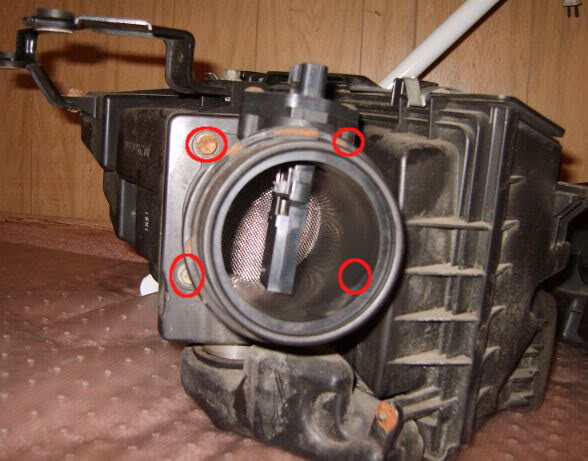
Unclip the MAF connector; remove air box/maf housing/intake tube by removing these bolts & loosening the collar’s flathead. ALSO don’t forget to take off the hose that connects from the intake to the front valve cover (I think)—the spiggot on the intake is the upper-most red circle. Then remove the whole thing from the car:

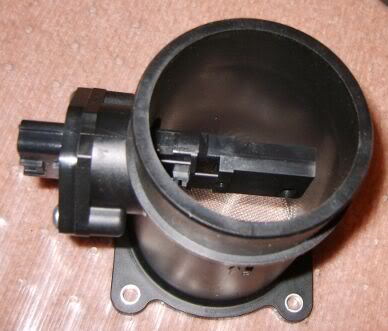
The maf sensor once removed from the maf housing:

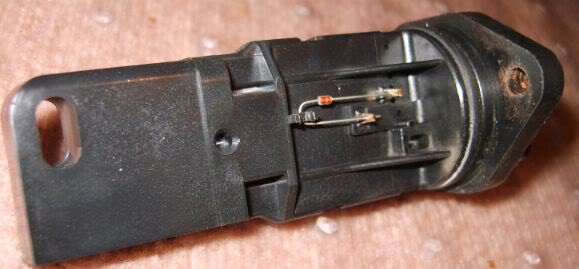
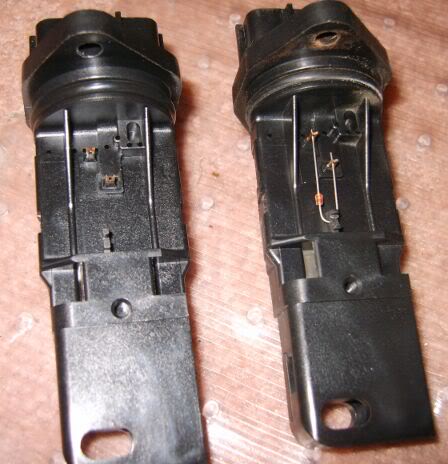
New (2k1) vs. old (2k2)

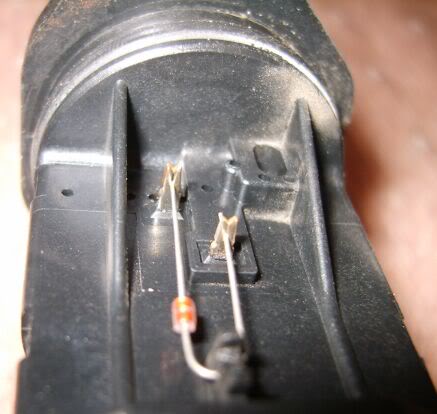
Electrical connection is via the metal clips squeezed around the leads of the thermistor

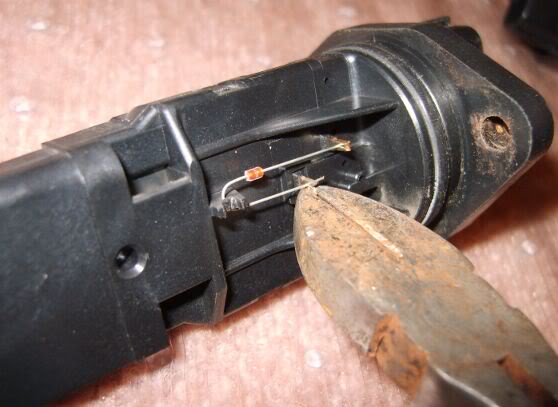
Separate clips using some side clippers…like you’re removing a cotter pin.

Clips separated; also cut the plastic at the base (at the curved part)..be careful not to cut the leads!

Remove the bolt & loosen the collar with a flathead to separate maf housing from intake tube:

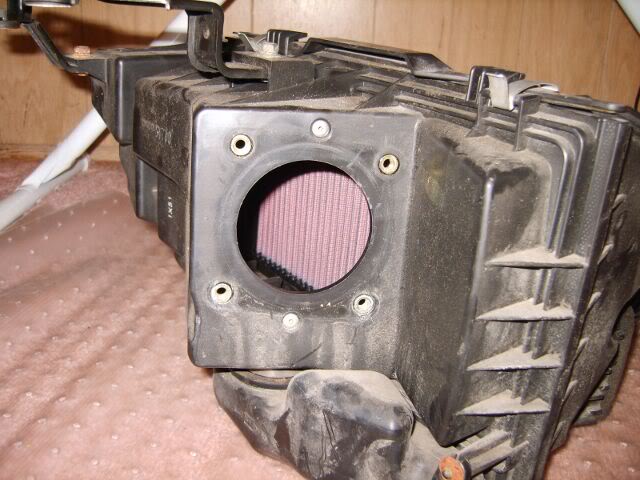
Remove these bolts to separate maf housing from air box:

View after maf housing removed (can see the filter):

Remove the 2 torx screws, turn the connector a quarter-turn, and wiggle/pull the sensor out:

Note: might be best to handle the themistor with small pliers…I just used my hands & you can see I bent the leads – straight wires mean jack in terms of electrical conductivity…

Thermistor free…removing:

Thermistor in place on the 2k1 maf:

Squeeze the clips together once in place on the 2k1 maf:

Use something to hold the top of the thermistor in. Whatever you use, make sure you give it enough time to set, otherwise you’ll hear a rattle on throttle (like I did with super glue gel…)

Put everything back together now…but don’t forget to transfer the rubber gasket from your old maf housing to the new housing:

…looks like the maf that was on my car may have been from a junkyard…

There you have it. Start the car up. I did an ECU reset so it could get used to the more accurate airflow measurements. Go ahead and enjoy your new car…..

OEM Comparison

Loading