Tag

Engine, Trans, F/I & Tuning

Browsing

Community Member Credit: CS_AR

In viewing several internet postings and videos that show how to remove a VQ30DE Timing Cover (TC). Unfortunately only a few explain the two bolts inside the oil pan area that are required for TC removal. Next week when I remove another TC on the 99 Max, I will start with removing by removing the bolts inside the oil pan.

The first picture shows how the engine looks with the timing cover removed and the inside area where the two bolts connect with the cover with the two yellow arrows.

This picture shows the bolts from looking inside the oil pan area from below the engine. I removed one bolt (left) before I snapped the picture.

This picture shows the bolts from looking inside the oil pan area from below the engine. I removed one bolt (left) before I snapped the picture.

I hope this helps another VQ30DE owner in the future. If you need to remove the timing chains to remove the rear timing cover, remember to position it at Top Dead Center before you start.

The Half Moon gasket appears to be “glued” to the TC with a brown RTV looking material that is different from the gray RTC used to seal other engine components. It appears Half Moon gasket is so well bonded with the timing cover in the picture that will need to be separated with a scraper.

When you get the TC off, it is a good practice to get everything lined up on top dead center (TDC) with the gold link, the crankshaft mark, and the dowel marks. The first time I took the TC off of Max III’s first engine, I found the camshaft chain color links were opposite for each cam. It doesn’t really make a difference if you find your camshaft chains links like the picture.

The FSM goes into detail about TDC alignment.

The main point is to get everything lined up on TDC before you start working with the guides or water pump. If something goes wrong and the chain jumps a notch, you know how everything should be lined up. I like to use my own markings once I’ve found TDC so it is easier to recover if the chain jumps a notch.

My first big car project was to replace the timing chain guides on a VH45DE. That was a great experience.

One thing I learned on that project was to zip tie the chains to keep them from slipping when replacing the guides. If you think you might have some chain slack while working with the tensioner, guides, or water pump, you use a big zip tie or some mechanics wire to pull out the slack so the chain won’t jump.

Additional Reference Photos


Loading

Community Member Credit: Ferhan Syed

My own solution for the 00VI + Pathfinder throttle body + 4th IACV. The reason for this is was to have a straight TB and no idle issues when running the 00VI. I decided to go close to OEM as possible by using a bad MAF and some custom flanges to make one adapter to cover everything needed. Just finished. Prepped, primed, sanded and painted. I could have made a few minor changes but realized a little too late.

Loading

Community Member Credit: uptownsamcv

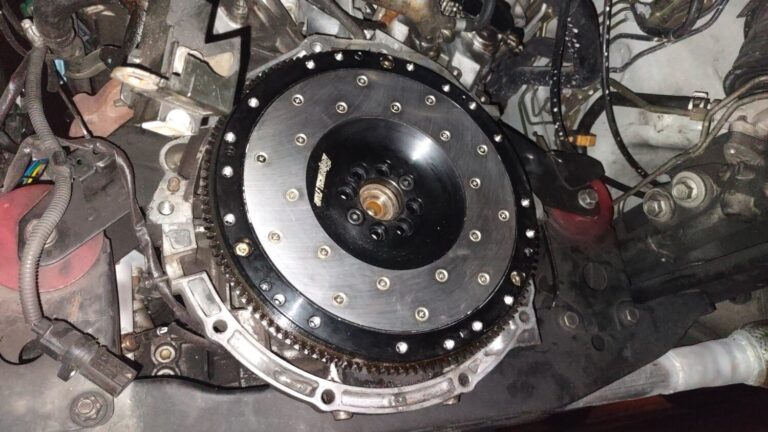
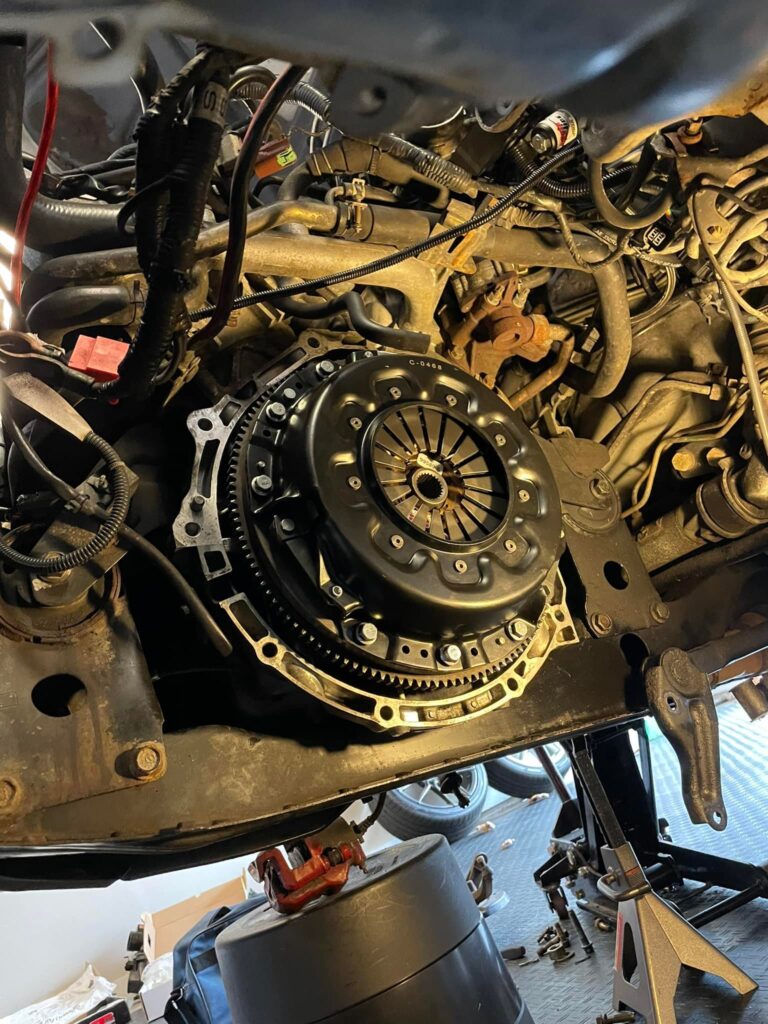
Recently I installed a SE-R spec V H-LSD along with a JWT flywheel and decided to try the M-Pact clutch components they sell on www.rockauto.com. The latest year Z that they list separate pressure plate and disc for is 2006, which should be good enough for bolt-ons and ECU reflash for 02 Maxima.

The pressure plate part number is M-PACT 98630 which is also their pressure plate listed for 02-06 Maxima. The disc part number is M-Pact 99688D which is their general sprung organic disc for many other Nissans and G35. I went with a National throw-out bearing and pilot bearing this time.

After putting 500 miles of city driving for break-in I finally started getting on it yesterday and it has a lot more bite than the outgoing basic Exedy kit I was running.

I also replaced the flywheel bolts with Allen head bolts with orange Loctite, I hate Torx bolts. Only Fastenal had the Allen head bolts that matched up. JWT instructions called for Loctite red but I don’t think it’s a good idea to use it on a crank. The flywheel will need to come off eventually, mainly when I do the 2nd gen swap.

All the clutch components together ended up costing me $168.97 which isn’t bad, now it’s just a matter of how good it holds up. My lust clutch kit was actually a LUK that came packaged with a LUK dual mass flywheel, not Exedy as I mentioned above. When I first got my car in December of 2012 the throw-out bearing went bad a month later and I had installed an Exedy kit.

  • M-pact pressure plate #98630 $82.79
  • M-Pact friction disc #99688D $60.79
  • National release bearing #614049 $23.79
  • national pilot bushing #PB22 $1.60

I only paid $300 for the 04 Sentra SE-R Spec V donor tranny that I took the Helical LSD out of. it fit right in since it’s the same LSD that comes in some of the 6 speed Maxima’s, I just had to put Maxima’s ring gear on it. I would have swapped the whole gear set as I saw in some write-ups but my tranny doesn’t grind any gears so I kept the stock gears.

Loading

Credit: NISformance

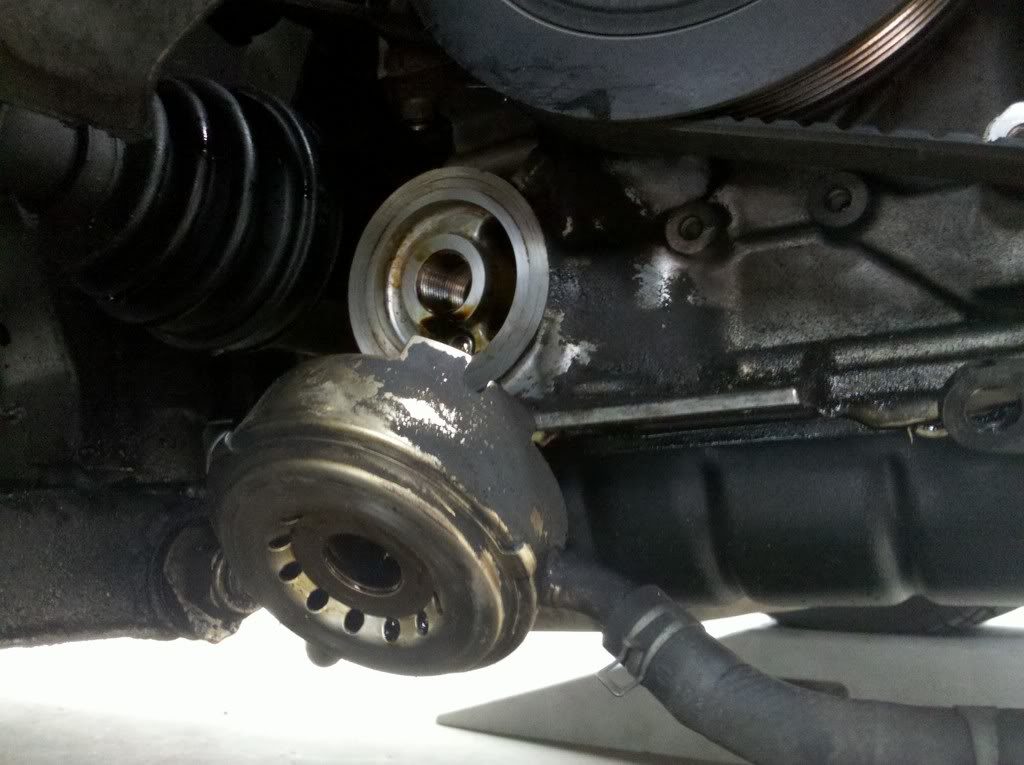
This kit is designed to replace the factory oil cooler/warmer. Factory setup warms the engine oil and maintains it at coolant temperature. However, this often leaks or cannot be reused due to damage or contamination.

When using this delete kit vehicles must be driven carefully upon cold startup, no high rpm driving until oil temperature warms up *

Includes:

  • Block plug
  • Oil filter stud
  • Thermostat (without coolant hose fitting)
  • Gasket

Installation:

The block plug replaces the metal line running from block to the factory oil warmer plate

Oil filter stud is used for attaching oil filter to engine block once the oil warmer plate has been removed

Welded coolant block replaces factory coolant block as well as the rubber hose

Loading

Owner: Carlos Marinaka guapoman2000

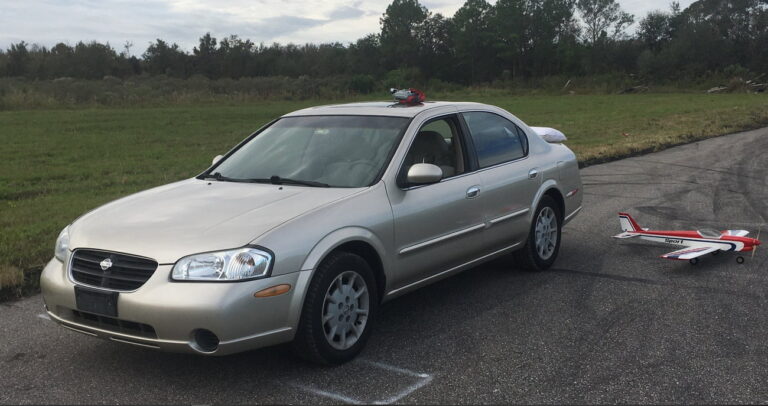
Year: 2000
Model: Maxima
Color: Tan
Engine: VQ30DE
Transmission: 4-Speed Automatic
Trim: GLE

Notes:

  • Okay good people! Finally got my 2000 Nissan Maxima GLE back from the Pro Mechanic Shop (Ruben’s Tire, Altamonte Springs, Florida) and it has been there since September 26, 2022 and until today November 8th, 2022. Yes, 43 days but, to replace an Engine with a newer one you need lots of patience as this is a 22-year old car!
  • As you proceed in removing and placing parts here and there you realize that the “PROJECT” is better off with new parts instead of reusing the old in some circumstances and this is why it took the amount of time. Also, I insisted in Genuine Nissan Parts such as the new Thermostat, Water pump and Rear Main Seals and many other small and large gaskets.
  • The Maxima with this newer Engine (Certified to have only 130,000 miles) is performing spectacular! I can already see an improvement in Gas mileage and acceleration is exhilarating! I like to thank all at Ruben’s Tire at Altamonte Springs, Florida for having patience with me and taking great care of my car during Hurricane Ian.
  • The hard planning and work acquiring new parts paid off as it rides smooth without any rattles or vibrations! One BIG reason I decided to keep it and replace this Engine is because two years ago new suspension parts were installed such as the Front and Rear Struts, Lower Control Arms with Bushings and lateral links. New brakes all around and many more items.
  • The original Engine suffered a front main seal Blow-Out and most of the Oil left along with the Oil Pressure sending unit announcing low Oil Pressure and most recent about three months ago the Engine’s Thermostat stuck CLOSED and over-heated the Engine.
  • The original estimate was for $2,000 US for Removing the Damaged Engine and Installing a newer one from JDM Motors. I found the newer Engine from JDM Engines (Auto & Truck LLC) located in Orlando, Florida. This is mostly imported Engines from Japan (Used).However, due to my own directions about installing:
    1. New Half Moon Seals at the upper Oil Pan / Cavity.
    2. New Rear Main Seal assembly. (Genuine Nissan Part)
    3. New Water Pump. (Genuine Nissan Part)
    4. New Thermostat. (Genuine Nissan Part)
    5. New Oil Pan (lower) gasket.
    6. New Frontal Crank Seal.
    7. New Valve Cover Gaskets.
    8. Many more O-Ring Seals & Gaskets.
    9. New Radiator.
    10. Intake Manifold Gasket.


  • The grand total came to $2,635.85 which reflects a $250 discount as I played part in sourcing many parts myself and burned the gasoline to retrieve them from Auto Parts store using my Commercial Account. Oh, the certified Engine was $525 which is included in the grand total price.
  • I called around to at least three AAA certified Auto Repair shops (PRO) and two of them turned me down and the one quoted me a whopper of $5,650 large ones! You might say that for someone like me over 60-years old and no longer have my mechanic partner as he became blind, I did pretty good negotiating a super deal.
  • Again, I decided to keep the 2000 Maxima because it had previous maintenance such as complete suspension replacement up front and rear which consisted of Lower Control Arms, lateral links, Struts, Springs etc… etc…. Hope this helps.

Videos:

Loading

Community Member Credit: CS_AR/ KP11520 / The Wizard / EddyMaxx

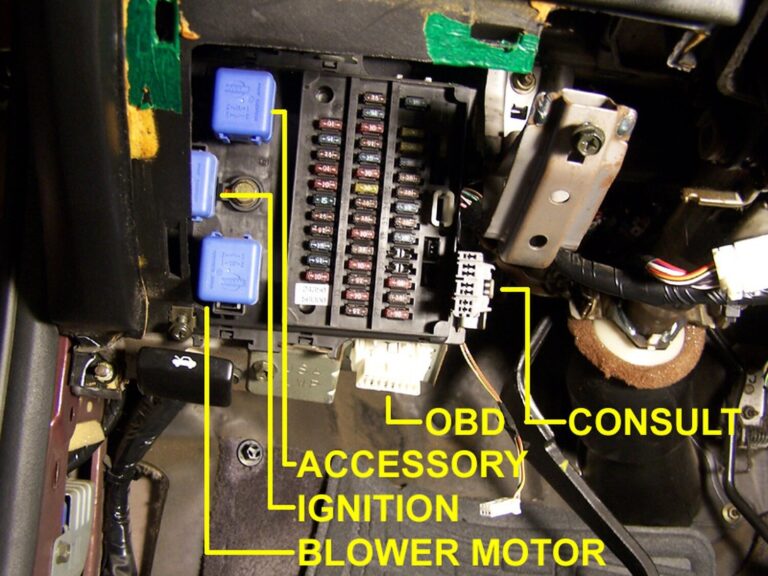
The 4thgen Nissan Maxima use two ports for diagnostics. There is a somewhat limited OBD2 port and a fully functional consult port. The consult port is behind the door where the fuses are located on the dash. The OBD2 port is below the dash.

White OB2 Port

  • Located underneath the steering wheel.
  • It gives some basic readings and lets you clear CEL codes.
  • The only reason this port is there is for State Inspection diagnostics (required by law in the US) and although
  • does offer some functionality, was never meant to be the port to diagnose and manage 4th Gen Maximas.
  • There are no advanced diagnostics or functionality using this method.

Grey CONSULT Port

  • The CONSULT port is where all the functionality resides.
  • The Consult port and communicate with the engine, transmission, ABS, and SRS modules, but not the BCM unfortunately.
  • Nissan DataScan I software works with the CONSULT port not the OBD2 port.
  • Port Reference:

Additional Info

  • If you want your “meat and potatoes” and to be able to communicate with the ABS and SRS, the Autel 619 plus the consult connector and cable may be your best bet.
  • With the new cable and connector, you can connect through the Consult port and communicate with the engine, transmission, ABS, and SRS modules, but not the BCM unfortunately.
  • So, for anyone reading this and planning on using the MD802 only on a 95-99 Maxima, an option to save some money is to go for the Autel 619 instead. It can communicate with the engine; and the ABS and SRS (no transmission) assuming you spend the extra $39 for the consult adapter connector and the male-to-male cable. The Autel AL619 is quite a bit cheaper than the MD802.
  • Make sure your terminals are the same as the 802 that I have. Meaning, they’ll both be 15 pins and the same shape, but your 619 could have a male fitting where 802 had a female.

Additional Reference Photos

Video Reference using ECUTalk


Loading