Credit: boredmder

![]()


")
")
Credit: davey6693
Just successfully overhauled my a/c – report (long)
I think I’m one of the few people that have done this, so I’ll post my findings here. In short, a/c repair IS possible if you do some research, take a little care with O-ring connections and buy a set of pressure gauges. I saved myself 600 dollars and I now have a set of gauges and a vacuum pump for any work on future cars. If you can rent a vacuum pump or get a garage to do the vacuum/recharge you can save more in the short term.
Here’s how I got my ice-cold air back
1. Bought a set of gauges and did some research at aircondition.com and ackits.com. These are excellent boards with a/c service professionals making daily contributions. The gauges I bought from the tool warehouse.
2. Found that my low side pressure was too high and my high side pressure was too low. Diagnosis: shot compressor. This was fairly easy because it was starting to make noise and get worse with time.
3. Unfortunately a dead compressor can spew metal parts around other components (black death). In my case I couldn’t just replace the compressor because that crud can cycle around to the new compressor and kill it very quickly. Our condensers are parallel flow condensers, so flushing often fails. I decided to replace it.
4. At this point I had a choice to make – get an a/c shop to vacuum and recharge my system or buy a vacuum pump. They can apparently be rented too but I couldn’t find any in my area. I figured why not pick one up, it’ll serve me well for years. Got some vacuum pump oil and a pump from the tool warehouse.
5. As an expansion valve is only 45 bucks, I picked up one of those too. O-rings are important to prevent leaks, and should be replaced whenever a system is opened up. My shopping list was now:
compressor, dryer, expansion valve (all from Carlisle Auto Air).
condenser, o-rings, compressor oil, nylog (an excellent o-ring conditioner that minimises leaks) and flush solvent (all from ackits.com).
6. The whole job took about 10 hours, but it’s pretty straightforward.
a) Add six ounces of oil to the compressor and 2.5 to the dryer (do the dryer bit right at the end).
b) Undo the drivebelt and bolt on the new compressor.
c) Drain coolant, remove radiator and install condenser.
d) Expansion valve was the trickiest – remove glove box (six screws), unbolt refrigerant lines near the firewall (two bolts), remove evaporator housing (four screws), open up evaporator case (six screws), remove old expansion valve (three bolts and a bit of tape). At this point I added flush solvent to the evaporator and blew some compressed air through it. Then I replaced the expansion valve.
d) Replace dryer last it’s good to keep it sealed until it’s needed so that the dessicant bag doesn’t get saturated with moisture).
7. When each pipe between components was unhooked at both ends, I poured in some flush solvent and blew compressed air through to clean them out. One of the tubes is long and most of the others are pretty short so it wasn’t much of a big deal. O-rings were replaced and covered in a thin layer of nylog as I went along.
8. Vacuumed system down for an hour, added a bit of refrigerant and watched the pressure gauges for 20 minutes. No leaks, so continued to fill until almost two cans of 12 oz refrigerant (1.4 lbs) had been added. Air was cold, job done!
This probably looks long, and in some ways it is. But some of you guys do much more complicated stuff than this. One thing I don’t like is being told by mechanics to never touch my a/c because it’s “complicated” or “beyond the DIYer”. The truth is it’s a pump, valve, two heat exchangers and a dryer, and no-one should be scared about doing work on it. I would say if you’re serious about it, buy a set of gauges for 60 bucks. If you don’t want to buy the gauges, then it’s probably not for you.
The old saying of “Do it right, do it once” definitely applies, but providing you do some research and don’t cut corners you’ll be fine and can save a lot of money.
![]()

Credit: h0ldem_8o8


Helpful Videos:
![]()

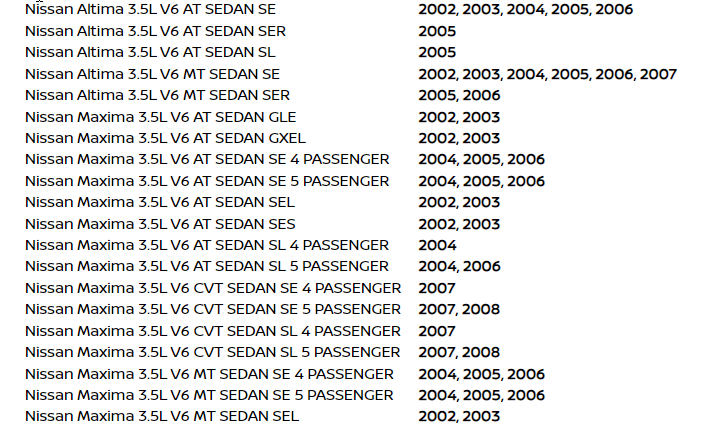
The mixture ratio feedback control system monitors the mixture ratio signal transmitted from air fuel ratio (A/F) sensor 1. This feedback signal is then sent to the Engine Control Module (ECM). The ECM controls the basic mixture ratio as close to the theoretical mixture ratio as possible. However, the basic mixture ratio is not necessarily controlled as originally designed. Both manufacturing differences (i.e., mass air flow sensor hot wire) and characteristic changes during operation (i.e., fuel injector clogging) directly affect mixture ratio.
Accordingly, the difference between the basic and theoretical mixture ratios is monitored in this system. This is then computed in terms of “injection pulse duration” to automatically compensate for the difference between the two ratios.
“Fuel trim” refers to the feedback compensation value compared against the basic injection duration. Fuel trim includes short term fuel trim and long term fuel trim.
“Short term fuel trim” is the short-term fuel compensation used to maintain the mixture ratio at its theoretical value. The signal from air fuel ratio (A/F) sensor 1 indicates whether the mixture ratio is RICH or LEAN compared to the theoretical value. The signal then triggers a reduction in fuel volume if the mixture ratio is rich, and an increase in fuel volume if it is lean.
“Long term fuel trim” is overall fuel compensation carried out long-term to compensate for continual deviation of the short term fuel trim from the central value. Such deviation will occur due to individual engine differences, wear over time and changes in the usage environment.
Instructions
![]()
")

Credit: Eddy
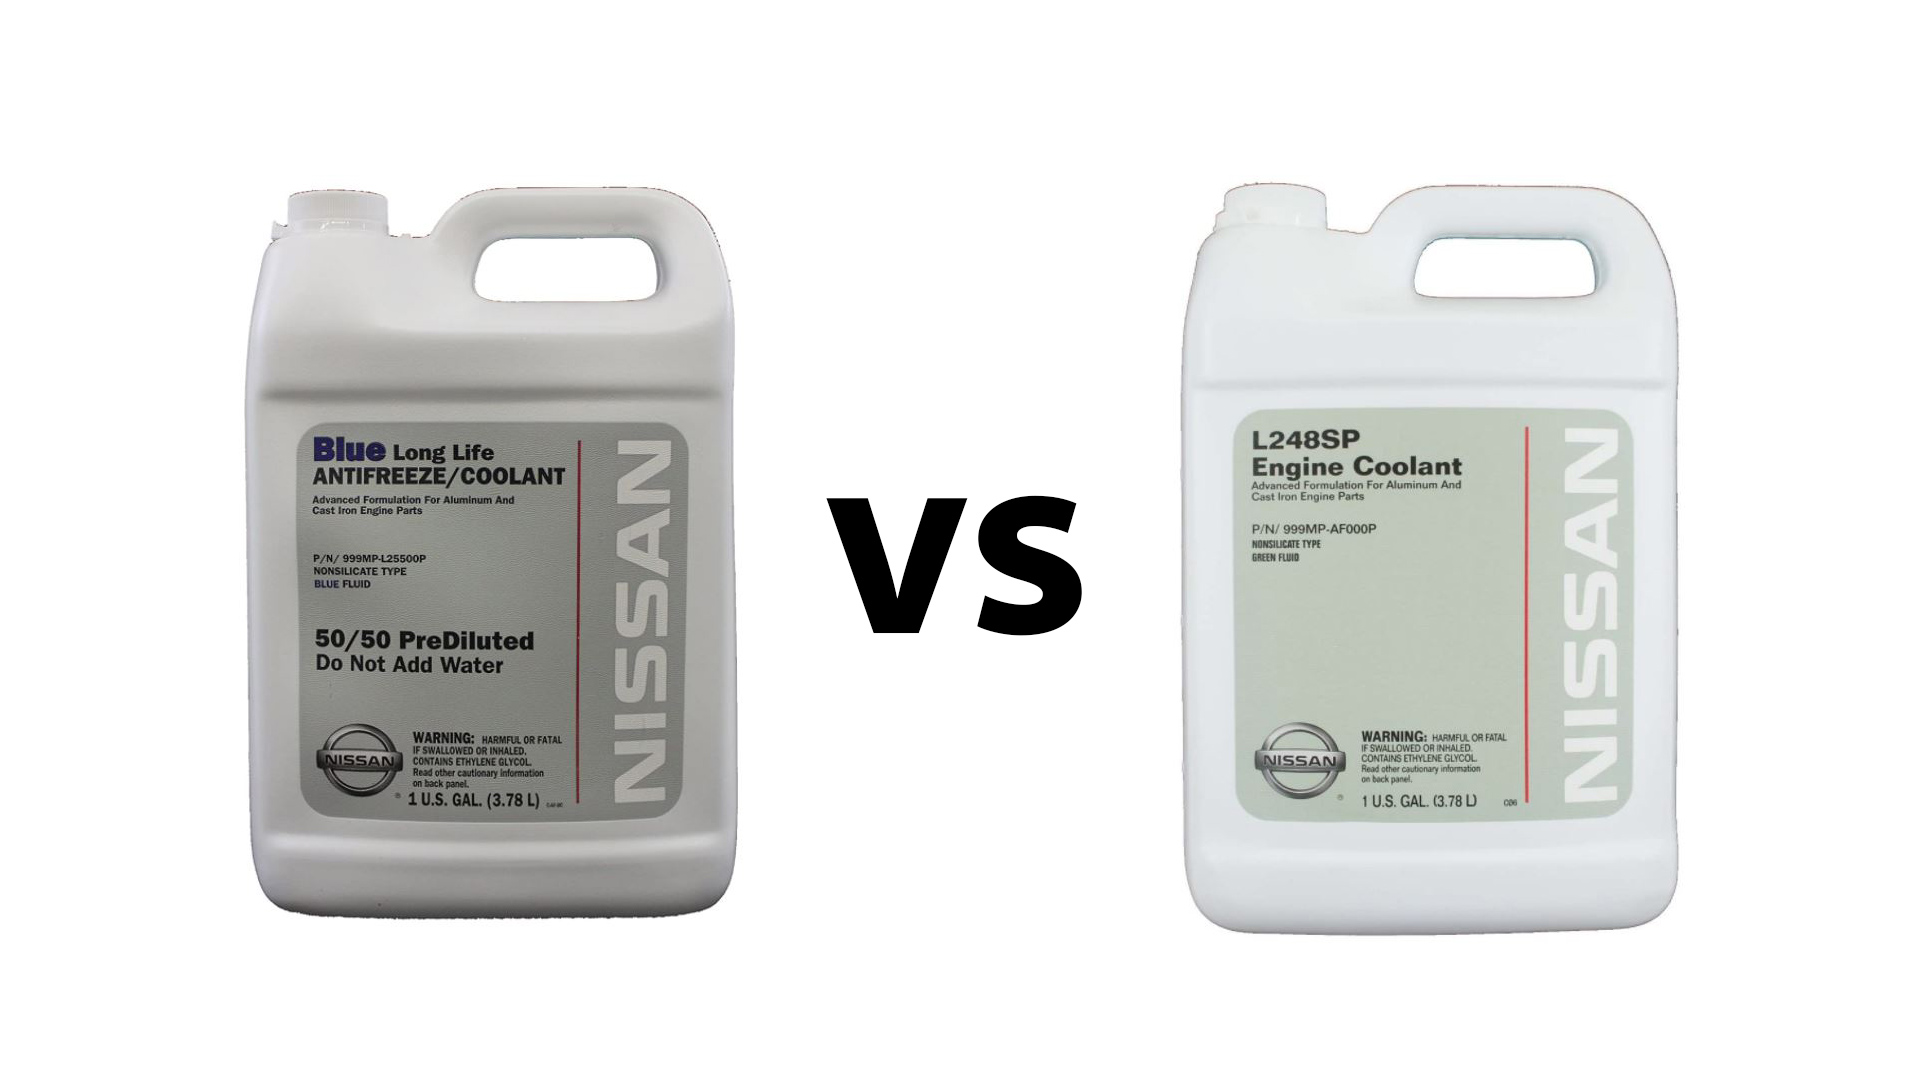
If you have recently swapped your Maxima with a newer 2016+ Engine, you will notice that it comes with BLUE OEM Nissan coolant. You can choose to keep it blue or switch back to green no matter which engine you have (Gen1/2/3). In this post, you will see the differences and honestly it’s up to you on when to change. The main difference is longevity of the coolant.
Both color coolants will work equally as well in your Nissan, so in terms of a performance benefit there really isn’t a difference at all. It won’t make your car cooler or less cooler. Green is less expensive and we would honestly recommend that. You also don’t need to use Nissan OEM. Aftermarket will work just fine and can be found significantly much cheaper (PRESTONE, SUPER TECH or PEAK).
When it comes to the time frame, Nissan Green Coolant has a shorter time span than the blue. Nissan recommends changing it every four years or every 60,000 miles.
Nissan’s Blue Coolant is built to last for a much longer time. This coolant should last at least 10 years or 135,000 miles; however, it is ideal to change the coolant after seven years of use or 105,000 miles. Future coolant changes with Nissan Blue should be every 5 years or 120,000 km (75,000 miles).
![]()

Credit: DBear
This is my description of the “slop” cause of a no-start no-crank condition. I’m putting it here to get it all in one place, so I have an easy thread to link back to.
The symptoms: You turn the key and the starter doesn’t turn over, but the dash lights all go on. (If the dash lights don’t go on, you probably aren’t getting power to the ignition switch, so you should look somewhere else.) I found that if I turned the key enough times, usually I could get it to start. But sometimes it took 10 or 15 tries.
The problem: If you replace your ignition switch, you’ll see that it has a T-shaped slot in the face. (Here’s a good how-to on replacing your ignition switch:
It’s a pretty simple process.) If you look inside the steering column, you’ll see a corresponding T-shaped piece of metal. When you turn the key, the metal piece turns the ignition switch and the starter wire gets juice. But over time, a little slop develops between the piece in the key cylinder and the slot in the switch, and the switch won’t quiiiiiite turn all the way to engage the starter.
This isn’t going to be the case every time you have a no-start no-crank condition. It may well be that your starter is bad or your battery isn’t sufficiently charged. This assumes you’ve already ruled those out as causes. You can check for the problem by taking the ignition switch out of the column (keeping it connected) and using a screwdriver in the slot to start the car. If it starts every time, you probably have the slop problem. However, since the problem is usually intermittent, it may take you a while to decide that it really does start every time with the screwdriver. In the meantime, you’ve made it ridiculously easy for your friendly neighborhood car thief. And you don’t want to use the screwdriver too many times or you may deform the slot. If you have the ignition switch out in the first place, you might as well fix it and put it back in.
The obvious fix, and the one a dealer would no doubt insist on, is to replace the key cylinder. You can do that, but it’s a bit of a PITA the first time you do it, and an unnecessary expense. The alternative is just to shim up the slot in the ignition switch to eliminate the slop.
I first tried a piece of electrical tape down in the side of the slot. Here’s what that looked like.
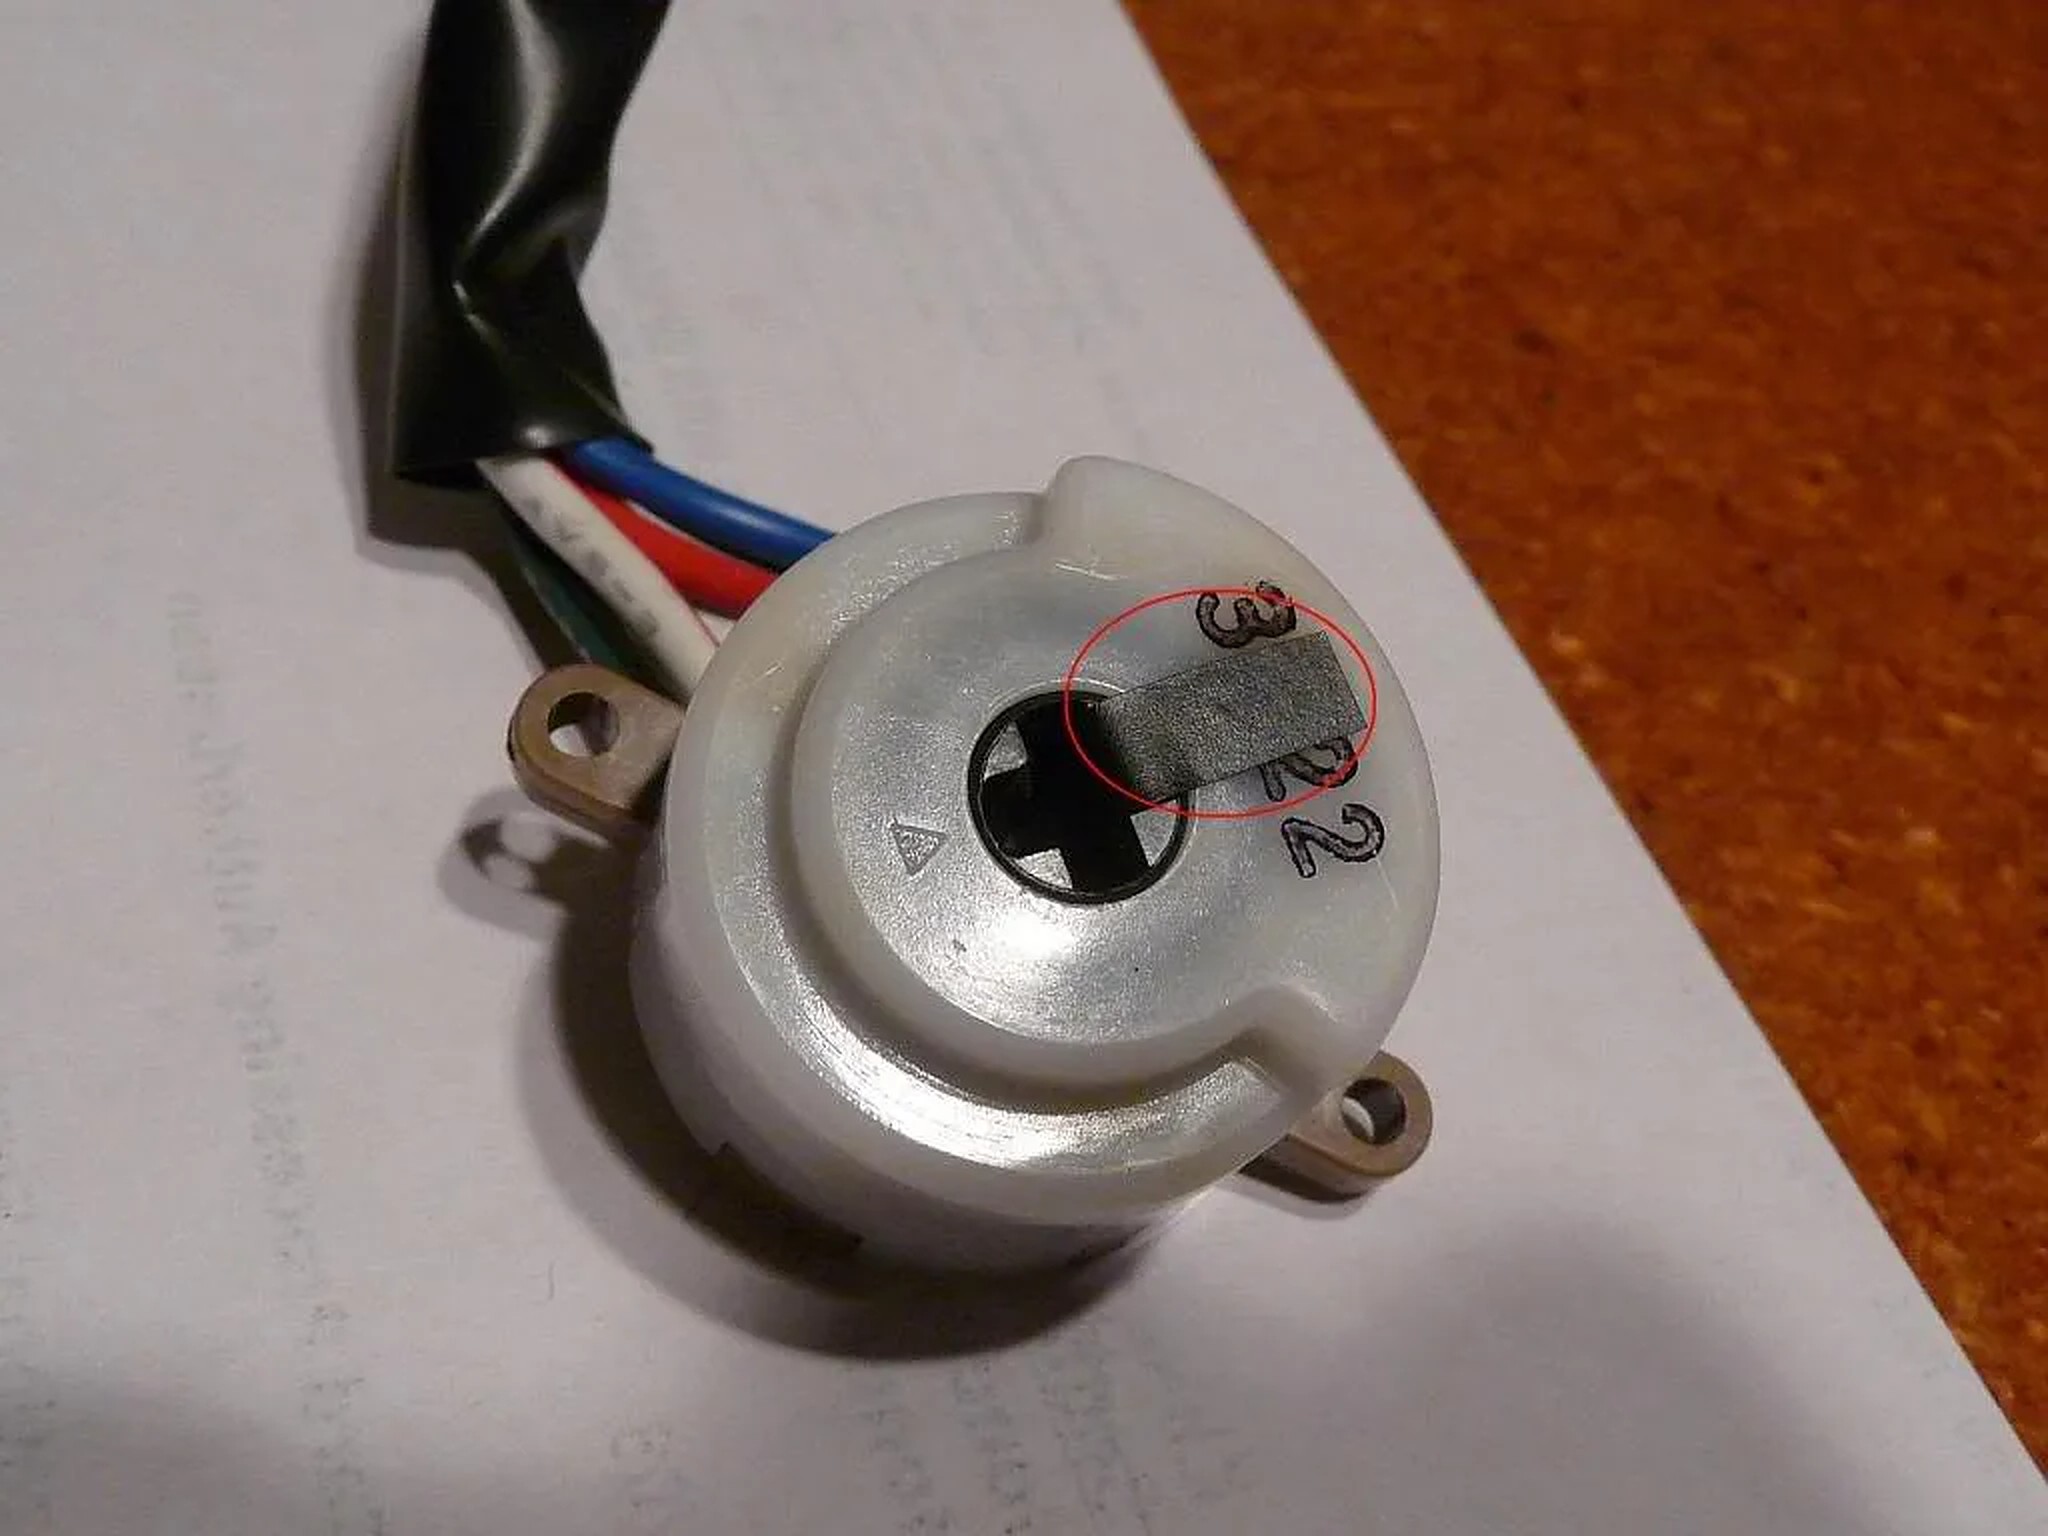
(The circled piece is electrical tape, even though it looks gray.) That worked fine for a while, but eventually the tape worked its way out, probably after a number of hot days. Others have used multiple pieces of duck tape, which might hold longer. But I finally ended up cutting a little piece of coke can to a shape that will fit in the side of the slot, and then super gluing it in. (The shim goes into the side of the slot, not the bottom.) If you look at how I put the tape in, you should get the idea. So far that’s worked beautifully.
Incidentally, this isn’t a matter of a bad ignition switch. When it first happened, I replaced my ignition switch with a new OEM, and it didn’t help. The problem is a result of the piece in the cylinder lock not pushing the ignition switch far enough over to engage the starter. If that’s what’s happening, a new ignition switch is unlikely to make a difference.
![]()
")
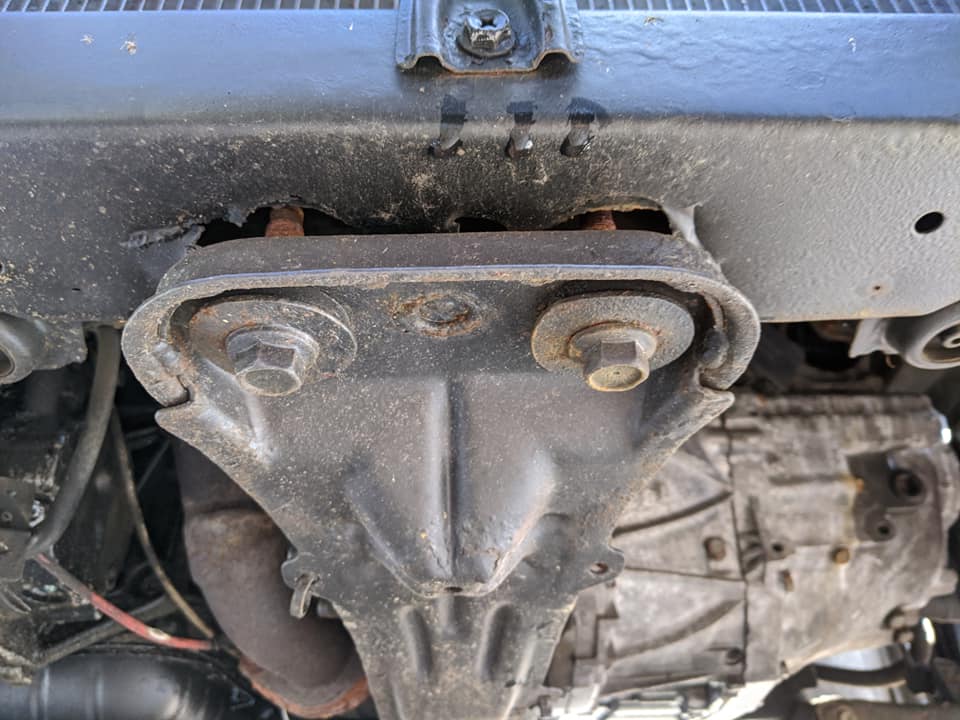
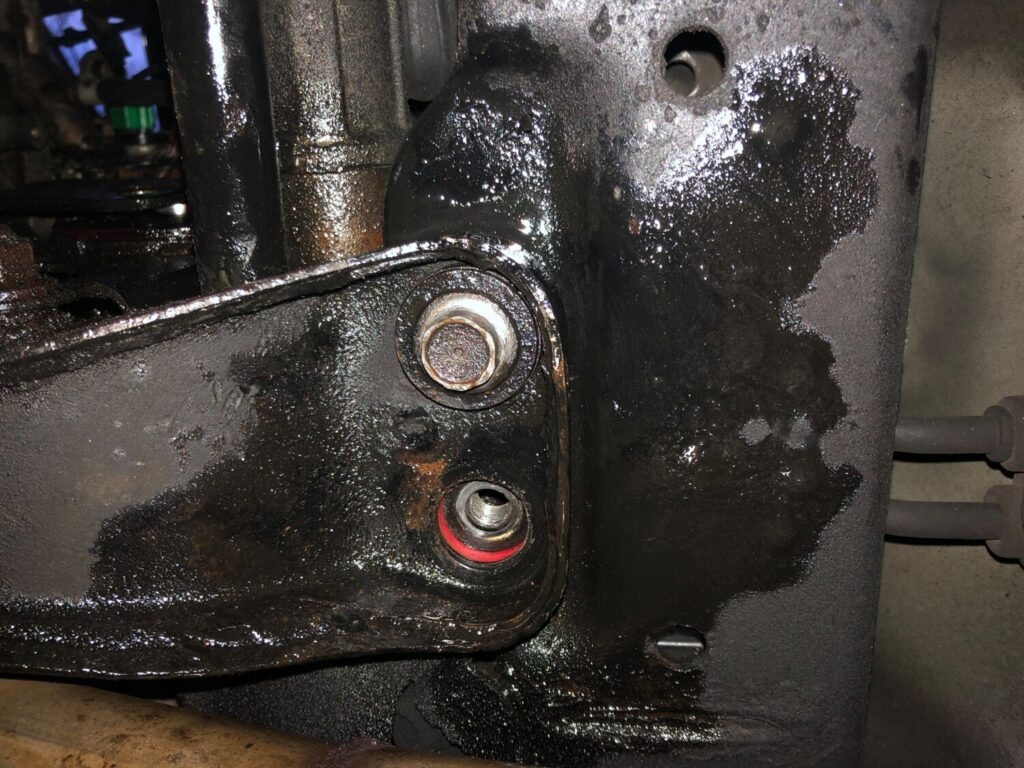
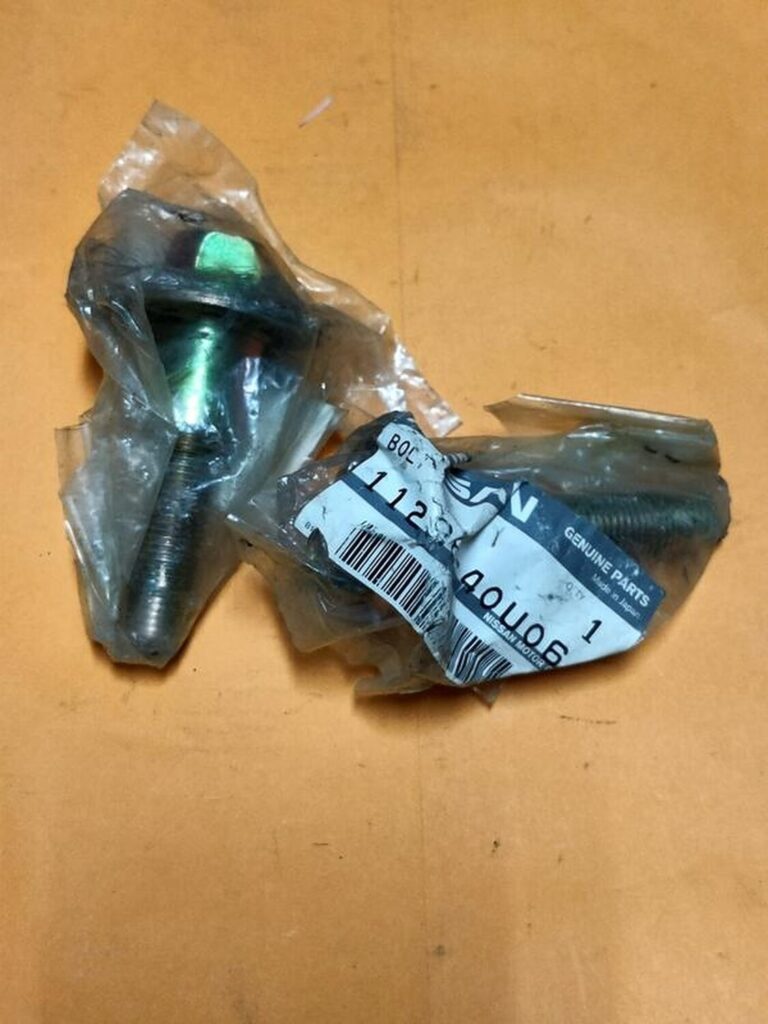
Community Member Credit: Eddy
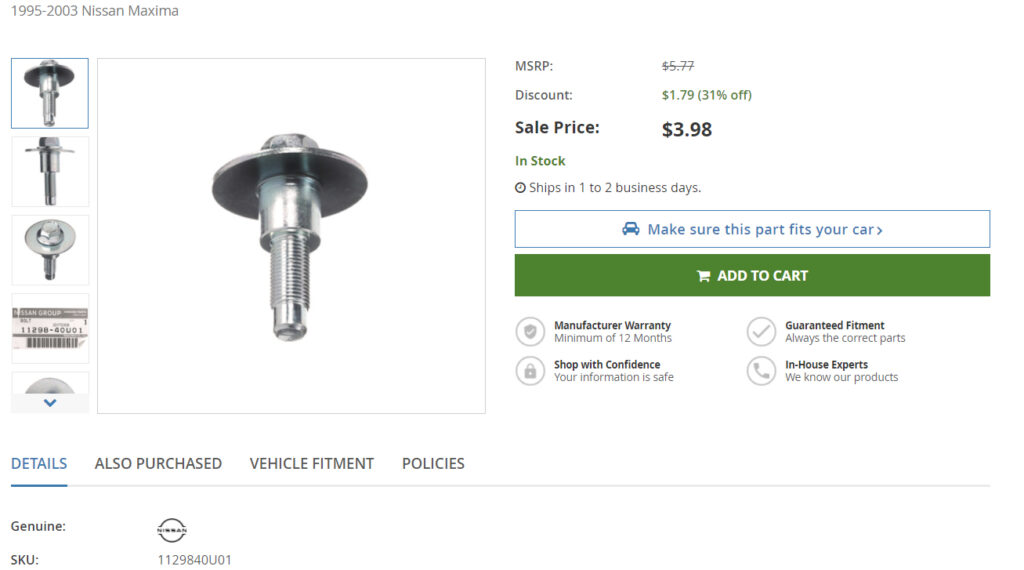
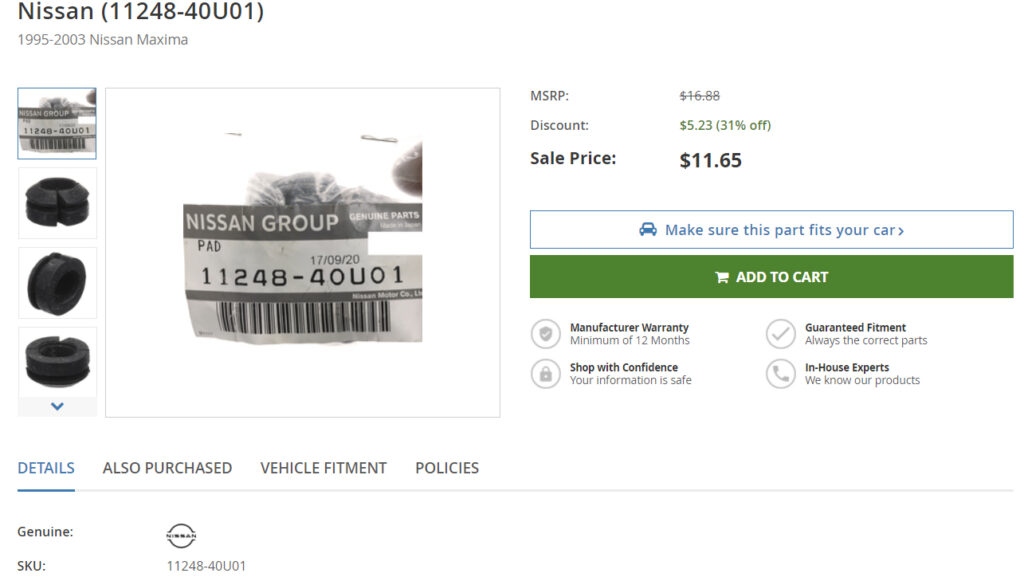
Applies to 1995-1999 and 2000-2003 Nissan Maxima. The cross-member bolts show up as two different part numbers but they are the same exact bolt. You can enter the part numbers online and order from whichever site you prefer.
1995-2003 Nissan Maxima Engine Crossmember Bolt:
1995-2003 Nissan Maxima Engine Crossmember Mount Bushing:
![]()

")