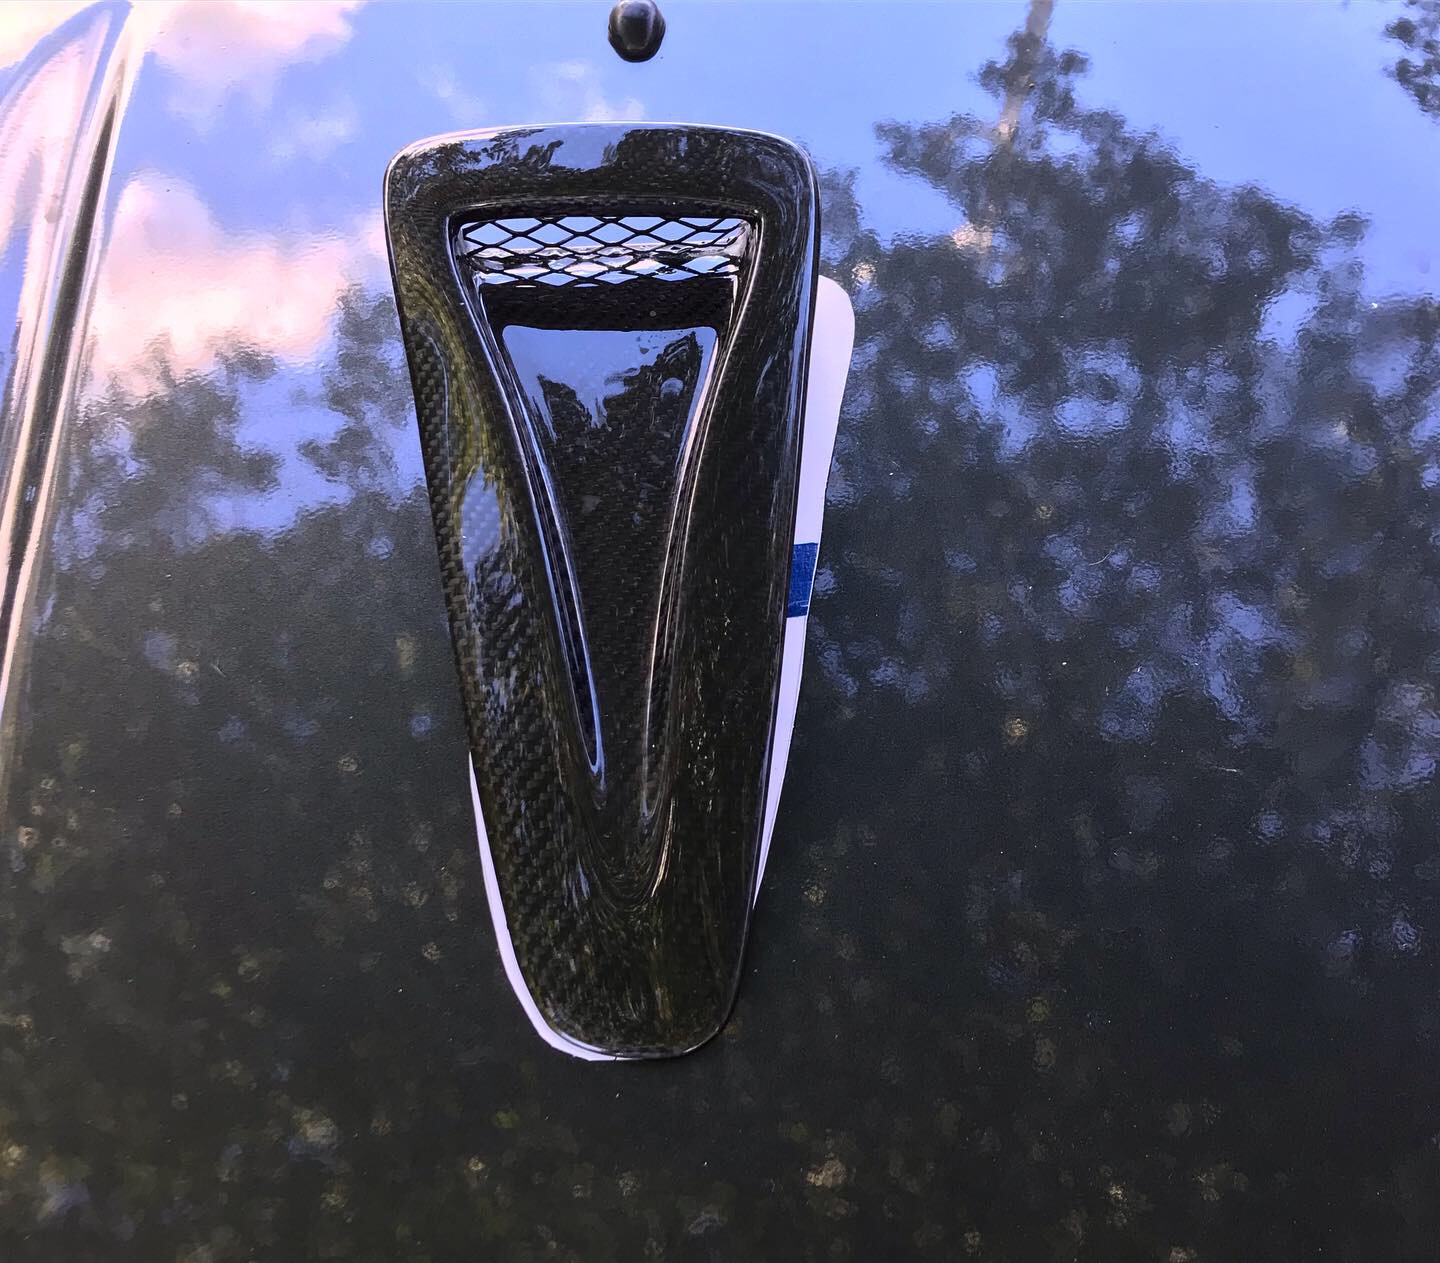
Installed R35 GTR vents today. They are fully functional and provide some additional airflow through the engine bay. You can find these on eBay between $85 to $180. Some are better made than others. Some are just carbon fiber overlay while others are full carbon fiber.
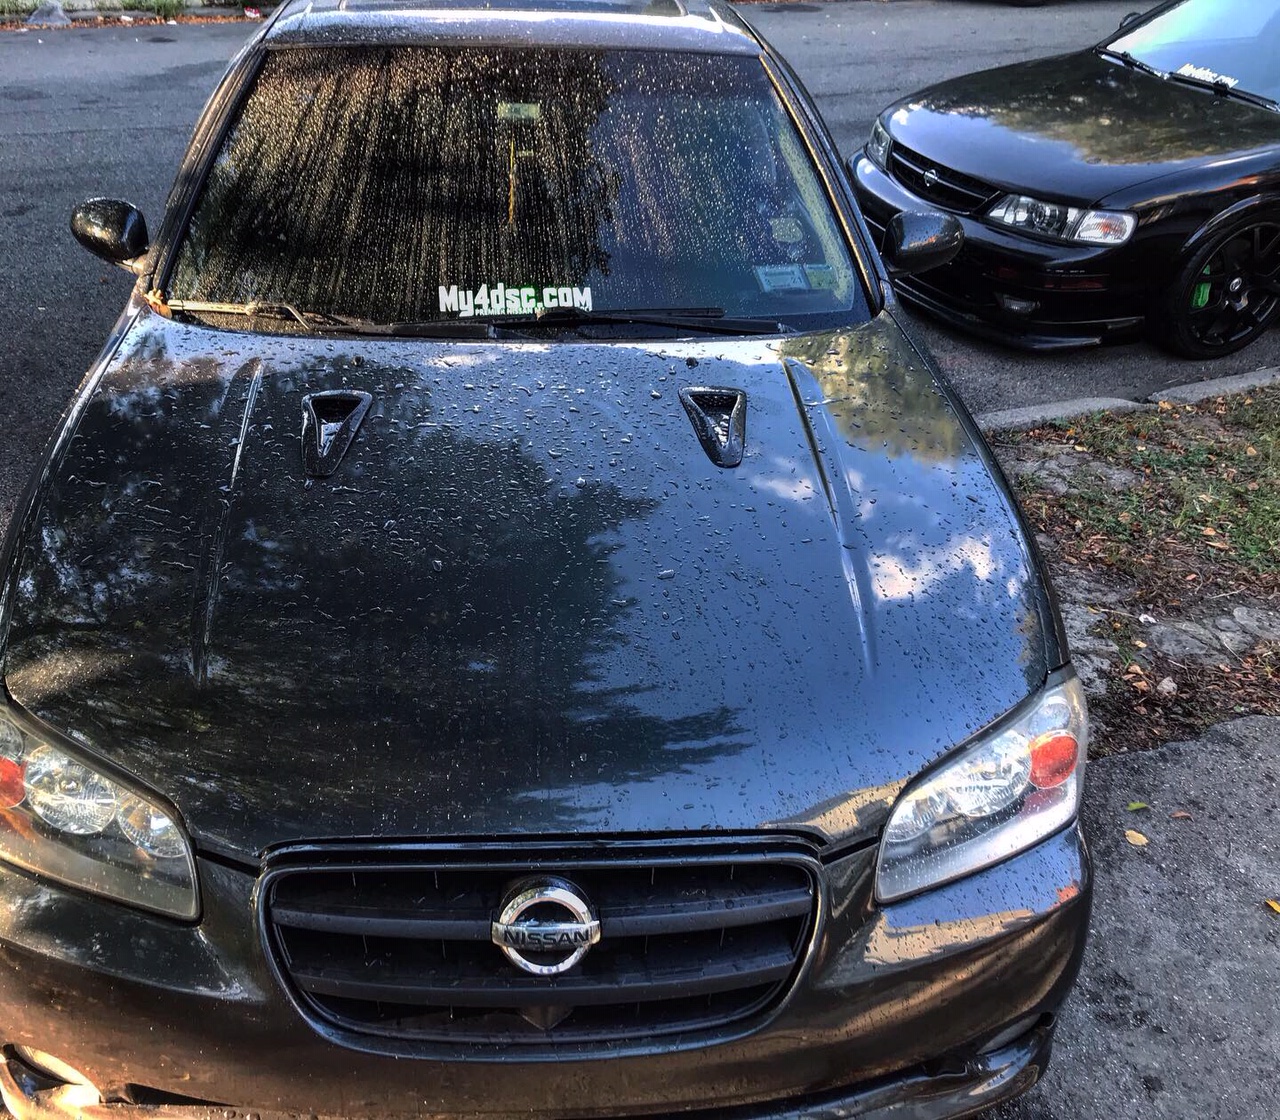
Took us about 2-3 hours. We measured very carefully. I used a harbor freight cutting wheel.The vents clear the HR Motor Manifold and my strut bar. I love the way everything came out. Should also get some better cooling now. Need to align the passenger side a little more but will do that once I’m ready to silicone them in.
Now my6thgen and 7thgen have R35 GTR ventsWill be doing my 4thgen next.
This mod provides power all the time, with doors open or closed. I have this irritating habit of forgetting to close the rear windows and I didn’t like having to put the key in the ignition and turn it on in order to operate the power windows. So I decided to undo years of governmental nanny state-ism and have the windows work the way I want them to, not the way some bureaucrat wants them to.
Turns out this is an easy mod to do. You don’t have to take anything apart if you don’t want to. I did in order to get better photos. In stock form, Nissan uses a relay to supply the power to the window motors. This relay is energized when the ignition switch is in the “ON” position. So all you need to do is to remove the relay and add a jumper in the relay socket.
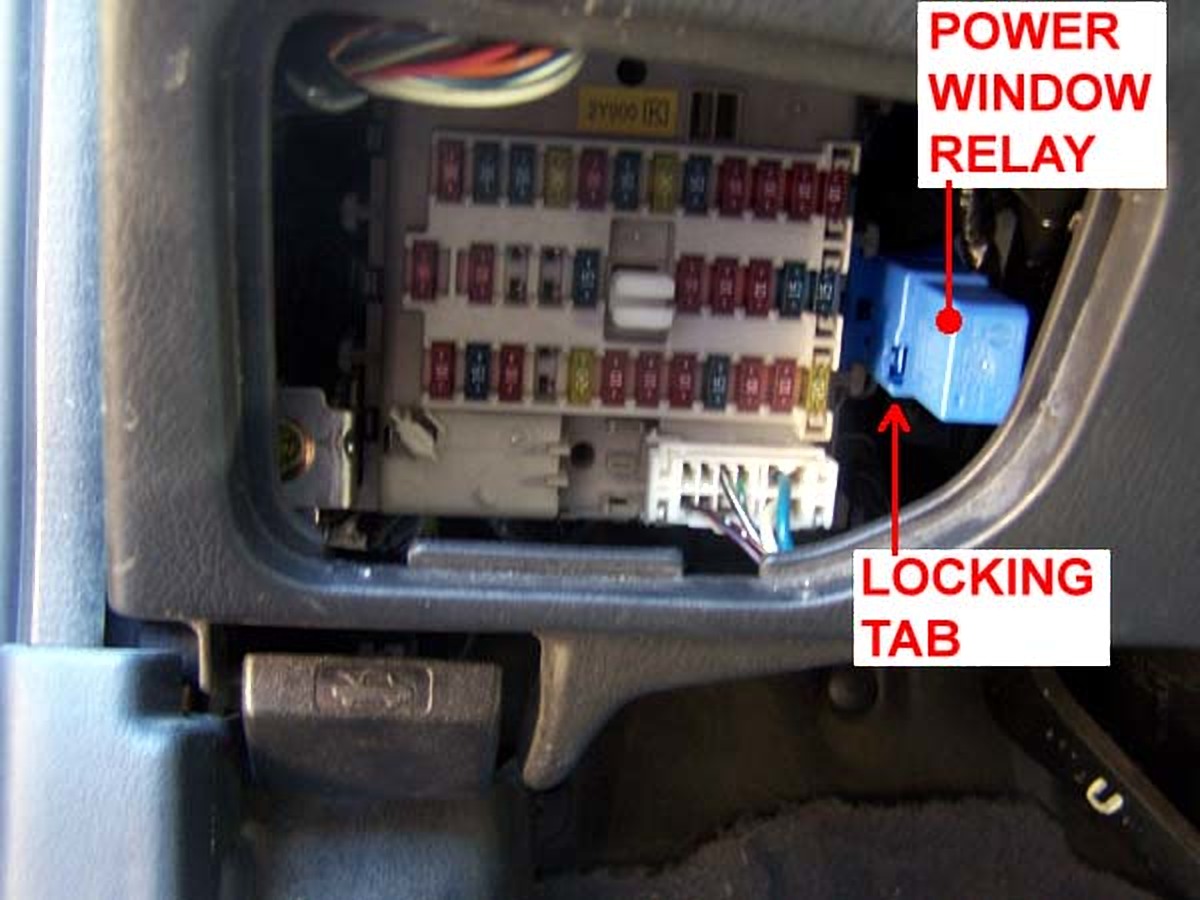
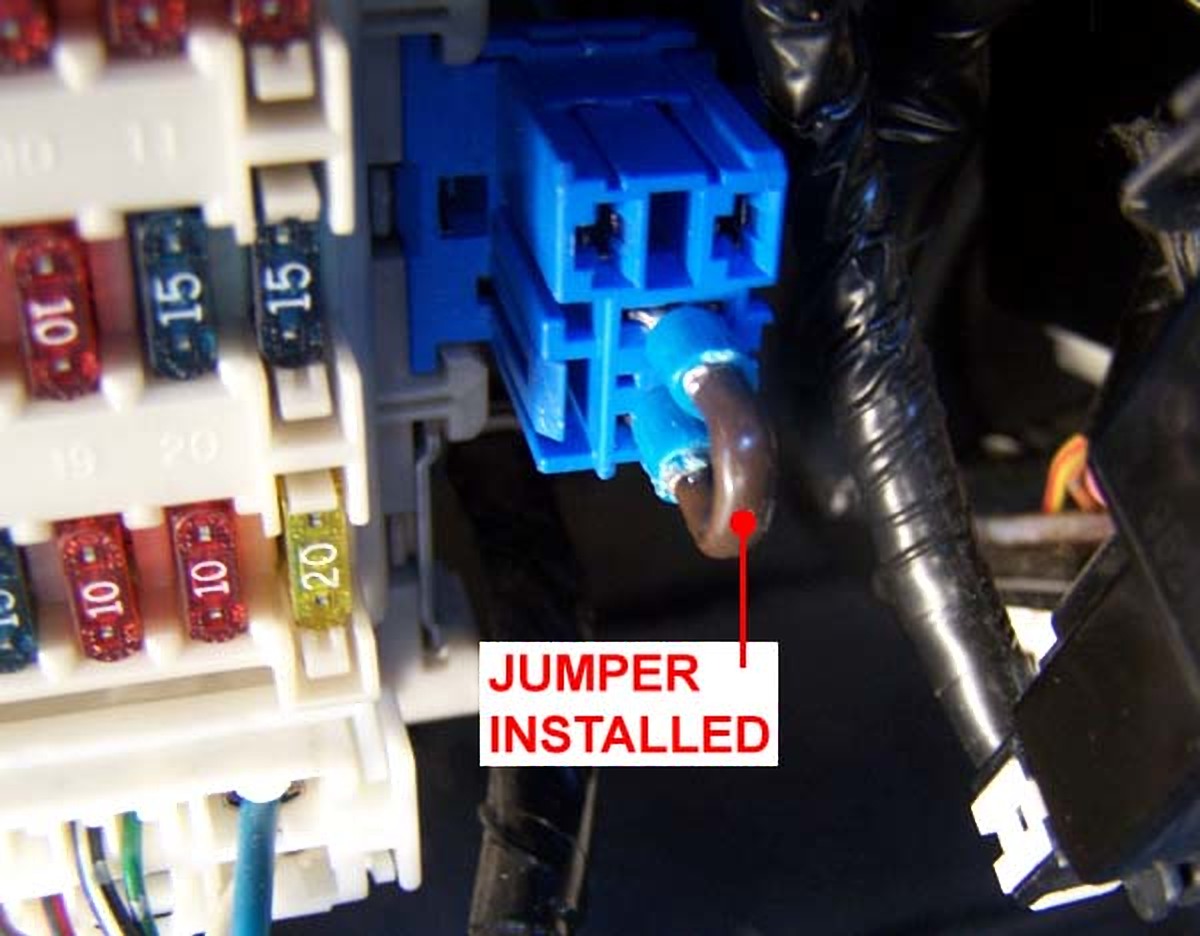
The Power Window Relay is located on the right side of the in-dash fuse panel. Remove the access cover to the fuses and you will see the blue Power Window relay on the right side. Look on the lower corner of the relay and you see the locking tab that you must push in on in order to remove the relay.
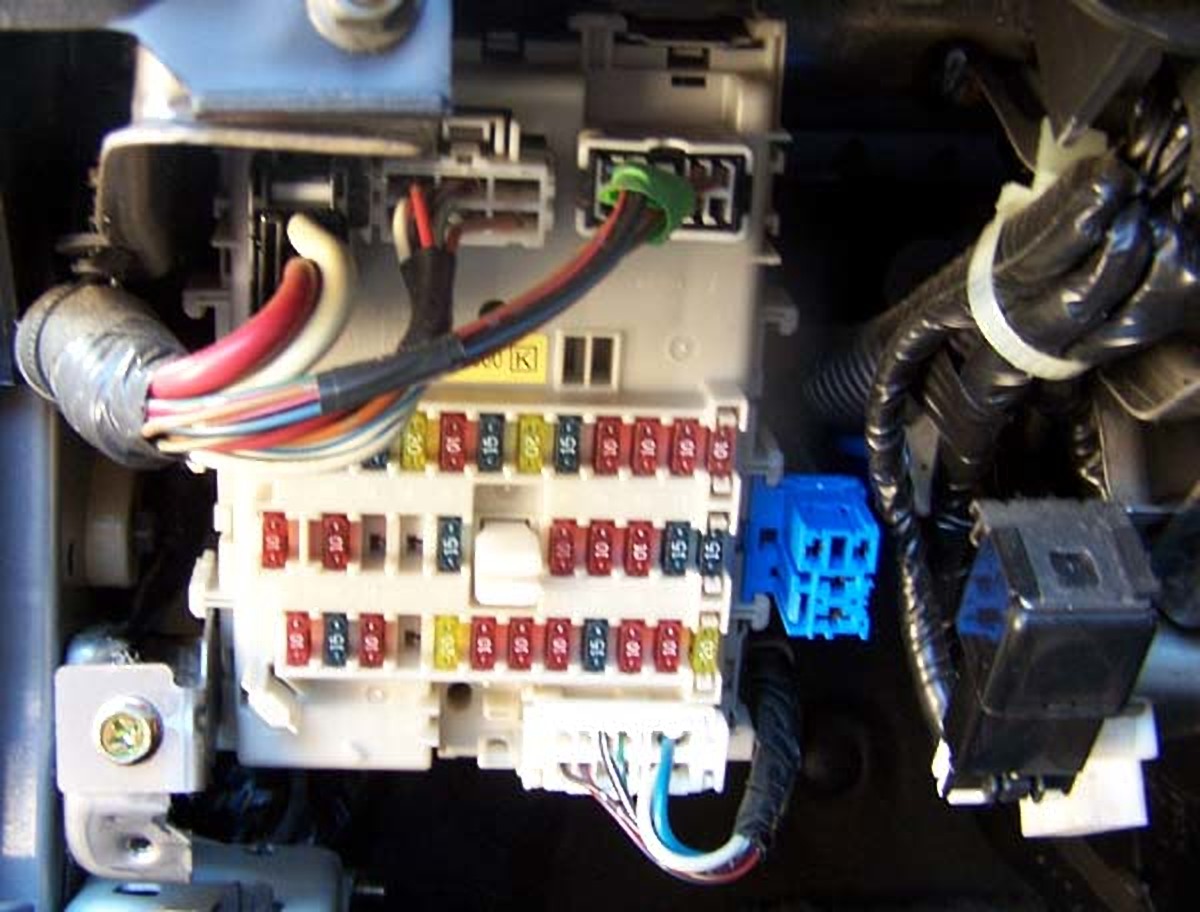
With the lower dash panel removed (you don’t need to do this), you can see that there is all kinds of room. FYI- the black thing to the right of the relay is the turn signal/hazard flasher unit.
Power Window relay removed.
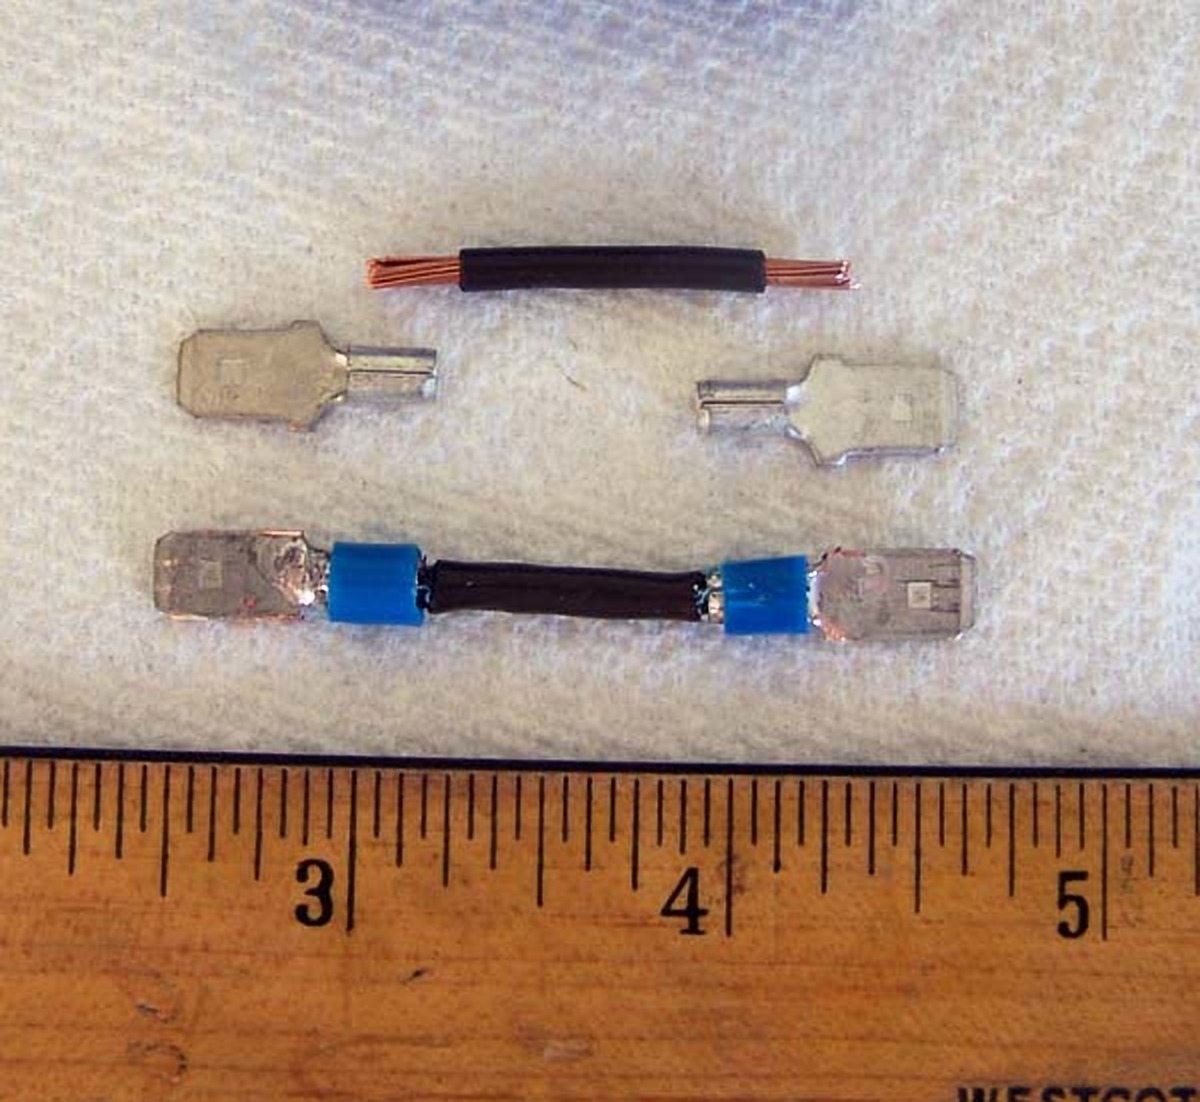
You need to make a jumper wire. You want to use at least 14 gauge wire because this wire will carry a higher amount of amperage that most other wires in the car. 12 gauge wire is what Nissan has in the wire harness and if you intend to operate all the windows simultaneously, then you better use 12 gauge wire for this jumper. And if you do use 12 gauge wire, make sure the spade connectors can accept that size wire. I cut a piece of wire to be 1 1/4 inch long. I stripped 3/16 of an inch of insulation off of each end and soldered a 1/4 inch wide male spade lug connector onto each end.
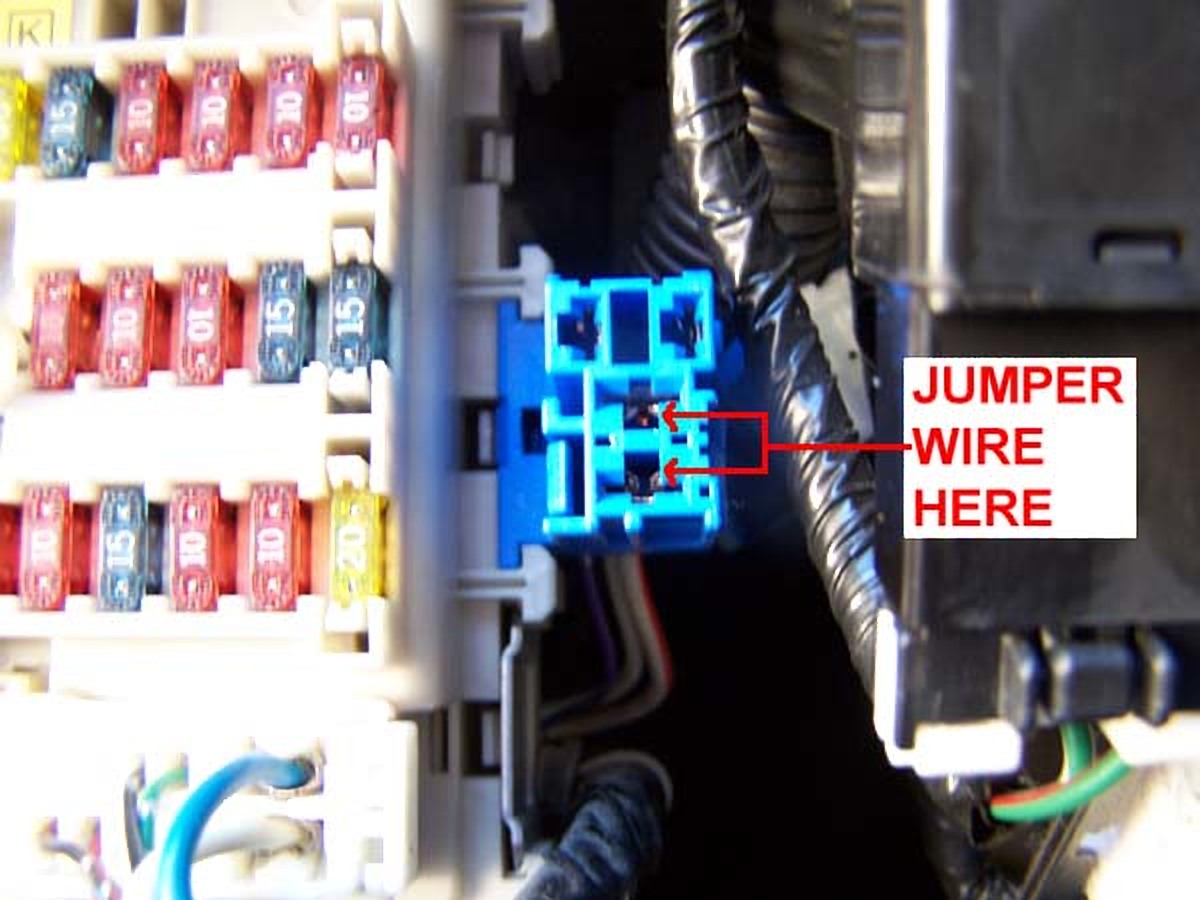
Bend the jumper into a U shape and plug into the lower half of the relay socket.
Torx bit (on some models) – otherwise metric socket (size unknown)
Old towels
Channel locks
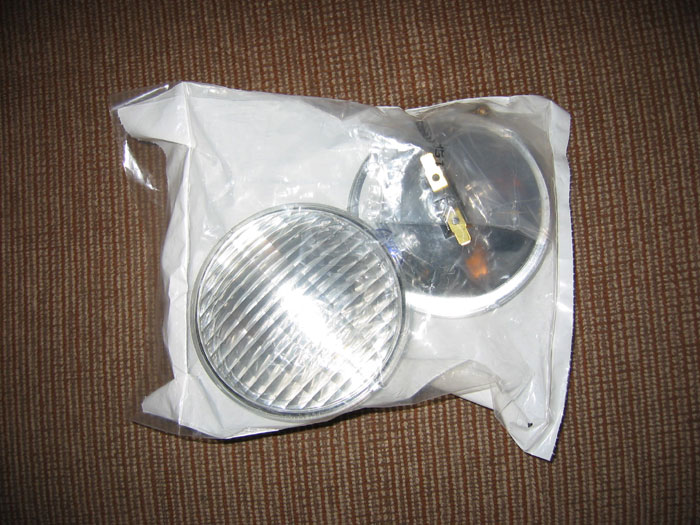
Purchase clear lens from Home Depot or frosted lens from Tap Plastics (contact info below):
Tap Plastics Inc
4538 Auburn Bl
Sacramento, CA 95814
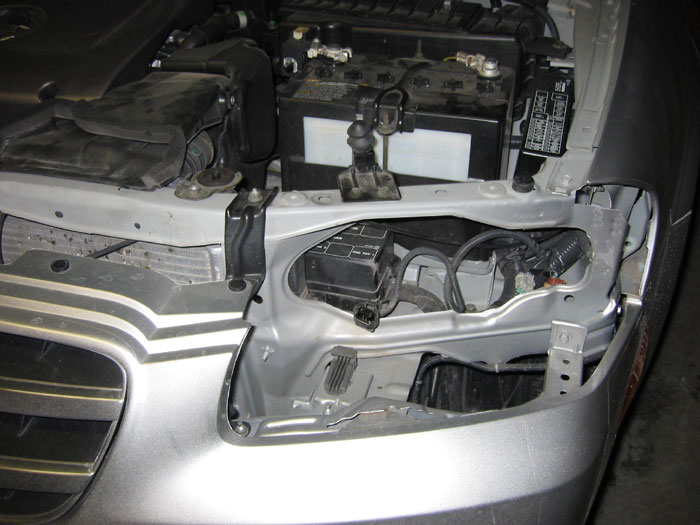
Clear Leans from Tap Plastics 1. Remove headlight from the vehicle. Take care not to scratch the fender with the metal mounting pin.
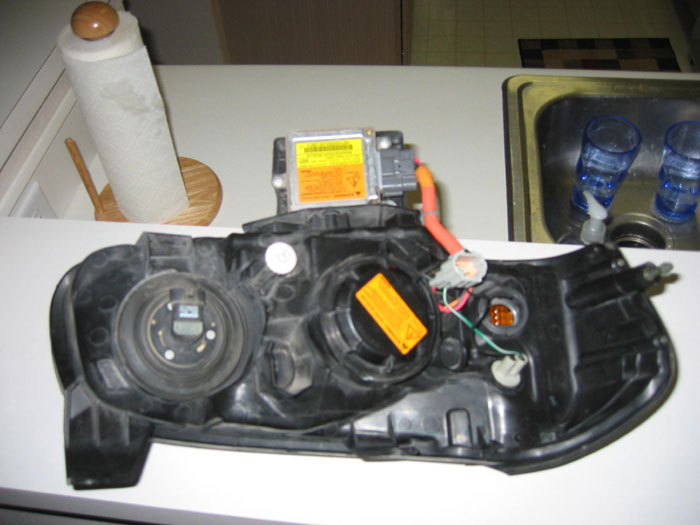
2. Remove bulbs and ballast from headlight. The ballast has a yellow and orange sticker in the picture below. It is attached with 3 screws.
To remove the HID bulb, rotate the plastic cover counterclockwise. Then squeeze the 2 metal pins toward each other. Take care not to touch the bulb!
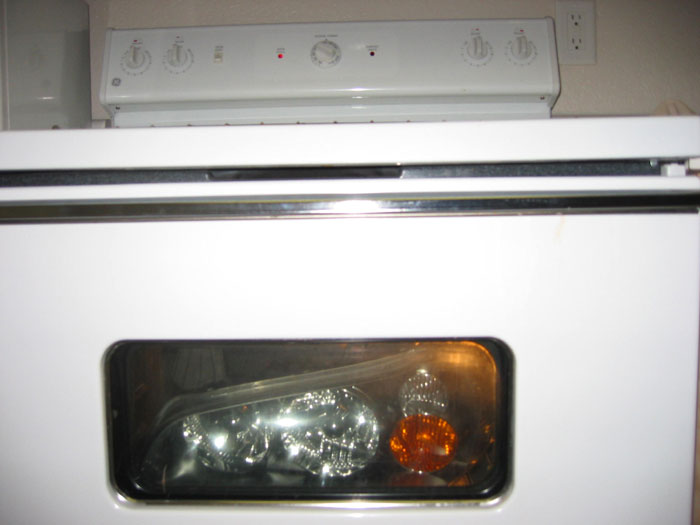
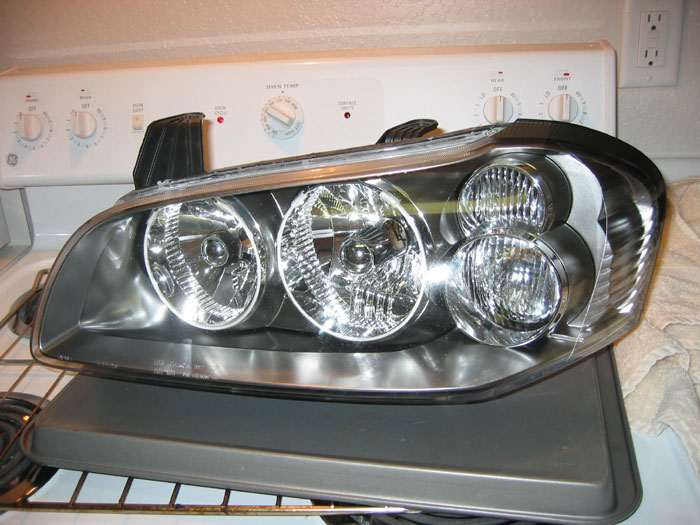
3. Bake headlight in the oven on cookie sheet for 15-20 minutes at 200 – 250 degrees. The scary part:
4. Remove headlight from the oven with old towels (will be very hot)
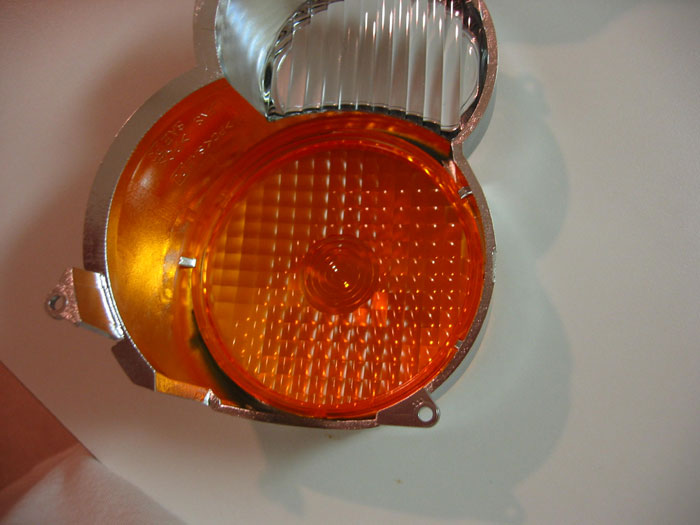
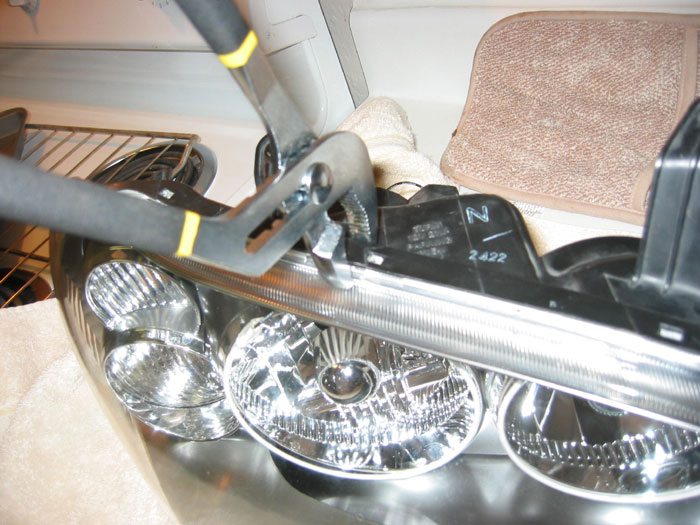
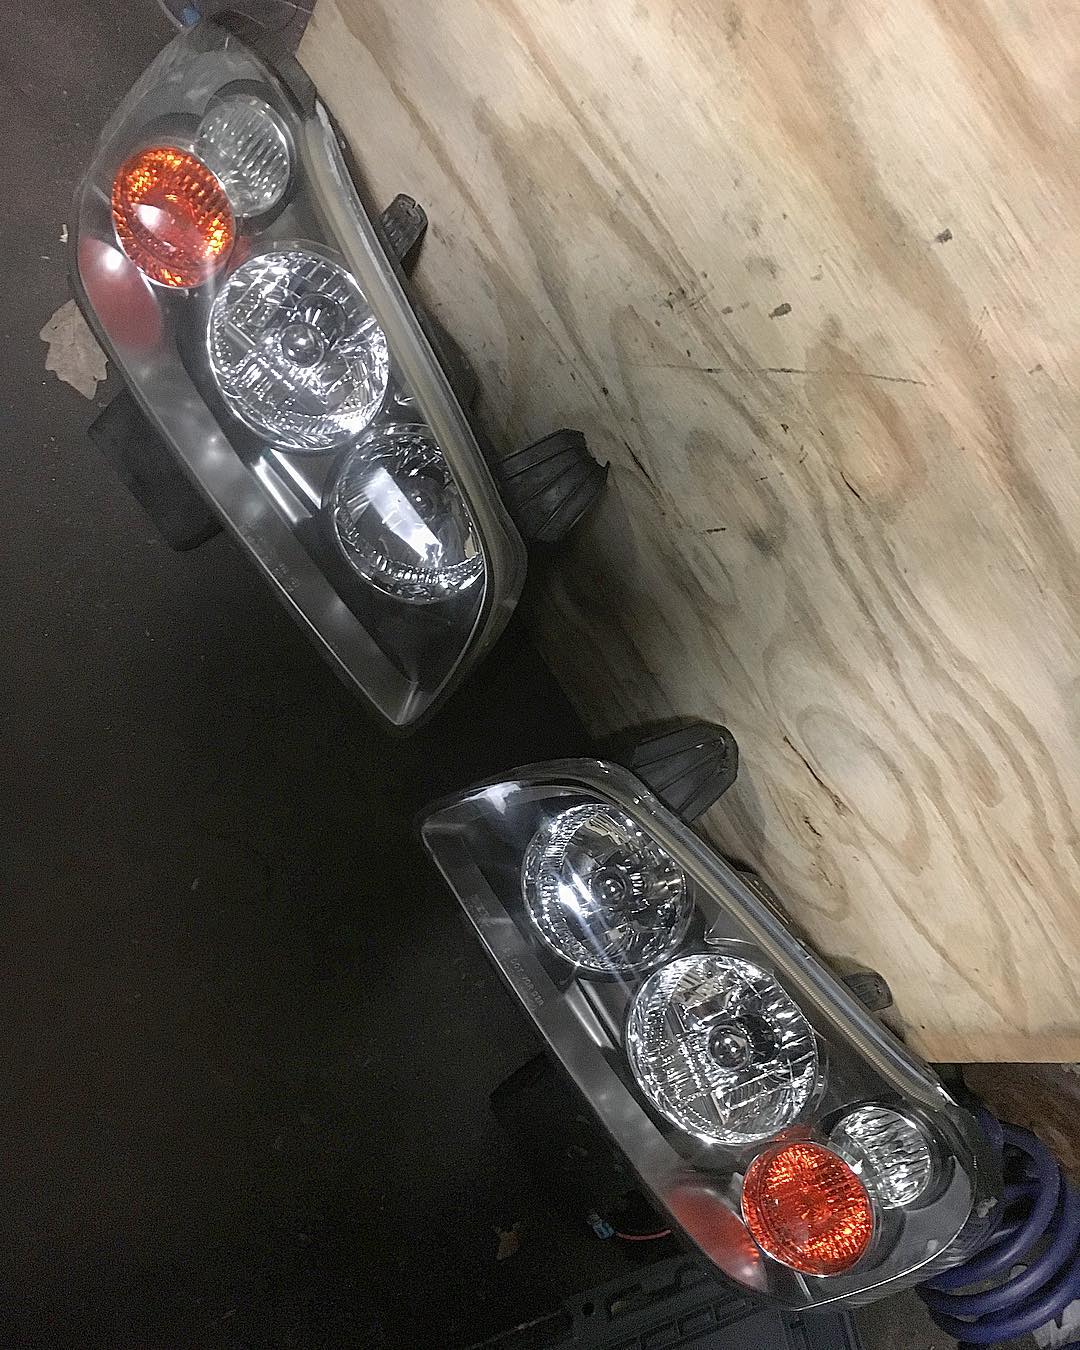
5. Remove amber lens carefully. Use a small flathead screwdriver to pop lens out of tabs. Silver tabs are visible below.
6. Use the amber lens to trace onto the clear lens
7. Cut out the clear lens with Dremel. Lens from Tap Plastics comes pre-cut and drops right into place.
8. Install clear lens taking care to ensure that it fits snug under the tabs. If the lens is a little loose, apply 90-second epoxy lightly around the edge to assure a tight fit
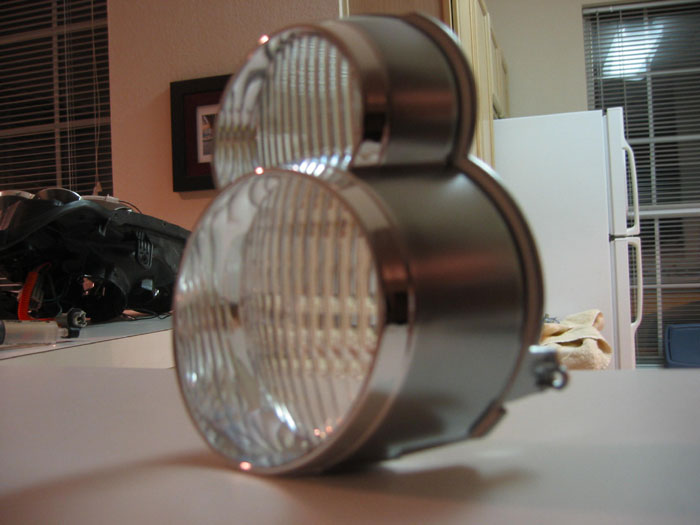
9. Reassemble headlight as best you can and return headlight to oven
10. Bake for 15-20 minutes at 200 – 250 degrees
11. Remove from oven with old towels (will be very hot)
12. Use channel locks to assure a tight seal
13. Reinstall headlight
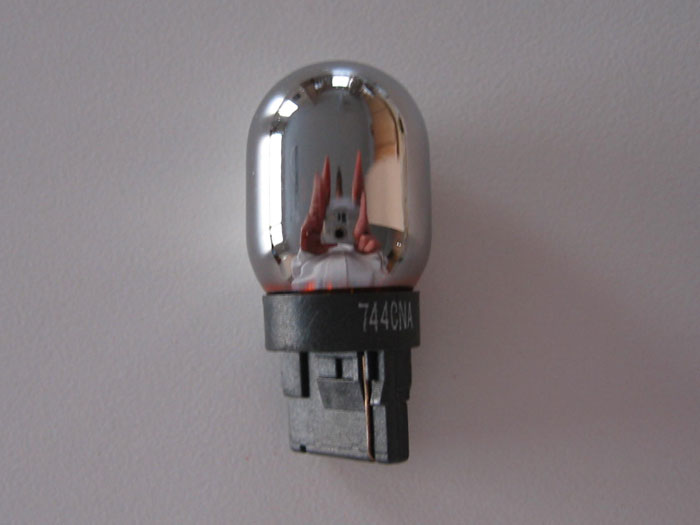
14. To produce a clear effect and retain amber blinking, I suggest using a chrome blinker bulb:
I purchased mine from autolumination. Alternatively, you can create your own by spraying the stock bulb with a light misting of silver paint.
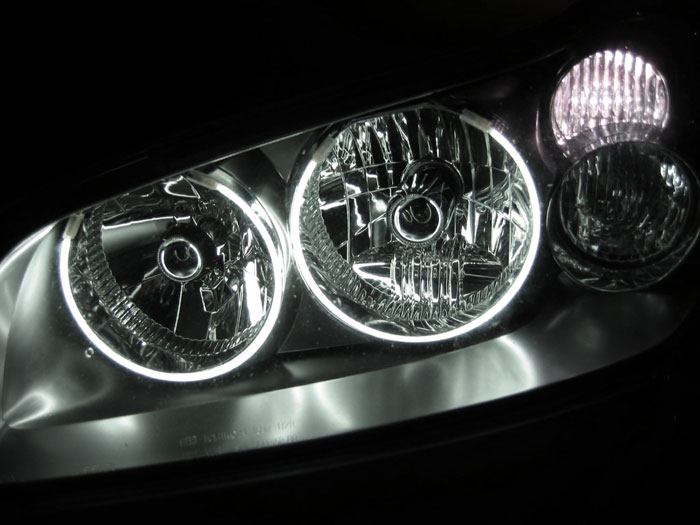
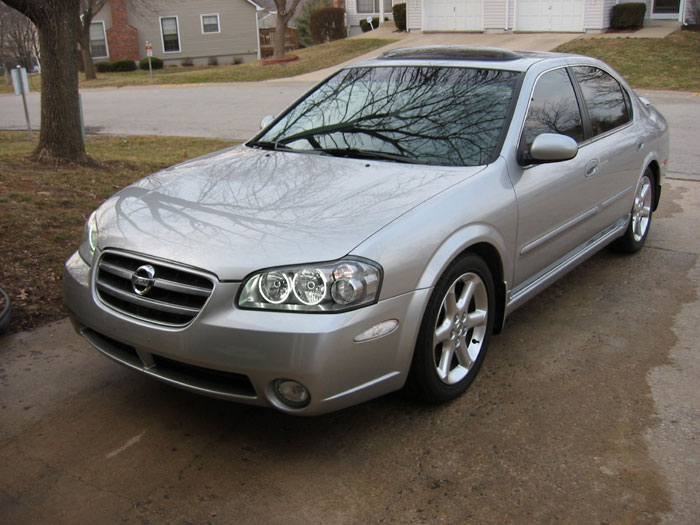
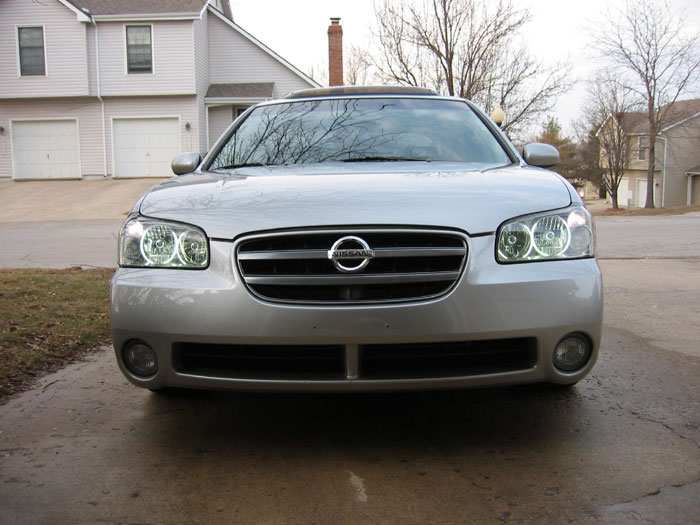
You can find these online using the part number. There are other manufacturers as well. I find this to be a simpler option in getting rid of the orange lens on the headlights. Gives the headlights a much cleaner look.
Part Number: ML11P2 Part Description: Intermatic Malibu ML11P2 Floodlights Price: $20-$30 (Set of Two)
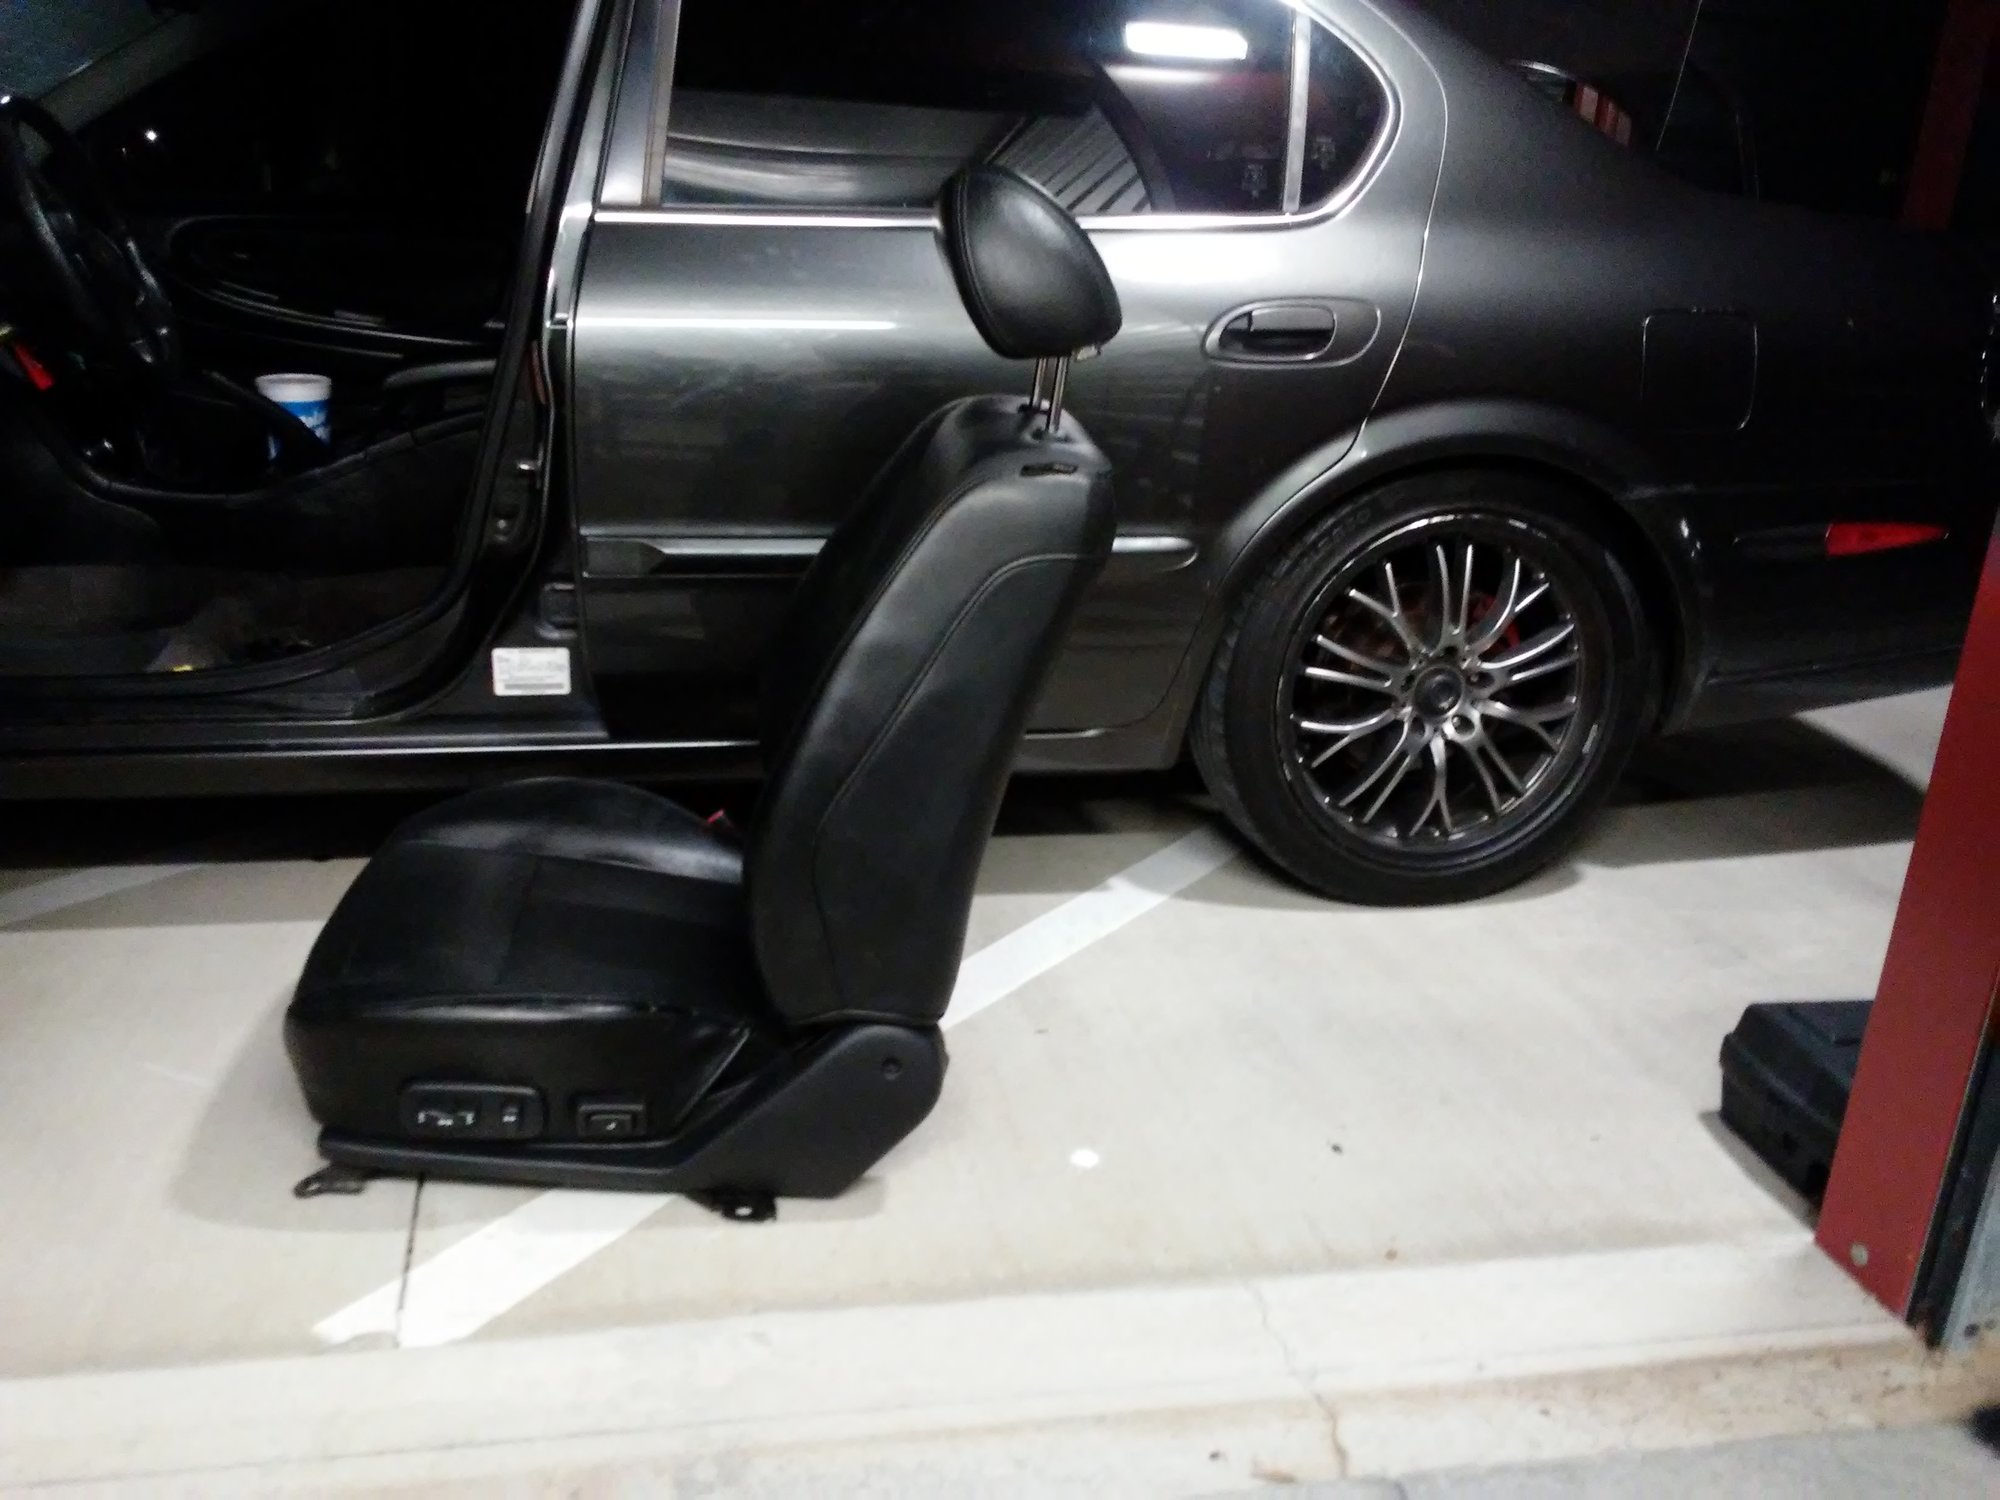
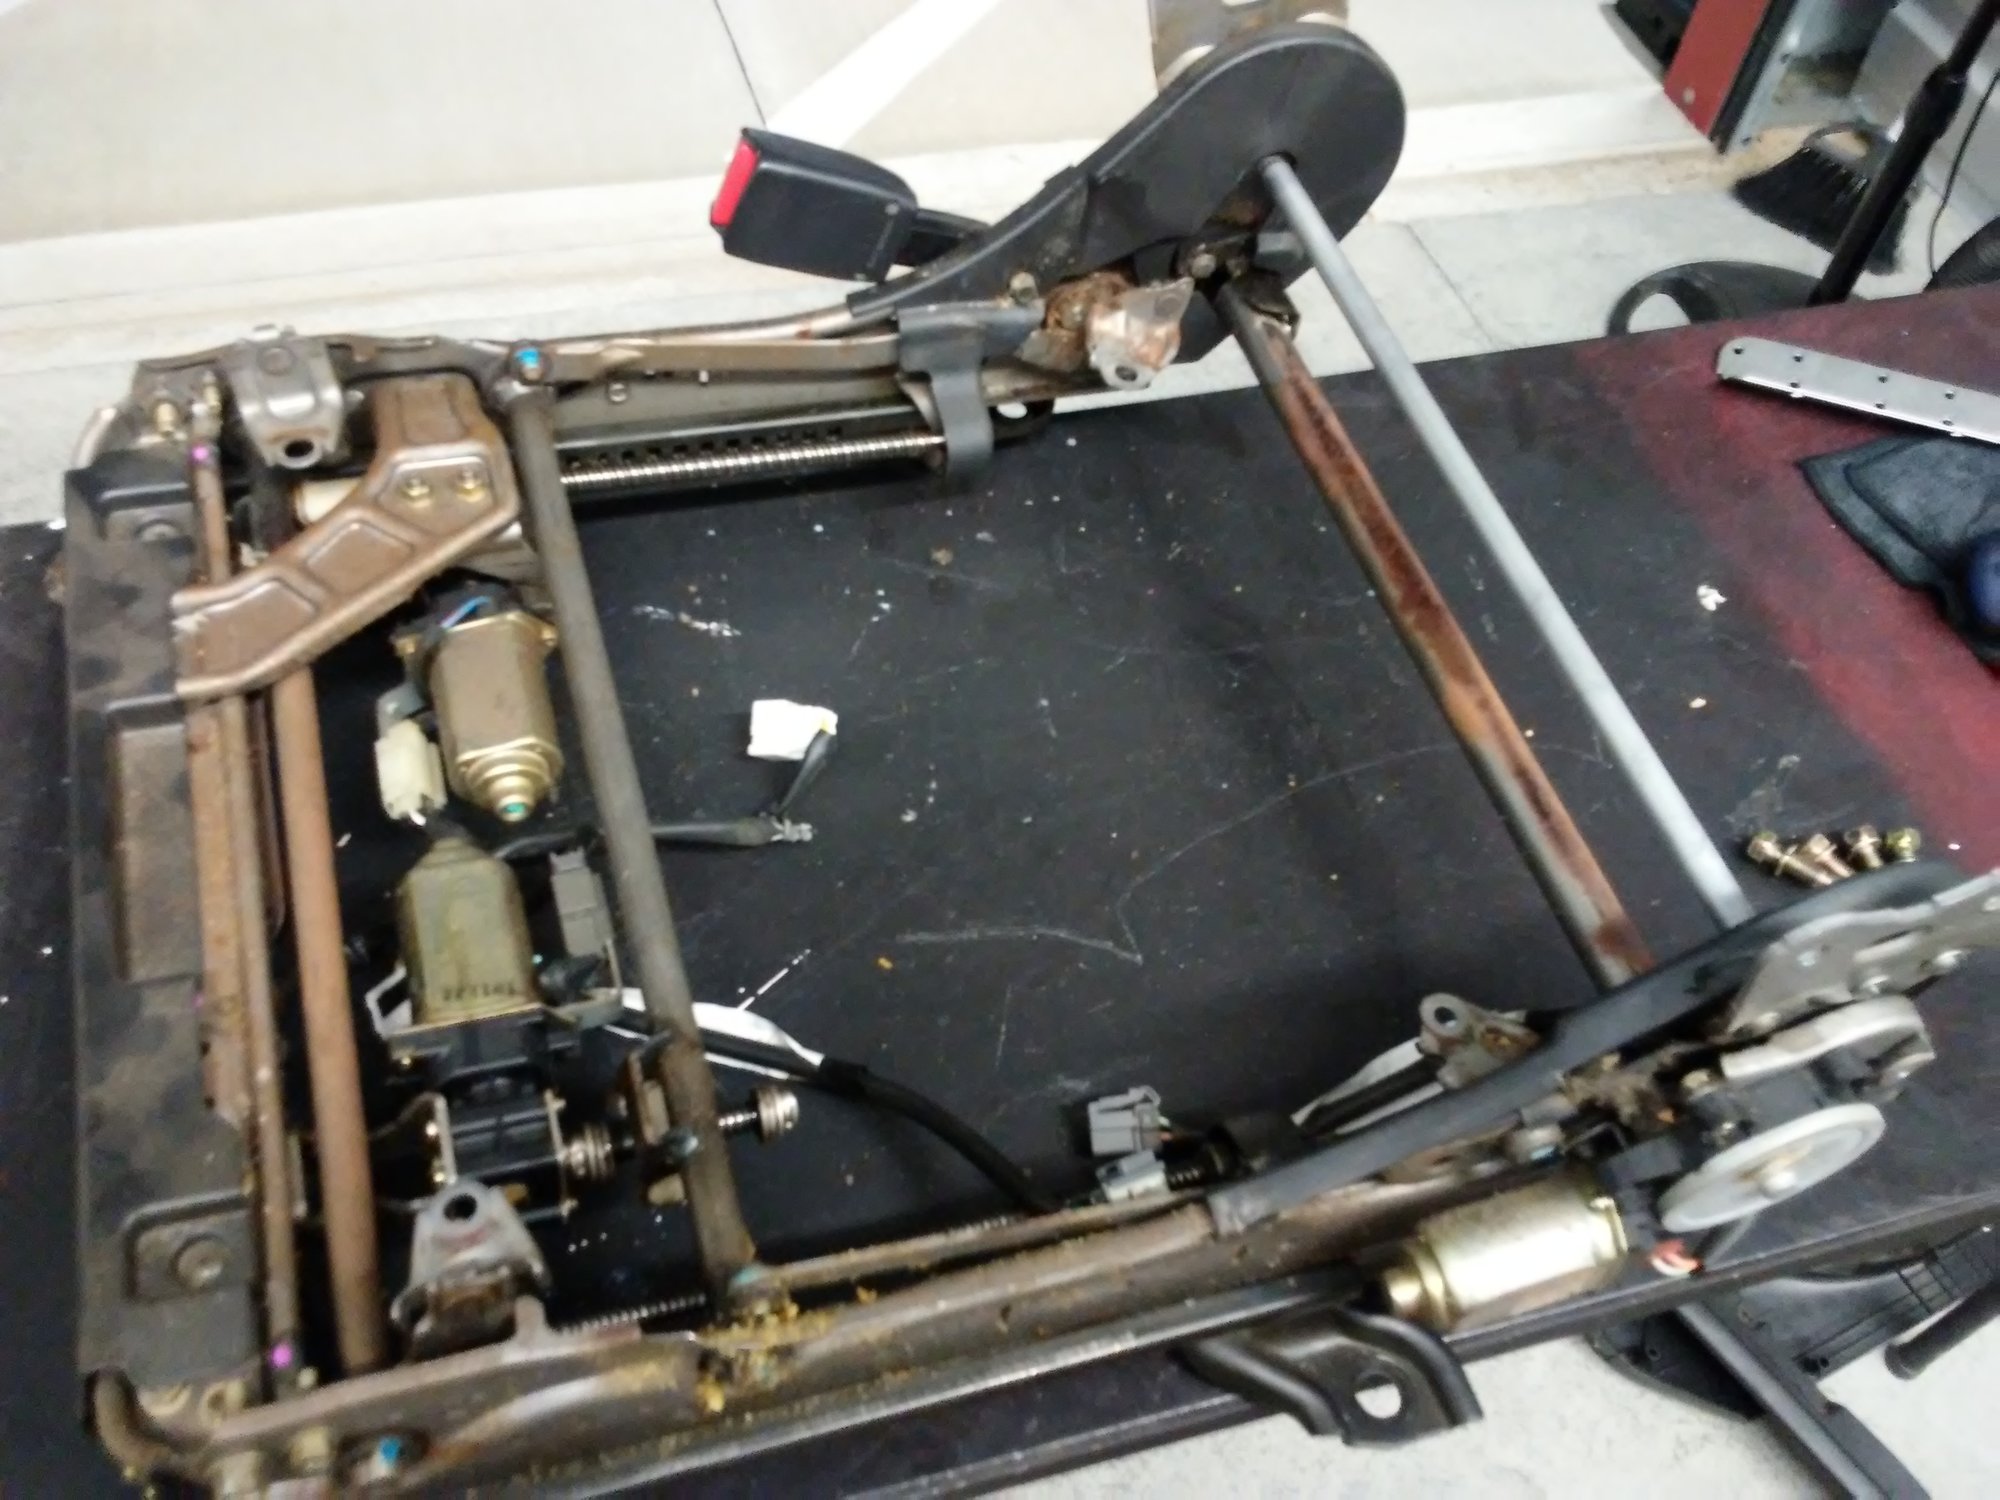
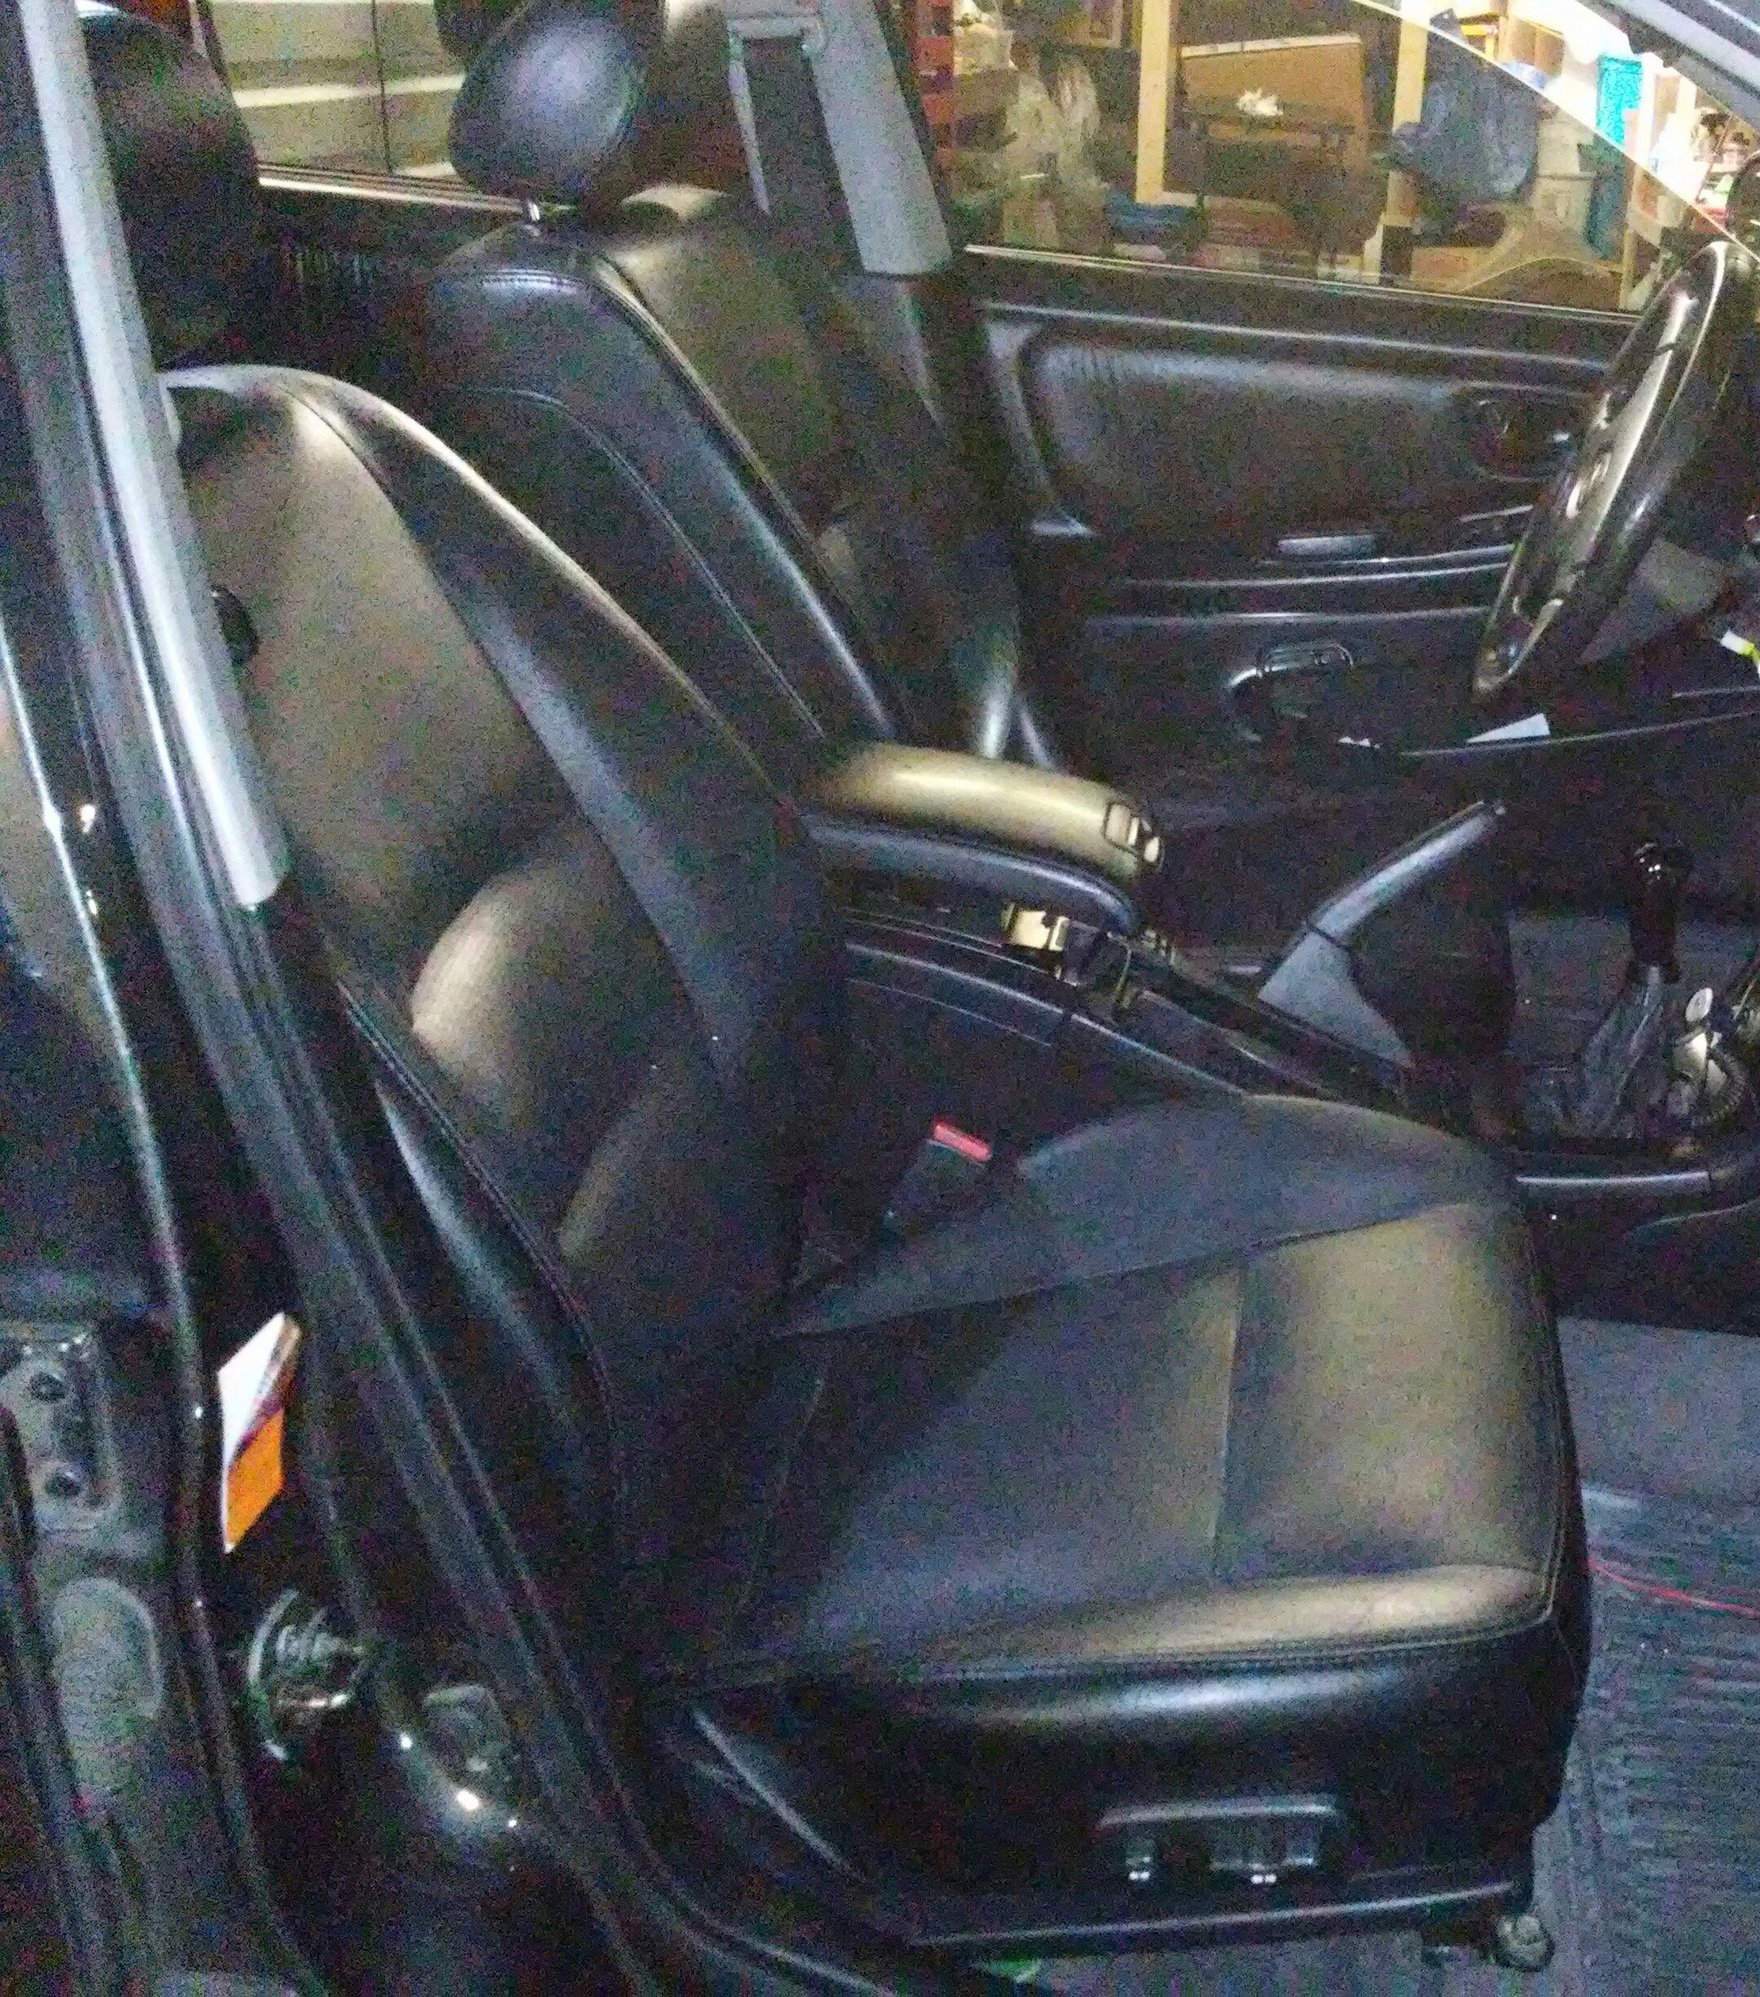
Added 6th gen 2004-2006 dual power/heated front seats in my 5th gen. Process was pretty simple by swapping the rails/tracks from the 5th gen seat to the 6th gen seat cushions. No frame modifications needed just swap over and use the harness plugs. Seat airbag connections were the same.
This is for a 370z but is applicable to 6thgen Maximas as well.
DISCLAIMER: REMOVE YOUR STOCK SEAT SRS AIRBAG SYSTEM AT YOUR OWN RISK, I AM NOT CONDONING REMOVAL, NOR DO I TAKE RESPONSIBILITY IF YOU DO SO.
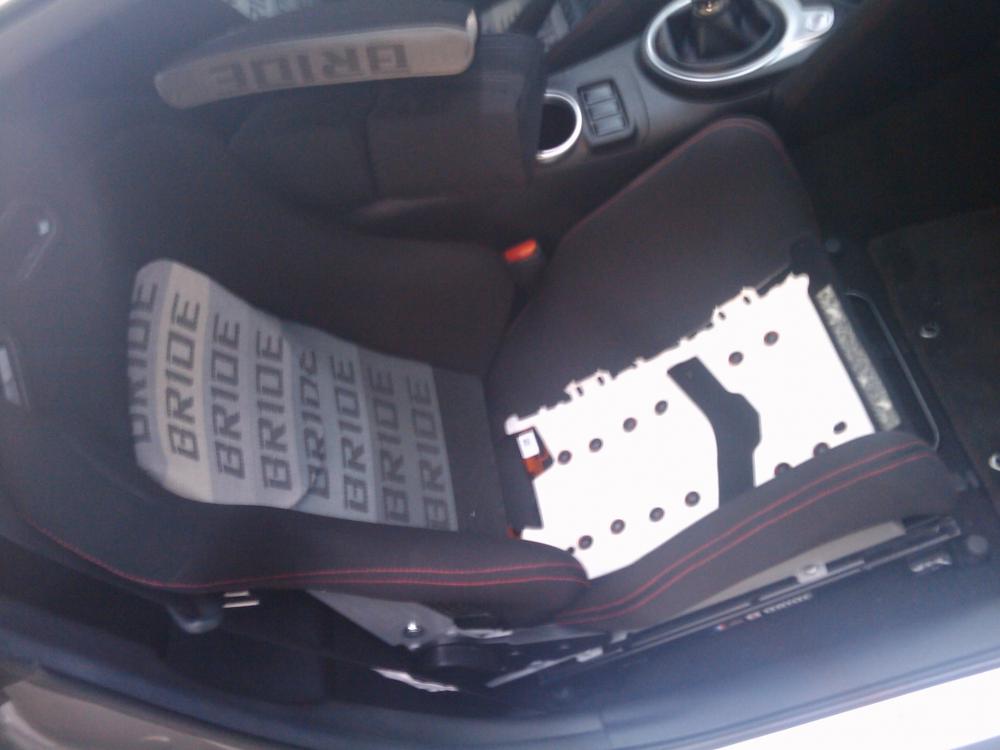
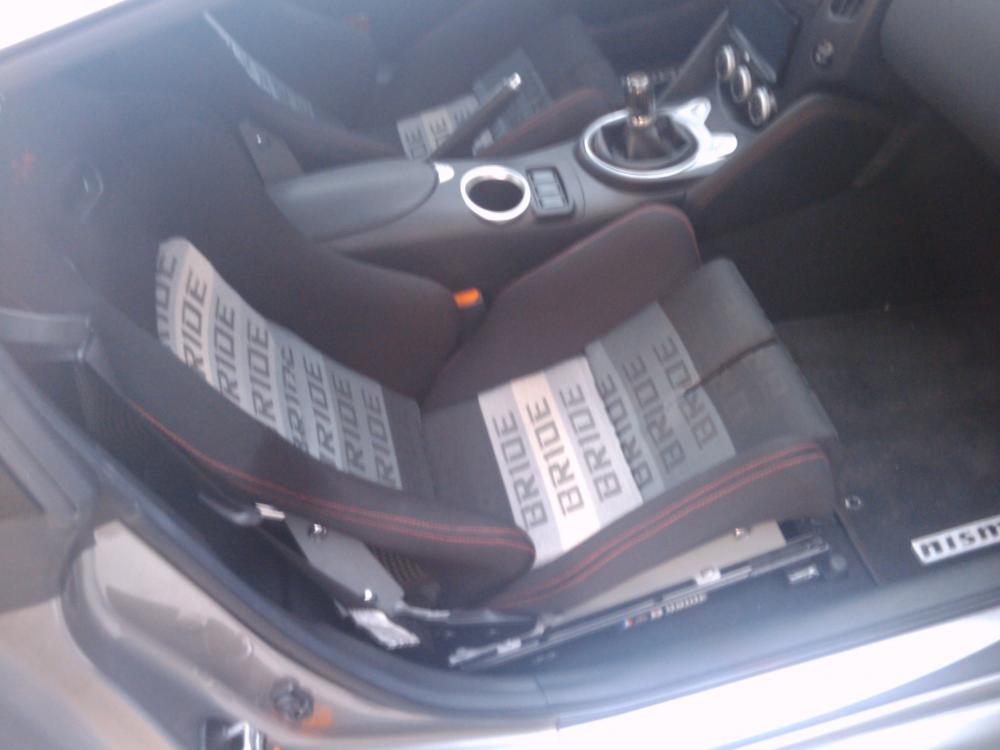
Okay, some of you may have put racing seats in your car, and noticed that now you have a flashing airbag light (a stick figure seat belted in, with an airbag in his face) blinking on your dash, or some of you may want racing seats, but do not want to do it because of the flashing light. Well, below is how you get rid of the light without ripping it out the dash.
First, the reason why you get the light. Your stock 370z seats have SRS airbags inside the shoulder of the seat. When you wreck, these deploy and basically are like a pillow between you and the door for side impact collisions. If you choose to remove your stock seats, you will have to disconnect a plastic electrical connector under EACH seat. This is the SRS connector. NOTICE: Under the Passenger seat are two connectors, one is the passenger airbag weight sensor pad, the other, the SRS system. I will tackle the weight sensor further down this how to.
Note, airbag module shown just for reference, as I took it completely out the seat just to see what I was dealing with. You do not need to remove the whole airbag assembly.
Second, Supplies you will need for the SRS airbag light removal ‘trick’ depending on your style.
(2) 4.7ohm, 1/2 watt resistor [that’s one resistor per seat]
(1) Wire Stripper
(1) Soldering Iron*
(1) Solder*
(1) Heatshrink*
Suggested
(1) Helping Hands, or ‘Third Hand’ electrical holder
*Can be used in lieu of Solder
(4) Electrical Butt COnnectors
(1) Roll of Electrical Tape
(1) Wire Crimper
Some may want to use electrical butt connectors or crimp tools, this is fine, I prefer soldering my connections and heatshrinking them. It’s all up to you,
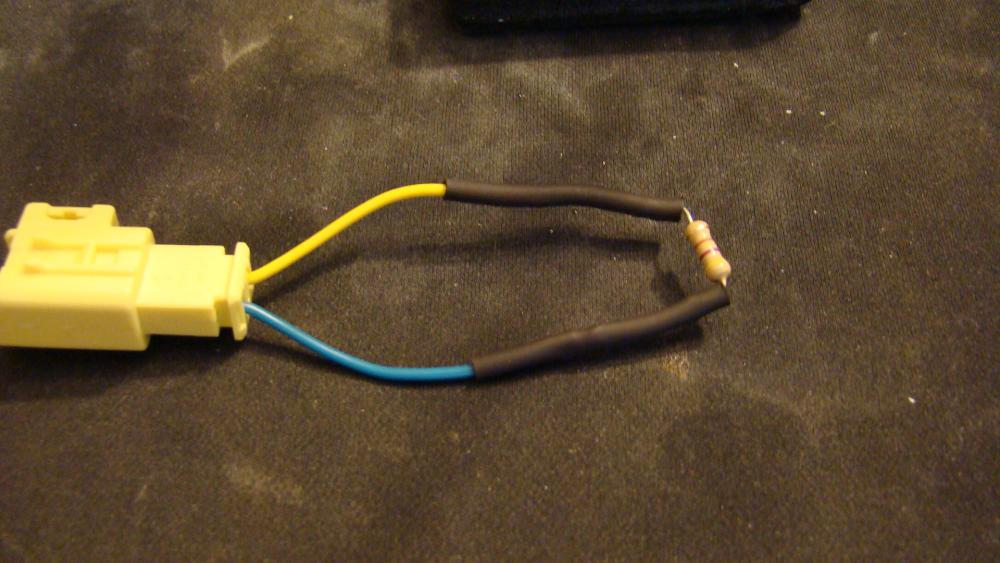
Now, assuming you still have your stock seat somewhere around – look under the stock seat, and cut off your electrical connector with yellow tape wrapped around it, leaving several inches of wire on the connector for you to strip off. Do this for both seats.
Then, Un wrap your yellow tape from the connector, and strip the ends of the wire.
Put your connector into your Third Hand to hold it for you, and wrap one end of your resistor around the exposed wire. Solder this connection together, using your solder gun, heat the connection from below, and press your solder down on the connection from the top. The hot wire will melt the solder and draw it down between the strands of copper, you don’t have to heat the solder directly. Ensure you get a shiny finish on the solder, if it looks dull, you have air in the solder connection and need to remelt the metal to get a good connection.
Now, slide come heat shrink down over your soldered connection, and heatshrink that puppy on. Then, slide another peice of sleeve over your now smaller, melted heatshrink, so you can use it for the next connection. Bend the resistor around in a U shape so it can be wrapped around the other wire of the connector, and solder this end together, and neatly heatshrink the connection. You should look something like this.
Do the same for the other connector, and you’re done with electrical engineering. Just reconnect these suckers in your car under your racing seats. You will need to perform the AIRBAG RESET TRICK in order to remove the airbag light once this is done, and you should be good to go.
Now if you want to retain the usage of your stock passenger weight sensor with your racing seats, and still have a passenger airbag, that is covered below.
Inside the passenger stock seat, is a thing peice of material that you basically sit on everytime you get in the the side seat. It detects whether or not you are heavier than a certain number, and decides whether or not to arm the passenger airbag in the dash in front of you. I think the weight is something like IF > 80lbs, then arm airbag else disarm airbag.
Now I didn’t really take pictures on this section with the intentions of making a how-to when I stripped the upholstery, so I apologize for the lack of exact images you might want. I’ll try to just do it by memory.
What you will need for this project:
(1) Ratchet 3/8″ drive
(1) 12mm socket
(1) 6″ long extension
(15+) Small cable ties
(1) Needle Nose pliers or Needle Nose Vice Grips
(Pair) Wuevos*
*Suggested
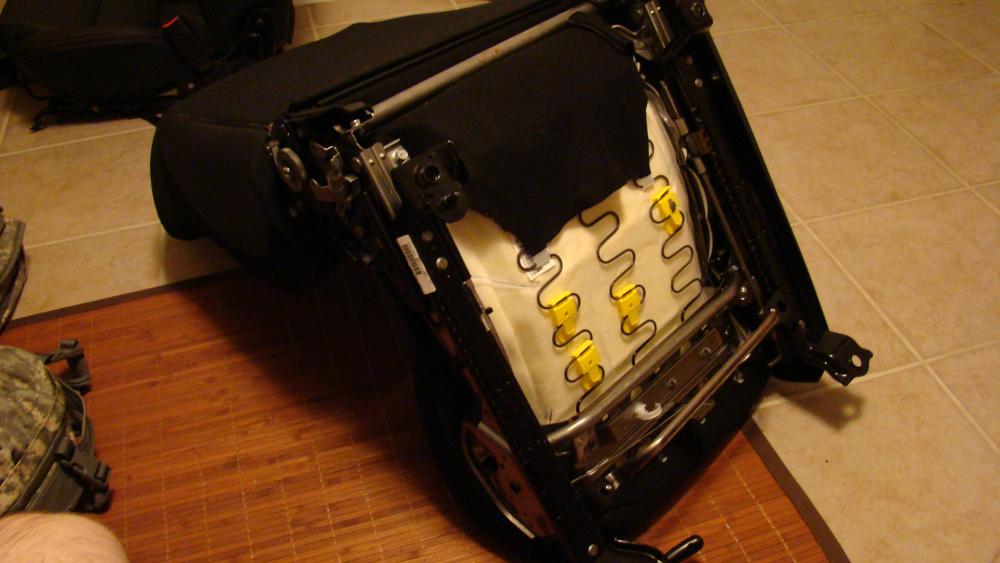
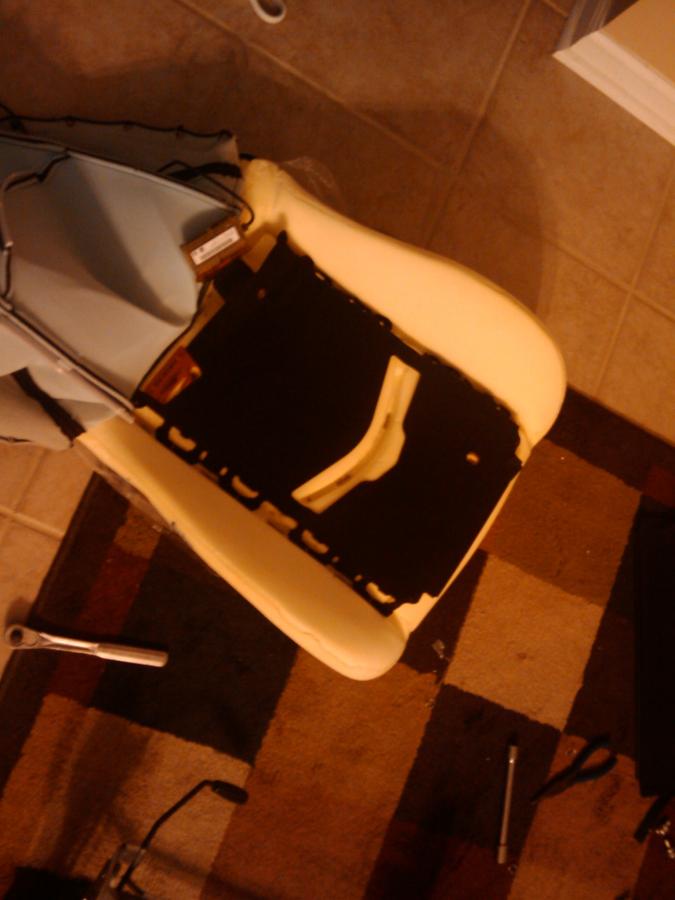
BELOW: Here is the bottom of the passenger seat, but note this is a picture after I was already done, so there isn’t any SRS or Weight Sensor connectors hanging out the bottom of this seat, so don’t get disconcerted when your seat has these in the beginning. You will need to remove the lower pad of the seat to get to the weight sensor. This is accomplished by removing four 12mm bolts.
BELOW: Bottom of passenger seat. Remove the four bolts on the bottom of the seat holding the lower pad in. Just these four bolts actually hold the lower pad in. These bolts have a little number ‘7’ on them, and are 12mm.
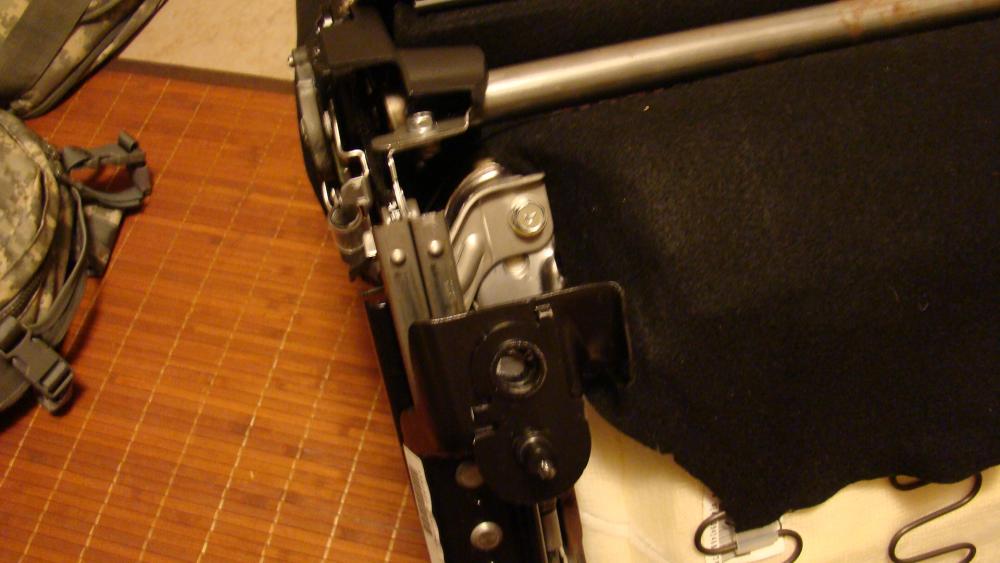
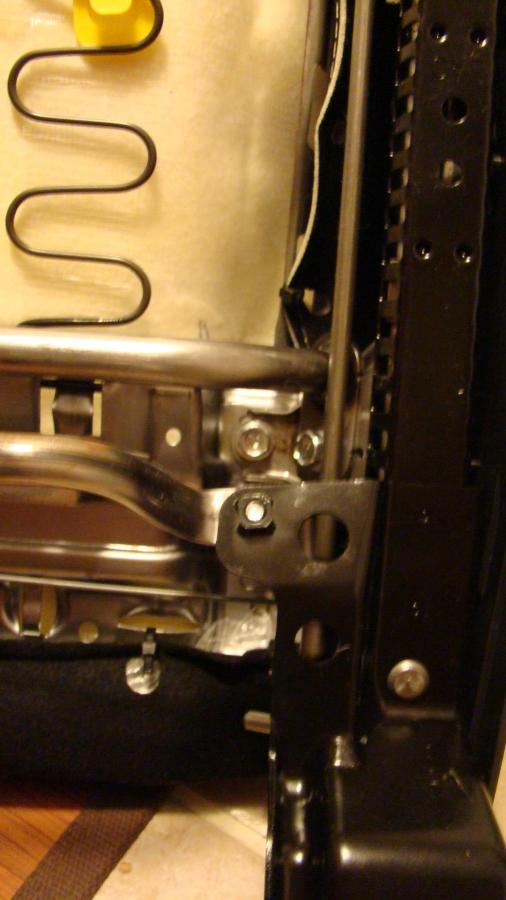
BELOW: Bottom of passenger seat, this time a picture of the bolt closer to the front of the seat. Remove the bolt that is flat into the lower pad, not the one sitting at an angle on the bracket to the side. The bolt is 12mm.
Now that the seat pad is loose from the seat, we will work just on the pad. Starting on the underside of the seat pad, take your needle nose pliers and disconnect the seat pad sensor wire from the plastic clips holding it down. THen, with your pliers again, find the small metal rings that hold the black fabric to the seat foam/frame. Grab each ring and twist it until unwravels, disconnecting the black fabric from the seatpad. The small rings are actually wrapped around a strong metal rod going through the foam seat, so you aren’t ripping these rings out, you’re just bending them open using your twisting torque and the rod as a wedge. Discard the metal rings, we will replace these with small cable ties. Peel away the fabric as you realease it from the rings, removing all the rings you can find. Once you uncover the whole pad, you will see the weight sensor is fastened to the seat pad in the same way.
BELOW: The Passenger Airbag weight sensor. Twist off the metal rings holding the sensor to the seat pad, being careful not to rip the seat pad weight sensor too much. Once you have the weight sensor loose, put it off to the side so we can re-assemble the seat pad.
Now to re-assemble/re-upholster the stock lower seat pad, you will take your small cable ties, and run them down and under the metal rods that the rings were attached too, and using the same hole on the fabric that the ring was through, pull the fabric tight to the foam just as it was. If you need to poke a new hole in the excess fabric on the underside, to run cable ties through, feel free, this won’t hurt anything. Make sure you trim the cable ties down to size, and twist them so the trimmed point of the cable tie is pointed down into the fabric. Just as a precaution. This is a very simple shaped seat, and is very easy to wrap. Re-bolt your seat bottom back on the seat frame, and your seat should look good as stock once more, now just with not connectors sticking out the bottom (assuming you already cut the SRS airbag connector off, and did the first airbag fix listed).
Now, take your passenger weight sensor, and stick it in your racing seat, under the center pad, and fish the electrical tail through the back of the seat. Make sure to connect the weight sensor to the harness below your racing seat in the car. If you do not have a removable center pad in your racing seat, and can’t put the sensor under it, you can just just place the weight sensor below your racing seat, and flip it upside down with the white facing up. When upside down, the weight sensor seems to ALWAYS arm, atleast mine did. This way your passenger airbag will just always be on. CAUTION: Ensure if you do this, you DO NOT install a forward facing child seat in the passenger seat. In an accident, the airbag may KILL THE CHILD. (not that I imagine anyone is going to try to mount a child seat into a racing seat, but hey, this IS America.)
Below is an image of the stock weight sensor in the Bride seat center, and connected up. NOTE: THE SENSOR IN THIS PICTURE IS UPSIDE DOWN TO SHOW CONTRAST. ENSURE YOU PUT THE BLACK SIDE UP IF YOU WANT IT TO WORK PROPERLY.
Below is a picture of the seat with the center Bride pad put back down over the passenger weight sensor.
I took the 1/2 watt 2 ohm resistor and bent it in such a way that it stuck through the orange connector like so:
YEAH!!! No airbags went off, no air bag light. Car ran great. Drove it around. I feel more connected with the car. The wheel has a much higher quality feel. I really love it.
When installing racing seats in a 6th generation Maxima, there are two issues to be dealt with in order to clear the airbag light. The first is the occupancy sensor which can be removed from the original passenger seat and plugged into the car and rolled up so that it is always sensing someone in the seat. The alternative is to install the sensor in the existing seat that you installed. I am going to look into this because I am considering removing the heating elements from my original Seats and installing them in my Recaro seats.
The second issue of course is that there are airbags that will be disconnected from each seat and a 1/2 Watt 4.7 ohm resistor across the terminals of the connectors will trick the computer into thinking that there is an airbag hooked up. That way all the other air bags will be armed and should deploy normally in the event of an accident. Of course if you install Maxima Seats from a different model car, then it may be possible to simply plug in the air bag from the seat if it has one.
There comes a time in a man’s life when you sometimes have to just say . . .what the f<>k. The Maxima steering wheel is a nice but conservative item, which is styled towards the luxury side of its split personality (sport and luxury). My car explores the performance aspect of this 4DSC. In conformance with the performance aspect, I have changed a number of things in my car to reflect that performance aspect. For example, I replaced the mundane lip spoiler with a more muscular WRX spoiler. Inside the car, I replaced the shift knob and e brake handle with the knob and handle from a 2006 Mitsubishi Evo MR. The pedals gave way to Alitma SE-R units, and so forth. But every time i got in the car, I would grab the Maxima steering wheel, and think “There has got to be a better one than this.” Sure it has cruise buttons, and radio buttons and it HEATS UP. Im not sure my friend’s Bentley GTC steering wheel heats up.
And then by chance in a 350Z forum, I came across this:
Momo made two wheels as Nissan factory options for the JDM Fairlady Z (350Z in Japan). I found a guy who would import this steering wheel for me for around $700, including airbag! If you think that costs a lot, go ahead and price an OEM Maxima wheel. I think the OEM airbag alone costs that.
Here is how to install one:
Prelims: DISCONNECT the battery completely and wait 3 minutes. Get your tools ready. Wear gloves if you can to prevent static electricity from building up. I did but took them off in the pics.
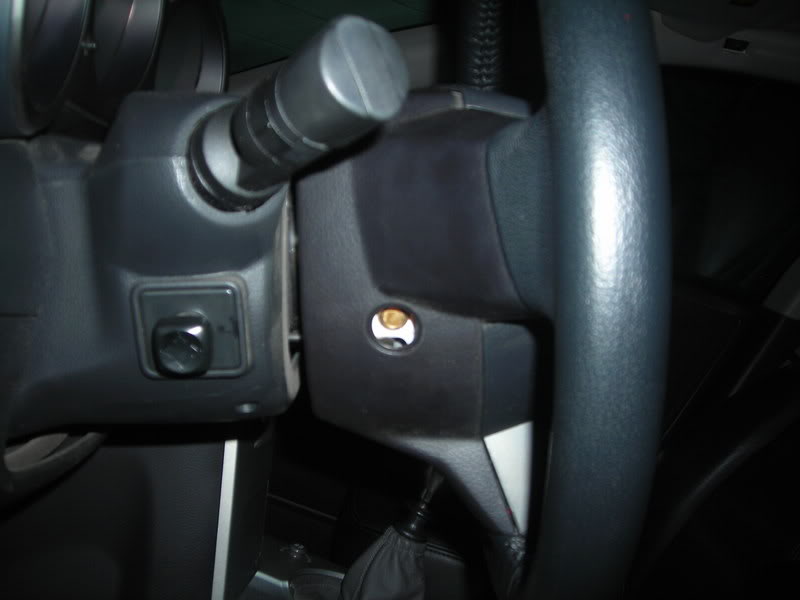
1. Remove the dime size bolt covers on the side of the wheel and remove the bolts – 10mm.
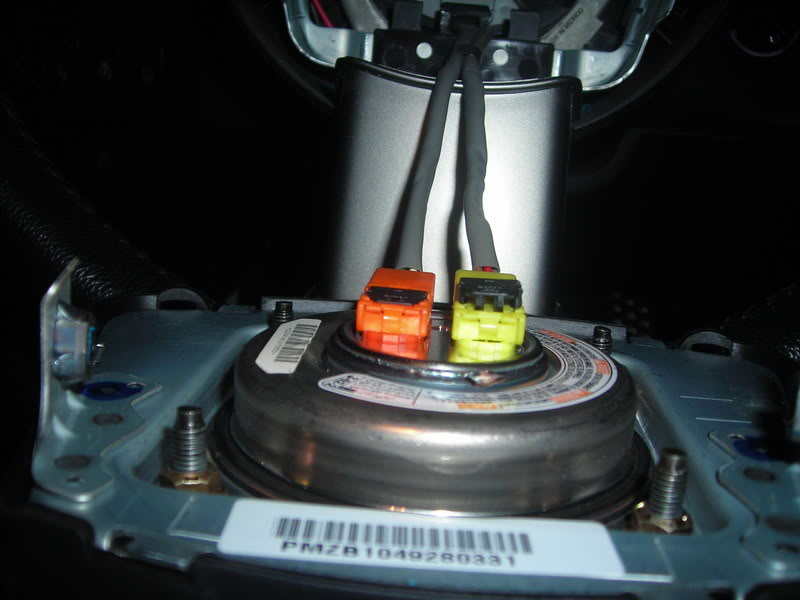
2. Remove the airbag cover and assembly in one unit. 3. Look at the back of the airbag. Two connectors – orange and yellow are there.
The connectors are locked by these little black locking devises. Raise them like this:
Then unplug them. The whole unit is free from the car. DO NOT DROP IT. Set it aside carefully. Its an airbag – it could explode. Keep it away from extreme heat.
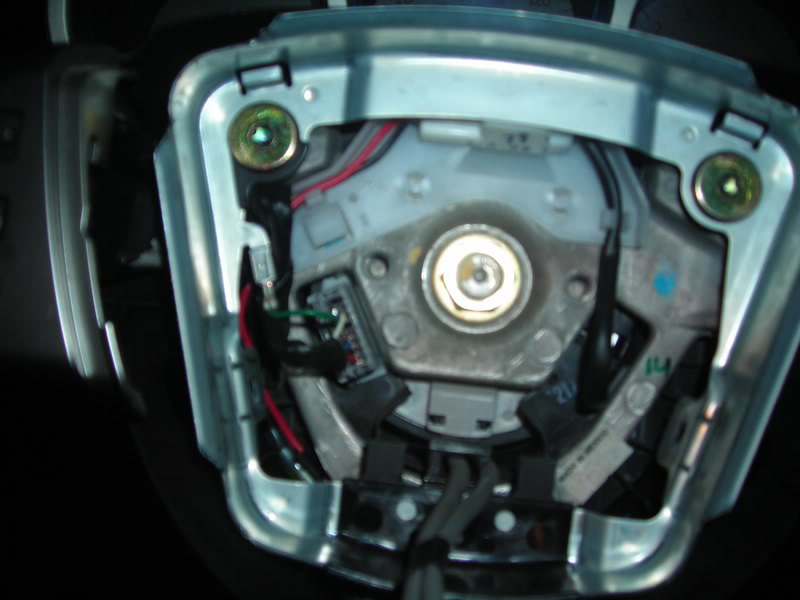
4. Remove the center nut-19mm. I used a lug nut remover.
Note the marks to make sure its straight.
5. Use a steering wheel puller – Pep boys, 12 bucks, or rent one if ur a cheap skate or starving college student.
6. Undo the remaining connectors. Plug in the sole red wire to the matching plug. I haven’t figured out what to do with the airbag plugs since the OEM bag had two connectors and the JDM wheel has only one.
Here is what it looks like on the car:
I took the 1/2 watt 2 ohm resistor and bent it in such a way that it stuck through the orange connector like so:
Then I wrapped the connector in tape to hold it all in place:
I buttoned it back up, hooked up the battery, said a short prayer that the airbags wouldn’t all go off AND that there wouldn’t be an airbag light, and started it up.
YEAH!!! No airbags went off, no air bag light. Car ran great. Drove it around. I feel more connected with the car. The wheel has a much higher quality feel. I really love it.
As we all know, there is no way to make our back seats fold down. Here is an option to make it happen.
With MAXUS scheduled to be in Central Florida next year, I felt that I needed to step my game up on the interior if I plan to enter any car shows at the event. I didn’t take detailed pics but you will get the idea. I went to the local junkyard where they had a 2000 I30. I got the backseat for $30! That was a steal to me so I made sure to grab it. On to the pics…
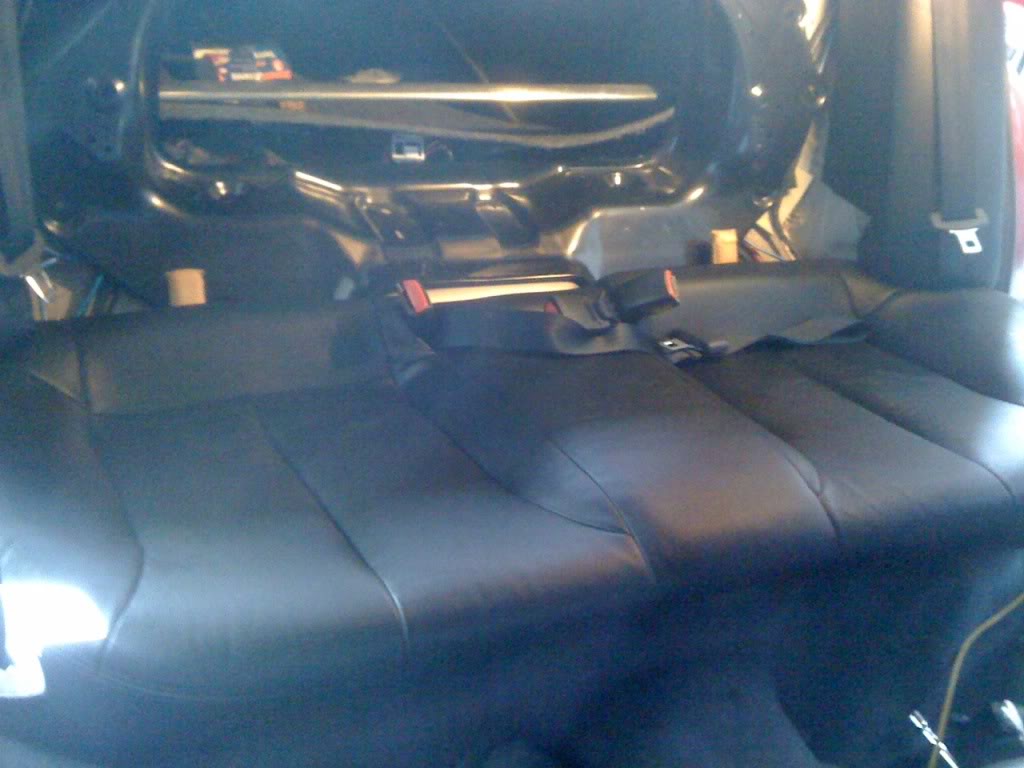
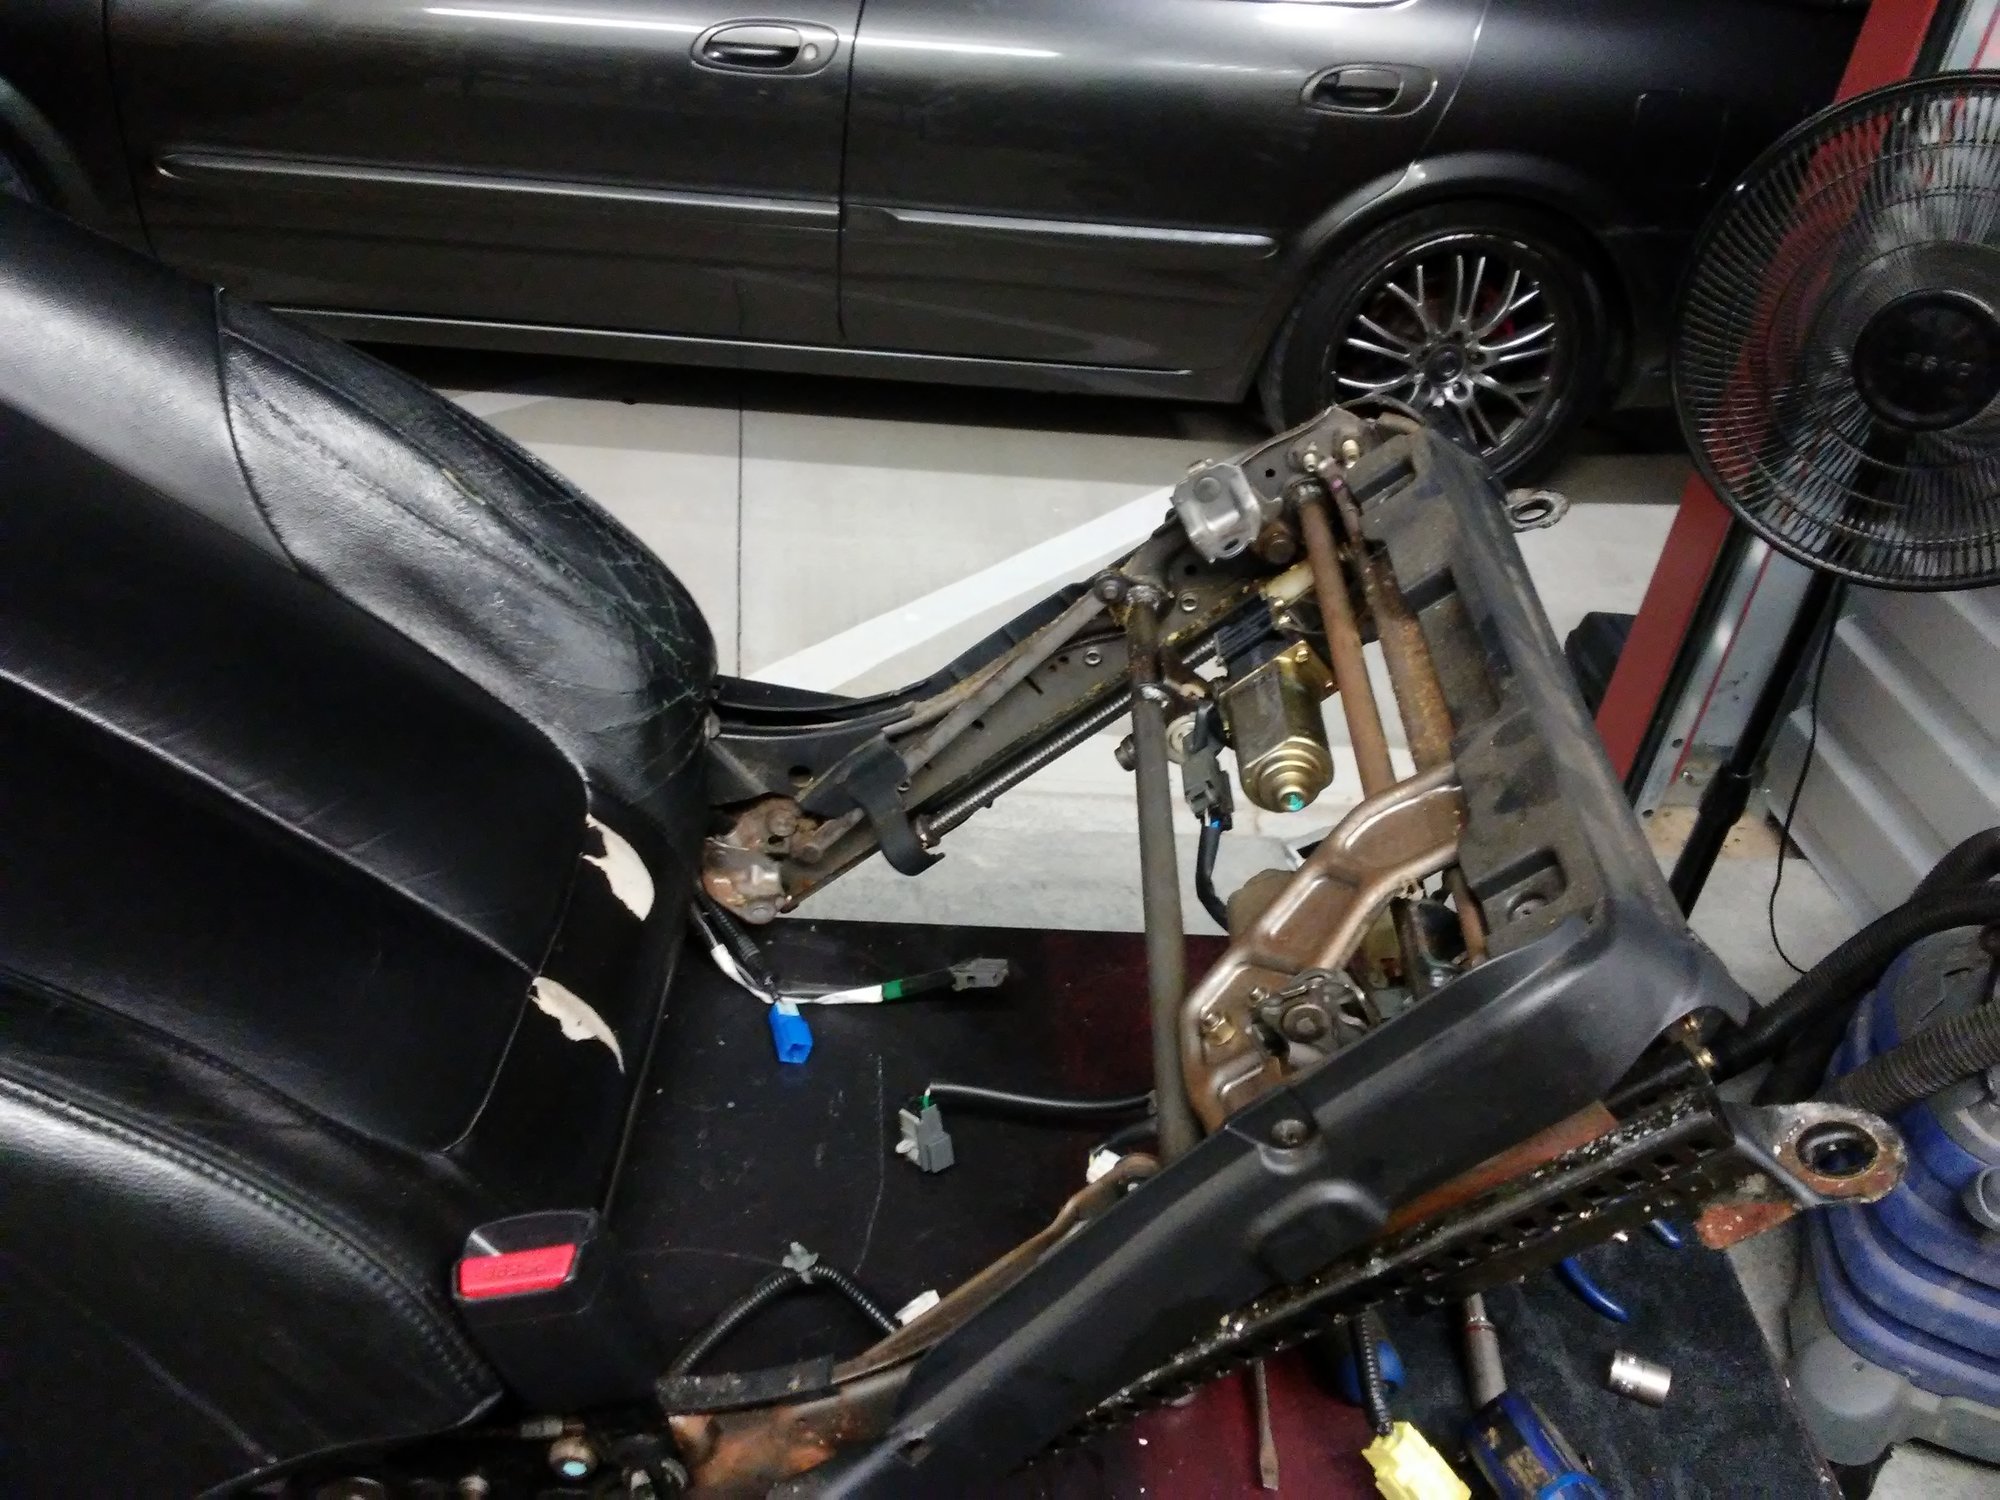
I started taking the backseat and metal bracket out of my car, this is what it looked like when all out:
You will need to remove those 3 hinge brackets that the back rest attaches to. I used a dremel and was able to get them off. Here is what it looks like:
Now put the new metal bracket on. You can reuse the stock holes on the very bottom. For the other holes you will need to drill new ones in order to attach the bolts. You don’t need to attach all the bolts, just enough so that its on there solid:
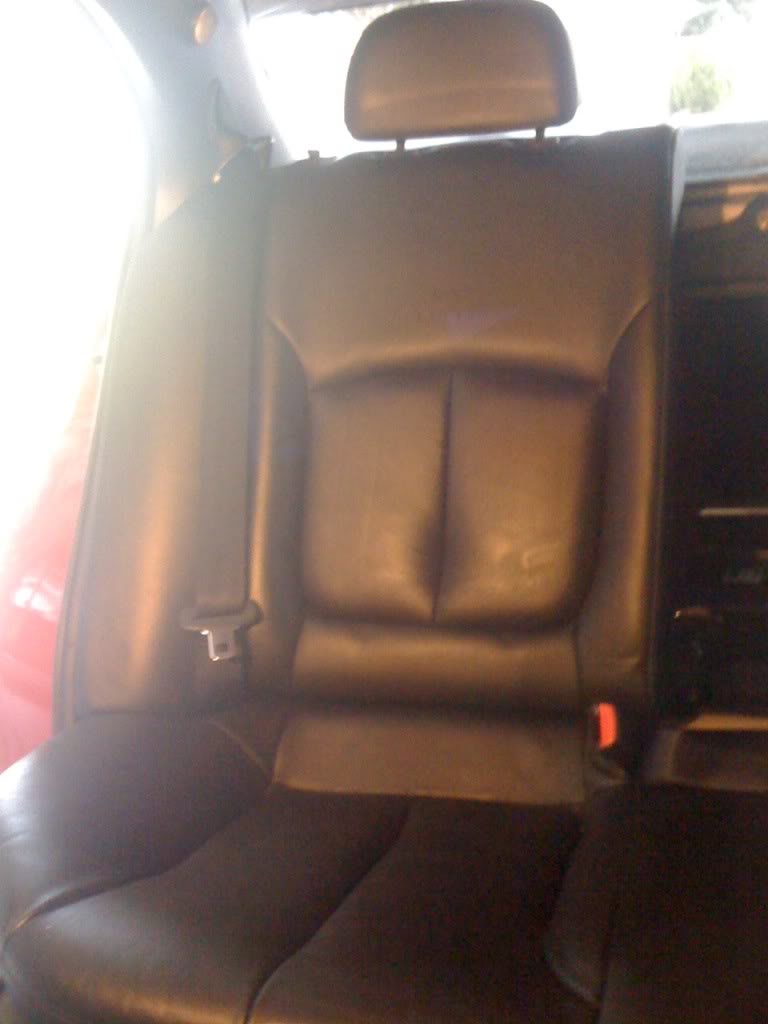
Now put the bench seat on first. They clip right into the stock mounting tabs. Then put the sides for the back rest on. This is what it should look like:
Now with that in place, you can start putting the back rest parts on, i started with the single seat:
Then I put the other piece on:
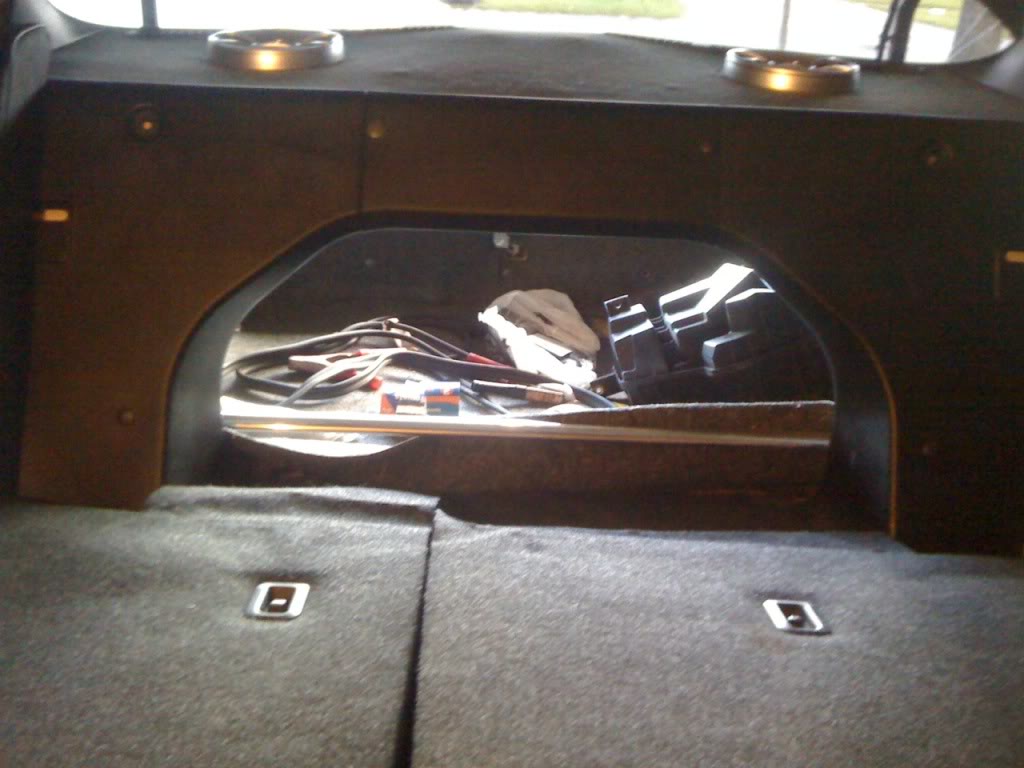
And now for what you have been waiting for, THEY FOLD DOWN!!!
This is with the finished plastic trims on:
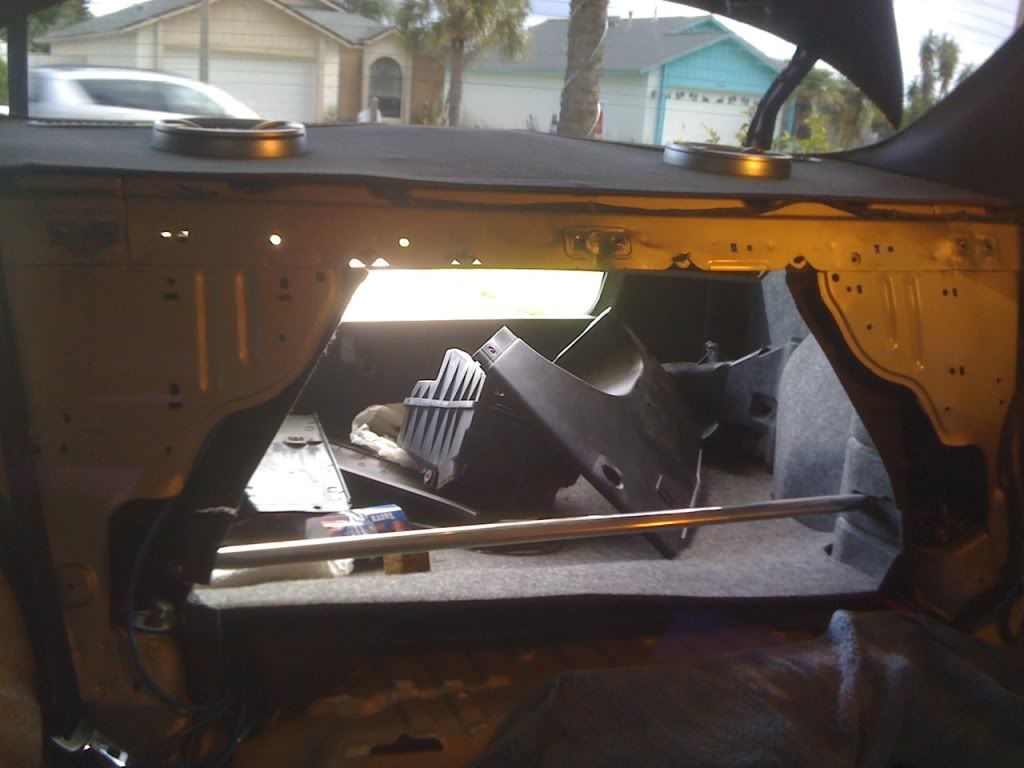
Access from the trunk:
And there you have it. Took me a total of about 2 hours to fit them in there. Seats are a nice and snug fit, comfortable and very functional.


")


 1. Remove headlight from the vehicle. Take care not to scratch the fender with the metal mounting pin.
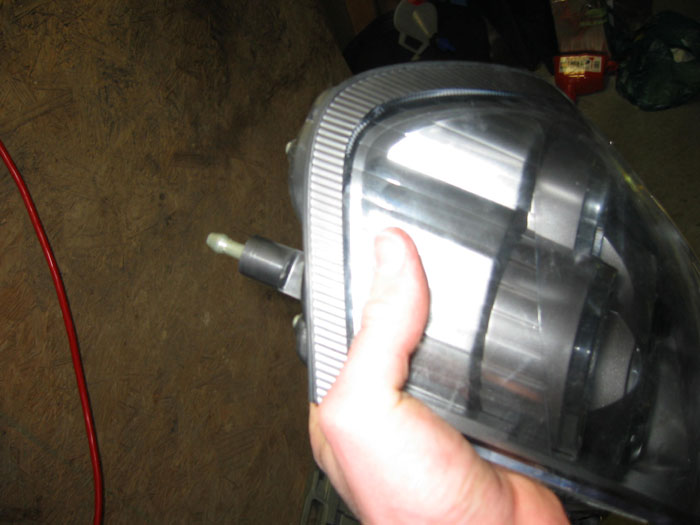
")


 1/2 Watt 2 Ohm resistor")


 1/2 Watt 4.7 Ohm Resistor")


 3. Look at the back of the airbag. Two connectors – orange and yellow are there.