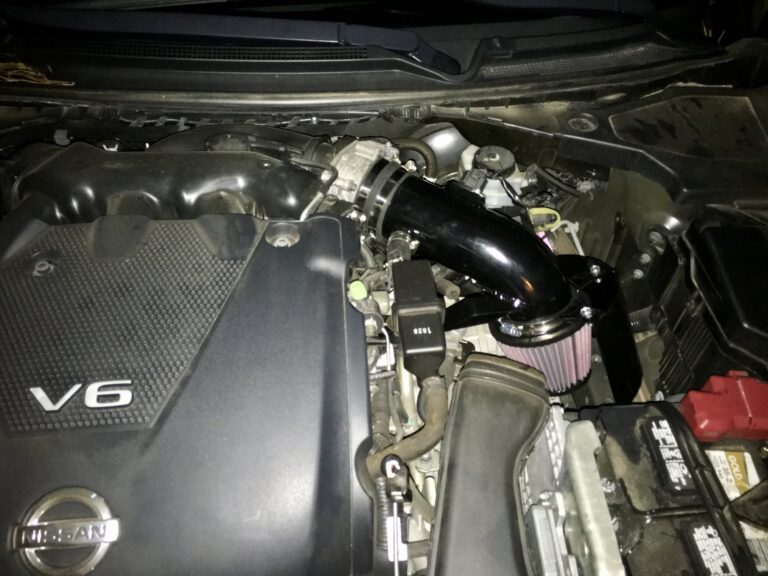
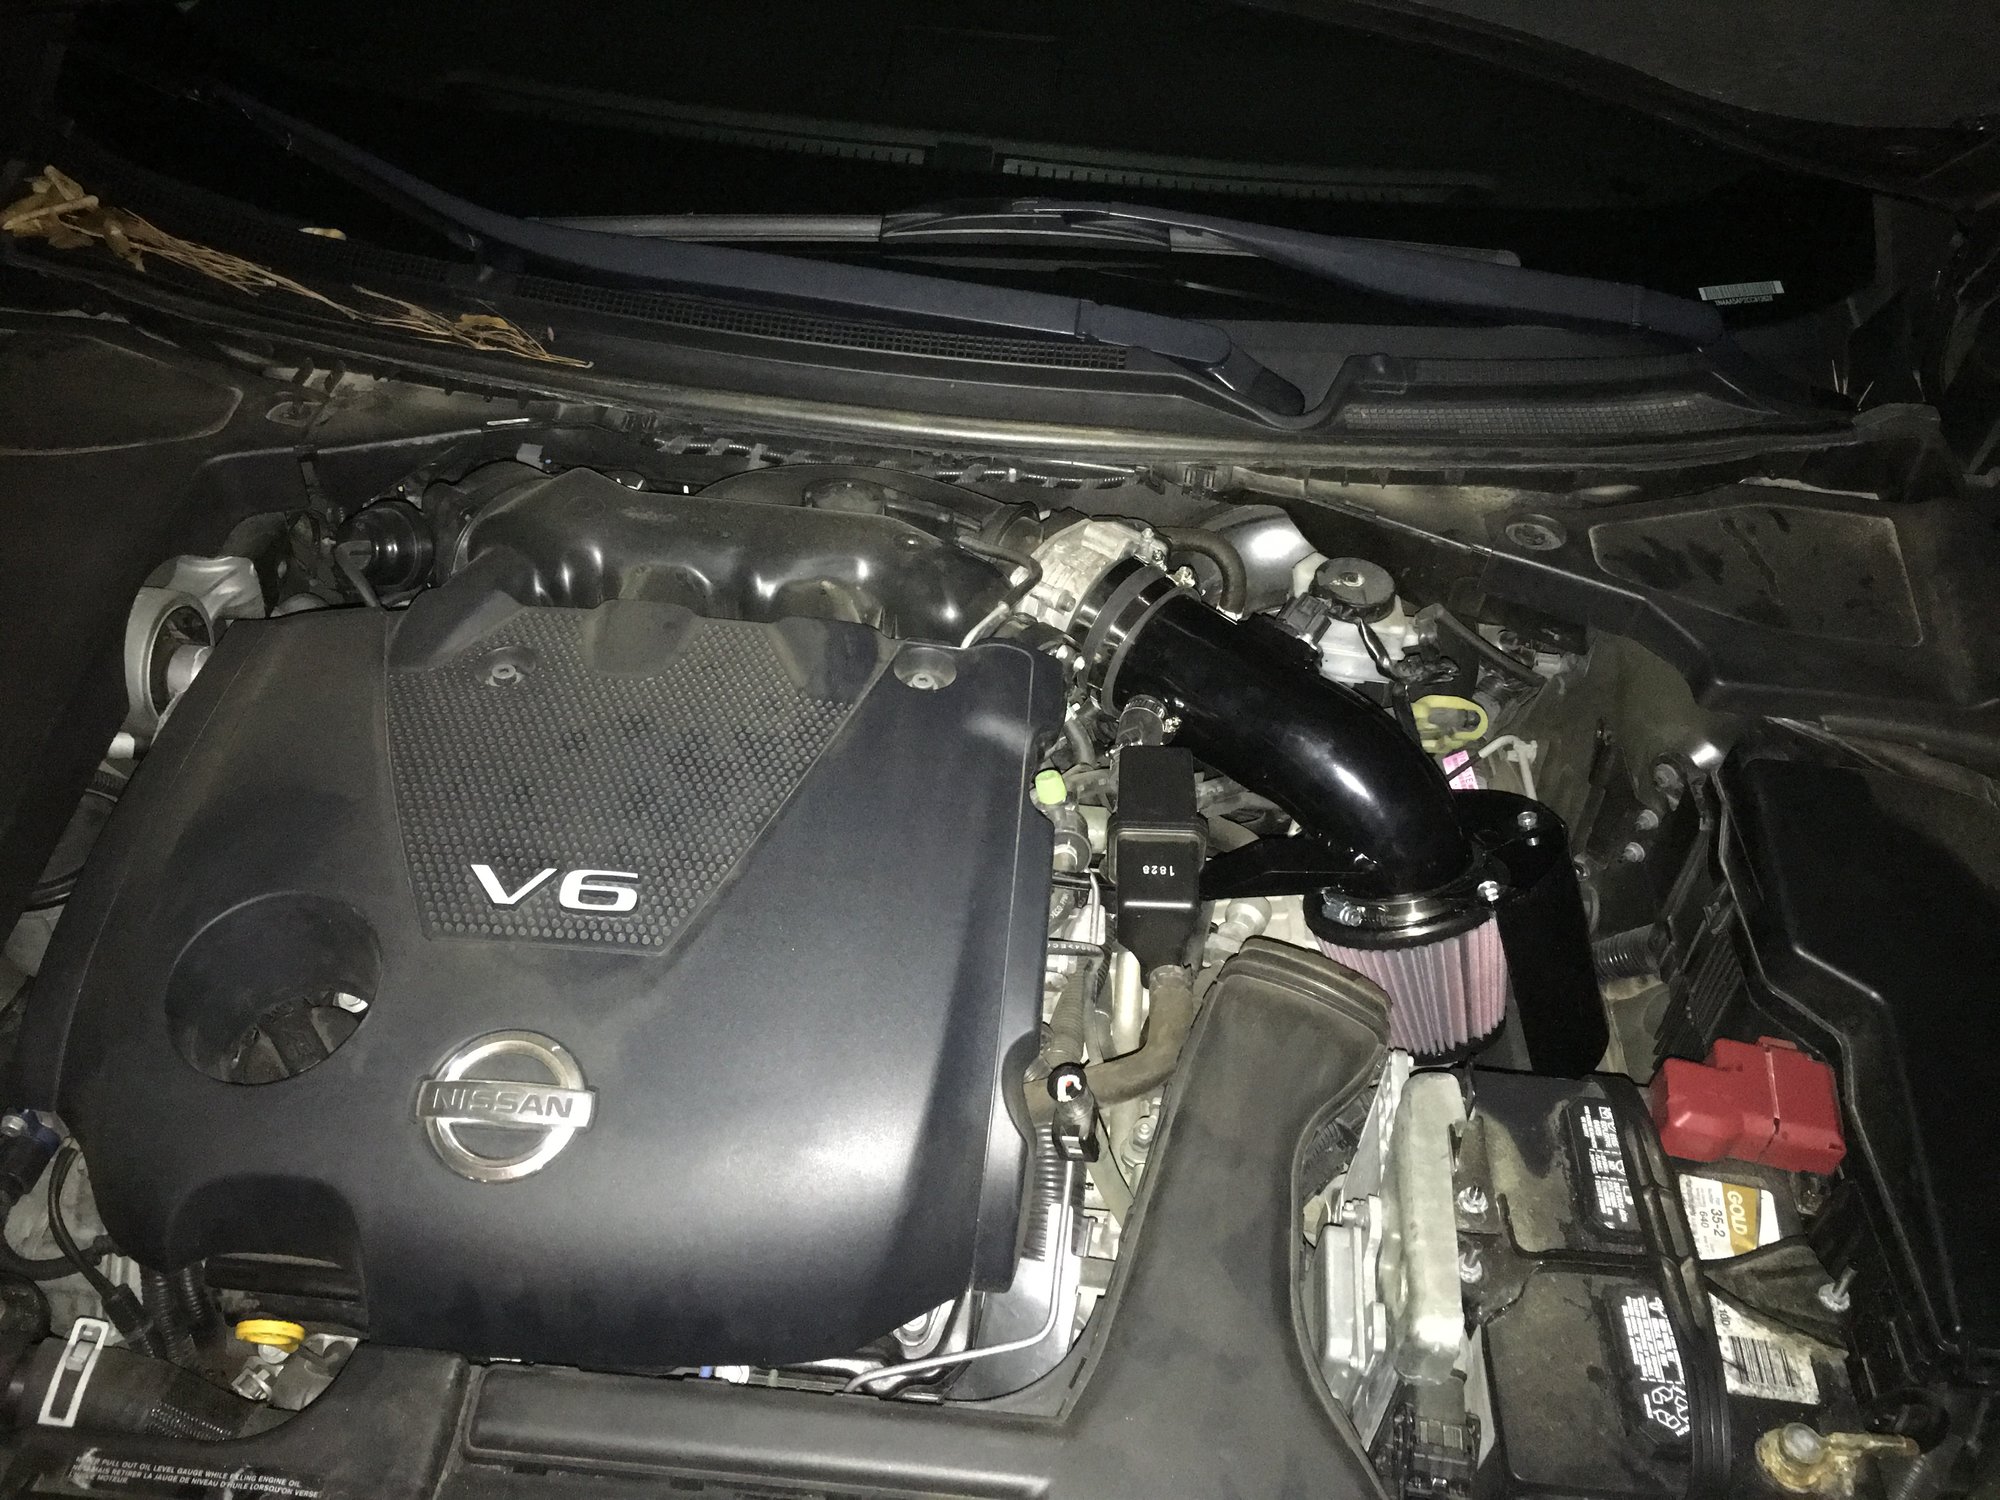
I recently toyed around with the idea of putting an intake in my Max, so I started reading some threads on here. After looking at the posts and my own engine bay it’s pretty obvious that all intakes are pretty much going to be the same for this car…there’s only one place to go. The filter on the end of it is really the only variable.
So, I went with a bit of a gamble and got a little known (but all over the bay) intake kit from a company called Check Point Tuning, or CPT for short. They have two options for their kits, $99.95 for one that comes with what looks like a ‘Spectre’ type knock-off filter, and $139.95 for the same pipe – but with a K&N filter included. I went with option B. At that price it undercuts K&N’s own air intake system’s price by more than half, and K&N is already on the cheaper end of the spectrum for intakes. So, I’m putting this review out there for people like me, who want to check out their options and maybe came across this low price company on the bay.
Now to get this out there…what every other thread out there for the 7th gen Maxima says is true. No out of the box intake swap will gain power in this car. I’ve built true CAI’s for other cars before and the stock system truly is about the best you can do performance wise. It’s pretty well thought out. So, you won’t be gaining mad VTEC or anything, but if you go into it for the sound, like I did, you won’t be disappointed.
That being said, while I didn’t gain any performance I don’t feel like I lost any either. Driving dynamics are essentially unchanged. So that’s a plus. No low end power loss or any other abnormalities.
Sound wise, well it’s just nifty. Google Maxima K&N intake video and you’ve got the sound, it’s nice. Noticeable even in low RPMs but obviously gets more so as the engine is pushed. Sounds just as great as the 2x expensive name brand with exactly the same level of protection. All around fantastic, unless you’re my gas card.
Now, for the negative –
Yes, it does come with instructions. They are not very good. I suppose that’s because I’m a visual person and I like diagrams, but I’d say if you’ve never really worked on an engine or installed an intake…WITHOUT instructions…this may not be the kit for you. I had to double back a couple of times just because things weren’t completely clear.
Secondly, my third drive after the installation did throw a check engine light. My car had been running and driving as smooth as ever so I knew there was nothing wrong. I cleared the code and it hasn’t come back in days, so I think I’m in the clear. Just a false code more than likely, but still something that others may face.
Lastly, it does come with a heat ‘shield’ but it doesn’t do much. Again though, with these cars there just isn’t any cold air to pull unless you custom build or use the factory intake. Don’t buy a kit and expect performance…it’s all about the sound pretty much, so spend your money on a good filter. The pipe and the shield really won’t matter when compared to other kits.
All in all – great value. That great VQ sound is there, NO performance loss (or gain), and I spent less than half (or even less than that) of the price of the name brand kits with the same K&N protection. What’s not to like?
Please excuse the dirty engine pics. It’s been a long summer.
Price: $189.99 (Shipped Anywhere in the Continental US)
Applications
2009 – 2016 Nissan Maxima
2007 – 2016 Nissan Altima
2007 – 2013 Nissan Altima Coupe
Tune On The Go is proud to present phenolic its 2pc thermal intake spacers. These spacers are made from 3/8 thick high-grade phenolic. The spacers will isolate the throttle body from the manifold and also the manifold from the block.
With the isolated areas spaced off this way the manifold will run about 23 degrees cooler thus creating colder, denser, heavier air into the chamber
Sold as a complete kit which includes:
2 – Extended High Strength Manifold Studs
4 – Stainless Steel Manifold Bolts
8 – Stainless Steel Lock Washers
4 – Stainless Steel Allen Head Throttle Body Bolts
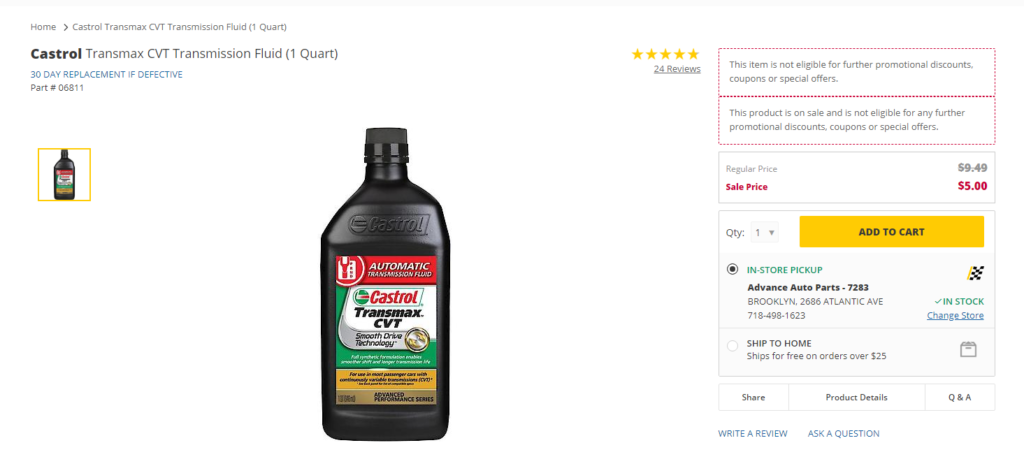
I was up for a CVT fluid drain and refill on my 2009 Nissan Maxima. The car has 200K miles on the original CVT (yeap original CVT). Upon checking the fluid, it was really dark and needed to be replaced. Typically, I use Nissan OEM CVT Fluid. The non-OEM fluid is usually not recommended given the sensitivity around the CVT transmissions. But given my car is way out of warranty and I might need a CVT replacement anyway, figured I’d give the Castrol Transmax CVT a try.
Castrol Transmax CVT has good reviews and hasn’t seen any reports of damaged transmissions. Also, most of the people who have had transmission issues used Nissan OEM Fluid (so not so much of a fluid issue). Not to mention that the Castrol fluid was on sale for only $5 bucks a quart and available locally.
Update 11/19/2019: After driving approx. 20K miles, the car is still driving smoothly and perfectly. The car has 212,806 miles on the original CVT.
Update 2/15/2020: 215,522 miles and still running smoothly.
Update 4/3/2021: 222,893 miles and still running smoothly (not many miles as we have a newer family car)
Important Note:If your vehicle is still under Nissan’s warranty, and you don’t want any hassles should you have a transmission issue, don’t use this product. Not because it’s not a good product, but because it is RED just like regular transmission fluid. You’ll have a heck of a time proving that you actually used an OEM Nissan fluid.
Old CVT Fluid
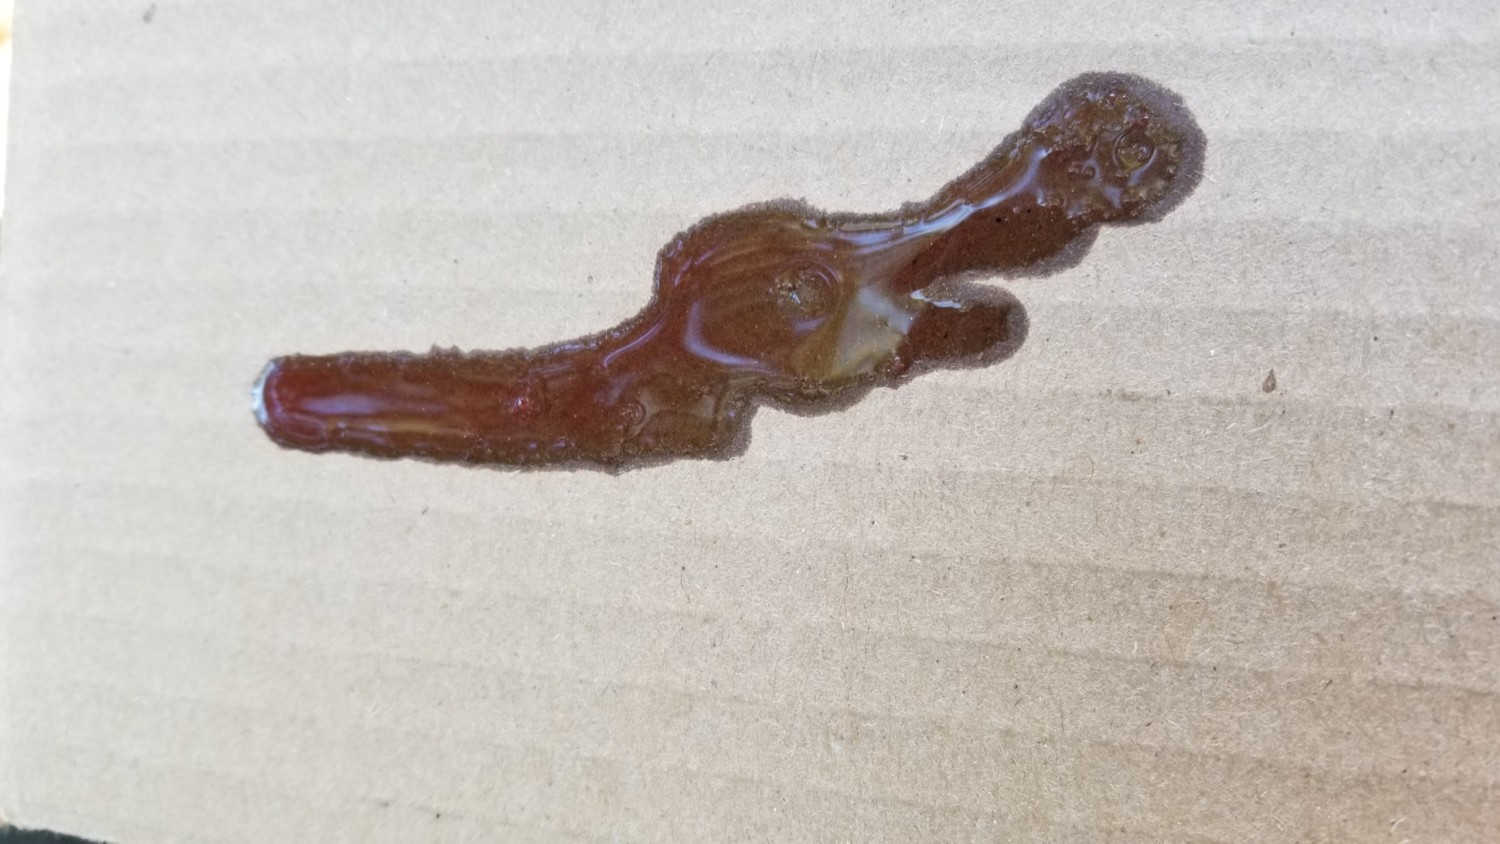
Castrol CVT Fluid (As you can see it’s RED)
Product Details:
Part Number: 06811 / Castrol Transmax CVT Transmission Fluid
Price: $5.00 (on sale, typically it’s $9.00 or so)
Formulated with Smooth Drive Technology and premium full-synthetic base oil, is designed for most continuously variable transmissions. It is suitable for use in most passenger cars fitted with push belt transmissions, assuring peace of mind across a wide range of vehicles.
Product Features:
Enhanced friction durability for a smoother drive for longer transmission life
Enhanced wear protection for longer transmission life
Superior high-temperature protection to effectively resist oxidation
Superior variator torque capacity that can prevent belt or chain slippage.
If you are looking to replace the Axles on your 2009-2015 7thgen Maxima, the A1 Cardone brand is a very good option and alternative to OEM. All owners that have installed A1 Cardone axles confirmed they DO NOT have any vibrations when driving at highway speeds. In fact, many couldn’t tell the difference between OEM.
Order Link:https://www.ebay.com/itm/303897376210(A fellow member confirmed these are Cardone) Additional Note: If you are in Canada, you can order Cardone Axles from partsavatar.ca Price: $319.41 Shipped (Includes both Driver and Passenger Side Axles)
This is a project that has been on my slate for a while, and I’m finally getting around to it. I have seen several people ask what the advantages of stiffer motor mounts are. The answer it simple, the more you reduce the amount the motor moves by rotational force, the more power you put to the pavement, and reduce wheel hop. They do not increase power but allow you to harness the power you already have. The downside is that engine vibration is greatly increased inside the cabin. There are trade-off in every project you take on.
Step 1
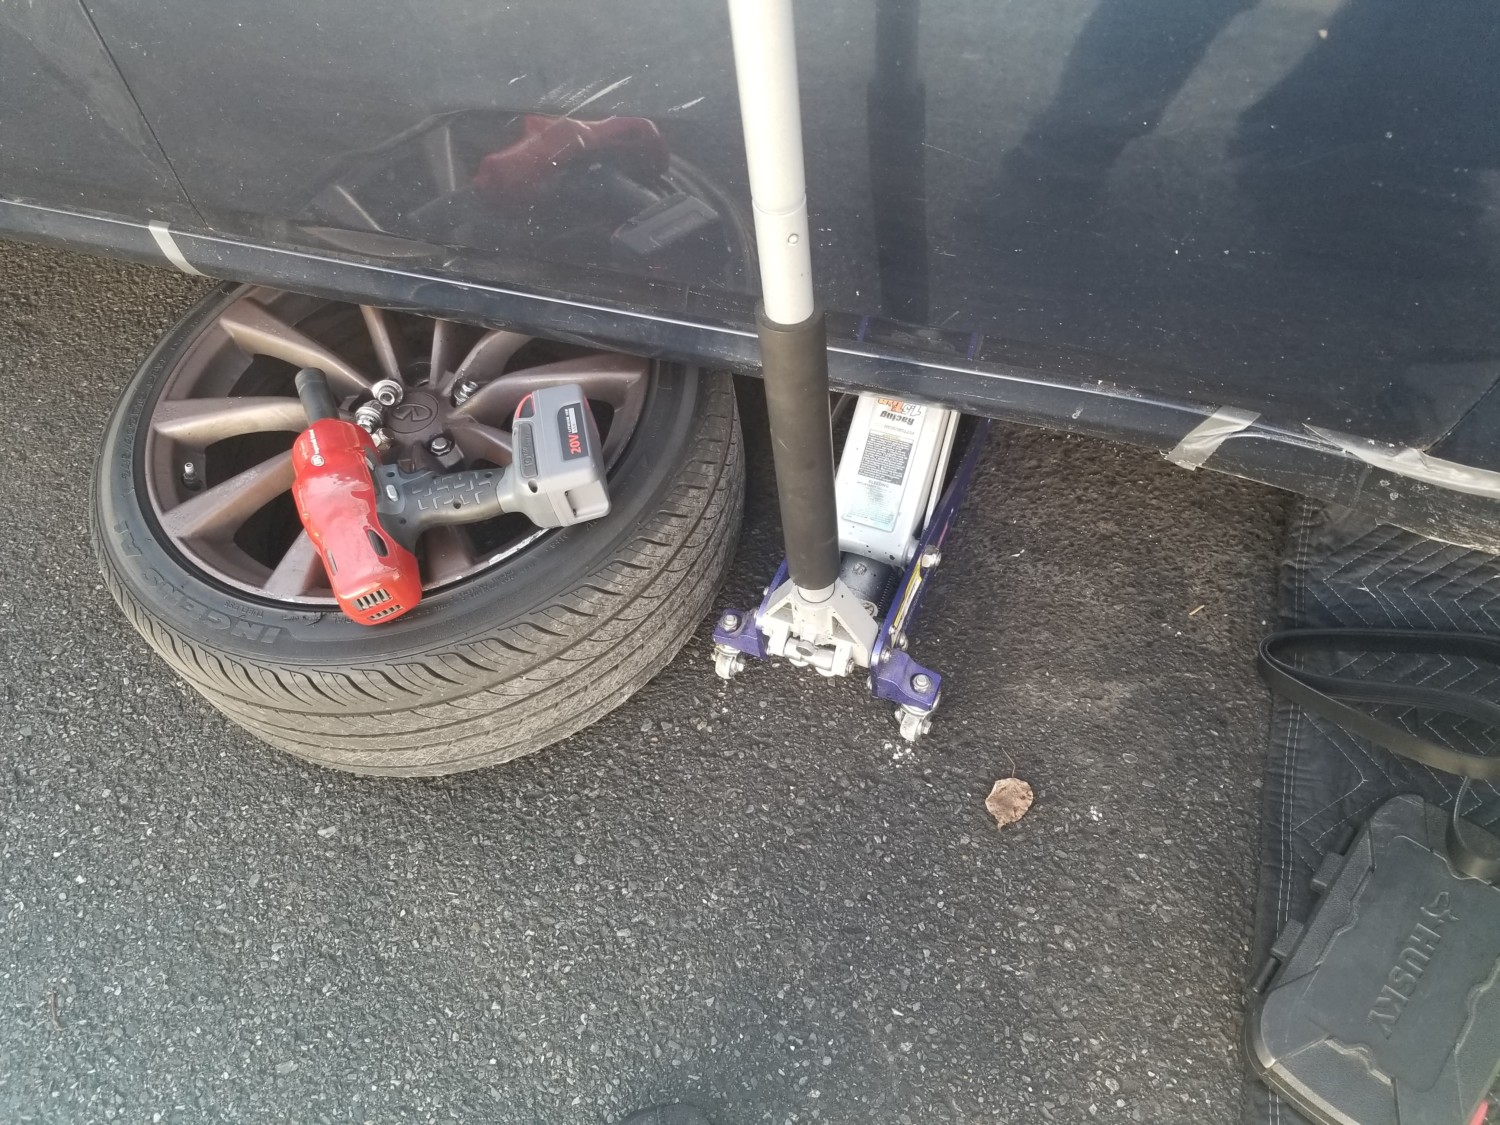
Jack up the car and support with jack stands. Remove the lower engine cradle. This can be done by supporting the weight of the motor with your floor jack to slowly lower it down. The tranny and timing cover mounts will support the motor while the lower support is out of the car. I’ve been turbo’d for 5 years, and I cannot recall if removal of the Y pipe is necessary. Use your own judgment.
Step 2
Once the mounts are out of the car, evaluate the condition of your mounts. You will want to remove a lot of the factory material; however, you do not want to change the location of the center bushing. Make sure you have a way to keep it in its factory location. I made sure I had plenty of rubber on both ends to keep it in place during curing.
Step 3
Remove as much factory material as you feel comfortable with. The more Poly you have in there the stronger it will be. To do so, I used an electric drill and several sized drill bits, and a set of needle-nosed pliers. There is considerable metal reinforcement on the inside of the mount, so don’t be too afraid to explore. Just remember to keep the center bushing centered.
Step 4
Cleanliness is next to Godliness! Get a bucket of hot soapy water and scrub away. The cleaner the inside of the mounts are the better the poly will stick to it. Depending on the funkiness, you might want to hit them with some degreaser first. Dawn dishwashing detergent works wonders. If your mom won’t get too upset, put them in the toaster oven at 200 degrees to for an hour or so, to make sure they are good and dry.
Step 5
Seal one side of the motor mount. Trace out the outer boundary of the mount on cardboard and cut it out. Lay the mount on its side and center the circle cardboard piece on the center bushing. Lightly tap the center of the cardboard to make an impression of the center bushing. Cut out the center impression a little small, and then force it onto the center bushing. This will stop the resin from pouring out the bottom. Cover the cardboard piece with aluminum foil, and pull it tight without tearing. Spray some sort of release agent (PAM, Olive oil, WD-40) only on the side that will make contact with the motor mount. Tape it into place using masking tape. Masking tape will not leave a residue like duct tape, but this is your project. Tape the ring securely to the mount. The more tape the better. There will be leaks that show up; this will just keep them at a minimum. Don’t forget to tape around the center hole really well. The resin pours in like warm molasses, and if it has a place to go, it WILL LEAK OUT. Then you have to start over.
Step 6
The Pour. The polyresin I used was Devcon, Flexane 94. It dries the hardest of their line; however, they do have Flexane 60 that is more flexable. It can be picked up at any industrial supply store, like Granger, for around $36. The kit comes with the resin, curing agent, plastic cup to mix it in, and a stir stick. One “kit” will build two mounts with some leftover if you remove a considerable amount of material from the factory mount. Place the mounts on their sides, and make them level. Rolls of duct tape or masking tape work. Combine the resin and activator according to the enclosed directions and stir for a good 7 to 10 minutes. The mixture has a work time of a good ten to fifteen minutes depending on temp and humidity. The warmer it is the faster it cures. You only have one shot at this, so make sure the mounts are ready to be filled. Pour slowly and try to keep from developing bubbles in the mount. Fill one-half full; fill the next one-half full, and then top off the first.
This gives the resin a chance to seep into all the nooks and crannies and allowing the air to escape. If small leaks appear, don’t freak out. The resin will thicken up and stop leaking. If a big leak shows up, get creative, you didn’t follow the directions.
Step 7
The Cure. The mixture will harden so that it can be handled within 30 to 45 minutes. To speed up this time, place them under a heat lamp. I have a torch lamp in my living room that has 3 adjustable lights that work perfectly. Remove the cardboard end and foil. They are hard in 24 hours and reach full stiffness within 7 days. If this is a two-day project then you can put them in the oven again at 200 degrees for 24 hours to speed up the cure.
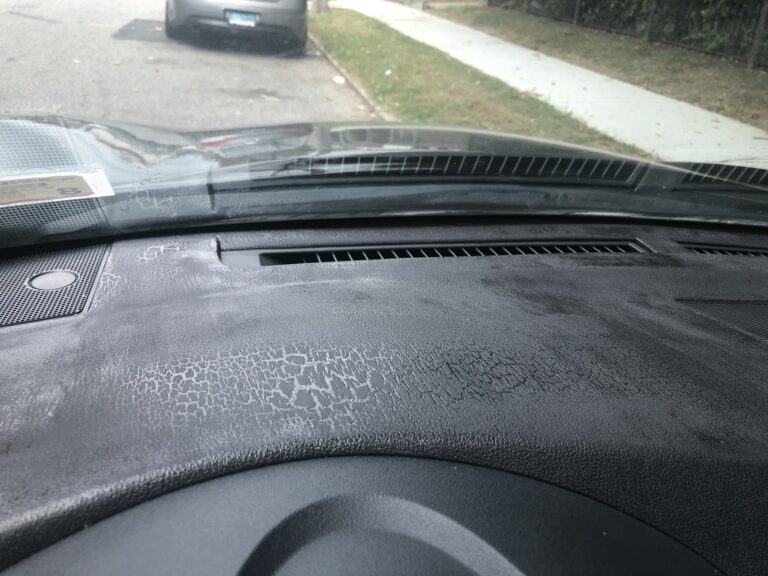
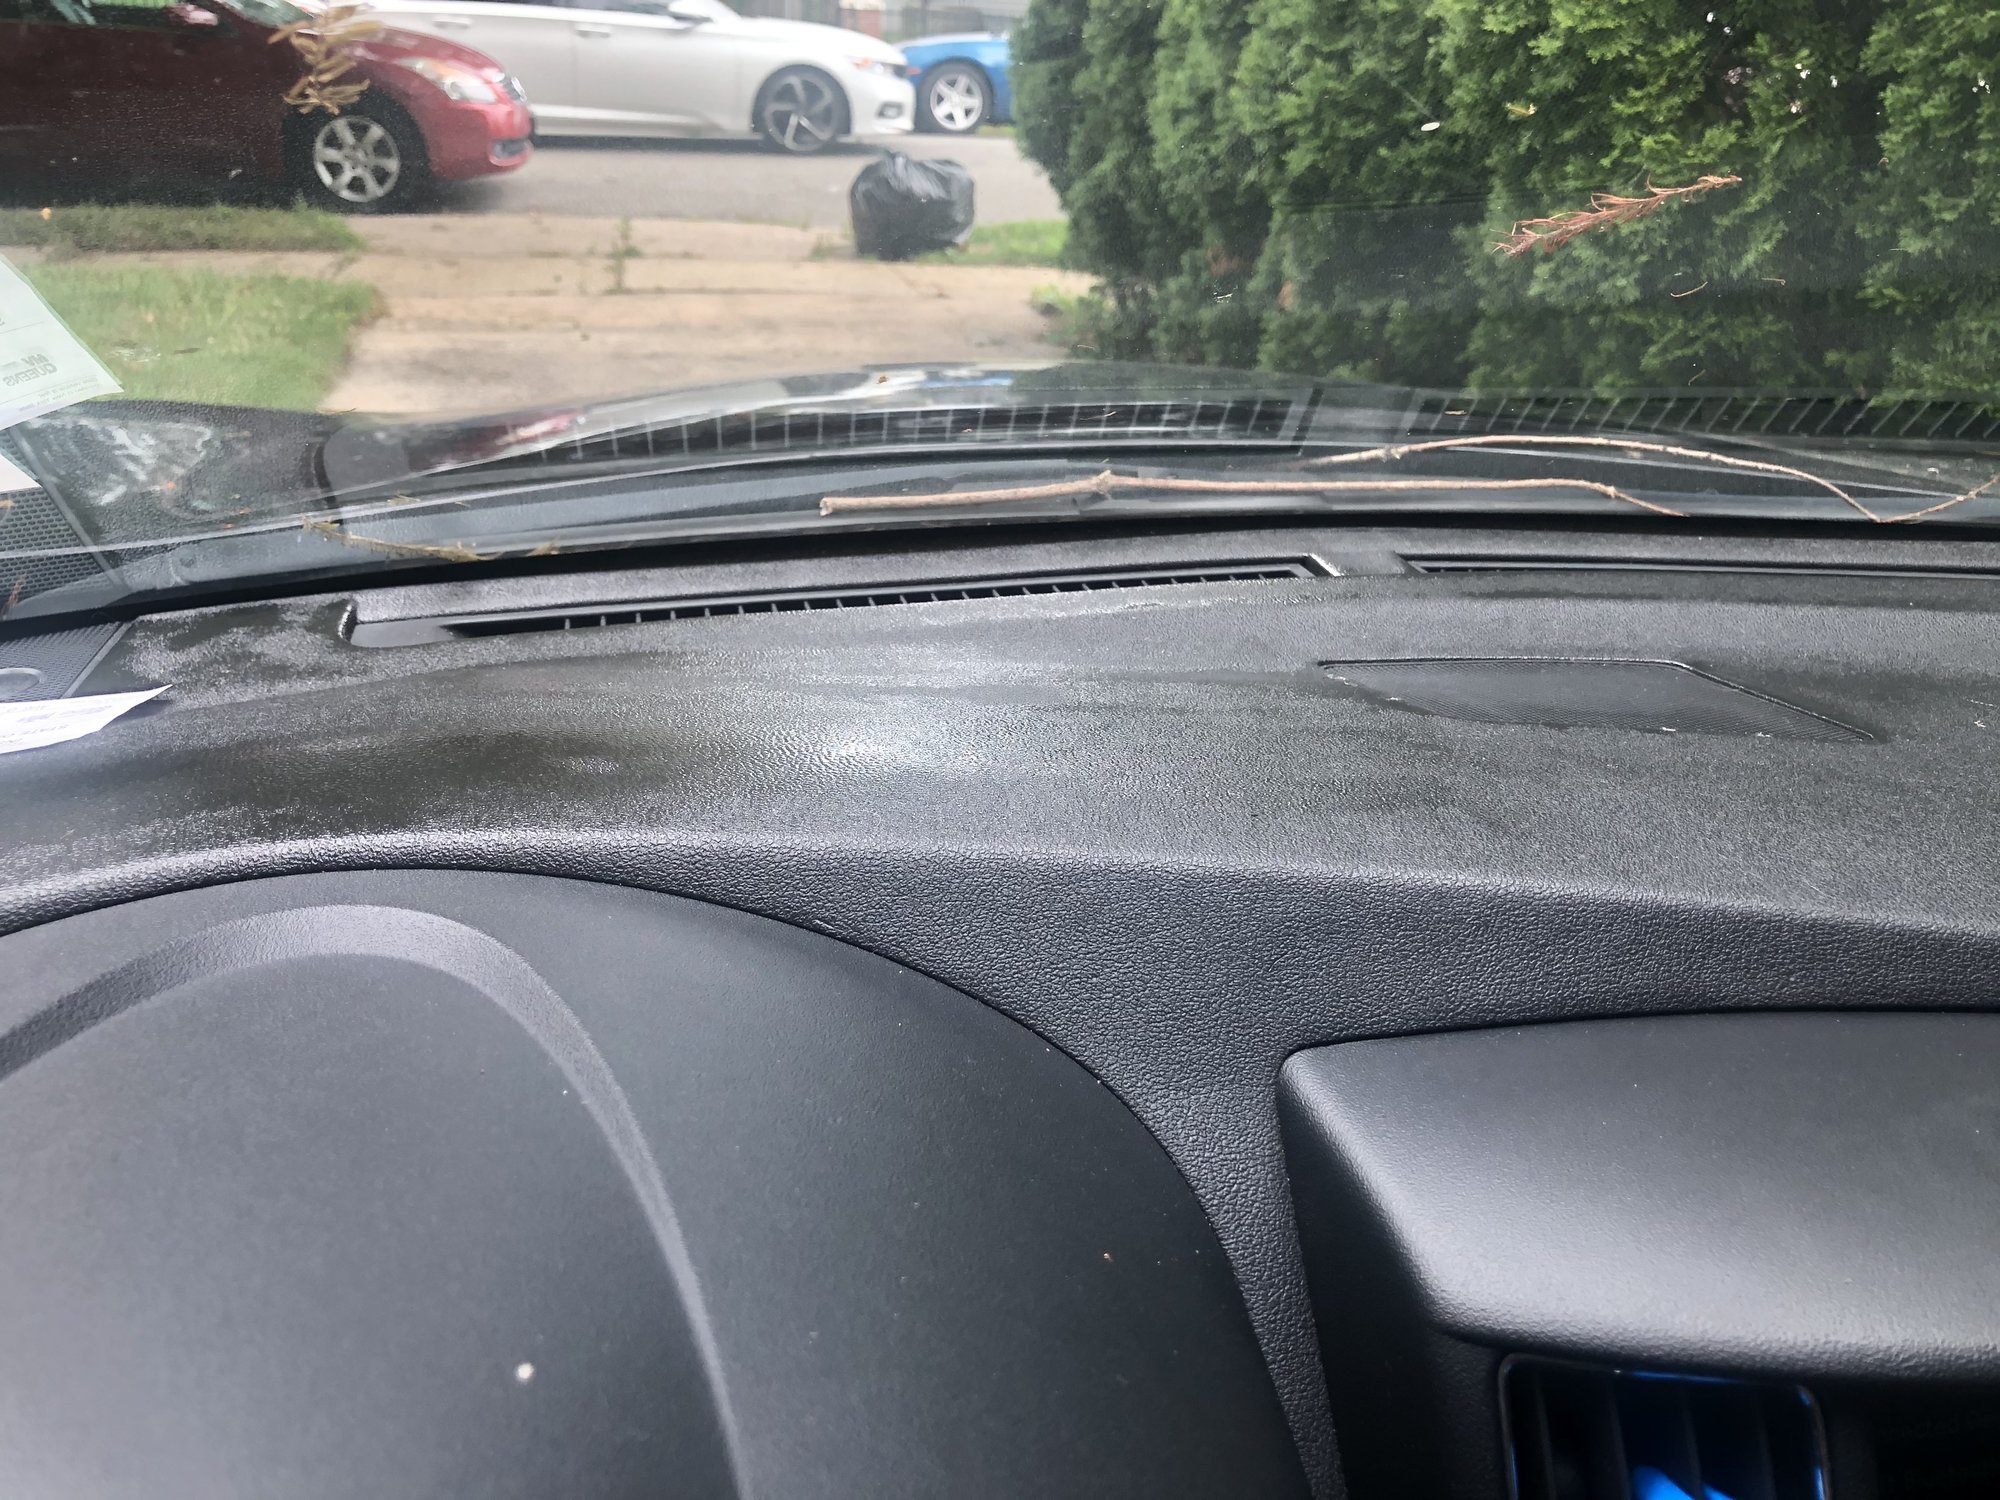
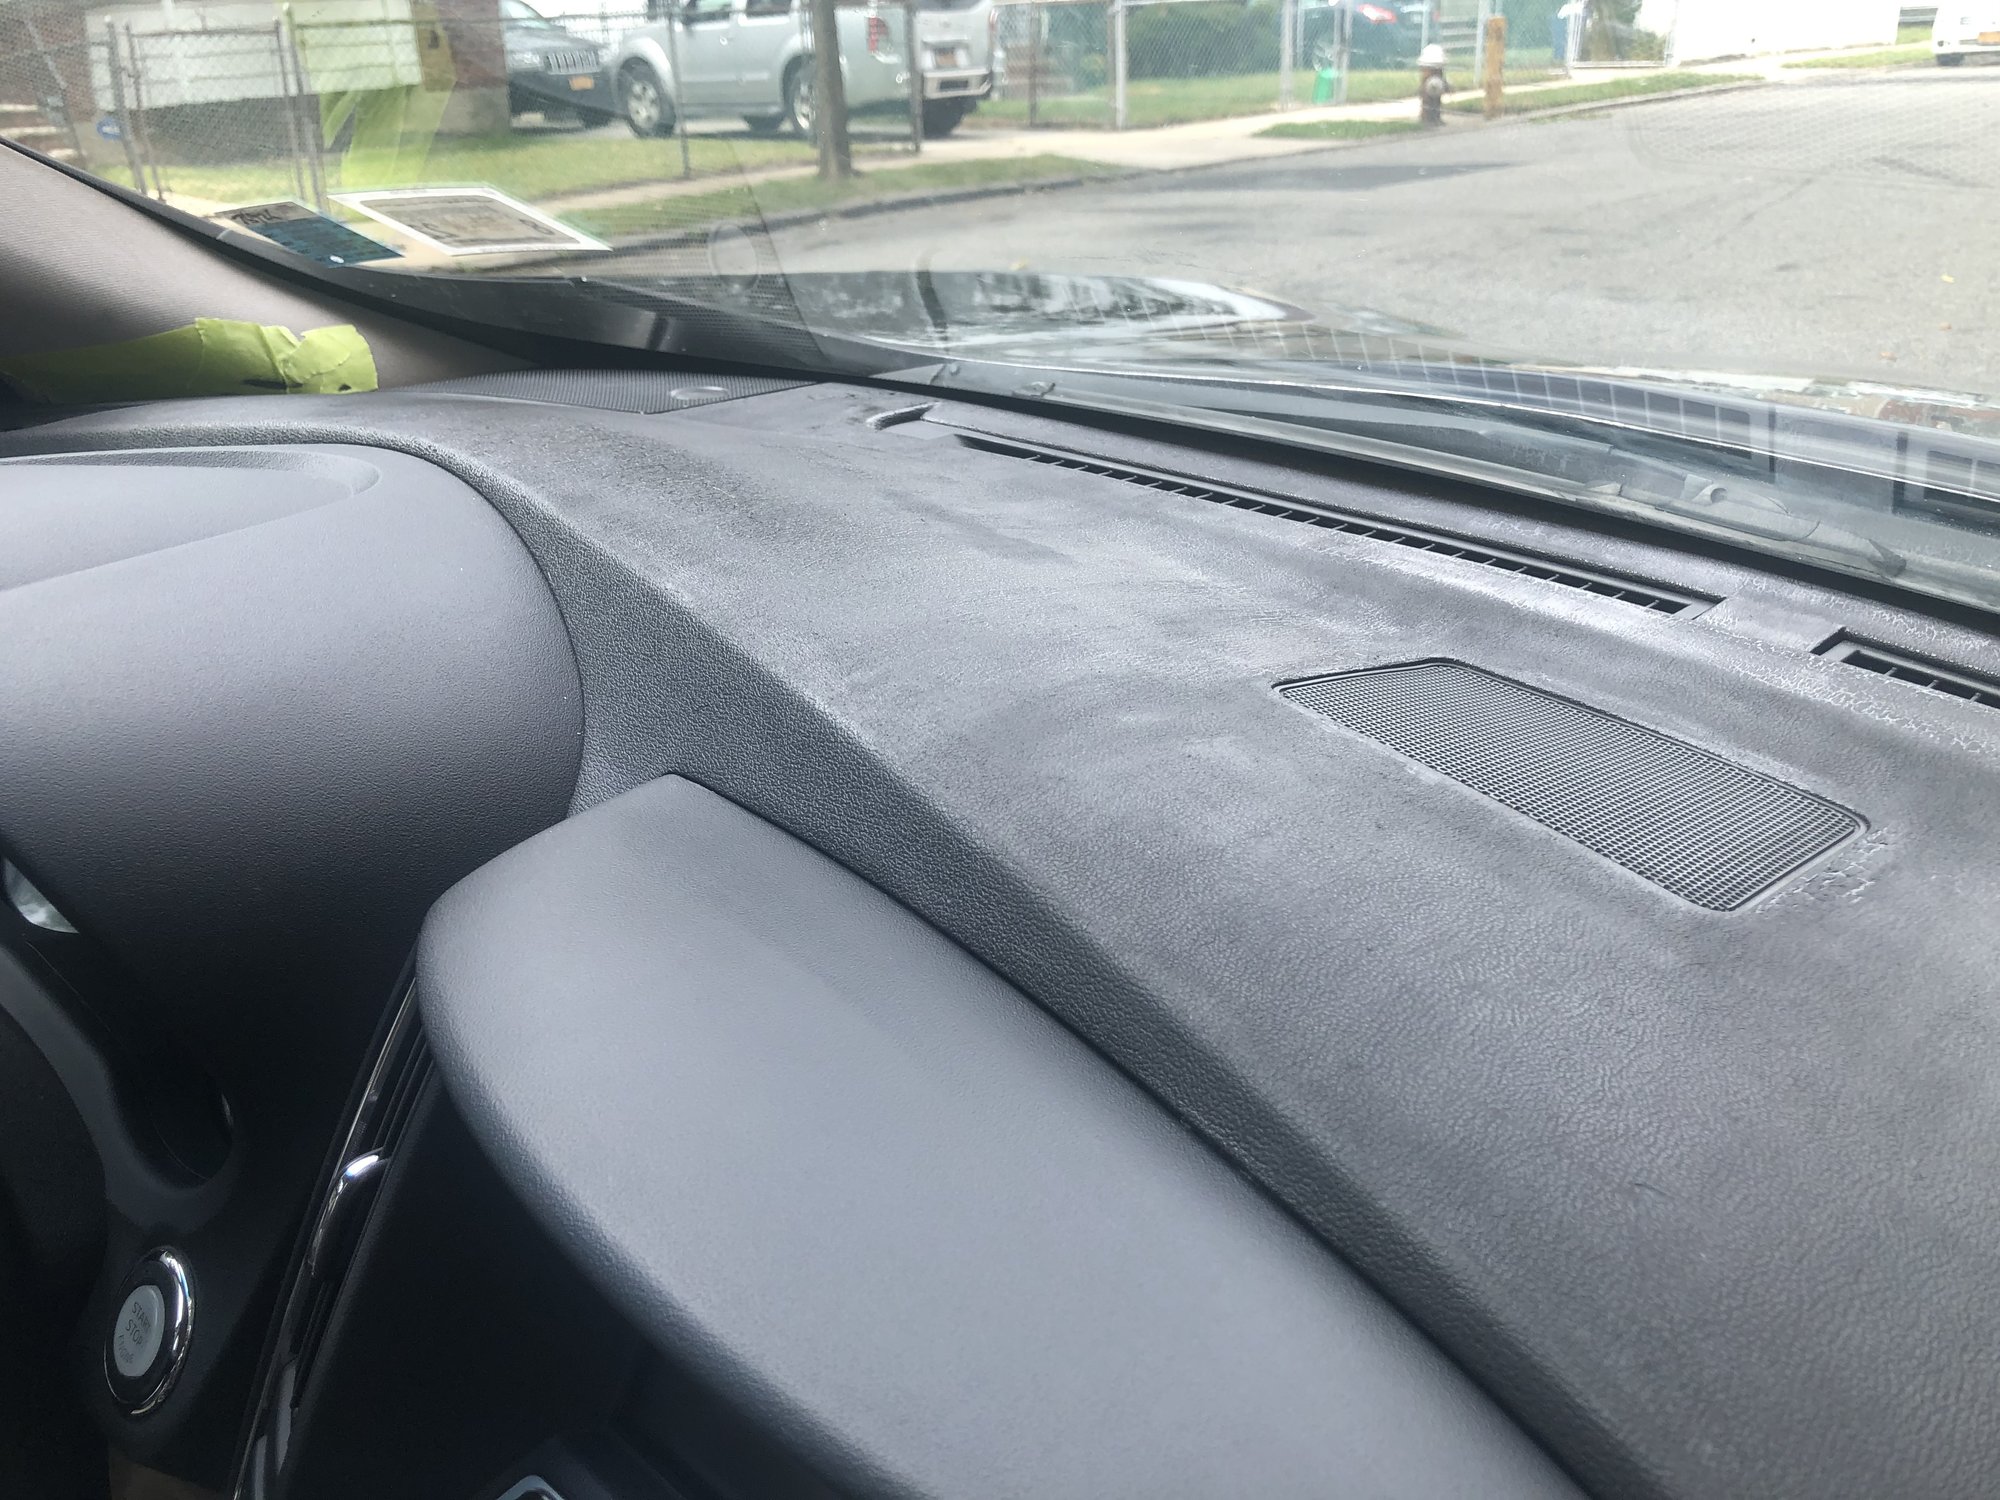
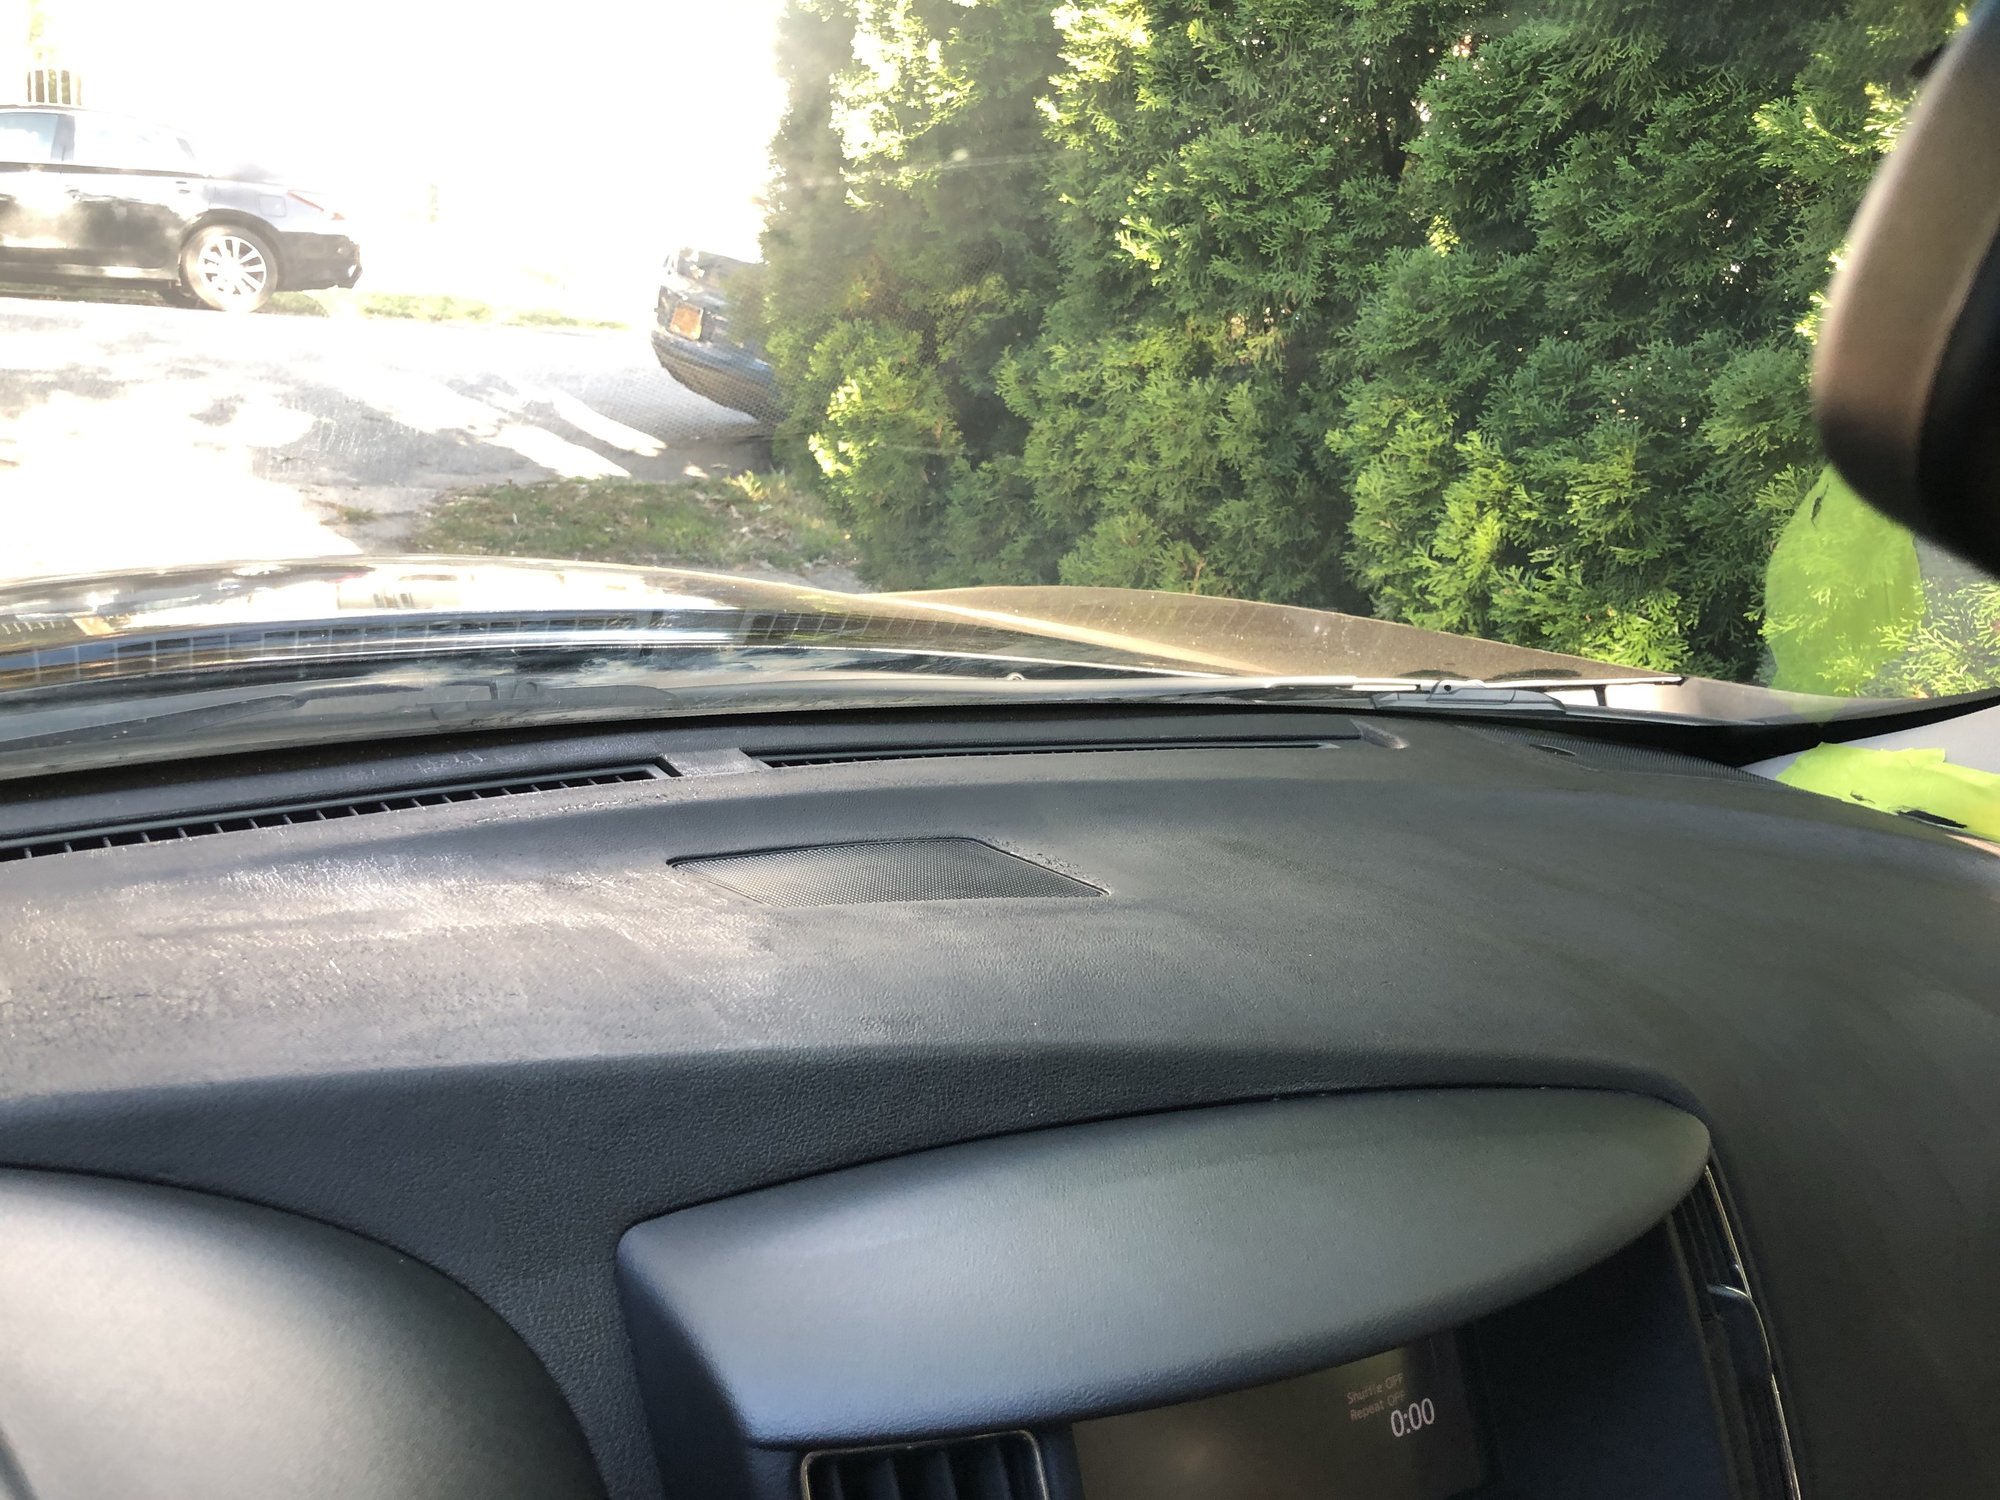
A little backstory: So I bought my 2012 SV used back in February. The car was sitting there for months waiting to be registered (thank you pandemic). During the height of summer, I was doing my routine engine start and realized the dashboard was blindingly shiny. As I do with anything I want to know more about, I poked it, and alas, the dashboard was sticky and deteriorating.
I asked around the forums, on Facebook, and my sister (who happens to have a 2014 max) if they’d experienced it, and several have but left it/didn’t know what to do. All were 2009-2012 maxes (my sister’s was fine). I did some research, and apparently this was a common issue in the 2005-2014 era for a lot of cars in hot climates. Nissan actually had a recall in Florida for Altimas with this issue, but only for those cars in that state. I called Nissan hoping they’d stand by their product, but they politely gave me the finger over the phone and said, “hopefully the glare doesn’t get you killed on the freeway.” Paraphrasing here
I took to Youtube, and after hours of videos of people scrubbing away their dashboards and gluing sheets of leather & vinyl to it, I found the solution I was looking for: StickyDashFix.com. According to them, the dashboard isn’t literally melting as I originally thought. Apparently there’s a chemical inside the dashboard that oozes up to the top in high heat/humidity, giving it a sticky surface. Their approach is basically to clean the surface of lint, debris, bugs, etc and coat it with a color-matched (their kits are make-specific, Nissan included) matte finish that seals up the pores the chemical surfaces through, and dull the shiny surface. Think Plasti-dip, but more care to retain the texture, color, and feel of the dash. The price seemed a little steep at first for what I was getting (the $40 product not so much, mainly the $20 shipping from Australia), but it beat my other options by far, which were put an ugly carpet on my dashboard for the same price, or replace the dash for over $1K, so I gave them a shot. A 5-week trip around the world later, I got my kit and here I am.
Anyway, enough history. Here’s how their product worked (spoiler, it worked great.):
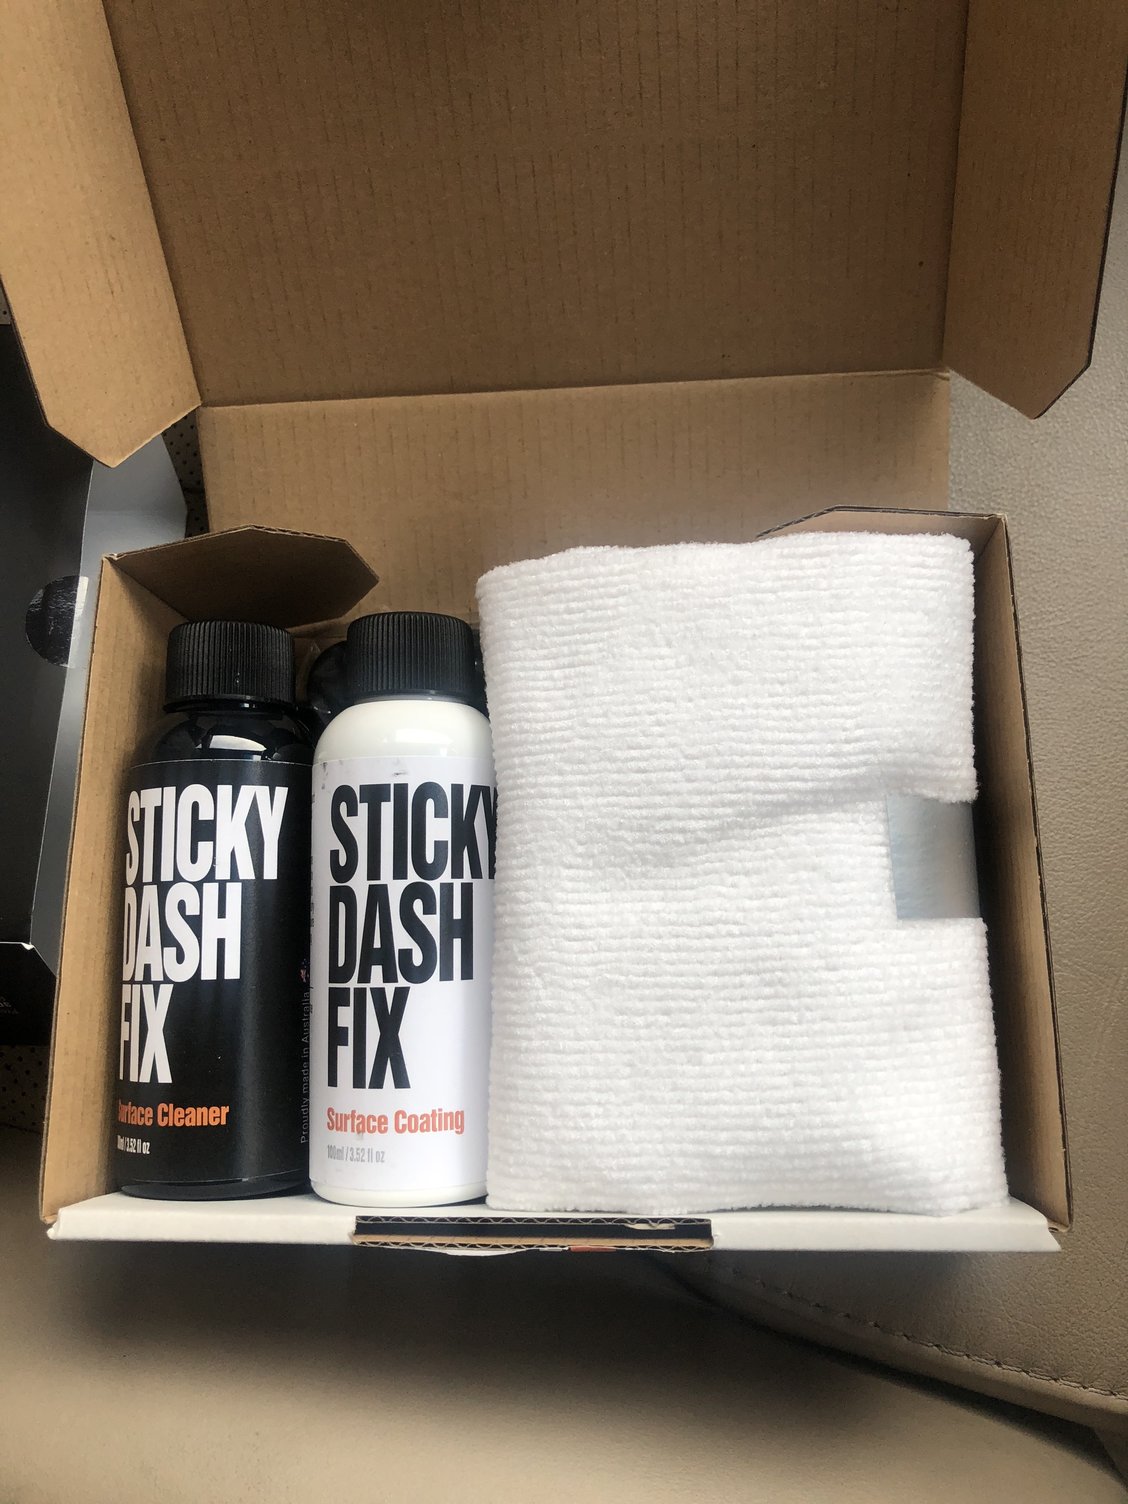
The package comes with a bottle of surface cleaner, the matte surface coating, 2 foam applicator brushes, black nitrile gloves, and a microfiber towel. They threw in an extra bottle of surface coating which was nice, but hopefully I won’t ever need it.
Some other tools I had that were helpful: A razor/cutting knife, tweezers (to remove any stubborn debris), low lint shop towels, a plastic plate to hold the coating liquid, and a flashlight. Doing it in the shade on an overcast day (or even better, indoors) is best.
Step 1, mask off any areas you don’t want charcoal-colored film on. I have the Cafe Latte interior, which was an added challenge for this klutz. I masked off my beige side pillars for obvious reasons. You could also just pop them out, but I have my dash cam wired through the passenger one and I didn’t want to have to go through that again. They say to mask off all the vents, sensors, etc, but the coating won’t adhere to those surfaces anyway, so save yourself the trouble of trying to get tape in that awkward space where the windshield meets the dashboard and just be careful. Only apply to the rubbery dashboard surfaces. If you’re worried about getting coating on the sensors (A/C & Heat sensor on the driver side, headlight sensor on the passenger side if you’re curious), it’s that circle thing on the speakers(?) on either side, so you’ll really have to try to mess that up.
Step 2, clean the surface. Luckily my dash wasn’t too dirty, save some dust here and there, so I probably could’ve even skipped this step. Their cleaner is made to lubricate the surface so it’s less sticky and you can (lightly) brush off the now wet debris. They recommend spraying the cleaner on the microfiber they provide, but be careful: don’t let the edge of the towel touch the sticky surface. The hem of the towel will give off lint. I did this in a few places and had to go in with the tweezers to remove the added lint. Fold the towel and wipe with a section of it without an edge to avoid being worse off than you started. I contacted them about providing or suggesting edgeless or nylon-edged towels, but obviously if you already have one, use it. For the really dirty spots, spray directly on the dash and let it sit for a minute. It’ll slightly discolor the dash, but you’re essentially painting it over in the next step so don’t worry about it.
Step 3, apply the coating. Pour some of the liquid coating on a plastic plate (or a fancy painters tray if you have one). This is common sense, but put the plate somewhere it won’t get knocked over/you won’t drop anything on it. The seat next to you is a good place, just don’t forget it’s there when you switch sides. Also crack a window; the scent can get kinda strong. I used the provided foam applicator pads, but the instructions suggested using a small paint roller (not provided) which I think would’ve given even better results (this was a suggestion from one of their customers, which I thought was pretty cool). Only coat one side of the brush so you don’t get coating on the windshield in that vent corner. I got better coverage doing more pushing strokes than pulling, but remember the brush is a sponge; applying pressure will squeeze out more coating. You want to go light on the first coat and heavier as needed. I got pretty good results after my first, light coat. I left it over night after this coat, but they suggest just 30 minutes in between layers.
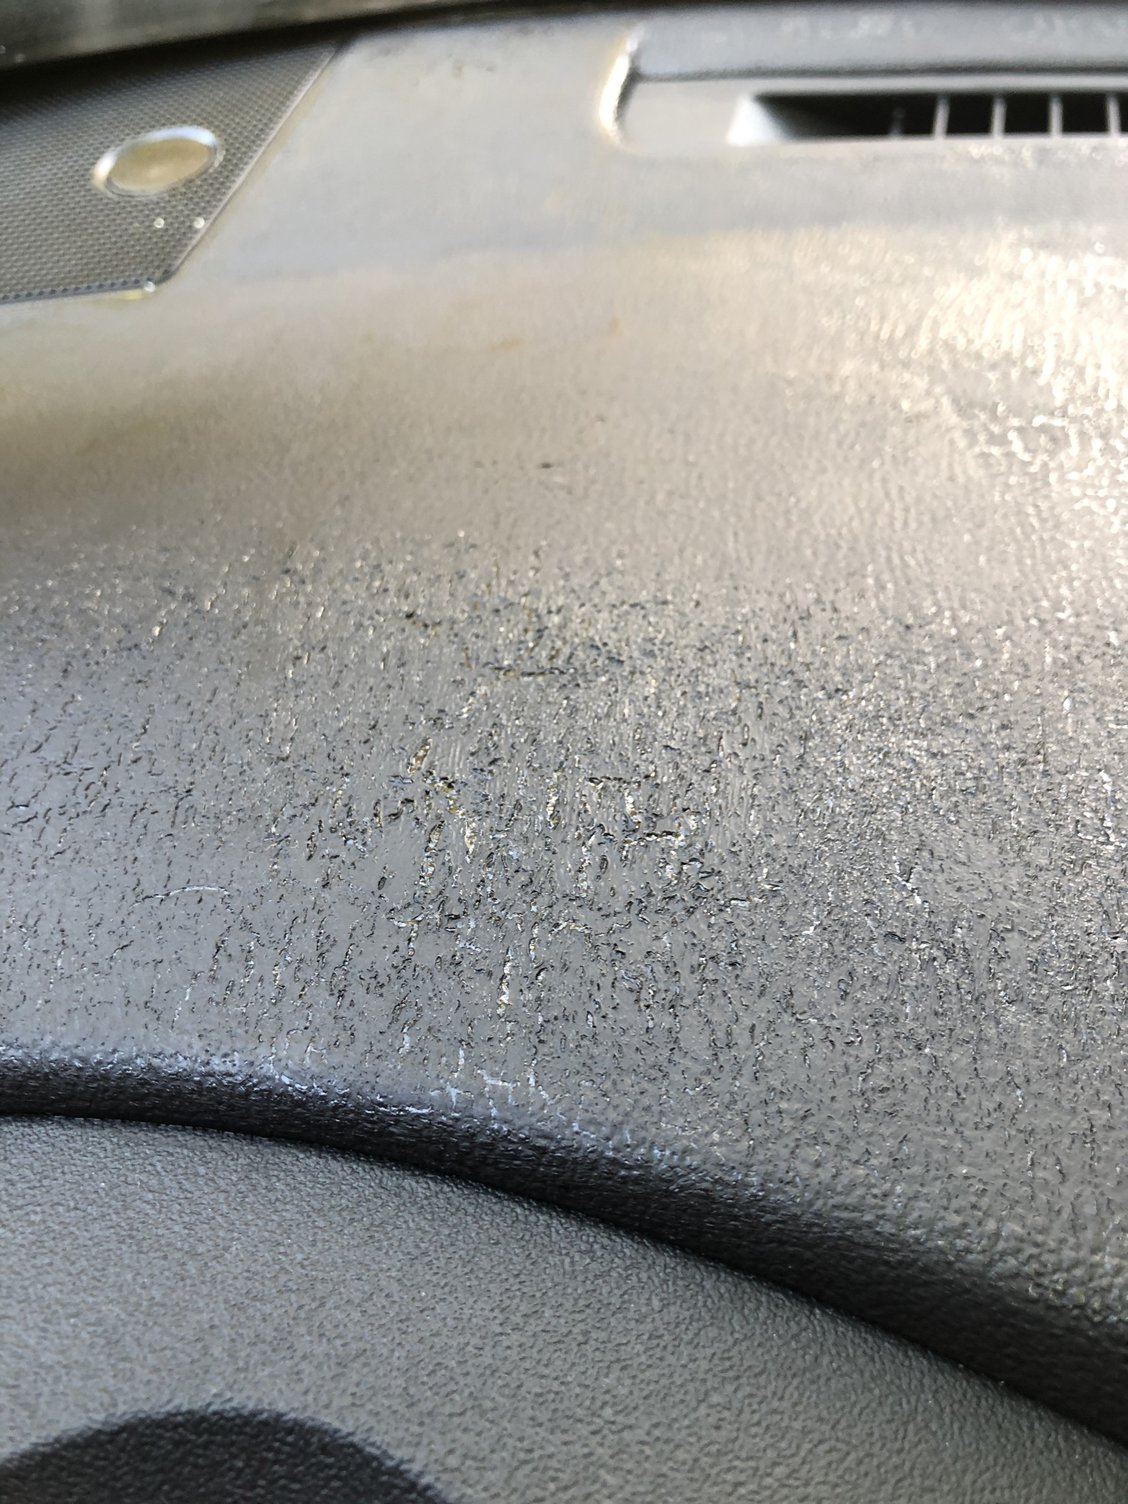
That crocodile skin texture occurred on the stickiest/most deteriorated parts. They suggested getting some rubbing alcohol and trying to smooth it out with a finger, but I just put on more coats in those areas. I was left with some rough texture in the end so I might do the alcohol thing later on if it bothers me. I ended with 2 coats on the whole dash, 3-4 on the crocodile parts. Still had more than half the bottle left. The only area I had trouble with was the side of the vent facing the windshield. I did what I could but some of it is still slightly sticky. If this is like rust and starts spreading, I’ll just go in again, but I’m not getting glare from that area so it wasn’t worth the hassle/risk of getting coating all over that hard-to-reach vent.
Step 4 is optional, but wipe the dash one more time with the surface cleaner. I think it helped a little bit to blend in the streaks and uneven spots. Final results:
(this was the previously crocodiled section)
Overall, the results were better than I expected and well worth the price. The dash looks pretty much like a lightly-used stock now. There’s some streaks, which I think the paint roller would’ve helped with, but only noticeable if pointed out. The crocodile spots were on the driver side, so a passenger would never know there was ever anything wrong. No residue to the touch. No more glare and no more stickiness, which was ultimately the goal. Like I said, I did this across two days, but including prep & wait time between coats, I’d say it’s a 3-4 hour job.
The manual they provide is very clear and thorough, but just wanted to share my experience. If you have any questions, their R&D rep Derek (derek@3dformulations.com.au) was super helpful before and after I ordered and cared more about my dashboard than Nissan did.
Hopefully someone like me searches and finds this thread helpful.
About 6 months ago I received the death code P1778 (stepper motor) in my 2008 Altima. I searched far and wide, low and high, only to be told 2 things… you need a new transmission, or you need a new valve body. Since I didn’t have $2500 for a new trans, let alone $800 for the valve body I decided to look into this a little further. watched a YouTube video the only one I could find was a Nissan armada, but thought what the hell. I drained the fluid, dropped the pan, yanked out the valve body, and found that little bastard that gave me such trouble.
Now with part in hand I went to my local parts store, and told we don’t sell that part, its not even in our system… went to the dealership, told the same thing and was told I needed to buy a new transmission as they are not “serviceable” funny but I had the part in hand, how can it be not serviceable?
Lastly I took a gamble, I went to eBay, ordered a stepper motor. 20k miles later, still no code, no whine, and no lock up.
Part Number: 203452A Description: JF011E RE0F10E F1CJA Transmission CVT Stepper Motor For SENTRAN Nissan Dodge Refurbished Price: $30-$40
Here is how I saved thousands and bought a $35 part.
Drain fluid.
Drop pan (clean with brake cleaner)
Remove the 3 bolts holding filter. (clean with brake cleaner while your at it)
Remove the valve body about 11 bolts
Remove the stepper motor from the top of the valve body (the side you can’t see with the pan off) 2 bolts
Take a piece of dental floss about a foot long and hold the spring loaded arm back against the stepper motor and return the valve body back to the transmission.
After you have a few bolts in place remove the floss before you tighten all the way.
Reconnect trans filter and bolt back into place.
Rejoin the fluid pan to the transmission and replace with quality CVT fluid. Amsoil makes a great product.
I hope this helps and if you have questions please feel free to ask.
Video How-to (Many thanks to Budget Drift for this)
Price: $330.00 + Shipping (Add $10.00 for new set of Gaskets) Ordering Info: To order, you can email Adam at SilverSpyder117@Gmail.com
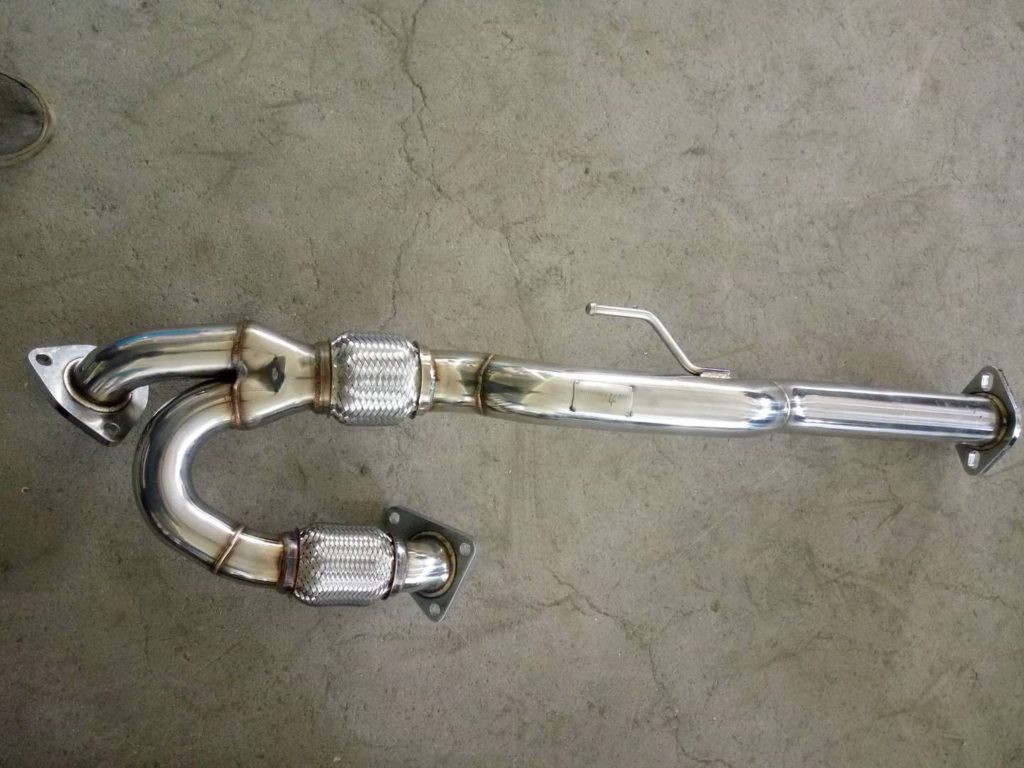
Notes: This will not void any warranty under the Magnuson Moss act. Yes, it deletes the 3rd unmetered cat. No it does not cause any check engine lights or codes. Direct bolt on about 45 min. Install. Yes this will fit 7th and 8th gens alike. This will not fit an Altima SE-R due to the rear header connection only.
About Product & Seller:
Jemini Power Performance was officially founded on 12/28/17 and named after my beautiful wife who God has blessed me with and who puts up with me dedicating my time to this community. This business and group were created for the 7th and 8th generation, Nissan Maxima. We are specializing in bringing back the well sought after performance y-pipe for the VQ35.
We took the Racingline y-pipe and revamped it to a whole new level. Racingline used bare materials such as mild steel, mild coated with aluminum, and 201 stainless steel to produce the initial y-pipe. We had it tested to see these results. Many people have seen the results of this down the road with rust and premature failure.
What we are now bringing to the Maxima community is far better. Top-quality 304 stainless steel construction throughout that will not rust, all custom made gaskets for 2 entry and 1 exit path, shortened .5 inches to meet OEM specifications and a 2 year warranty.
Everyone knows what these y-pipes do and are capable of. If you have questions please ask. From my own experience, I felt a difference immediately after install. Much smoother powerband from the CVT, no lag at all, and steady pickup. From 0 much more responsive and carries that power to well over 100+.
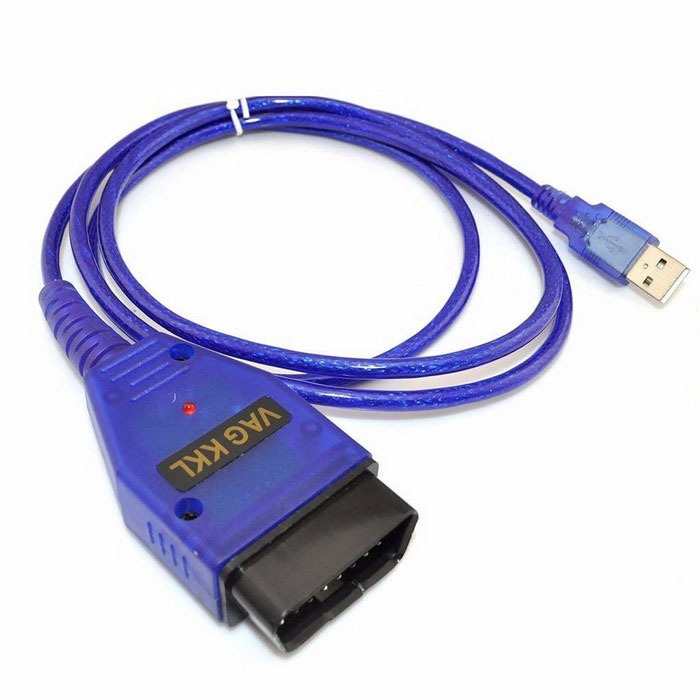
If you are DIY person and love working on your Nissan Maxima, then this tool is a MUST HAVE! When you go to the Nissan dealer, the person working on your car typically uses a tool called a Nissan Consult. The Nissan Consult that the dealer uses costs thousand of dollars and is only available to dealers. By using the Nissan DataScan software, a laptop and a generic VAG COM OBDII adapter you can achieve just about the same level of on-board diagnosis that $5,000 Nissan Consult provides.This software allows you to:
Check CEL codes
Check/Reset ABS and SRS-Airbag Faults
Check/Reset TCM Codes
Adjust timing
Perform Idle Air Relearn
Reset ECU learned settings
Data-log
Program keys
Check Emissions Readiness Monitors
Active Test temporary modify some of the engine parameters for testing purposes
And Much much more….
The software itself costs $55.00 and generic cable costs around $7.00-$8.00.
You can find the cables on eBay between $12.00-$20.00 shipped. It ranges based on location and shipping. Search for the following keywords on eBay and you will find it: “KKL 409.1 VAG-COM OBD2 USB Cable”
Below are all the functions it provides:
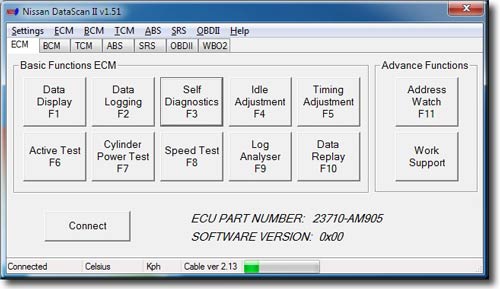
ECU Part Number
This is the main window of the NDSII software which shows the ECM Nissan Identification part number. Basic and Advance Functions can be selected by clicking on the buttons, using the shortcut keys (F1 – F11) or using the Menu bar. Most functions except Data Replay and Log Analyser are disabled until communication with the ECU is successfully established.
Progress bar at the bottom indicates communication between the ECU and PC. If the bar is not moving there is no data being received from the ECU.
Data Display Settings
This window is used to assign parameters to be displayed by the Data Display function. Only parameters that are supported by the currently connected ECU are available for selection. Gauges are counted from left to right, top to bottom. Multiple gauges can monitor the same parameter.
Data Logging ECM
Selected parameters can be logged to a file. This function can also be accessed from the Data Display window. The data log file can be analysed using the Data Replay or Log Analyser functions.
Self Diagnostics ECM
Self Diagnostics function allows users to read and reset engine ECU error codes.
Idle Adjustment
Idle Adjustment function allows users to adjust the base idle RPM. The setting is saved to the ECU and it does not reset with engine restart.
Timing Adjustment
Timing Adjustment function allows users to adjust the base ignition timing. The setting is saved to the ECU and it does not reset with engine restart.
Active Test ECM
Active Test allows users to temporary modify some of the engine parameters for testing purposes. They return to their original values when a function is stopped, PC disconnected or engine restarted.
Note: It is possible to damage the engine if the A/F Base % functions is used to excessively modify fuel delivery. Likewise the engine may overheat if the Engine Temperature is set to low for a long period of time. Do not use those functions if you are not sure how they will effect your engine.
Work Support
Work Support functions allow users to perform some of the advance service procedures. Those procedures may need to be performed after replacement parts are installed.
Clear Self Learn – clears the A/F Base SL map learned by the ECU.
Idle Air Volume Learn – is an operation to learn the fully closed position of the throttle valve.
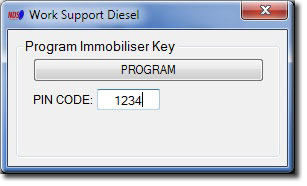
Program Immobiliser Key – allows to register the Nissan transponder keys with the Immobiliser Note: The immobiliser security PIN CODE needs to be known. Initially all registered keys will be erased and all keys will need to be reregistered.
Cylinder Power Test
Cylinder Power Test function can be used to identify cylinder that is under performing. This function allows shutting down individual cylinders. If all of the cylinders are producing the same amount of power the engine RPMs will drop exactly the same amount on each cylinder that is cancelled.
Log Analyser is used to review log files previously generated by with Data Logging function. Graphs are drawn by selecting boxes next to parameter value. Graph colours match the parameter value colours.
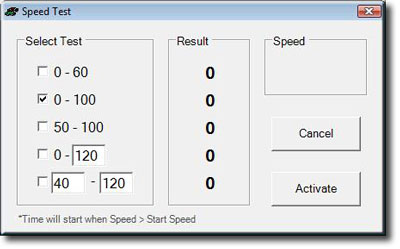
Speed Test
Speed Test is a unique function for measuring car’s acceleration performance. Predefined or user specific tests can be used. Due to the low resolution of Nissan speed sensors, measurements should only be used as a guide and not a true reflection of car’s performance.
Note: This function should not be used while driving on public roads.
Address Watch
Address Watch function is used for monitor specific ECU memory addresses. By monitoring a memory address extra information can be retrieved that is not normally available using Consult II protocol. A knock sensor reading can be obtain using this method if knock sensor memory address is known.
Wideband O2 sensor
Nissan DataScan II also supports wideband Air/Fuel ratio meters from Innovate Motorsports. A second serial port is used to connect to the controller and collect data.
The data from the wideband meter can be displayed or logged in conjunction with other engine parameters using the Data Logging function.
ECU Part Number BCM
The BCM tab shows the BCM Nissan Identification part number. Basic Functions can be selected by clicking on the buttons or using the Menu bar. All functions are disabled until communication with the ECU is successfully established.
Progress bar at the bottom indicates data being send between the ECU and PC. If the bar is not moving there is no data being received from the ECU.
Note: Some vehicles may use K line for diagnostics of engine ECU (ECM) but still use DDL1 line for diagnostics of other control modules. This software does not support diagnostics over the DDL1 line. Some of those models are: X-trail, Maxima, Patrol.
Self Diagnostics BCM
Self Diagnostics function allows users to read and reset BCM error codes.
Active Test BCM
Active Test allows users to temporally activate some of the functions of the BCM. This is usually used to manually test the functionality of the systems controlled by the BCM.
Note: Functions not supported by the BCM are disabled (grayed out).
ECU Part Number TCM
The TCM tab shows the TCM Nissan Identification part number. Basic Functions can be selected by clicking on the buttons or using the Menu bar. Most functions except Data Replay and Log Analyser are disabled until communication with the ECU is successfully established.
Progress bar at the bottom indicates data being send between the ECU and PC. If the bar is not moving there is no data being received from the ECU.
Note: Some vehicles may use K line for diagnostics of engine ECU (ECM) but still use DDL1 line for diagnostics of other control modules. This software does not support diagnostics over the DDL1 line. Some of those models are: X-trail, Maxima, Patrol.
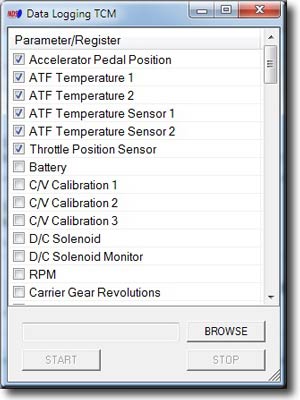
Data Logging TCM
Selected parameters can be logged to a file. This function can also be accessed from the Data Display window so the data can be logged while it is displayed. The data log file can be analysed using the Data Replay or Data Analyser functions.
Self Diagnostics TCM
Self Diagnostics function allows users to read and reset TCM error codes.
ECU Part Number ABS
The ABS tab shows the ABS Nissan Identification part number. Basic Functions can be selected by clicking on the buttons or using the Menu bar. Most functions except Data Replay and Log Analyser are disabled until communication with the ECU is successfully established.
Progress bar at the bottom indicates data being send between the ECU and PC. If the bar is not moving there is no data being received from the ECU.
Note: Some vehicles may use K line for diagnostics of engine ECU (ECM) but still use DDL1 line for diagnostics of other control modules. This software does not support diagnostics over the DDL1 line. Some of those models are: X-trail, Maxima, Patrol.
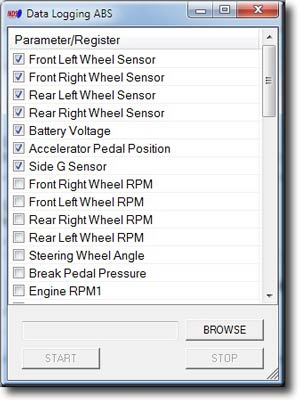
Data Logging ABS
Selected parameters can be logged to a file. This function can also be accessed from the Data Display window so the data can be logged while it is displayed. The data log file can be analysed using the Data Replay or Data Analyser functions.
Self Diagnostics ABS
Self Diagnostics function allows users to read and reset ABS error codes.
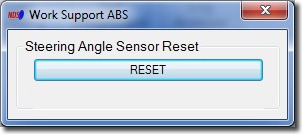
Work Support ABS
Work Support functions allow users to perform advance service procedures. Those procedures may need to be performed after replacing parts.
Steering Angle Sensor Reset – After removing/installing or replacing VDC/TCS/ABS control unit, steering angle sensor, steering components, suspension components, and tires, or after adjusting wheel alignment, make sure to adjust neutral position of steering angle sensor before running vehicle.
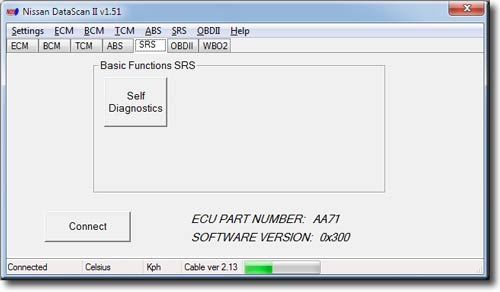
ECU Part Number SRS
The SRS tab shows the SRS Nissan Identification part number. Basic Functions can be selected by clicking on the buttons or using the Menu bar. All functions are disabled until communication with the ECU is successfully established.
Progress bar at the bottom indicates data being send between the ECU and PC. If the bar is not moving there is no data being received from the ECU.
Note: Some vehicles may use K line for diagnostics of engine ECU (ECM) but still use DDL1 line for diagnostics of other control modules. This software does not support diagnostics over the DDL1 line. Some of those models are: X-trail, Maxima, Patrol.
Self Diagnostics SRS
Self Diagnostics function allows users to read and reset SRS error codes.
Note: Recorded faults are historical and can not be cleared.
Work Support
Work Support functions allow users to perform the advance service procedures. Those procedures may need to be performed after replacement parts are installed.
Program Immobiliser Key – allows to register the Nissan transponder keys with the Immobiliser Note: The immobiliser security PIN CODE needs to be known. Initially all registered keys will be erased and all keys will need to be reregistered.
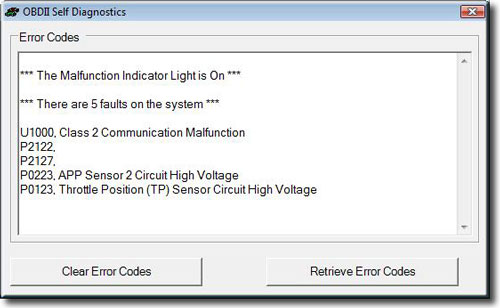
OBDII Self Diagnostics
OBDII Self Diagnostics function allows users to read and reset ECU error codes.
OBDII Monitor Status
OBDII Monitor Status shows the current status of various monitoring systems used by the car’s engine management system.
OBDII Log Analyser
Log Analyser is used to review log files previously generated by with Data Logging function. Graphs are drawn by selecting boxes next to parameter value. Graph colours match the parameter value colours.
OBDII Fuel System Satus
OBDII Fuel System Status can be used to check if the car’s fuel system is running in Closed Loop mode.
Fuel systems do not normally refer to injector banks. They are intended to represent completely different fuel systems that can independently enter and exit closed loop fuel. Banks of injectors on a V-engine are generally not independent and share the same closed-loop enablement criteria.
OBDII Data Logging
Selected OBDII parameters can be logged to a file. The data log file can then be analysed using the Log Analyser function.
Due to the slow nature of OBDII protocol it’s recommended to log only the required parameters.