Over time the brake system can take on air as the effectiveness of the brake fluid decreases with age. Air can also enter the system from a leaky brake hose, a bad connection on the brake caliper, during any maintenance when a brake line is removed, or if the fluid reservoir is allowed to run dry.
Air in the line makes the brake pedal feel mushy, and bleeding the brakes is the solution to that embarrassing mushy pedal feel. While we’re on the topic, if you’re not happy with the factory brake feel even after the system is properly bled, replacing the factory brake lines with more sturdy steel braided lines can greatly increase pedal firmness and brake feel.
Ttools/Supplies:
Lug wrench
14mm wrench
Jack
Clear Jar
Small hose at least 6″ long. Approximate diameter of bleed valve. The tighter fit the better. Auto parts store should have small vacuum hose that will work.
Fresh jar of brake fluid (do not use a previously opened container since brake fluid takes on moisture over time.
An assistant or speed bleeders.
INSTRUCTIONS:
1. Place the car on level ground, chuck the rear wheels, and make sure car in park (or in gear if a manual). Make sure parking brake ISN’T on. If you have ABS, remove the ABS fuse.
2. Pump the brakes multiple times to release any residual vacuum in the lines.
3. Remove the brake fluid reservoir cap and fill the reservoir with fresh brake fluid. Check this level often as you bleed the brakes. Never let it get too low because if it gets empty it introduces air back into the brake system and you have to start all over!
Bleed the brakes in the following order:
1. Passenger rear
2. Driver front
3. Driver rear
4. Passenger front
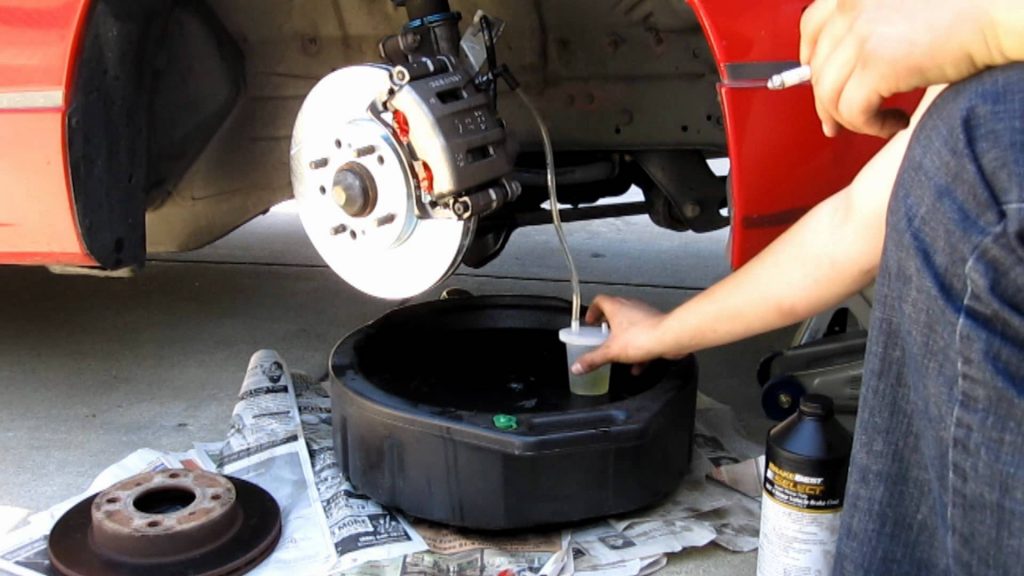
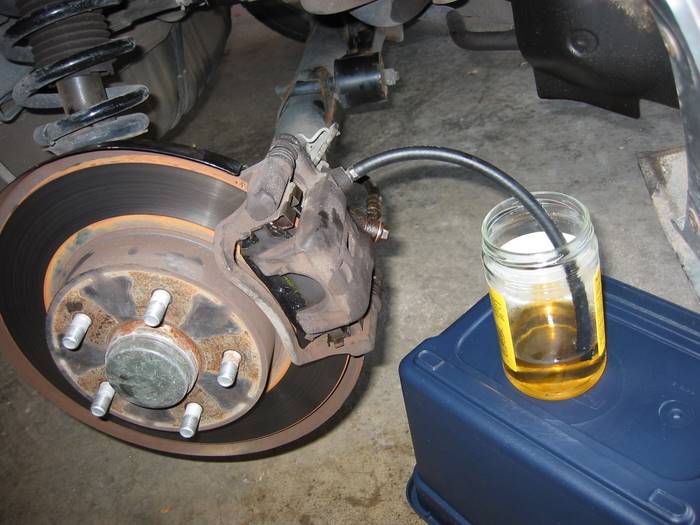
4. Remove the rubber boot on top of the bleeder screw. Attach a hose to the bleed screw and insert the end of the hose into a clear jar that is partially filled with brake fluid.
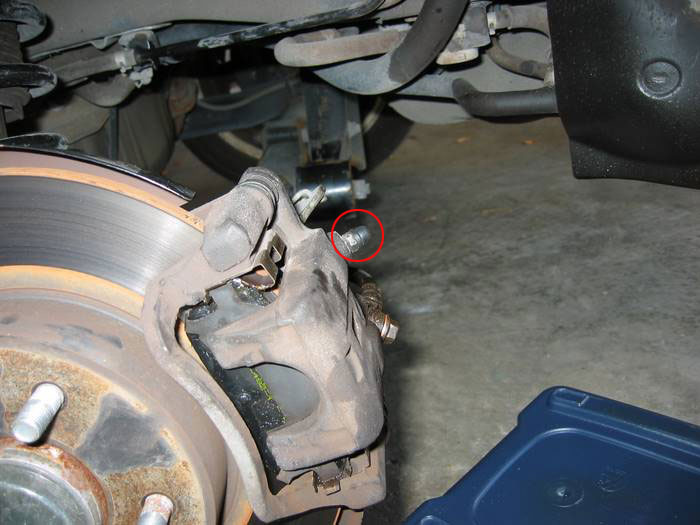
The bleed screw with the rubber boot still on:
Bleed screw
Hose attached to bleed screw:
Hose attached to caliper bleeder screw
5. Have your girlfriend press firmly on the brake (you’re killing time reading this on the internet so you obviously have one…right?). While the brake is depressed, loosen the bleed screw. If your girlfriend freaks out at this point because the pedal just fell to the floor, throw an empty beer can at her and tell her to quiet down. Or, if you’re not much for the single life, you can be the nice guy. “Honey, that it is completely normal. I just loosened the bleeder screw which allows the brake pressure to escape…oh, and I sure like those new strappy shoes of yours.” Totally your call on this one.
Anyway, back on topic. When you loosen the bleed screw with the brake depressed, you will see brake fluid flow through the hose and into the jar. Watch the tip of the hose for air bubbles – this is a sign that air is in the system. When the flow of fluid stops, tighten the bleed screw and tell your girlfriend (assuming she’s still there) to release the brake. Repeat this process (press brake, loosen bleeder, check for bubbles, close bleeder, release brake) until there are no air bubbles released, only fluid.
If you mouthed off above and lost your assistant, don’t worry, this step can also be done alone if you buy a set of speed bleeders.
6. Check the brake fluid level in the reservoir and top off as needed. Take care not to overfill or spill because brake fluid is very hard on paint. As mentioned above, never let the reservoir get empty or it will introduce air into the system and you’ll have to start over. And let’s be honest, this job is barely enough fun to do once.
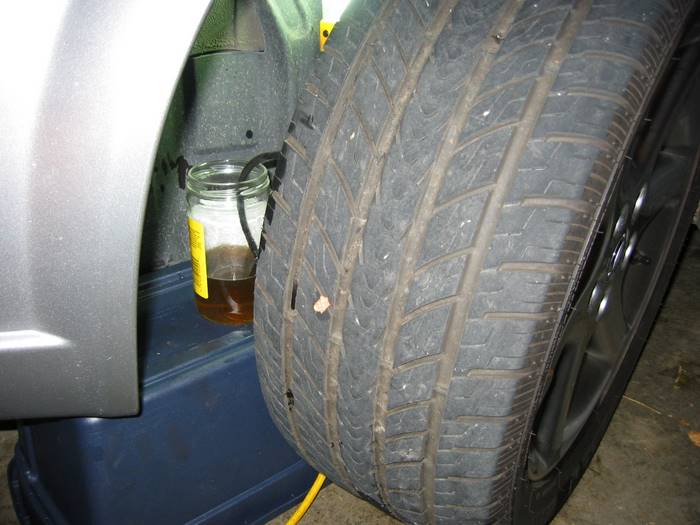
7. Repeat steps 4 -6 at each wheel in the order outlined above. For the front brakes, if you’re feeling lazy you can get away with not removing the wheels at all by turning the tires toward the brake you want to work on. It takes a skinny arm or a strange angle to get a wrench on the bleed screw, but it can be done.
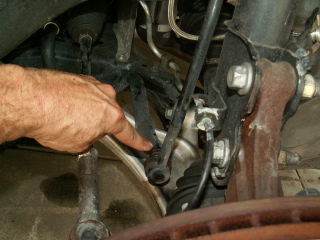
A lazy man bleeding the front brake:
Bleeding the front brakes with the wheels on
8. When complete, do yourself a favor and double check that every bleed screw is tight. Remember, a loose bleed screw means no brake pressure and brake fluid spraying everywhere like a garden hose. And hey, that’s no fun. Well, unless you’re the lucky onlooker.
Seriously though, test the brakes on a flat surface before running out and terrorizing the neighborhood.
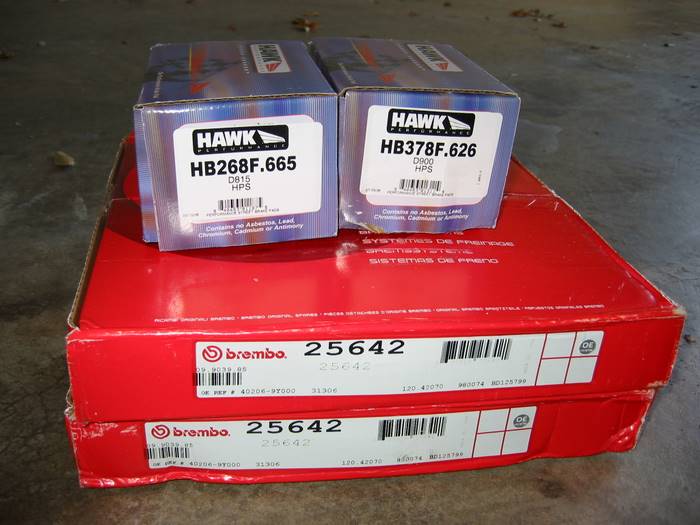
There are many rotor and brake pad options for the Maxima. Check out the brake choice how-to if you’re having problems deciding. In this how-to, I install Hawk HPS pads and Brembo blank rotors, though the process will be the same for any OEM replacements.
The new equipment:
Tools/Supplies:
Lug wrench
Hammer – the bigger the better!
Socket wrench
14mm, 17mm & 19mm sockets
Rotors
Brake Pads
Disc Brake Caliper compressor (aka caliper spreader) tool (available on loan from many autopart stores)
Hanger
Wire Brush
Piece of scrap wood (optional, useful if rotor is rusted on)
Brake grease (typically available at the front counter of most autopart stores)
Brake Cleaner
Jack
Jack stands
Wheel chuck
Old rag
Torque wrench
Turkey baster (optional, to remove extra brake fluid from reservoir)
INSTRUCTIONS:
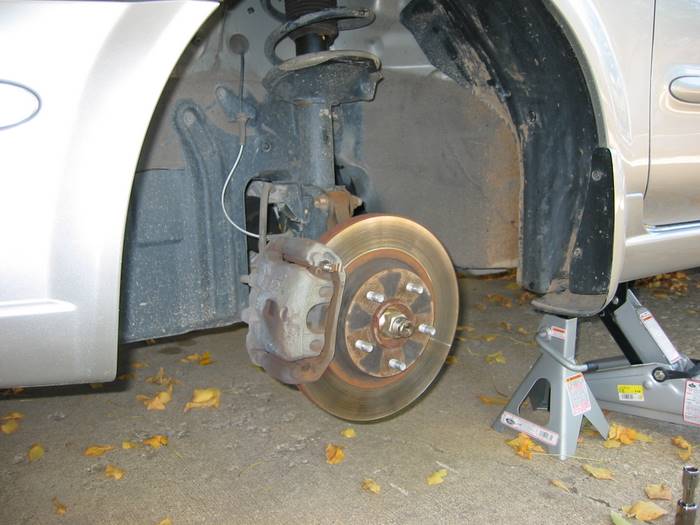
1. Place car on level ground. This is very important since you’re removing the brakes! Chuck the rear wheels and pull parking brake while doing the front wheels. Jack up the front of the car using the jack point outlined in the manual.
2. Remove wheel using lug wrench
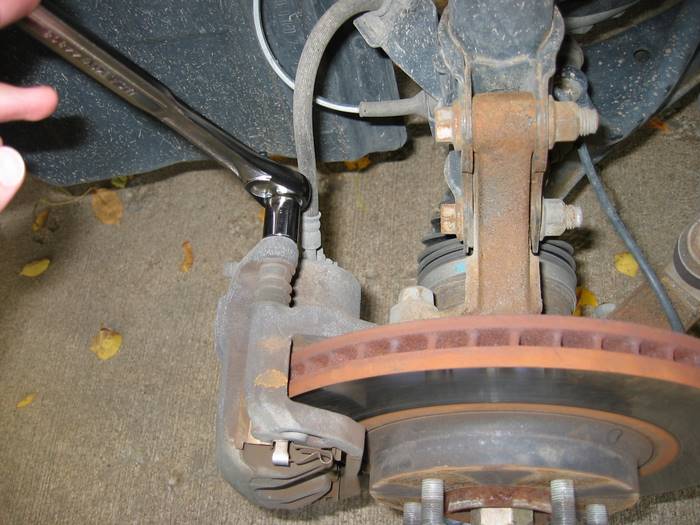
3. Remove the 3 17mm bolts that attach the caliper. There are two on top and one toward the bottom of the caliper bracket.
NOTE: Do NOT remove the bolt that connects the brake line to the caliper. This will introduce air into the brake system and you will have to bleed the brakes to get the air out. The brakes will be very spongy until this is resolved.
So keep the brake line connected and hang the caliper to avoid strain on the line as described in the next step.
Removing the top brake caliper bolt:
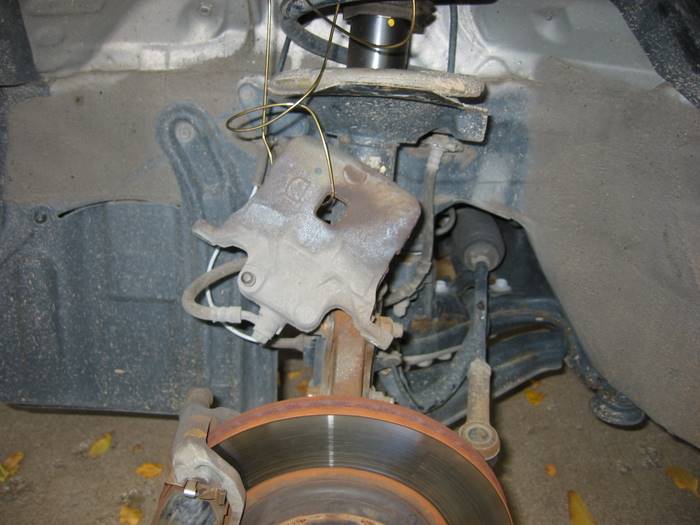
4. The caliper should easily slide right off the rotor after removing the above 3 bolts. Hang the caliper with an old coat hanger from the top of the spring. Never let the caliper hang from the brake line – it can damage the brake line and cause a leak.
Caliper hanging from hanger:
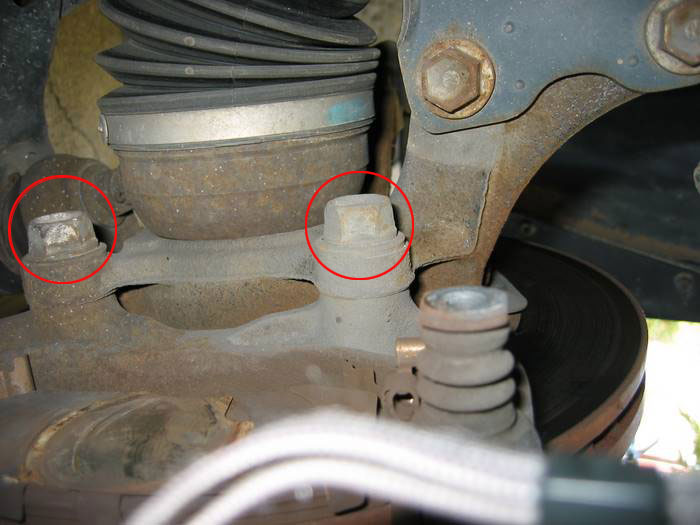
5. Remove the two 19mm bolts on the back of the caliper mounting bracket.
Two bolts circled in red:
6. NOTE: This step and any steps below relating to the rotor, only apply if you’re replacing the rotors as well. If the brake pedal pulsates when you press on the brake, you might consider replacing the rotors as well. This is typically noticable when braking harder at faster speeds such as when exiting the highway on an offramp.
Remove the rotor. Depending on the age of the vehicle and climate, the rotor may be rusted on. My Maxima was only 3 years old and my rotor was rusted on tight. To remove a rusted rotor there are a number of options:
Apply a liberal amount of WD-40 to back of the rotor and inside the lug holes on the front. Allow to soak. After a few minutes of soaking, use a large hammer and strike the back of the rotor in various locations to help dislodge it. If you are removing the rotor so it can be machined at a shop, be sure to use a piece of old scrap wood so you don’t damage the back of the rotor by striking it directly with a hammer. I started with a rubber mallet but eventually had to use a large steel hammer to knock my rotor loose.
Alternatively, you can use the holes on the caliper mounting bracket to help push the rotor off. This requires a 4″ long, 1/2″ wide bolt with a matching washer and nut.
7. Open brake fluid reservoir and wrap an old rag around it to catch any spill.
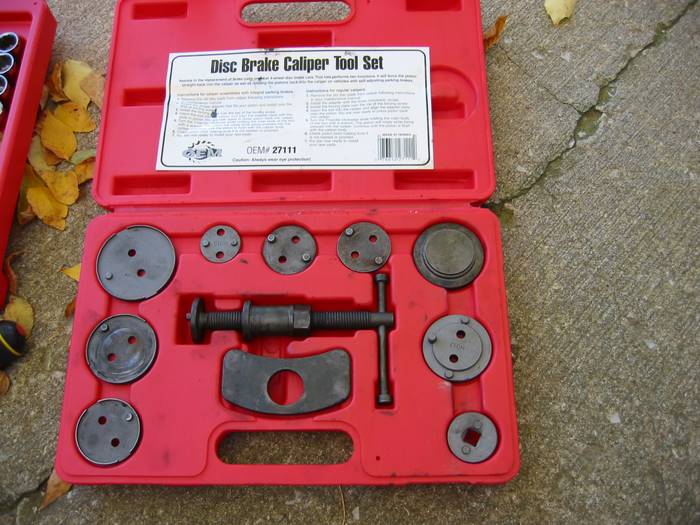
8. Compress the caliper pistion using a C-clamp or Caliper piston compressor tool. The C-clamp method only works on the front brakes since the rear piston must be twisted as it is compressed (the piston caliper tool naturally does this). While there are a variety of piston compressor tools, the general premise is to place the flat metal plate inside the caliper and twist the bolt until the strike plate (which rests against the piston) presses the piston back into the caliper. See the picture below. If you choose to use a C-clamp, place the old pad against the caliper piston so the c-clamp doesn’t press directly against the piston and mar the metal.
NOTE: As you compress the piston, the brake fluid level will rise. Keep an eye on the brake fluid level and siphon out any extra fluid or cleanup any spill that occurs. I recommend siphoning out some of the fluid since brake fluid is hard on paint.
Brake caliper compression tool kit:
9. Note the orientation of the pads. It’s also good idea to do one wheel at a time so you can always reference the other wheel if you have any question on how to orient the pads on reinstall.
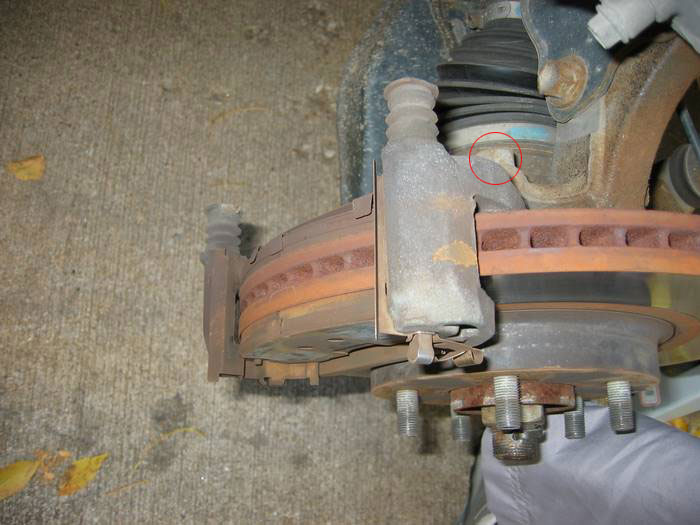
Only one of the two bolts that need removed are visible here:
10. Remove the two 19mm caliper mounting bracket bolts (the cradle that holds the pads).
11. If the old rotor was stuck, use a wire brush to clean the hub face. Optionally, you can apply a small amount of grease to the hub face to keep the new rotor from sticking sometime down the road.
12. Before installing the new rotor, it’s important to clean it off with rubbing alcohol and brake cleaner or rubbing alcohol. Rotors are shipped from the factory with a protective coating to keep them from rusting before sale. Use a liberal amount of brake cleaner and give it a good scrub until it no longer feels like it has a film on it. Once clean, install the new rotor by sliding it over the lugs.
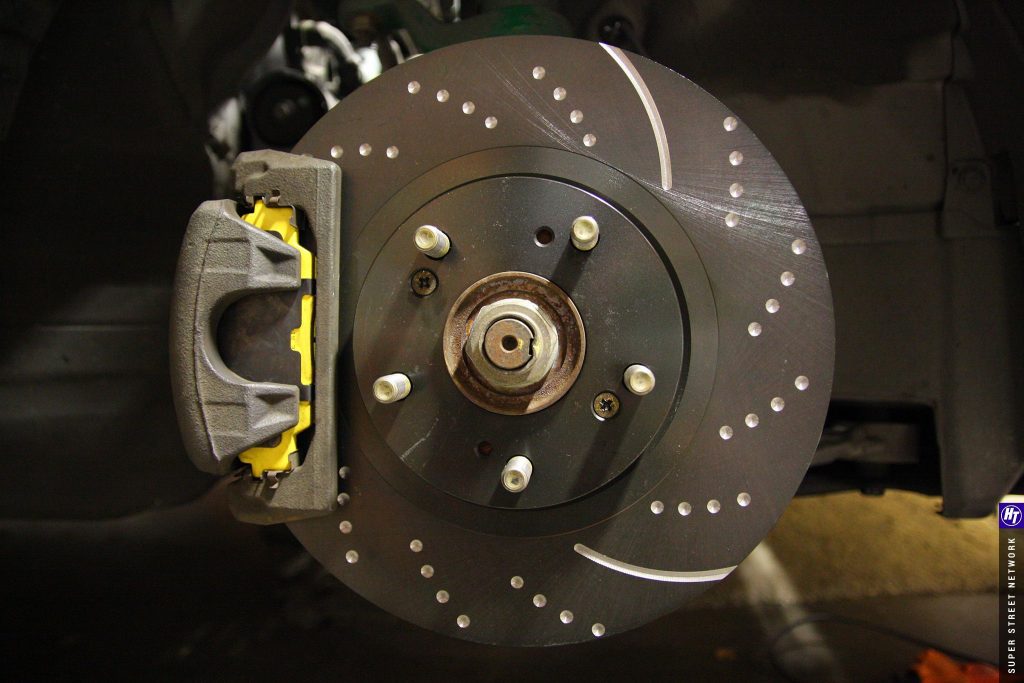
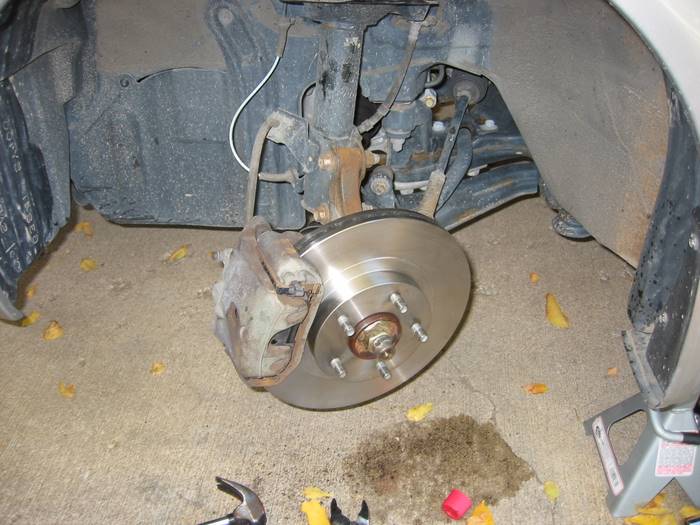
New rotor installed:
13. Remove the old brake pads from the caliper mounting bracket and clean the shims and hardware thoroughly with brake cleanup. Use a clean rag to scrub off deposits. Make sure this hardware is smooth and clean. The pads slide back and forth in this hardware so it’s important to make sure the path is smooth as possible. Once clean, dry them off.
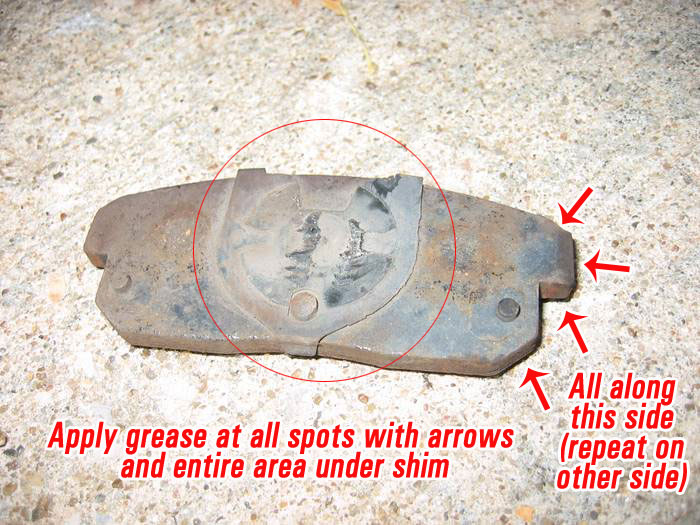
14. Apply grease to all the touch points in the channel where the pads sit. Apply a liberal amount of grease on the back of the brake pads and reinstall the shims. Apply grease to the points on the caliper mounting hardware where the pad will sit.
Apply grease to the following points on the brake pad. This is the back pad so the shim is smaller. Apply a liberal amount of grease to the back of the pad wherever the shim and the pad meet.
Apply grease to the following areas on the brake pad
15. Reinstall caliper mounting bracket and torque bolts to 53-72 ft. lbs. Insert pads back into caliper mounting bracket and slide caliper over the pads.
16. Reattach caliper to caliper mounting bracket and tighten caliper mounting bolts to 16-23 ft lbs.
Completed job:
17. Check brake fluid level. Add fluid from a brand new bottle of brake fluid as needed. It’s important not to use brake fluid that has already been opened because brake fluid soaks up moisture overtime reducing its effectiveness.
18. Reinstall wheel, remove wheel chucks, and lower car.
19. IMPORTANT: You must bed the brake pads after installation. This is very important to help avoid squeaking down the road. The specific bedding procedure is typically provided with the brake pads, but the general rule is to drive around 45 and brake hard, releasing the brake right before coming to a stop. Repeat this process 4 or 5 times.
20. While not required, it’s a good idea to bleed the brakes after doing a brake job.
21. The pictures above are for the front brakes, but doing the back is just the same with a couple minor differences:
Remove the 14mm bolt holding the mount for the emergency brake cable to get the upper part of the caliper off.
The lower piece of caliper has 17mm bolts.
The piston must be turned clockwise to be compressed. Make sure the end of the caliper compressor is inserted properly into the grooves in the piston so the tool actually twists the piston as it compresses.
Hook the emergency brake cable back onto the spring mechanism before reinstalling the upper caliper piece. It’s hard to hook up after the caliper is assembled.
To get the rear caliper back over the rotor, you must turn the cylinder so the nub lines up with the groove it slides into.
Edit: Here’s a few more notes submitted from reader ajahearn:
Some vented rotors are directional so people need to pay attention to the one to install.
Slotted/drilled/dimpled/etc rotors are supposed to be non-directional but some manufacturers want you to install them such that the first dimple/part of the slot/etc that reaches the pad needs to be at the top with the idea that any grabbing will pull the pads inward toward the hub and not force them upward away from the hub.
The caliper should never be left hanging from the brake line – it should always be supported by a hanger or bungy cord.
For the rear piston, the boot may start to bind and make it harder to compress/rotate. To resolve, occasionally back off (counter clockwise) to get the boot to straighten and then start again. And opening the bleed valve makes it considerably easier to turn the piston back in. Of course you need to have a hose to prevent the fluid from spraying
Well, after all the trials and tribulations of installing a part never installed before, I’m finally finished. I took the car for a test drive. Clearly, the car does not lean at all. VERY flat handling, and very nice tracking through a turn. I like the tighter feel in a corner, yet no adverse effects on the straight. That’s the beauty of stiffer sway bars. For $91 and 2-4 hours of time, I say money well spent.
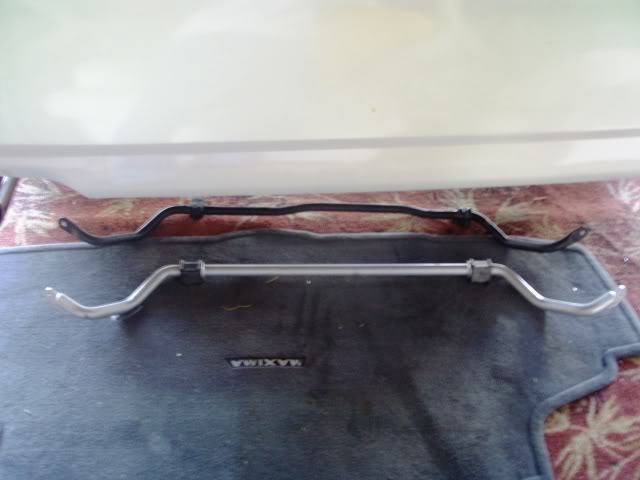
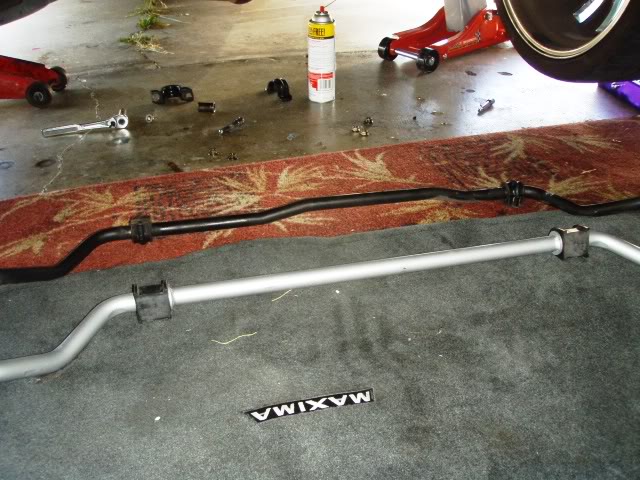
The bar weighs 1 1/2 pounds more than the OEM bar and is 2mm thicker. This may not seem like much, but its significantly stiffer when going through a turn.
Here is the installation instructions:
Tools needed – Air tools are very very very helpful. I got some 1/2″ drive hardened metric sockets and an 18″ pipe to fit on my 1/2″ drive ratchet as a breaker bar. I believe the sockets I used were 12mm, 14mm, 17mm and 19mm.
1. Loosen lug nuts and jack car up. IMPORTANT!!!—> Position jack stands behind the brackets that hold subframe. If you put jack stands in front under subframe, you will NOT be able to lower subframe.
2. Remove wheels.
3. Remove sway bar endlink using 17mm wrench.
4. Remove y-pipe. This opens up the middle area.
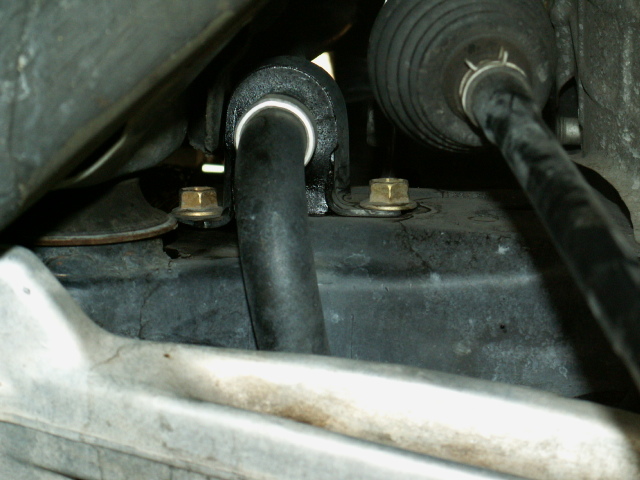
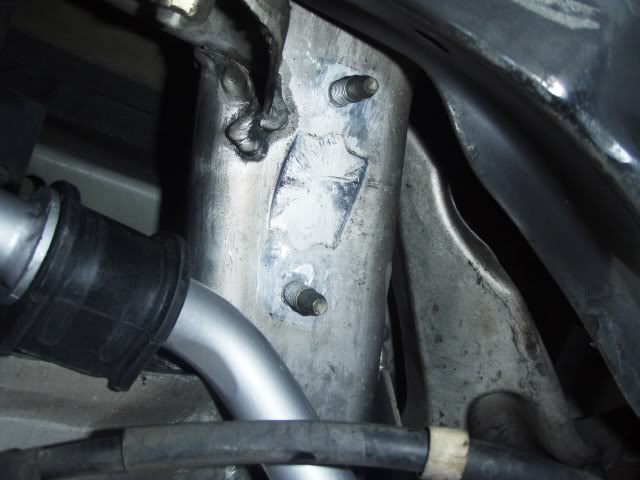
5. Remove the REAR bolt from each sway bar support bushing, but only LOOSEN FRONT bolt of each bushing. Remove these from the wheel well and from underneath in the middle where y-pipe was. Sway bar should be loose now.
6. Now the fun part. Use a floor jack and a small piece of wood and support the engine under the oil pan. Just make sure its supported. DO NOT raise the car at all with this jack or you will bend the oil pan.
7. Remove the rear sub frame support brackets. The two rear bolts on each bracket are 12mm and the large front one is 19mm.
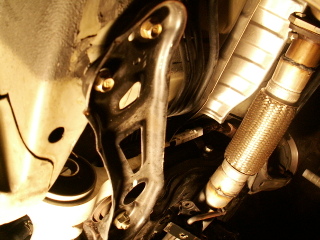
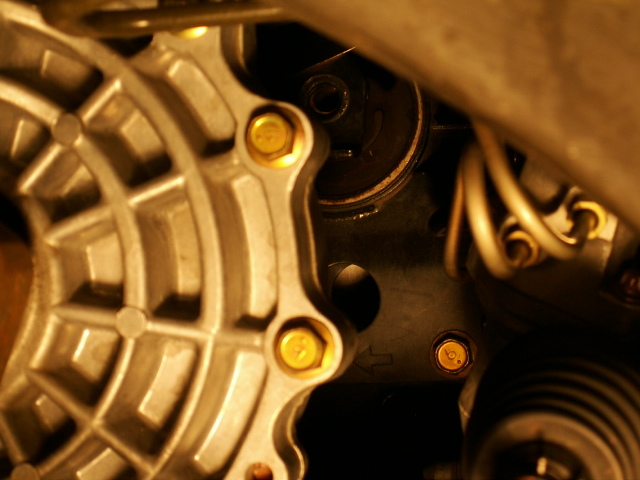
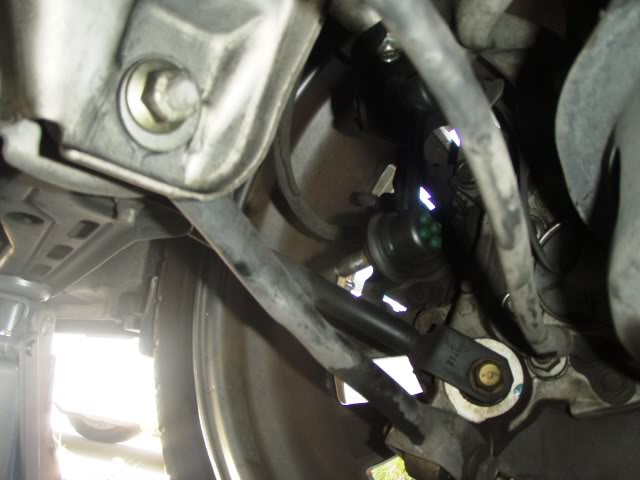
8. Remove the looooong 17mm bolt from the rear motor mount. its located in the center of the subframe and its fairly high up. I used my 18″ pipe on a ratchet and it broke loose easily. Here is a shot of the mount without the bolt. Its in the top center of pic behind the tranny.
9. Now you have to pry the subframe down so it drops below the big bolt on each side. I got it down and then put in a small floor jack and pried it until the subframe cleared to two rear bolts hanging down.
10. I removed the sway bar from the side rather than out the back. Either way is fine. Take your time. A helper is good here to help snake that curly bar outta there.
11. I marked the old bar on the top passenger side and then took the new bar and put it next to it and marked it as well. That way, there is no confusion as to which way the bar goes in.
12. Snake the new bar in.
13. Now you have to jack up the subframe. Mine was a little off and I loosened the front subframe bolts and pried it until it lined up. This part is tough. Two people are almost mandatory.
BEFORE YOU GO ON TO THE NEXT STEP . . .MAKE SURE THE STEERING SPLINE DID NOT PULL OUT OF THE RECEPTACLE. IF IT DID AND YOU IGNORE IT YOU WILL DO THIS OVER, LIKE I DID. HERE IS A PAINFUL PICTURE:
LOOK UNDER THE DASH AT THE BASE OF THE STEERING COLUMN ON THE FLOOR, AND THE SPLINE SHOULD NOT LOOK LIKE THE PIC. IF IT DOES, GET IT BACK IN THE RECEPTACLE.
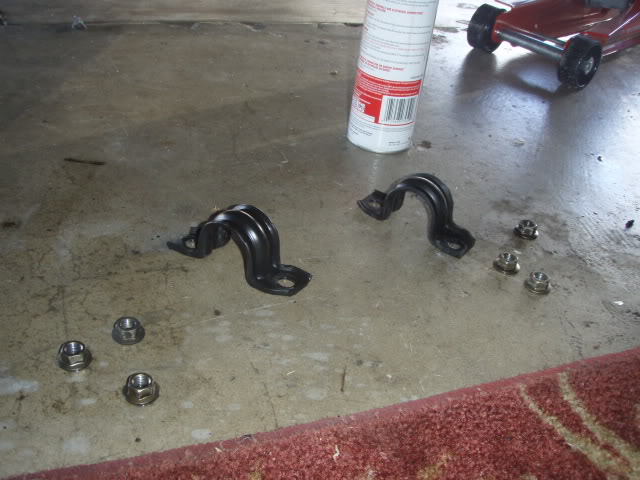
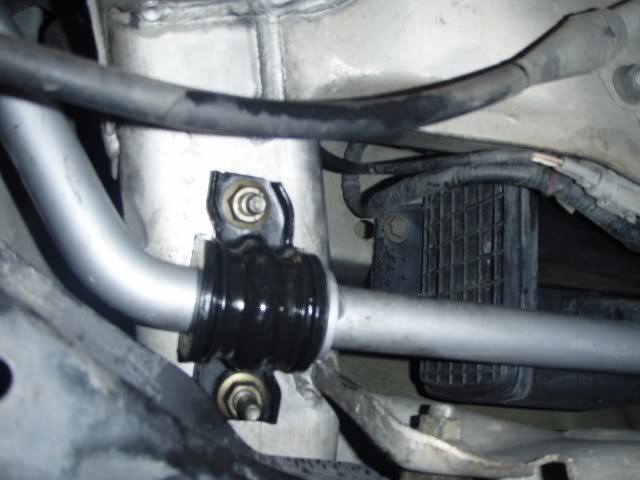
14. Now bolt it all back together. Subframe bolts, sway bar bushings, motor mount bolt (looooong one), y-pipe, and then end links. Sway bar support bushings are marked “L” and “R”. Left is drivers side and R is passenger side. The slit in the bushing is at the front. Make sure you lube the bushing inside and out. I used anti seize compound.
15. Put wheels back on, let it down, and fire it up.
16. FOR SAFETY SAKE . … take it easy for a bit to make sure nothing is loose. Then slowly take corners. See how flat it is through the turn??? Tracking is great.
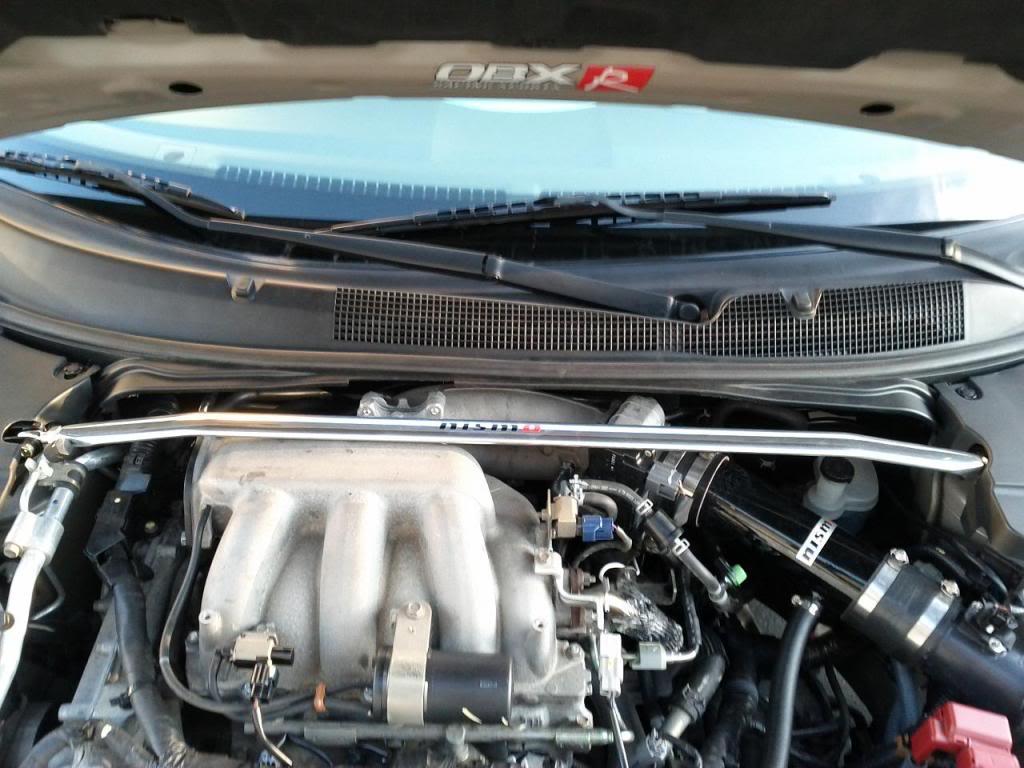
Next, take off the plastic covers a pick or small screwdriver will work
Remove 6 14mm nuts from towers
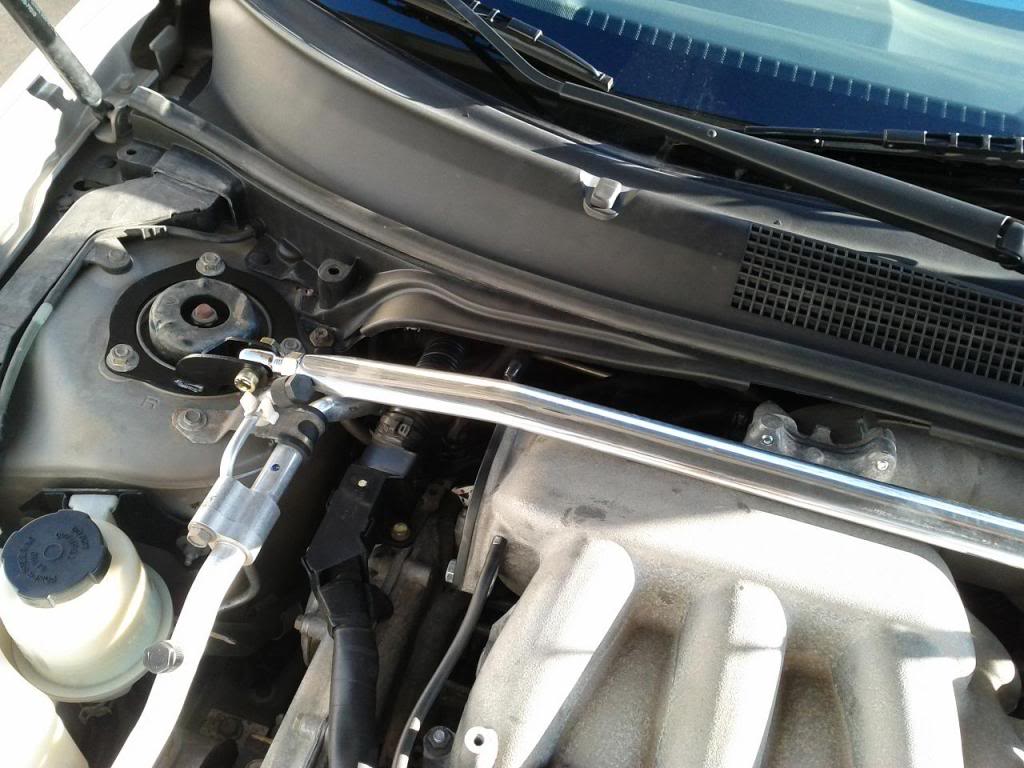
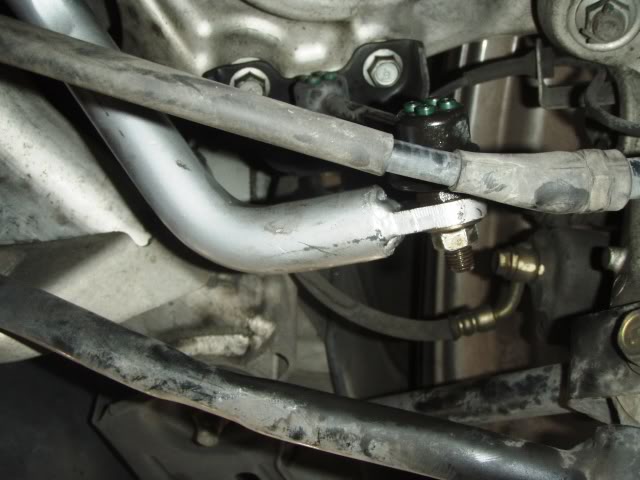
You need to relocate the service port for the A/C, very simple just pull it up out of the white clip and move the clip to the opposite side of the port. This will give you more than enough clearance to tighten the 19mm nut, and save your tech some hassle when it comes time for A/C service.
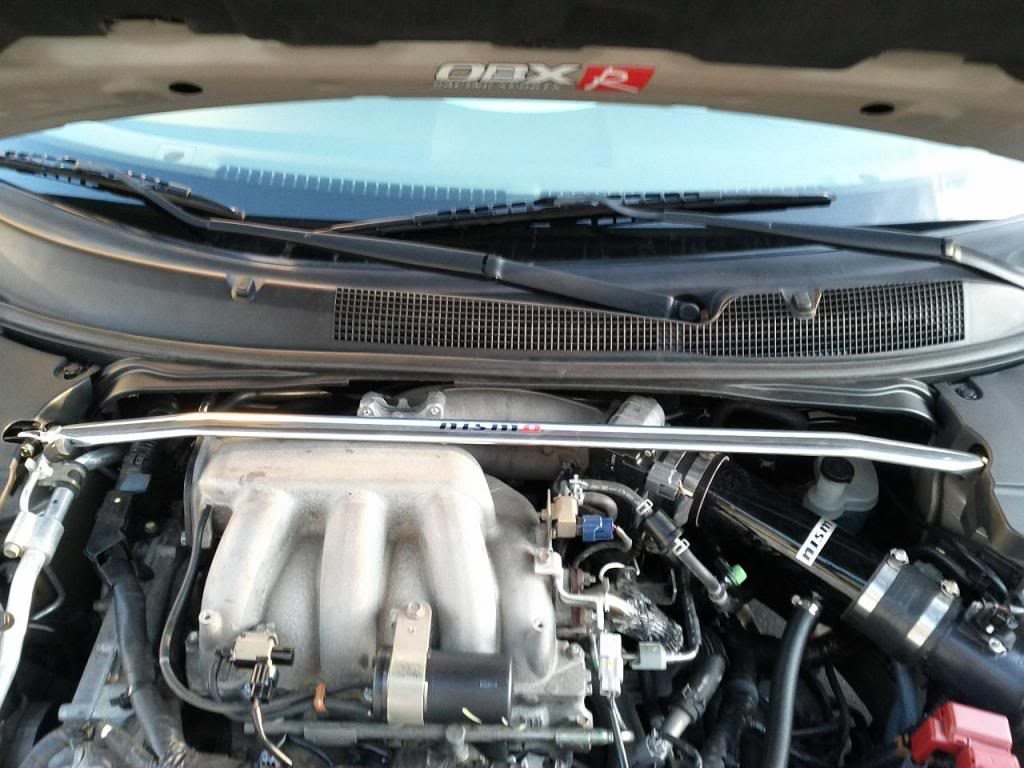
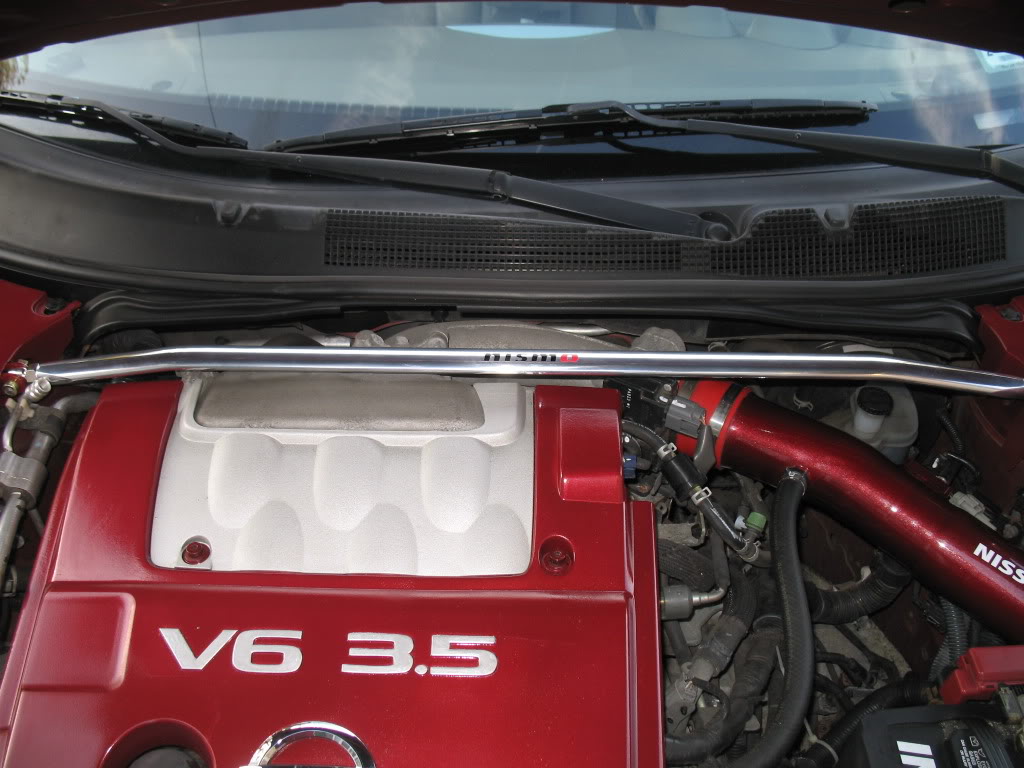
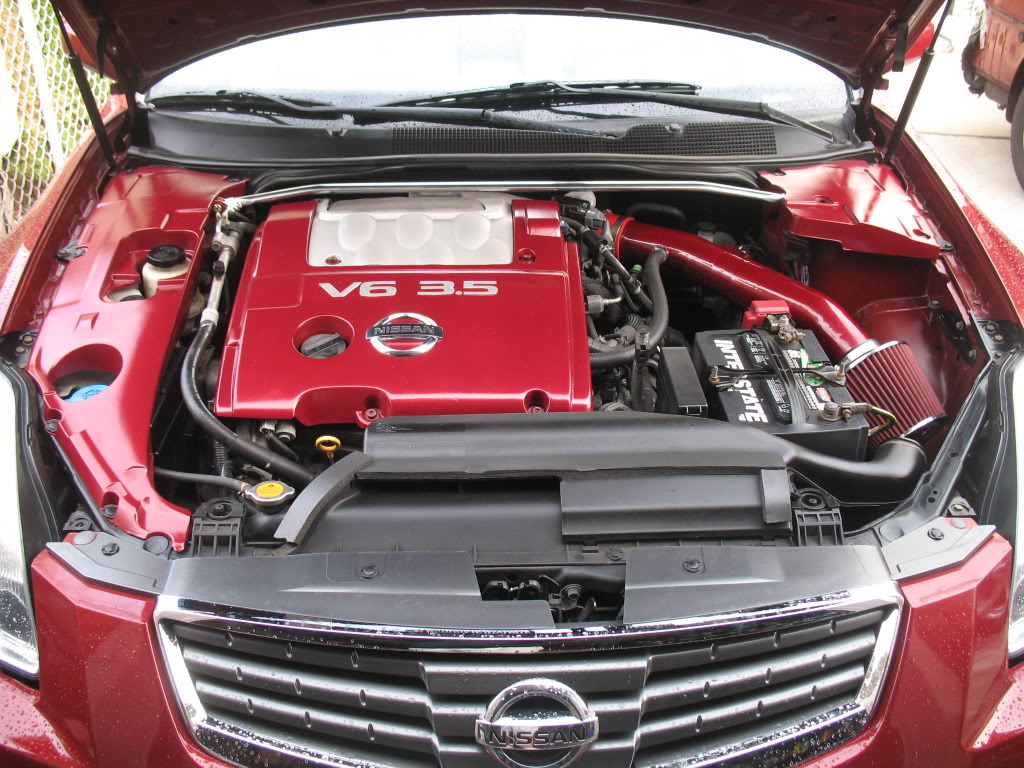
Install your FSTB, might take some finnagling to get the bolts to line up right, but it should fit, retorque the nuts and tighten the allen/14mm brass nut on each side and the 19mm adjustment nut
This was the trickiest part. Your OEM plastics will not fit over the FSTB, you can keep them off or do as I did and trim to fit. I just eyeballed it and took the dremel to it and sanded off the burrs. Reinstall your plastics and your good to go!!!
Pic with OEM cover installed
Still have clearance after spacer install, and I haven’t seen any sign of rubbing on hood
I wanted to give a walk-through of how to install the 2 brace setup as it is a little different:
I would recommend that you use the following when doing this install:
• Power drill with a 21/52 bit (it is 1 size bigger than a 5/16 bit- you could use a 5/16 and then just make it larger)
• 5/16 socket wrench
• Level
• Get a 1 inch 5/16 bolt (as KCMAXX currently has ¾ inch 5/16 bolts and I’ve told KCMAXX about this and hopefully he’ll change it with the future2 brace kits). This gives a little more thread for the nut to grab hold of.
Installation
Total install time took about 4 hours, but it really should take no more than an actual hour of real labor. I ate away time doing the following:
• Trying to find a good mounting position for the lower bar
• Drilling out one side to mount the bar
• Finding that the included bolts aren’t long enough
• Going to get longer bolts
• Mounting one side
• Drilling out the mounting location for the other side
• Finding out that mounting location isn’t level
• Guestimating another location based on the previous and drilling it.
• Checking the level and drilling through the brace
• Cutting the carpet where the bars are in order to pull it back into place
Suggestions: I would suggest installing the bars in the following way:
Top brace
Install with the bar from the interior of the car with the bolts on the interior side and the nut on the trunk side
Bottom Brace
Install the bar in the interior of the trunk with the bolts on the interior side and the nuts on the trunk side. This way you will be going through the same metal mounting plate as the top brace as well as the silver brace below it to increase the rigidity of the mounting holes you will have to drill out. Try to drill out a hole for the brace at 5 1/4 inches up from the folded down seatback on the drivers side 3 inches over from the seat, and 5 1/4 inches up and 2 1/4 inches over on the passangers side. This should get you in the area that I drilled out my holes, but you might need to see what works best for you.
Hopefully these pictures will help you out in mounting your rear lower strut brace. Let me know if you have any questions and I’ll get back to you as soon as possible.
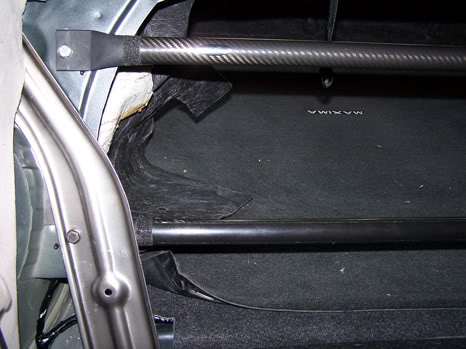
Shows the where I decided to drill on the metal brace that the the upper strut brace mounts to as well as the silver brace behind it.
Interior view (passanger side) of lower brace mounting pont
Interior view (driver side) of lower brace mounting point – I drilled once, missed the mark, drilled again got in the right ballpark, but the level was off, drilled a 3rd time and it was better.
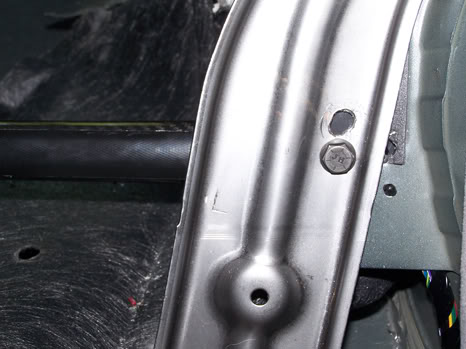
Interior view (driver side) of upper and lower brace mounting points. If you look to the right of where the brace is connected you will see a hole. That is where the bar would have connected with the stock mounting point, but there was no way that the bolt would fit and be able to be snugged down with the silver brace in the way. I corrected this by drilling in the current location through the silver brace, metal, and support bar. Everything seems solid now.
Both braces installed with carpet peeled back
Both braces installed with carpet put back in place
Here are my impressions on how the car handled before and after the install of these braces:
Before
The car has more of a luxury car feel in that the suspension is soft and feels a bit floaty over bumps in higher speed sweeping corners. It has body roll (both left/right and up down). It feels kind of like a boat in that it’s comfy, but it doesn’t inspire confidence when you first go into a uneven fast sweeping corner and find out what the car does (bobbing and rolling).
After
With 1 bar the car does feel more responsive in that the chassis feels more rigid and connected. The front still seems to bob and roll when tossing it around a corner (as the front has yet to receive a FSTB), but the car seems more planted and stable. With the 2nd bar added in, the car feels like a sport/luxury car (it has crisper and more connected handling, but it isn’t harsh). The front still bobs and rolls, but the rear is more stable and planted with the bobbing now gone. A high speed sweeping corner with a bump that would once make me anxious now doesn’t as the rear of the car doesn’t get unsettled. If you are going to put in a rear lower brace, I would recommend that you take your time and plan out what you are doing as there isn’t a lot of room for mistakes.
Afterthoughts
This is a good upgrade that is well worth the money. It isn’t hard if you are doing either a single bar or a double bar. The single brace was a snap to install, the lower brace was a little more complicated but by no means difficult. I agree with Chernmax in that this is a 1 wrench job that anyone can perform, just take your time and take it one step at a time.
I also want to add a side bar that with the FSTB installed and Rear Sway Bar the car now feels more stable during the long sweeping corners. If I am going around a 180 degree sweeping onramp (I take this onramp everyday so I am used to it and have tested my car many times on it) with a posted 40MPH speed limit I can do the following:
* I can make the corner at 60 with the car holding stable (tires might be squeeling, but the car sticks and is controllable). I could go faster, but I would have to give it all its got and I don’t feel the need to go any faster.
* If I wanted to I can lift off of the gas during this corner at 50MPH and the car might start to kick out the rear end ever so slightly, but the braces bring it right back into line and keep it controllable. If I did this before without the RSB and the FSTB, the rear end would start to come around and regaining control would be a whole lot more difficult.
Morale of the story – don’t let out of the gas during a sweeping corner or brace your car to ensure better handling if you have to so that it keeps in line. At least now I know how my car will react if it does get upset during a corner (either intentional or in a case of emergency) and I can respond accordingly. I am not saying to go blazing into a corner at wreckless speeds, but if you can find a deserted place where you can test your car do it in increasing increments so you can find some limits of your car and know how it will react with your current setup. Better to know what your car will do when the need arises than hope it will react the way you think when the time comes.
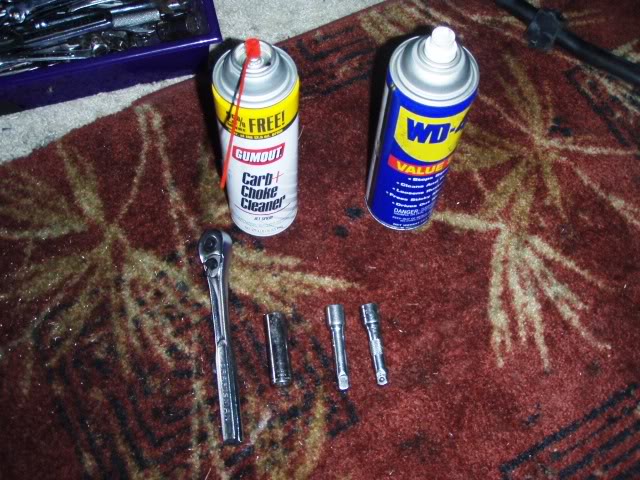
Tools Needed: (NOTE: Socket is size 14 & make sure it’s a long socket, not short)
1) Jack up the car from BOTH sides.
2) Unbolt the outer part of the sway bar first, since the sway bar is stable. There’s 1 bolt on each side
3) Unbolt the middle section
Now you should have 3 bolts total from each side and the middle section brackets
4) Wiggle the old sway bar out and be careful. Take your time and try twisting the bar to avoid pulling any lines with you. NOTE: Notice the way the sway bar is facing before you put it in.
5) After you put in the NEW sway bar, connect all bolts in place, but DO NOT tighten anything yet. NOTE: Do the middle section first to hold up the bar because it’s heavier than stock.
6) Once every bolt is in place, tighten the outside bolts then do the middle section. And now you’re done.
Items needed:
350Z/G35 Rear Camber Arms (I bought the Ichiba ones. There are cheaper ones, but they don’t look as strong. Here’s a link for the Ichiba ones on eBay
WD-40, Liquid Wrench, etc.
17mm socket and/or wrench (my impact gun made it real easy, but it can be done without it)
19mm socket and/or wrench
Jack and jack stand
1. Jack up the car and place a jack stand under it.
2. Soak the nuts & bolts with WD-40 and let them sit for 10-15 minutes.
3. Remove the nuts, bolts and OEM arms. The lower nut and bolt are both 17mm. The upper bolt head is 19mm and the nut is 17mm.
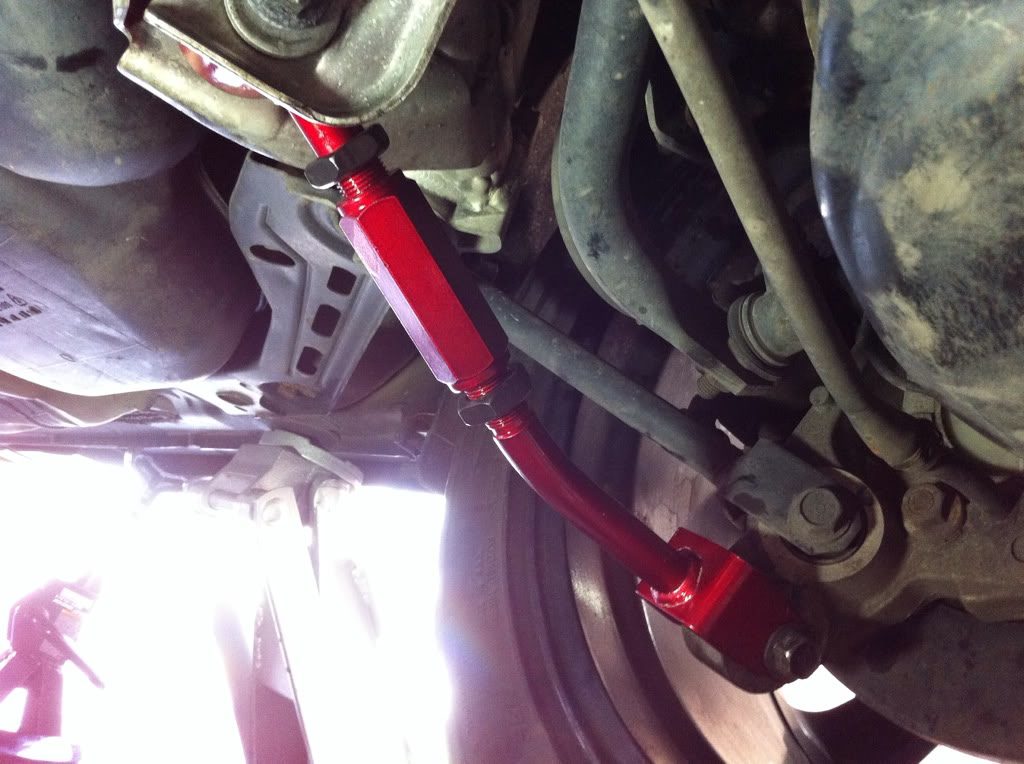
4. Install the new camber arms.
5. Remove jack stand and let car down.
6. Take pics and post them or BE BANNED!
7. Most importantly, GO GET AN ALIGNMENT IMMEDIATELY!
No surprises really and not much to it, just get in there and get it done!
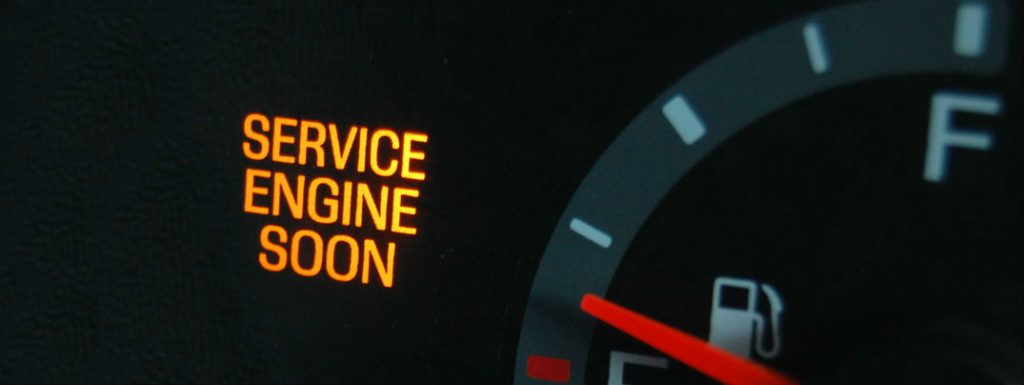
This article explains the various ways of resetting and/or clearing codes on your 6thgens. It should also work for any of the current generation Nissan and Infiniti vehicles. Clearing the codes will turn off any check engine lights (aka: SEL, CEL, SES, etc..). There is a table of OBDII codes at the end of this page to reference. You will need an OBDII scanner in order to pull the error codes. Some high end scanners will tell you both the code and the definition, but many simply tell you the code. If you have a scanner, you can use it to turn off the error codes. If the same code and CEL comes back, you should investigate the problem.
Clearing Codes
There are several ways to clear ECU error codes. Scan Tool
If using a scan tool, follow tool manufacturer instructions to clear Codes. Manual Method
Here is a quick way to reset your ECU. It is also known to clear codes thrown, and turn off the “Service Engine Soon” Light. It’s a little tricky, but works.
Confirm that accelerator pedal is fully released, turn ignition switch on and wait 3 seconds.
Repeat the following two procedures quickly five times within 5 seconds:
Fully depress the accelerator pedal (HARD).
Fully release the accelerator pedal.
Wait 7 seconds, fully depress the accelerator pedal and keep it for approx. 10 seconds until the CEL starts blinking.
Fully release the accelerator pedal (while the CEL is still blinking)
Wait about 10 seconds.
Fully depress the accelerator pedal and keep it for more than 10 seconds.
Fully release the accelerator pedal (The CEL light will continue to blink).
Turn ignition switch to On position and now you can start the car. The CEL light should be gone.
With Consult
Turn ignition Off.
Connect Consult he data link connector (DLC), located behind fuse box cover.
Turn ignition On.
Touch Start.
Touch Engine.
Perform each diagnostic test mode according to each service procedure.
Without Consult
Turn ignition On.
Turn diagnostic mode selector on ECU fully clockwise and wait until inspection lamps flash. #Number of flashes displayed indicates corresponding mode.
Note number of flashes, then immediately turn diagnostic mode selector fully counterclockwise.
If ignition is turned Off during diagnosis, in each mode, and then turned back on again after power to the ECU has dropped off completely, diagnosis will automatically return to Mode I.
For description of modes, proceed as follows:
(Mode I): with engine stopped, system in bulb check state. with engine running, system in malfunction warning state.
(Mode II): with engine stopped, system in self diagnostic results state. with engine running, system in front O2S monitor state.