Category

my4thgen 95-99

Category

Community Member Credit: schmellyfart

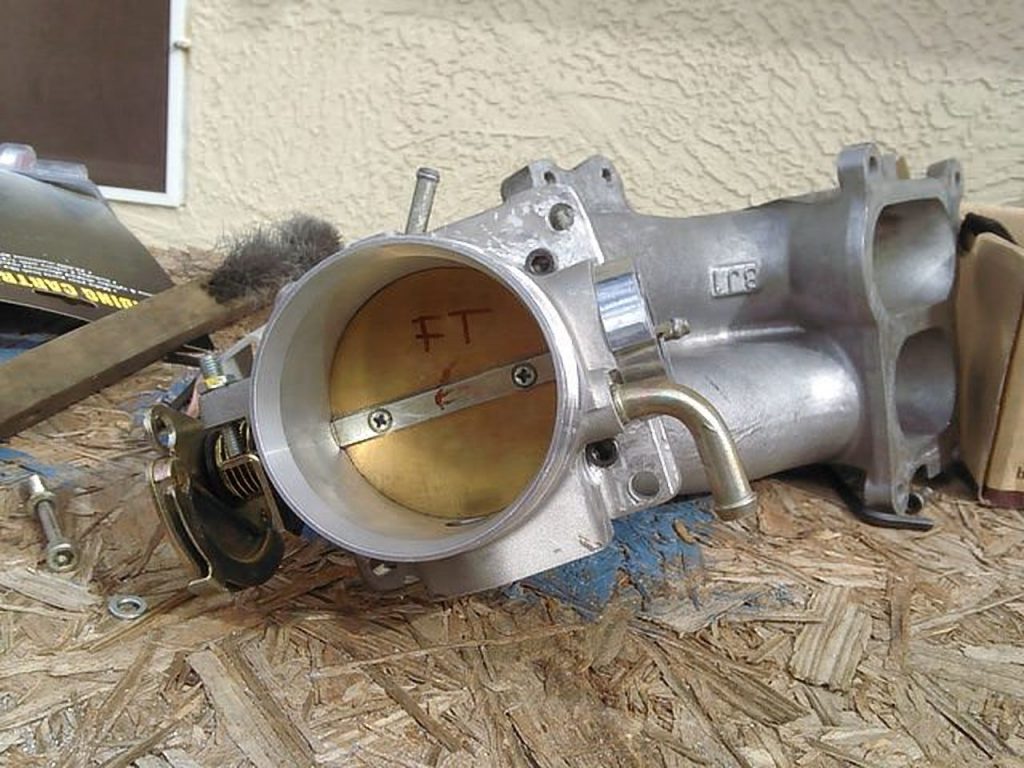
I’ve had this project on the back burner for the better part of the last year and a half, but it is finally done. 75mm TB on an A32 3.5 swap with a functioning IACV.

  • The TB is an aftermarket 75mm TB produced for a 86-93 Mustang, redrilled and clearance to fit the VQ35DE TB bolt pattern, TB mounted upside down to make throttle cable routing a bit easier.
  • The throttle Cable bracket was fabbed from a random aluminum bracket I had previously removed from the car and bolted it to the firewall in place of the cruise control unit (for now).
  • The IACV is a VQ30DE-K IACV Housing with a Pathfinder IACV, mounted onto the TB with an adapter plate I fabbed up.
  • Throttle Cable Pulley is off of a VQ30DE.
  • I wasn’t thrilled with the way the original throttle cable return spring felt, so I replaced it with one from a B14. Note, this spring winds in the opposite direction than the VQ30DE throttle cable return spring.
  • The TPS is a stock 86-93 Mustang TPS wired up to a salvaged A32 TPS connector, making it plug and play.
  • No cruise control, unfortunately. I am currently looking into another 75mm TB where I can retain an IACV and CC.

As expected throttle response is increased, but low-speed driving requires more attention than before as the throttle only needs to be held open 1-2% to maintain speed at 45mph according to my scangaugeII. Though the twitchiness at low speeds could also be attributed to the throttle cable being mounted to the Chassis, rather than the engine – even though I have all 4 poly engine mounts.

Before Port Matching

Everything bead blasted and port matched

75mm Mustang on left, 70mm PFTB on right

Loading

Community Member Credit: yellow_cake

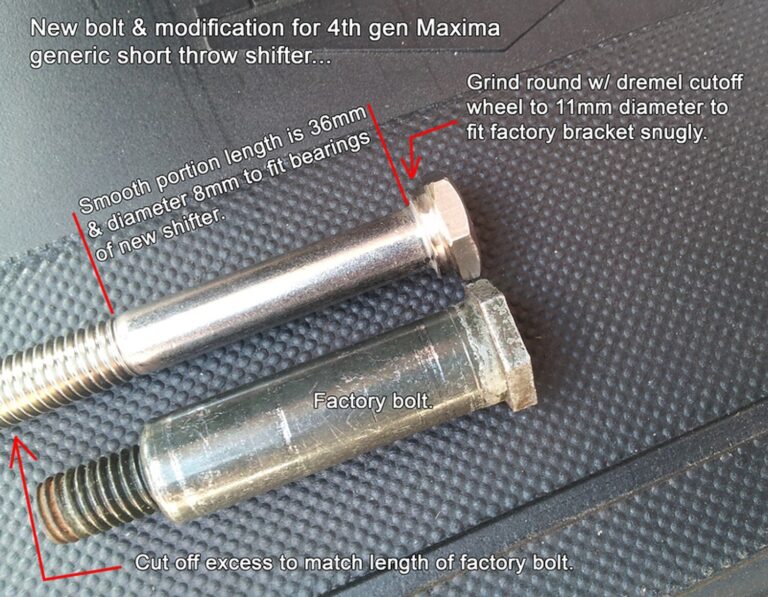
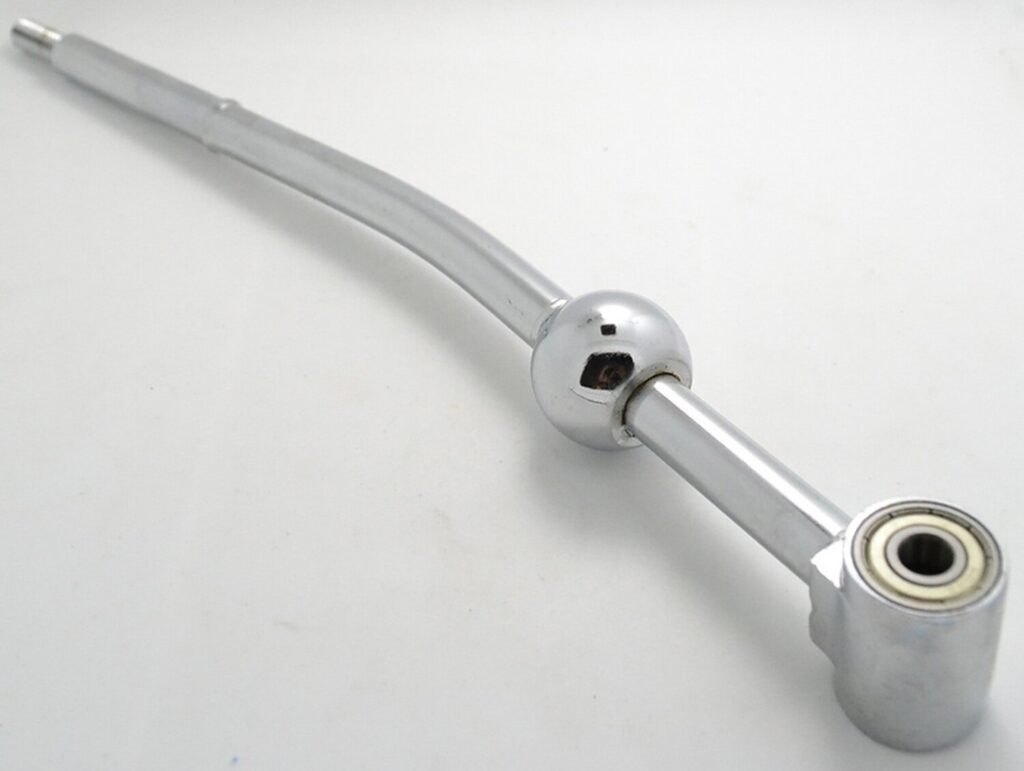
As you know may know, the generic short shifters do not come with a bolt. These use roller bearings (what you find in skateboards) and the factory bolt is too large to pass through.

Now, the important thing with this bolt is that the smooth shaft is the right diameter and length to fit into the roller bearings of the new shifter… The rest can be modified from here… See the pic for a description.
The rounding of the hex part is necessary for the bolt to sit snugly in the factory bracket, see the 2 bolts side by side.
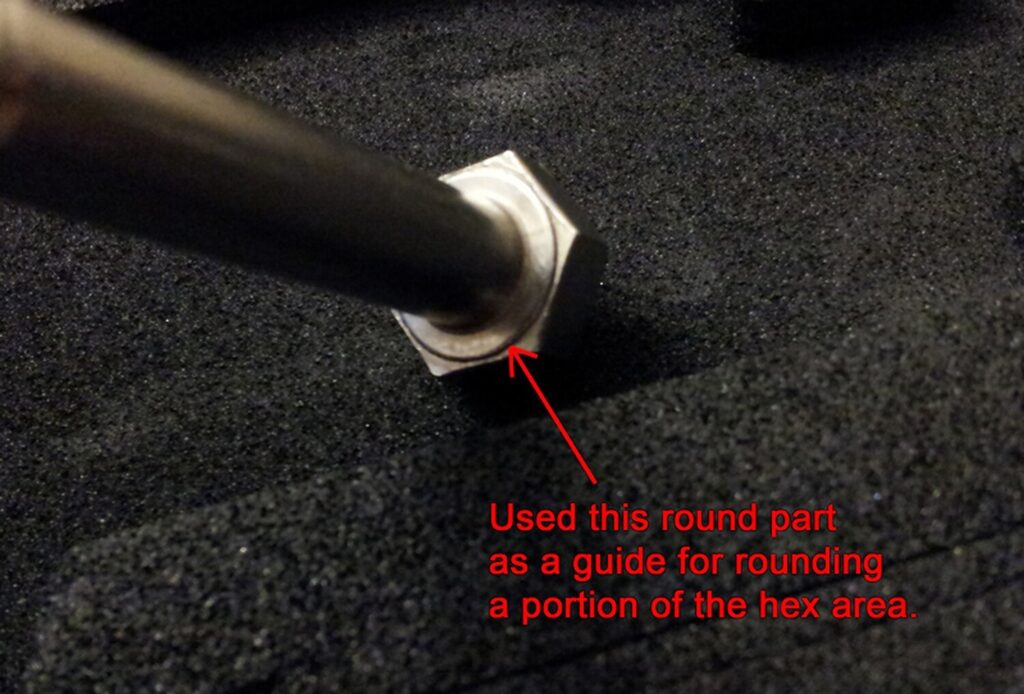
I used a dremel type tool to round off the portion of the hex head. It helps to use a new cut off wheel as it’s edges are nice and square and not rounded.

The bolt actually has a round indentation which I used as a guide while grinding.

You’ll need some washers to fill the space as the new shifter is not as wide as the original. Buy a few various thickness washers and see what fits best. Oh, and use a washer before the nut as well.

Important: DO NOT TIGHTEN THE NUT TOO MUCH OR SHIFTING WILL BE STIFF! Just tighten it till it’s snug, then back it off about a 1/2 turn or so. The nylon locking nut will stay in place.

Hope it helps some of the guys who don’t have the cash to buy a brand name shifter with all the complete parts but want it done cheap and right…

Loading

Community Member Credit: Eddy

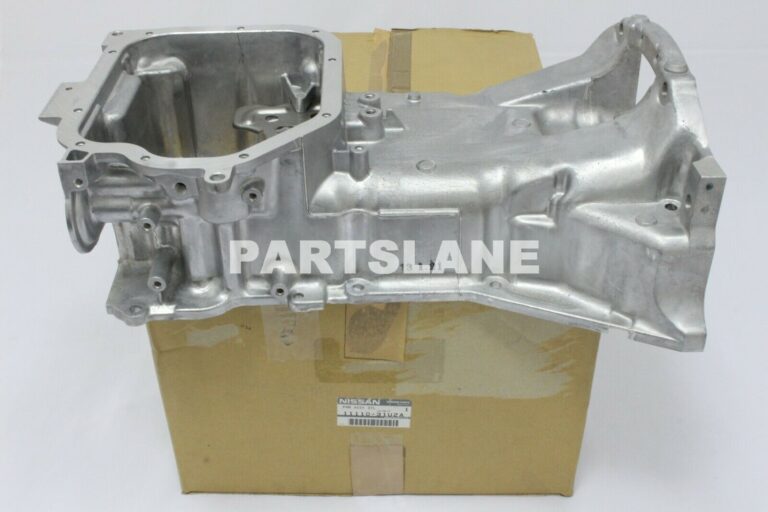
If you are doing a VQ35DE swap on 3.0 timing, you will need the 3.0 upper oil pan. Both the Automatic and Manual upper oil pans are the same, making it easier to source one. Below are the part numbers that you need. I personally didn’t want to re-use my old one. The time spending cleaning and removing RTV was not worth the hassle to me. Plus I had a brand new 2020 engine and wanted to keep everything as close to new as possible.

Order Link: https://www.infinitipartsdeal.com/parts/infiniti-pan-asmy-oil~11110-31u2a.html
Price: $142.48

Part Numbers:

  • 11110-31U21
  • 11110-31U22
  • 11110-31U2A

Fitment:

  • 1995-2001 Nissan Maxima VQ30DE (Auto or 5MT)
  • 1996-2001 Infiniti I30 VQ30DE (Auto or 5MT)

Loading

Owner: choray911

Year: 1996
Model: Maxima
Color:  Black
Transmission: Manual 5-Speed
Trim: SE

Mod List:

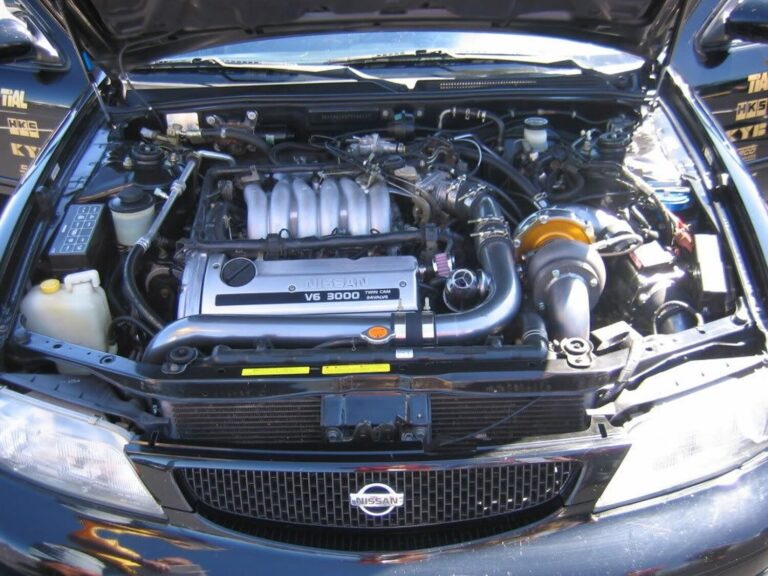
  • VQ30DE Engine
  • 5-Speed Manual Transmission
  • T04E Turbo
  • Spearco Front Mount Intercooler
  • TIAL 38mm Wastegate
  • HKS SSBOV
  • Deachwerks 570 Injectors
  • GReddy E-manage Blue
  • Sard FPR
  • Stillen Flywheel
  • XTD 6-Puck Kevlar Clutch
  • Zeitronix WBO2
  • TSW Laguna Wheels
  • Z32 Brakes
  • K-Sport Coilovers
  • 84′ 300ZX Hood Scoop
  • Blacked Turn Signals & Tails

Loading

Community Member Credit: Trini Boom

As some of you may know, when you go over bumps or rough road surfaces, you hear a clunking noise that sounds like metal to metal contact in your steering wheel. This thread will show you how to fix the problem.

Tools Needed:

  • Ratchet with 10mm and Deep 19mm (6-Point)
  • Phillip screwdriver
  • T50 Torx bit with ratchet adapter
  • Rubber Squeegee from Body Shop
  • Yellow adhesive glue
  • Tissue with rubbing alcohol

Step 1: Disconnect both positive and negative from battery 10mm (I take no chances with airbags)

Step 2: Remove the left side cover

Step 3: Remove right side cruise control cover

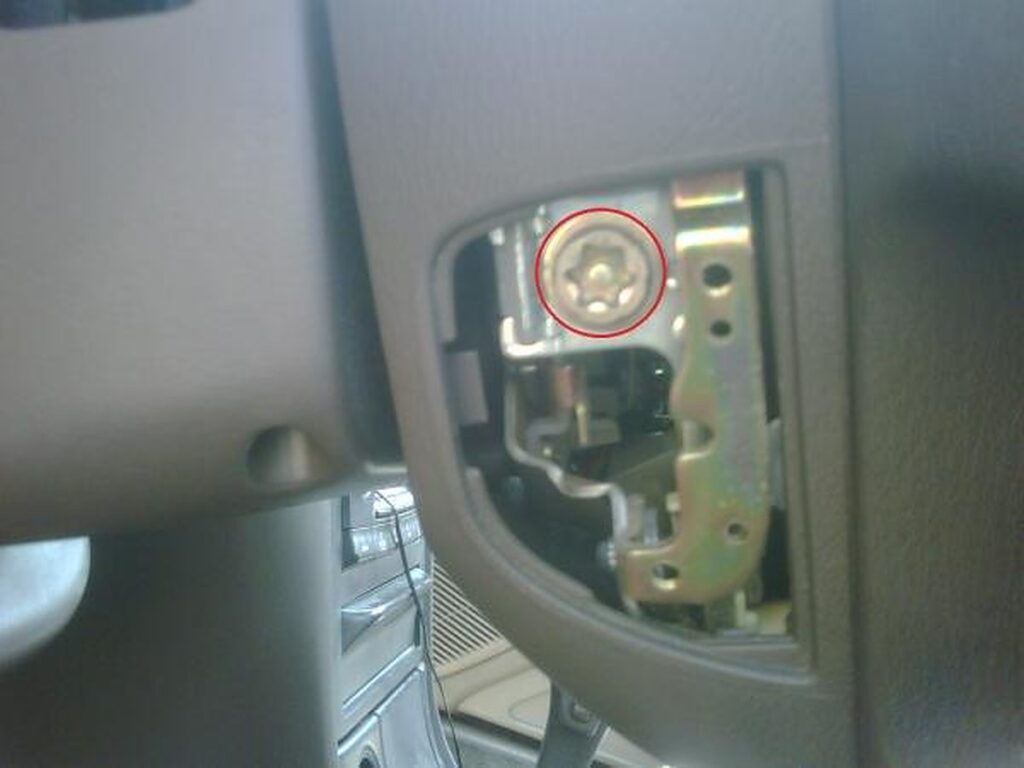
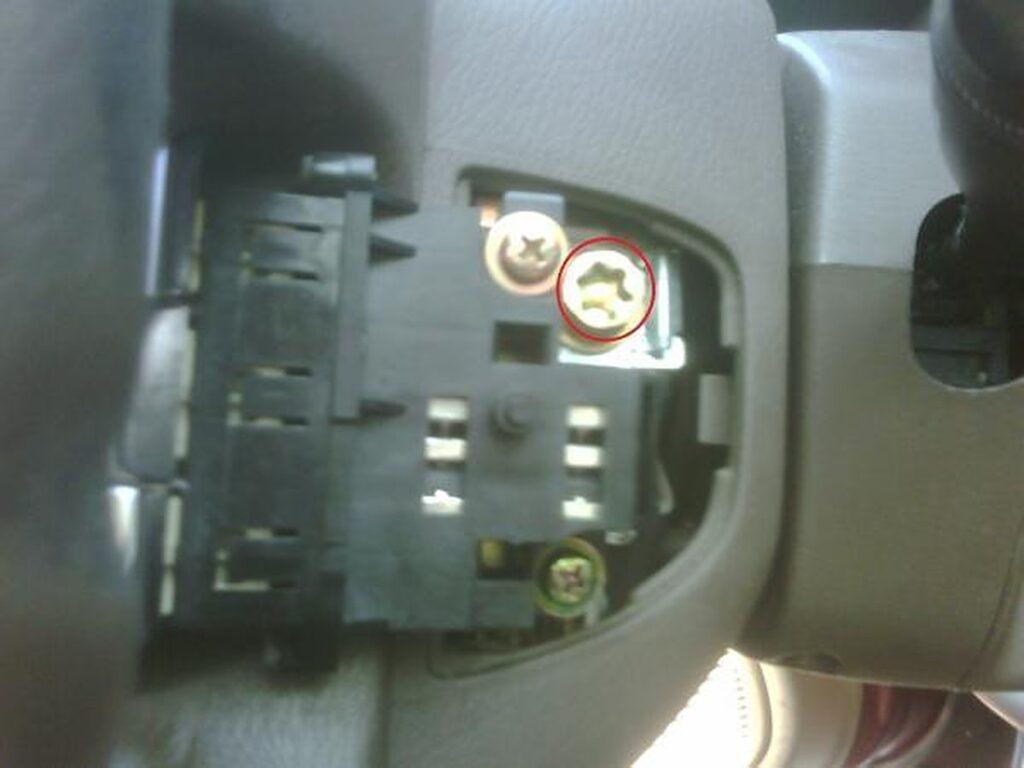
Step 4: Remove both airbag screws with a T50 Torx bit.

Step 5: Slide the airbag forward and disconnect the airbag harness.

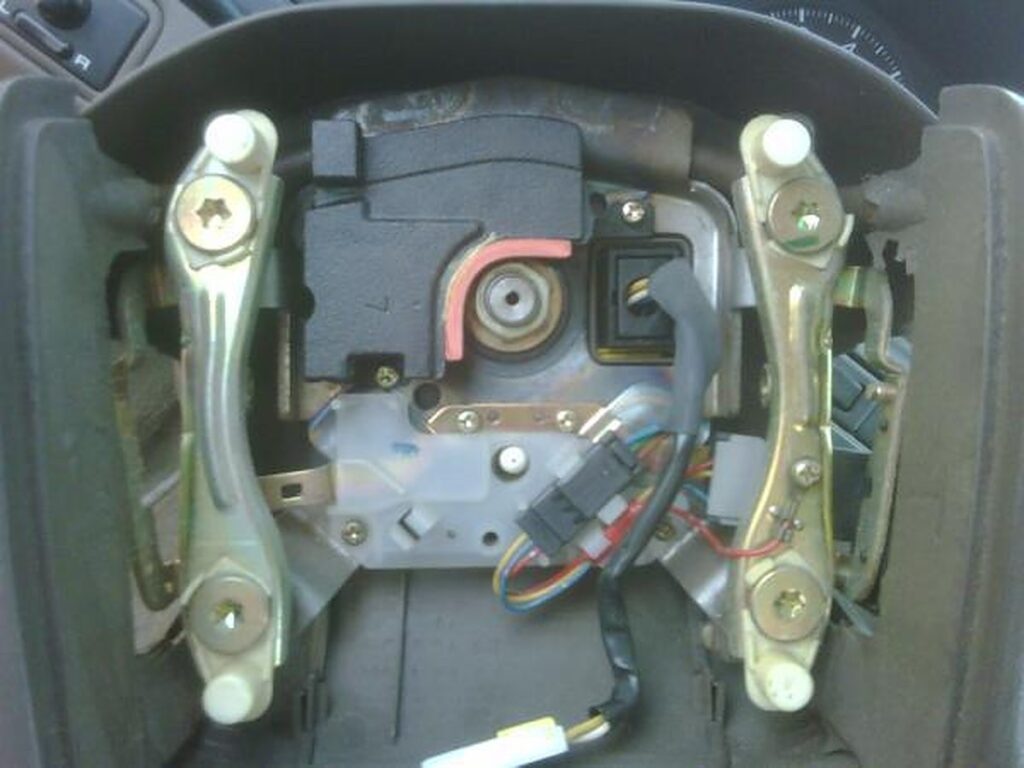
Step 6: Remove both Philip screws shown along with steering wheel nut 19mm. Lift the piece out.

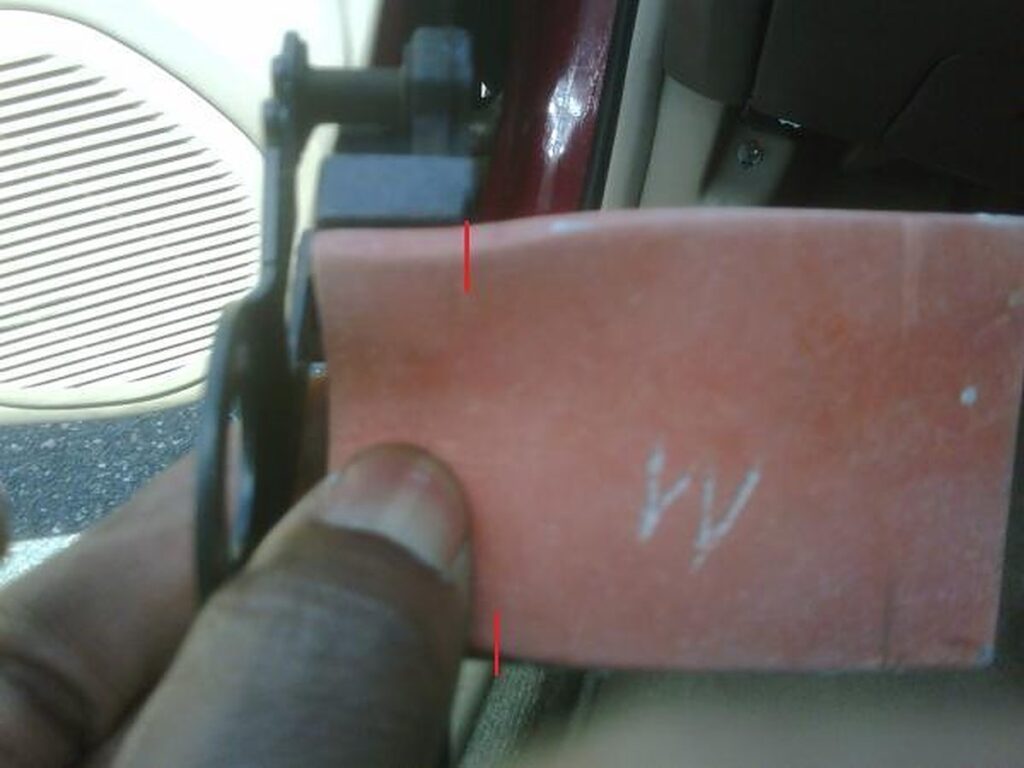
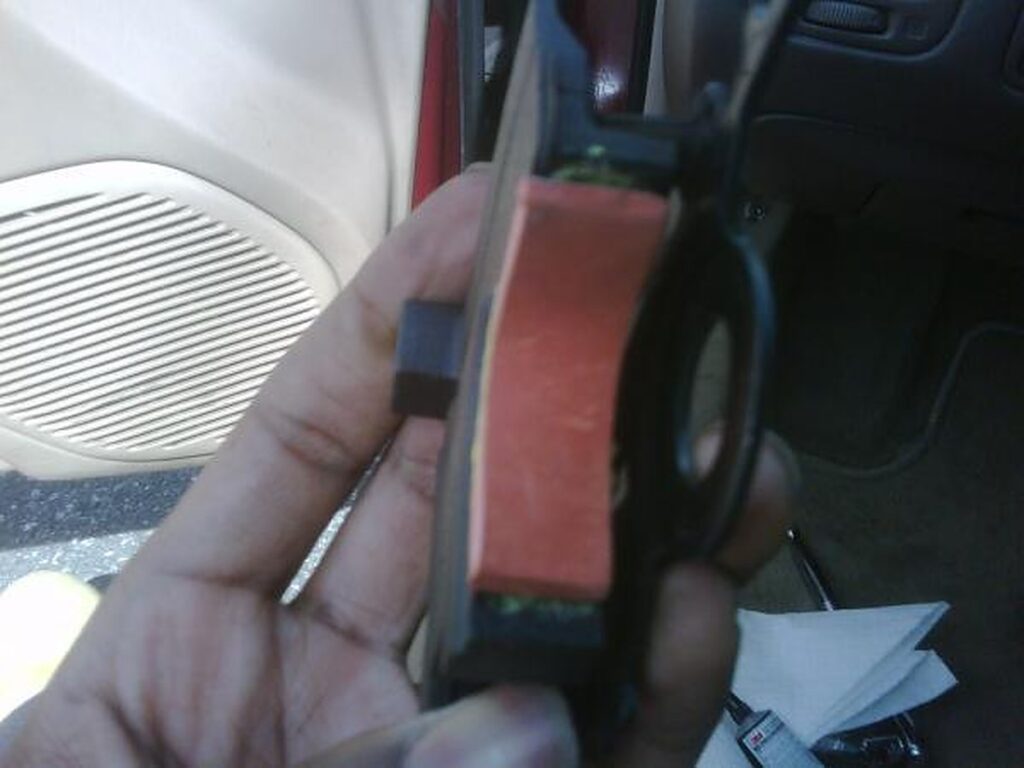
Step 7: Pre-fit rubber squeegee and mark where to cut as I have done with the red lines.

Step 8: Cut the piece off on a flat surface. Clean metal surface and rubber with tissue with rubbing alcohol.

Step 9: Apply adhesive to the metal surface and allow a few minutes to dry some but not completely.

Step 10: Place rubber on the surface and hold for a few minutes for it to dry and stay in place.

Step 11: Reinstall the piece and this should be your finished product.

Reinstall air bad and covers and take for a test drive. Should not hear anything from the steering wheel again.

Loading

Community Member Credit: Finkle

I have been looking around for cool-looking steering wheels at the junkyard for a while now. I wanted something other than the 5th gen wheel.

I found a 2001 Toyota Celica wheel and jumped on it. After a couple of afternoons of work, this is what it looks like:

Never mind the Toyota logo, I am going to make it into a Nissan logo.

I used the Maxima 5th gen clockspring I had in there from my steering wheel audio controls I had on the stock wheel. I will be making new controls for this wheel.

I got really lucky, the airbag on the Celica is the same as the maxima’s. I swapped the airbag connector, no airbag light! My multimeter had 4.4ohms for the Celica one and 4.3 for the maxima. My meter has a tendency to run a little high, might be closer to 2ohms. Either way, the computer can’t tell the difference.

For the cruise controls, I trimmed down a little bit and screwed it onto the side where the Toyota cruise control stick would be.

The horn works too. Easy wire splice.

The Celica wheel is smaller and does not extend out as far, making it look sportier and also easier for my large legs to fit under it. It’s about 5 pounds lighter as well.

Loading

Community Member Credit: ejarmol

The first mod I ever did to my car was the cruise control always ready one. I use it every day, 10 times a day, and I love it cause I’m lazy. I don’t have to turn that annoying rocker switch and then push set, I can just push set.

I remember when I did it a couple of years ago the current sticky did not apply to the 99se, its box of relays was different, so I experimented and found the one that worked. I took pictures then, and it wasn’t until I discovered those pictures randomly looking through my computer did I remember I was gonna make my own very first DIY. So here it is:

You need: 5 minutes, (2) 1-2″ strand of wire, 4 crimp-on spade connectors, something to crimp ends, a flat head screwdriver

1. Locate the box that has the cruise control relay in it. I used a flat head screwdriver to pop it open

2. Use that screwdriver to pop off the cruise control relay, (this is a picture of the final product), it is the one where you can see two little wires

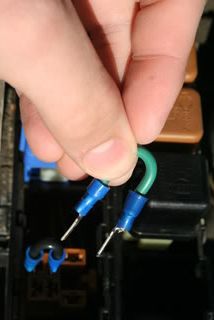
3. Crimp the 2 spade connectors to each end of your little wires, should look like this

4. Plug them accordingly and you’re done!!

Additional Notes:

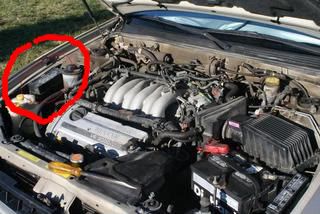
  • That “trick” as ejarmol described it is only for the 99 model. Nissan changed the electrical wiring. On the 95 through 98 models, the ASCD Hold relay (that’s what Nissan calls it) is in front of the battery.
  • Look at the cover over the relays that are in front of the battery and you will see one is labeled ASCD. This is the relay that gets removed. If your car has an automatic transmission, you need 2 jumper wires. If your car has manual trans, you only need 1 wire.
  • The electrical schematics for the 99 Maxima and the 99 I30 are the same, same wire colors and all.
  • The one thing that was not pointed out is that he has an automatic transmission. There is a difference between the auto and manual trans in how you would do this mod.
  • If the car has an auto trans, you use 2 jumpers as shown. If you have a manual trans, you use only one jumper. This is because the relays are different for the different transmissions. The auto trans uses a 2 circuit relay with 6 connections where the manual trans uses a single circuit relay with 4 connections.
  • If you have a manual trans car and use 2 jumpers, you will be shorting out fuse # 12 which is for the ASCD and a few other things.

Loading