Credit: Jairo Rodriguez


![]()


![]()

The “4DSC” name was officially designated by Nissan in 1985. The Nissan Maxima has always one of the sportiest midsize sedan offerings. Its roots trace back to the 1976 Datsun 810, which had a fuel-injected straight-six, five-speed manual transmission, and semi-trailing arm rear suspension. Nissan introduced the updated 1985 Maxima as the four-door sports car or 4DSC, forever cementing the car’s position in the minds and hearts of the enthusiastic driver.
This is our branded name adding “MY” which means showcasing “MY OWN” (aka your own) 4-Door Sports car. This website was officially launched on January 1st, 2017. It’s the #1 educational Nissan Maxima website on the web. We provide the latest and most exclusive content in the Maxima community!
Commercial from 1989 for the Nissan Maxima, promoting it as a 4-door Sports Car (4DSC), a naming they put on each car as a sticker. The Maxima was redesigned on October 24, 1988 for the 1989 model year as the J30 series (not to be confused with the unrelated Infiniti J30) model.
Larger dimensions made it the second Japanese sedan sold in North America to qualify as a “mid-size” (after the Mazda 929). Nissan marketed this generation Maxima in North America a four-door sports car and even gave it a “4DSC” window decal showing this. This generation was briefly sold in Japan, replacing the Nissan Leopard sedan at Nissan Bluebird Store locations.
![]()
")
Credit: kasemodz
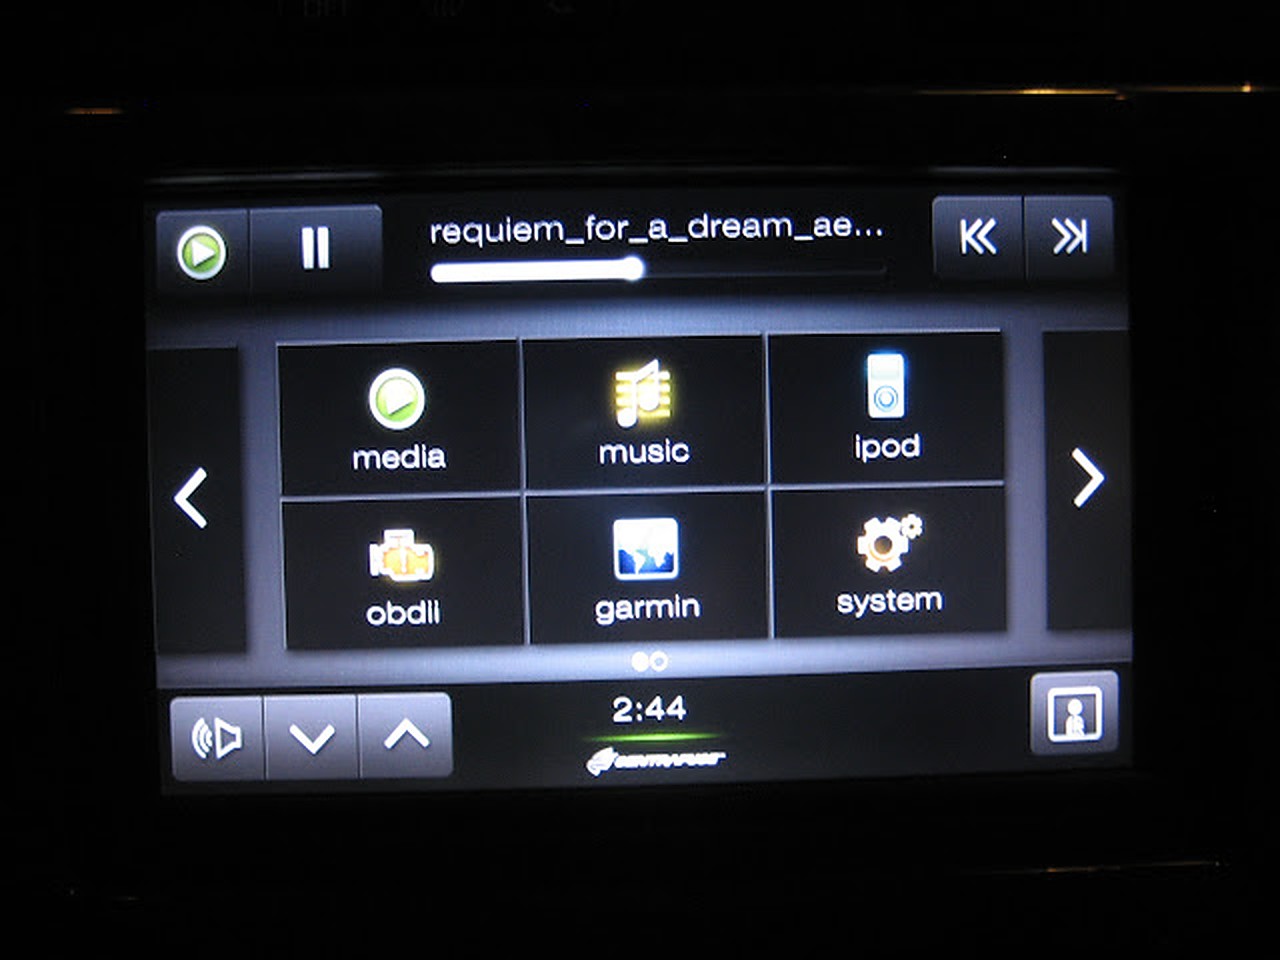
I’ve been wanting to install a carputer on my maxima since a very long time, but I never had the experience or the time/patience to install all the equipment. Finally, starting in mid December, I’ve finished installing my carputer.
I tried to make this as factory finish as possible without fiberglassing. Also, I tried my best to keep everything intact and not create unnecessary holes.
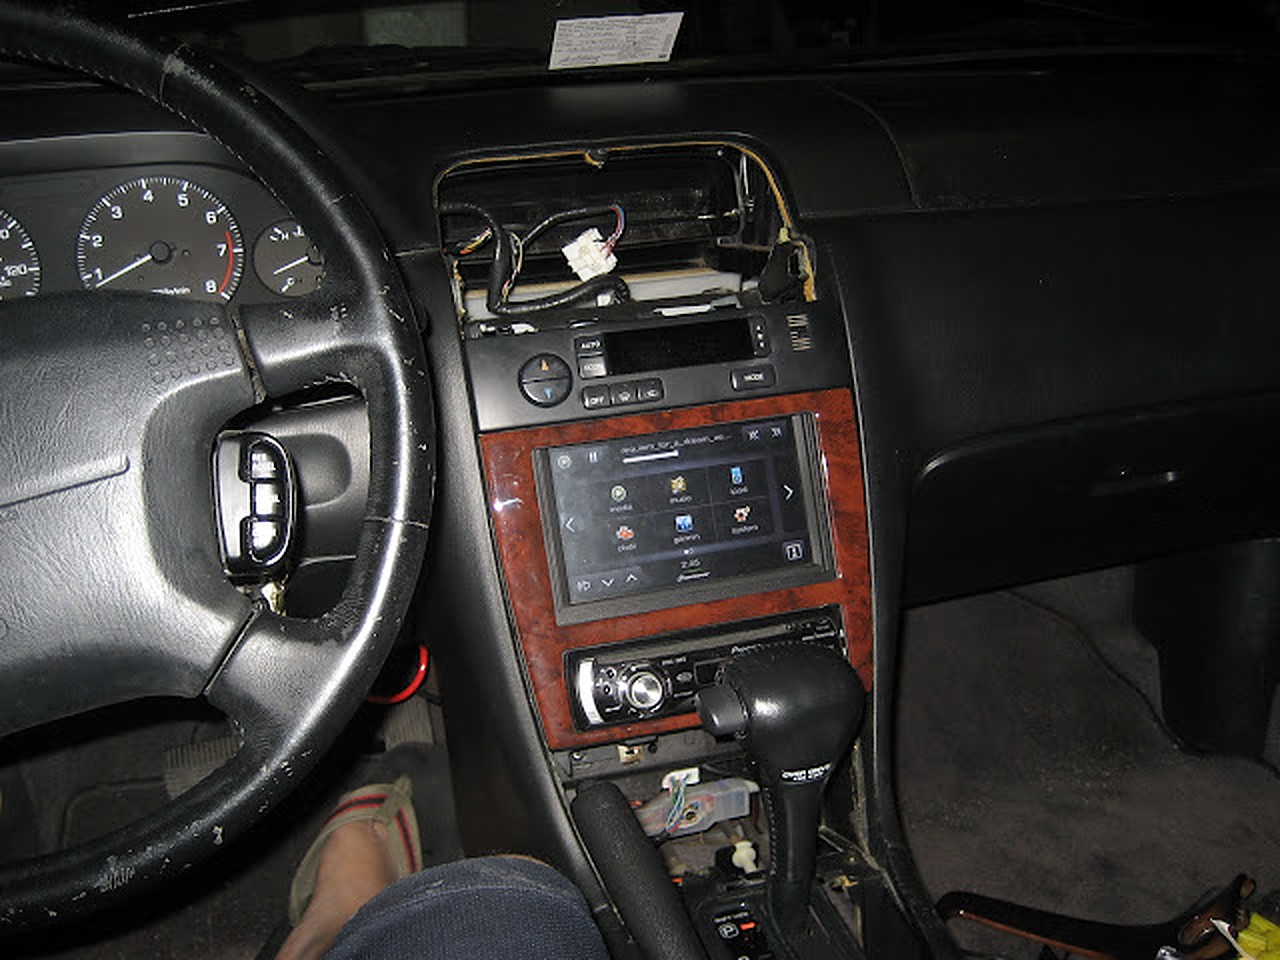
I actually never took a picture before I started this project, but here is the closest picture of the stock picture with the original Bose headunit.

Next, are a few computer setup pictures and also my homebrew shutdown/startup controller for the computer. I’ll post those schematics soon.
SPECS:


This next picture is my homebrew startup/shutdown controller. You can see that I used a computer power supply box to put my controller and extra wires inside. It just so happened that that psu fits perfectly and flush with my headunit. The red and black rca cable are connections that I’ve made on the computer that connects to my power switch and laptop lid switch respectively. More information about this schematic will be posted later.


INSTALLATION PICTURES
Here are a few pictures of the install in my car. I decided to put the computer underneath the driver’s side seat. I also pulled the wires through the channel underneath the seat along with the seat warmer and seat belt wires.


This next picture is my obdii connection to the car ecu, followed by gps installation pictures.


Next, my startup/shutdown controller needed someway to determine if the car is on or off. So, luckily I found a telephone acc line that was not being used in the fuse box.

FINISHING UP INSTALLATION


Few Screenshots


CONCLUSION
This project took a while, but I learned that patience is the key. There were a lot of times when I second thought myself if I should continue this project, but I just kept believing in myself. There are still a few small problems that I will fix soon.
PROBLEMS
This laptop is actually equipped with a pretty good sound card, but the headphone jack and spdif connection both have a lot of static noise from the hard drive. This is not a grounding issue, but the motherboard fault. I remember when I used to use this laptop, I could hear the static on my headphones as well. I’ll probably just get a new usb soundcard.
Also, the bluetooth device I have is flaky, it works sometimes and sometimes it doesn’t. I’ll prob just get a new one.
Lastly, but none the least, I’m going to continue improving the functionality of my startup/shutdown controller.
BEFORE
AFTER

![]()
")
Credit: kasemodz
I decided to upgrade my carpc that I had done last year. If anyone is interested in looking at the old setup, here is the link https://www.my4dsc.com/1997-4thgen-nissan-maxima-with-custom-carpc-installed-part-1/.
Some Problems with the old Setup:
So I got rid of the old setup and had the following new components:
The old setup

So, now the new stuff, the goal of this project was to:

Next, I wired my OEM Nissan Heated seat warmer switch. I wired it up for use and then used a 2000 grit wet and dry sandpaper to remove the marking off the switch.

Next, I made my wiring diagram which is shown below.

Installation
Here are some install pictures. Below you will see my plexiglass enclosure. The design came out perfect, I had only a few mm in tolerance around the edges. I also fitted a small fan to blow any heat generated.


Now doing a test run.


Here is the finished setup with everything working, as you can see the new switch at its location.
My USB port integrated into the ash tray


Finished!

![]()

Thanks everyone for the continued love and support. All photos in post are added to gallery below.


![]()
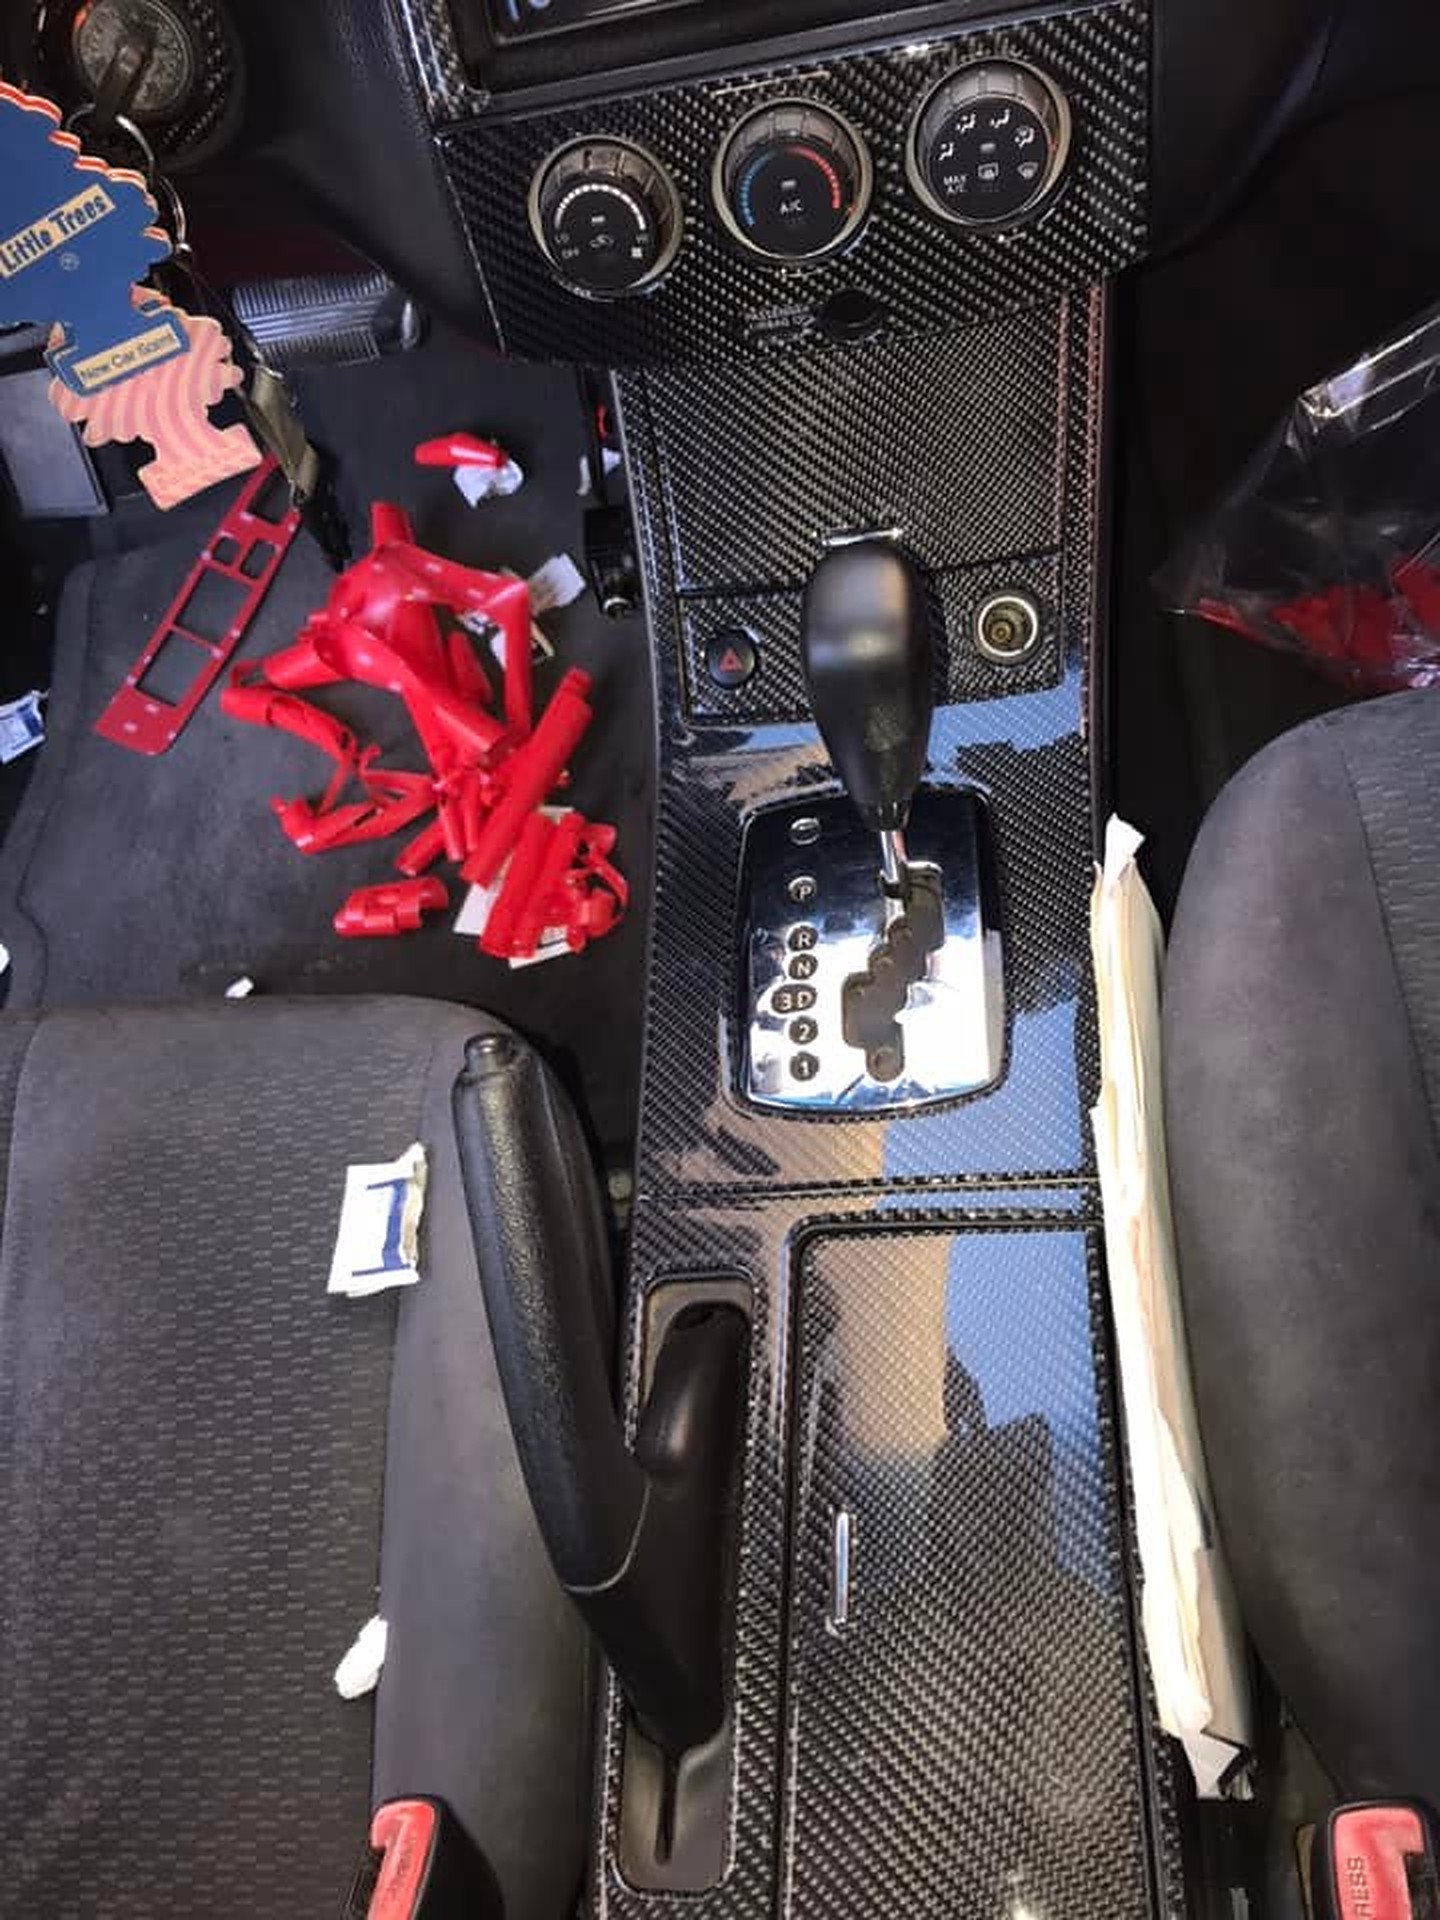
 Button On My Shift Knob?")
Credit: Tamotsu Todoroki
Source: https://www.picknbuy24.com/column_207.html
Have you seen the button located on your shift knob but have no idea what it is or what it does? That button is known as the overdrive (O/D) and regulates the gear system of your automatic vehicle. You might be wondering why such an option exists; you bought an automatic vehicle so that you didn’t have to deal with this type of mechanical jargon, right? Despite the convenience of an automatic vehicle, a little manual work of using the O/D does have a useful purpose and will benefit you financially to learn what it does and how to use it.
So, What Does it Do?
The short answer to what the O/D does is that it saves you money on gas. When the O/D is on, your transmission lowers the revolutions per minute (RPMs) of the engine to make it work less to achieve the same job. You’ll notice that if you drive 10 miles going up hill, your vehicle is forced to put in a lot of effort. As a result your gas will be eaten up a lot faster than if you were driving on a flat road for the same 10 miles. Less work equals better fuel economy.
You may be wondering why your car has this option but some of your friend’s cars do not. Many of the newer vehicles being produced are no longer being built with these overdrive buttons, but they do still have these features installed; instead newer vehicles automatically turn on the overdrive usually when the speed exceeds 45 miles per hour. Just because your vehicle has a physical button doesn’t mean that it is difficult or complex to use, most of the time it’s as simple as turning on the radio.
How Do I Turn O/D On?
The primary setting on your automatic vehicle is to use this function whenever possible; therefore, pressing the overdrive button will actually turn the cars’ overdrive function off. It is recommended that whenever you are driving your vehicle that you leave the overdrive on. Whenever overdrive is on, you are saving money on gasoline because your car is being more efficient and doing more with less.
If It Saves Me Money, Why Would I Turn it Off?
Vehicle manufactures include this O/D function for the purpose of towing and climbing hills. When your vehicle is taking part in a strenuous activity, you want to utilize the full power of your vehicle by increasing its torque. Increasing the torque and allowing your vehicle to operate with its full potential will decrease the damage that could be caused on your vehicle from towing and generating heat.
What Are RPMs and Torque and How Does O/D Affect These?
Revolutions per minute, or the RPMs, are the total 360o rotations that an engine crankshaft can perform within 60 seconds. You’ve probably seen the RPM meter on your dashboard; this meter can be detected by a portion of the meter shaded in red. The red color indicated what is essentially the “danger zone,” or a level that you should not go above without shifting into a higher gear. The higher the RPMs, the harder your car is working to perform the speed and power that you desire. O/D is a little bit like a manual regulator telling your car to take it easy.
Horsepower can be calculated by multiplying your total RPMs and the torque of the vehicle. If your vehicle is running in overdrive, the RPMs will be lower, and therefore the vehicle will have less power. When this O/D option is disengaged the power of the vehicle will increase. That means that whenever you are in need of an extra boost, turn your overdrive off, but otherwise do your best to leave it alone.

![]()

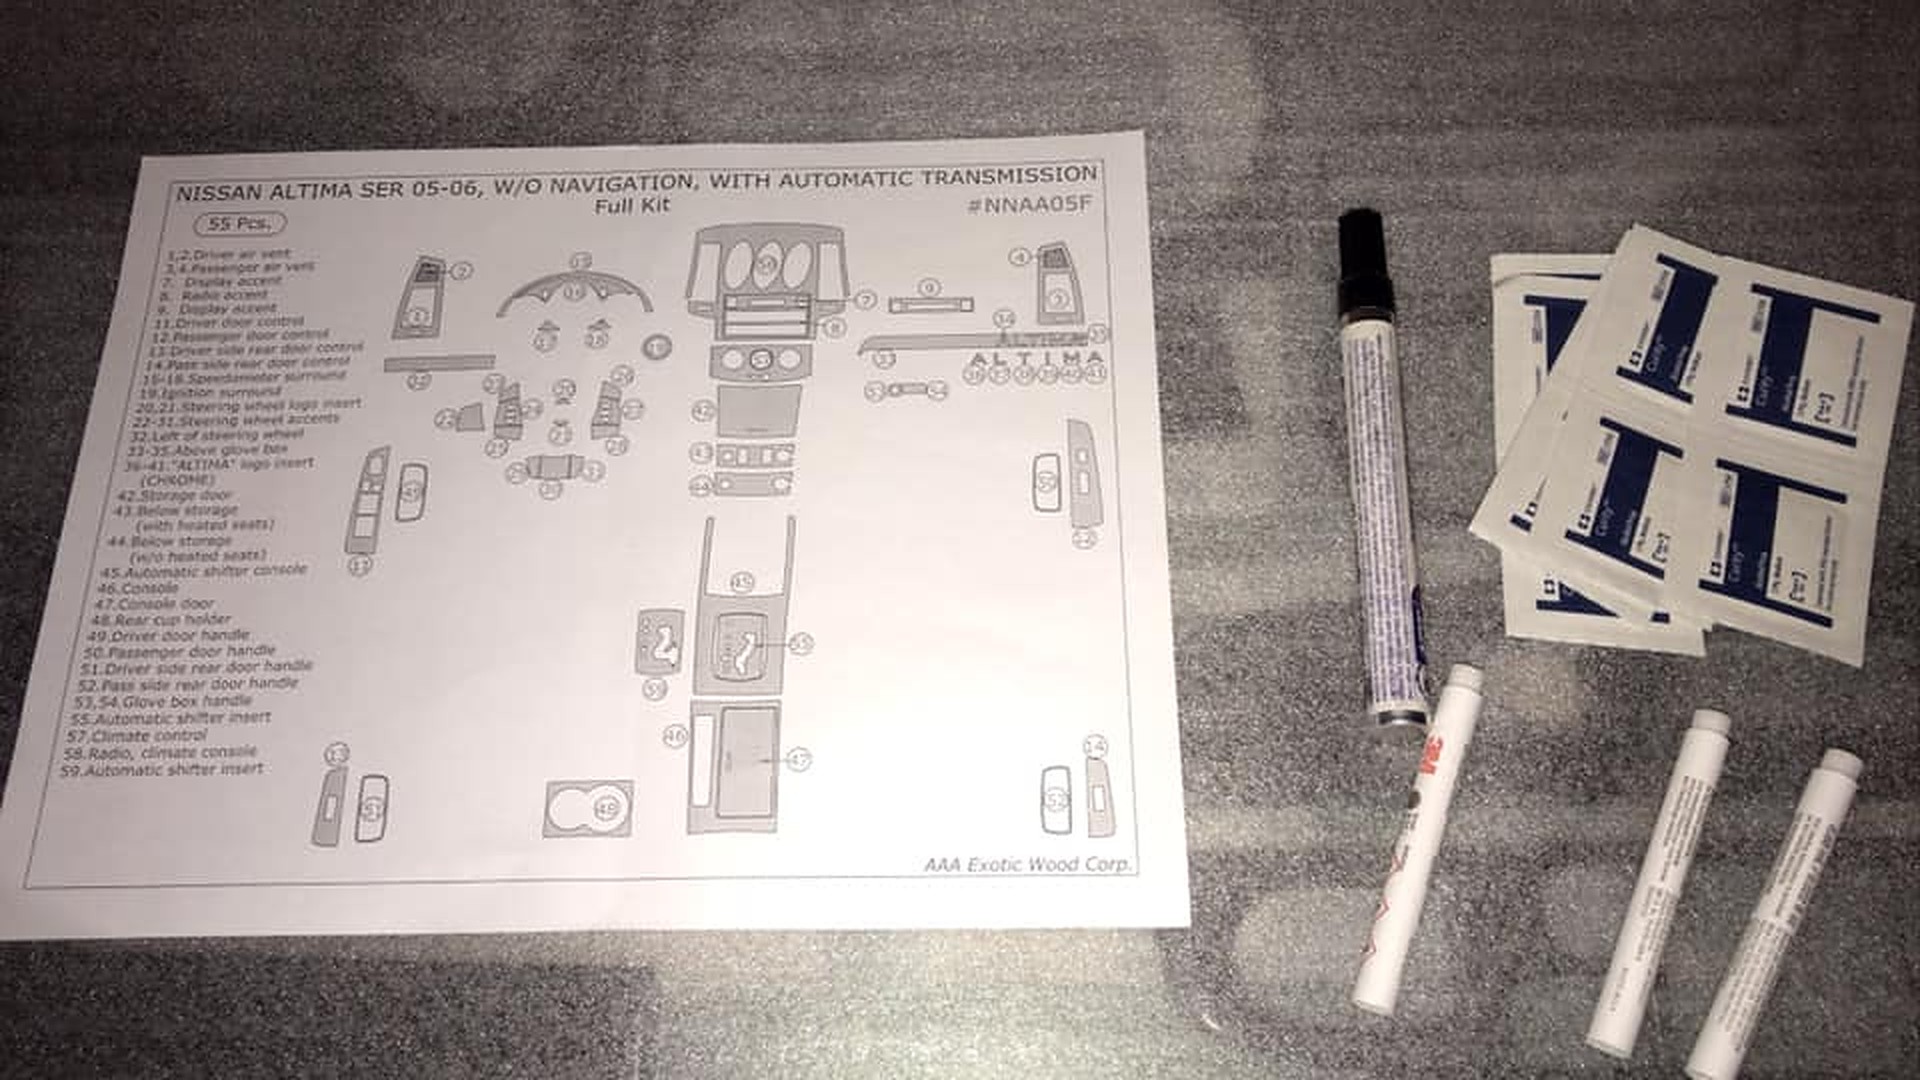
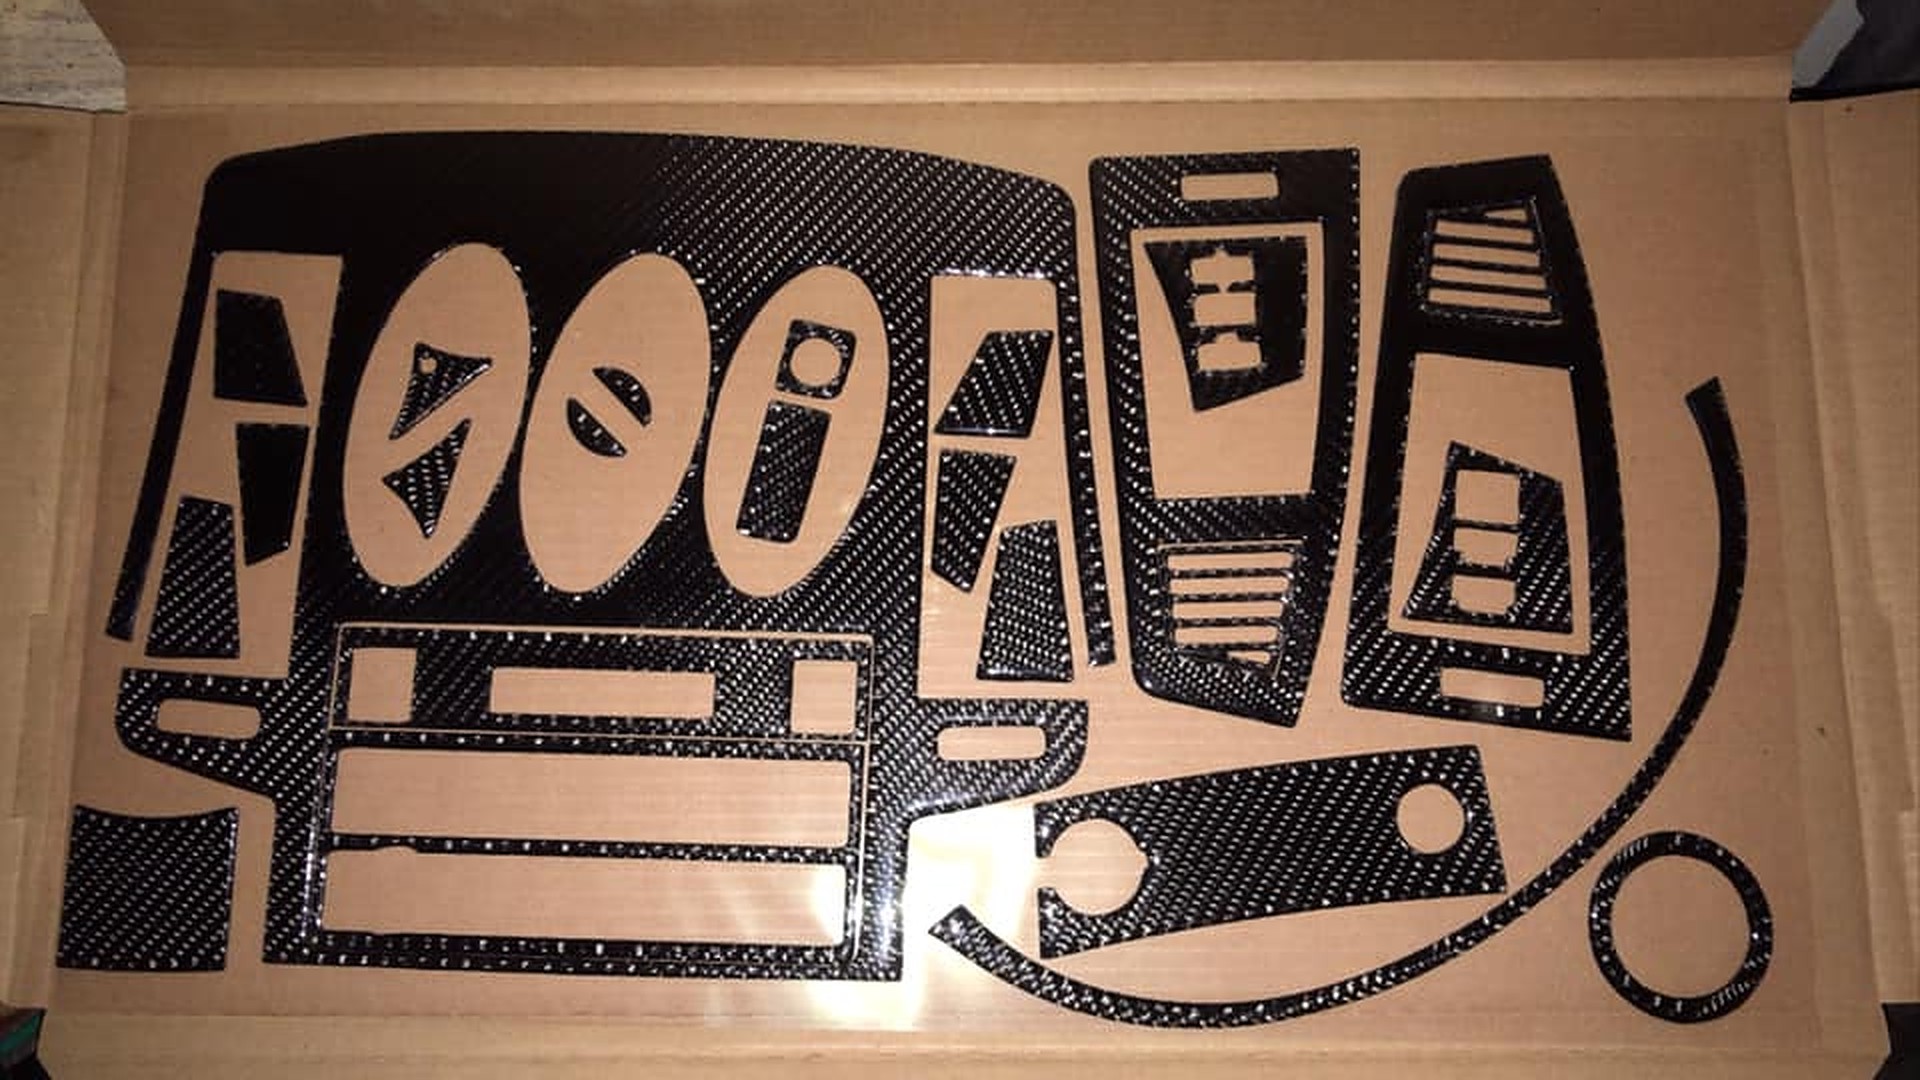
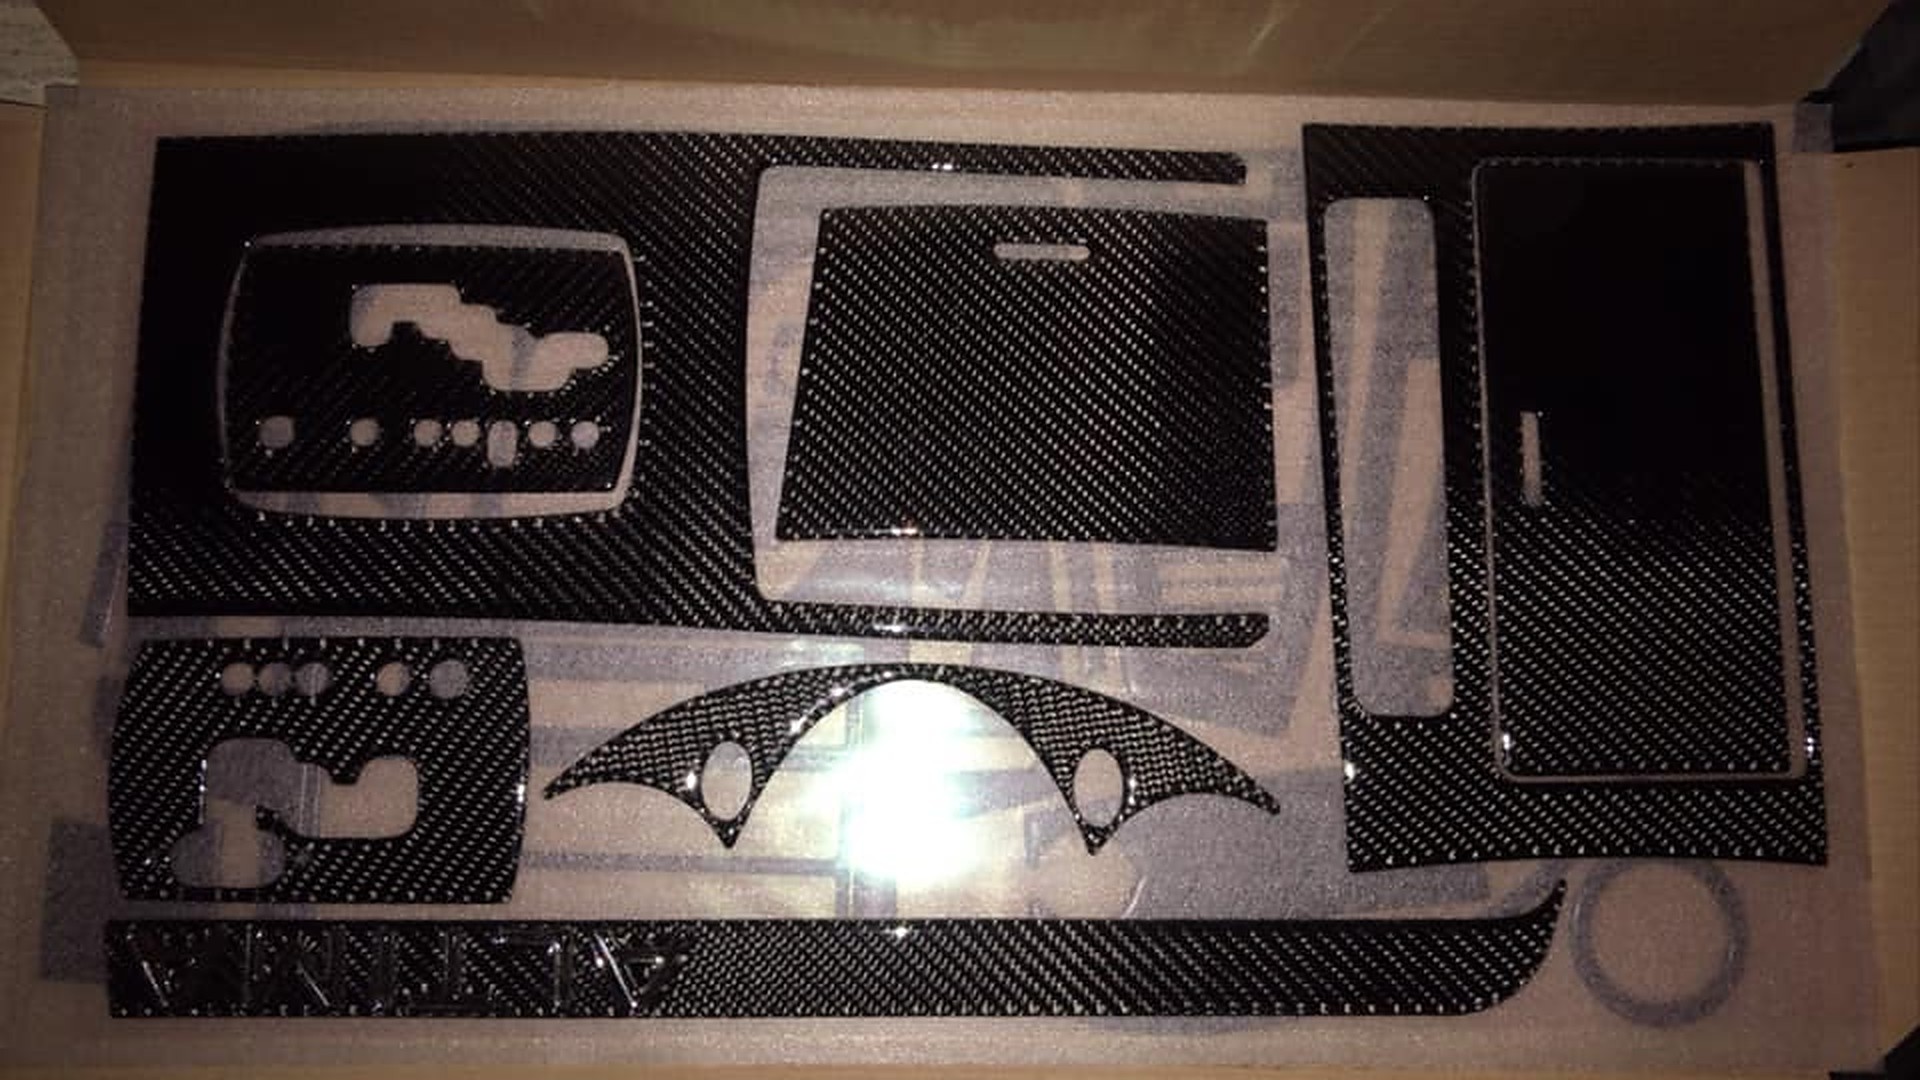
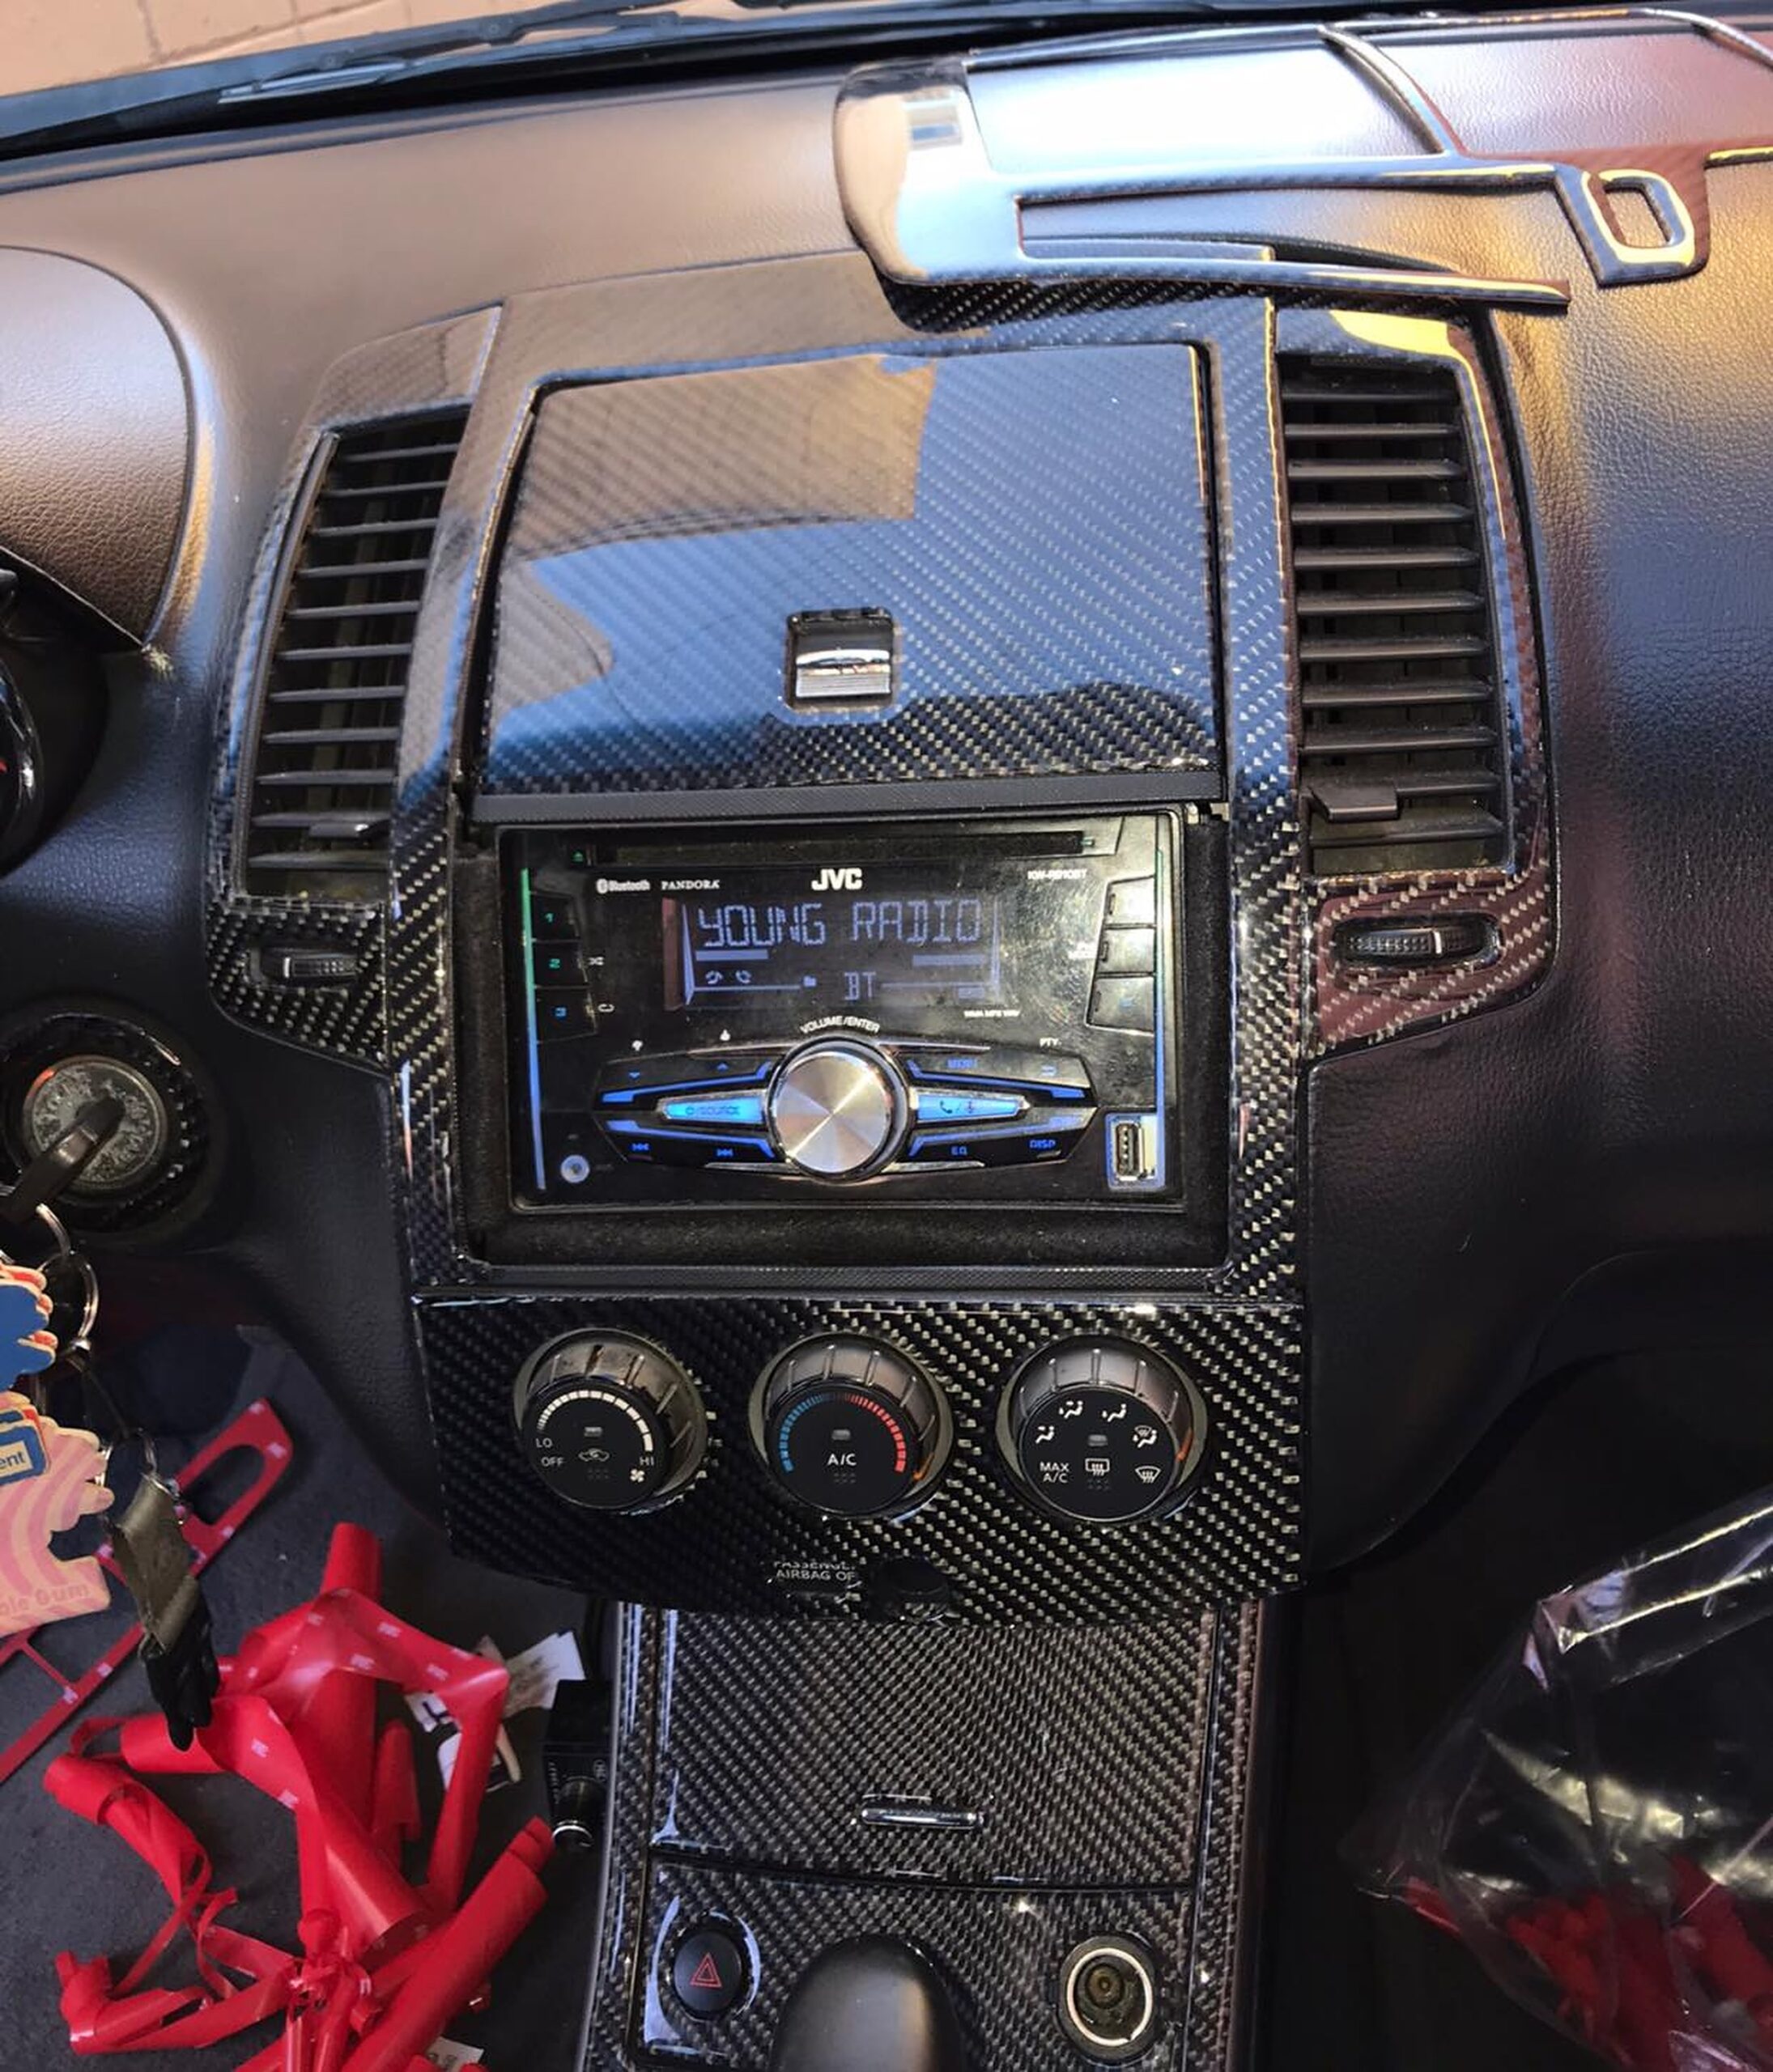
Interiores Tuning Ulises
Order Link: https://www.facebook.com/diegoalonso.martinezhernandez/
Notes:


![]()

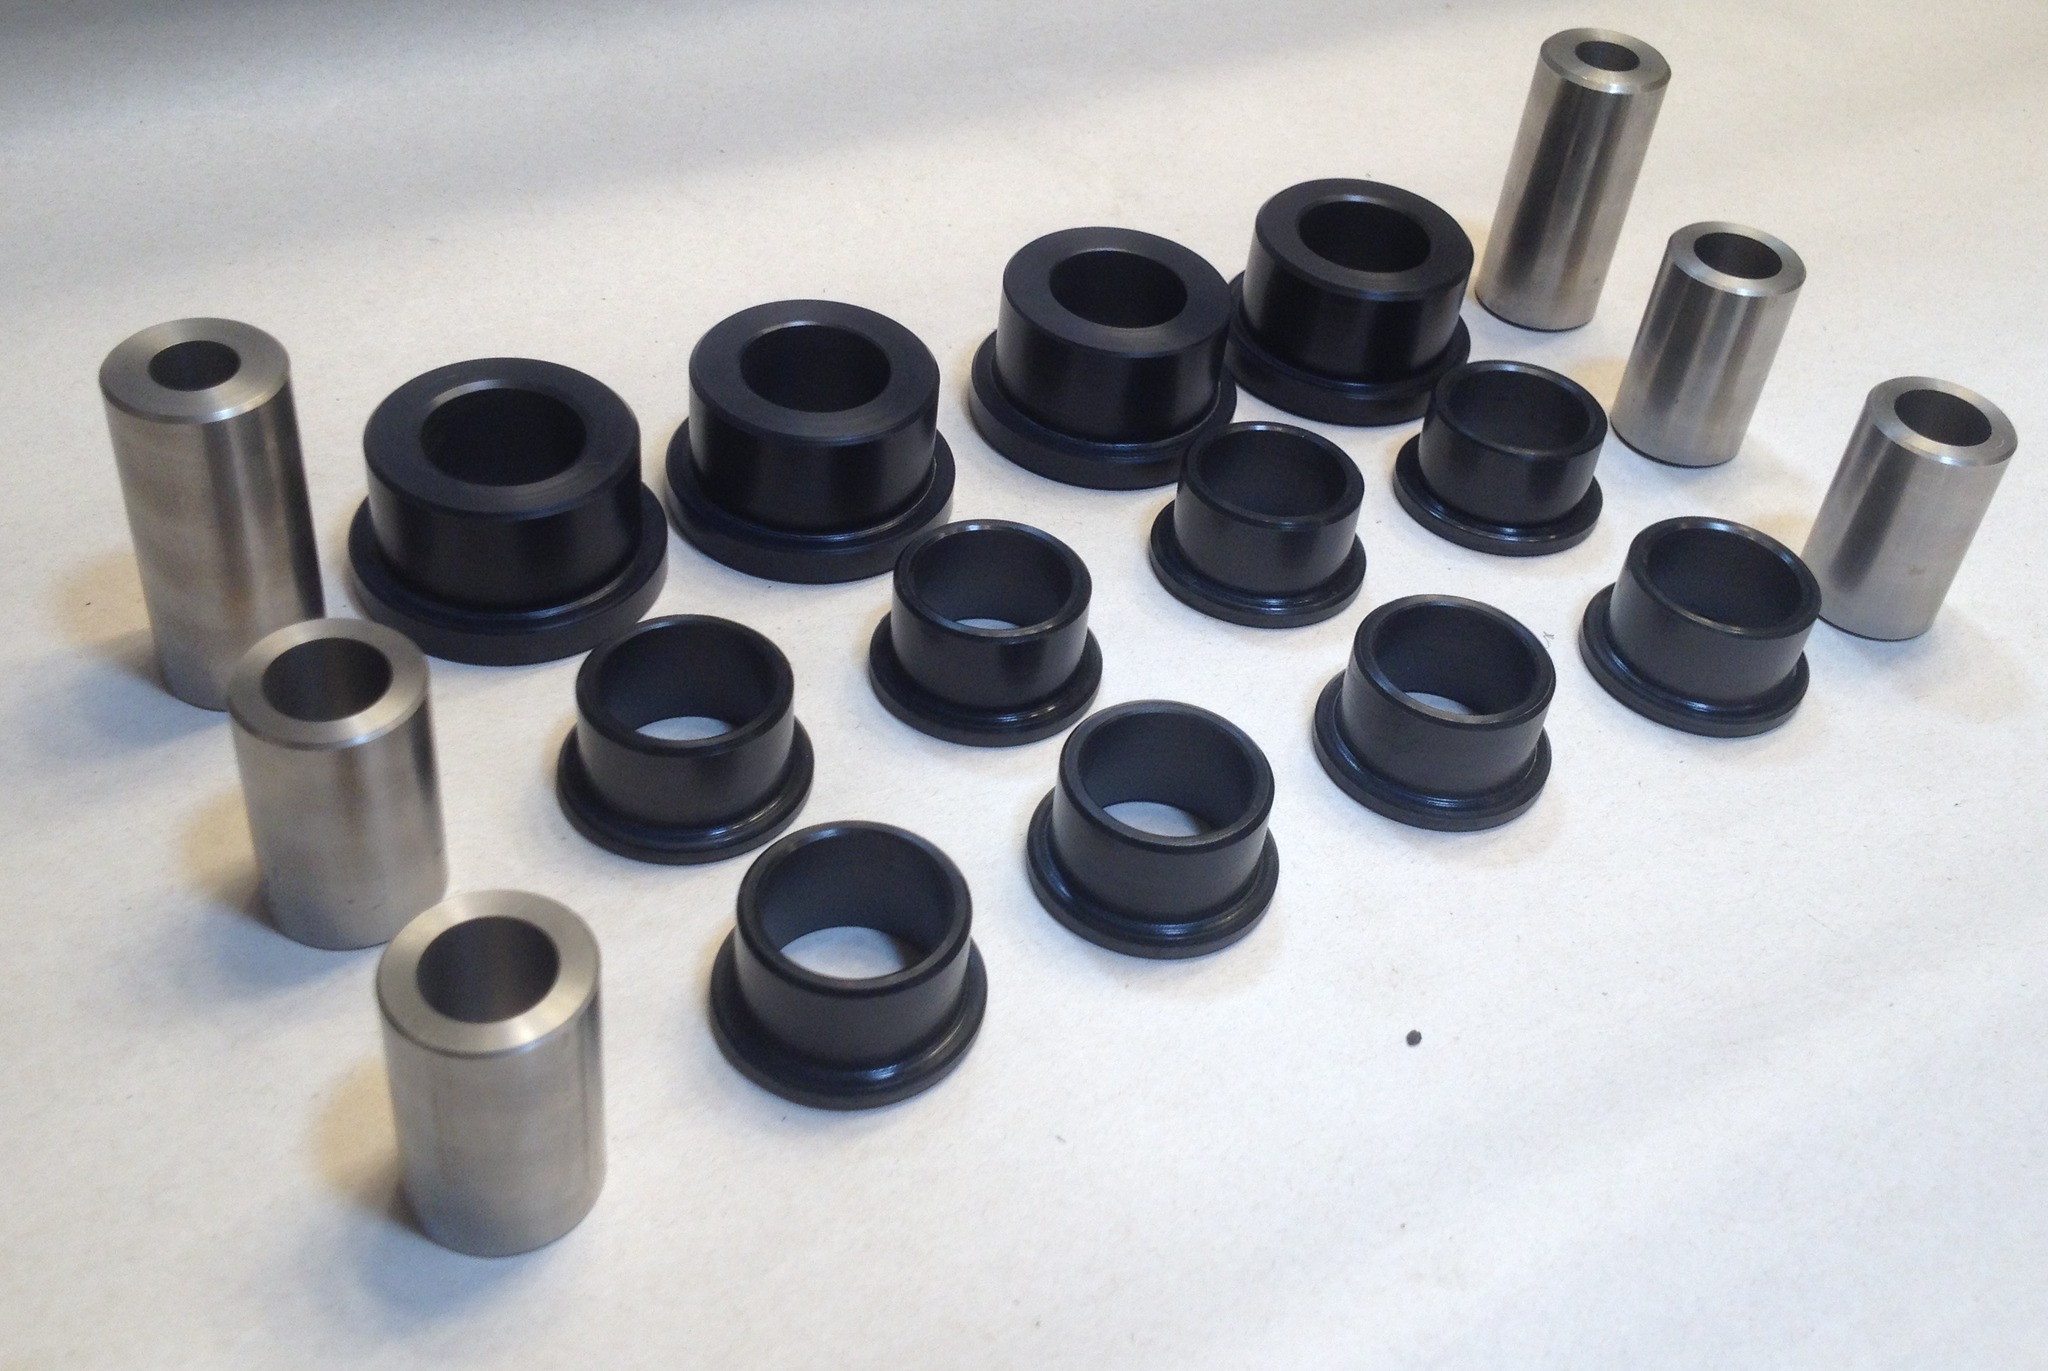
Credit: Red Lion Racing
Red Lion Racing offers high quality control arm bushings, made from premium Nylatron plastic – stronger, stiffer, and sleeker than polyurethane! These bushings come with stainless steel sleeves to ensure the smoothest bushing function.
These will increase the cornering performance of your car as well as lessen wheel hop during drag launches on higher HP cars.
Caster versions are the control arm bushing designed with angled, offset mounting holes to increase your front caster alignment by 1degree to give you even more cornering performance. This can increase torque steer a little and is recommended only for cars that are purposely built for road racing or autocross; the regular bushings will greatly increase cornering performance over OEM or poly bushings and as such are recommended for normal daily driving or drag racing set ups.
Fitment
Pricing:
Purchase Info:


![]()

Credit: Roger McDonald
Something I learned from watching a lot of YouTube. These numbers tells how balanced the motor is. If it’s the same all across that motor is well balanced. The markings are located in the valley on the flywheel side.


![]()