Community Member Credit: Tommy Love
![]()


Community Member Credit: maxilvr06
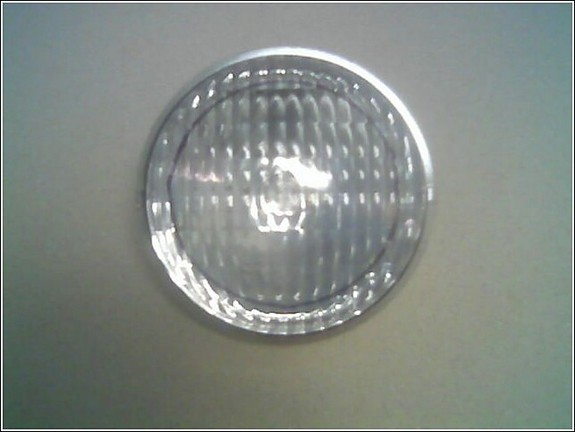
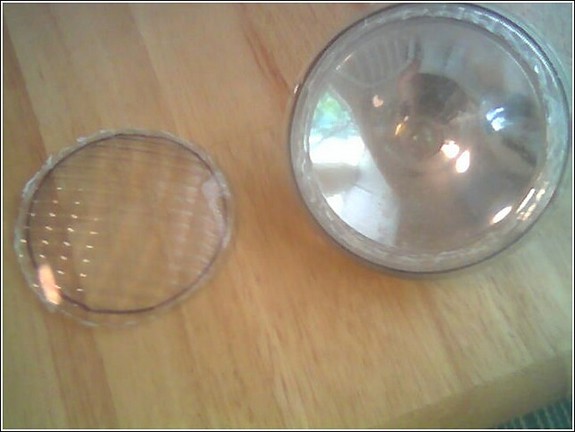
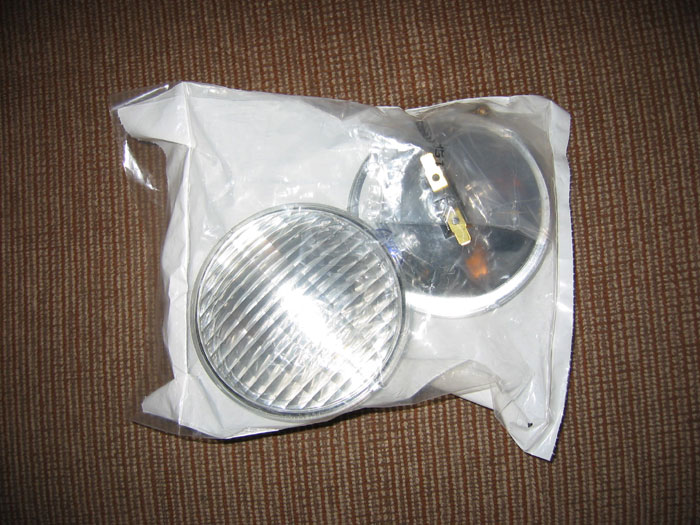
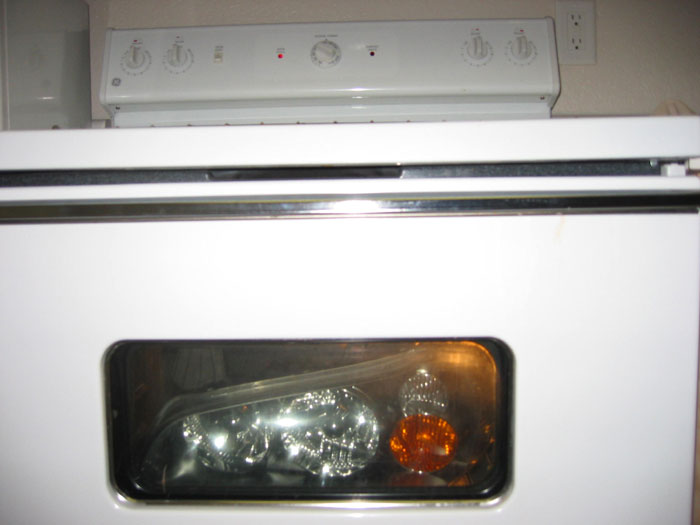
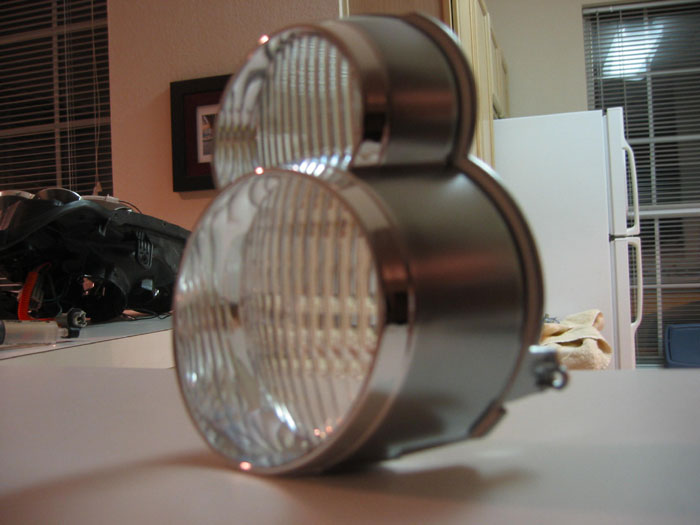
This page is a How to on clearing out that ugly orange blinker lens within the 02-03 maxima headlight housing. If you choose to use a clear lens (and not just leave the lens out) on your headlight, I suggest you buying a package of malibu 11 watt sealed beams (P/N: ML11P2) found at home depot in the outdoor lighting section. They are shown below:

Materials Needed:
Instructions:
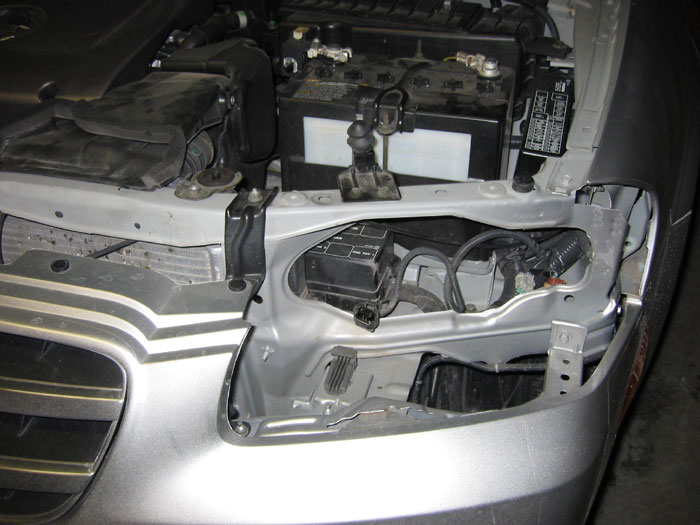
1.) Remove headlight from car by using a 10mm socket wrench to remove the two screws attached to the upper radiator support and pulling sharply.
2.) Unplug one grey harness leading to the low beam and unplug the blinker and the high beam bulbs by twisting and pulling out.
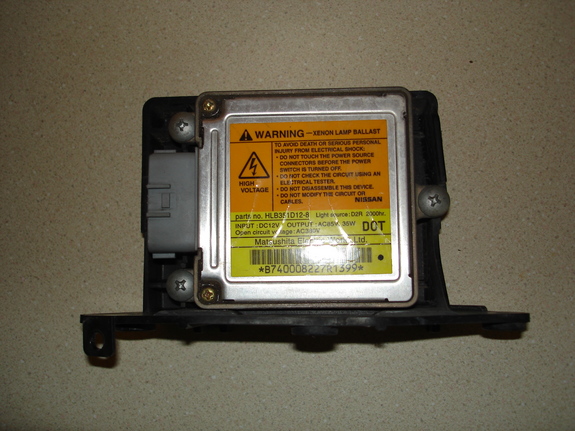
3.) Once the headlight is removed from the car, remove all the bulbs and the ballast from it:

-use an average sized phillips screwdriver to remove the three silver screws holding the ballast to the headlight housing

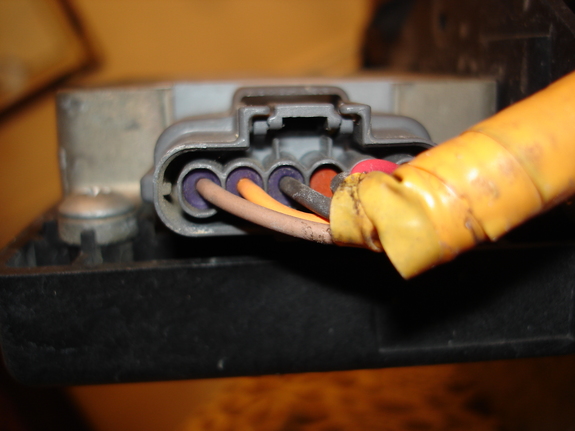
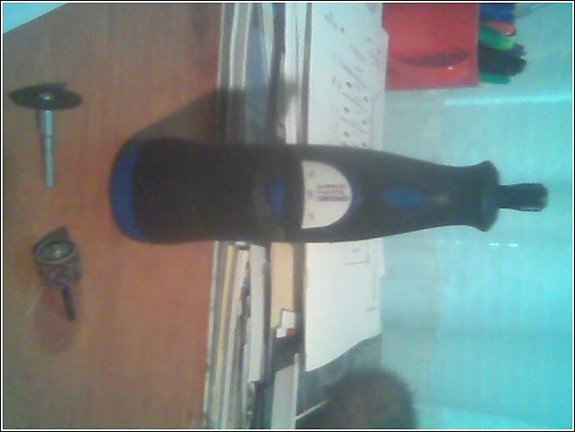
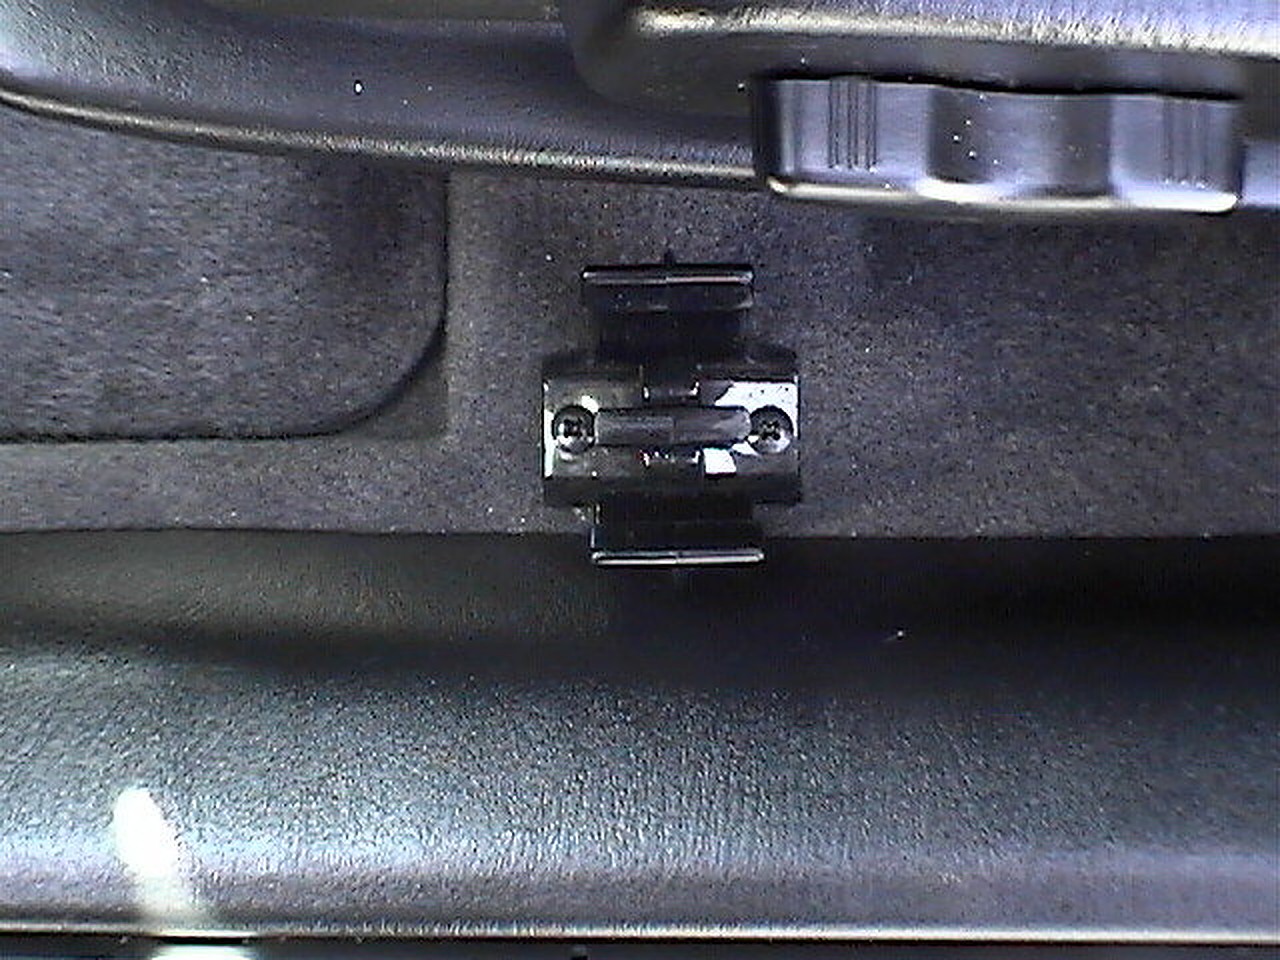
-unplug the harness connecting the ballast to the headlight housing by inserting a small flathead screwdriver (or something else small and flat) into the opening pictured below to release it while pulling

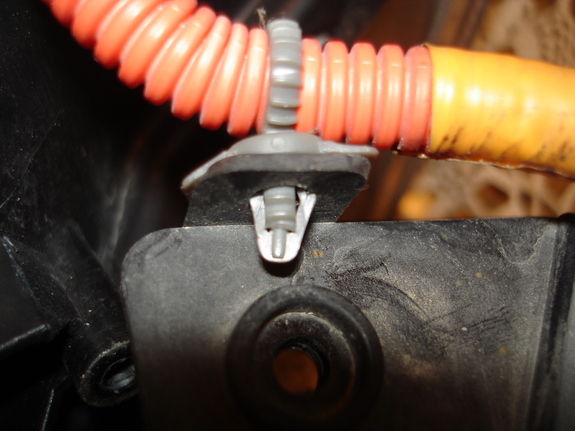
-disconnect the large red/orange wire from the anchor point by squeezing the tip end together and pulling through
-remove the clearance bulb,
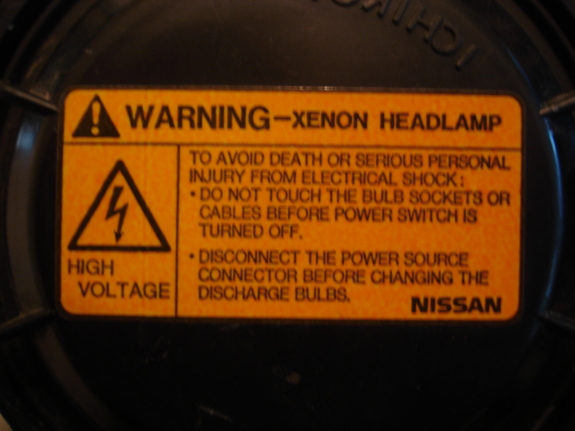
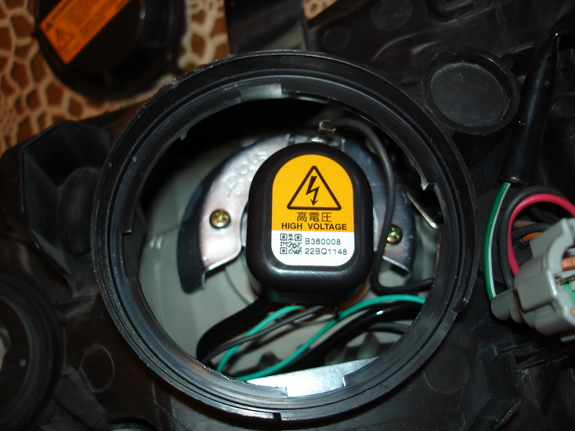
-remove the black plastic cap covering the HID bulb
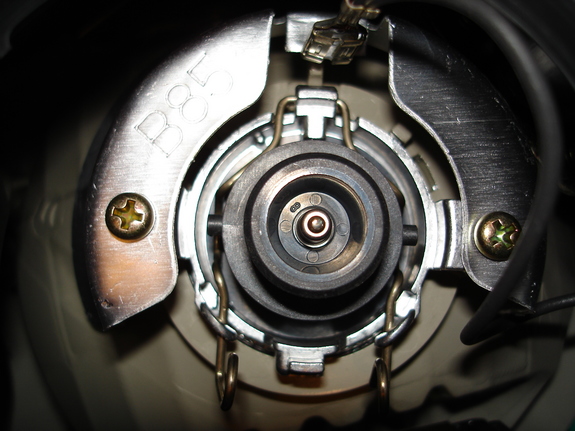
-twist the harness and pull out to reveal the bulb.
-After you get the bulb disconnected, remove it by pinching the two metal pins together and lifting upward giving you access to it. (all the attatched harnesses and plugs will be fine in the oven)
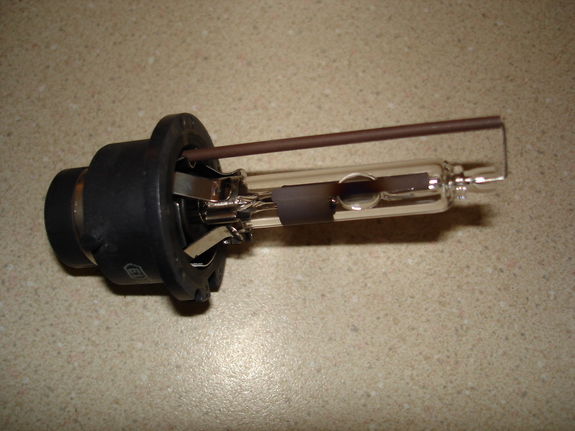
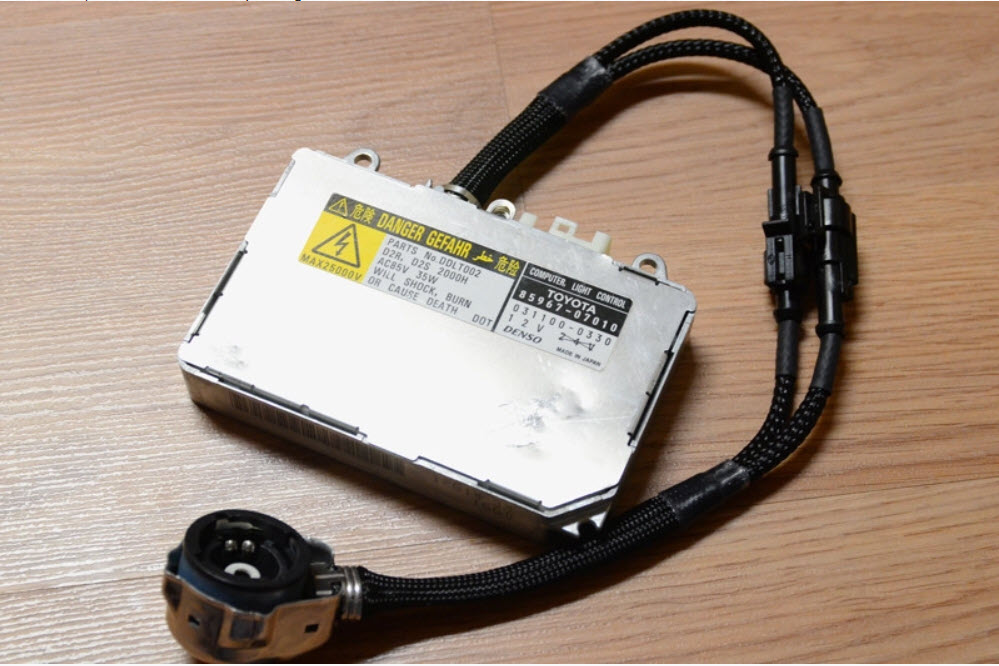
Here are what the bulb and ballast look like removed:
4.) Remove three very small screws from the backside of the headlight housing (two are located on the blinker side of the headlight, and one is just above where the ballast is; circled in red in the picture at the top of the page)
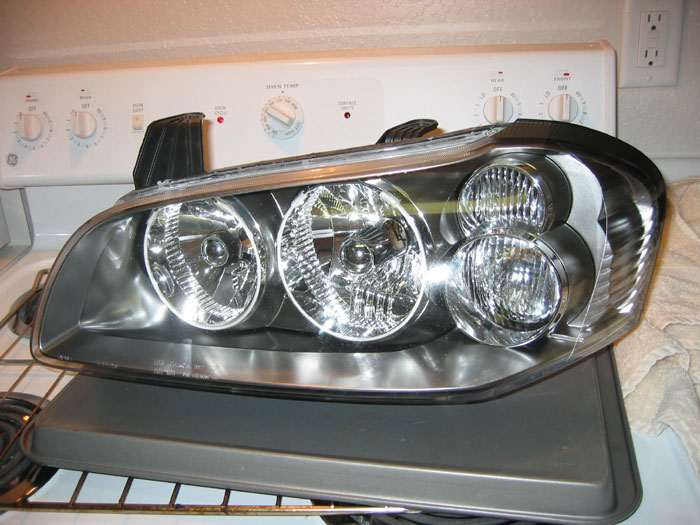
5.) Take an old towel and wet it, then put it on a cookie sheet or some type of baking pan so that the housing will not come in contact with hot metal while in the oven.
6.) Set the headlight on top of the wet towel face down (no need to cover the housing with the towel) and bake it for 20 minutes in the oven at 210 degrees.
**DANGER! Do NOT let any of the plastic parts, including the harnesses come in contact with any part of the oven or the metal pan! It could melt!**
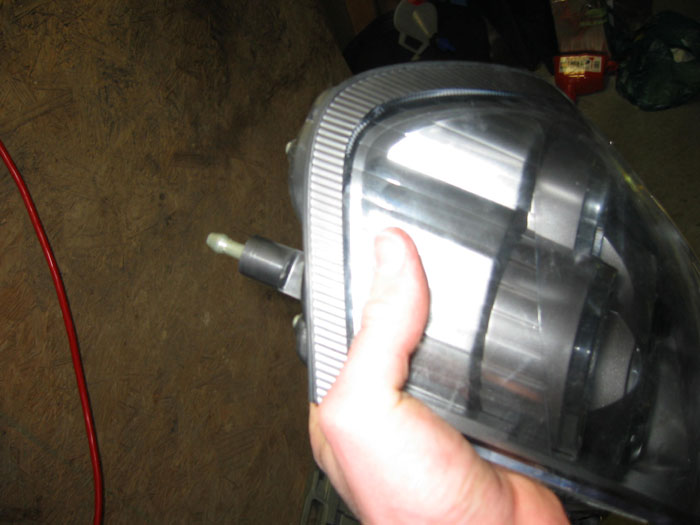
7.) After taking the headlight out of the oven, lay it on an old towel and put the headlight on your lap while sitting down so you can get a good grip on it.
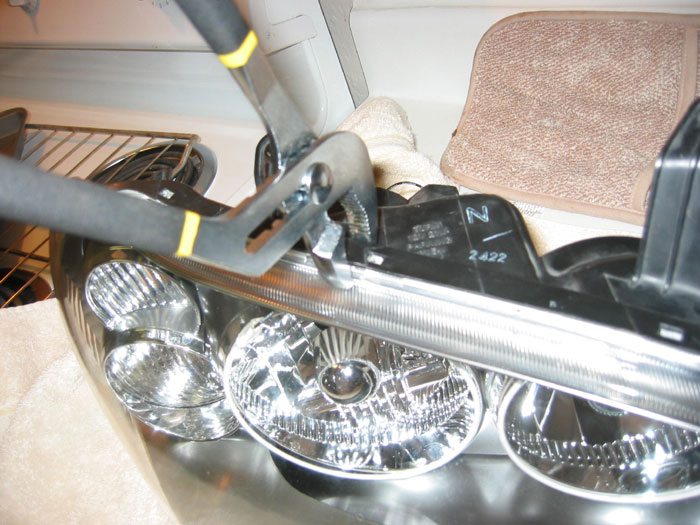
8.) Using a wide, flat screwdriver, gently insert it in between the black plastic housing and the clear lens where ever there is a gap. (i started at the top)
9.) With the screwdriver inserted still, slowly move it around the housing lifting the black plastic part up and try to pry the tabs up as you go. You can also use a couple other screwdrivers and just wedge them in where the tabs are so that you can pull apart the housing without having the tabs latch again on you.
10.) Be extremely patient on this part and try not to damage any of the plastic. (because it can be quite pliable after they’re baked) Once you get a bit of a gap all around the top of the housing, get a good grip and, without breaking anything preferably, slowly pull it apart. (the sealant will still be very sticky, so if you need to, you can put it back in the oven for 5 more minutes to make it a bit softer)
11.) When pulling apart the housing, try to release as many as the bottom tabs as possible for more ease, but after you get the top half disconnected, it should be pretty easy to pry apart the rest of the housing.
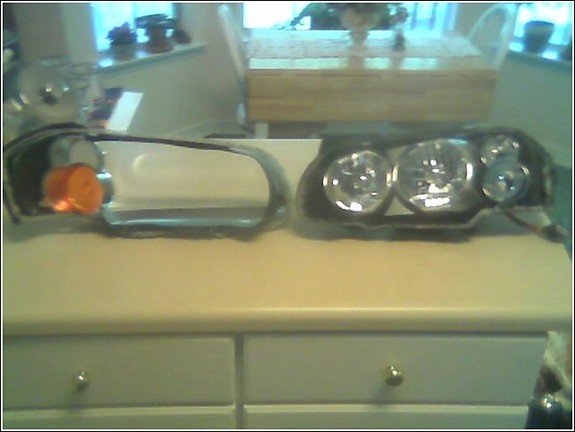
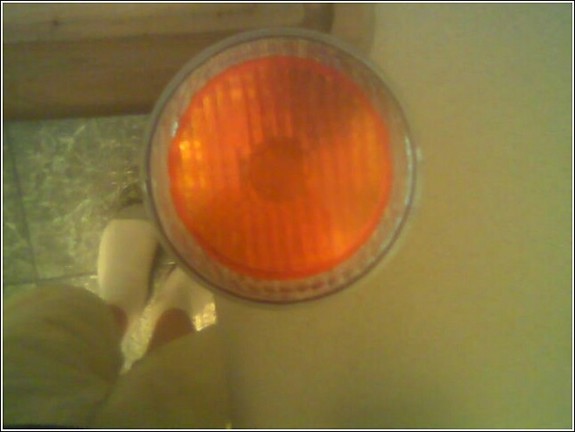
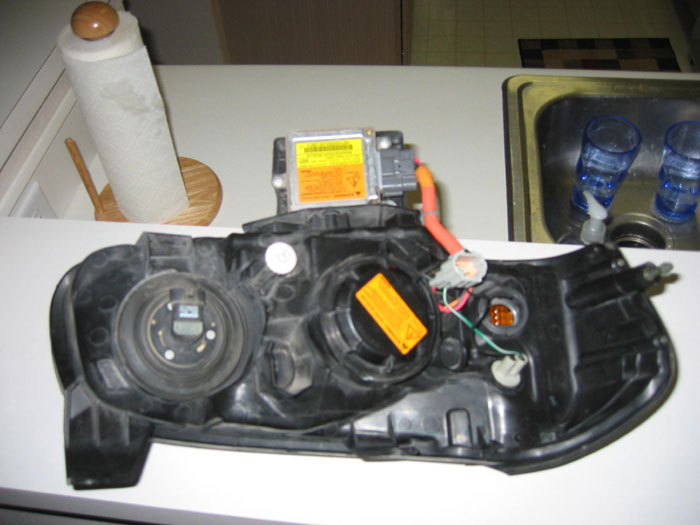
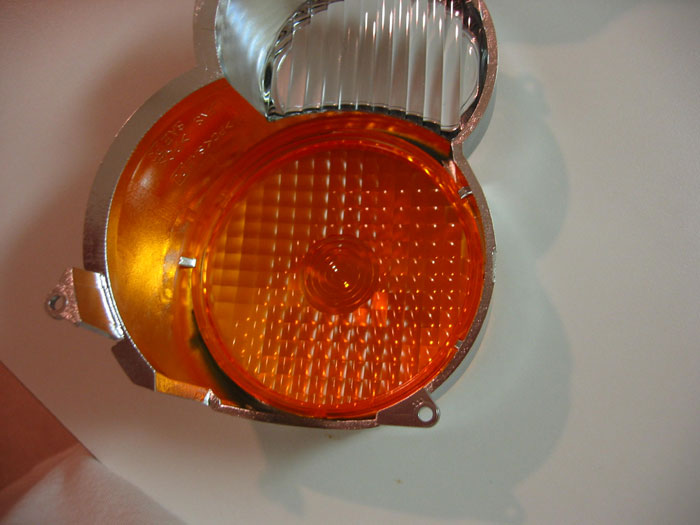
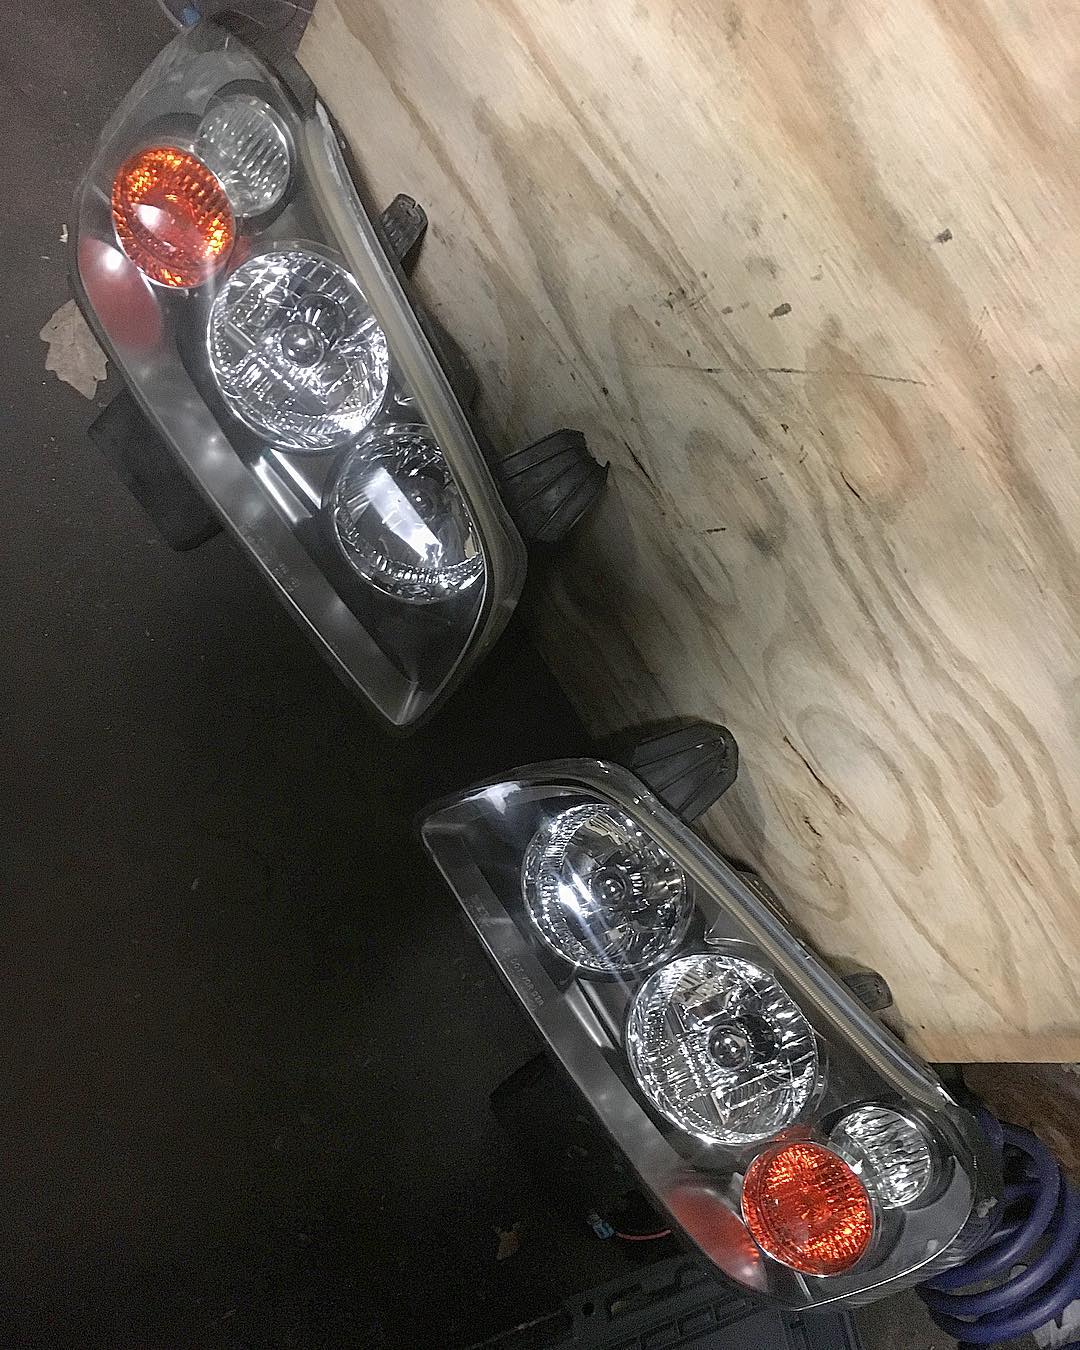
12.) When taken apart, it will look like the picture below. Remove the orange lens by simply snapping it out toward you from the three little tabs. (be very careful on this part though. The tabs are very small and will probably be very easy to break if too much stress is applied to it)
13.) Center the orange lens over the malibu housing as best as possible, and use a permanent marker to trace it onto the malibu lens.
14.) Using a dremel with a cutting wheel attachment, carefully cut the lens out of the housing. (try not to get too close to the circle you traced. the cut doesn’t have to be perfect and you’ll see why in the next step)
15.) Swap attachments on your dremel to a fine grit sander type and go to town sanding down the lens until you get a perfect fit. I suggest doing several trial fits before hand, because in my case, the circle i traced was a bit too small and i ended up using rubbing alcohol to remove the black circle i traced so that it wouldn’t show through.
16.) Snap the clear lens in the same way you took the amber one out, still being careful to not break one of the small tabs.
17.) Assemble the headlight again as best you can and bake for another 10 minutes at the same temp.
18.) Once the sealant is softened again, take your channel locks and put a paper towel inside of them (so that you don’t scratch the plastic) and go around the entire housing squeezing the lens back on using the channel locks. Make sure that all the tabs are attached firmly in the end.
19.) Re-assemble the entire housing and install it back on your car in reverse order and enjoy! (don’t forget the three little screws around the housing though, because i did!)
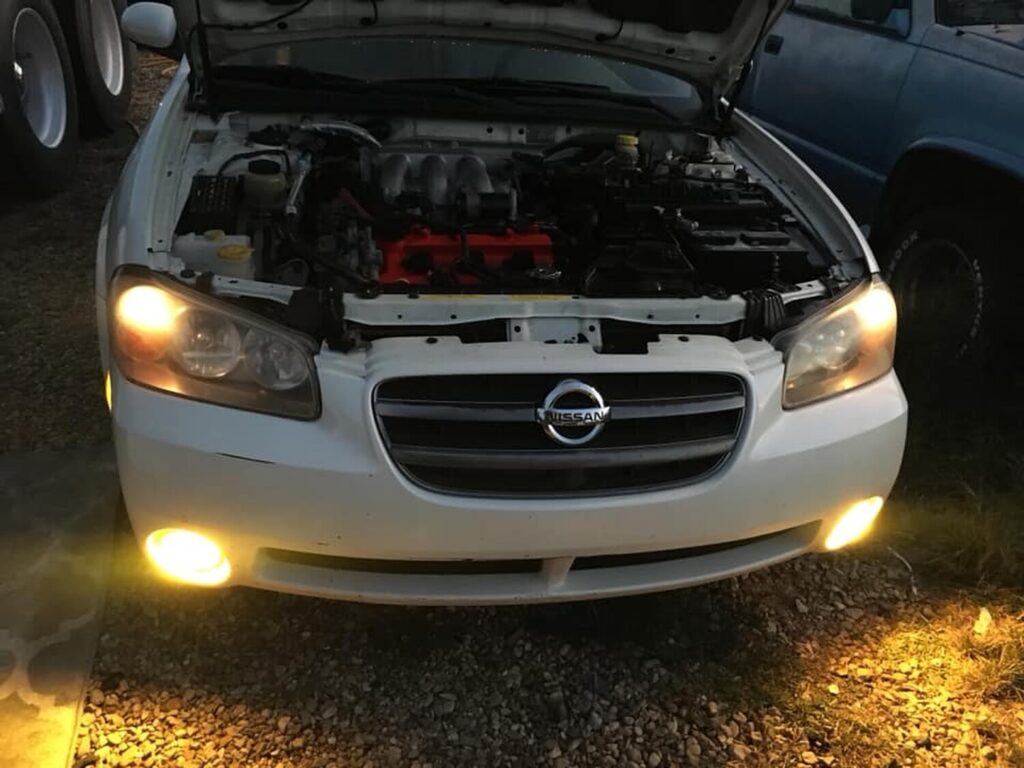
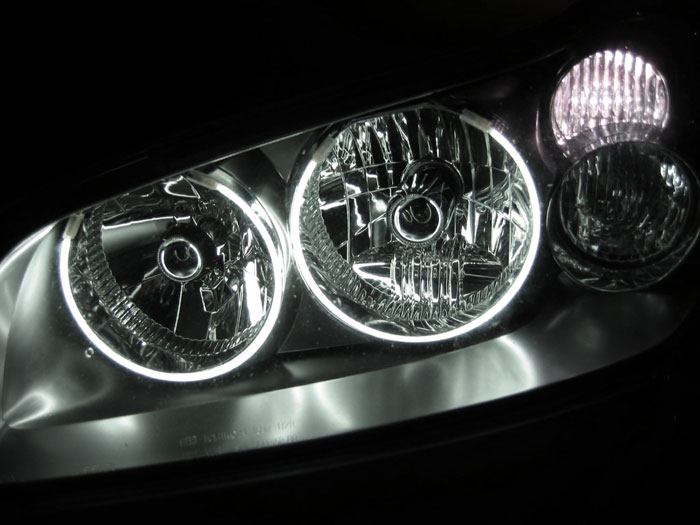
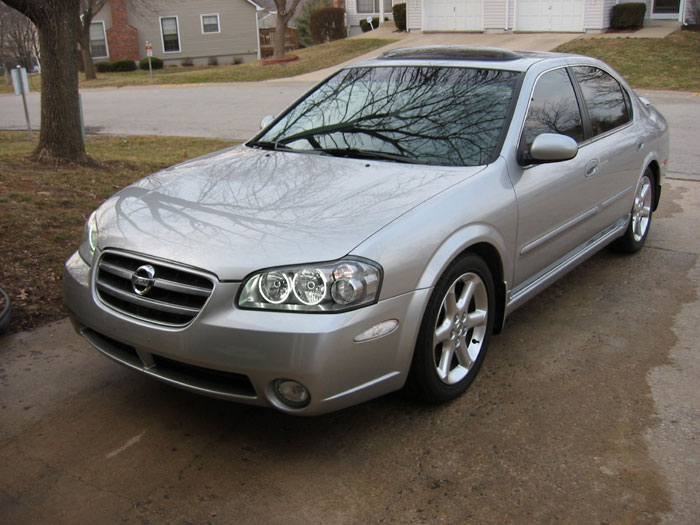
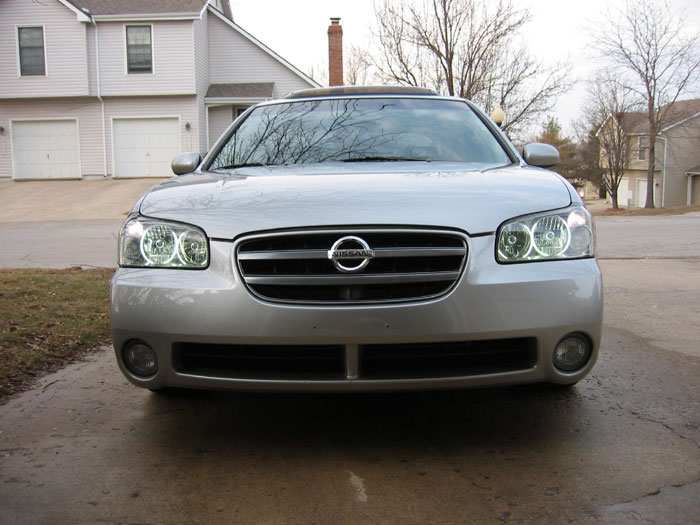
The results are great!
This is a comparison between the cleared headlight and the stock one. A pretty big difference if you ask me..
![]()

Community Member Credit: maximadave
I bought the Maglite at Home Depot for about $18 bucks. It’s a 4D size Maglite and you can get it in different colors. The mounts are sold in pairs so you only need one, they are about $3-$4. Just screw in the mount to the body of the car and you are done.
An anti-car-jacking mod for the Max!


![]()

Member Credit: yellow_cake
Hi folks, just thought I’d share my retrofit project on my 99 Maxima.
Components:
– Used Depo headlights.
– G37 sedan projector.
– ’13 Cadillac SRX semi-clear lens.
– OEM G37 shrouds.
– Denso Slim ballasts.
– Osram CBI 66240 bulbs.
– Nichia Superflux white LEDs.
– exLEDs reflectors for superflux LEDs.
– Custom wiring harness + DRL & headlight controller.
Mounted using the JNC method, giving minor rotation and height adjustment on top of the factory reflector adjusters (vert + horiz).
For more info about the JNC mounting method: http://www.hidplanet.com/forums/show…model-pictures

OEM G37 sedan shrouds fitted.

After cutting the container, I used lots of JB weld to secure it into place.
Not shown, but there is also a bunch of epoxy around the inside for added strength. For that I used a self-mixing syringe type clear epoxy.

Here it is, fitment with the reflector mounted into the housing.
The empty containers were from workout supplements; different colours, but both were identical in size.

I used a sheet of balsa wood for the base, with some chrome vinyl for the front edge which will be visible.
The LED were secured into the reflectors with epoxy; the reflectors secured to the base & one-another with clear epoxy.

Home-made resistor array, clear-coated after everything was soldered to prevent the copper from oxidizing.


Epoxy’d the DRL base into place.

Cutout the top cover, also made from a sheet of balsa wood. Showing the bottom view where the chrome vinyl wraps around.
Prior to mounting, I spread epoxy all over to prevent the edges of the vinyl from lifting.

Epoxy’d the top cover. The reason I used chrome vinyl is so that the DRL assembly flows well with the rest of the headlight.

Close up of fitment.

The Denso slims had the short cords, this would be problematic for most retrofits…
I extended the wires while making the ballasts D2S/AMP hybrid. This will make headlight removal easier as well.

Soldered + adhesive lined shrink tubing. Notice how the solder joints offset one-another, good practice in case the joint or insulation fails (which it shouldn’t, lol).

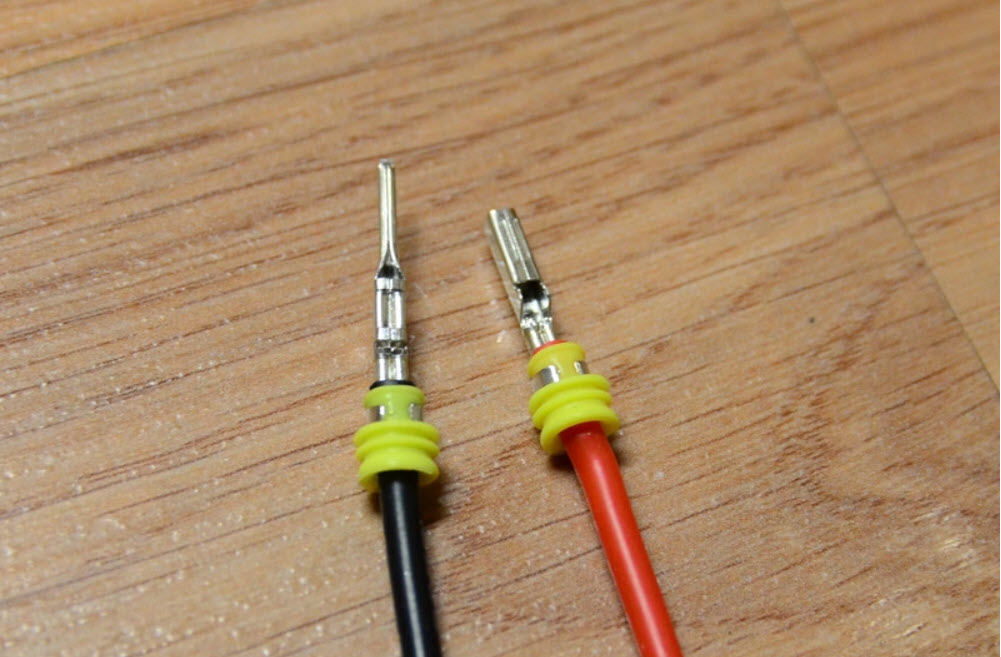
Terminals crimped on.
Ooooohhh, aaaahhh… I’ll be potting the ballasts as well.
Wires fished out through a rubber grommet.
Here’s the wiring setup: The one loom has the DRL + solenoid wires, the other has the ballast cord.

Cap screwed on, sealing the back from dust/water.
The 3-pin connector wires: solenoid positive, ground, and DRL positive.

The rubber grommet at the bottom.

Headlight completed!

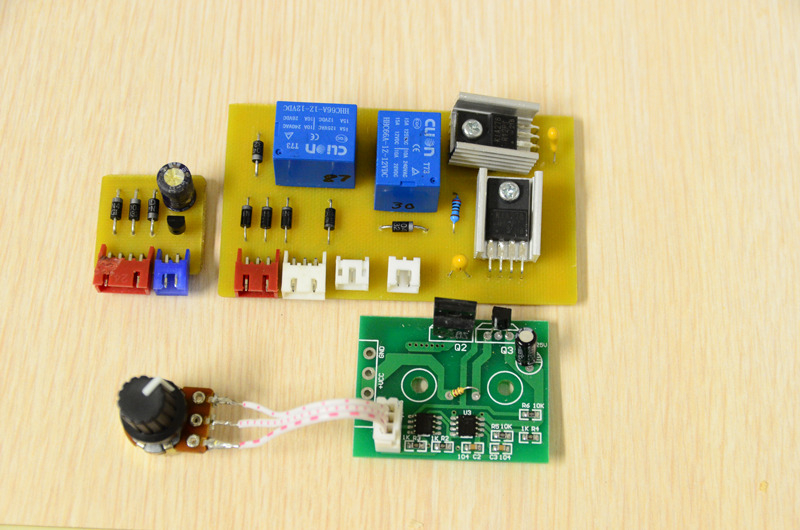
Here’s the custom DRL controller + headlight controller.
The DRL controller has a dual brightness mode via an external PWM (ebay). Also, I’ve made it so engaging the e-brake will disable the DRL, just like the stock DRL. This will give me the ability to pull the handbrake up one click and have the DRLs off if I need to be stealthy, lol.
On the right is the low+high beam controller. basically it’s a delay off circuit. Meaning, if the headlights are on and then turn them off, it will take about 2 seconds to shut off… I did this mainly for flashing while the headlights are off. This way it’s not flashing the ballasts as they remain on in between flashes.

Ebay PWM at the bottom.
Potted the Denso ballasts.

Made a 9004 “connector” out of an old bulb. Removed the bulb and soldered wires onto the pins, then filled it with potting compound.

Eventually I plan on making an Arduino controlled DRL/headlight controller, it will have a fancy aluminum housing… For now, I’ve got the current setup wrapped in electrical tape… yea, it looks like a grease job, LOL.

Installed.

DRLs on:

LEDs are dimmed when parking lights come on.
Low beams on:

I don’t have output pics at the moment, but I’ll get them in the next few days.
![]()

Member Credit: Metal Maxima
Alright, as my final HOW-TO on the .org, I am going to be detailing how one can black out your headlights and add the newly coveted Audi LED effect to your headlights. Without much adeiu, let’s begin!
ITEMS NEEDED:
STEP #1
Remove headlights. I am not going to detail this, there are two screws to remove that are exposed at the bumper level then just pull out…HARD.
STEP #2
You’re going to need to remove some hardware from the headlights before beginning. All rubber components, bulbs, and any screws that will come out. One universal item the bulbous thingie that was a beotch to remove in the previous step.
STEP #3
Obtain a flat baking sheet and a large towel. Wet the towel so it’s wet, but not dripping wet. Drape across the entire length of the sheet. TEST FIT THE SHEET WITH THE HEADLIGHT IN POSITION. Once you’re comfortable with the fit, preheat the oven to 250F. Place the headlight facing UP.
STEP #4
Bake for 10-12 minutes, ONE AT A TIME. Feel free to nervously pace the kitchen floor. *DING* That’s the sound of opportunity! Take your headlight out. I recommend using leather gloves, you’ll need the dexterity. Start by removing the two screws where the bulbous thing is…they are easier to remove once the adhesive is at working temp. Pry your headlight apart by using a flathead screwdriver to pry the mechanical attachment points open. Then pull…I only did 10 minutes and pulled…hard.
STEP #5
Remove the chrome components from the body. Here’s a shot of the only two screws for the 5th gen. The 5.5 gen will have more, sorry, I have limited pics of the 5.5gen. NOTE: Your lens portion will need to be warm for the 5th gen shroud to be removed; this allows proper expansion…believe me, it ain’t coming out otherwise.

You’re going to want to tape the chrome sections you want to retain. This is actually easier then it sounds. Use small pieces when going around the corners. TIP: Take the tape and slowly walk it across the contours…you will have 0 difficulties if you do so.

STEP #6
Paint using Duplicolor’s High Temp Engine Enamel. Do 3 coats; two light coats at about 12″ distance, very quickly. Do a third “wet” coat; you can do multiple light coats, but I’ve used close to 100 cans of spray, so I have an unfortunate familiarity with how it behaves. Allow 2 hours cure time, then peel away.


STEP #7
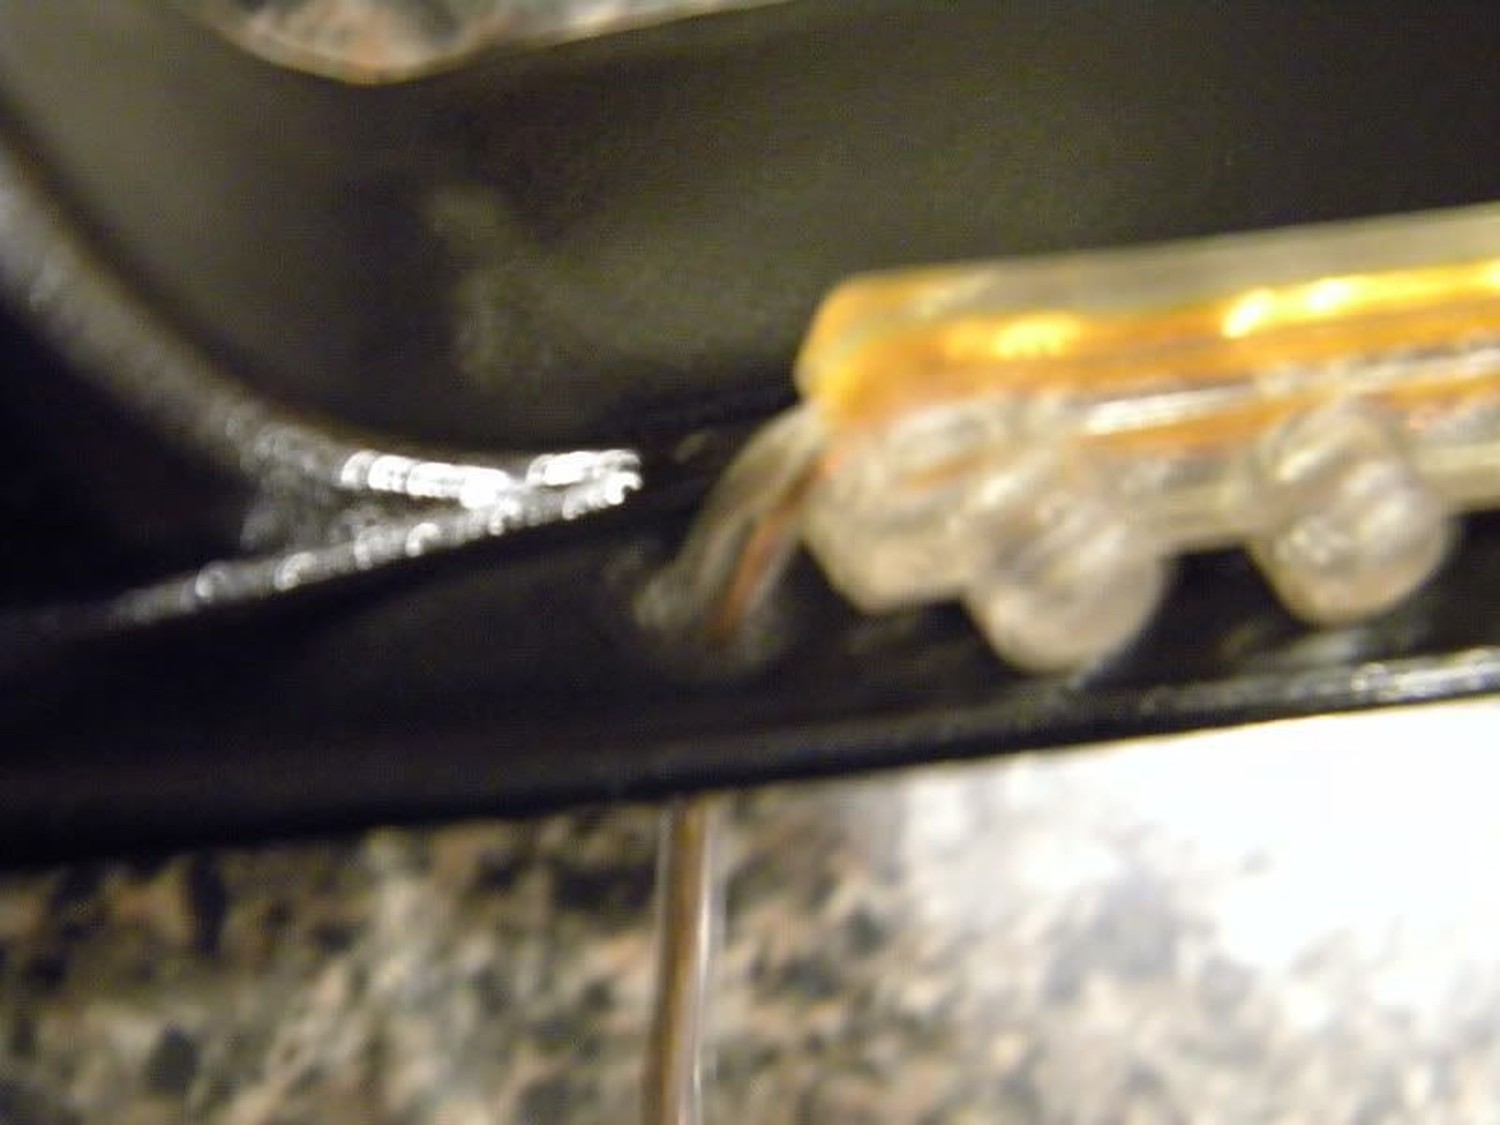
Cut your LED strip to size and attach it using the double-sided tape included. One the 5th gen, you’ll use 21 LEDs. The 5.5 gen is considerably more, just cut to size. NOTE: The array on the strip is in denominations of 3, so you must have a multiple of 3 in order for the full length to light!!! (i.e. 36, 33, 30, etc.)
STEP #8
Drill a small hole to allow for wire passage…I did mine as seen here on the 5th gen…I recommend going toward the turn signal as it is less readily seen below:

STEP #9
Now this is what I consider to be the hardest step. In order to properly reseal, we need to reuse the existing sealant. SO, back in the oven we go…ONLY PLACING THE LENS AND BODY IN THE OVEN. Do so at 250F for 10 minutes. You’re going to want to leave the body face up as the channels will likely contain the largest portion of sealant. Remove when the adhesive is glossy, meaning it’s at working temp.

STEP #10
While everything is hot, QUICKLY reassemble. Be confident, you can do it. You’ll need to do this for the proper seal. Push the body and lens together, making sure the mechanical tabs properly latch. Route the wire behind the lens shroud, you can drill your own hole or use the vent line aperture.
STEP #11
*WHEW*, ok, so you got the lenses probably 80% sealed. Time for some GOOP! Add some extra sealant, we’ve done all this work and don’t want to blow it now.

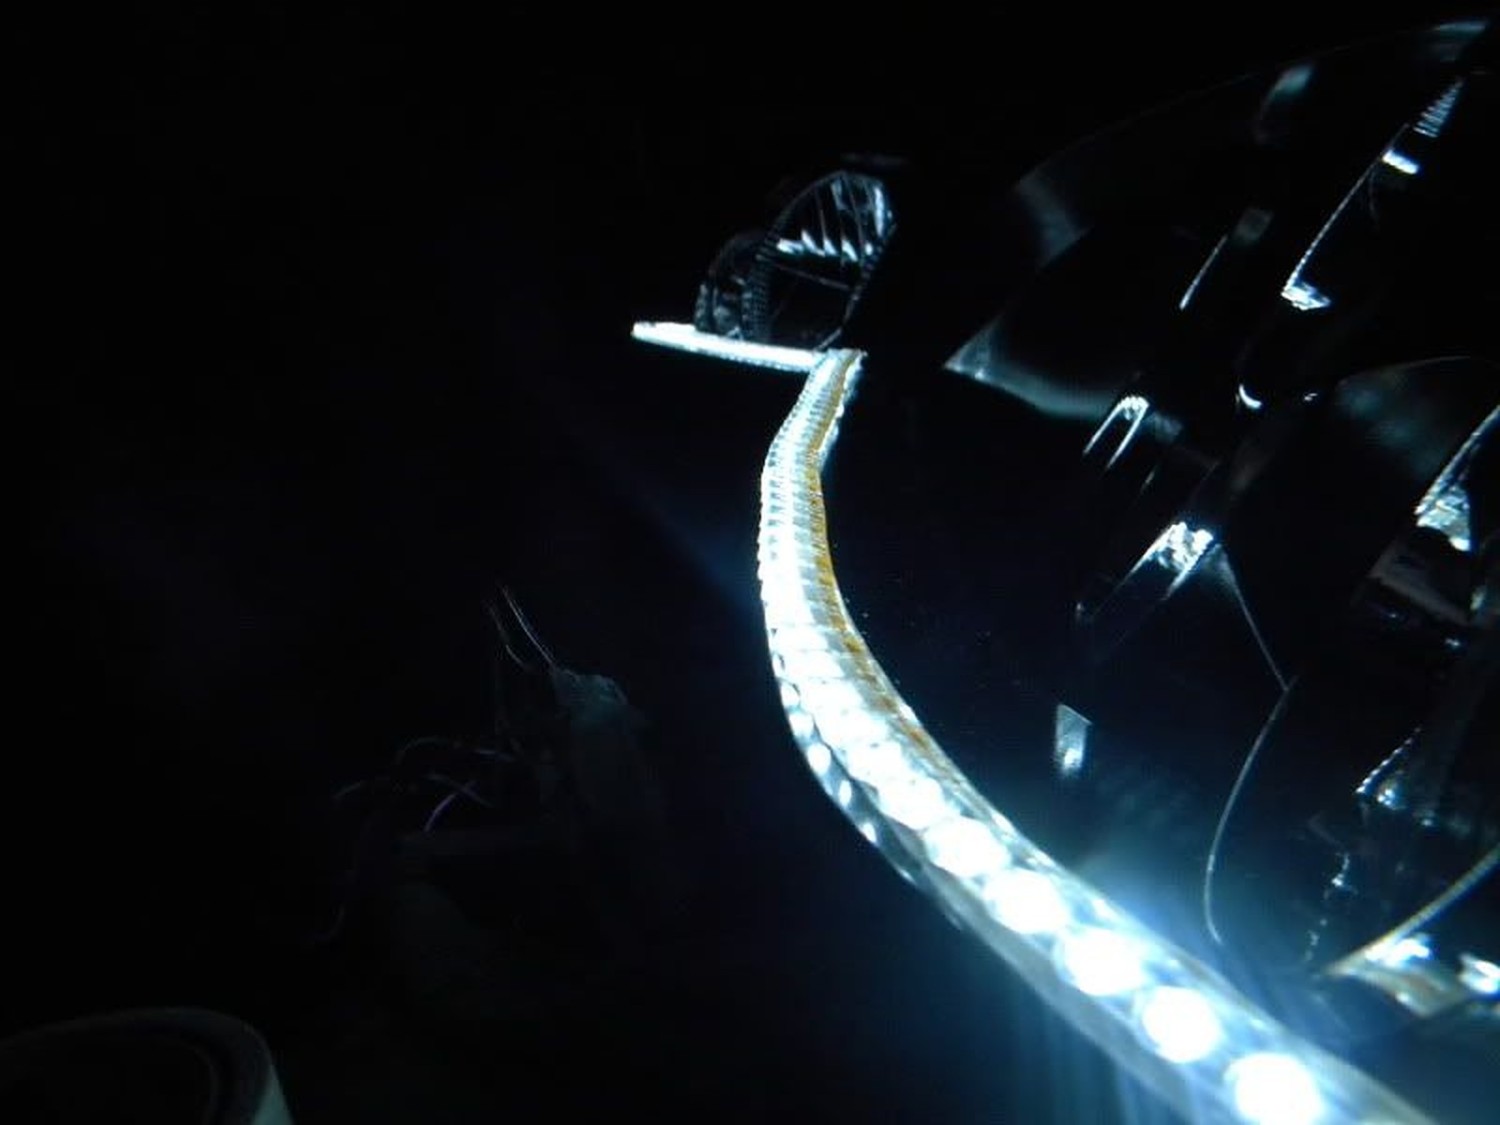
STEP #12
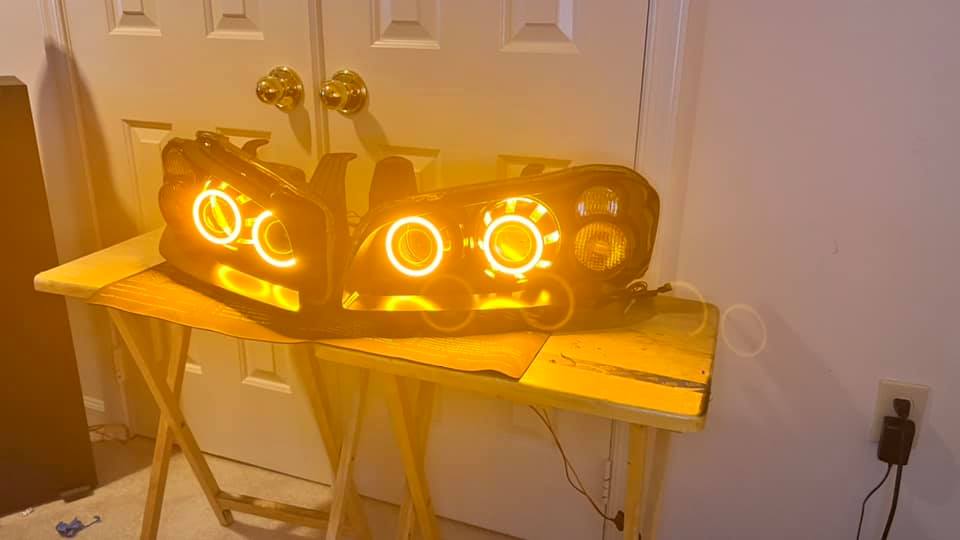
FIRE IT UP! Test with a 9V to enjoy the awesome effect. These things are BRIGHT!


![]()

Member Credit: Shift_Ice
Tools:
Clear Leans from Tap Plastics
 1. Remove headlight from the vehicle. Take care not to scratch the fender with the metal mounting pin.
2. Remove bulbs and ballast from headlight. The ballast has a yellow and orange sticker in the picture below. It is attached with 3 screws.
To remove the HID bulb, rotate the plastic cover counterclockwise. Then squeeze the 2 metal pins toward each other. Take care not to touch the bulb!
3. Bake headlight in the oven on cookie sheet for 15-20 minutes at 200 – 250 degrees. The scary part:
4. Remove headlight from the oven with old towels (will be very hot)
5. Remove amber lens carefully. Use a small flathead screwdriver to pop lens out of tabs. Silver tabs are visible below.
6. Use the amber lens to trace onto the clear lens
7. Cut out the clear lens with Dremel. Lens from Tap Plastics comes pre-cut and drops right into place.
8. Install clear lens taking care to ensure that it fits snug under the tabs. If the lens is a little loose, apply 90-second epoxy lightly around the edge to assure a tight fit
9. Reassemble headlight as best you can and return headlight to oven
10. Bake for 15-20 minutes at 200 – 250 degrees
11. Remove from oven with old towels (will be very hot)
12. Use channel locks to assure a tight seal
13. Reinstall headlight
14. To produce a clear effect and retain amber blinking, I suggest using a chrome blinker bulb:
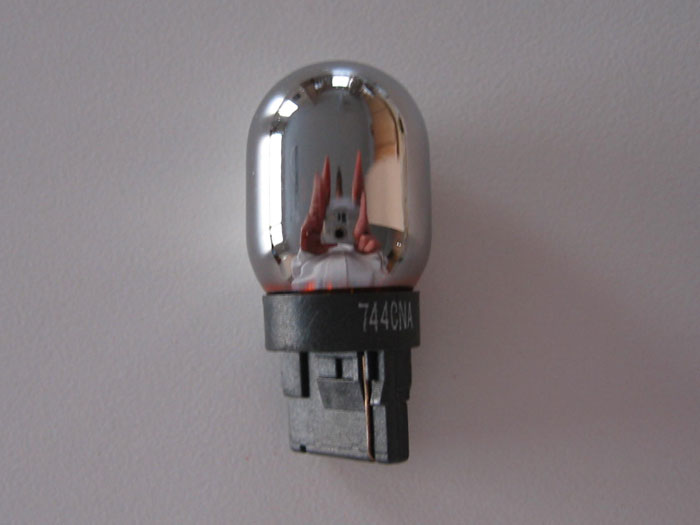
I purchased mine from autolumination. Alternatively, you can create your own by spraying the stock bulb with a light misting of silver paint.
15. Enjoy. The finished product:
![]()
")
Member Credit: Shift_Ice / EddyMaxx
You can find these online using the part number. There are other manufacturers as well. I find this to be a simpler option in getting rid of the orange lens on the headlights. Gives the headlights a much cleaner look.
Part Number: ML11P2
Part Description: Intermatic Malibu ML11P2 Floodlights
Price: $20-$30 (Set of Two)
How-to Article: https://www.my4dsc.com/how-to-clear-the-orange-blinker-lens-on-5thgen-maxima-headlights/
![]()

Low Beam Headlamp Light Bulb Size: 9012 or 9012 HID Upgrade Kit or 9012 LED Upgrade Kit
High Beam Headlamp Light Bulb Size: 9012 or 9012 HID Upgrade Kit or 9012 LED Upgrade Kit
Parking Light Bulb Size: 1157A
Front Turn Signal Light Bulb Size: 1157A
Rear Turn Signal Light Bulb Size: 3057
Tail Light Bulb Size: 3057
Stop Light Bulb Size: 3057
High Mount Stop Light Bulb Size: 2825
Fog/Driving Light Bulb Size: H3 or H3 HID Upgrade Kit
License Plate Light Bulb Size: 168
Back Up Light Bulb Size: 3156 or 912
Cornering Light Bulb Size: 3156
Rear Side Marker Light Bulb Size: 168
Glove Box Light Bulb Size: 158
Map Light Bulb Size: DE3021
Dome Light Bulb Size: DE3175
Step/Courtesy Light Bulb Size: 194 or 2825
Trunk/Cargo Area Light Bulb Size: 158
Daytime Running Light Bulb Size: 1156
![]()

Member Credit: MaxJ04
This how-to is for getting rid of the orange side makers on your 6thgen headlights. Headlights look so much better with clear side markers.
Materials needed :
I took the headlights off and I took the HID ballast and the D2S bulbs out of them and place them away from the heat. I didn’t use an oven instead used a heat gun letting me have more control.

Next when you open the headlight cover there is a screw on the lense take out the black screw and then slowly pull out the chrome piece containing the amber piece. Once done take a knife or a screw driver ( flat head ) and slowly pry out the amber piece the lower part is easier to take out but you have to jiggle out the upper part because is tight.


Take the florescent light cover * under 10 $ from home depot* and using the chisel cut a piece that can be used to trace out the amber piece in which you would replace. Use the chisel to cut the piece of florescent light cover to a smaller size or use a pair of pliers to clamp out the unnecessary pieces that are remaining and close to your out line.


Getting near the outline that you traced? Then is time to start sanding I used 60 grit and then worked with 80 to 120 .. but mostly 60 and here are the end results but close enough keep sanding until is small enough to fit back into the lenses.

Use silicone to glue it on the edges of the chrome piece all you need is to use the tip or something to align it to the edge so that it won’t show the glue . next use clamps to hold it in place and leave it there until it dries. After its dried put back the chrome piece into the lenses and screw it in heat up the oven or use the heat gun to put it back together and then just repeat to the other side.

Put back your D2S bulbs and ballasts all these came off fine for me just with patience and screwdrivers.. All is done take a walk outside and put it back into the car and put it all together and get some stealth bulbs .. I used Sylvanias 1157’s that are clear when off but orange when lit.


![]()