Member Credit: Marko Cvetic
This video is how to remove trim from 7th Gen 09-14 maxima’s.



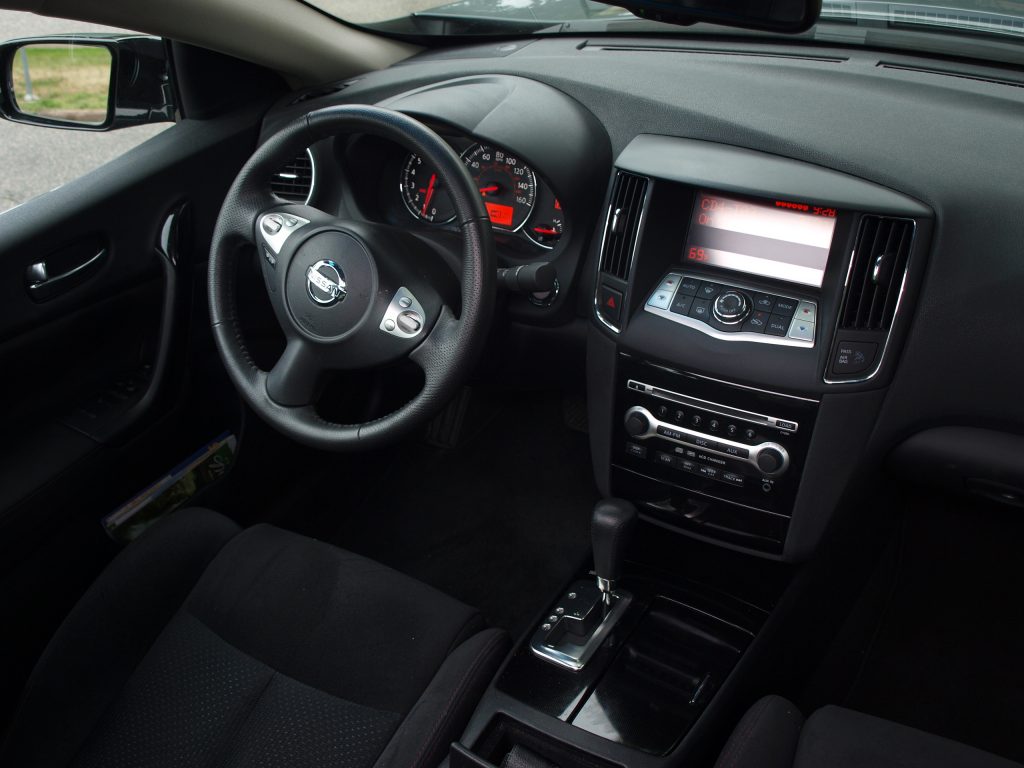
Member Credit: Marko Cvetic
This video is how to remove trim from 7th Gen 09-14 maxima’s.
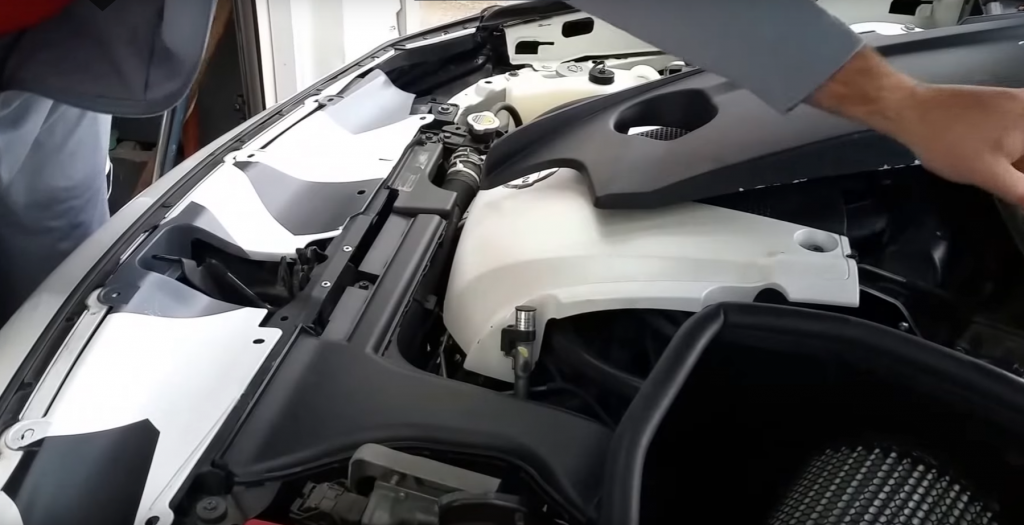
Member Credit: Marko Cvetic
Tools: 10mm Socket Wrench
If you have a Stillen front lip and is painted make sure to lay a towel down so the lip doesn’t scratch. This will give you access to the headlights, foglights and grill
Member Credit: Ichigo
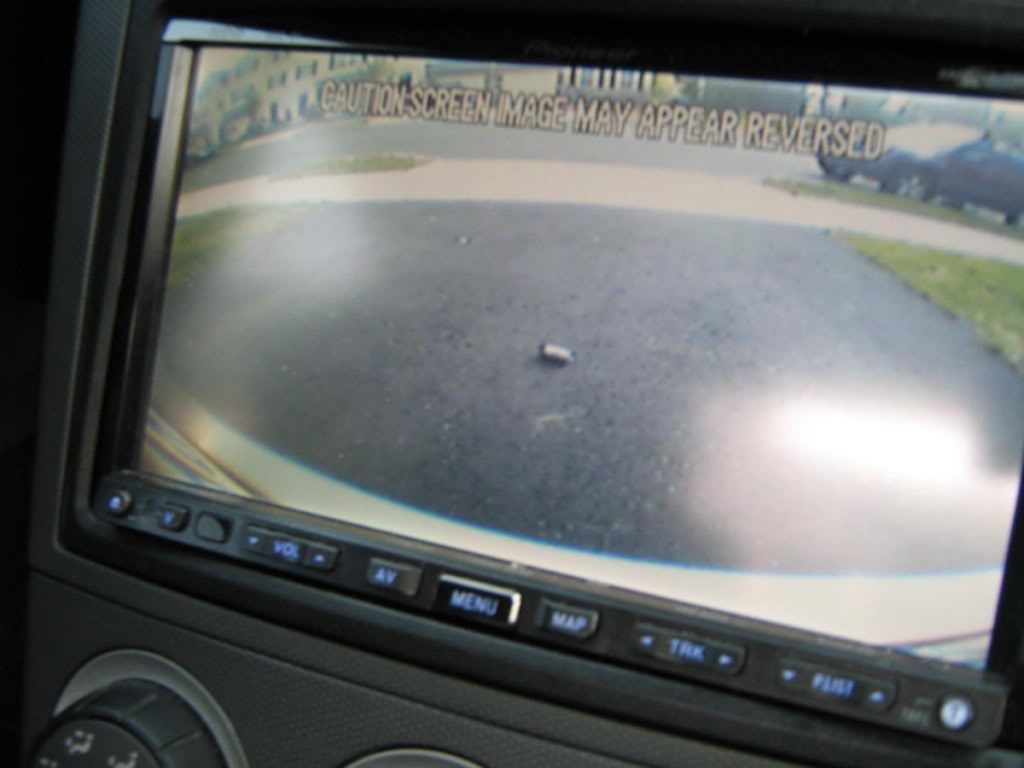
So it was spring cleaning at the stereo shop I work at part time and I noticed a box I know I had seen at least twenty times before but never read. Whoa its a Farenheit rear view camera. SNATCHED (with permission of course). I already have the interior out of the car because I’m upgrading my sub and amplifiers so that just makes it easier to route the wires. Now the pics:
*ADDED – Camera model # – Farenheit LP-1CA
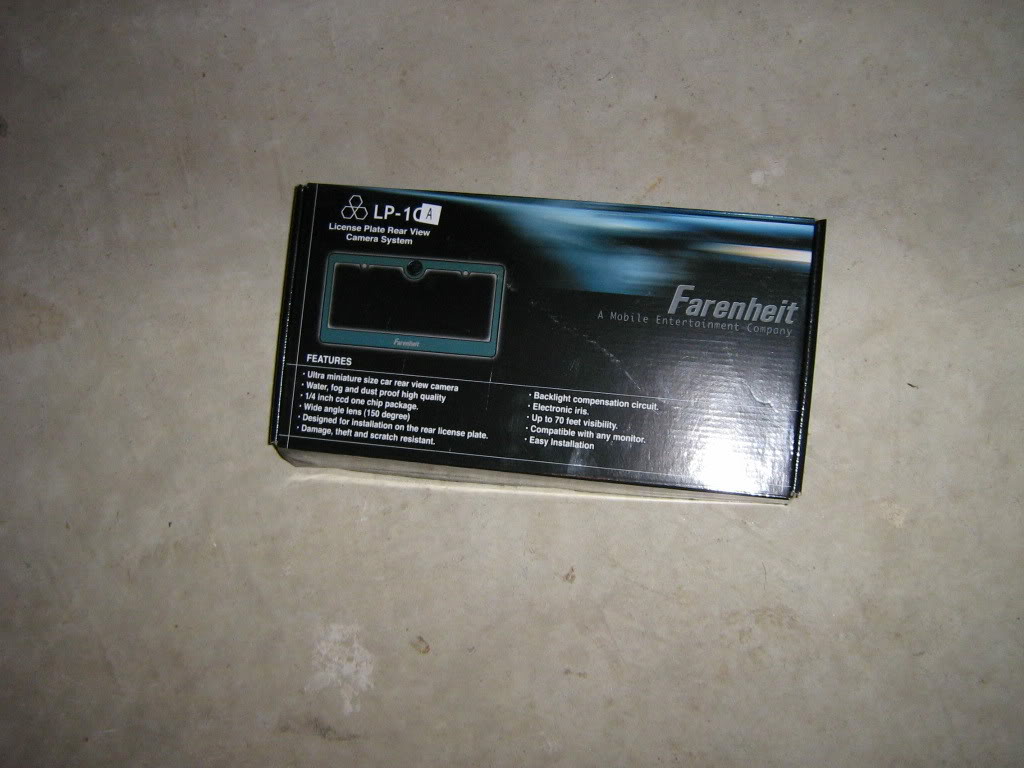
2. The contents of the box
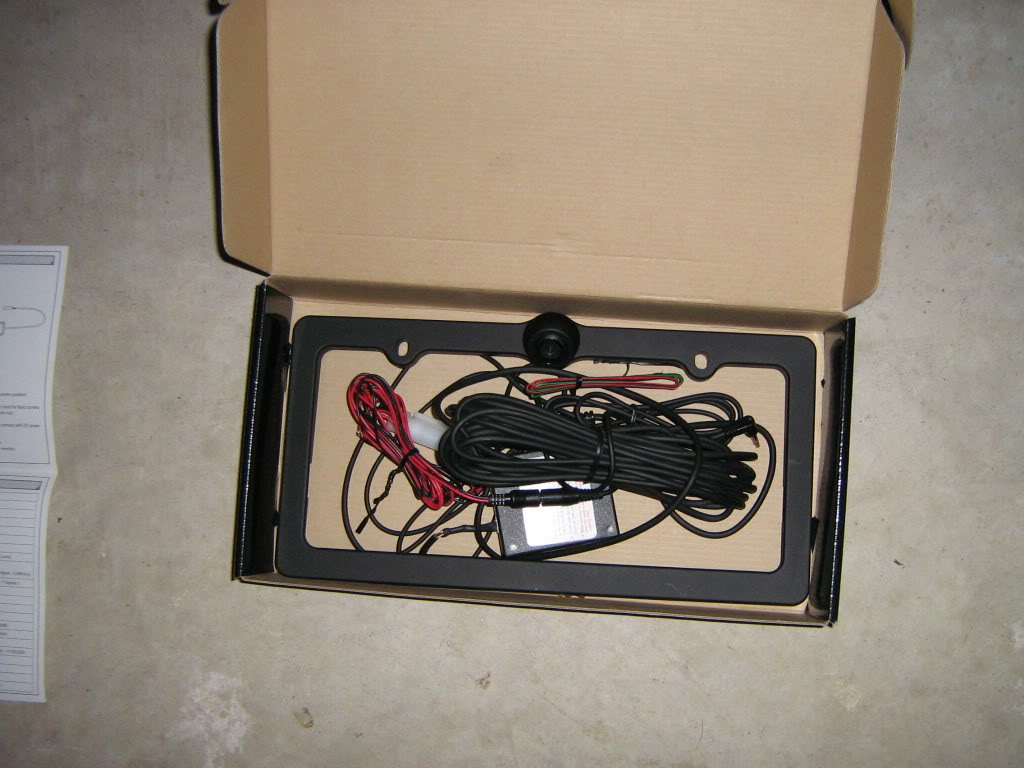
3. The contents sorted on the floor

4. Removed plate and old license plate holder

5. The inside of the rear, notice the large grommit in the center. This is where I ran the wire inside the car
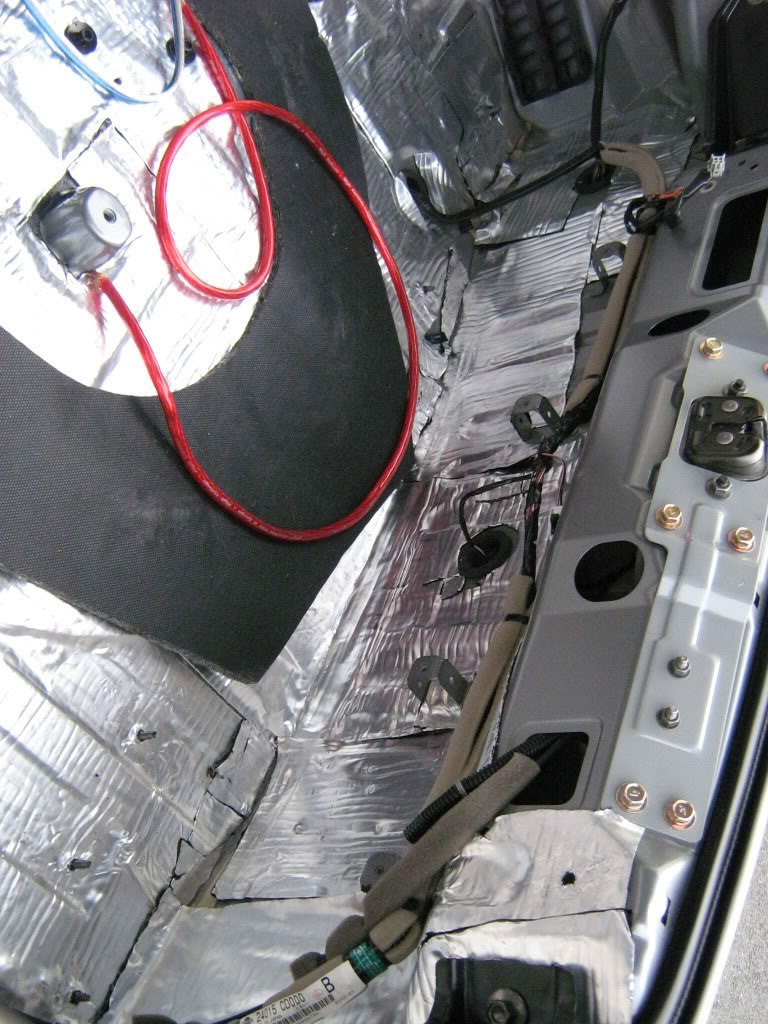
6. Once the grommit is removed, you can cut a small slice in it to run the wires through
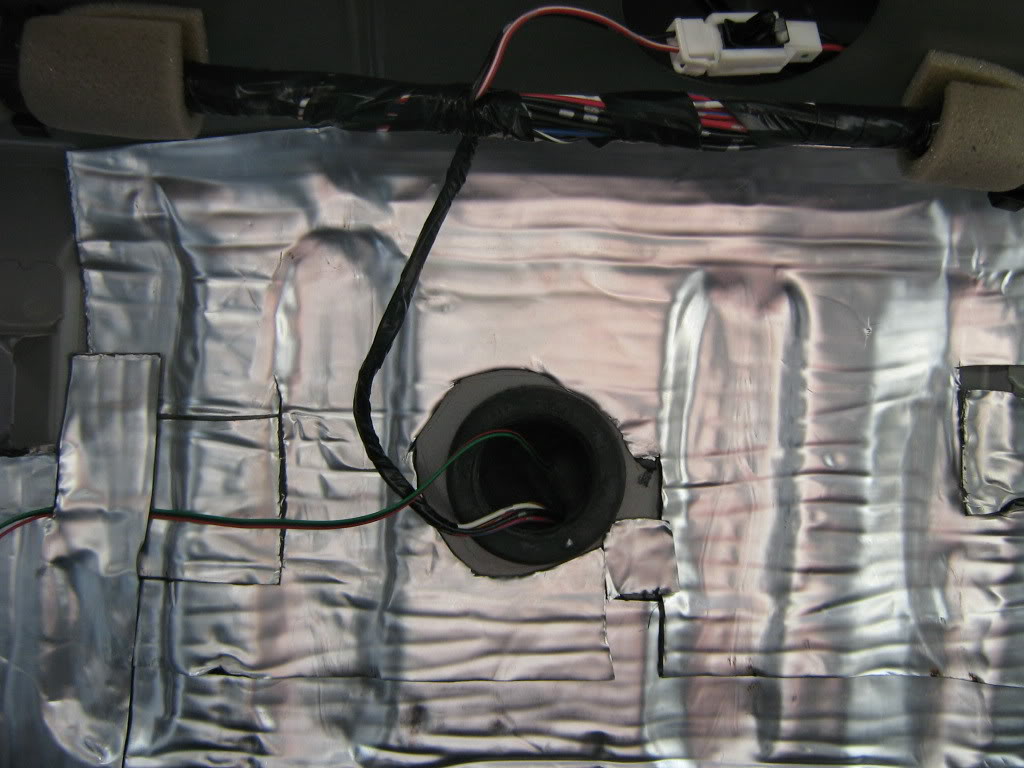
7. Once the wire from the frame is inside the car, it must be connected to a small box that was included with the frame. the image processing is done inside this box and then images are sent from the box to your headunit. Be sure to tuck it away so it doesn’t get crushed.
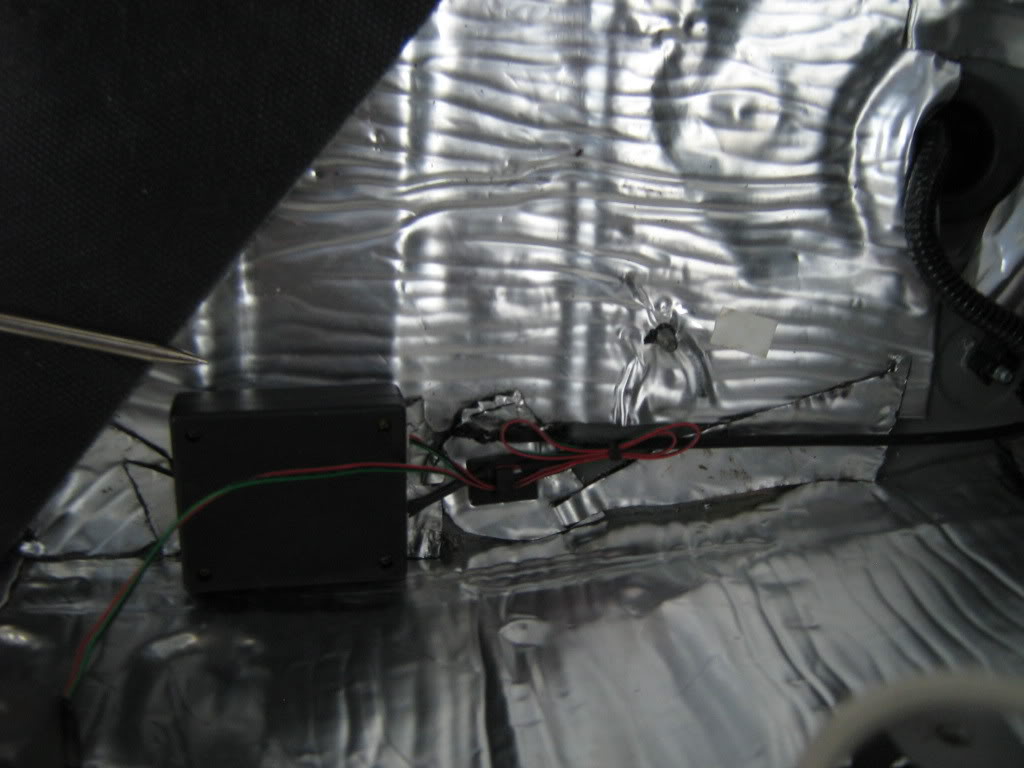
8. Reverse wire. Dont forget the reverse wire. Without this connection the Avic Z1 wont switch to rear camera when you shift into reverse. Pioneer included a specific wire for this connection so I tapped into the reverse light in the rear as opposed to finding the wire up front.

9. Once the wires is tapped it’s time for a little wire management.


10. Through the rear strut bar and out the compartment behind the passenger seat.
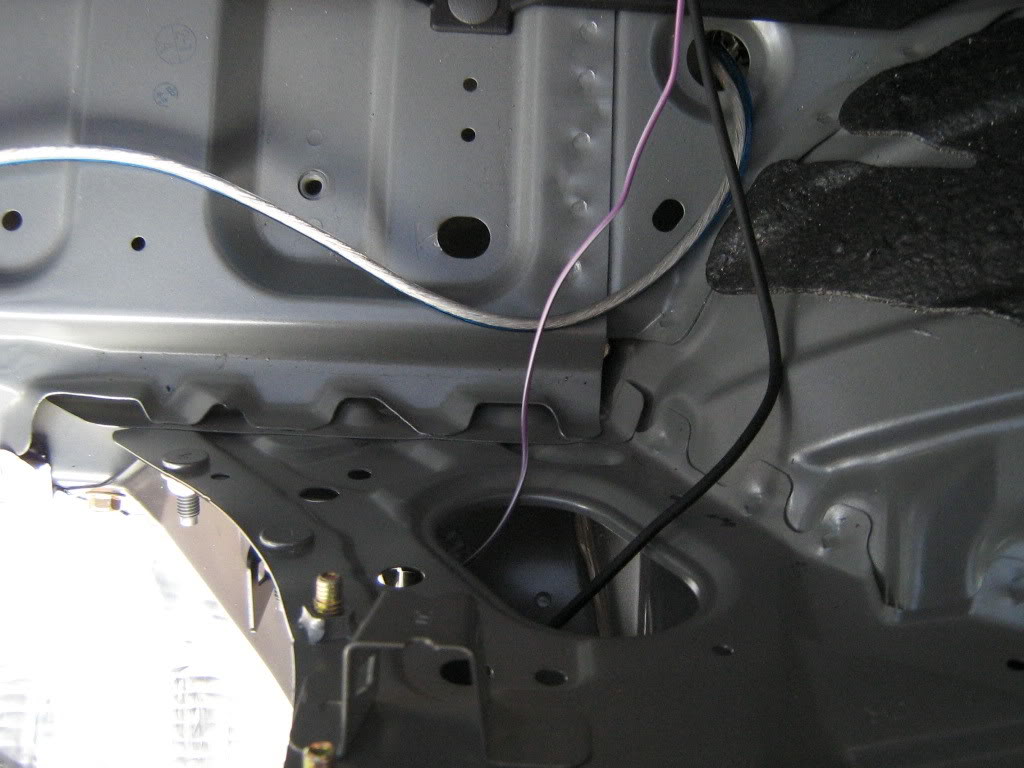

11. I ran the wires down the center, its a lot easier then pulling up the carpet. Time for the Z1 to come out again.

12. Find the wire for the reverse gear input and connect it to the wire that you tapped into the reverse light in the back.
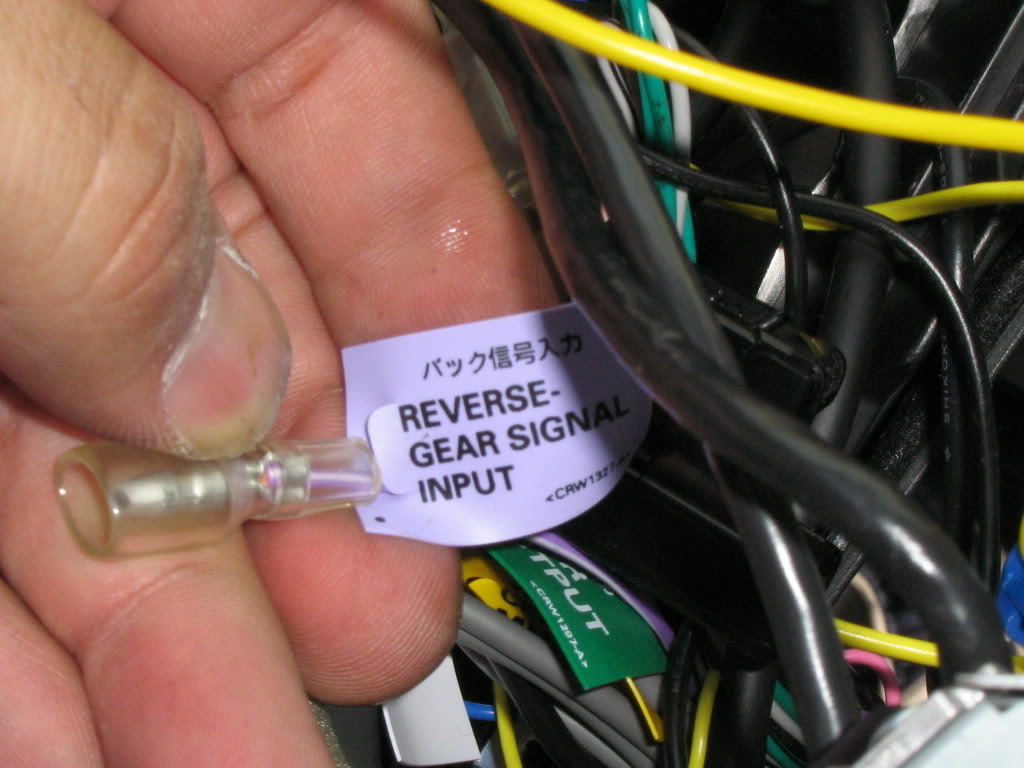
13. Time to tap into some power for the camera. It doesnt really matter where you tap into the power, but since this camera has the power wires attached on the end of the cables that get attached to the head unit, I tapped the constant power from the head unit and the oem ground. The headunit has its own separate ground now. Here is a shot of the power wire prepped for install
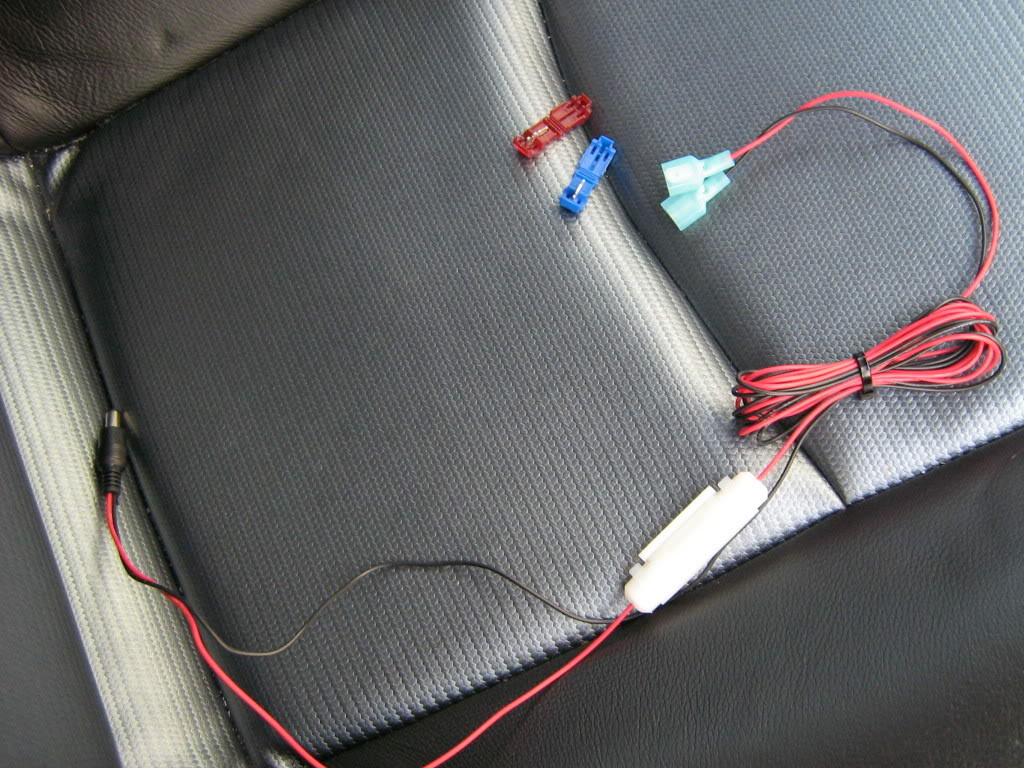
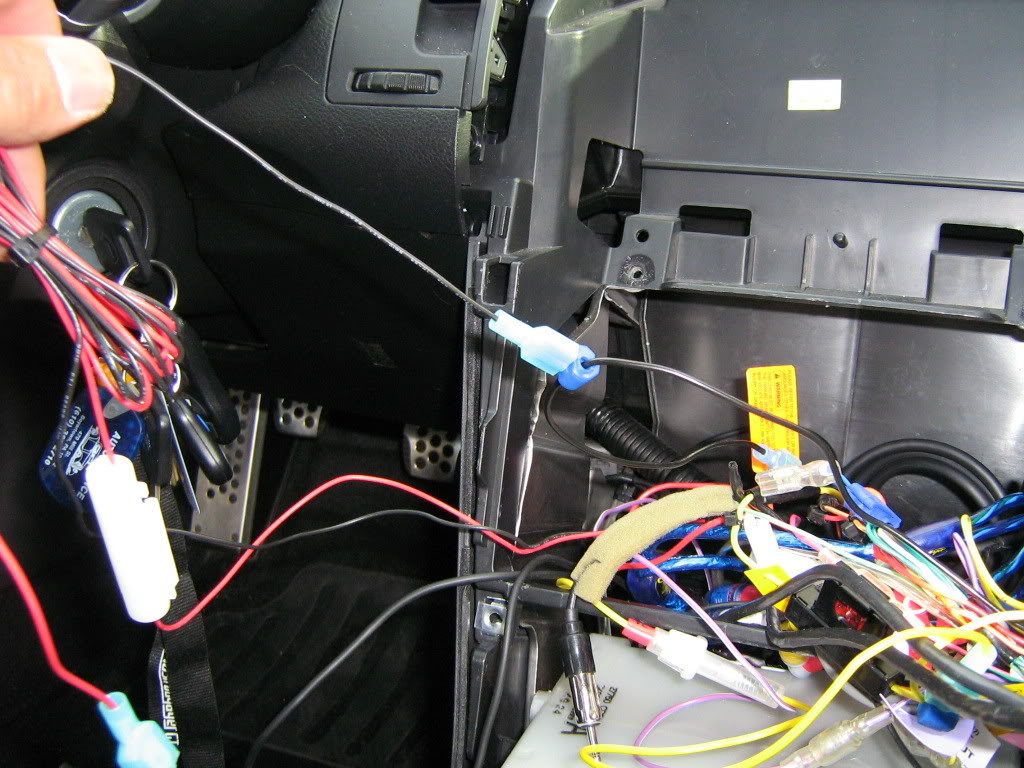
14. The last connection, the actual video feed from the box mounted in the rear.

15. Turn on the car and test it out before securing down the head unit. Make sure all of your speakers and devices attached to the radio are functioning. It gets really tight behind the head unit and its easy to disconnect wires when reassembling. I had to change a setting on the headunit to accept camera feed for the rear.

Here are some pics of the images from the camera
With old school cheap a$$ pager on the ground for scale

with some needle nose pliers
From the side

The finished product

Enjoy.
BTW since the license plate camera frame is substantially thicker then your average frame, I had to replace the screws and the mounting clips. When I bought the car the stealership used some horrible little screws that stripped the nuts inside the oem clips. A quick trip to lowes for two new coarse thread phillips head bolts, two body clips and two plastic black screw caps did the trick.
Member Credit: shift_ice
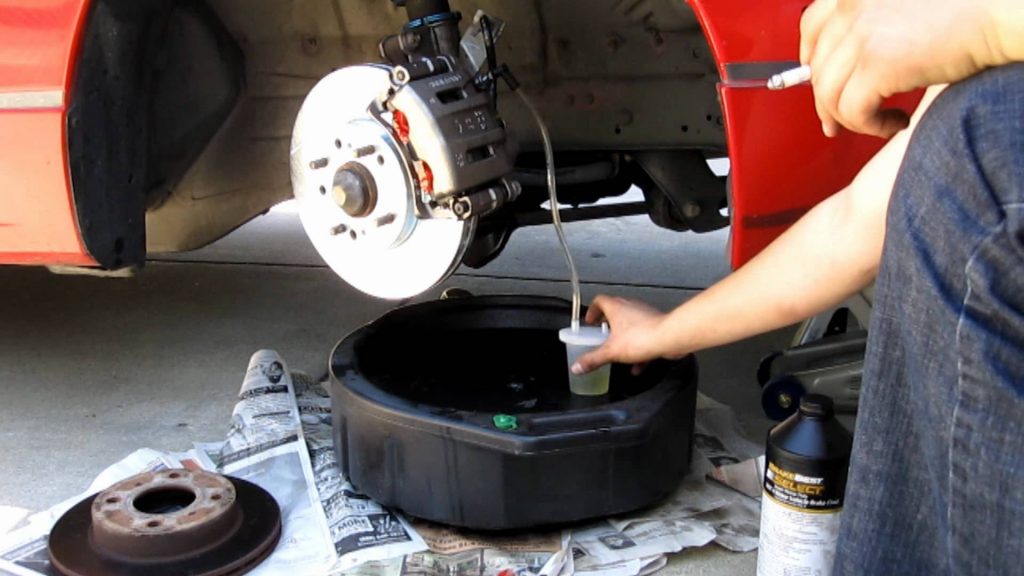
Over time the brake system can take on air as the effectiveness of the brake fluid decreases with age. Air can also enter the system from a leaky brake hose, a bad connection on the brake caliper, during any maintenance when a brake line is removed, or if the fluid reservoir is allowed to run dry.
Air in the line makes the brake pedal feel mushy, and bleeding the brakes is the solution to that embarrassing mushy pedal feel. While we’re on the topic, if you’re not happy with the factory brake feel even after the system is properly bled, replacing the factory brake lines with more sturdy steel braided lines can greatly increase pedal firmness and brake feel.
Ttools/Supplies:
INSTRUCTIONS:
1. Place the car on level ground, chuck the rear wheels, and make sure car in park (or in gear if a manual). Make sure parking brake ISN’T on. If you have ABS, remove the ABS fuse.
2. Pump the brakes multiple times to release any residual vacuum in the lines.
3. Remove the brake fluid reservoir cap and fill the reservoir with fresh brake fluid. Check this level often as you bleed the brakes. Never let it get too low because if it gets empty it introduces air back into the brake system and you have to start all over!
1. Passenger rear
2. Driver front
3. Driver rear
4. Passenger front
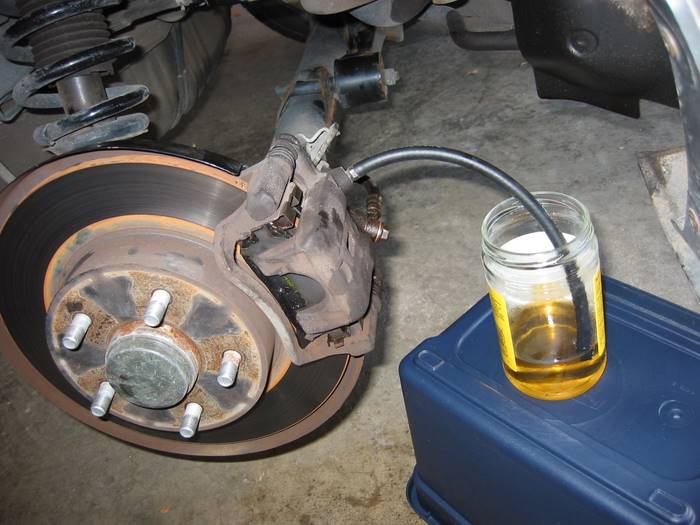
4. Remove the rubber boot on top of the bleeder screw. Attach a hose to the bleed screw and insert the end of the hose into a clear jar that is partially filled with brake fluid.
The bleed screw with the rubber boot still on:
Bleed screw
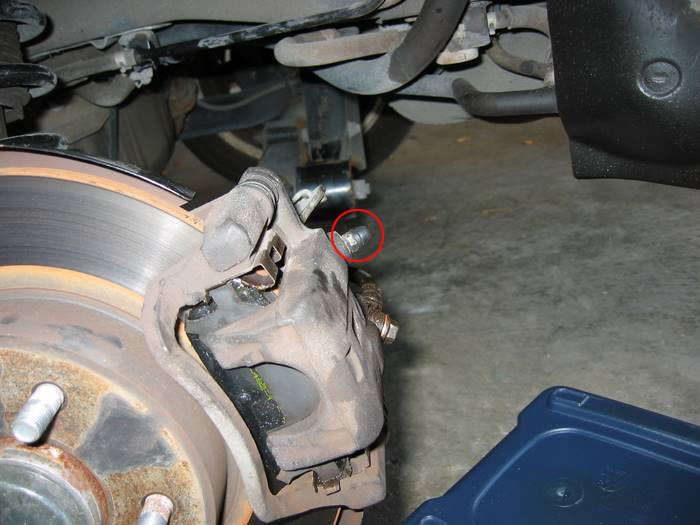
Hose attached to bleed screw:
Hose attached to caliper bleeder screw
5. Have your girlfriend press firmly on the brake (you’re killing time reading this on the internet so you obviously have one…right?). While the brake is depressed, loosen the bleed screw. If your girlfriend freaks out at this point because the pedal just fell to the floor, throw an empty beer can at her and tell her to quiet down. Or, if you’re not much for the single life, you can be the nice guy. “Honey, that it is completely normal. I just loosened the bleeder screw which allows the brake pressure to escape…oh, and I sure like those new strappy shoes of yours.” Totally your call on this one.
Anyway, back on topic. When you loosen the bleed screw with the brake depressed, you will see brake fluid flow through the hose and into the jar. Watch the tip of the hose for air bubbles – this is a sign that air is in the system. When the flow of fluid stops, tighten the bleed screw and tell your girlfriend (assuming she’s still there) to release the brake. Repeat this process (press brake, loosen bleeder, check for bubbles, close bleeder, release brake) until there are no air bubbles released, only fluid.
If you mouthed off above and lost your assistant, don’t worry, this step can also be done alone if you buy a set of speed bleeders.
6. Check the brake fluid level in the reservoir and top off as needed. Take care not to overfill or spill because brake fluid is very hard on paint. As mentioned above, never let the reservoir get empty or it will introduce air into the system and you’ll have to start over. And let’s be honest, this job is barely enough fun to do once.
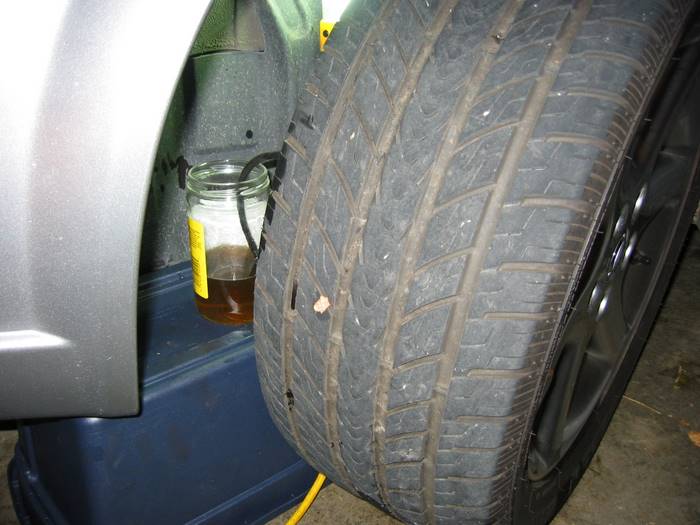
7. Repeat steps 4 -6 at each wheel in the order outlined above. For the front brakes, if you’re feeling lazy you can get away with not removing the wheels at all by turning the tires toward the brake you want to work on. It takes a skinny arm or a strange angle to get a wrench on the bleed screw, but it can be done.
A lazy man bleeding the front brake:
Bleeding the front brakes with the wheels on
8. When complete, do yourself a favor and double check that every bleed screw is tight. Remember, a loose bleed screw means no brake pressure and brake fluid spraying everywhere like a garden hose. And hey, that’s no fun. Well, unless you’re the lucky onlooker.
Member Credit: shift_ice
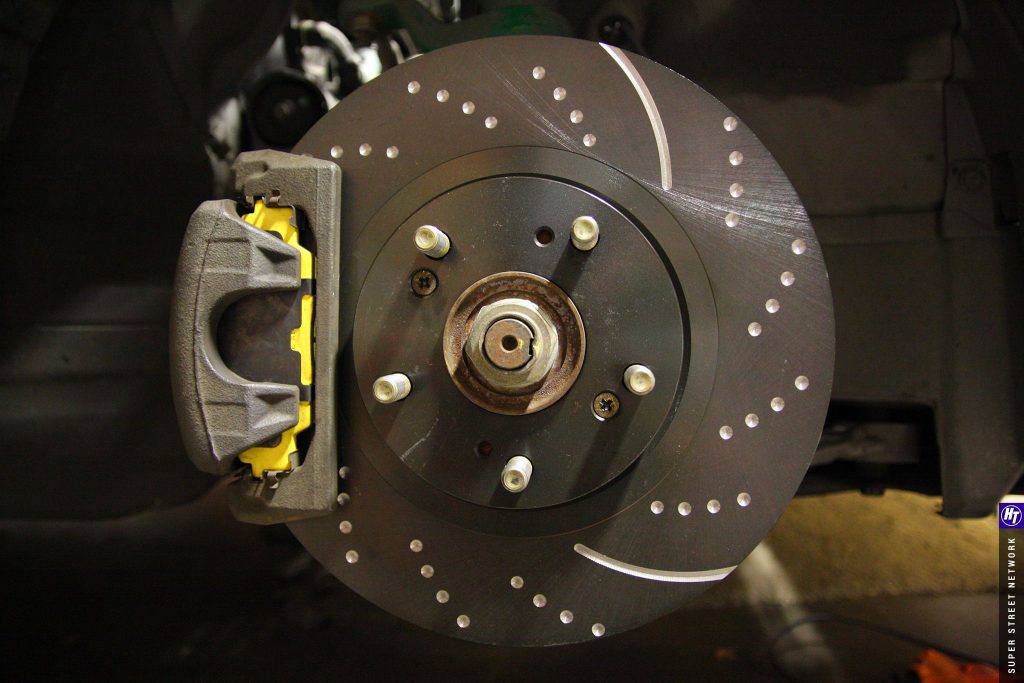
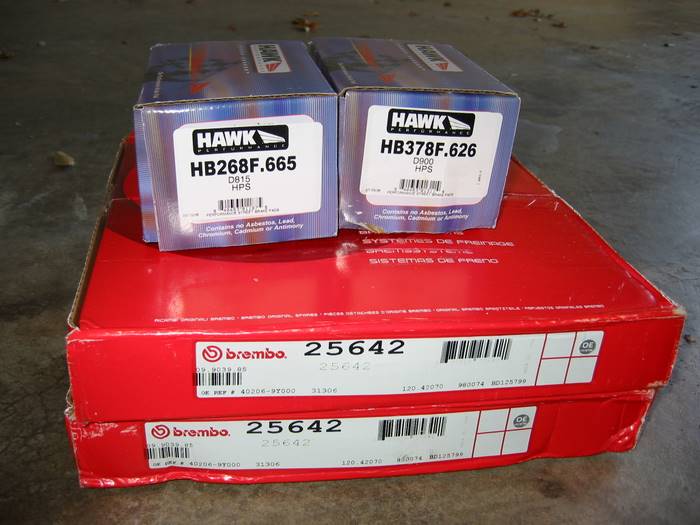
There are many rotor and brake pad options for the Maxima. Check out the brake choice how-to if you’re having problems deciding. In this how-to, I install Hawk HPS pads and Brembo blank rotors, though the process will be the same for any OEM replacements.
The new equipment:
Tools/Supplies:
INSTRUCTIONS:
1. Place car on level ground. This is very important since you’re removing the brakes! Chuck the rear wheels and pull parking brake while doing the front wheels. Jack up the front of the car using the jack point outlined in the manual.
2. Remove wheel using lug wrench
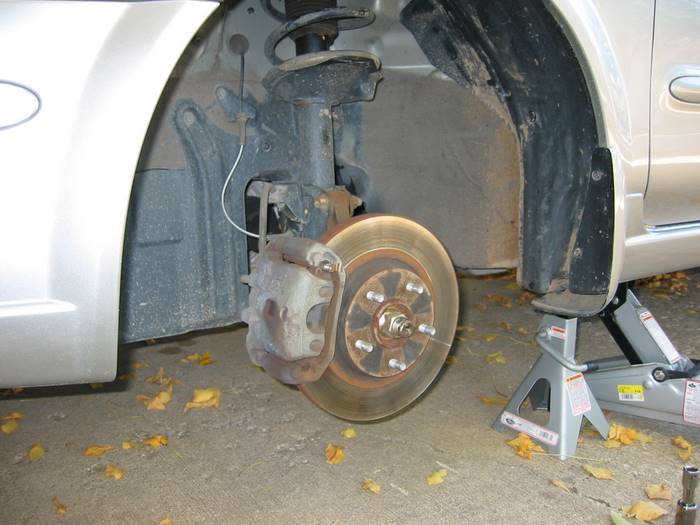
3. Remove the 3 17mm bolts that attach the caliper. There are two on top and one toward the bottom of the caliper bracket.
NOTE: Do NOT remove the bolt that connects the brake line to the caliper. This will introduce air into the brake system and you will have to bleed the brakes to get the air out. The brakes will be very spongy until this is resolved.
So keep the brake line connected and hang the caliper to avoid strain on the line as described in the next step.
Removing the top brake caliper bolt:
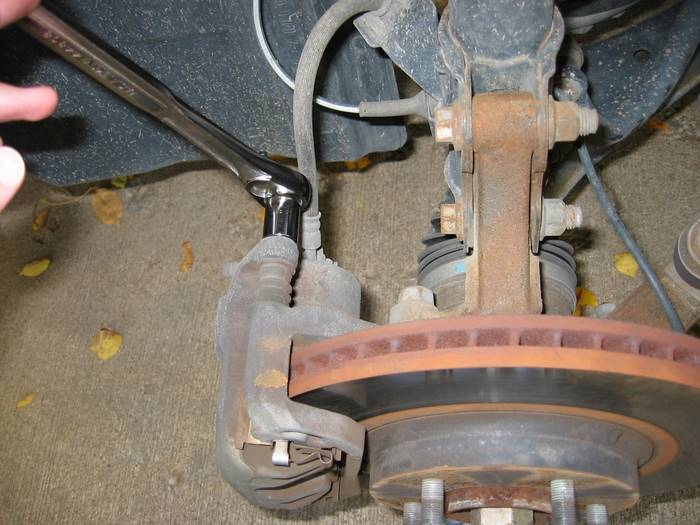
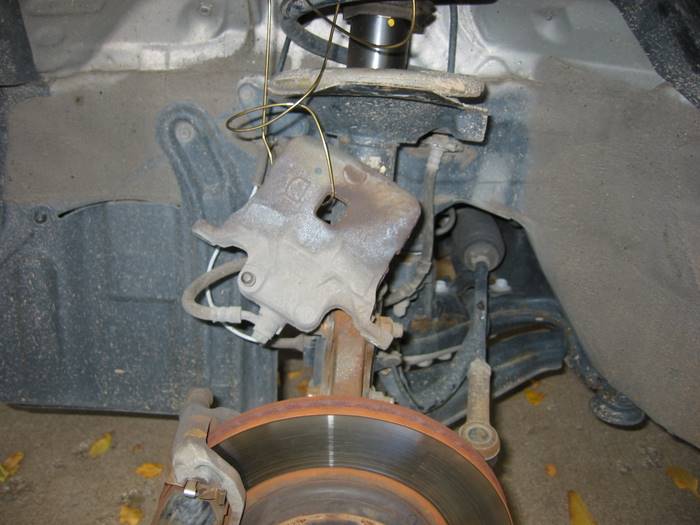
4. The caliper should easily slide right off the rotor after removing the above 3 bolts. Hang the caliper with an old coat hanger from the top of the spring. Never let the caliper hang from the brake line – it can damage the brake line and cause a leak.
Caliper hanging from hanger:
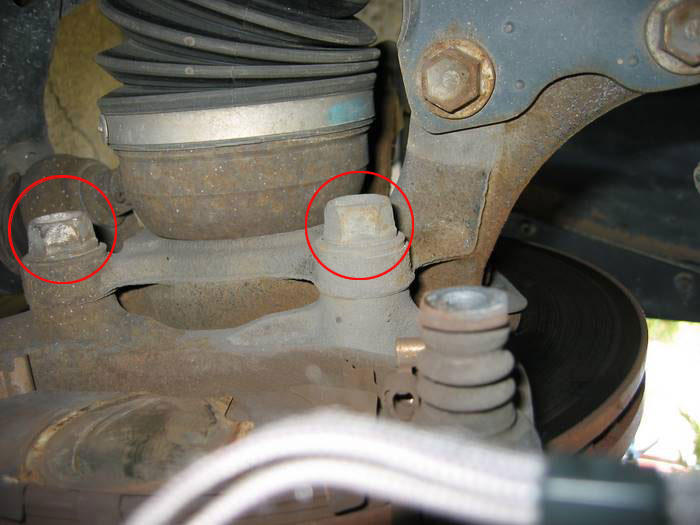
5. Remove the two 19mm bolts on the back of the caliper mounting bracket.
Two bolts circled in red:
6. NOTE: This step and any steps below relating to the rotor, only apply if you’re replacing the rotors as well. If the brake pedal pulsates when you press on the brake, you might consider replacing the rotors as well. This is typically noticable when braking harder at faster speeds such as when exiting the highway on an offramp.
Remove the rotor. Depending on the age of the vehicle and climate, the rotor may be rusted on. My Maxima was only 3 years old and my rotor was rusted on tight. To remove a rusted rotor there are a number of options:
Apply a liberal amount of WD-40 to back of the rotor and inside the lug holes on the front. Allow to soak. After a few minutes of soaking, use a large hammer and strike the back of the rotor in various locations to help dislodge it. If you are removing the rotor so it can be machined at a shop, be sure to use a piece of old scrap wood so you don’t damage the back of the rotor by striking it directly with a hammer. I started with a rubber mallet but eventually had to use a large steel hammer to knock my rotor loose.
Alternatively, you can use the holes on the caliper mounting bracket to help push the rotor off. This requires a 4″ long, 1/2″ wide bolt with a matching washer and nut.
7. Open brake fluid reservoir and wrap an old rag around it to catch any spill.
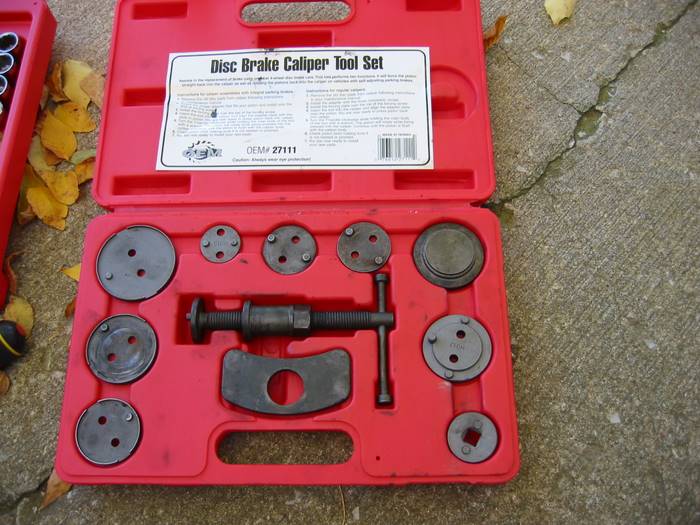
8. Compress the caliper pistion using a C-clamp or Caliper piston compressor tool. The C-clamp method only works on the front brakes since the rear piston must be twisted as it is compressed (the piston caliper tool naturally does this). While there are a variety of piston compressor tools, the general premise is to place the flat metal plate inside the caliper and twist the bolt until the strike plate (which rests against the piston) presses the piston back into the caliper. See the picture below. If you choose to use a C-clamp, place the old pad against the caliper piston so the c-clamp doesn’t press directly against the piston and mar the metal.
NOTE: As you compress the piston, the brake fluid level will rise. Keep an eye on the brake fluid level and siphon out any extra fluid or cleanup any spill that occurs. I recommend siphoning out some of the fluid since brake fluid is hard on paint.
Brake caliper compression tool kit:
9. Note the orientation of the pads. It’s also good idea to do one wheel at a time so you can always reference the other wheel if you have any question on how to orient the pads on reinstall.
Only one of the two bolts that need removed are visible here:
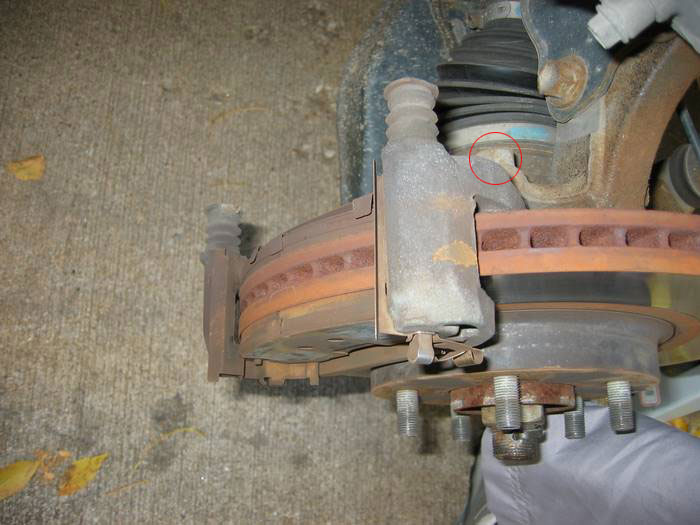
10. Remove the two 19mm caliper mounting bracket bolts (the cradle that holds the pads).
11. If the old rotor was stuck, use a wire brush to clean the hub face. Optionally, you can apply a small amount of grease to the hub face to keep the new rotor from sticking sometime down the road.
12. Before installing the new rotor, it’s important to clean it off with rubbing alcohol and brake cleaner or rubbing alcohol. Rotors are shipped from the factory with a protective coating to keep them from rusting before sale. Use a liberal amount of brake cleaner and give it a good scrub until it no longer feels like it has a film on it. Once clean, install the new rotor by sliding it over the lugs.
New rotor installed:
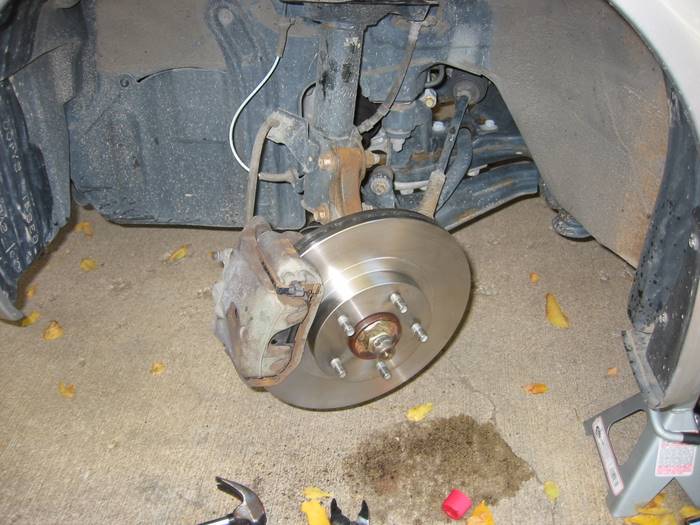
13. Remove the old brake pads from the caliper mounting bracket and clean the shims and hardware thoroughly with brake cleanup. Use a clean rag to scrub off deposits. Make sure this hardware is smooth and clean. The pads slide back and forth in this hardware so it’s important to make sure the path is smooth as possible. Once clean, dry them off.
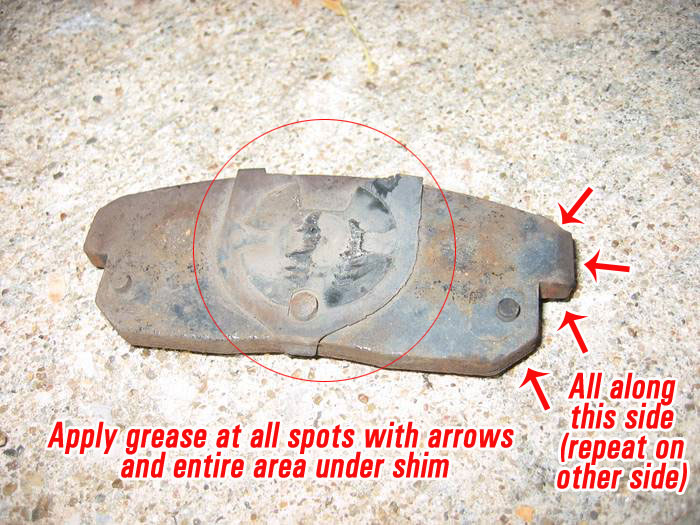
14. Apply grease to all the touch points in the channel where the pads sit. Apply a liberal amount of grease on the back of the brake pads and reinstall the shims. Apply grease to the points on the caliper mounting hardware where the pad will sit.
Apply grease to the following points on the brake pad. This is the back pad so the shim is smaller. Apply a liberal amount of grease to the back of the pad wherever the shim and the pad meet.
Apply grease to the following areas on the brake pad
15. Reinstall caliper mounting bracket and torque bolts to 53-72 ft. lbs. Insert pads back into caliper mounting bracket and slide caliper over the pads.
16. Reattach caliper to caliper mounting bracket and tighten caliper mounting bolts to 16-23 ft lbs.
Completed job:
17. Check brake fluid level. Add fluid from a brand new bottle of brake fluid as needed. It’s important not to use brake fluid that has already been opened because brake fluid soaks up moisture overtime reducing its effectiveness.
18. Reinstall wheel, remove wheel chucks, and lower car.
19. IMPORTANT: You must bed the brake pads after installation. This is very important to help avoid squeaking down the road. The specific bedding procedure is typically provided with the brake pads, but the general rule is to drive around 45 and brake hard, releasing the brake right before coming to a stop. Repeat this process 4 or 5 times.
20. While not required, it’s a good idea to bleed the brakes after doing a brake job.
21. The pictures above are for the front brakes, but doing the back is just the same with a couple minor differences:
Remove the 14mm bolt holding the mount for the emergency brake cable to get the upper part of the caliper off.
The lower piece of caliper has 17mm bolts.
The piston must be turned clockwise to be compressed. Make sure the end of the caliper compressor is inserted properly into the grooves in the piston so the tool actually twists the piston as it compresses.
Hook the emergency brake cable back onto the spring mechanism before reinstalling the upper caliper piece. It’s hard to hook up after the caliper is assembled.
To get the rear caliper back over the rotor, you must turn the cylinder so the nub lines up with the groove it slides into.
Edit: Here’s a few more notes submitted from reader ajahearn:
Some vented rotors are directional so people need to pay attention to the one to install.
Slotted/drilled/dimpled/etc rotors are supposed to be non-directional but some manufacturers want you to install them such that the first dimple/part of the slot/etc that reaches the pad needs to be at the top with the idea that any grabbing will pull the pads inward toward the hub and not force them upward away from the hub.
The caliper should never be left hanging from the brake line – it should always be supported by a hanger or bungy cord.
For the rear piston, the boot may start to bind and make it harder to compress/rotate. To resolve, occasionally back off (counter clockwise) to get the boot to straighten and then start again. And opening the bleed valve makes it considerably easier to turn the piston back in. Of course you need to have a hose to prevent the fluid from spraying