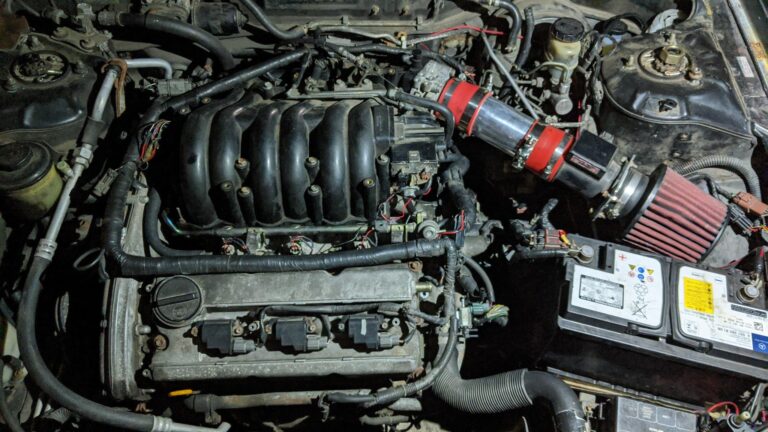
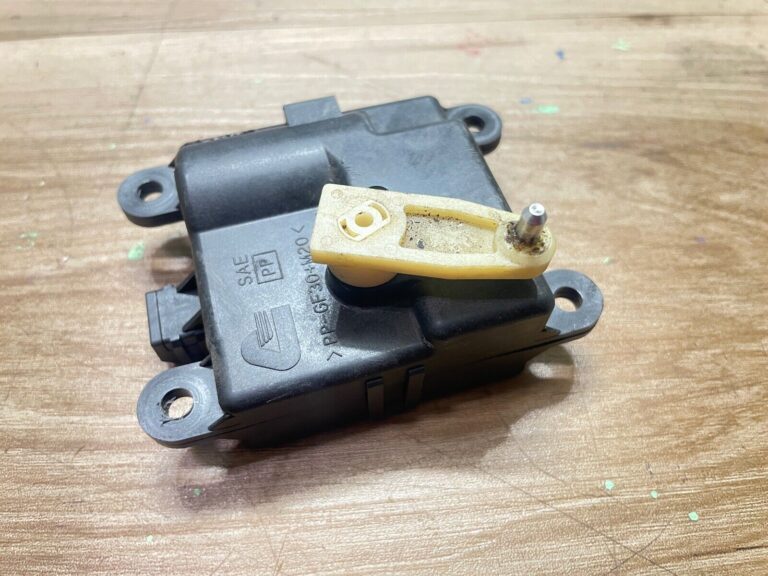
Credit: Ryan Repairs
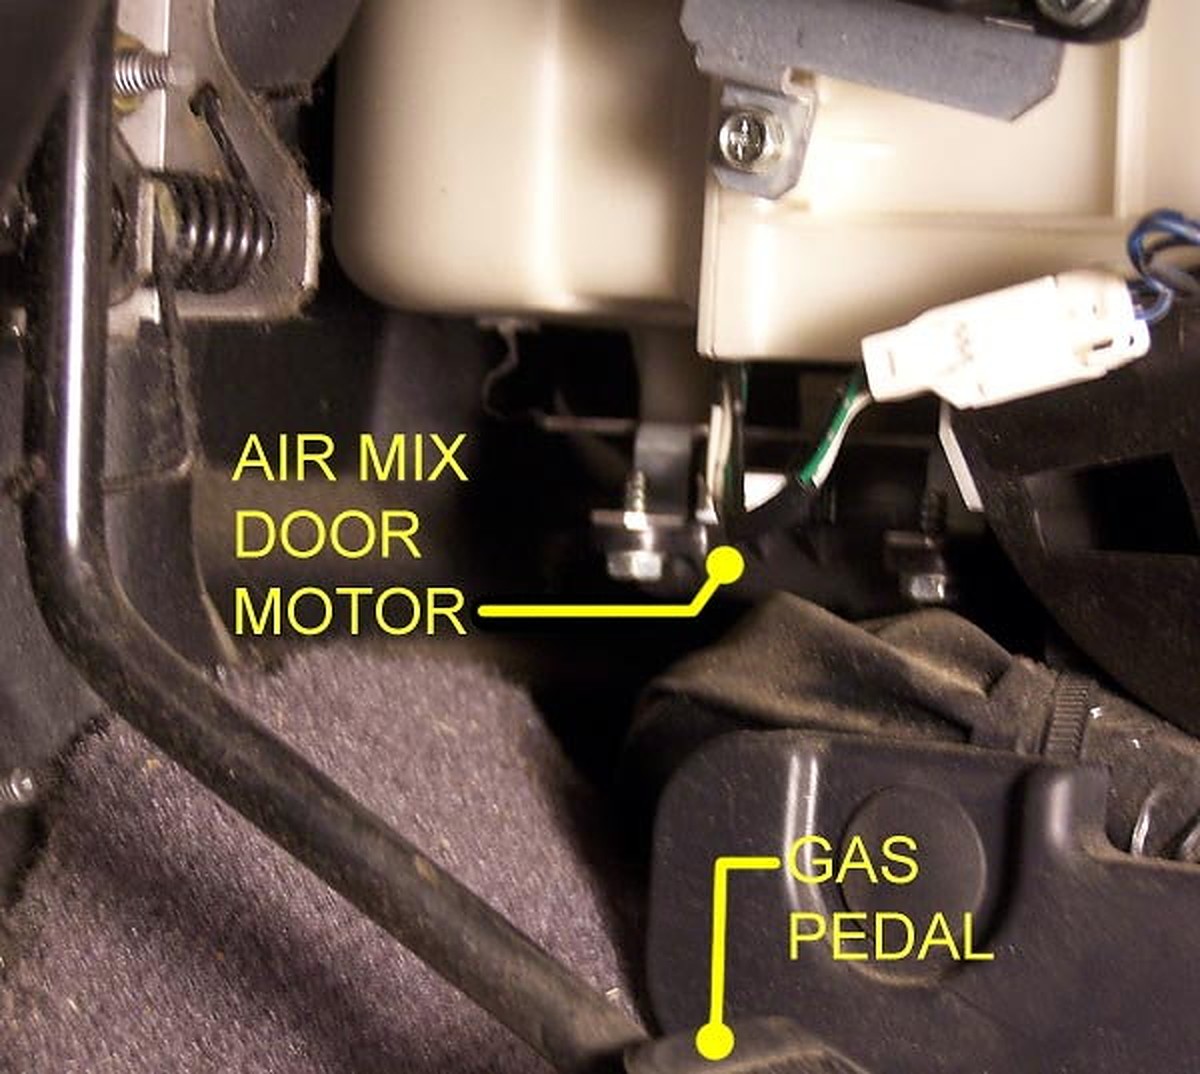
Replacing a dead Actuator for the Blend Door (a.k.a. Air mix door) in a 1997 Nissan Maxima with manual temperature control. Replacement procedure should be similar or the same for 1995-1999 Nissan Maximas.
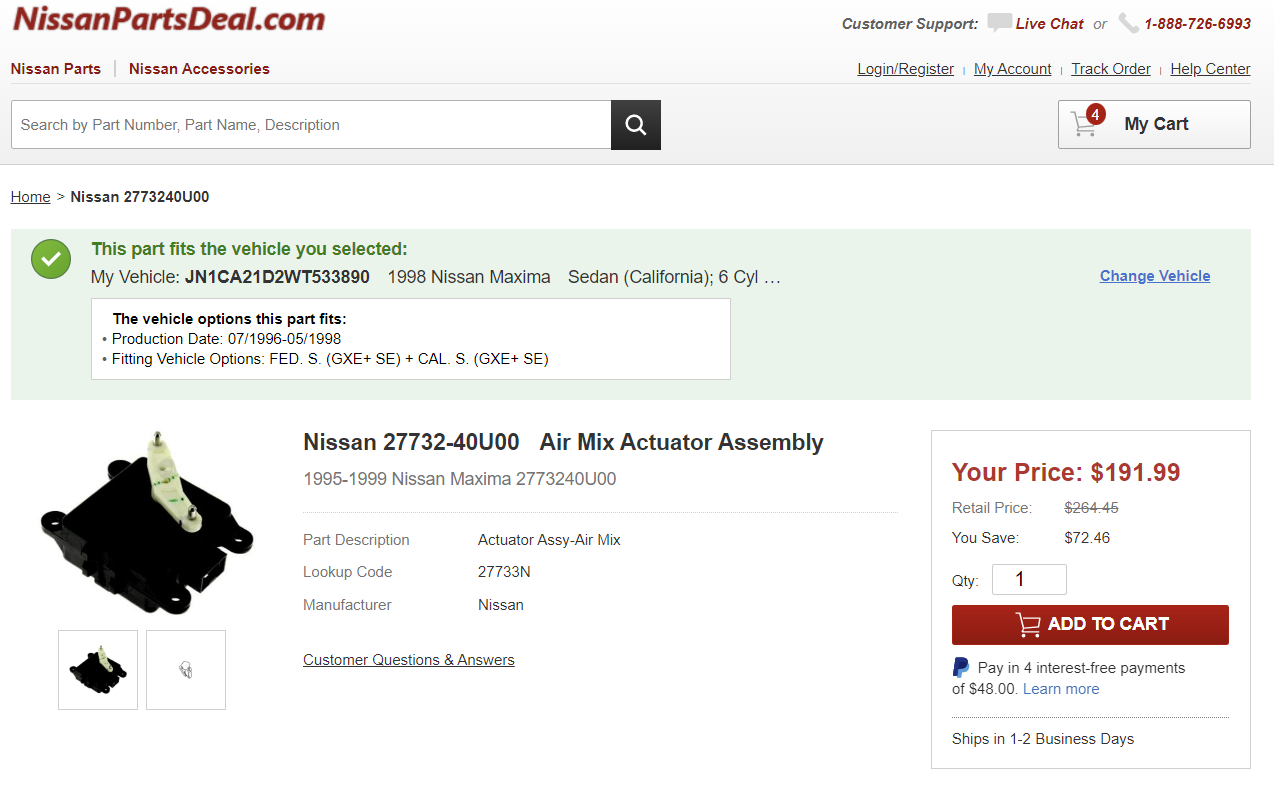
Part Number: 27732-40U00
Part Description: Air Mix Actuator Assembly
Price: $150 – $190.00
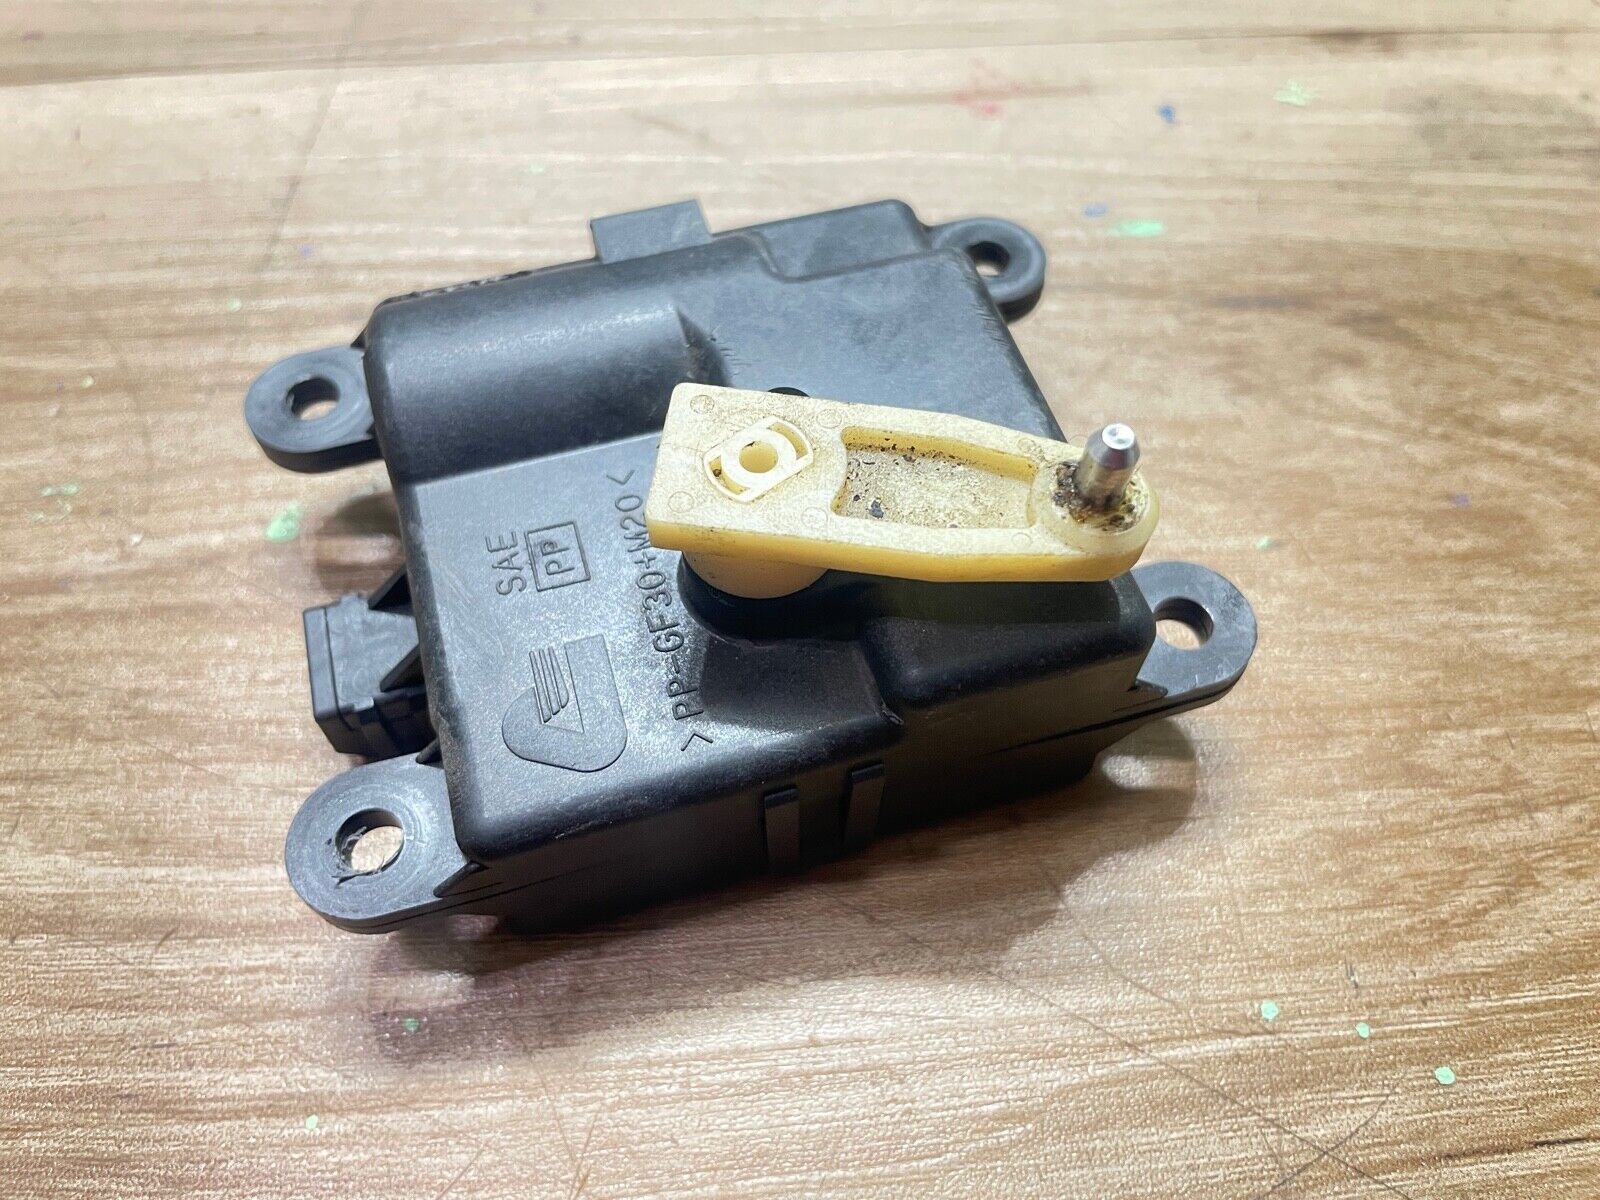

Community Member Credit: The Wizard
| Manufacturer Part Number | Year | Transmission | Spec | Engine | Nissan Part Number |
| A18-E24 ER5 | 1995 | Automatic | Cali | A32-VQ30DE | 23710- |
| A18-B42 EE8 | 1995 | Automatic | Fed | A32-VQ30DE | 23710-40U10 |
| A18-B42 EM1 | 1995 | Automatic | Fed | A32-VQ30DE | 23710-40U12 |
| A18-B42 EL1 | 1995 | Automatic | Fed | A32-VQ30DE | 23710-40U13 |
| A18-E11 EQ1 | 1995 | Automatic | Fed | A32-VQ30DE | 23710-40U14 |
| A18-E11 ER1 | 1995 | Automatic | Fed | A32-VQ30DE | 23710-40U17 |
| A18-H80 E3S | 1995 | Automatic | Fed | A32-VQ30DE | 23710- |
| A18-B41 EL0 | 1995 | 5-Speed Manual | Fed | A32-VQ30DE | 23710- |
| A18-B41 EM0 | 1995 | 5-Speed Manual | Fed | A32-VQ30DE | 23710- |
| A18-E10 ER0 | 1995 | 5-Speed Manual | Fed | A32-VQ30DE | 23710-40U04 |
| A18-H79 E3R | 1995 | 5-Speed Manual | Fed | A32-VQ30DE | 23710-40U06 |
| A18-E12 EQ2 | 1995 | 5-Speed Manual | Cali | A32-VQ30DE | 23710- |
| A18-B41-EL0 | 1995 | 5-Speed Manual | Fed | A32-VQ30DE | 23710- |
| A18-B42-EL1 | 1995 | Automatic | Fed | A32-VQ30DE | 23710- |
| A18-E11-ER1 | 1995 | Automatic | Fed | A32-VQ30DE | 23710- |
| A18-C85-EX9 | 1995 | Automatic | Fed | A32-VQ30DE | 23710- |
| A18-C85-EY1 | 1996 | Automatic | Fed | A32-VQ30DE | 23710- |
| A18-L00 0E1 | 1996 | Automatic | Fed | A32-VQ30DE | 23710-54U16 |
| A18-C84 EY0 | 1996 | 5-Speed Manual | Canada | A32-VQ30DE | 23710-54U01 |
| A18-C84 EX8 | 1996 | 5-Speed Manual | Fed | A32-VQ30DE | 23710-54U03 |
| A18-H92 E4B | 1996 | 5-Speed Manual | Canada | A32-VQ30DE | 23710-54U05 |
| A18-E65 EZ7 | 1996 | 5-Speed Manual | Outside US | A32-VQ30DE | 23710-56U62 |
| A18-L01 0E2 | 1996 | 5-Speed Manual | Outside US | A32-VQ30DE | 23710-56U66 |
| A18-C84-EX8 | 1996 | 5-Speed Manual | Canada | A32-VQ30DE | 23710- |
| A18-F55 E0N | 1997 | 5-Speed Manual | Fed | A32-VQ30DE | 23710- |
| A18-J08-E5Y | 1998 | Automatic | Fed | A32-VQ30DE | 23710- |
| A18-G70-E5U | 1998 | 5-Speed Manual | Fed | A32-VQ30DE | 23710- |
| A18-N10-Z90 | 1999 | Automatic | Fed | A32-VQ30DE | 23710- |
| A18-N11-Z91 | 1999 | Automatic | Fed | A32-VQ30DE | 23710- |
| A18-N12-Z92 | 1999 | 5-Speed Manual | Fed | A32-VQ30DE | 23710- |
| A18-J50-4E6 | 1999 | 5-Speed Manual | Fed | A32-VQ30DE | 23710- |
| A18-N07-Z87 | 1999 | 5-Speed Manual | Fed | A32-VQ30DE | 23710- |
| A18-N04-Z84 | 1999 | 5-Speed Manual | Fed | A32-VQ30DE | 23710- |
Credit: Leonard Bellgardt IV
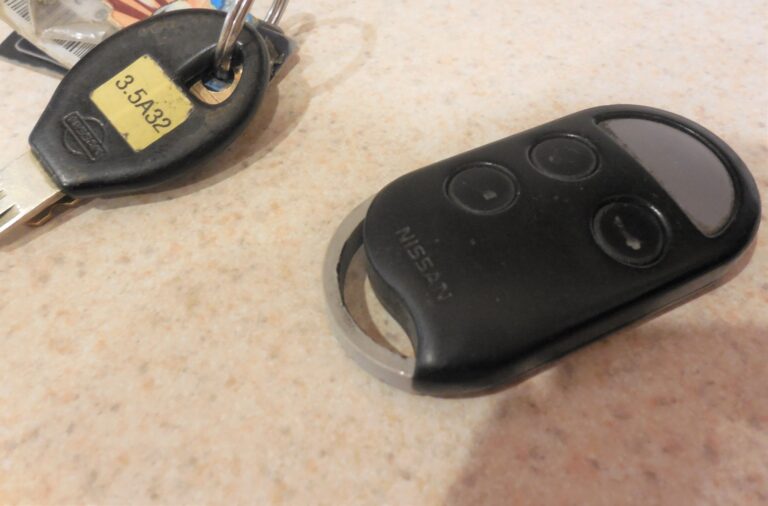
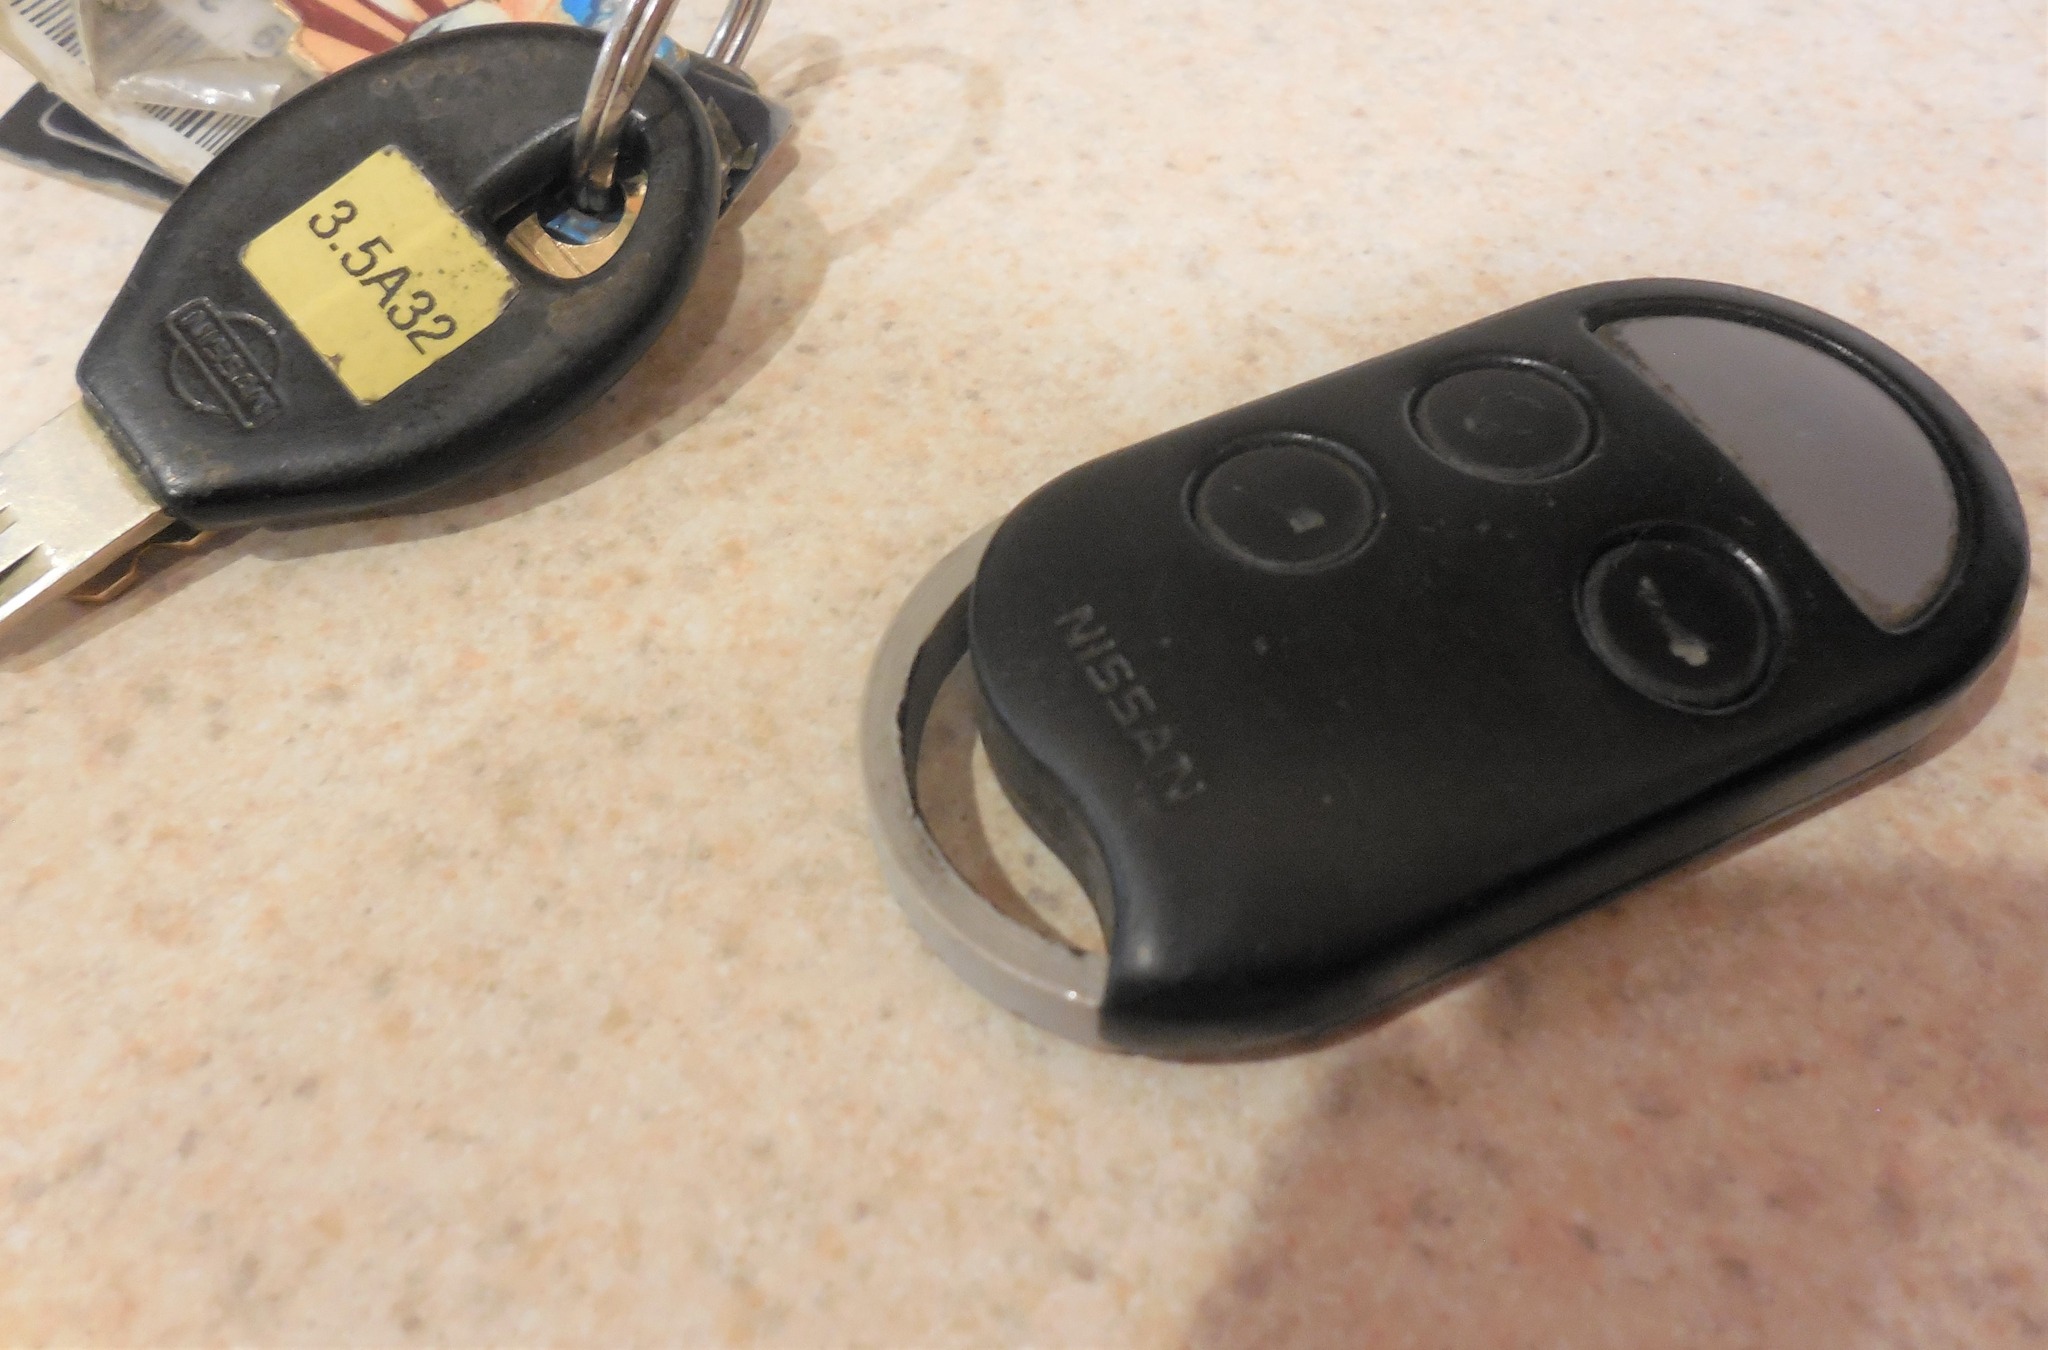
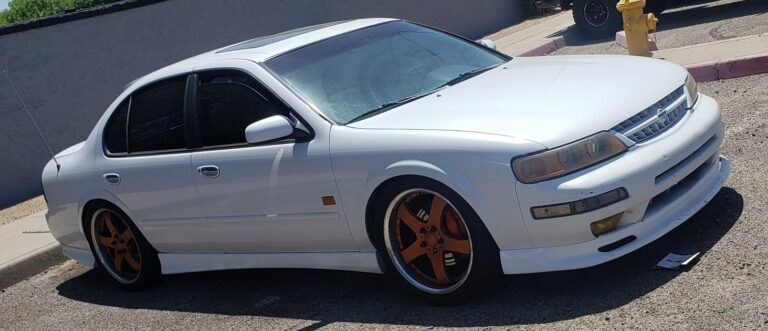
A year ago I made a new key ring loop for my A32 keyfob because the original broke and didn’t want to lose it again. Photo after 1 year of daily use. Designed and 3D printed by yours truly.
Order Link: https://www.schmellyparts.com/maxima/key-fob-repair
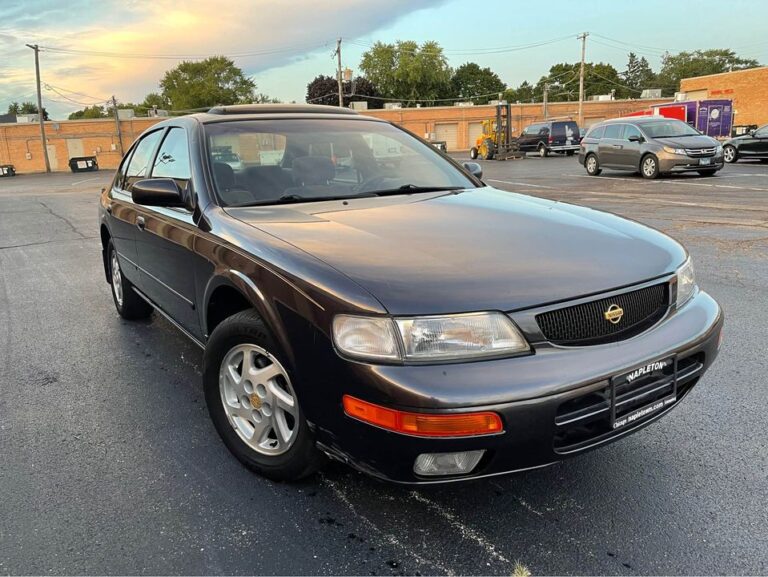
Owner: Donny Slater
Year: 1998
Model: Maxima
Color: Charcoal
Transmission: 4-Speed Automatic
Trim: SE


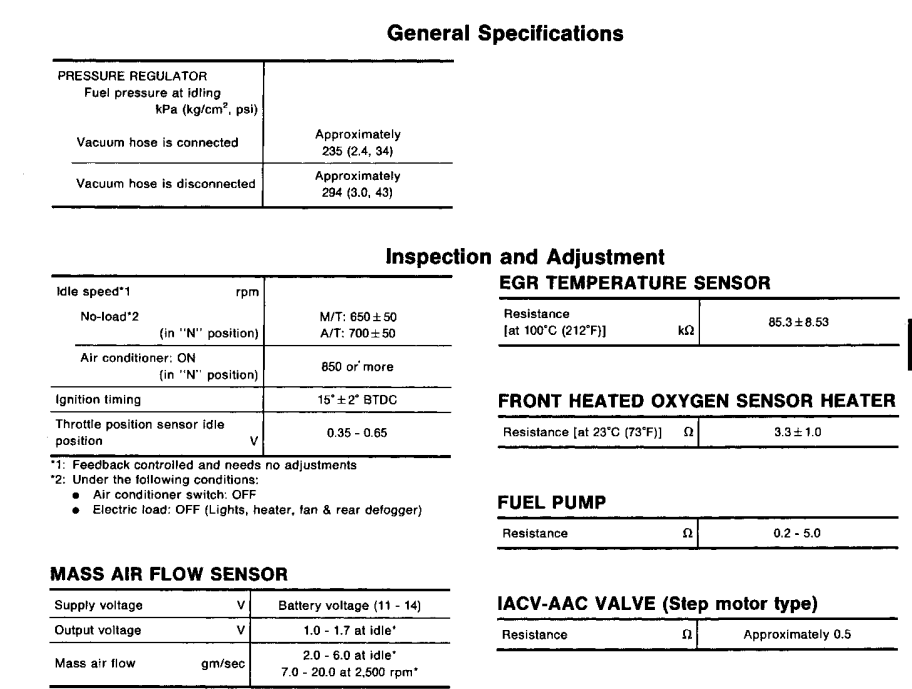
Idle Speed:
Ignition Timing:
Fuel Pressure:
Credit: Chrono
Hey guys, I just reset all my monitors yesterday on the interstate and passed the emissions test immediately after. Here’s some helpful info and background for anyone who has to go through this as I noticed there was a lot of confusion about this. First important thing: DO NOT go for an inspection/emission test if you have a check engine light and your monitors are not ready (check with scan tool), as they will not pass you and you’d have wasted your time. The first step is to fix the issue causing a check engine light if it’s on and then clear the code. In my case I replaced my O2 sensor and was good. When you clear the code the monitors will show as ‘not ready’ and you need them to show as ready. So remember for future: every time you clear your ECU with the scan tool, your monitors will become ‘not ready’ and will need to be reset – this is important to keep in mind if you have an inspection/emissions test coming up soon as you’d want adequate time to make your car ready for testing before your deadline.
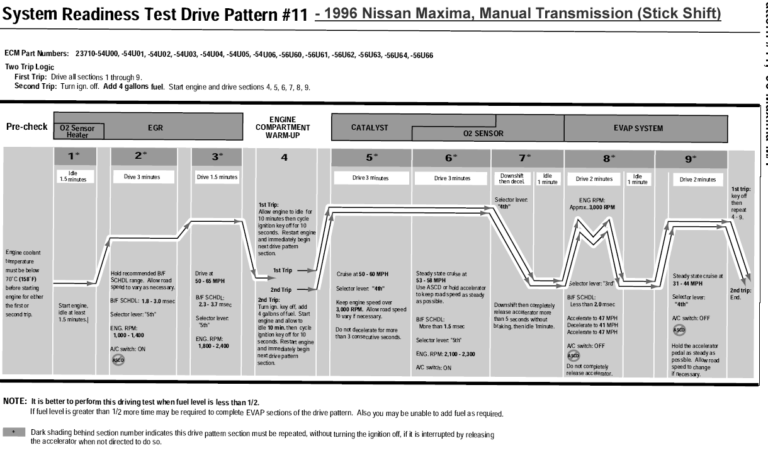
The easiest/fastest way to do this is to complete the Nissan Driving Pattern for your car which can be found here:
NTB98-018c (Found this for 96 and 97 Nissan cars, for other years check your owners manual)
SB 1996-1997 Nissan; System Readiness Test (SRT) Drive Patterns
“As part of an enhanced emissions test for Inspection & Maintenance (I/M), some States may
require the System Readiness Test (SRT) status be checked. – The SRT is used to indicate
whether the engine control module (ECM) has completed self diagnosis of major emissions
systems and components. – In these instances the State may require completion of the SRT
before permitting the emissions inspection to proceed.”
Find your Maxima by year and transmission style in that document, and follow the directions carefully. I got my monitors ready in 50 mile trip on the interstate when their were few cars on the road. BEFORE you start the drive you should use an OBD scanner to check which monitors are not ready, it may be that only 4 need to be reset so you now know to only complete portions of the drive pattern that pertain to those specific monitors, saving you time. If you don’t own a scanner I highly suggest buying one as not only will it help big time here but will let you diagnose and learn a lot about your car, plus they really don’t cost much. Ideally you want to monitor the status of all monitors in real time as you’re driving, other wise you’re driving blind not knowing which ones are ready/not ready.
Your best bet is to do the drive at a non-peak driving time on a less busy interstate. Doing this in city/suburbs will be difficult if not impossible due to constant stop lights etc that interfere with the drive pattern. Stay in the slow lane, maintain plenty of distance between cars behind and in front of you. Driving hundreds of miles to get monitors ready is not necessary, it won’t make a difference unless you follow the specific steps in the drive pattern. For example in one of the steps you have to have AC on, be on cruise control etc to make the monitor ready.
I used a bluetooth OBD Scan tool hooked up to my Droid that continuously displayed the status of all my monitors while driving (this was cool ). Once they all showed up as ready I turned around and drove to the emissions facility and passed.
Below is the drive pattern I did for my 97 SE, I annotated some important points in red that will apply to any year 4th gen (95-99). Click on it for a larger view.


Other Reference:


Credit: vbxmaxima
So there you are, happily driving your Max like I was, when the dreaded Check Engine Light came on. There is a simple procedure you can do to find out what’s wrong without having to take it to a dealer.
So there you are, happily driving your Max like I was, when the dreaded Check Engine Light came on. There is a simple procedure you can do to find out what’s wrong without having to take it to a dealer.
1. With the car parked and the engine off, pick up a flat head and phillips screwdriver.
2. The ECU is located by your gas pedal and is protected by a plastic cover.
Remove the cover by a quick twist of two screws:

You’ll find that the screw heads will pop up. Gently, but firmly pull the screws out – they’re the plastic snap-on type.
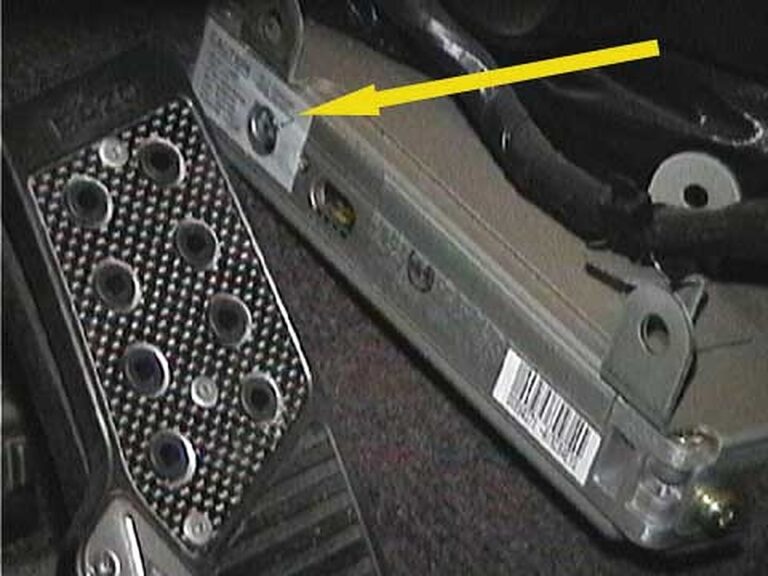
3. Remove the panel to expose the ECU. The Diagnostic Test Mode Selector is the screw indicated by the arrow.

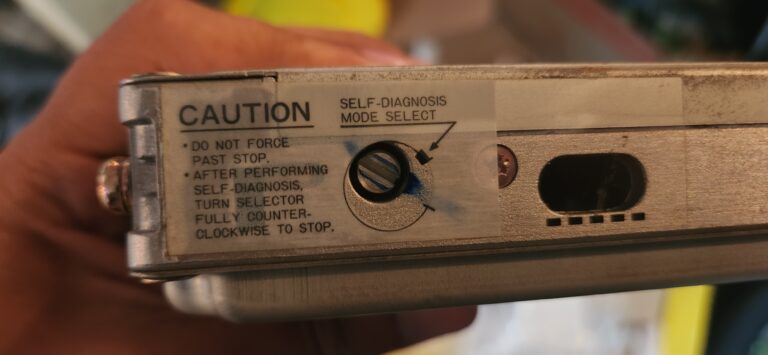
4. Here is a close up of the screw. It is protected by a warning sticker.
You’ll have to poke through the sticker to get to the Selector screw.

If you have a hard time reading what the sticker says (like I did) here’s what it says:
DO NOT FORCE PAST STOP
AFTER PERFORMING SELF DIAGNOSIS
TURN SELECTOR FULLY COUNTER-CLOCKWISE
TO STOP
5. Put your key in the ignition. Turn your key to “ON” but don’t start the car.
Your dash lights and the check engine light will come on.
6. With a flat head screwdriver, turn the ECU selector screw clockwise until you feel it go against the stop.
7. After waiting for at least 2 seconds, turn the selector counter-clockwise until it’s stop.
8. Now watch your check engine light. It should be blinking at you. You will see a series of slow blinks or pulses, followed by a series of quick pulses. You need to count each type. If you missed it, don’t worry, it will continuously repeat. The trouble codes are 4 digit numbers. The long pulses represent the first two digits and the short pulses the last two digits.
Note: If there is more than one error code, they will be displayed in sequence.
FOR EXAMPLE:
(LONG PULSE) (LONG PULSE) (LONG PULSE) (SHORT PULSE)(SHORT PULSE)
….means trouble code 03 02
ANOTHER EXAMPLE:
(LONG PULSE)(SHORT PULSE)(SHORT PULSE)(LONG PULSE) (LONG PULSE)(SHORT PULSE)
…means you have TWO trouble codes: 01 02 and 02 01
9. Got the codes? Good! Time to find out what’s wrong. Time to use the ECU Decoder!
10. Now that you found the codes and what they mean, it’s up to you whether you want to take it to a mechanic or fix it yourself.
11. If you do fix it yourself, don’t forget to reset the check engine light! The check engine light will not go away if you don’t, even after the repairs have been made.
RESETTING THE CHECK ENGINE LIGHT
To reset the engine light is a simple procedure.
The next time you start your engine, the check engine light should go away!