Category

my4thgen 95-99

Category

Credit: eng92

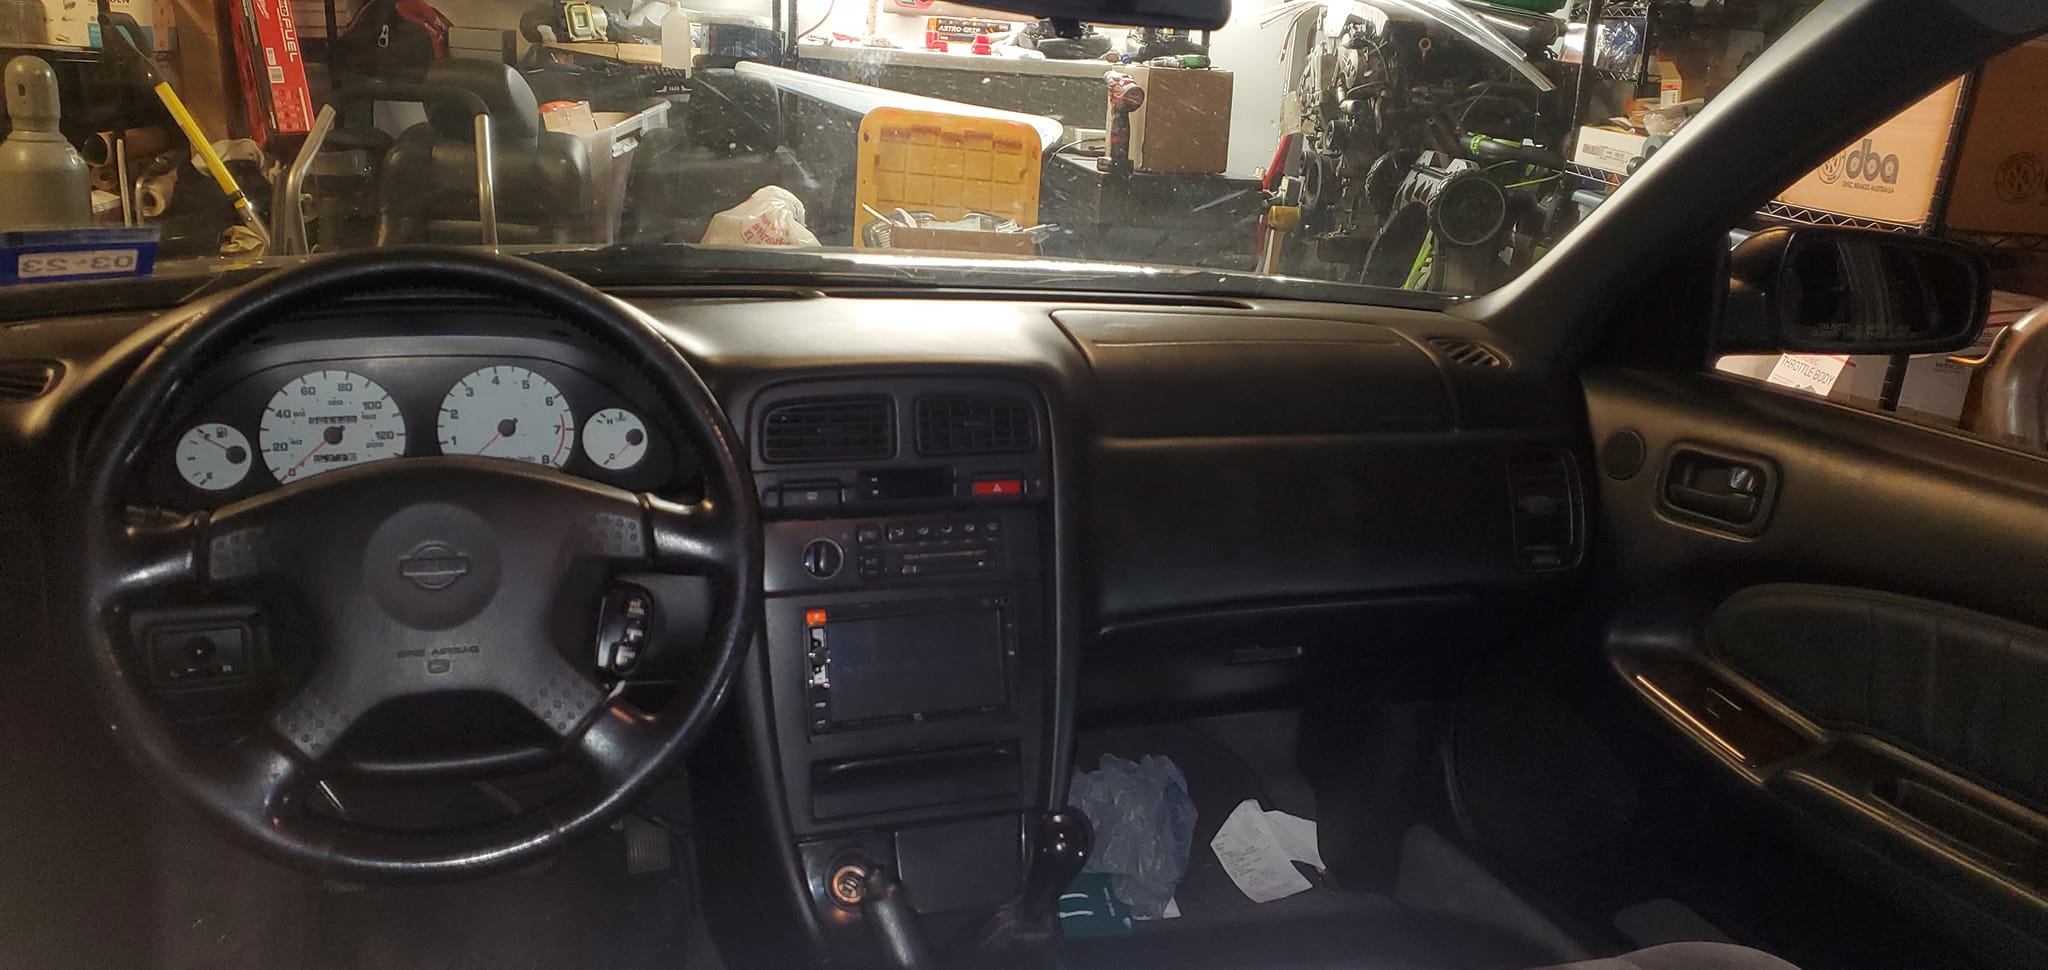
This is part of a full 3.5 swap that I will be doing in about a month.
I got a great deal on an 03 gauge cluster ($25 CDN) because one of the three mounting brackets was broken off. For the swap that is ok because all three brackets are in different locations compared to a 4th gen.

Here is the 03 cluster with the 2 remaining mounting brackets cut off.
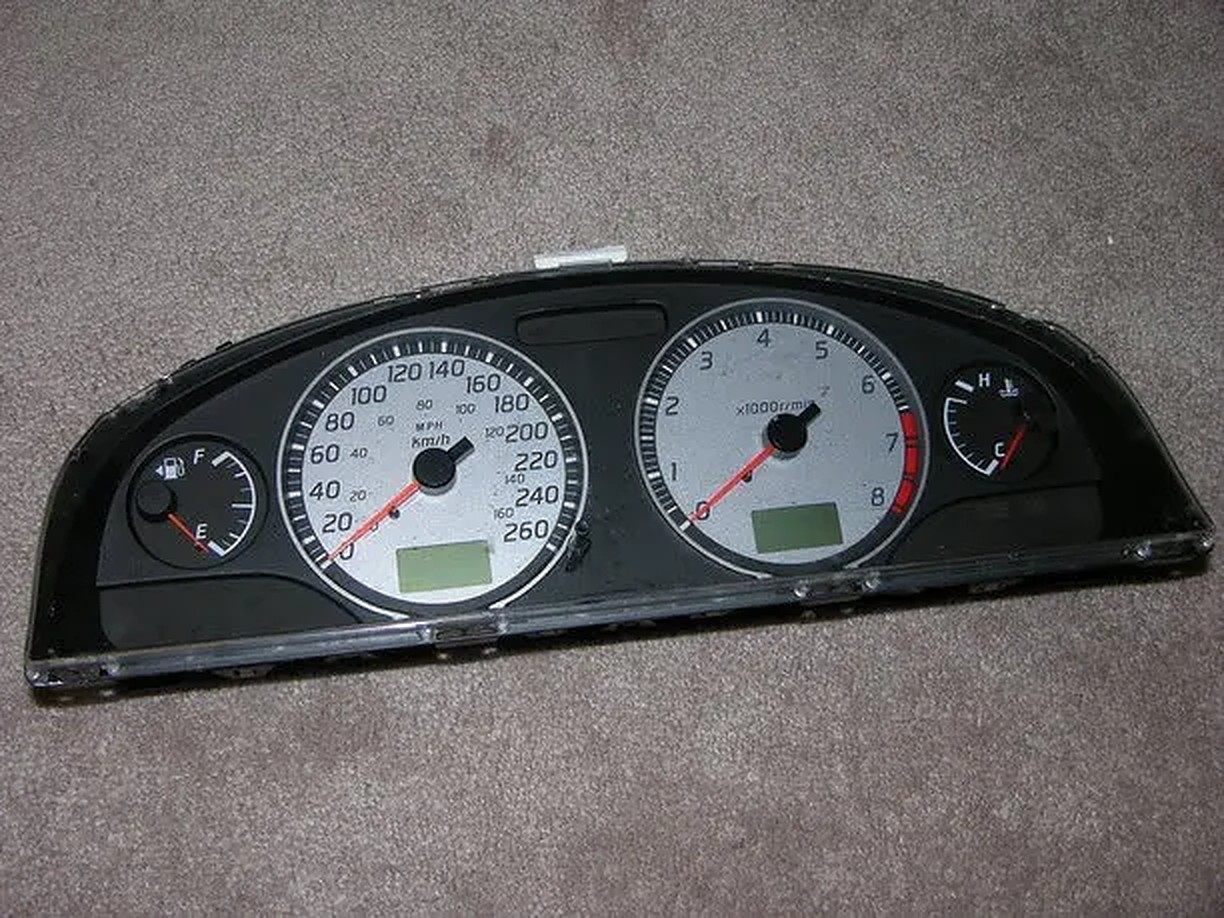
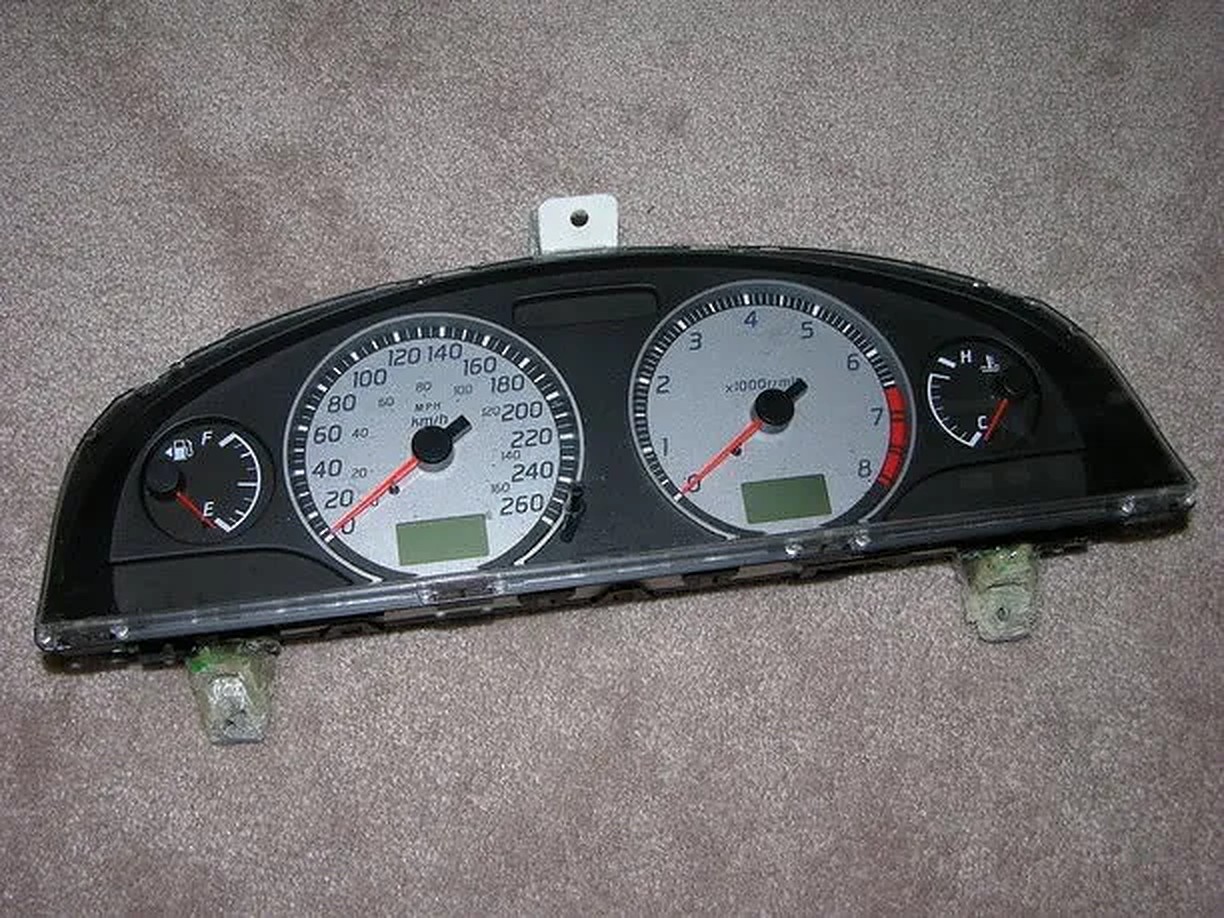
I fabricated the two lower brackets out of polyurethane using a plaster of Paris mold I made of my stock 98 cluster. For the top bracket, I just reused the one I cut off by gluing it in at the correct position and angle.

Here is the gauge cluster with the new brackets.
Here it is installed without the finishers on.
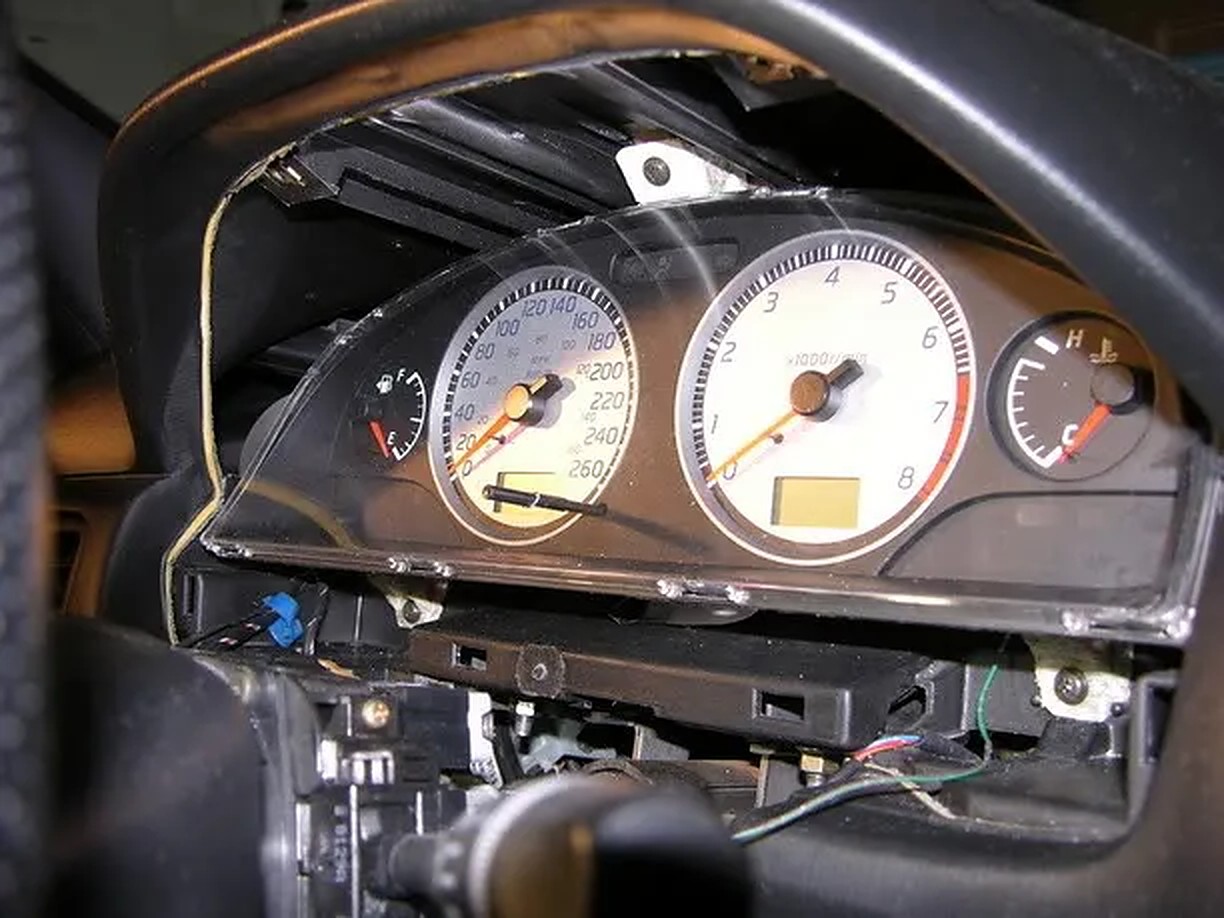
And with the finisher installed.


Check out the mileage on the odometer 3619 km (~2250 miles)

As far as wiring is concerned, you pretty well need to have a section of the the 03 dash harness as the three gauge cluster connectors are completely different from the 4th gen. I had the 03 harness already as I am using a portion of it for the engine swap. It was simply a matter of going through the 98 and 03 wiring diagrams and splicing the appropriate wires.

IMO this mod is not worth it unless you are doing a full 3.5 swap. The only nice feature that the 03 cluster adds is the board computer which displays: ambient temp, trip timer, ave. trip speed, fuel consumption and estimated driving range based on remaining fuel.

Loading

Community Member Credit: z_maxima

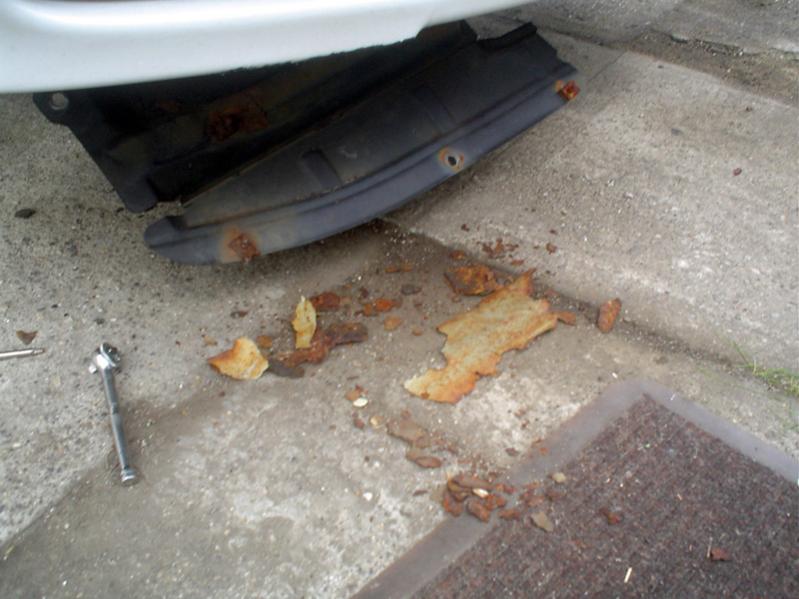
Hey Guys, I’m sure you have seen this over and over here. I just thought I share my photos as well. I should of replaced the support 6 years ago when I first spotted the rust during an inspection. I had no idea it was a common problem at the time.

After getting some expensive pricing on replacing the support, I decided to do this on my own. Many of the pictures that the owners posted here were very helpful in guiding me to complete this task.

Bumper Removal

1. Remove the center grille.
2. Remove side light first. A small screw on the top. Pop from the front out.
3. Remove main headlights, 2 side bolts, 2 10mm nuts from the back.
4. Remove the lower signal lights. Pop the smaller side marker light first, remove the screw, then remove the main signal light. Disconnect all wires.
5. Remove the 3 bolts holding the center bumper.
6. Remove the left and right retainers on the bumper that were under the Main headlights. 6 10mm bolts total.
7. Remove all the engine covers attach to the bumper underneath
8. Remove front wheels to open the liners to access the 3 10 mm nuts holding the side bumper to the fender. 6 total.
9. Bumper should be free to come off. fog lights are attached to the inner reinforcing bar. no need to remove them. Just disconnect wires.

Photos:

1: 98 SE
2: As soon I remove the lower covers, rust!
3: Front view of the support
4: Underneath view of the support
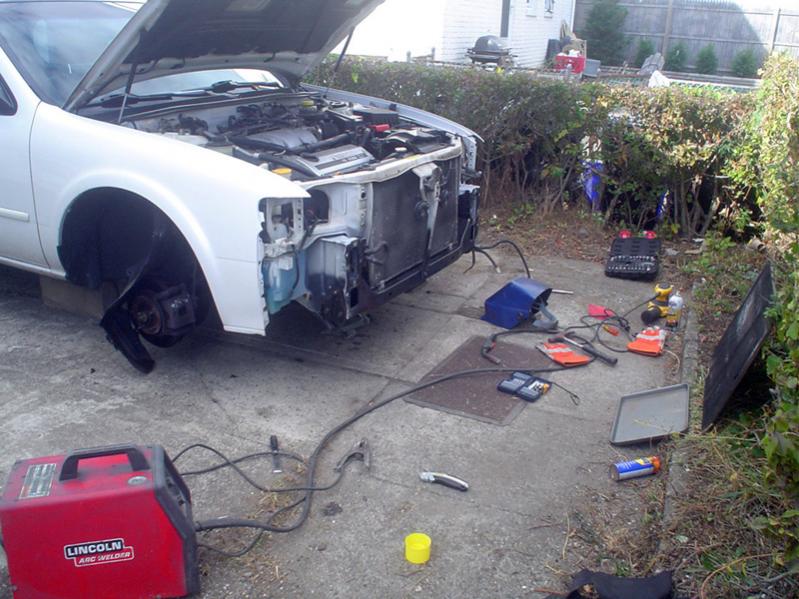
5: Bumper and wheels removed

6: Complete removal of front end parts
7: Removing the spot welds, 32 total and 6 others I use a sawzall.
8: Removing the old support
9: The mess
10: The old and new support side by side.

11: New support in place
12: New support welded in place.
13: First coat of POR 15 rust preventive paint.

14: Second coat of POR 15 Chassis Coat Black
15: Painted all front end parts before the bumper.
16: Done, 2 days later. A total of 14 hours, due to additional painting and cleaning that a body shop probably wouldn’t do.


Loading

Member Credit: pmohr

This howto is for the quick and easy task of replacing the ignition switch. If you have to jiggle the key around for the car to start, have to do any special tricks for it to work, whatever.

This whole process shouldn’t take but 10 minutes, if that.

First up, grab a phillips head screwdriver, and acquaint yourself with the kneeling position outside your driver’s side door. You should (kinda) see this:

Yes, that’s an automatic brake pedal. Deal with it.

You’ll need to locate the two screws, one at either end of the bottom of the panel.
They’re indicated by circles in the photo below (the rectangular highlights are the clips that hold the panel on):

Left side screw, above the hood release:

Right side screw:

Now to remove the screws. If you can’t figure this out, you’re just…lost.

Removing left side screw:

Removing right side screw:

Grab along the bottom of the panel and pull it off. There are several clips that hold it in place (see above picture), so it may be a little resistant. Don’t be afraid of breaking it, be a man (if applicable).

When it comes off, just toss it to the side. You’ll then see this:

That bar is safety equipment, there to protect you in the event of a crash (AFAIK). It’s held on by two 10mm head bolts, shown here:

Removing the left side bolt:

Removing the right side bolt:

Now the view with the crash bar removed:

Now you need to remove the steering column trim. There are 6 screws; the outer 4 hold the two pieces of the surround together, the two in the middle hold the lower piece to the steering column.

View from directly underneath, showing the screws. Green holds the two pieces together, red holds the lower piece to the column:

Now once you remove all of those (no pictures of that, but…yea) you can just pull the top piece right off:

Pop the trim around the key cylinder out (not pictured, it’s what goes around where you put the key), then pull off the lower piece:

Here’s your ignition switch, mounted to the back of the lock cylinder (don’t mind the unplugged white connector, it was in the way):

To remove the ignition switch, you’ll need a finer tipped screwdriver than what you used for everything else.

The two screws that affix it to the key cylinder:

Removing the left side screw (a shorter screwdriver helps):

Removing the right side screw:

The ignition switch then just pulls right out:

This is the tab in the lock cylinder that rotates along with the key:

Which fits into this slot on the ignition switch:

You really can’t install the ignition switch improperly (one would think, anyway…).

Obviously installation is the reverse of removal. I don’t have a picture specifically of the ignition switch harness connector, but just follow the harness back and you’ll find it.

Loading

Owner: McSteve

Year: 2001
Model: i30
Color: White
Transmission: 5-Speed Manual (Originally Auto)

Mod List:

  • Stillen Y-Pipe
  • HKS Rear Section
  • Unorthodox UDP
  • Injen WAI
  • Shinjinduo Grounding Kit
  • Timing Advance to 17*
  • Tokico Illumina’s + Eibach Pro Springs
  • Progress Rear Sway Bar
  • Stillen FSTB
  • Ionic Dynamics Bodykit
  • Halo Headlights
  • 6k HIDs in Headlights and Foglights
  • License Plate LEDs
  • Avic D3 Navigation w/ Bluetooth
  • Ipod Interface Mounted under Ashtray
  • Boston Accoustics Speakers

Loading

Owner: Chris aka QnzMax

Year: 1997
Model: Maxima
Color: Concord Mist (LS6)
Transmission: 5-Speed Manual
Trim: SE

Mod List:

Performance:

  • 2000 VQ30DE-K engine
  • Swirl valves removed
  • Ported and polished heads
  • Cattman cat-back exhaust
  • Cattman Fast Cat
  • Cattman Generation 3 headers
  • Vortech V2-SQ Supercharger
  • 10 PSI pulley
  • 3” charge piping
  • 3” custom CAI
  • TiAL 50mm BOV
  • Cartech FMU
  • Innovate WB O2 sensor
  • Walbro 255lph fuel pump
  • Prosport Gauges full sweep/electric boost gauge
  • Prosport Gauges electric oil pressure gauge
  • Prosport Gauges electric fuel pressure gauge
  • Apex’I VAFC II
  • VLSD 5-spd transmission
  • Exedy stage 1 clutch
  • B&M short throw shifter
  • Raxle axles
  • Polyurethane filled engine and transmission mounts

Brakes:

  • -Front” Wilwood 4 piston superlite calipers
  • Front: 12.6” slotted rotors
  • Wilwood BP-10 brake pads
  • Rear: -Rear
  • Rear: Brembo blank rotors
  • Rear: PBR brake pads

Suspension:

  • BC Racing coilvers
  • Stillen front strut bar
  • Stillen rear sway bar
  • Custom traction bars
  • Energy Suspension polyurethane bushings

Wheels/Tires:

  • 19” Mille Miglia Evo5’s
  • 235/30-19 Kumho tires
  • 17” 350Z Wheels
  • 225/50-17 Michelin tires

Exterior:

  • Stillen front lip
  • Smoked R34 1-piece headlights
  • 6000K HIDs in headlights and foglights
  • Custom smoked 3 row LED tail lights
  • Paradox half-sized rear roof spoiler

Interior:

  • Eclipse AVN6610 headunit
  • Rainbow component speakers
    Infiniti coaxial speakers
  • 2 12” Arc audio subwoofers
  • JL 500/1 amplifier
  • Hifonics 1600wt amplifier
  • Custom white LED interior lights
  • White LED gauge lights
  • Chrome gauge rings

Loading